
Are you looking to refresh your wardrobe in an eco-friendly, budget-savvy way? Upcycling a men’s blazer into a matching cropped vest and mini skirt is a fun DIY fashion project that transforms old tailoring into a runway-ready set.
In this detailed upcycled clothing guide, we’ll walk you through each step to create your own chic blazer-turned-vest-and-skirt ensemble—no fancy patterns required!
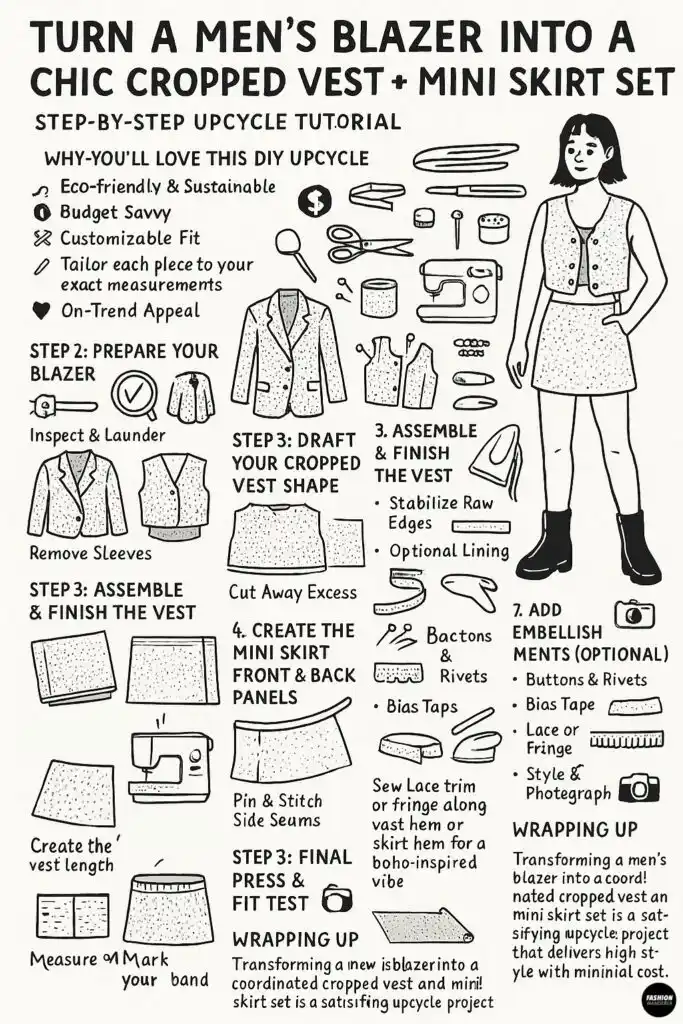
Why You’ll Love This DIY Upcycle
- Eco-Friendly & Sustainable: Give pre-loved fabric new life and keep textiles out of landfills.
- Budget-Savvy: Repurpose what you already own rather than buying new.
- Customizable Fit: Tailor each piece to your exact measurements for a perfect silhouette.
- On-Trend Appeal: Cropped vests and mini skirts are everywhere this season—get the look for less!
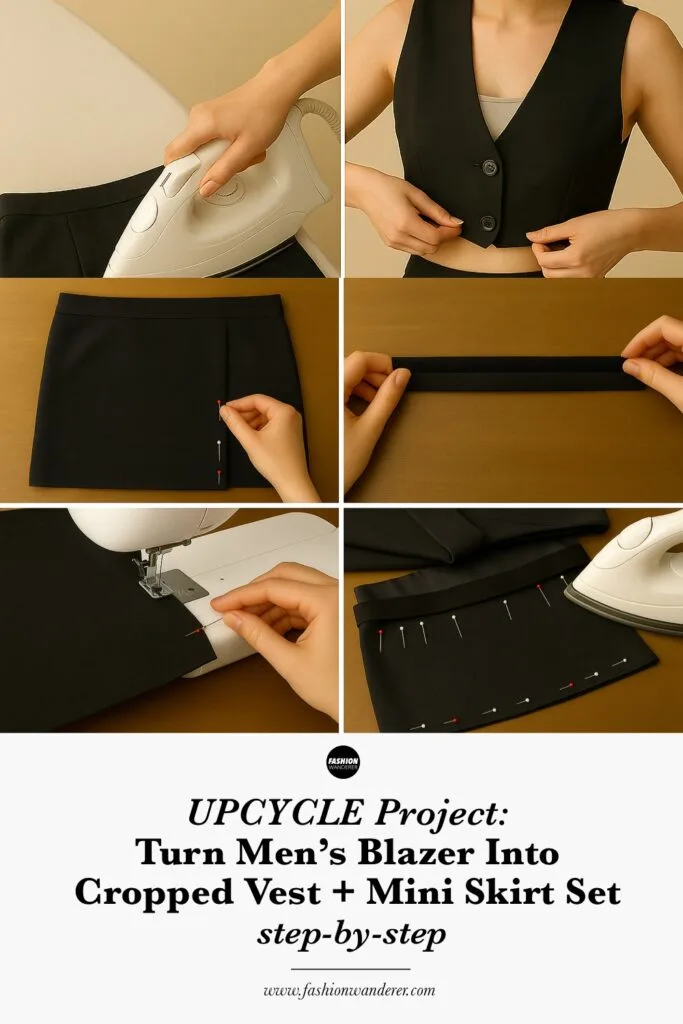
Step by Step Upcycle: Cropped Vest and Mini Skirt Set from Men’s Blazer

Supplies You’ll Need

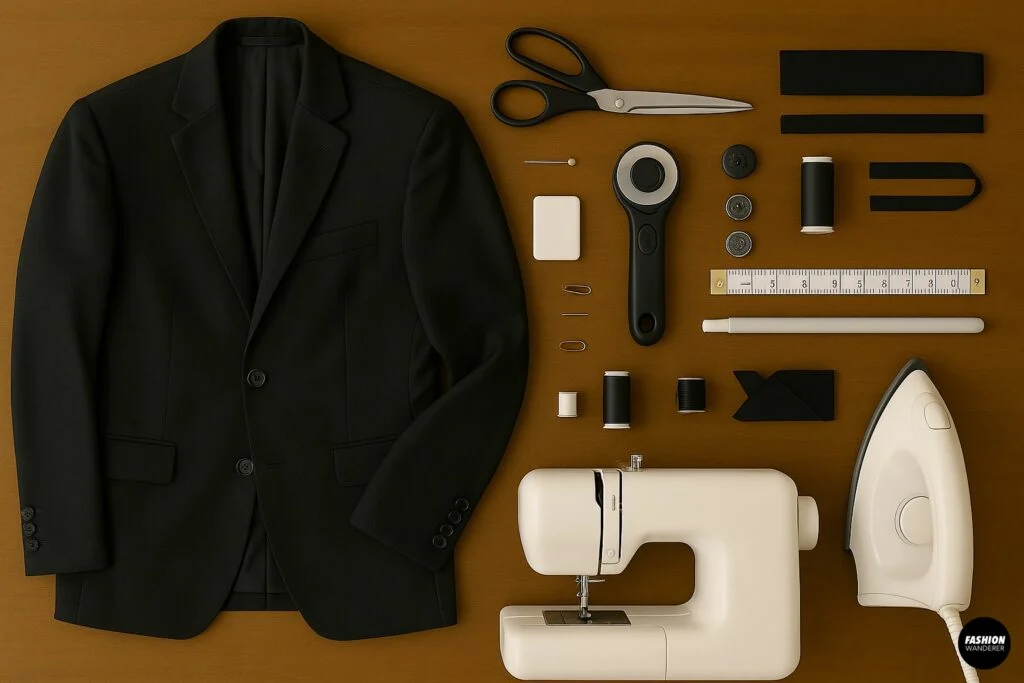
- One men’s blazer (structured wool, linen, or cotton blend works best)
- Fabric scissors or a rotary cutter
- Measuring tape or ruler
- Tailor’s chalk or washable fabric marker
- Pins or clips
- Sewing machine (or hand-sewing needle & thread)
- Matching or contrasting thread
- Optional: lining fabric scraps, bias tape, decorative buttons or rivets
- Iron & ironing board
Step 1: Prepare Your Blazer

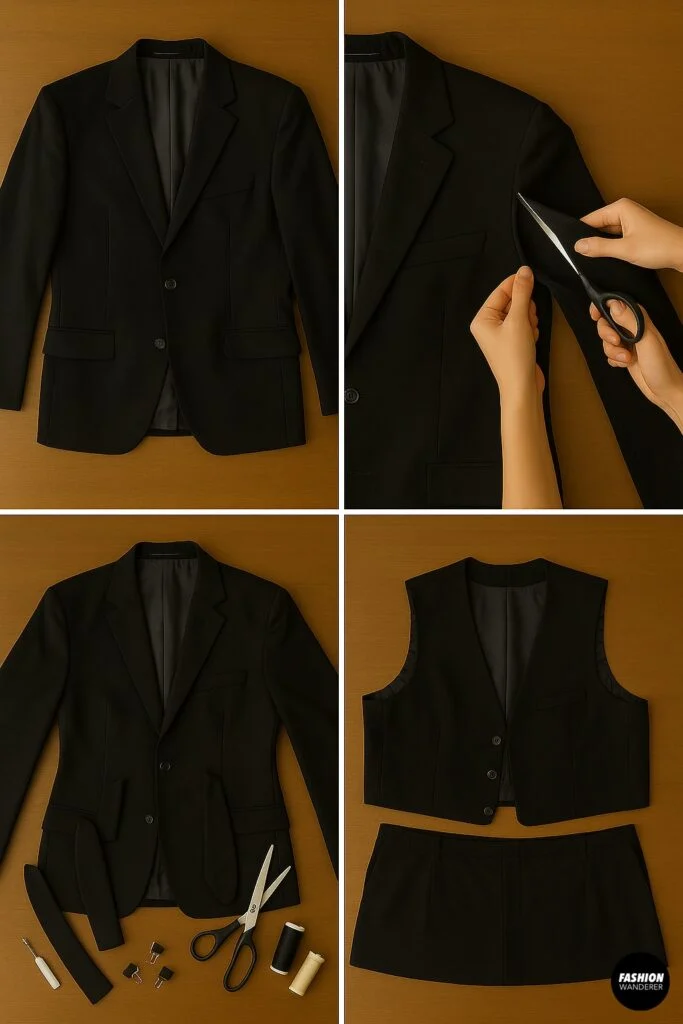
- Inspect & Launder – Check for stains or damage. Wash or dry-clean the blazer to start with a fresh foundation.
- Remove Sleeves – Lay the blazer flat, right side up. Seam-rip the underarm seam of each sleeve from cuff to shoulder. Pull the sleeve out carefully, saving them for possible patchwork or lining.
- Open Seams – Unpick the side seams of the blazer’s body (from hem up to the armpit) so you can spread the front and back panels flat.
Step 2: Draft Your Cropped Vest Shape

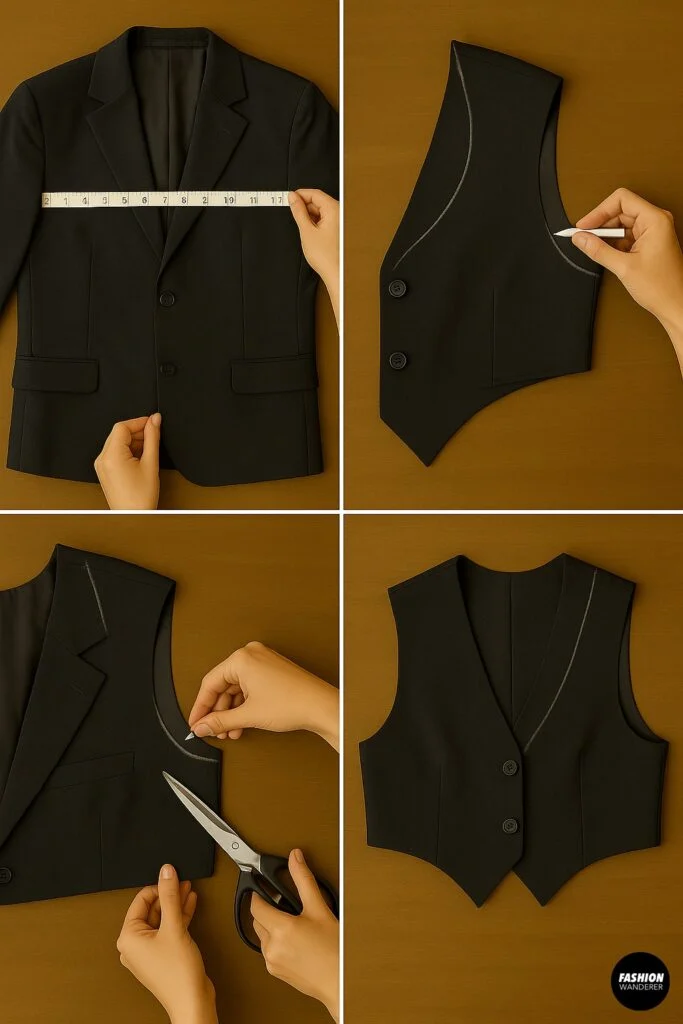
- Measure Desired Length – Decide where you want the vest hem to hit (e.g., just above the waist). Mark this line across the front and back panels with tailor’s chalk.
- Mark Armhole & Neckline – On the front panels, use chalk to draw a higher, more curved armhole. Sketch a gentle V or scoop neckline for a vest look.
- Cut Away Excess – Carefully cut off the lower portion below your vest hem line and trim the side panels along your new armhole/neckline lines.
Step 3: Assemble & Finish the Vest

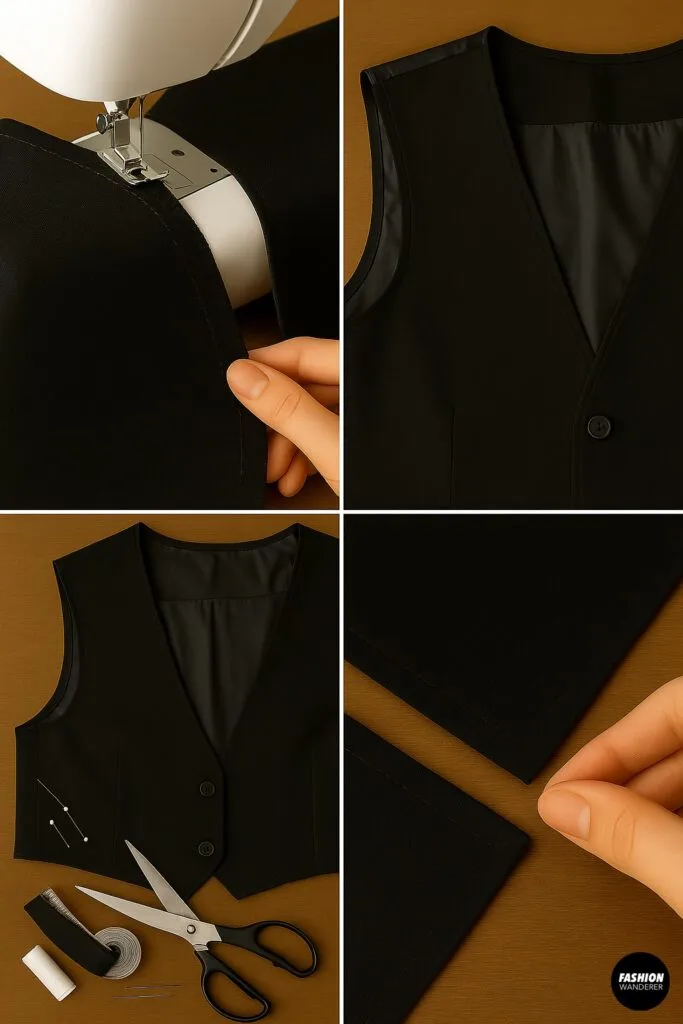
- Stabilize Raw Edges – Use a zigzag stitch or serger to finish raw neck, armhole, and hem edges to prevent fraying.
- Optional Lining – If you prefer a polished inside, cut lining pieces from the removed jacket lining or coordinating fabric; stitch them to each vest panel first.
- Sew Side Seams – Pin the remaining front panels to the back panel at the sides, right sides together. Stitch with a ½” seam allowance.
- Press & Topstitch – Press seams open, then topstitch around the neckline, armholes, and hem for a crisp, professional finish.
Step 4: Create the Mini Skirt Front & Back Panels

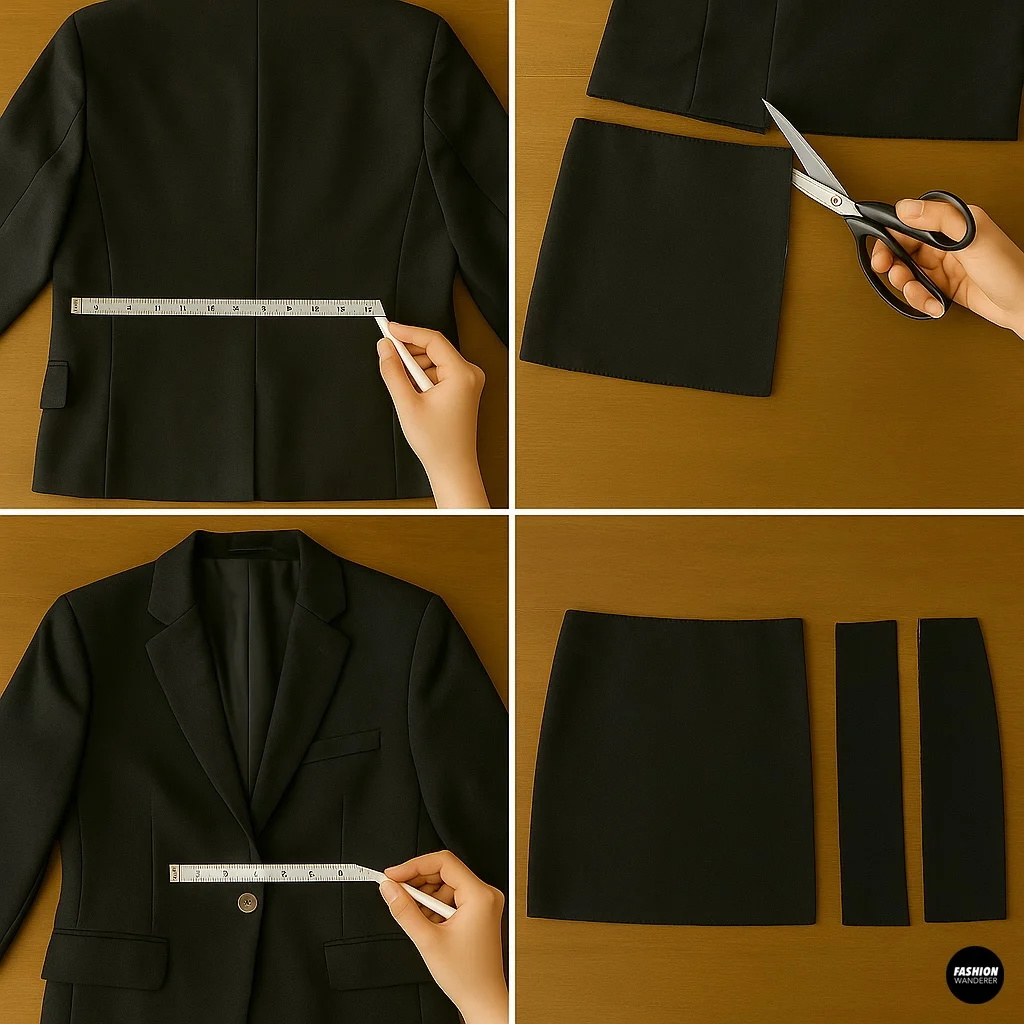
- Measure & Mark Skirt Length – From the hem of the blazer’s back panel, measure and mark your desired mini skirt length (e.g., 14–16″ from waist).
- Cut Off Blazer Hem – Cut straight across the blazer’s lower back panel to free the fabric for skirt panels. Use this large back piece for the skirt back.
- Front Panels from Blazer Front – Similarly, use the two front panels you trimmed for the vest hem to form your skirt fronts. Mark and cut so that each front panel is approximately half the width of the back panel plus seam allowances.
Step 5: Sew the Mini Skirt

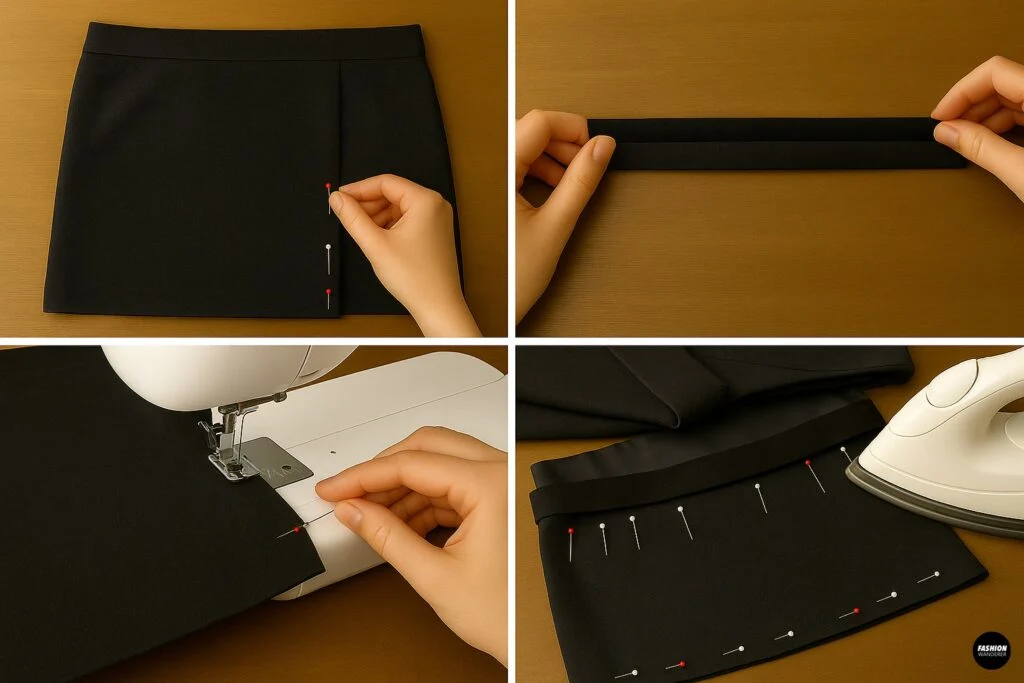
- Pin & Stitch Side Seams – With right sides together, pin the skirt front panels to the skirt back at the side seams. Sew with a ½” allowance.
- Create a Waistband – Cut a 3″–4″ strip from leftover blazer fabric or lining for a waistband. Fold in half lengthwise, press, and sandwich the raw top edge of the skirt in between the waistband fold. Stitch in place, leaving a small gap to insert elastic or create a buttonhole.
- Hem the Skirt – Fold up a ½” hem at the bottom of the skirt, press, pin, then sew with a straight stitch.
Step 6: Finish the Waistband

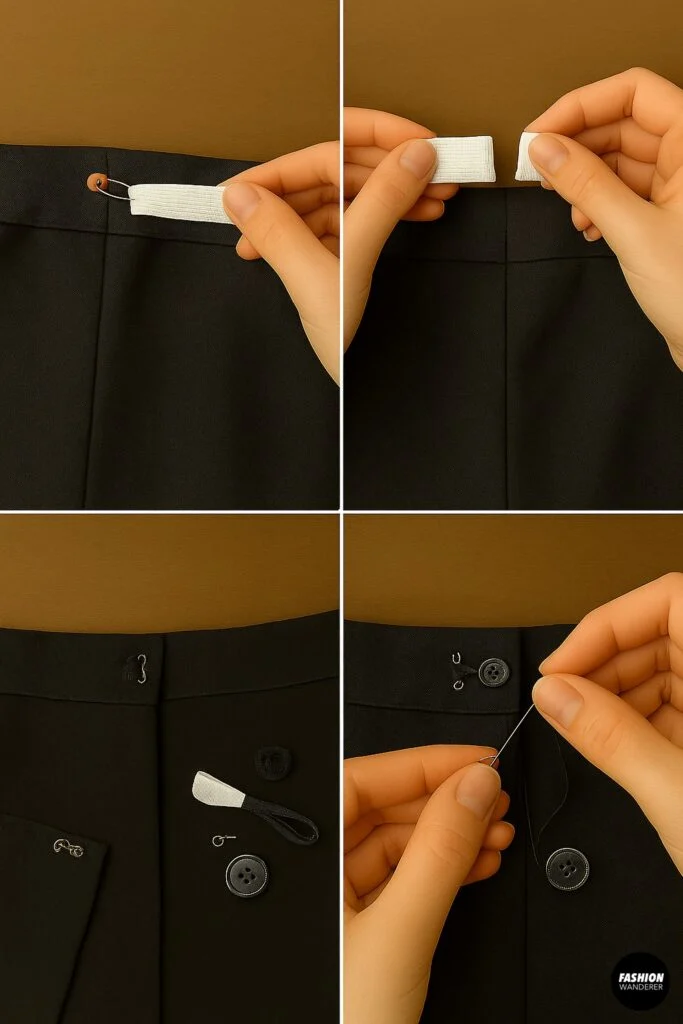
- Elastic Option: Thread a 1″ elastic through the waistband casing, stitch both ends together, then close the gap.
- Button & Hook Option: If you prefer a tailored closure, sew hook-and-eye fasteners or attach a decorative button and corresponding loop at the center back or side seam.
Step 7: Add Embellishments (Optional)

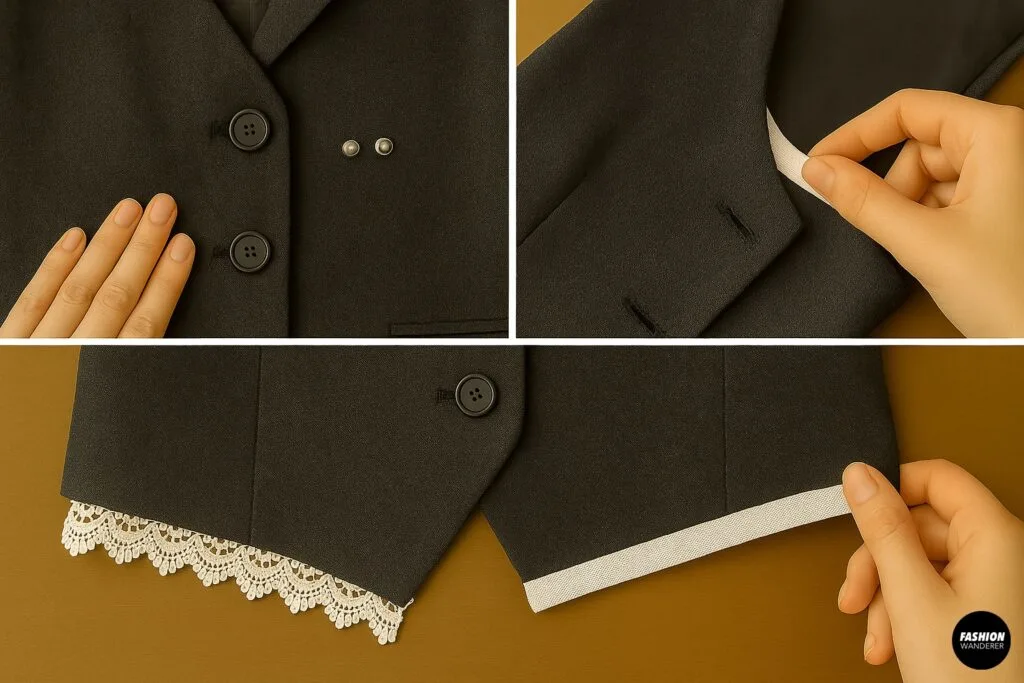
- Buttons & Rivets: Affix decorative blazer buttons to the vest’s front placket or use metal rivets for a utilitarian touch.
- Bias Tape: Bind all raw edges of the vest and skirt with bias tape for contrast.
- Lace or Fringe: Sew lace trim or fringe along the vest hem or skirt hem for a boho-inspired vibe.
Step 8: Final Press & Fit Test

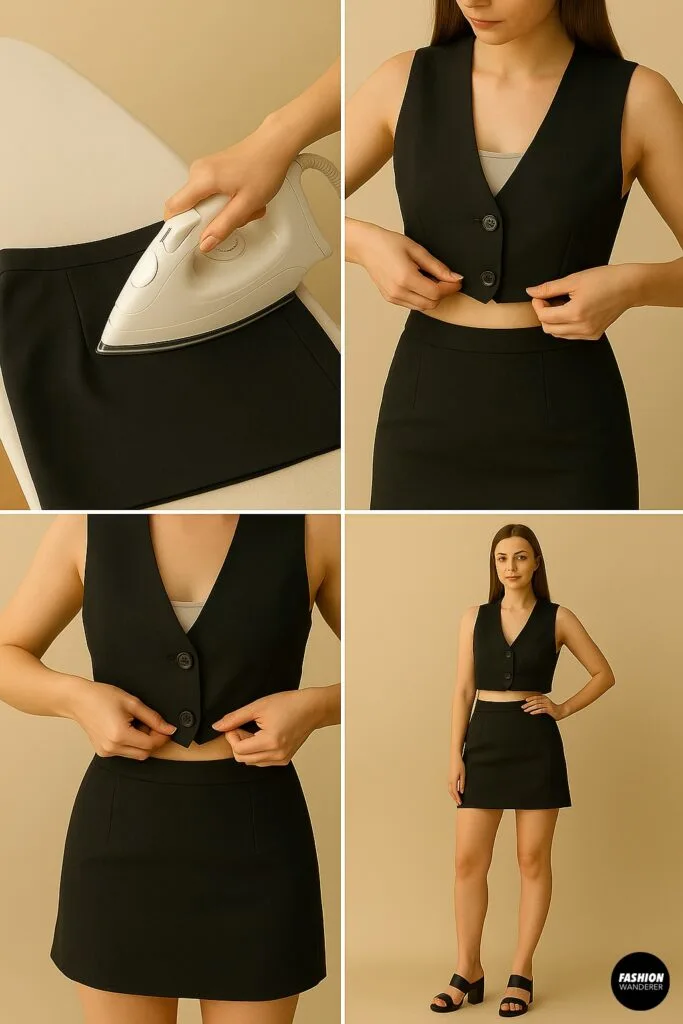
- Press All Seams – Use a steam iron to flatten and set all seams, hems, and waistband edges for a crisp look.
- Try It On – Slip into your new cropped vest and mini skirt set. Pin any areas that need taking in or letting out. Adjust side seams or darts as needed, then resew.
- Style & Photograph – Pair your set with a sleek tank top or crisp button-down, and add platform boots, mules, or strappy sandals to complete the look.
Wrapping Up

Transforming a men’s blazer into a coordinated cropped vest and mini skirt set is a satisfying upcycle project that delivers high style with minimal cost. By repurposing a single garment, you’ll achieve an on-trend look while embracing sustainable fashion.
Whether you wear your ensemble to brunch with friends or a night out on the town, this DIY set is sure to turn heads and spark conversations about creativity—and the planet-friendly benefits of upcycling.
Ready to upcycle your closet? Grab that blazer gathering dust, and let’s get sewing!
Trendy, Affordable Sewing Patterns for All Sizes


Tie Shoulder Jumpsuit Pattern


Palazzo Pants Sewing Pattern


Pocket Overall Romper Pattern


Wrap Maxi Skirt Sewing Pattern


Tie Back Top Sewing Pattern