
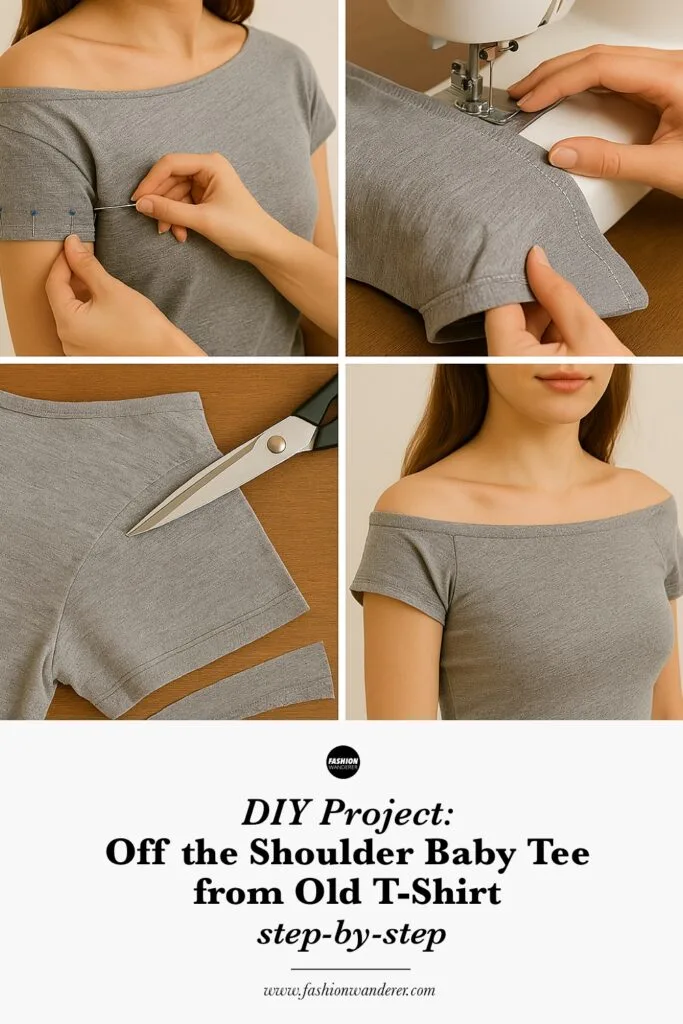
Looking to refresh your wardrobe with a flirty, on-trend staple? This DIY Off-the-Shoulder Baby Tee transforms an old shirt into a cropped, curve-hugging essential—perfect for layering, lounging, or a night out.
With just a few strategic cuts and basic sewing, you’ll create a custom-fit piece that shows just the right amount of shoulder. Best part? No store-bought pattern required!
Whether you’re upcycling a men’s tee, refashioning a thrifted basic, or rescuing a closet cast-off, this beginner-friendly tutorial walks you through each step to design your own off-the-shoulder baby tee.
✂️ Why You’ll Love This DIY Project
- Upcycled & Sustainable – Repurpose shirts you already have.
- Budget-Friendly – No new fabric or fancy tools required.
- Custom Fit – Create a made-for-you cropped tee that flatters.
- Beginner Friendly – Just a few seams and simple sewing steps.
- Trendy & Versatile – Pair with jeans, skirts, or layered under a slip dress.
🧶 Step-by-Step: How to Make a DIY Off-the-Shoulder Baby Tee
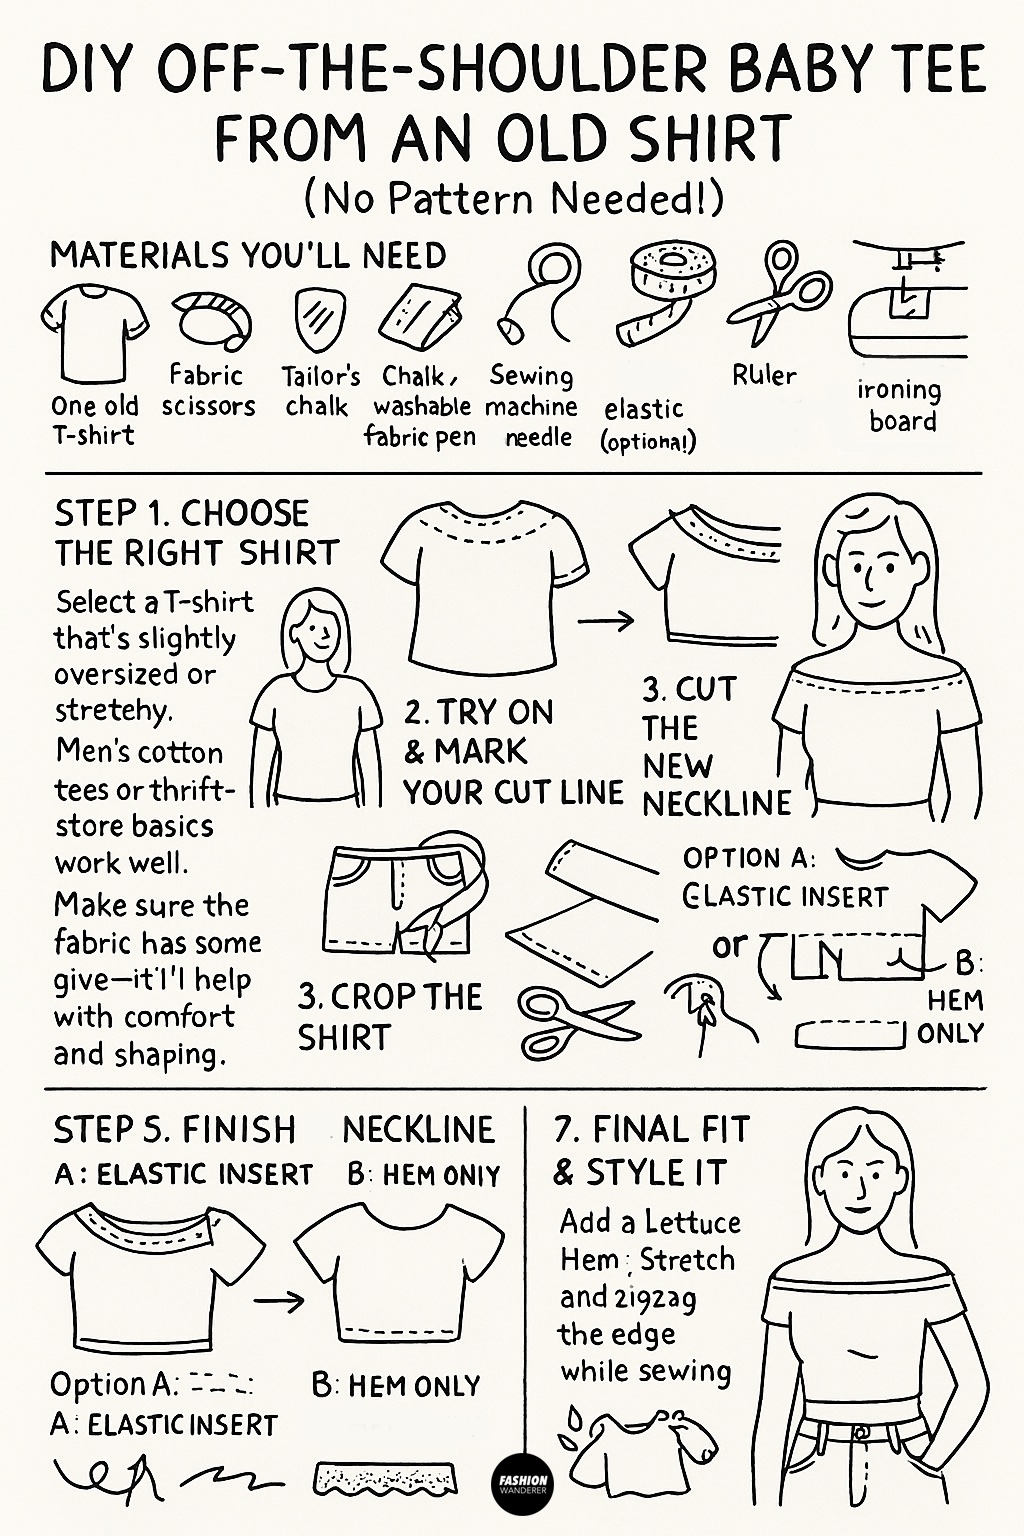
🧵 Materials You’ll Need

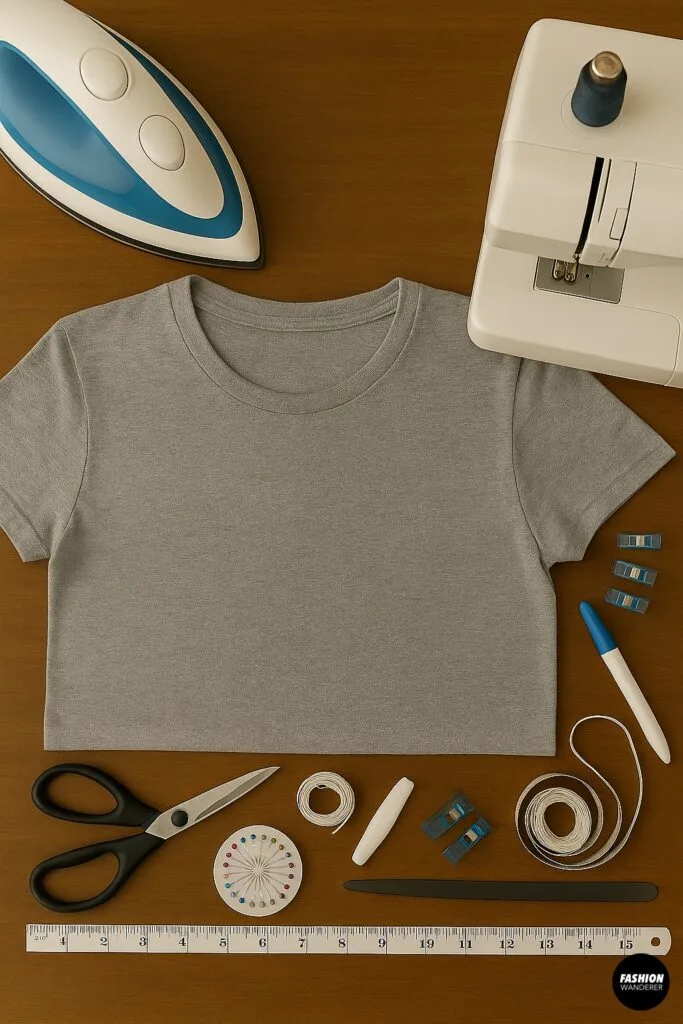
- One old T-shirt (preferably cotton or stretch-blend)
- Fabric scissors
- Measuring tape
- Tailor’s chalk or washable fabric pen
- Pins or clips
- Sewing machine or needle & thread
- ¼” elastic (optional for neckline)
- Iron & ironing board
- Ruler or straight edge
Step 1: Choose the Right Shirt

Select a T-shirt that’s slightly oversized or stretchy. Men’s cotton tees or thrift-store basics work well. Make sure the fabric has some give—it’ll help with comfort and shaping.
Tip: Darker or solid colors offer a sleek silhouette and hide seams better.
Step 2: Try On & Mark Your Cut Line

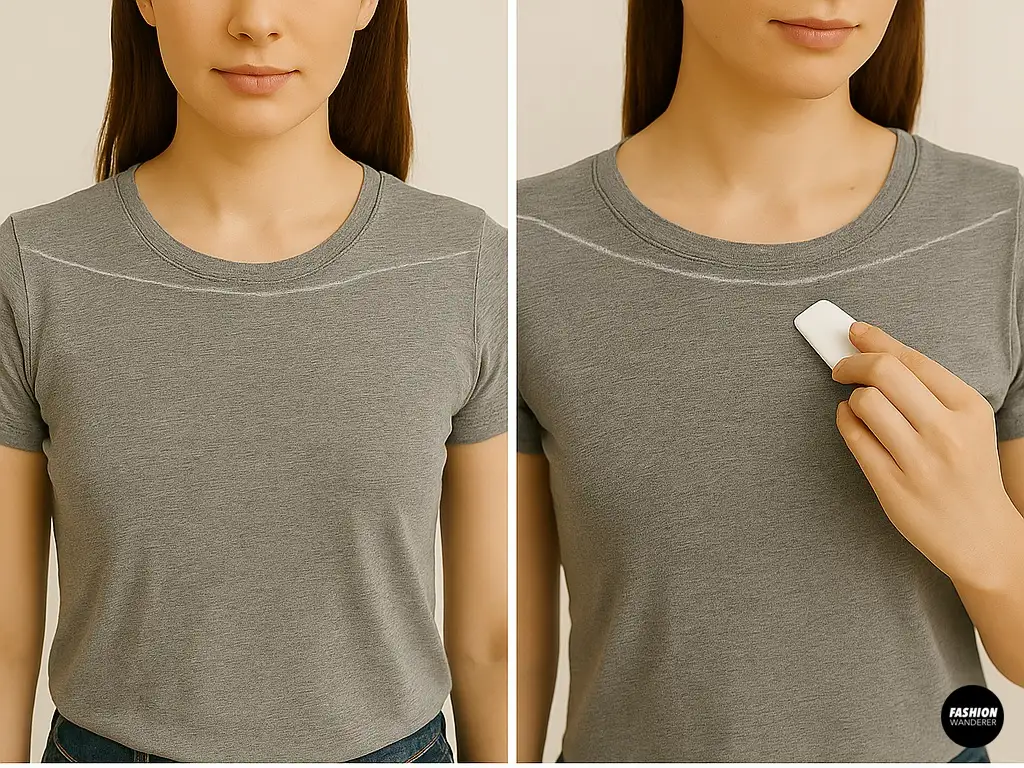
Put on the shirt and use tailor’s chalk to mark where you want the off-the-shoulder neckline to fall. Typically, this is 1–2 inches below the collarbone, spanning from one shoulder to the other. Draw a soft curve that dips across the chest, under both shoulders, and slightly higher on the back.
Pro Tip: Have a friend help trace or use a mirror for even placement.
Step 3: Cut the New Neckline

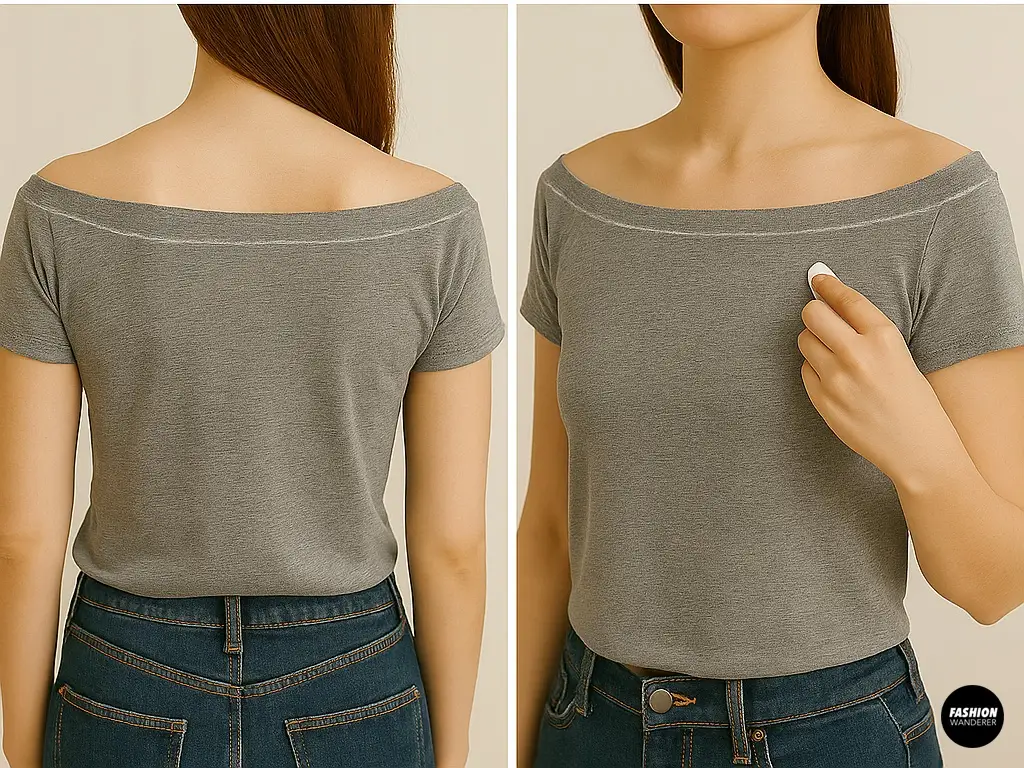
Lay the shirt flat and smooth out any wrinkles. Use sharp fabric scissors to cut along your chalk line, slicing off the original collar and shoulder seams. Keep the curve continuous and symmetrical.
Optional: Trim sleeve tops slightly to reduce bulk around the armhole.
Step 4: Crop the Shirt

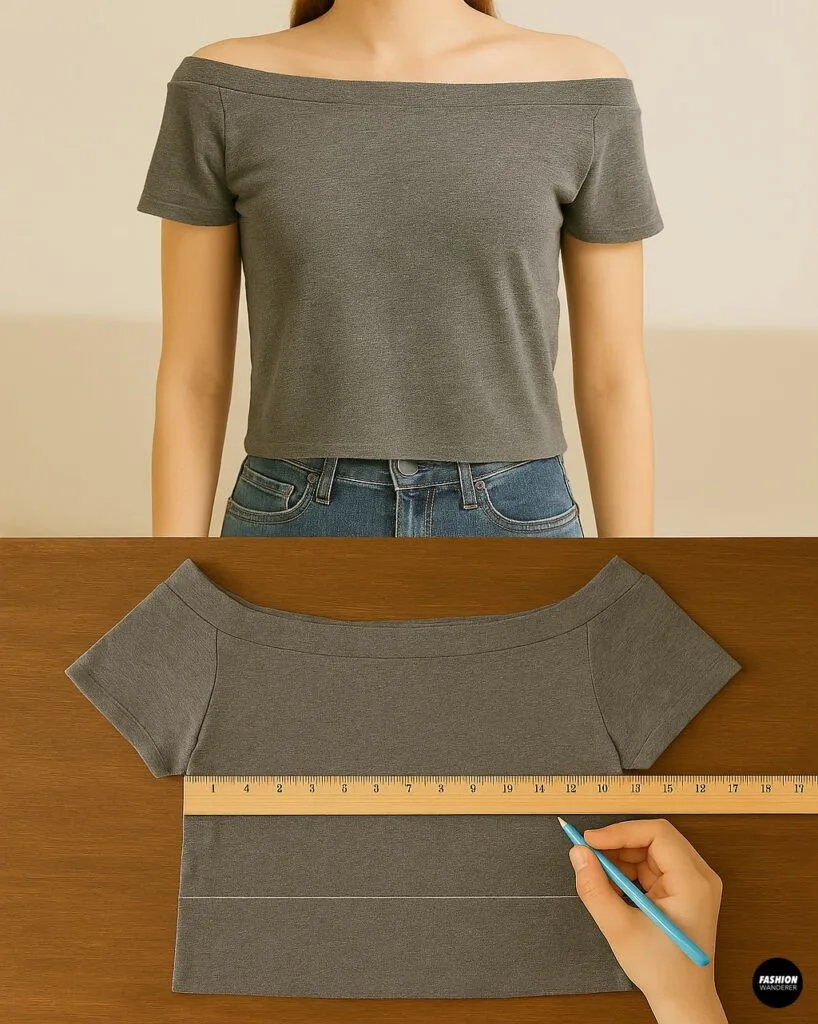
Decide how short you want your baby tee. Measure from the shoulder down and use a ruler to draw a straight horizontal line across the body. Crop the shirt just above the waist for a classic baby tee, or go even shorter for a bralette-style cut.
Optional Style Variants:
- Keep the raw hem for a grunge vibe.
- Fold and stitch a hemline for a cleaner look.
- Add side slits or tie-front detail for flair.
Step 5: Finish the Neckline

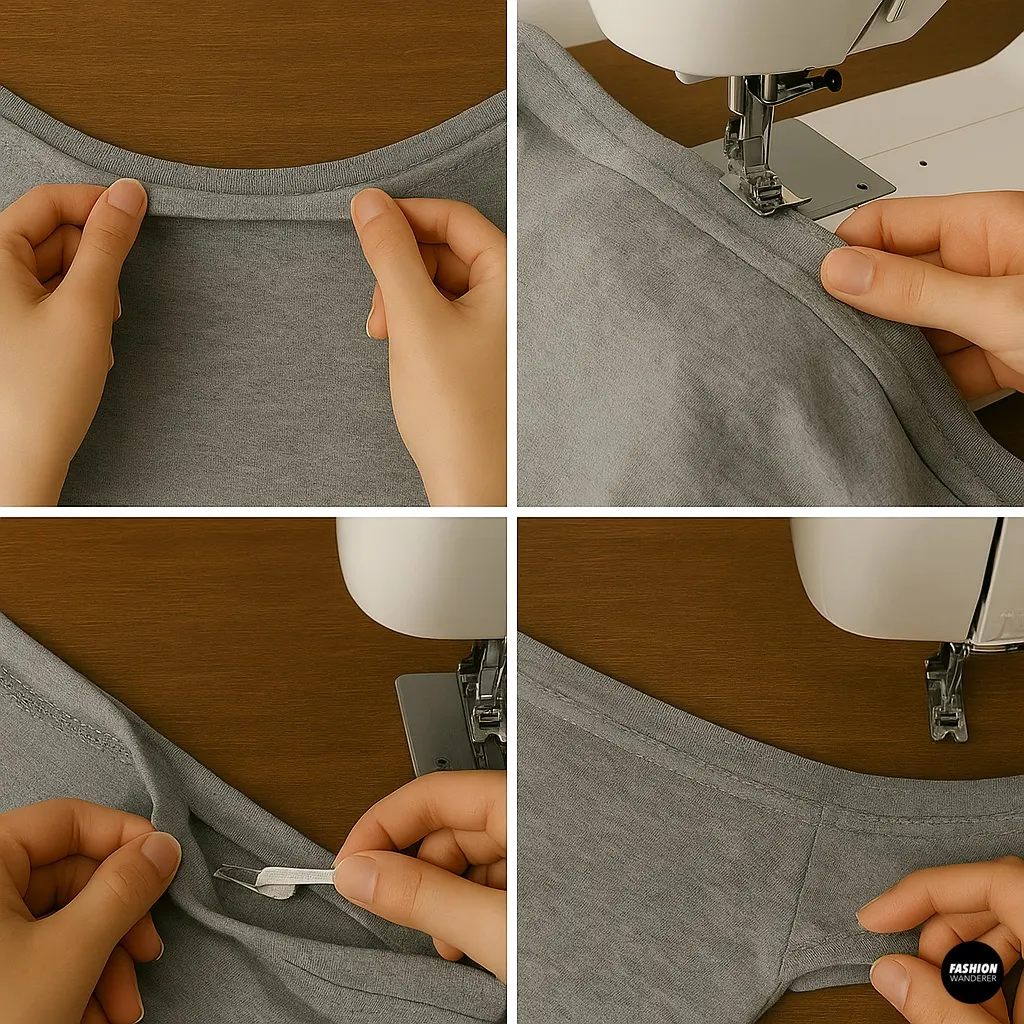
To keep the neckline from stretching out, you have two options:
Option A: Elastic Insert (Recommended)
- Fold the neckline inward by ½”.
- Stitch around the neckline, leaving a 1″ gap.
- Thread ¼” elastic through the casing using a safety pin.
- Adjust to your shoulder width and stitch the elastic ends together.
- Close the casing.
Option B: Hem Only (For Raw-Edge Stretch Tees)
- Simply fold the neckline inward by ¼” and stitch using a zigzag or stretch stitch.
Step 6: Refine the Sleeves (Optional)
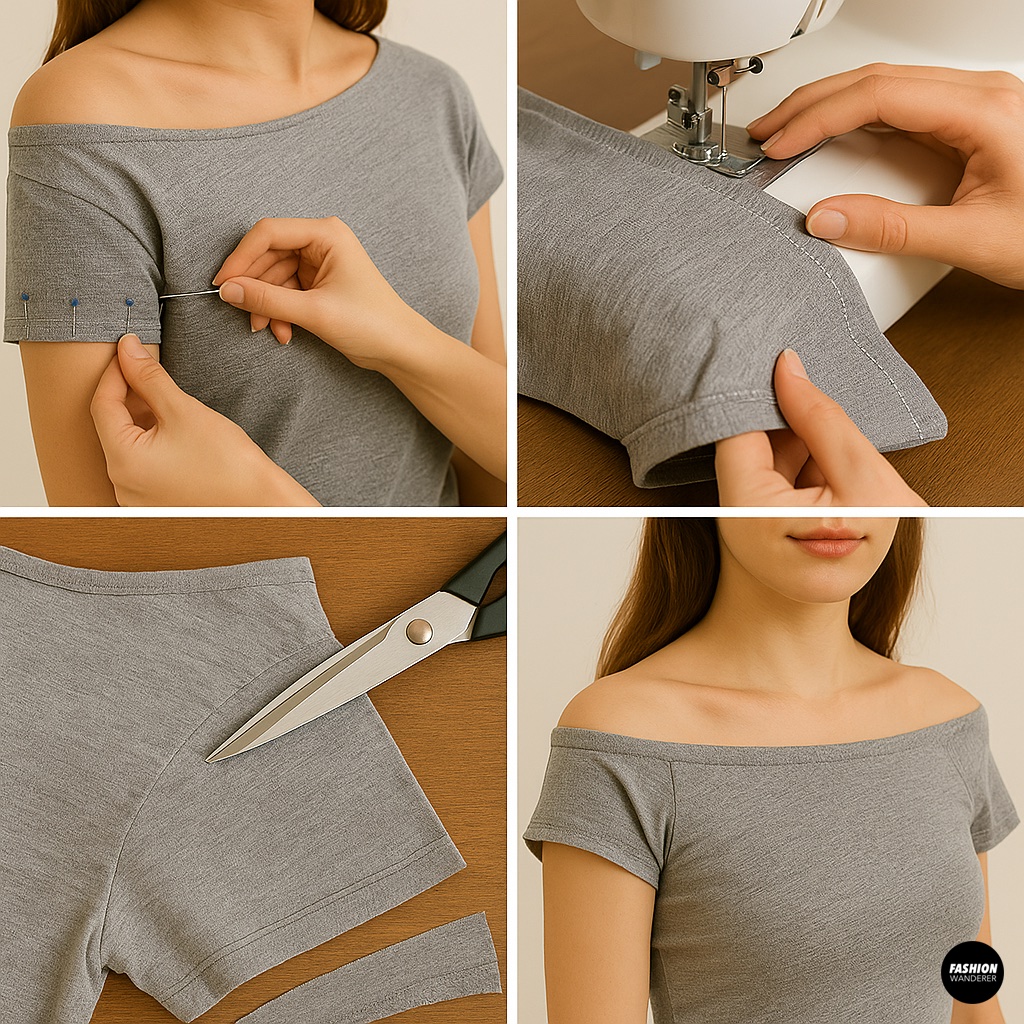

For a fitted baby tee sleeve:
- Try on the shirt and pin the sleeve to your desired snugness.
- Remove the shirt and stitch along the pin line.
- Trim excess and finish edges with a zigzag stitch.
Or:
- Cut sleeves into cap sleeves or flutter shapes for a playful look.
- Leave raw edges or hem depending on the fabric.
Step 7: Secure the Hems

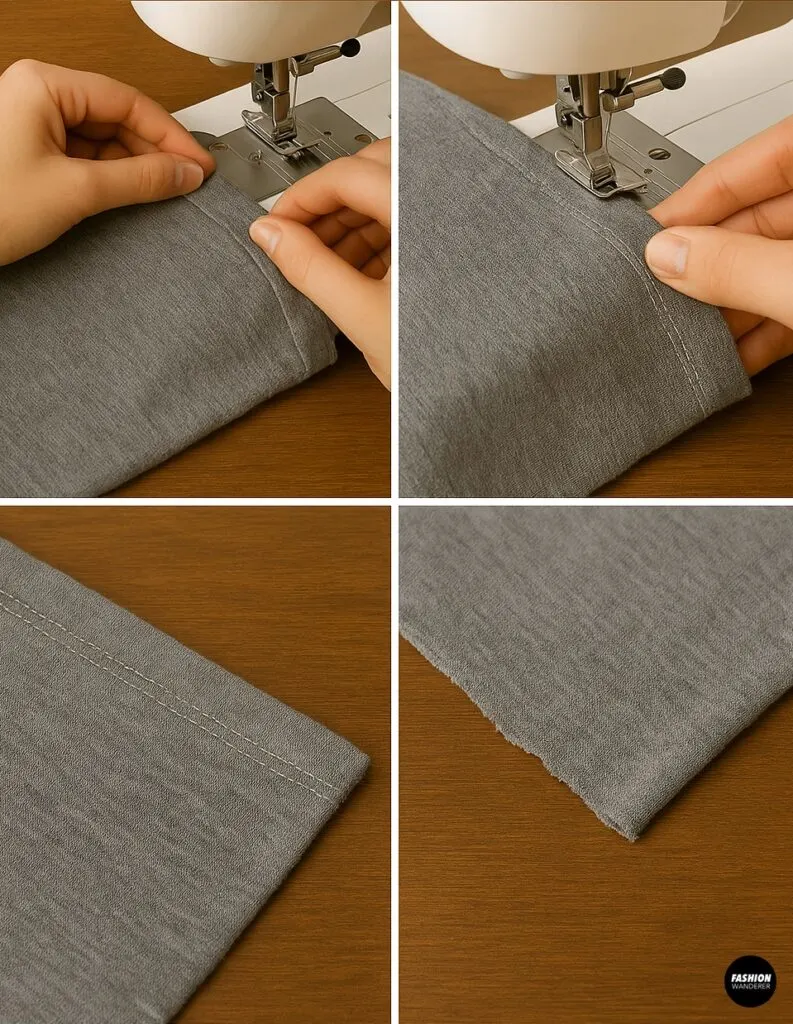
If you’ve made cuts to the body or sleeves, finish raw edges to prevent unraveling.
Options:
- Fold over ¼” and sew with a straight or zigzag stitch.
- Use a double needle for a professional finish.
- Leave raw for a relaxed, lived-in edge.
Iron all seams flat for a clean, structured look.
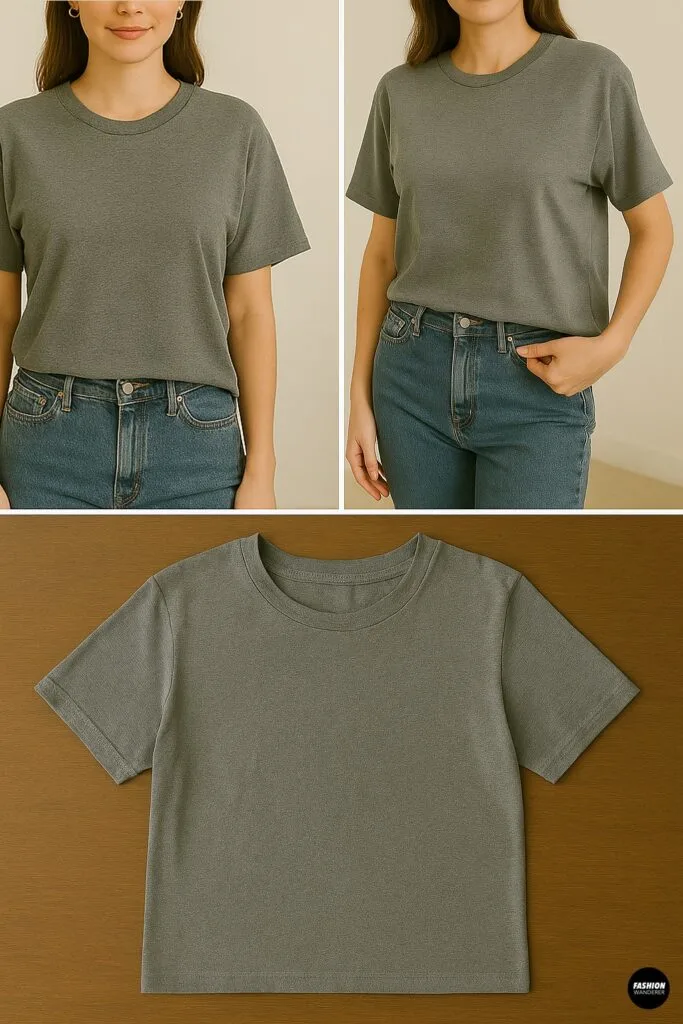
Step 8: Final Fit & Style It

Try on your new off-the-shoulder baby tee. The neckline should sit snugly across your shoulders, while the body fits close to your waist. Make any small adjustments with hand-stitching or elastic tightening if needed.
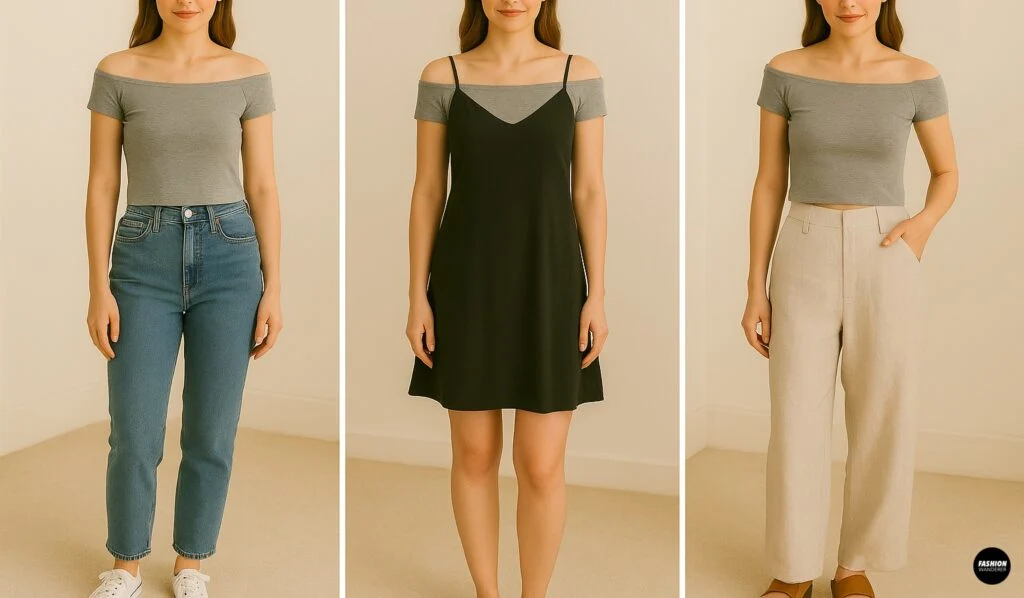
Style Pairings:
- With high-waisted denim and sneakers for a casual look.
- Under a strappy slip dress for a Y2K twist.
- Paired with wide-leg pants and platform sandals for 90s minimalism.
👕 Design Variations to Try

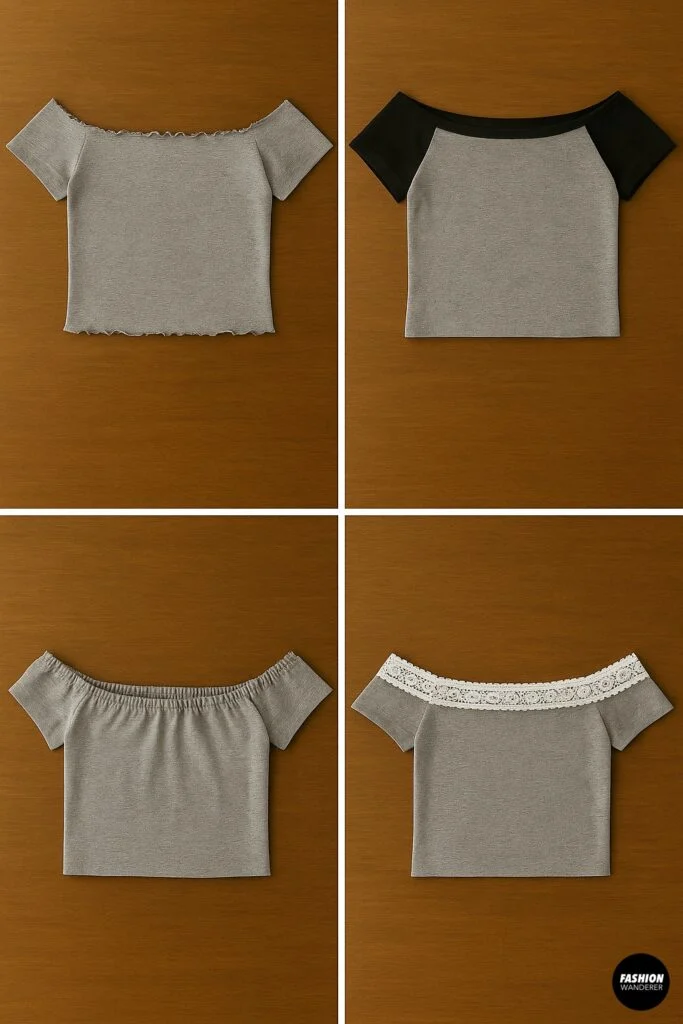
- Add a Lettuce Hem: Stretch and zigzag the edge while sewing to get that wavy finish.
- Color Blocked Shoulders: Use sleeves from a different tee as the neckline trim.
- Ruffled Edge: Gather extra fabric around neckline before adding elastic.
- Lace Insert: Add lace trim along the top edge or hemline for a romantic touch.
💡 Troubleshooting & Tips
- Neckline Too Loose? Add shorter elastic or stitch shoulder stays.
- Fabric Curling? Iron with steam or use fusible hem tape before stitching.
- Fit Too Tight? Use a looser tee or add gussets under the arms for ease.
- Uneven Hem? Lay flat and re-measure from shoulder to hem before trimming.
📌 Final Thoughts

Turning an old shirt into an off-the-shoulder baby tee is one of the easiest ways to remix your wardrobe and experiment with fit and silhouette. You’ll save fabric from landfills, practice core sewing skills, and end up with a stylish staple that feels like you.
Whether you wear it on vacation, to a concert, or just while lounging with friends, your DIY baby tee will be a conversation starter—and no one will believe it started as a basic old shirt.
Trendy, Affordable Sewing Patterns for All Sizes


Tie Shoulder Jumpsuit Pattern


Palazzo Pants Sewing Pattern


Pocket Overall Romper Pattern


Wrap Maxi Skirt Sewing Pattern


Tie Back Top Sewing Pattern