
If you have an old men’s button-up shirt sitting in the back of a closet, don’t toss it yet. With a little cutting, a few simple seams, and some dramatic black and red fabric, you can turn it into an adorable DIY dog vampire costume for Halloween.
This project is especially fun because the oversized proportions of a men’s shirt already give you plenty of fabric to work with. The collar can become part of the vampire look, the shirt body can be reshaped into a tiny dog vest or cape base, and scraps can even be reused for accessories.
For more budget-friendly Halloween inspiration, take a look at these last-minute pet costumes you can make from old clothes that don’t need advanced sewing skills or a commercial pattern. This upcycled dog Halloween costume is beginner-friendly, customizable, and inexpensive—plus, it gives an old shirt a completely new life.
Materials You Will Need
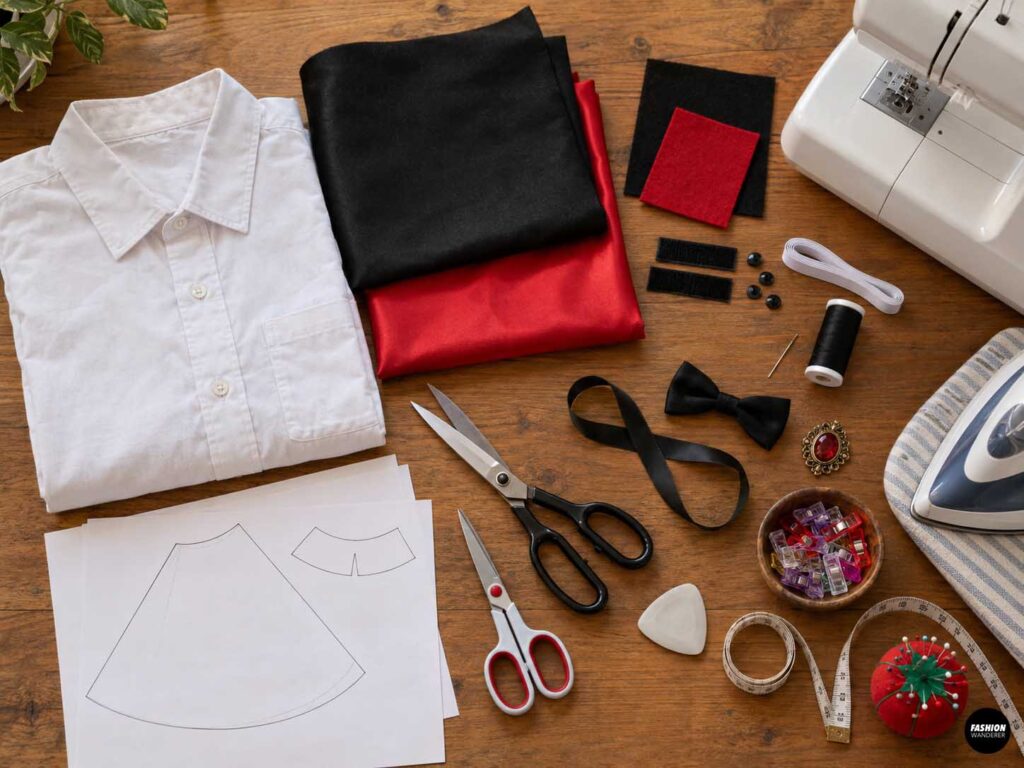
- 1 old men’s button-up shirt
- Black cotton, satin, felt, or lightweight fabric for the cape
- Red satin, cotton, felt, or lining fabric
- Small piece of black or red felt for collar details
- Hook-and-loop tape or snaps
- 1/4–1/2 inch elastic, optional
- Coordinating polyester thread
- Sewing machine
- Hand-sewing needle
- Fabric scissors
- Paper scissors
- Pins or sewing clips
- Measuring tape
- Fabric marker or tailor’s chalk
- Paper for templates
- Iron and ironing board
- Optional decorative button, ribbon, bow tie, or medallion
Upcycle Old Men’s Shirt Into Dog Vampire Costume
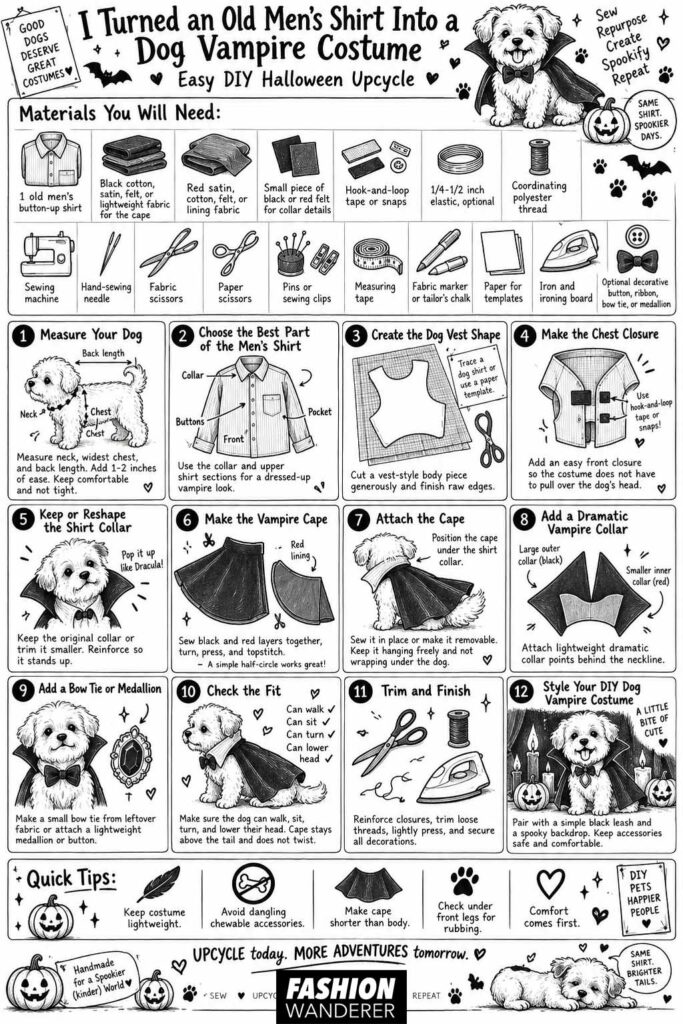
Step 1: Measure Your Dog
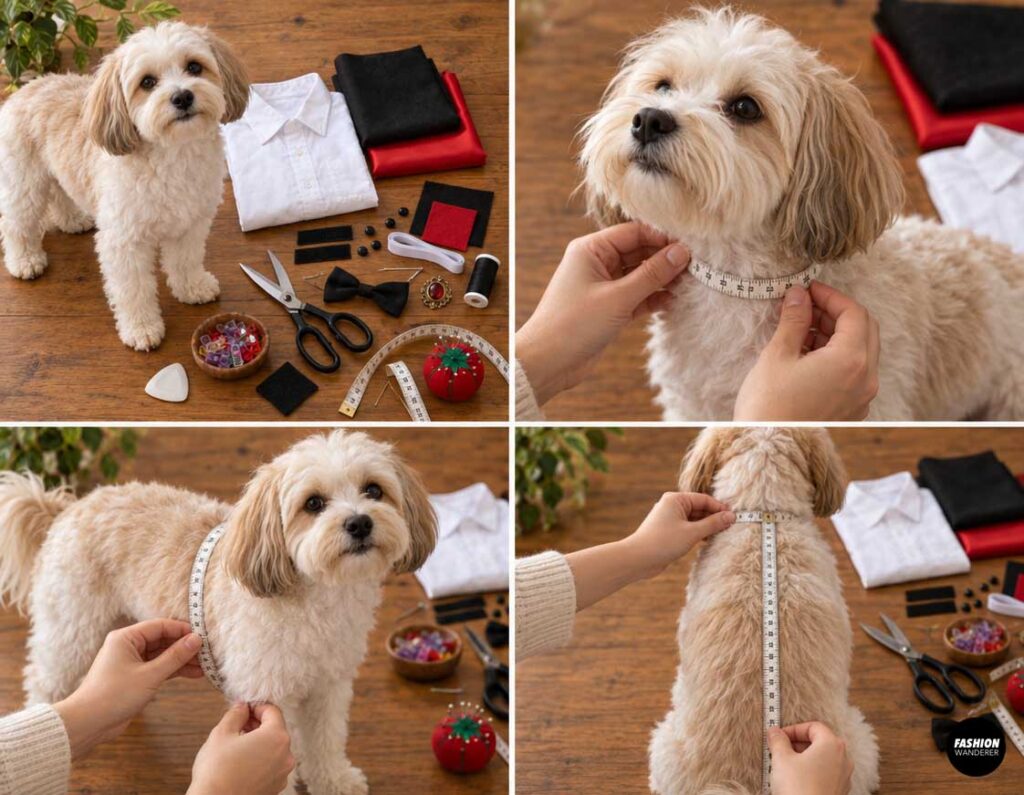
Before cutting the shirt, measure your dog around the neck and the widest part of the chest. Measure from the base of the neck down the back to where you want the costume to end.
The costume should sit comfortably without restricting walking, sitting, or lying down.
Add approximately 1–2 inches of ease around the chest depending on your dog’s size and coat thickness. Avoid making anything tight around the neck.
Step 2: Choose the Best Part of the Men’s Shirt
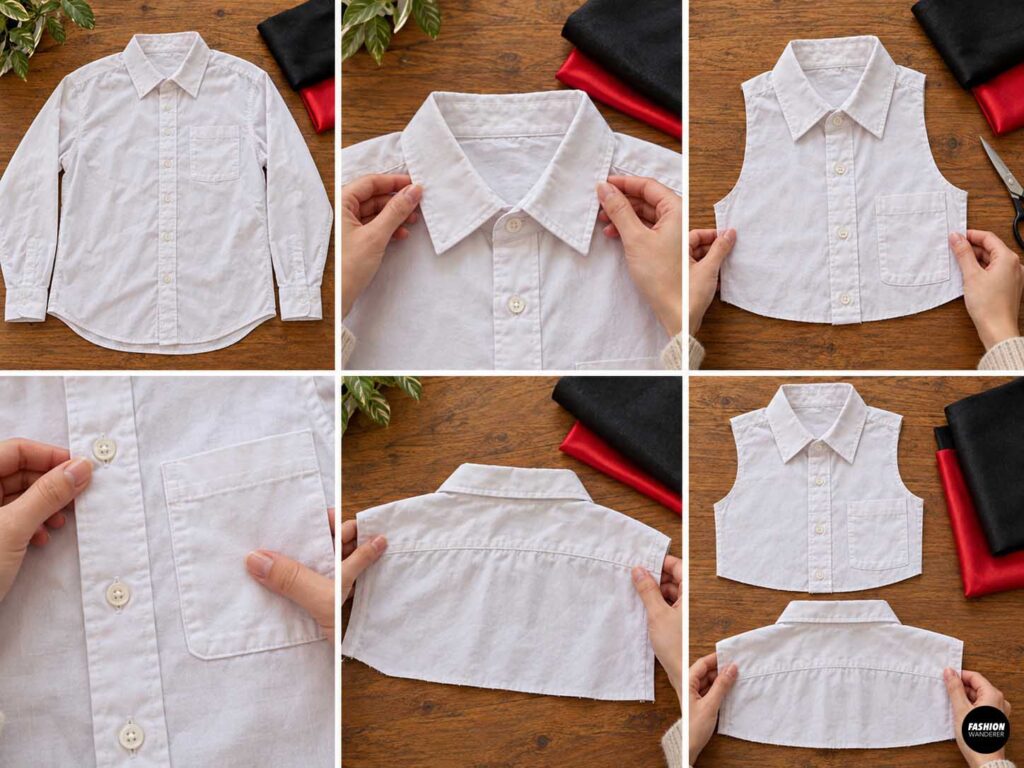
Lay the old men’s shirt flat and decide which sections you want to reuse.
For a classic vampire look, I like keeping the original shirt collar because it instantly gives the costume a dressed-up appearance.
You can use the upper front and back of the shirt as a small vest-style body piece. If the shirt has a nice pocket, interesting buttons, stripes, or contrast stitching, keep those details whenever possible.
That’s part of what makes an upcycled costume look unique.
Step 3: Create the Dog Vest Shape
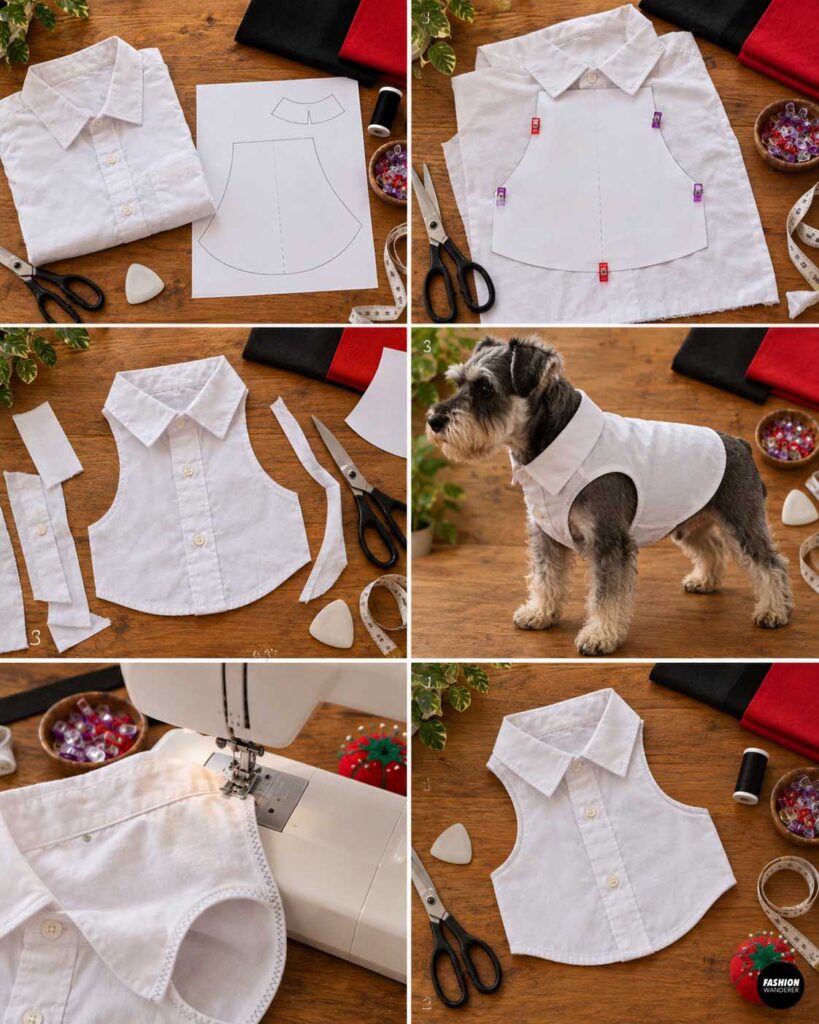
Lay a well-fitting dog shirt or harness over the men’s shirt as a rough guide. If you don’t have one, use your dog’s measurements to draw a simple body shape on paper first.
The vest should cover the upper back and wrap slightly around the chest.
Cut the shirt generously at first. You can always trim away more fabric after testing the fit.
Finish the raw edges with a zigzag stitch, overlock stitch, or narrow double-fold hem.
Step 4: Make the Chest Closure
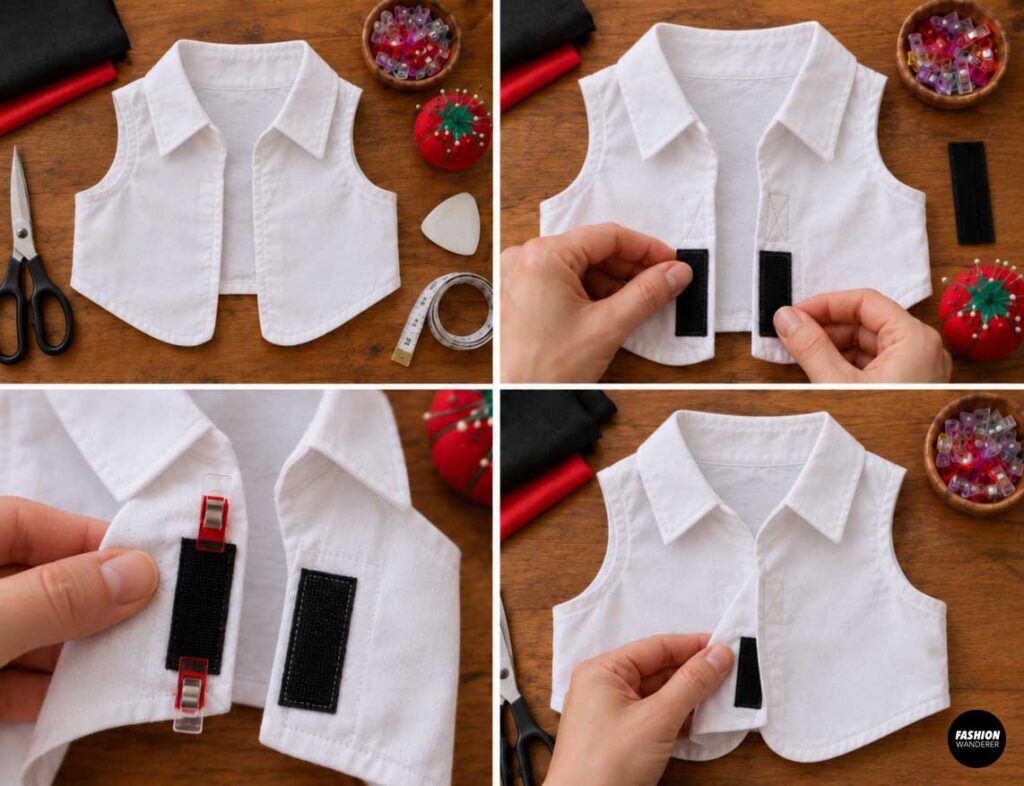
Instead of pulling the costume over your dog’s head, make the front easy to open and close.
Add hook-and-loop tape, snaps, or soft fabric tabs underneath the chest.
This makes dressing your dog much easier and is especially helpful for dogs who dislike clothing being pulled over their ears.
Keep closures away from the armpit area so they don’t rub while your dog walks.
Step 5: Keep or Reshape the Shirt Collar
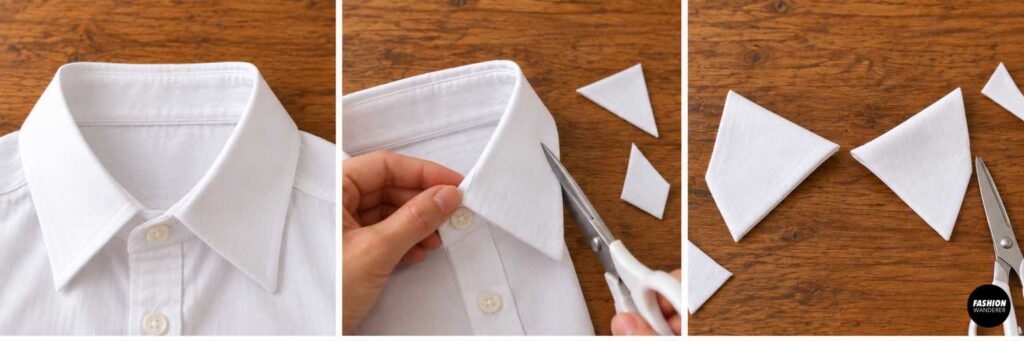
Now comes the fun vampire part.
If the original shirt collar fits your design, leave it attached and fold it upward for a dramatic Dracula-style neckline.
If it looks too large, trim it smaller while keeping the basic pointed collar shape.
You can also reinforce the underside with lightweight interfacing or felt so the collar stands up instead of flopping down.
Step 6: Make the Vampire Cape
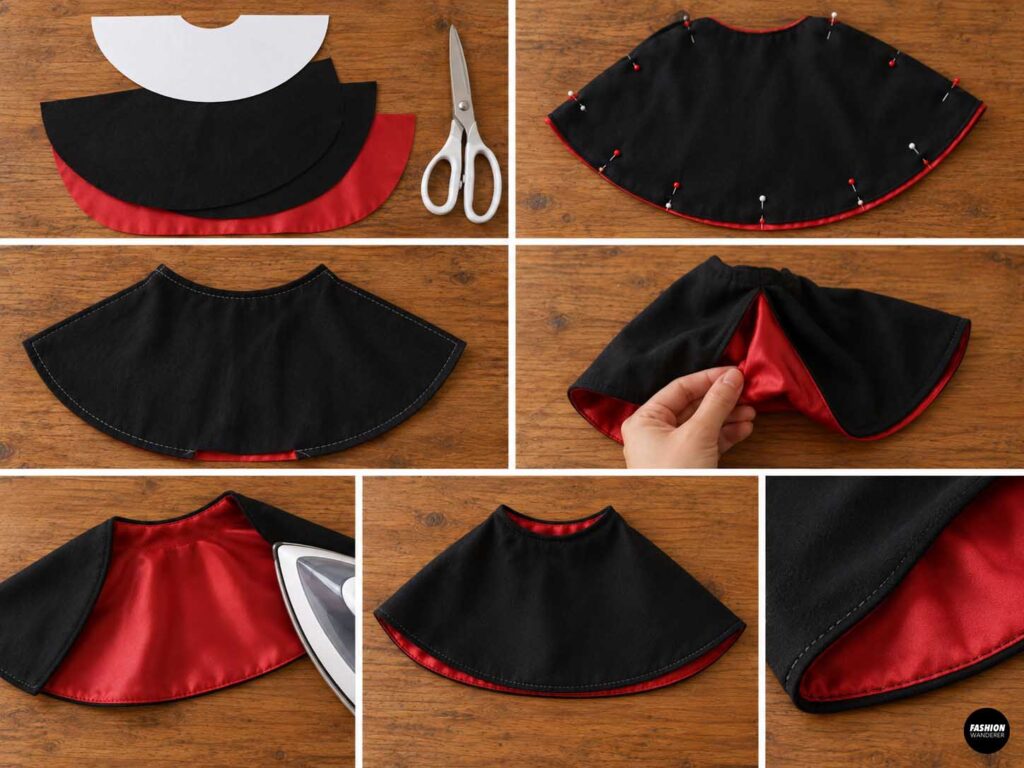
Measure across your dog’s shoulders and decide how long you want the cape.
Cut a simple half-circle, rounded rectangle, or slightly flared trapezoid from black fabric. The cape should be shorter than your dog’s body so it doesn’t drag on the ground.
For extra drama, cut a second matching layer from red fabric and sew the two layers right sides together.
Leave a small opening, turn the cape right side out, press carefully, and topstitch around the edge.
The flash of red lining underneath the black cape gives the costume that unmistakable vampire look.
Step 7: Attach the Cape
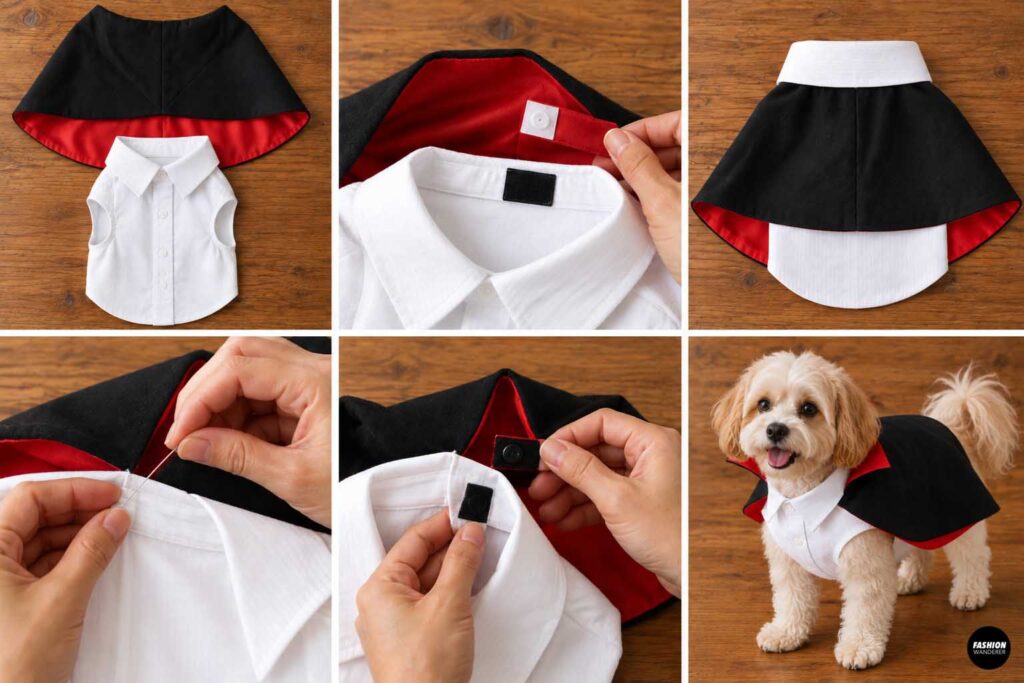
Position the cape directly underneath the shirt collar.
You can permanently sew it to the back neckline or make it removable using snaps or hook-and-loop tape.
I prefer removable pieces for pet costumes because they make washing easier and let you use the shirt portion separately.
Check that the cape hangs freely and does not wrap underneath your dog.
Step 8: Add a Dramatic Vampire Collar
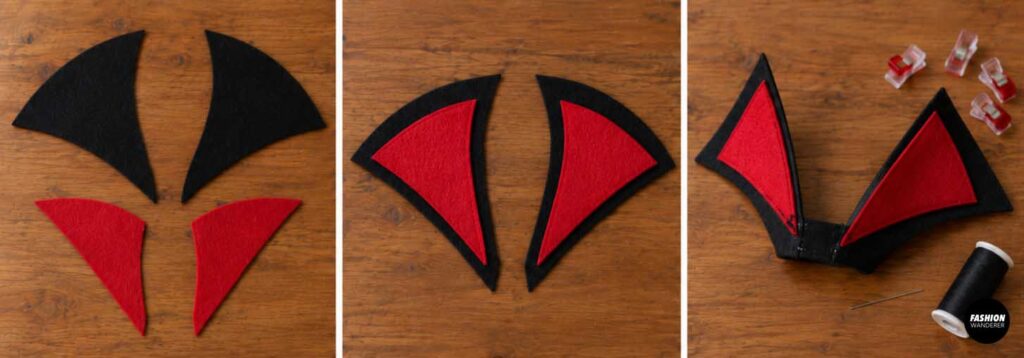
For an even bigger Halloween effect, cut two tall pointed collar pieces from black felt.
Cut slightly smaller pieces from red felt and layer them on top.
Attach the collar behind the original shirt neckline so the points rise upward beside your dog’s head.
For small dogs, keep this detail lightweight. Oversized stiff decorations can become uncomfortable surprisingly quickly.
Step 9: Add a Bow Tie or Medallion
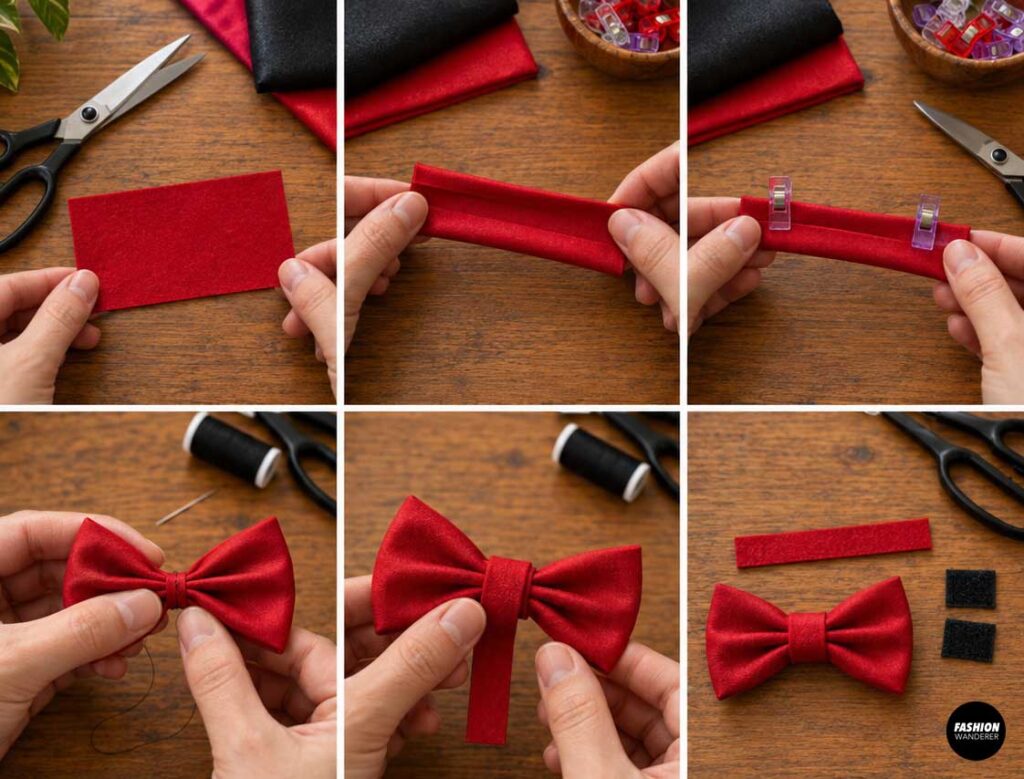
Use leftover red fabric to make a small bow tie.
Cut a rectangle, fold the long edges inward, gather the center, and wrap a narrow strip of fabric around the middle.
Hand sew or attach it to the shirt collar with hook-and-loop tape.
Another cute option is a small gold-colored button or lightweight medallion centered underneath the collar for a vintage vampire look.
Step 10: Check the Fit
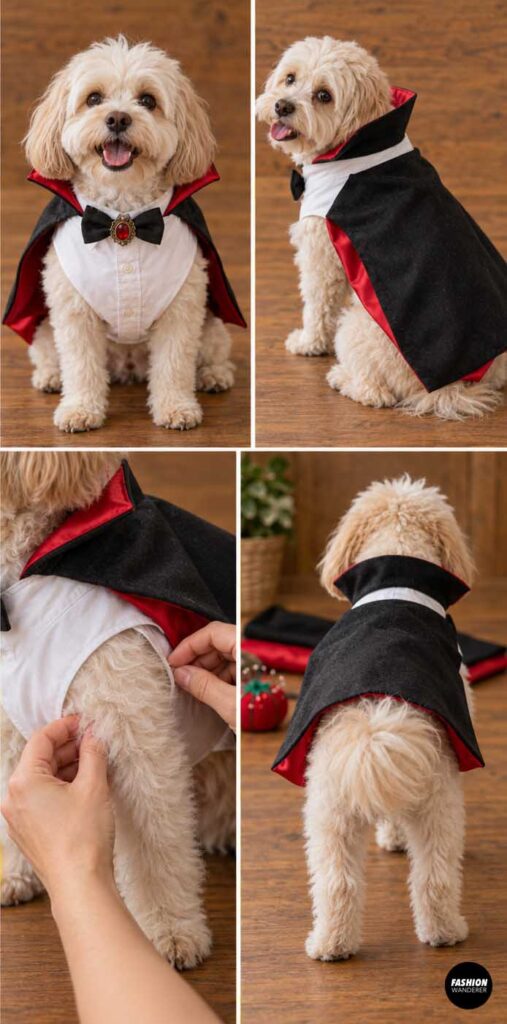
Try the costume on your dog before finishing everything permanently.
Make sure your dog can comfortably walk, sit, turn, and lower their head.
Check underneath the front legs for rubbing. Make sure the cape stays above the tail and doesn’t twist around the body.
If your dog seems uncomfortable, simplify the costume by shortening the cape or removing accessories.
Step 11: Trim and Finish
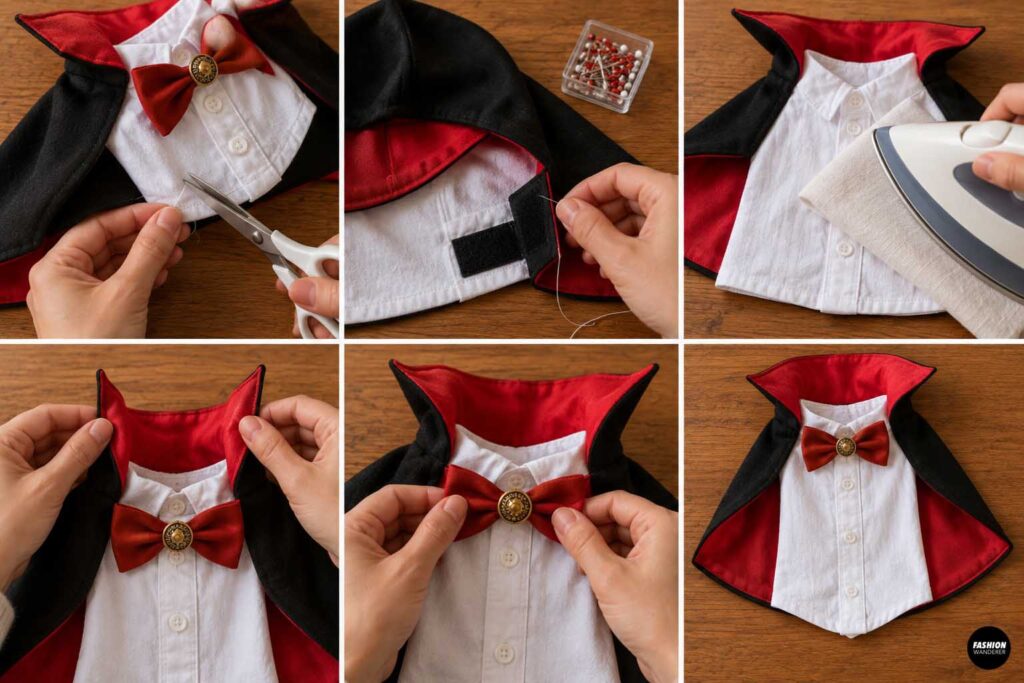
Once you are happy with the fit, trim loose threads and reinforce stress points around closures.
Give cotton sections a light press from the wrong side. Avoid placing a hot iron directly on synthetic felt or delicate satin.
Reshape the vampire collar with your fingers and make sure all decorations are securely attached.
Step 12: Style Your DIY Dog Vampire Costume
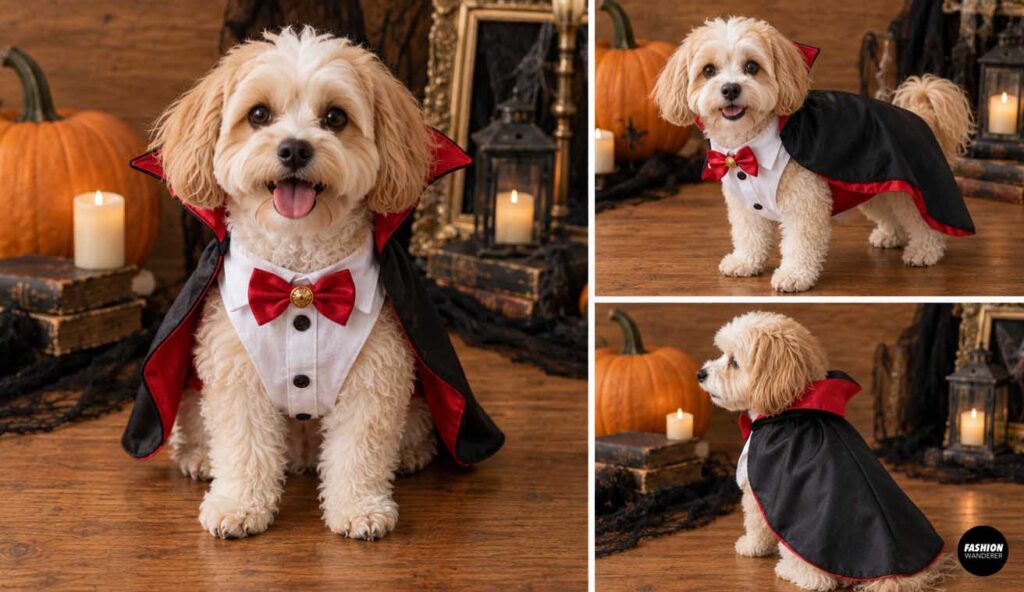
Now your old men’s shirt has officially gone from forgotten closet item to tiny canine Dracula.
Pair the costume with a simple black leash for photos, or create a spooky backdrop using pumpkins, vintage frames, faux candles, and dark fabric.
Skip dangling accessories or anything your dog may chew.
The best pet costume is one that looks cute while still letting your dog move comfortably.
Why This Men’s Shirt Upcycle Works So Well
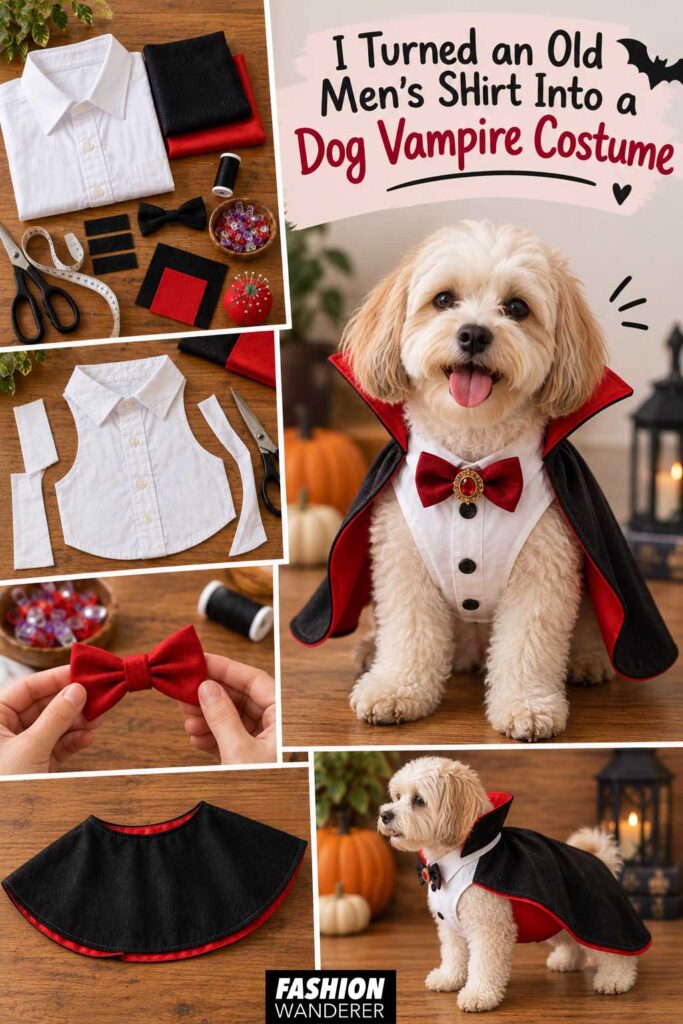
This DIY dog vampire costume from an old men’s shirt is one of those projects that looks much more complicated than it actually is. The existing buttons, seams, collar, and finished edges do much of the work for you.
Instead of purchasing another one-time Halloween outfit, you can reuse clothing you already own and customize the costume specifically for your dog.
And somehow, an oversized men’s shirt becoming a miniature vampire outfit feels like exactly the kind of ridiculous sewing magic Halloween was invented for.