
If you have a basket full of colorful T-shirt scraps waiting to be used, why not turn them into a fun and comfortable girls patchwork skirt? This beginner-friendly sewing project is a fantastic way to reduce fabric waste while creating a one-of-a-kind garment that’s full of personality. Since knit T-shirt fabric is soft, stretchy, and doesn’t fray easily, it’s perfect for first-time sewists learning basic garment construction.
This DIY upcycled patchwork skirt is great for everyday wear, school, playground adventures, family vacations, and handmade gifts. Every skirt turns out differently depending on the colors and prints you choose, making each project completely unique.
In this tutorial, you’ll learn how to transform leftover T-shirt scraps into a beautiful patchwork skirt with easy-to-follow, step-by-step instructions. We also go you covered with more kids t-shirt upcycle projects and patchwork designs that will inspire you to keep creating!
Why You’ll Love This Project
- Perfect beginner sewing project
- Uses leftover T-shirt scraps
- Eco-friendly clothing upcycle
- Soft and comfortable knit fabric
- Endless color combinations
- Great stash-busting project
- Quick afternoon sewing project
Materials You’ll Need
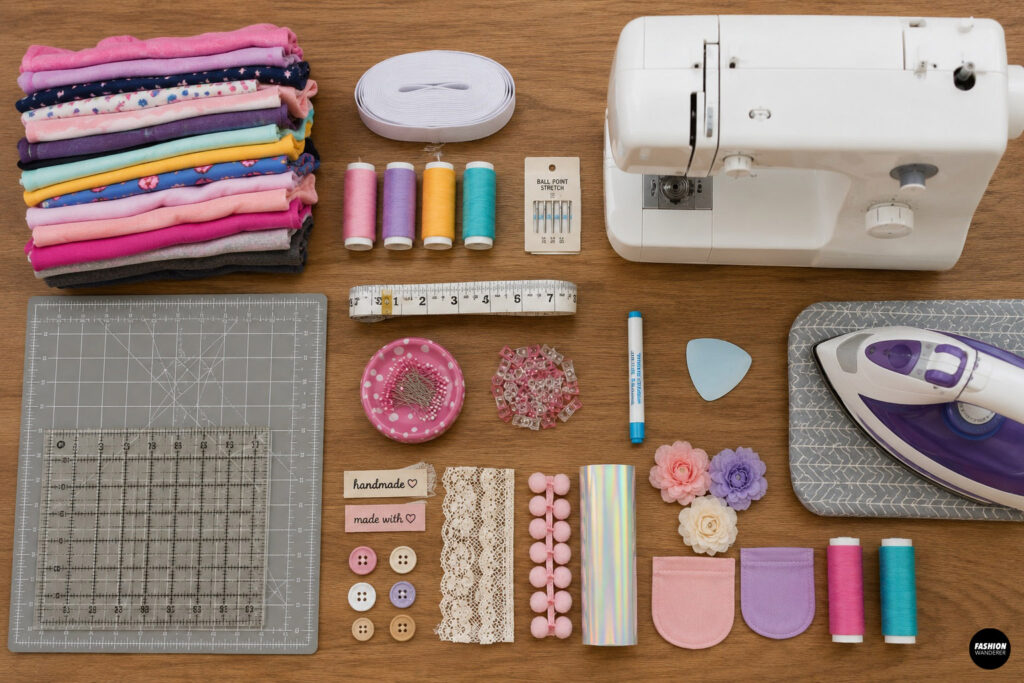
- Assorted cotton T-shirt scraps
- 1–1½-inch wide elastic
- Coordinating polyester thread
- Sewing machine
- Ballpoint or stretch sewing needle
- Fabric scissors or rotary cutter
- Cutting mat
- Acrylic quilting ruler
- Measuring tape
- Sewing clips or pins
- Fabric marker or tailor’s chalk
- Iron and ironing board
Optional Supplies
- Decorative labels
- Lace trim
- Pom-pom trim
- Decorative buttons
- Heat-transfer vinyl
- Fabric flowers
- Matching pockets
- Contrast topstitching thread
Upcycle T-Shirt into Girls Patchwork Skirt
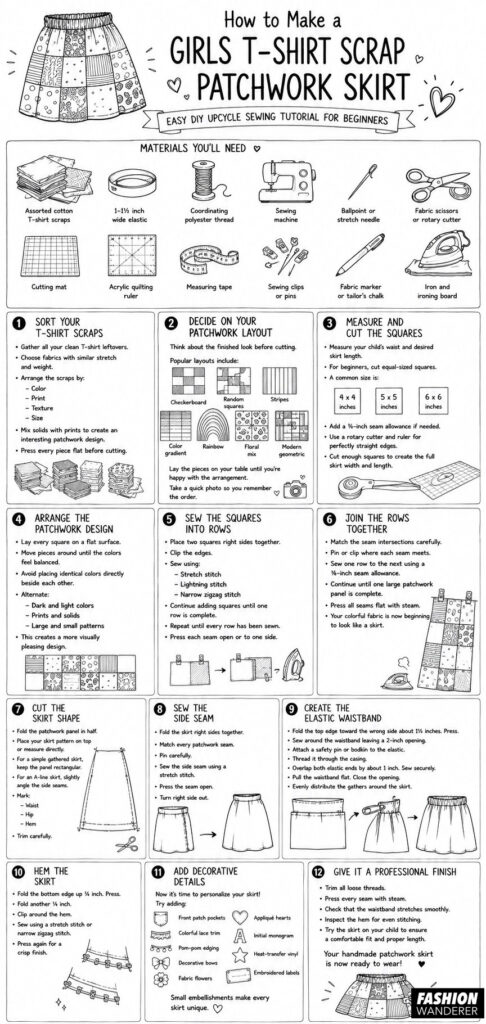
Step 1: Sort Your T-Shirt Scraps
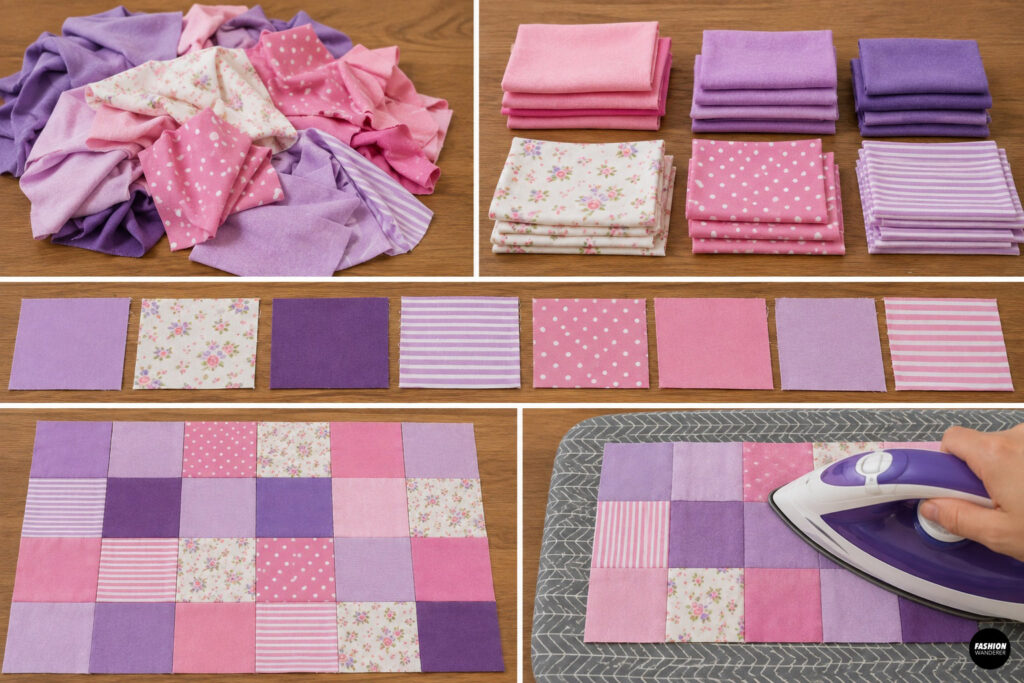
Gather all your clean T-shirt leftovers.
Choose fabrics with similar stretch and weight for the best results.
Arrange the scraps by:
- Color
- Texture
- Size
Mix solids with prints to create an interesting patchwork design.
Press every piece flat before cutting.
Step 2: Decide on Your Patchwork Layout
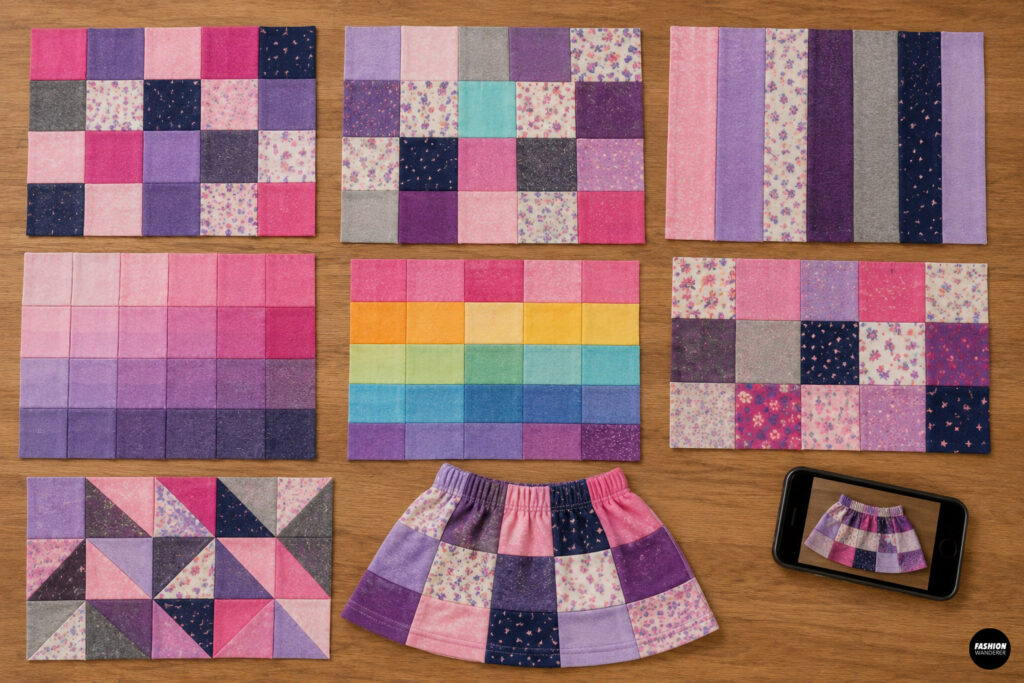
Think about the finished look before cutting.
Popular layouts include:
- Checkerboard
- Random squares
- Stripes
- Color gradient
- Rainbow
- Floral mix
- Modern geometric
Lay the pieces on your table until you’re happy with the arrangement.
Take a quick photo so you remember the order.
Step 3: Measure and Cut the Squares
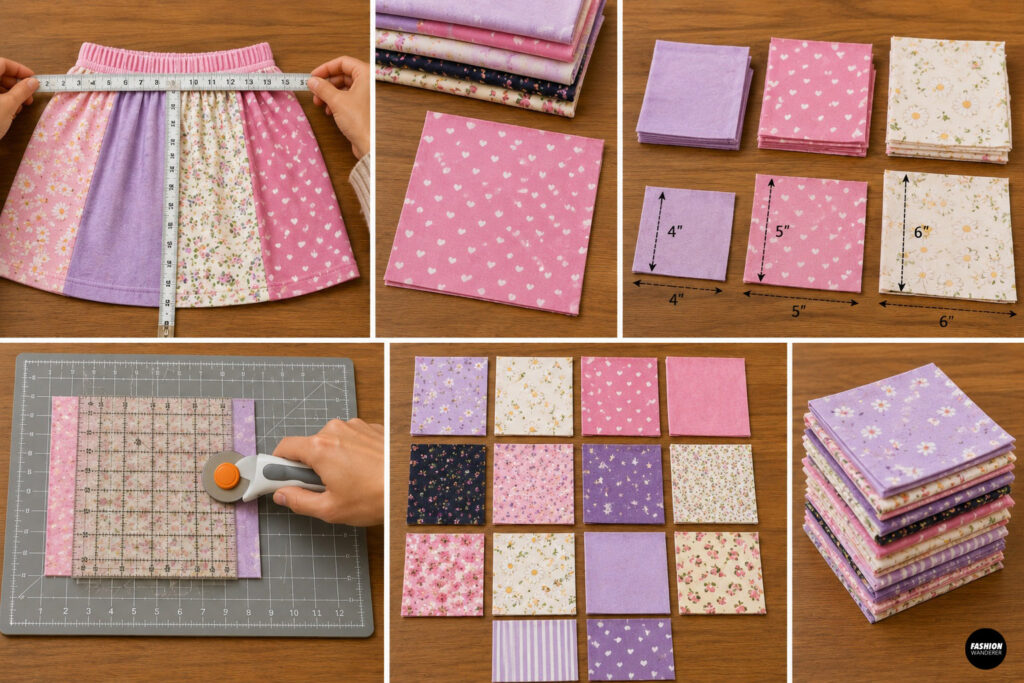
Measure your child’s waist and desired skirt length.
For beginners, cut equal-sized squares.
A common size is:
- 4 x 4 inches
- 5 x 5 inches
- 6 x 6 inches
Add a ⅜-inch seam allowance if needed.
Use a rotary cutter and ruler for perfectly straight edges.
Cut enough squares to create the full skirt width and length.
Step 4: Arrange the Patchwork Design
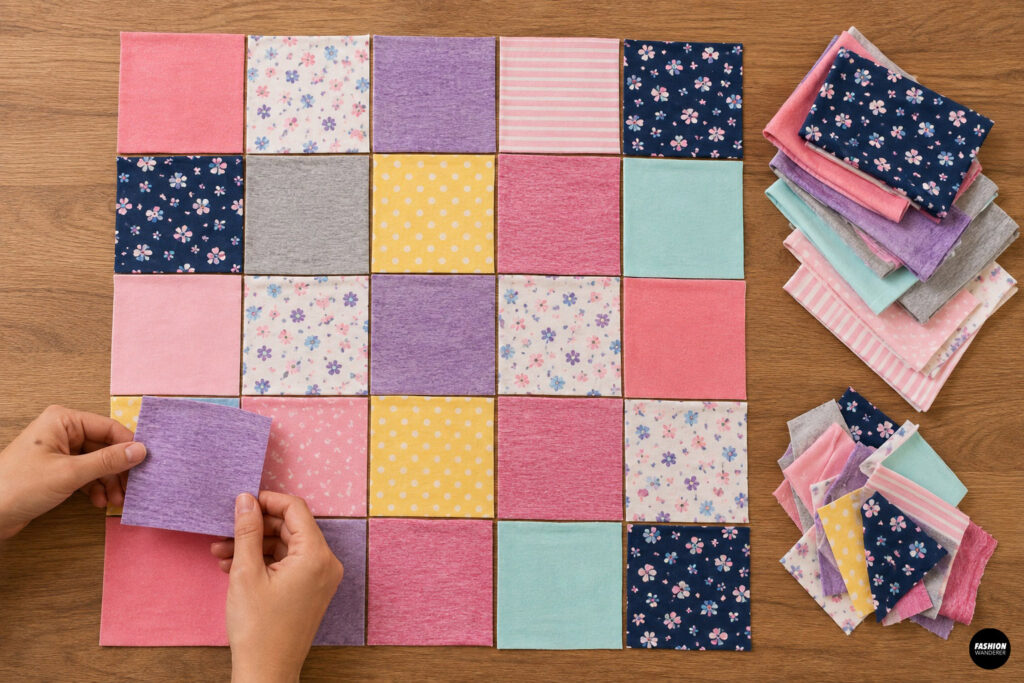
Lay every square on a flat surface.
Move pieces around until the colors feel balanced.
Avoid placing identical colors directly beside each other.
Alternate:
- Dark and light colors
- Prints and solids
- Large and small patterns
This creates a more visually pleasing design.
Step 5: Sew the Squares into Rows
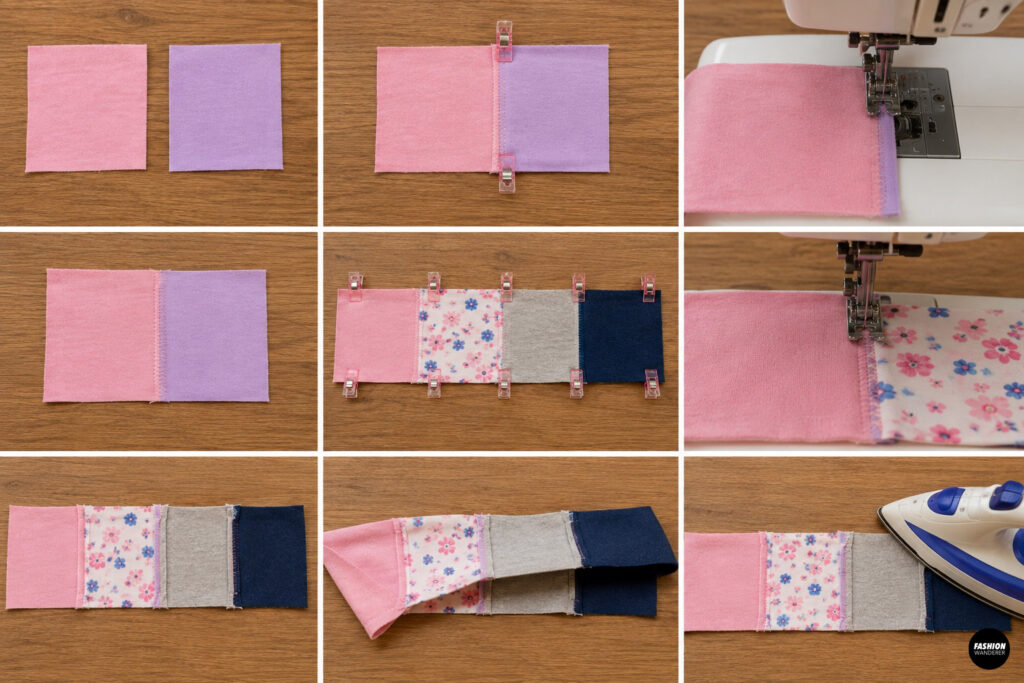
Place two squares right sides together.
Clip the edges.
Sew using:
- Stretch stitch
- Lightning stitch
- Narrow zigzag stitch
Continue adding squares until one row is complete.
Repeat until every row has been sewn.
Press each seam open or to one side.
Step 6: Join the Rows Together
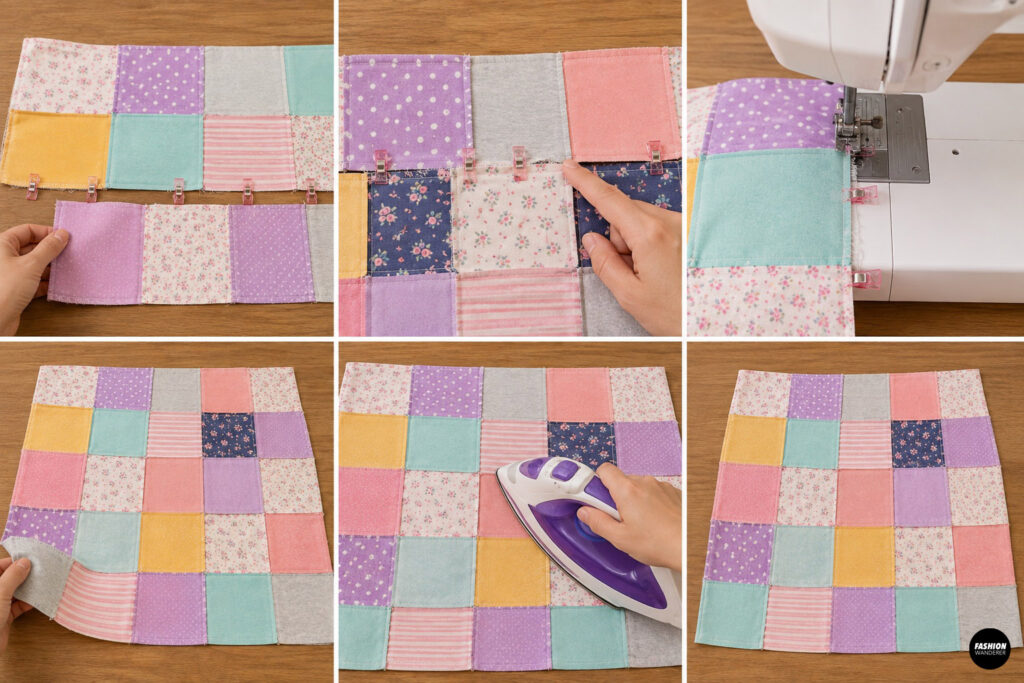
Match the seam intersections carefully.
Pin or clip where each seam meets.
Sew one row to the next using a ⅜-inch seam allowance.
Continue until one large patchwork panel is complete.
Press all seams flat with steam.
Your colorful fabric is now beginning to look like a skirt.
Step 7: Cut the Skirt Shape
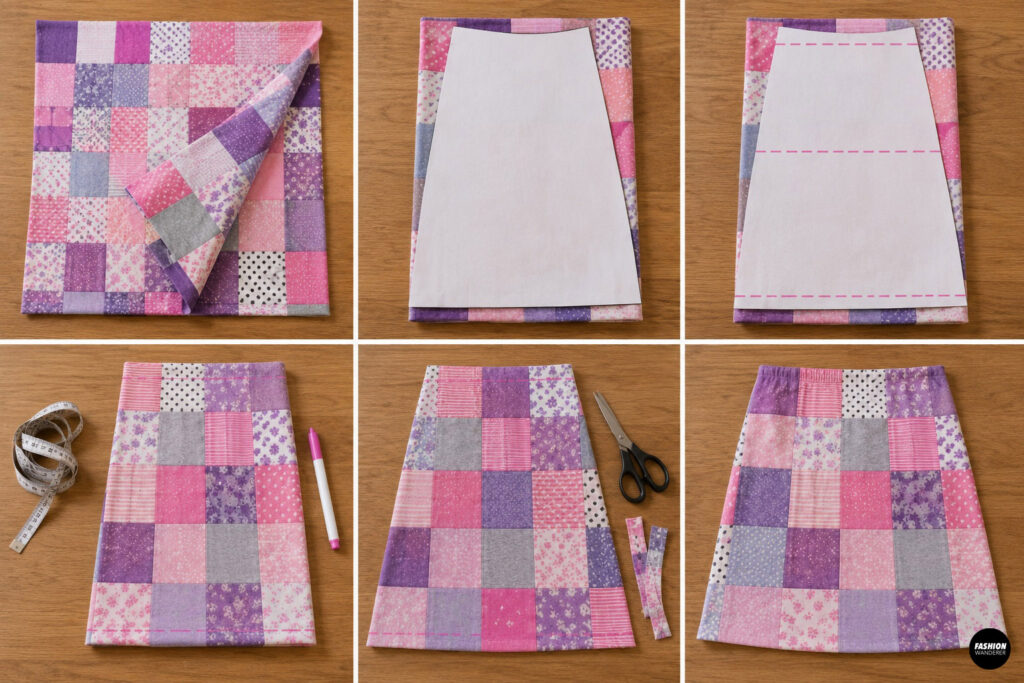
Fold the patchwork panel in half.
Place your skirt pattern on top or measure directly.
For a simple gathered skirt, keep the panel rectangular.
For an A-line skirt, slightly angle the side seams.
Mark:
- Waist
- Hip
- Hem
Trim carefully.
Step 8: Sew the Side Seam
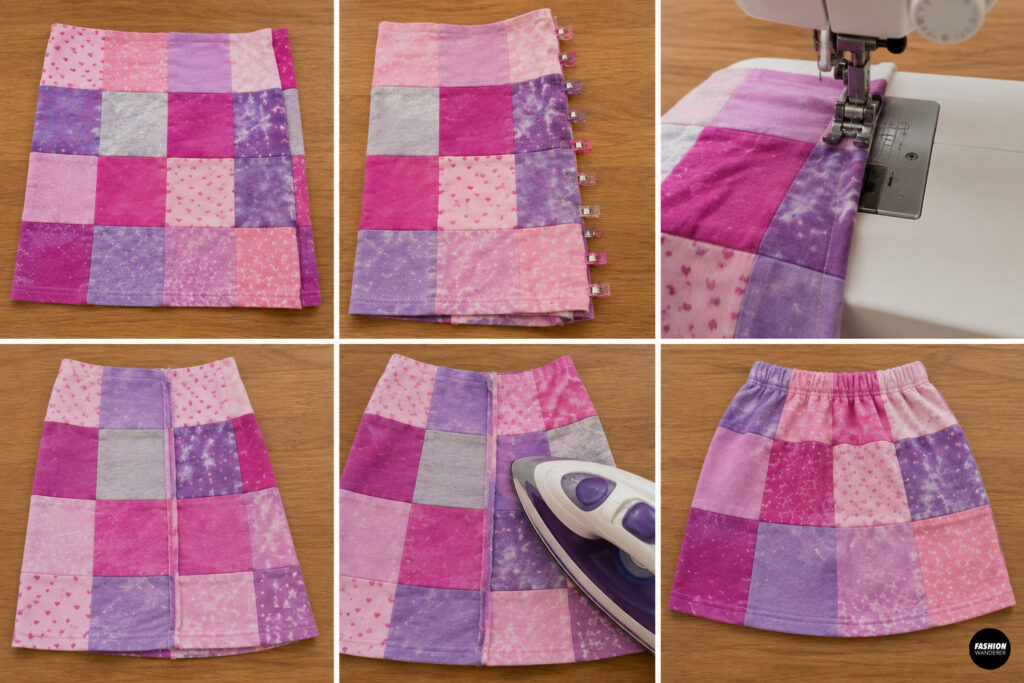
Fold the skirt right sides together.
Match every patchwork seam.
Pin carefully.
Sew the side seam using a stretch stitch.
Press the seam open.
Turn right side out.
Step 9: Create the Elastic Waistband
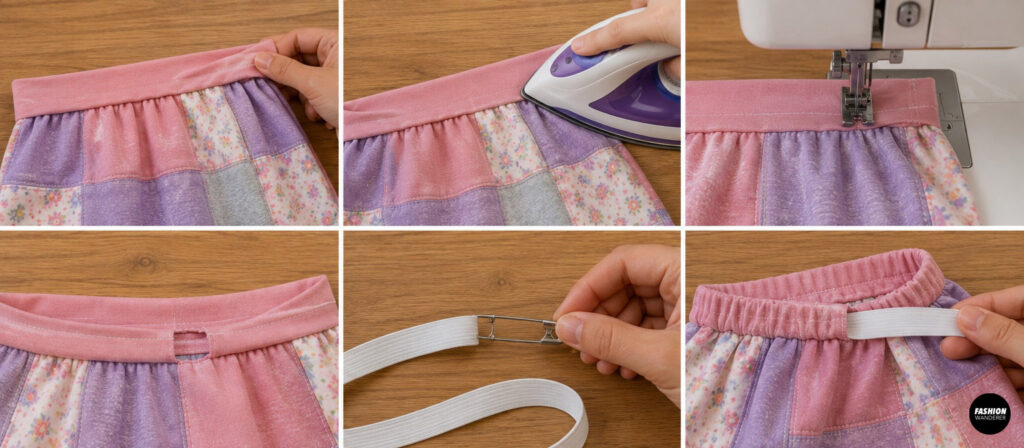
Fold the top edge toward the wrong side approximately:
1½ inches
Press well.
Sew around the waistband leaving a 2-inch opening.
Attach a safety pin or bodkin to the elastic.
Thread it through the casing.
Overlap both elastic ends by about 1 inch.
Sew the elastic securely.
Pull the waistband flat.
Close the opening.
Evenly distribute the gathers around the skirt.
Step 10: Hem the Skirt
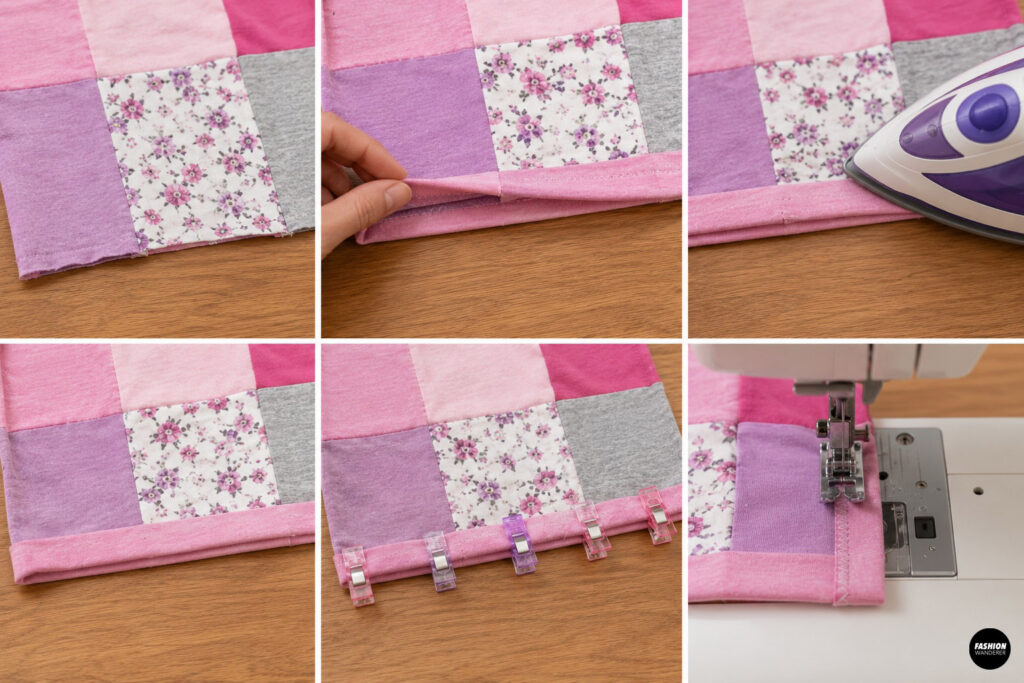
Fold the bottom edge up:
¼ inch
Press.
Fold another:
¼ inch
Clip around the hem.
Sew using a stretch stitch or narrow zigzag stitch.
Press again for a crisp finish.
Step 11: Add Decorative Details
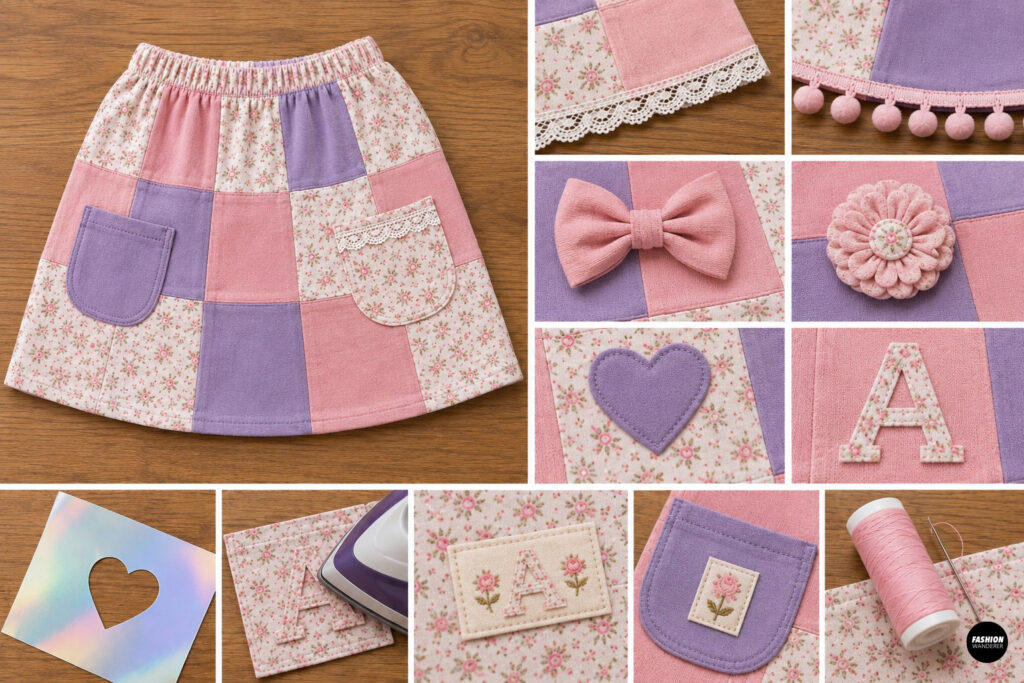
Now it’s time to personalize your skirt.
Try adding:
- Front patch pockets
- Colorful lace trim
- Pom-pom edging
- Decorative bows
- Fabric flowers
- Appliqué hearts
- Initial monogram
- Heat-transfer vinyl
- Embroidered labels
Small embellishments make every skirt unique.
Step 12: Give It a Professional Finish
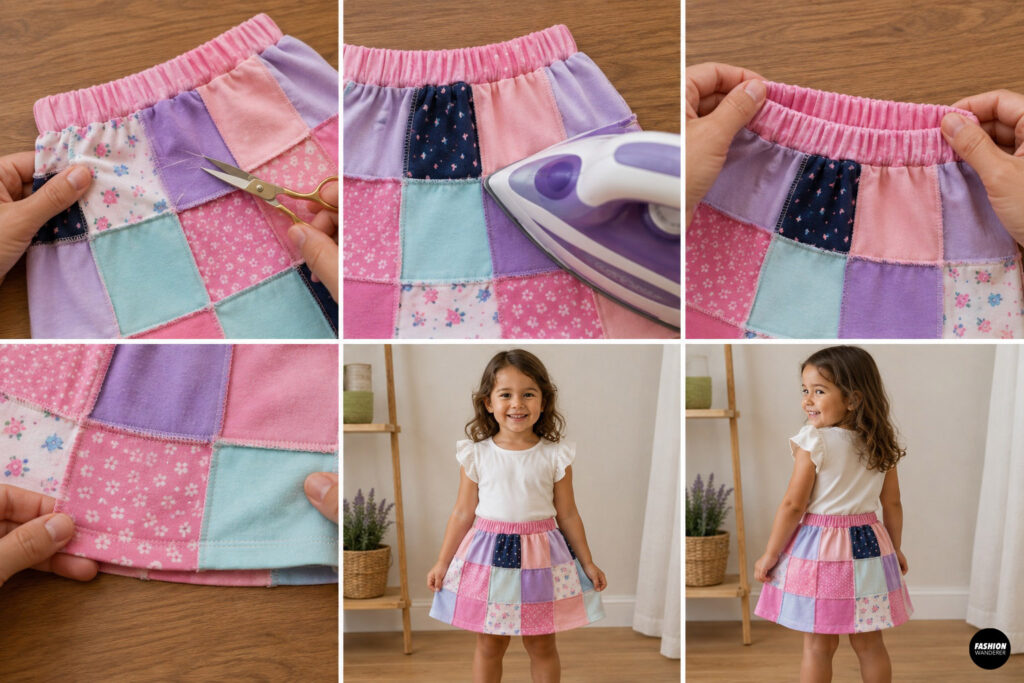
Trim all loose threads.
Press every seam with steam.
Check that the waistband stretches smoothly.
Inspect the hem for even stitching.
Try the skirt on your child to ensure a comfortable fit and proper length.
Your handmade patchwork skirt is now ready to wear!
Easy Patchwork Design Ideas
Looking for inspiration? Try these fun combinations:
- Rainbow colors
- Pastel patchwork
- Ombre shades
- Floral and polka dots
- Animal prints
- Holiday-themed fabrics
- Denim-look jersey
- Favorite graphic T-shirts
- School spirit colors
- Bright summer prints
Every combination creates a completely different look.
Beginner Sewing Tips
- Use a ballpoint needle when sewing knit fabrics.
- Always test your stitch on a fabric scrap first.
- Press after every seam for a flatter finish.
- Keep seam allowances consistent.
- Use sewing clips to avoid stretching knit fabric.
- Sew slowly across bulky seam intersections.
- Choose polyester thread for durability and flexibility.
Frequently Asked Questions
What kind of T-shirts work best?
Cotton jersey and cotton-blend T-shirts with a similar weight are ideal. Avoid mixing very thick and very thin knit fabrics, as they can stretch differently.
Can I use different-sized fabric scraps?
Yes. Although equal-sized squares are easiest for beginners, you can also create a modern patchwork design using rectangles or random shapes once you’re more comfortable with sewing.
Do I need a serger?
No. A regular sewing machine with a stretch stitch or narrow zigzag stitch works perfectly for this project.
How much fabric do I need?
Most girls’ skirts can be made entirely from leftover T-shirt scraps. Keep a variety of colors and prints on hand so you have enough pieces to complete the design.
Can I make matching accessories?
Absolutely! Use any remaining scraps to sew a matching headband, scrunchie, hair bow, doll skirt, or mini tote bag for a coordinated handmade set.
Final Thoughts
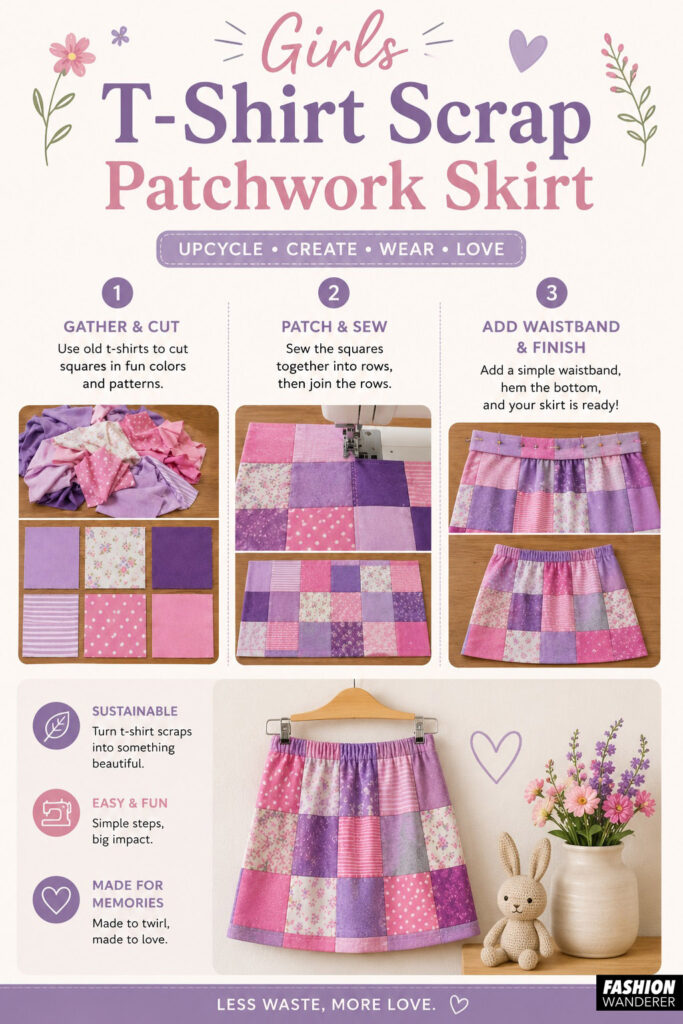
A girls T-shirt scrap patchwork skirt is a fun, creative, and eco-friendly sewing project that transforms leftover knit fabric into something beautiful and practical. It’s an excellent way to practice basic sewing skills such as piecing, pressing, sewing straight seams, and creating an elastic waistband, all while reducing fabric waste.
Whether you’re making a colorful everyday skirt, a thoughtful handmade gift, or simply looking for a satisfying scrap-busting project, this easy t-shirt upcycle tutorial is a wonderful place to start. Mix bright colors, playful prints, and favorite T-shirt memories to create a unique skirt your child will love wearing again and again.