
Have two old T-shirts hiding in your closet? Instead of tossing them out, turn them into a stylish color-block shorts set that’s comfortable, trendy, and perfect for summer. This beginner-friendly upcycling project transforms two oversized knit T-shirts into a matching T-shirt and shorts outfit with minimal sewing experience required.
A color-block design is a fantastic way to combine different colors, graphic prints, or patterns into one modern outfit. Whether you use solid colors, vintage band tees, sports shirts, or oversized graphic T-shirts, every set becomes completely unique.
In this detailed kids t-shirt upcycle project, you’ll learn exactly how to sew a DIY color-block shorts set using two T-shirts, including cutting layouts, sewing order, and beginner-friendly techniques.
Why You’ll Love This DIY Project
This sewing project is perfect because it:
- Recycles old clothing into something wearable
- Saves money on fabric
- Uses stretchy knit fabric that’s forgiving for beginners
- Creates a matching outfit for lounging or casual wear
- Can be customized with pockets, graphics, or trims
- Requires only basic sewing skills
Best of all, you can finish this project in an afternoon.
Materials You’ll Need
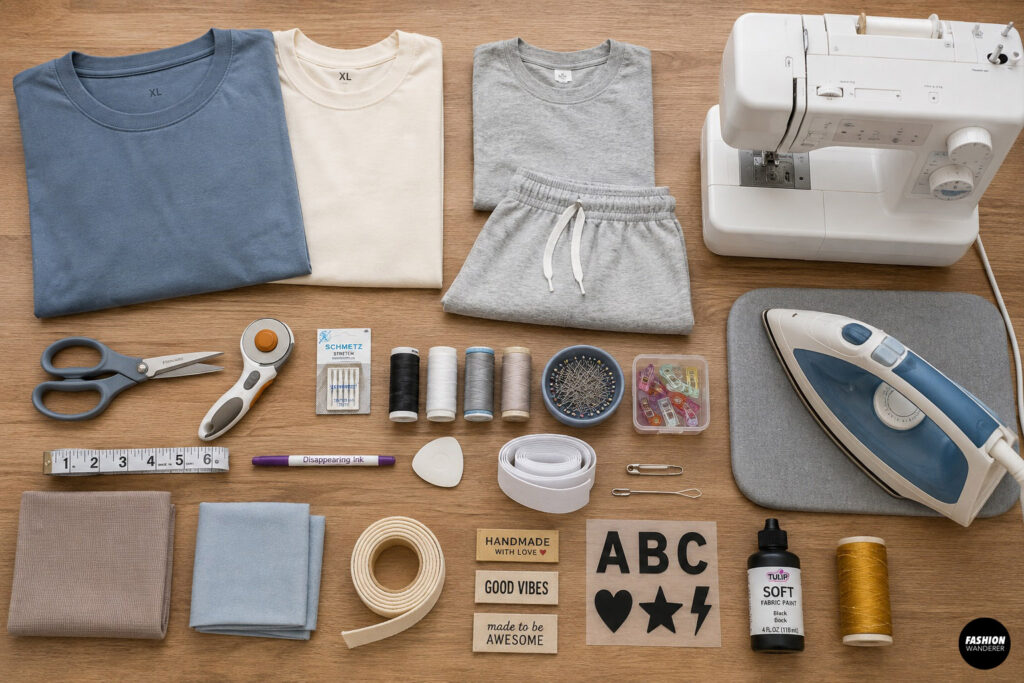
Gather these supplies before getting started:
- 2 oversized adult T-shirts (XL–3XL work best)
- Existing shorts and T-shirt for sizing reference or sewing pattern
- Fabric scissors or rotary cutter
- Sewing machine
- Ballpoint or stretch sewing needle
- Polyester thread
- Pins or sewing clips
- Measuring tape
- Fabric marker or tailor’s chalk
- Elastic (1–1½ inches wide)
- Safety pin or bodkin
- Iron and ironing board
Optional Supplies
- Rib knit fabric for neckband
- Matching pocket fabric
- Twill tape
- Decorative labels
- Heat transfer vinyl
- Fabric paint
- Contrast topstitching thread
Choosing the Right T-Shirts
For the best results, choose shirts that have:
- Medium-weight cotton jersey
- Similar stretch
- Similar fabric thickness
- Minimal holes or worn spots
- Large usable fabric areas
One shirt can become the main body while the second shirt creates contrasting sleeves, shorts panels, waistband, or pockets.
Upcycle Color-Block T-Shirt and Shorts Set
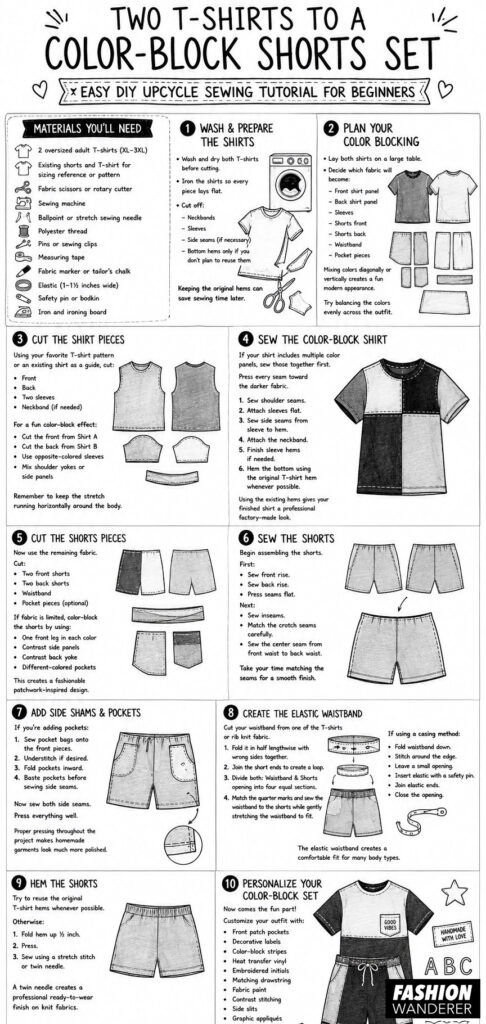
Step 1: Wash and Prepare the Shirts
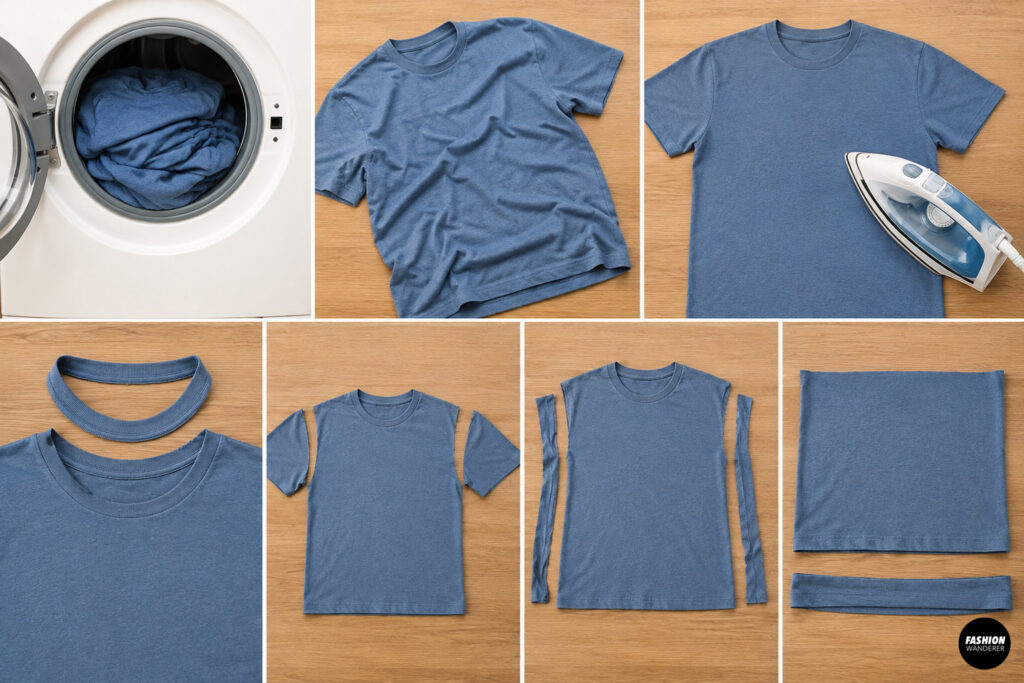
Wash and dry both T-shirts before cutting.
This removes shrinkage and softens the fabric. Iron the shirts so every piece lays flat.
Cut off:
- Neckbands
- Sleeves
- Side seams (if necessary)
- Bottom hems only if you don’t plan to reuse them
Keeping the original hems can save sewing time later.
Step 2: Plan Your Color Blocking
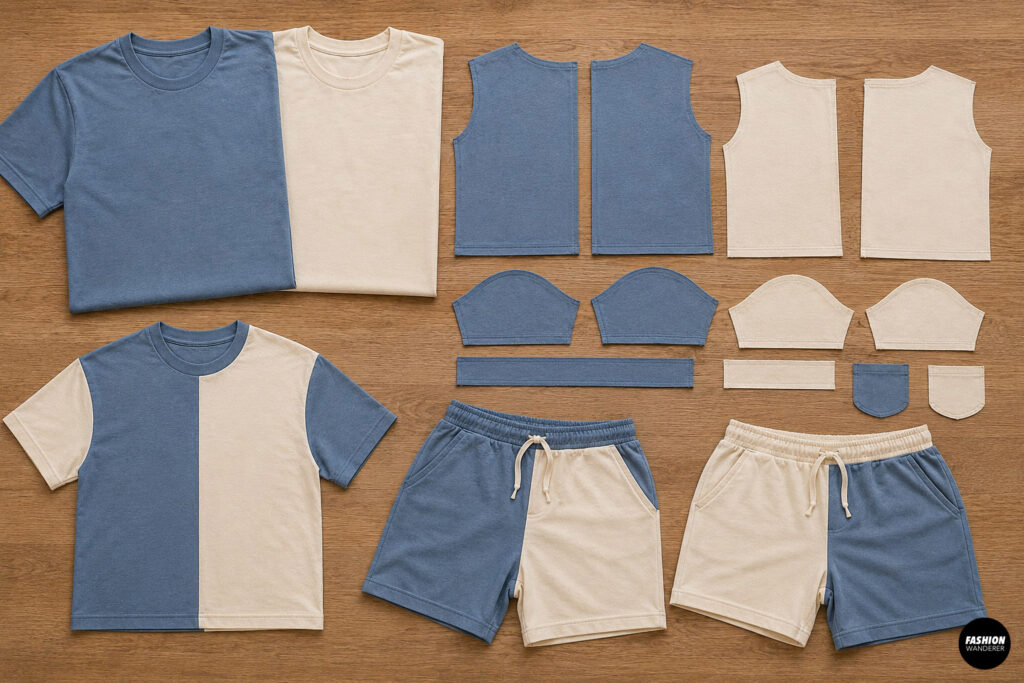
Lay both shirts on a large table.
Decide which fabric will become:
- Front shirt panel
- Back shirt panel
- Sleeves
- Shorts front
- Shorts back
- Waistband
- Pocket pieces
Mixing colors diagonally or vertically creates a fun modern appearance.
Try balancing the colors evenly across the outfit.
Step 3: Cut the Shirt Pieces
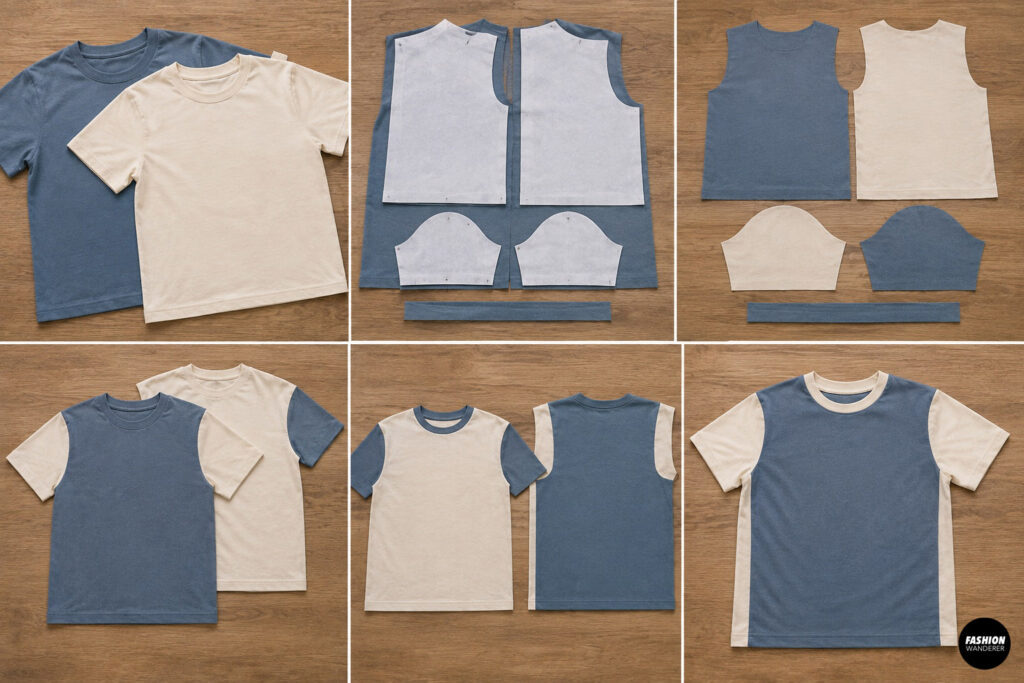
Using your favorite T-shirt pattern or an existing shirt as a guide, cut:
- Front
- Back
- Two sleeves
- Neckband (if needed)
For a fun color-block effect:
- Cut the front from Shirt A
- Cut the back from Shirt B
- Use opposite-colored sleeves
- Mix shoulder yokes or side panels
Remember to keep the stretch running horizontally around the body.
Step 4: Sew the Color-Block Shirt
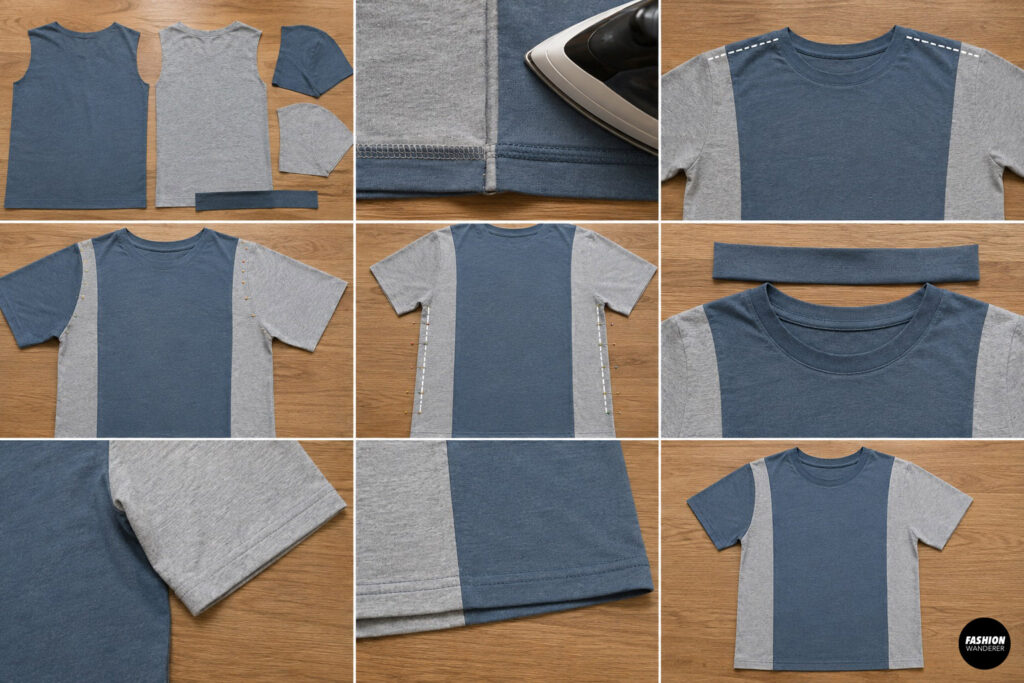
If your shirt includes multiple color panels, sew those together first.
Press every seam toward the darker fabric.
Next:
- Sew shoulder seams.
- Attach sleeves flat.
- Sew side seams from sleeve to hem.
- Attach the neckband.
- Finish sleeve hems if needed.
- Hem the bottom using the original T-shirt hem whenever possible.
Using the existing hems gives your finished shirt a professional factory-made look.
Step 5: Cut the Shorts Pieces
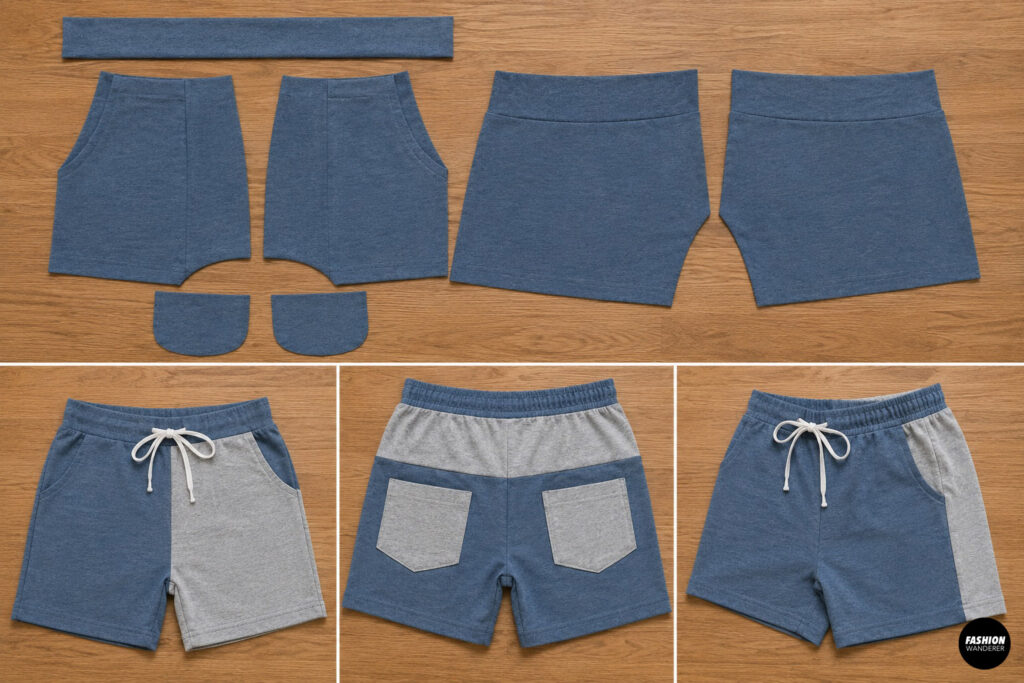
Now use the remaining fabric.
Cut:
- Two front shorts
- Two back shorts
- Waistband
- Pocket pieces (optional)
If fabric is limited, color-block the shorts by using:
- One front leg in each color
- Contrast side panels
- Contrast back yoke
- Different-colored pockets
This creates a fashionable patchwork-inspired design.
Step 6: Sew the Shorts
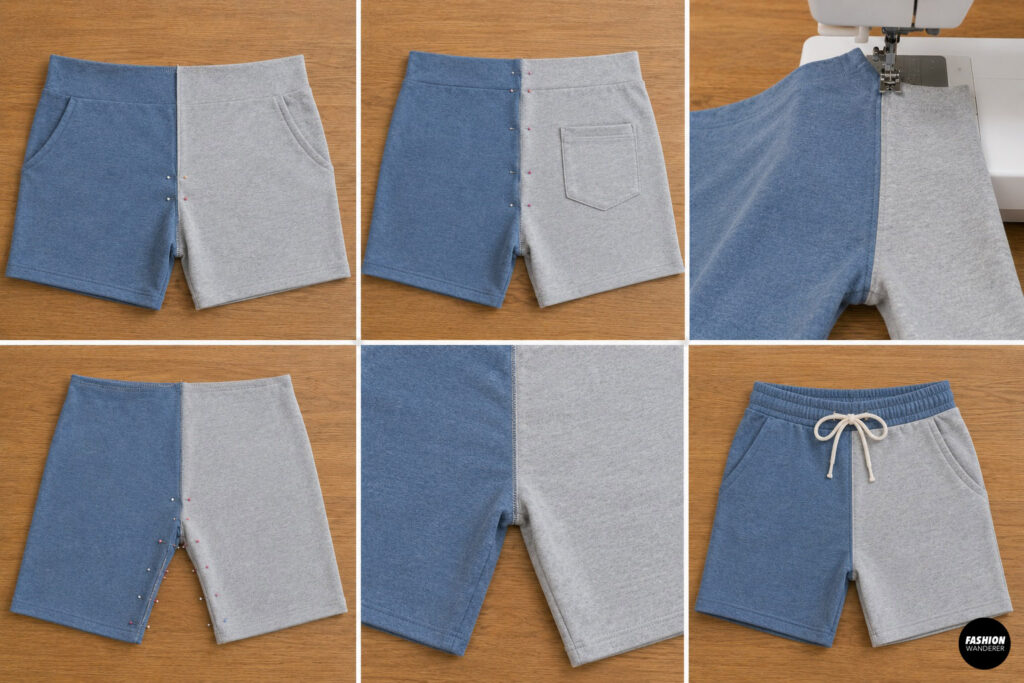
Begin assembling the shorts.
First:
- Sew front rise.
- Sew back rise.
Press seams flat.
Next:
- Sew inseams.
- Match the crotch seams carefully.
- Sew the center seam from front waist to back waist.
Take your time matching the seams for a smooth finish.
Step 7: Add Side Seams and Pockets
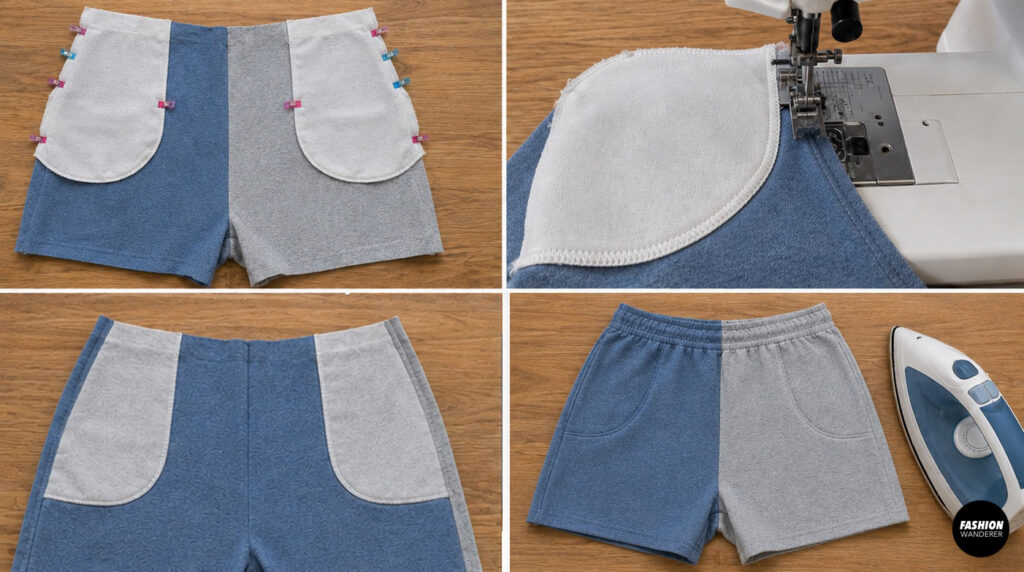
If you’re adding pockets:
- Sew pocket bags onto the front pieces.
- Understitch if desired.
- Fold pockets inward.
- Baste pockets before sewing side seams.
Now sew both side seams.
Press everything well.
Proper pressing throughout the project makes homemade garments look much more polished.
Step 8: Create the Elastic Waistband
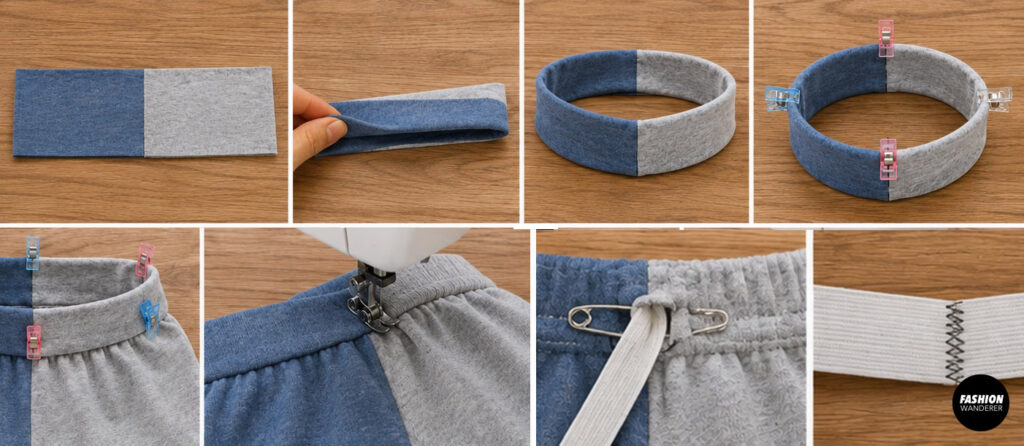
Cut your waistband from one of the T-shirts or rib knit fabric.
Fold it in half lengthwise with wrong sides together.
Join the short ends to create a loop.
Divide both:
- Waistband
- Shorts opening
Into four equal sections.
Match the quarter marks and sew the waistband to the shorts while gently stretching the waistband to fit.
If using a casing method:
- Fold waistband down.
- Stitch around the edge.
- Leave a small opening.
- Insert elastic with a safety pin.
- Join elastic ends.
- Close the opening.
The elastic waistband creates a comfortable fit for many body types.
Step 9: Hem the Shorts
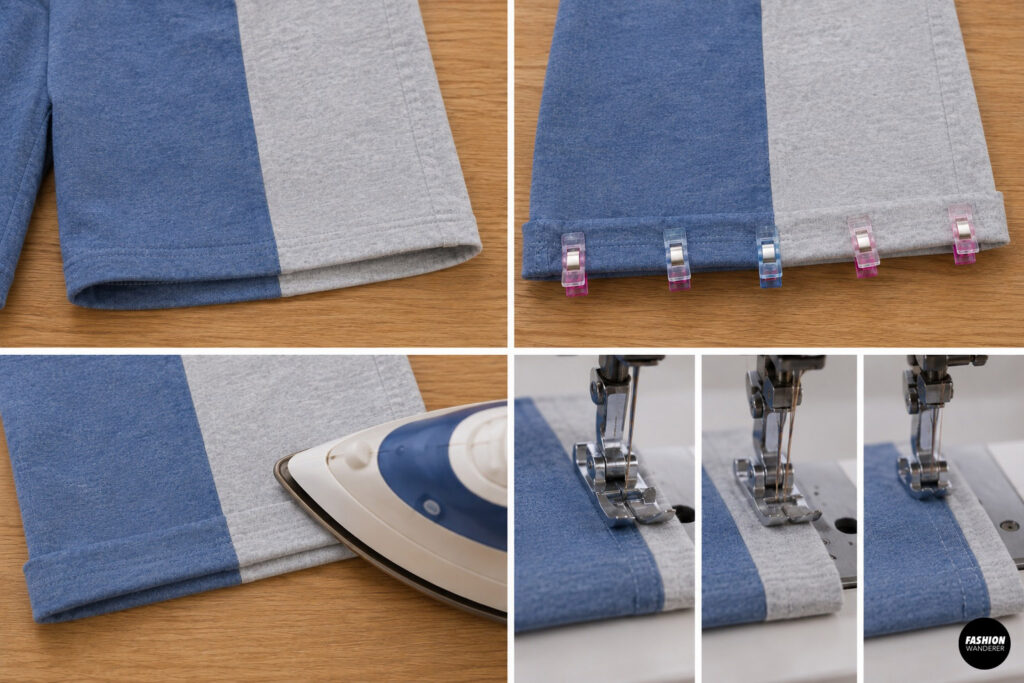
Try to reuse the original T-shirt hems whenever possible.
Otherwise:
- Fold hem up ½ inch.
- Press.
- Sew using a stretch stitch or twin needle.
A twin needle creates a professional ready-to-wear finish on knit fabrics.
Step 10: Personalize Your Color-Block Set
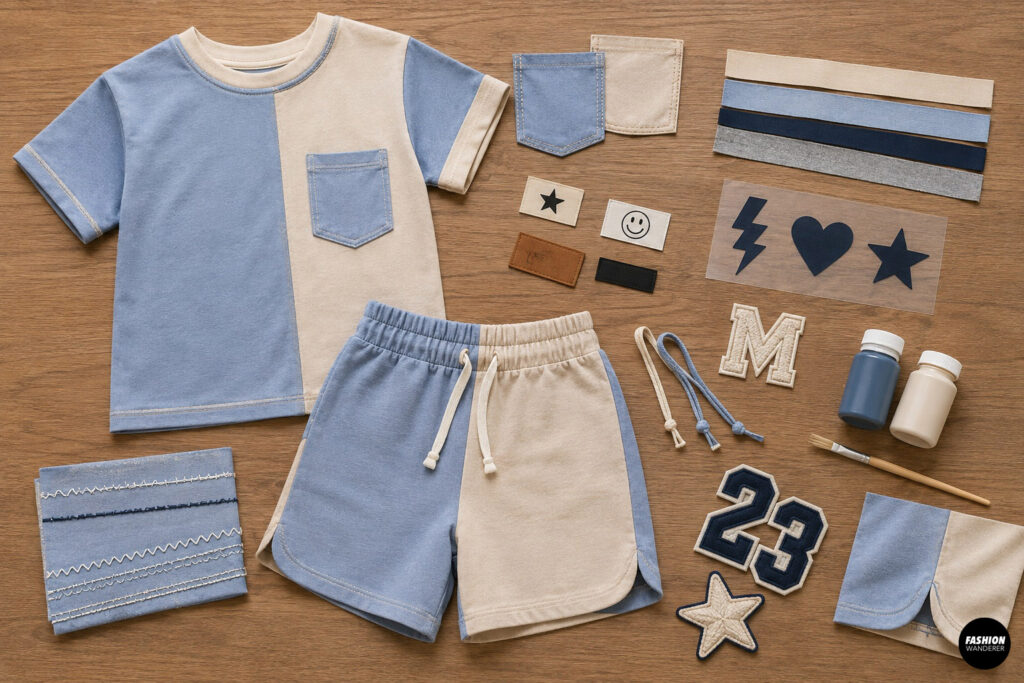
Now comes the fun part.
Customize your outfit with:
- Front patch pockets
- Decorative labels
- Color-block stripes
- Heat transfer vinyl
- Embroidered initials
- Matching drawstring
- Fabric paint
- Contrast stitching
- Side slits
- Graphic appliqués
These finishing details make every outfit one of a kind.
Beginner Sewing Tips
If you’re new to sewing knit fabric, keep these tips in mind:
- Use a ballpoint needle to prevent skipped stitches.
- Do not stretch the fabric while sewing.
- Sew slowly around curved areas.
- Press after every seam.
- Test stitches on scraps before sewing your garment.
- Use sewing clips instead of pins for thick layers.
- Finish seams with a zigzag or serger if available.
These simple habits greatly improve the final results.
Color Combination Ideas
Need inspiration? Try these trendy color combinations:
- Black + White
- Sage + Cream
- Navy + Gray
- Dusty Pink + Charcoal
- Lavender + White
- Olive + Beige
- Denim Blue + Heather Gray
- Coral + Sand
- Mustard + Black
- Mint + Ivory
Graphic tees also create fun statement outfits with bold personality.
Caring for Your Handmade Shorts Set
To keep your upcycled outfit looking great:
- Machine wash in cold water.
- Turn the garment inside out.
- Use mild detergent.
- Avoid bleach.
- Tumble dry on low or hang dry.
- Press with medium heat if needed.
Proper care helps preserve the fabric and color for years.
Final Thoughts
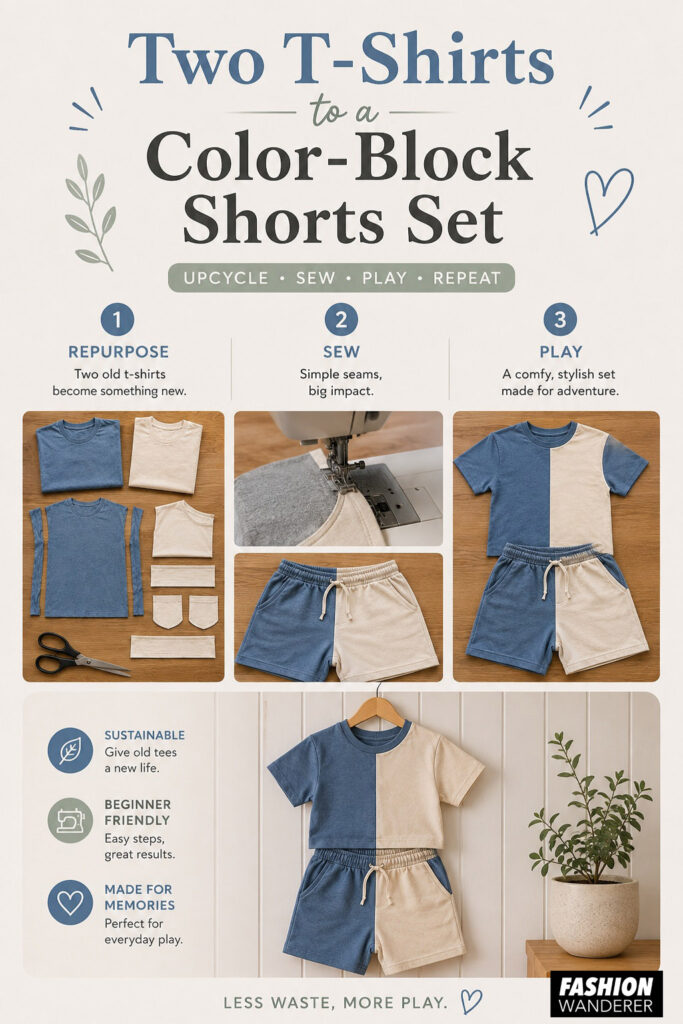
Making a DIY color-block shorts set from two old T-shirts is an enjoyable beginner sewing project that combines creativity, sustainability, and fashion. Instead of letting unused shirts collect dust, you can transform them into a comfortable matching outfit that’s perfect for vacations, relaxing at home, running errands, or enjoying warm summer days.
Every project will look different depending on the colors and graphics you choose, making each shorts set truly one of a kind. Once you’ve completed your first set, you’ll likely find yourself searching your closet for more T-shirts to upcycle into stylish handmade outfits.