
If you love cozy handmade accessories, these DIY floppy-ear bunny plushie slippers are such a fun sewing project to make for yourself, kids, gifts, or even holiday pajamas. The soft padded shape, oversized floppy ears, and adorable bunny face turn a basic pair of house slippers into something playful and seriously cozy.
This free bunny slipper sewing pattern is beginner-friendly and works especially well with fleece, minky, sherpa, or other soft fabrics. You can customize the colors, ear lining, facial details, and even add a tiny pom-pom tail.
Making DIY plushie house slippers is fun and rewarding beginner sewing project. These finished slippers have a cushioned sole, soft lining, rounded bunny toe, and floppy ears sewn into the front upper section.
Materials You Will Need
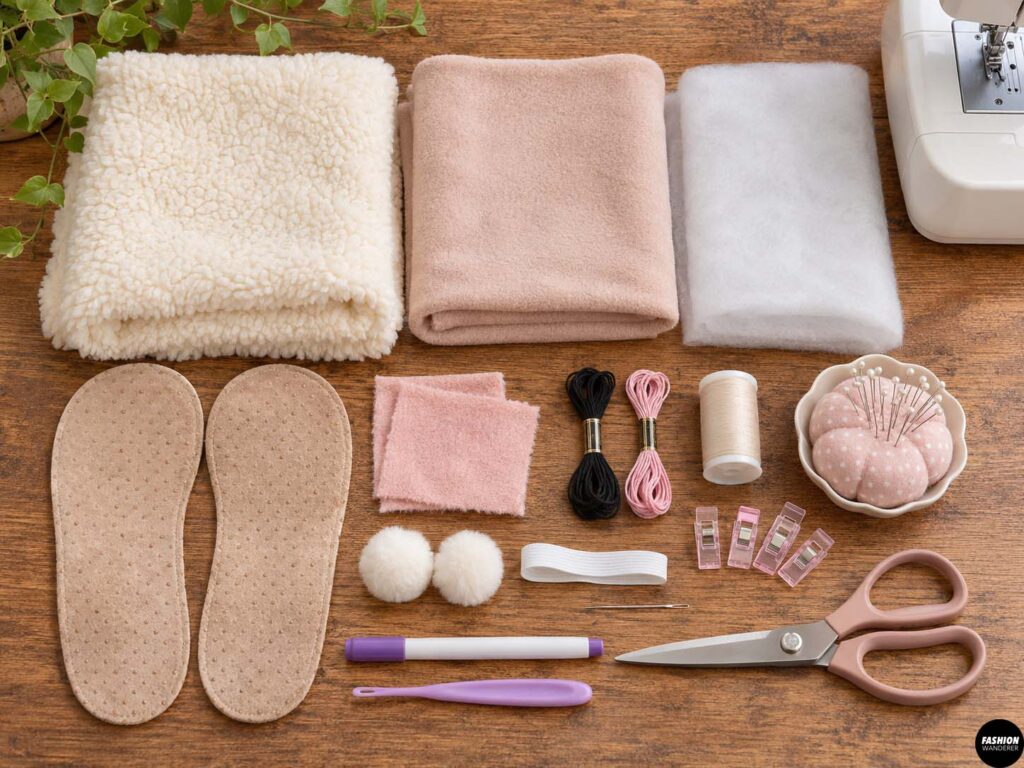
To make one pair of bunny plushie slippers, gather:
- ½ yard fleece, minky, sherpa, or plush fabric
- ½ yard cotton fleece or soft lining fabric
- ¼ yard foam, batting, or fusible fleece
- Non-slip fabric or faux suede for the sole
- Small fabric scraps for inner ears
- Black embroidery thread
- Pink embroidery thread
- Matching sewing thread
- Sewing machine
- Fabric scissors
- Pins or sewing clips
- Hand-sewing needle
- Fabric marker
- Turning tool
- Optional small pom-poms for tails
- Optional elastic for a snugger heel fit
For extra-soft slippers, use minky or sherpa for the outside and lightweight fleece for the lining.
Free Bunny Slipper Pattern Pieces
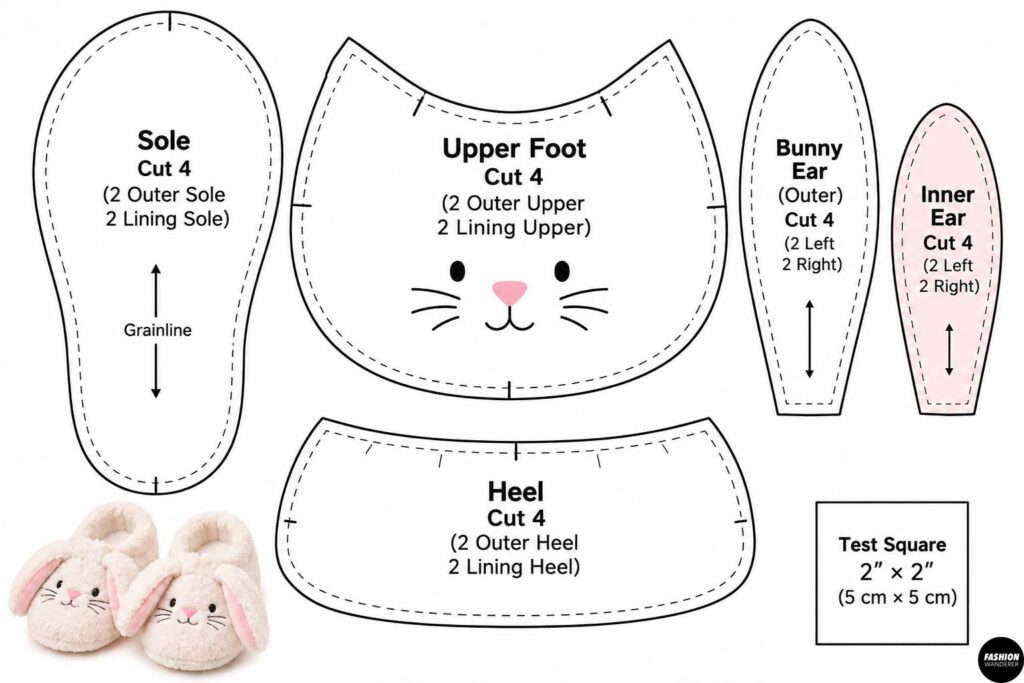
Your pattern should include:
- Sole piece
- Upper foot piece
- Heel piece
- Bunny ear piece
- Inner ear piece
Cut all pattern pieces with the grain running lengthwise.
For each slipper, cut:
- 1 outer sole
- 1 lining sole
- 1 padded sole layer
- 1 outer upper
- 1 lining upper
- 2 outer ear pieces
- 2 inner ear pieces
- 1 outer heel
- 1 lining heel
Remember to mirror your pattern pieces so you have one left slipper and one right slipper.
DIY Floppy-Ear Bunny Plushie Slippers
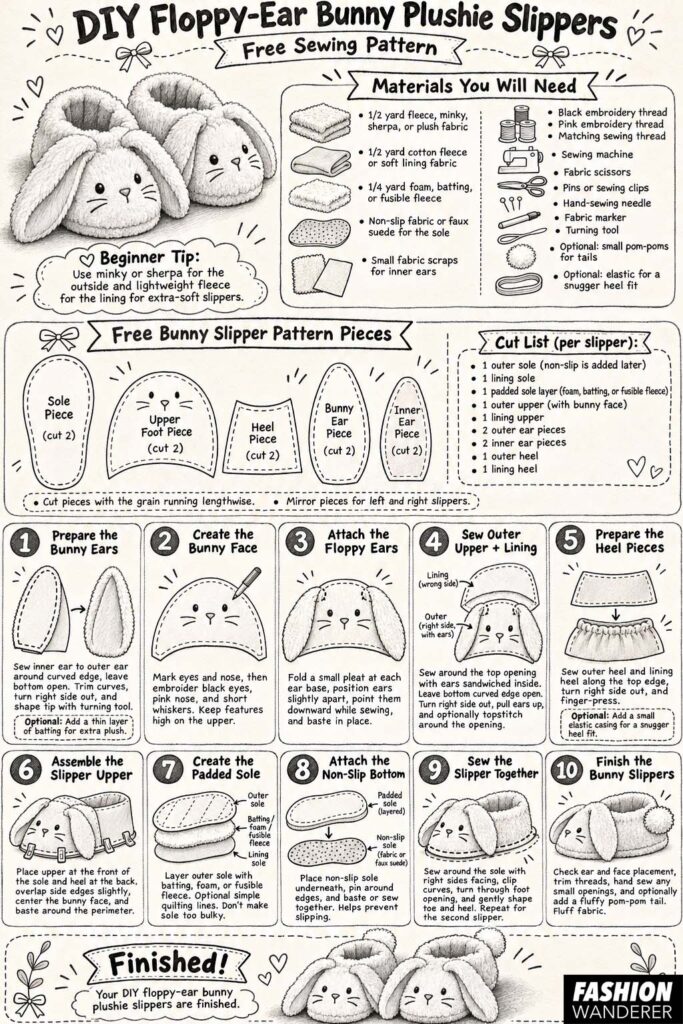
Step 1: Prepare the Bunny Ears
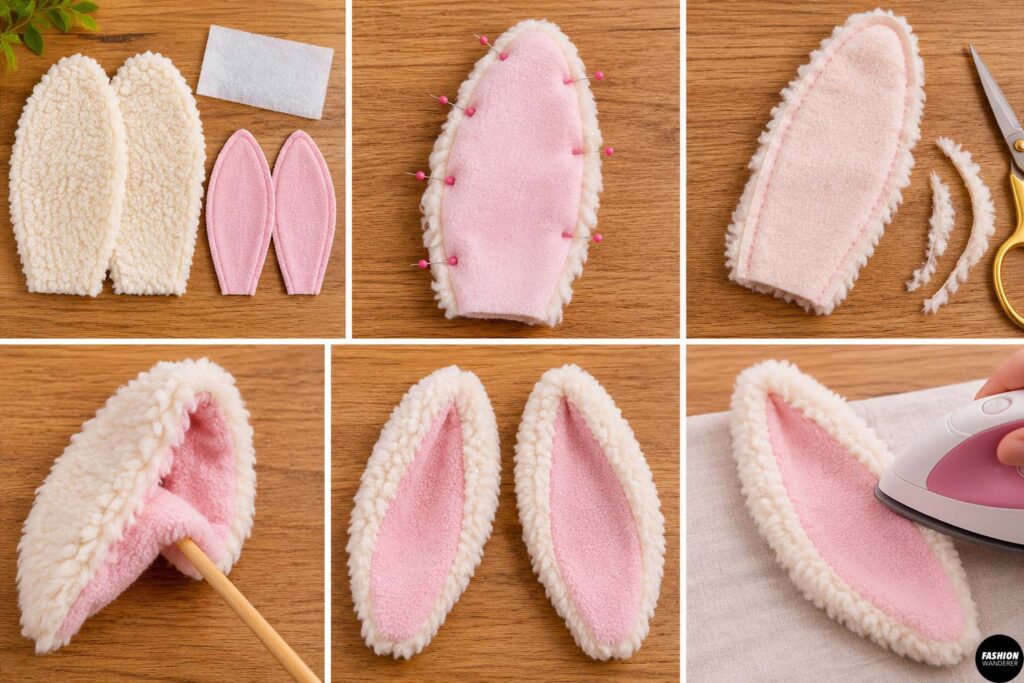
Start with the floppy bunny ears.
Place one inner ear piece right sides together with one outer ear piece.
Pin around the curved outer edges.
Leave the straight bottom edge open.
Sew around the curved edges using approximately a ¼-inch seam allowance.
Trim the seam allowance slightly around the curves.
Turn the ear right side out.
Use a turning tool to gently shape the tip.
Repeat for the remaining ears.
Press lightly if your fabric allows it.
For an extra plush look, you can add a thin piece of batting between the ear layers before sewing.
Step 2: Create the Bunny Face
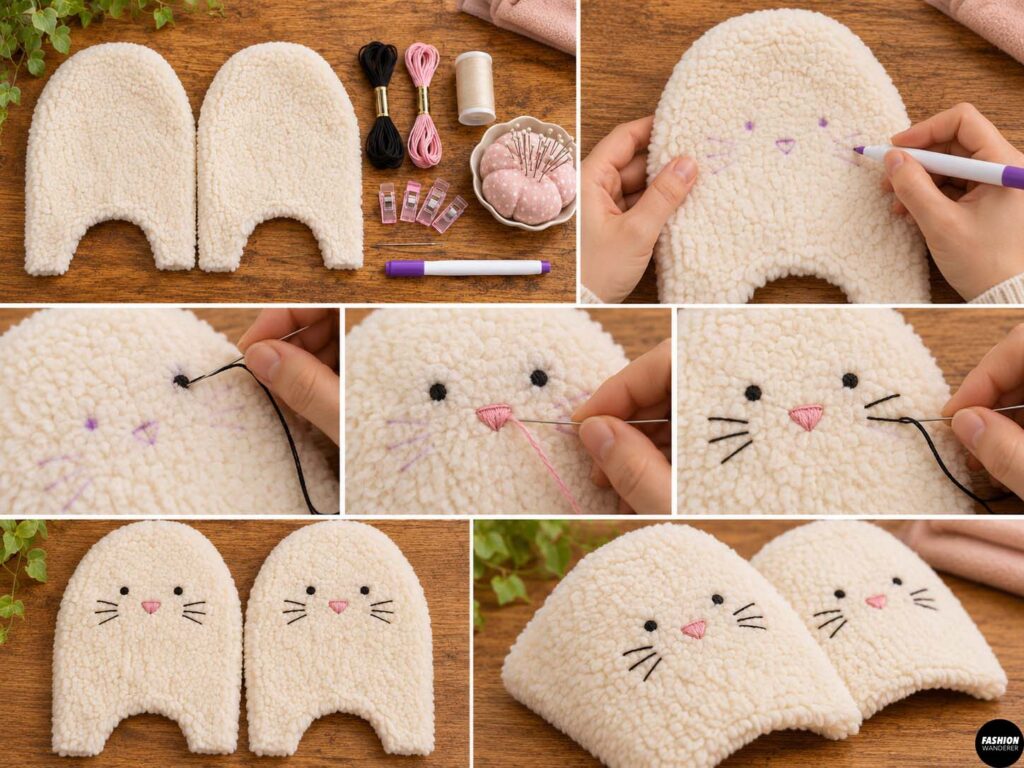
Lay the outer upper slipper pieces flat.
Mark the placement for the eyes and nose using a washable fabric marker.
Use black embroidery thread to stitch two small eyes.
Create a tiny triangle or oval nose using pink embroidery thread.
Add a few short black stitches on each side for whiskers.
Keep the facial features fairly high on the upper section so they remain visible once the slipper is assembled.
Step 3: Attach the Floppy Ears
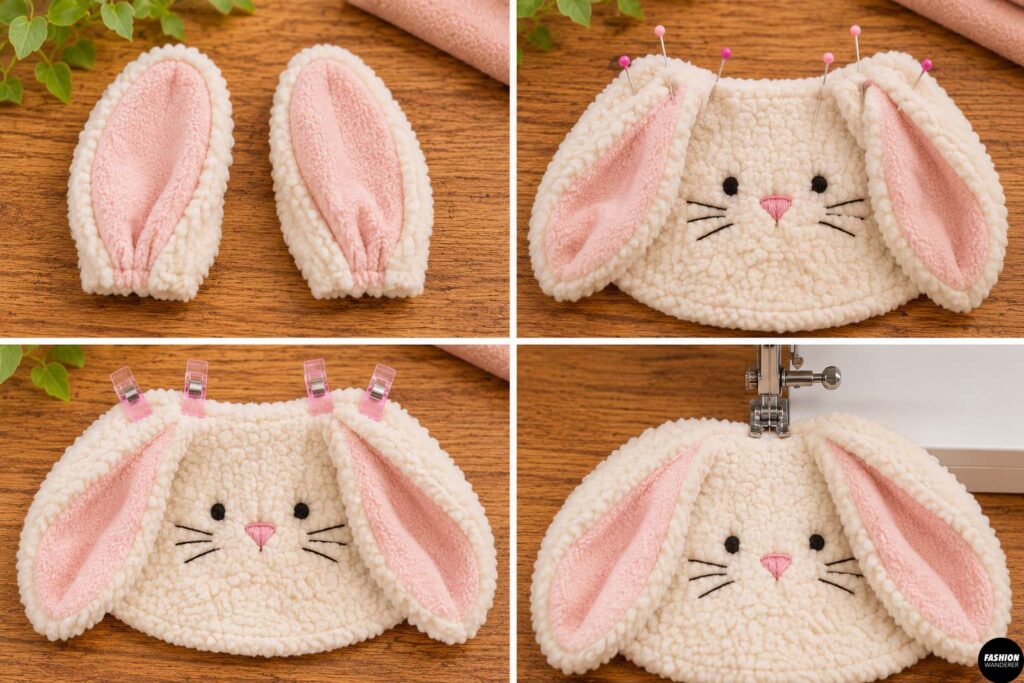
Fold each ear slightly at the bottom to create a soft pleat.
Pin two ears along the top edge of each outer upper piece.
The ears should point downward toward the slipper body while sewing.
Position them slightly apart so they frame the bunny face.
Baste the ears in place using approximately a ⅛-inch seam allowance.
This keeps them from shifting during assembly.
Step 4: Sew the Outer Upper and Lining
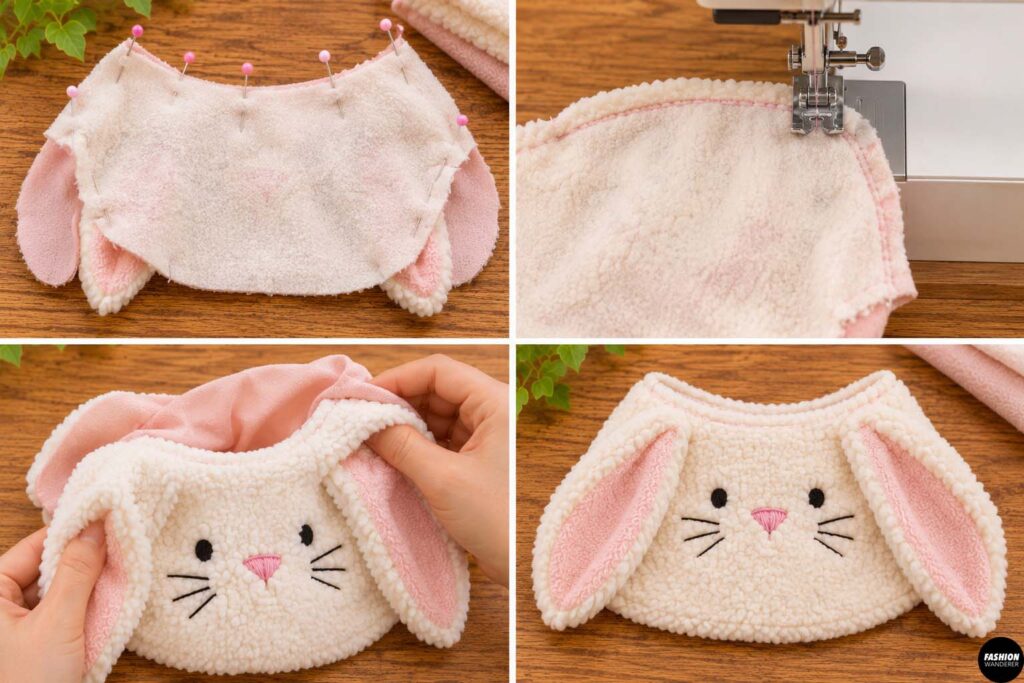
Place the lining upper over the outer upper with right sides together.
The bunny ears will be sandwiched between the two layers.
Pin around the top opening.
Sew using a ¼-inch seam allowance.
Leave the bottom curved edge open.
Turn the upper right side out.
Pull the floppy ears upward.
Topstitch around the opening if desired for a cleaner finish.
Step 5: Prepare the Heel Pieces
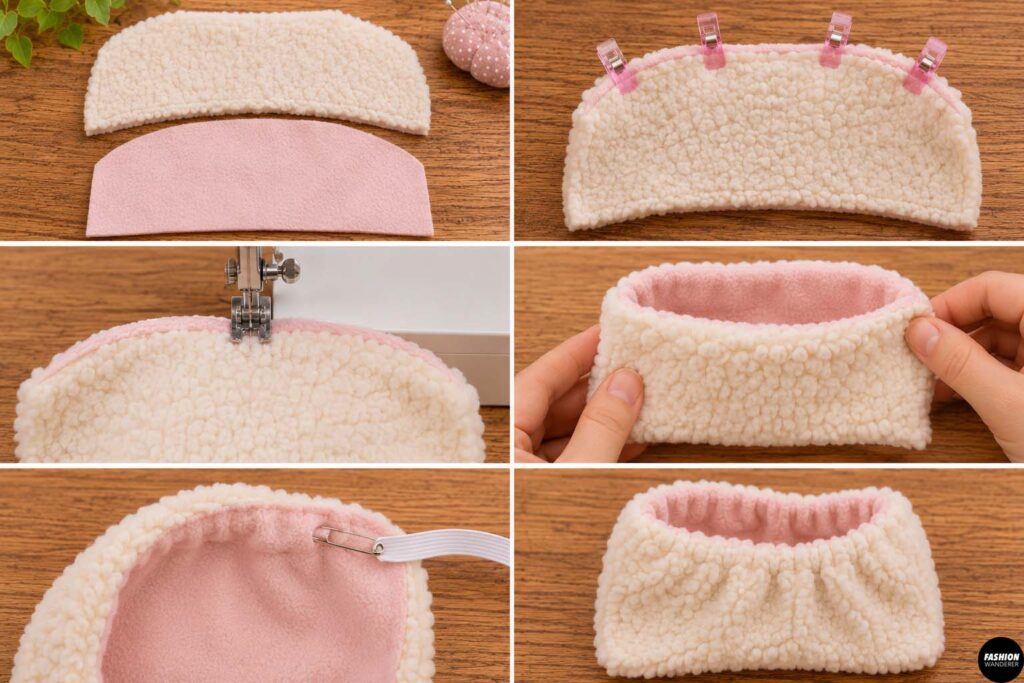
Place the outer heel and lining heel right sides together.
Sew along the top edge.
Turn right side out.
Press or finger-press the seam.
If you want the slippers to fit more snugly around the heel, create a small elastic casing along the top edge.
Insert a short piece of elastic and stitch both ends securely.
Do not pull the elastic too tightly.
Step 6: Assemble the Slipper Upper
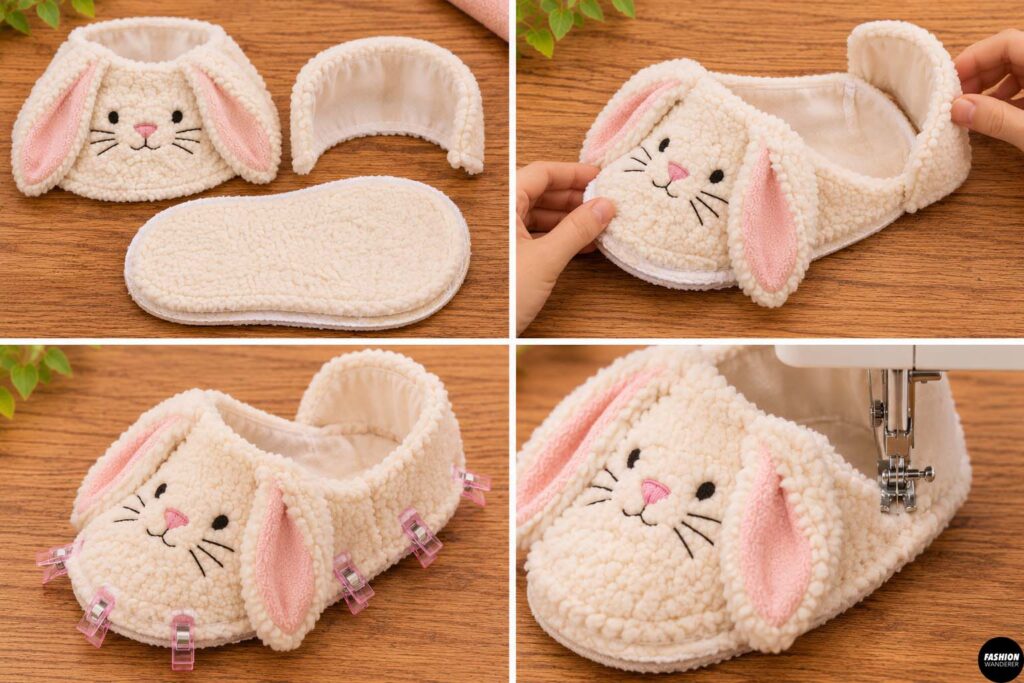
Lay the upper section over the front half of the sole.
Align the raw edges.
Next, position the heel section around the back of the sole.
The side edges of the heel should overlap slightly with the upper section.
Pin or clip everything around the perimeter.
Try to keep the bunny face centered over the toe.
Baste the entire upper section to the sole using a ⅛-inch seam allowance.
Step 7: Create the Padded Sole
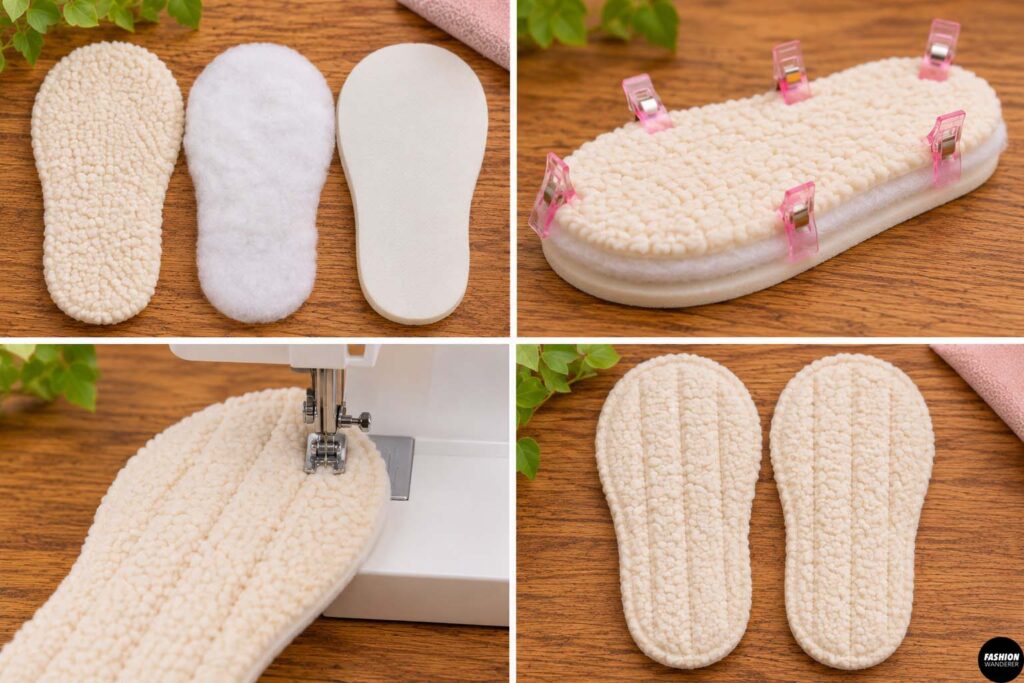
Layer the outer sole fabric with batting, foam, or fusible fleece.
If using fusible fleece, press according to the manufacturer’s instructions.
For extra comfort, add two layers of batting.
You can quilt a few simple straight lines across the sole to prevent the layers from shifting.
Avoid making the sole too thick because bulky layers can be difficult to sew around tight curves.
Step 8: Attach the Non-Slip Bottom
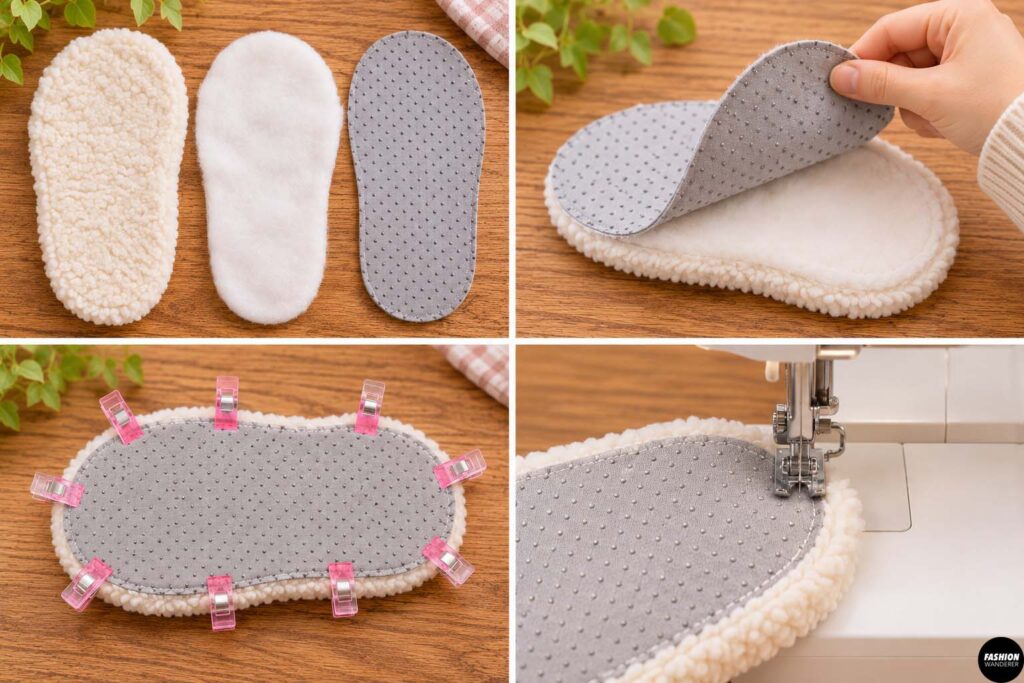
Place the non-slip sole piece underneath the padded sole.
The non-slip surface should face downward.
Pin around the edges.
Sew or baste the layers together.
Faux suede, grippy fabric, or dedicated non-slip slipper fabric all work well.
This layer helps prevent the slippers from sliding across hardwood or tile floors.
Step 9: Sew the Slipper Together
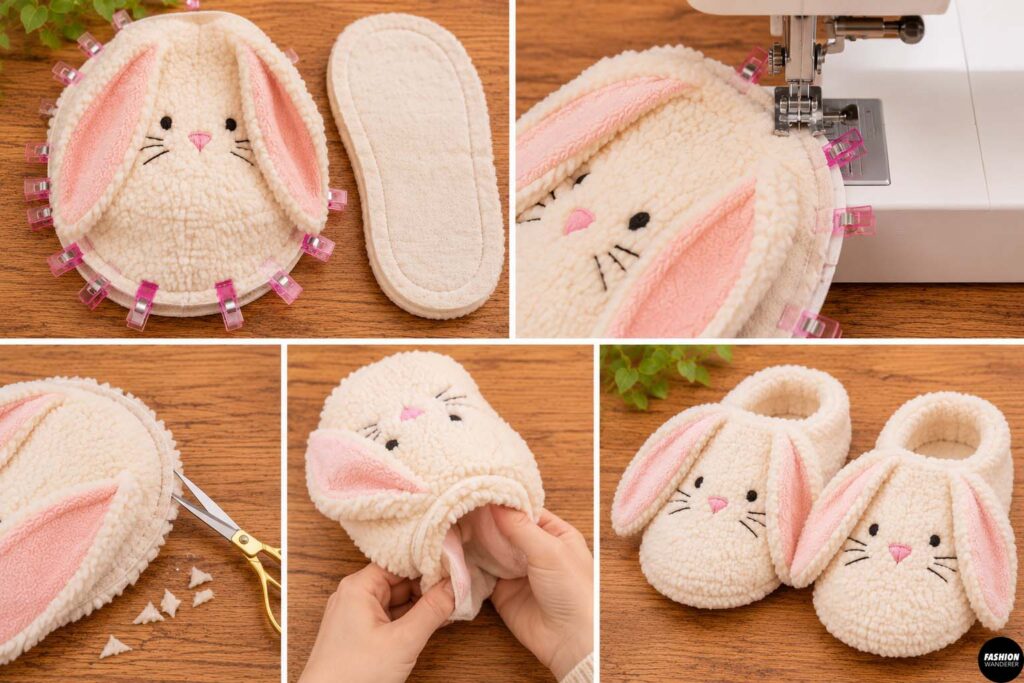
Place the assembled slipper upper against the prepared sole with right sides facing.
Pin carefully around the entire edge.
Sew slowly around the sole using approximately a ⅜-inch seam allowance.
Clip the seam allowance around curved areas.
Turn the slipper right side out through the foot opening.
Push out the toe and heel gently.
Repeat all steps for the second slipper.
Step 10: Finish the Bunny Slippers
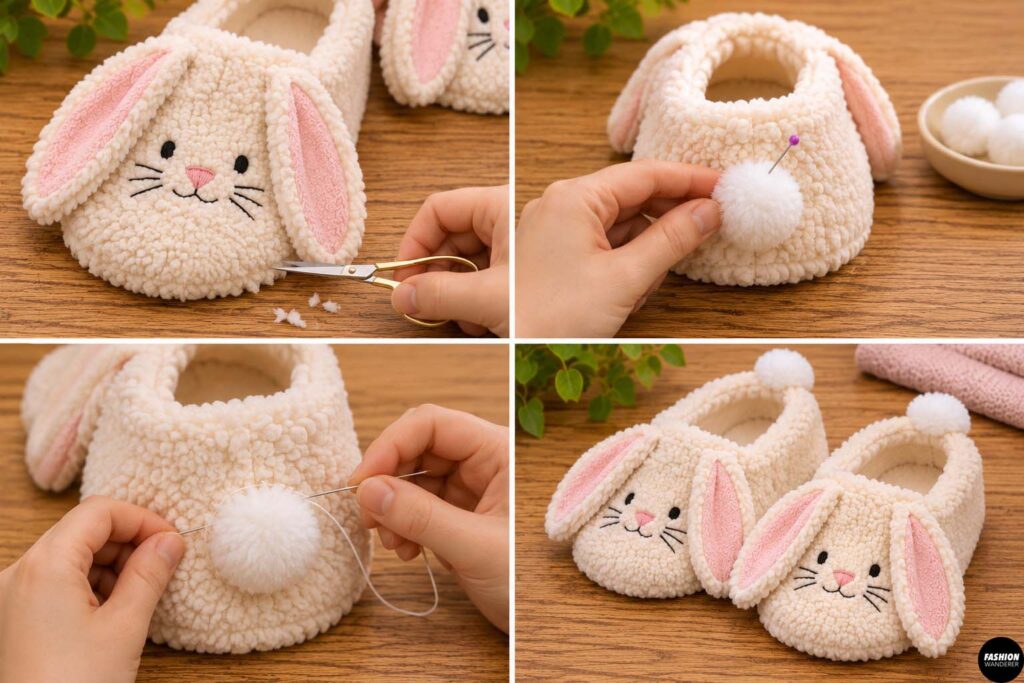
Check the ears and face placement.
Trim loose threads.
Hand sew any small openings closed.
For an extra-cute detail, sew a small fluffy pom-pom onto the back heel to create a bunny tail.
Fluff the fabric lightly with your fingers.
Your DIY floppy-ear bunny plushie slippers are finished.
Tips for the Best Fit
Before cutting expensive fabric, make one test slipper from scrap fleece.
Compare the sole pattern to an existing slipper or shoe.
For kids, leave a little growing room but avoid making the slipper excessively loose.
If your fabric stretches significantly, you may want to size down slightly.
For thicker sherpa or plush fabric, use a slightly larger seam allowance or size up.
Final Thoughts
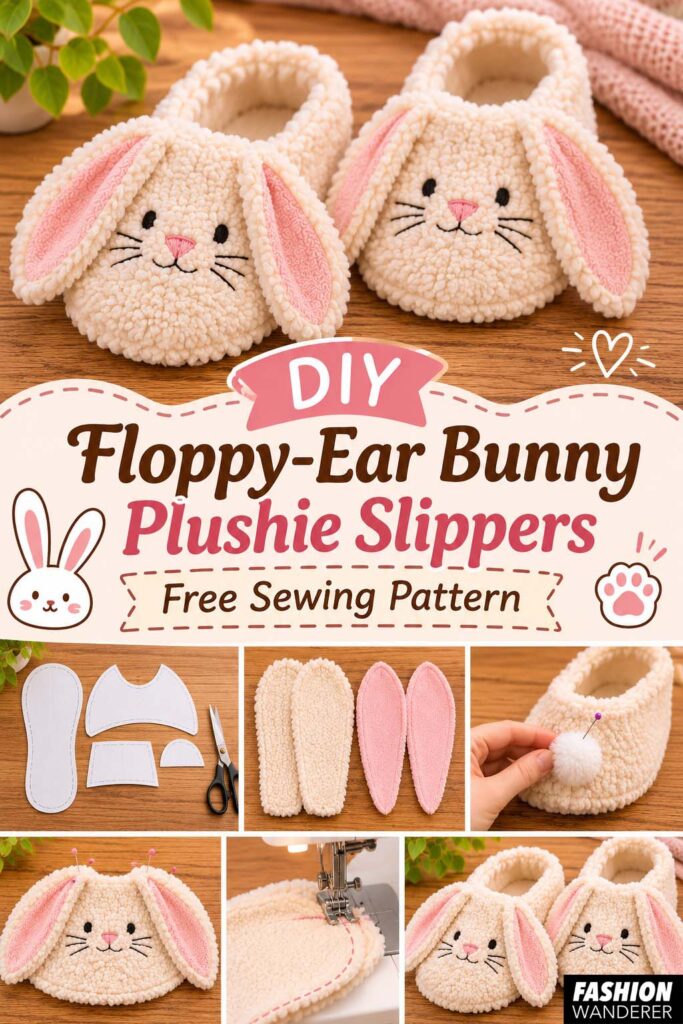
These DIY bunny plush slippers are an adorable way to turn a small amount of fabric into a cozy handmade accessory. They also make great Christmas gifts, Easter sewing projects, sleepover accessories, and handmade items to sell.
Once you make the basic version, try different variations such as pink bunny slippers, brown woodland bunnies, white sherpa rabbits, floral inner ears, embroidered sleepy eyes, or oversized floppy ears.
This free bunny slipper sewing pattern is simple enough for confident beginners but customizable enough to make every pair completely unique.