
If you love cozy sewing projects, cute handmade accessories, and anything that looks like it belongs in a kawaii gift shop, these DIY plushie house slippers are going to be hard to resist.
Plush slippers are surprisingly easy to sew at home because most styles use only a few basic pattern pieces: a sole, an upper, a lining, and a handful of adorable stuffed details. With soft fleece, minky, sherpa, or plush fabric, you can turn a simple slipper pattern into teddy bears, floppy-eared bunnies, cat paws, ducks, or frogs.
These five free plush slipper sewing pattern ideas are beginner-friendly and make wonderful handmade gifts for birthdays, holidays, sleepovers, or cozy winter weekends.
For safety, always finish house slippers with non-slip fabric, grippy dots, or a nonslip sole material, especially if they will be worn on hardwood or tile floors.
Basic Supplies for DIY Plushie Slippers
Most of these projects use similar materials:
- Fleece, minky, sherpa, velour, or plush fabric
- Cotton or fleece lining
- Foam, quilt batting, or fusible fleece
- Nonslip sole fabric
- Polyester fiberfill
- Matching thread
- Sewing machine
- Fabric scissors
- Pins or sewing clips
- Hand-sewing needle
- Fabric marker
- Paper for drafting the slipper pattern
To create a custom slipper pattern, trace around your foot while wearing socks. Add approximately ½ inch around the foot shape for ease and seam allowance. Use this as your sole pattern.
1. DIY Puffy Teddy Bear Plushie Slippers – Free Sewing Pattern
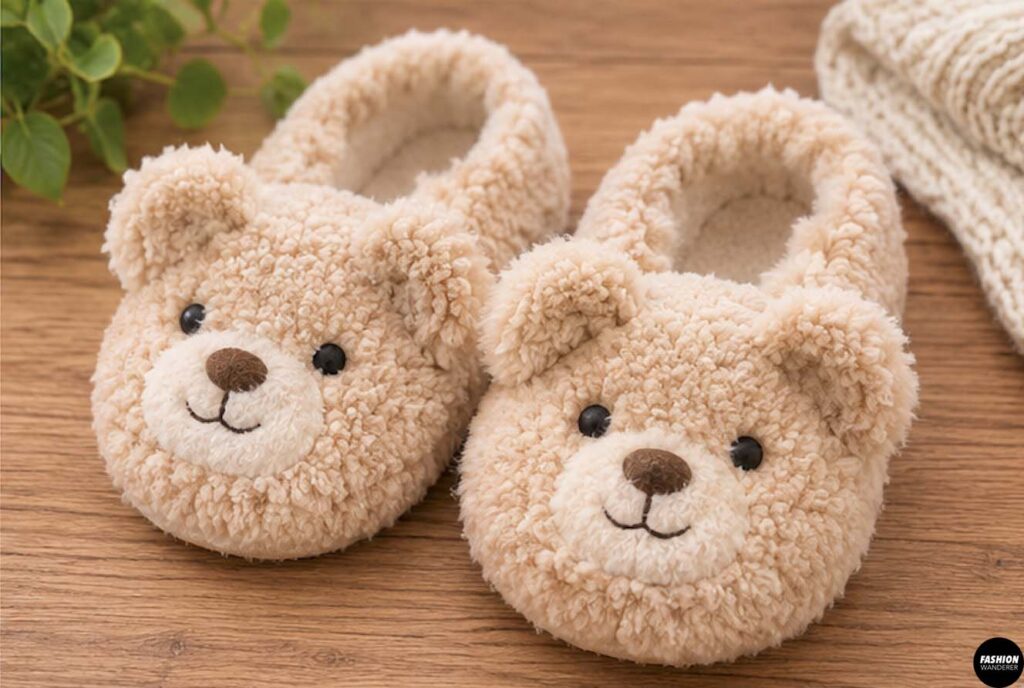
These puffy teddy bear slippers are soft, rounded, and perfect for using cream, beige, caramel, or chocolate-brown fleece.
Step 1: Cut the Slipper Pieces
For each slipper, cut:
- 1 outer sole
- 1 lining sole
- 1 nonslip bottom sole
- 2 upper pieces
- 2 small round ears
Cut matching foam or batting pieces for extra cushioning.
Step 2: Make the Teddy Bear Face
Place one slipper upper right side up.
Cut two small circles from black felt for the eyes and one oval for the nose.
Sew or hand stitch them securely in place.
For the muzzle, cut an oval from cream fleece. Add a small amount of stuffing underneath before stitching around the edge.
Step 3: Sew the Teddy Ears
Place two ear pieces right sides together.
Sew around the curved edge, leaving the bottom open.
Turn right side out and add a tiny amount of fiberfill.
Repeat for the second ear.
Baste the ears near the top edge of the slipper upper.
Step 4: Assemble the Slipper
Sew the upper pieces together where needed, then pin the upper around the outer sole with right sides facing.
Stitch around the entire sole.
Insert the lining and cushioning.
Attach the nonslip sole underneath.
Hand stitch the opening closed.
The finished slipper should look round, plush, and slightly oversized like a tiny teddy bear wrapped around your foot.
2. DIY Floppy-Ear Bunny Plushie Slippers – Free Sewing Pattern
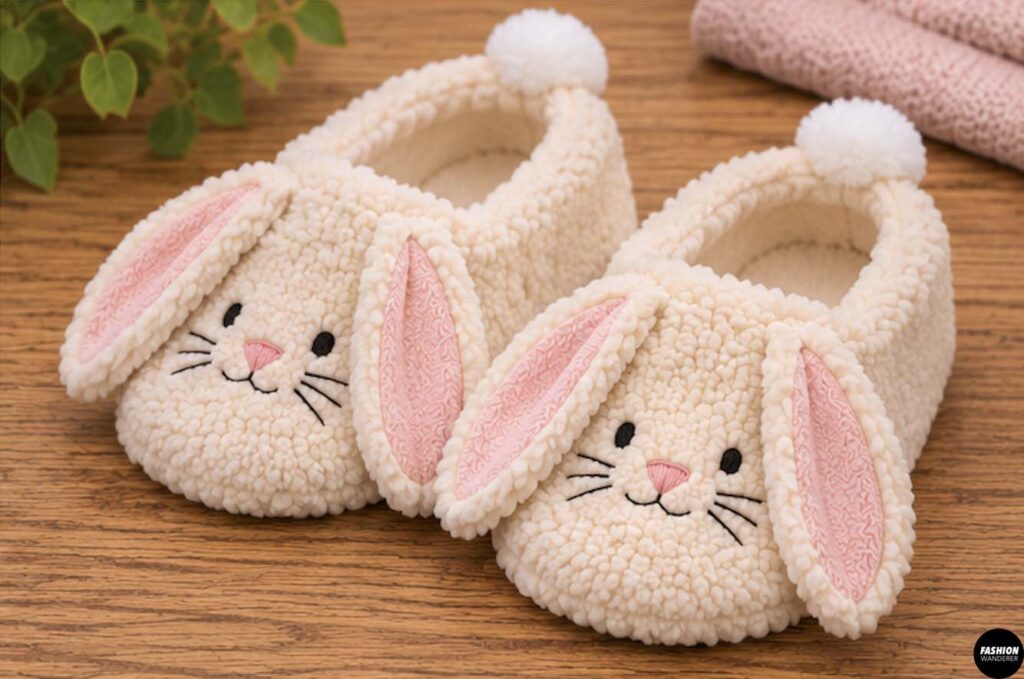
Floppy bunny ears make basic slippers instantly more playful.
Pink, white, cream, lavender, or pale gray fleece works beautifully.
Step 1: Make the Bunny Ears
Cut four long ear shapes from your main fabric.
Cut two slightly smaller inner-ear pieces from pink fleece or felt.
Sew the pink sections onto two ear pieces.
Place each ear pair right sides together and sew around the edge, leaving the bottom open.
Turn right side out.
Step 2: Make the Bunny Face
Add black felt eyes and a tiny pink triangular nose to the slipper upper.
Embroider a small mouth using black or dark brown thread.
Optional: add three embroidered whiskers on each side.
Step 3: Attach the Floppy Ears
Position the ears toward the top of the slipper.
Angle them slightly outward so they naturally flop toward the sides.
Baste them securely before assembling the upper.
Step 4: Finish the Slipper
Sew the upper to the padded sole.
Add the lining and nonslip bottom.
If you want extra-plush slippers, add a thin layer of foam between the outer sole and lining.
3. DIY Chunky Cat Paw Plushie Slippers – Free Sewing Pattern
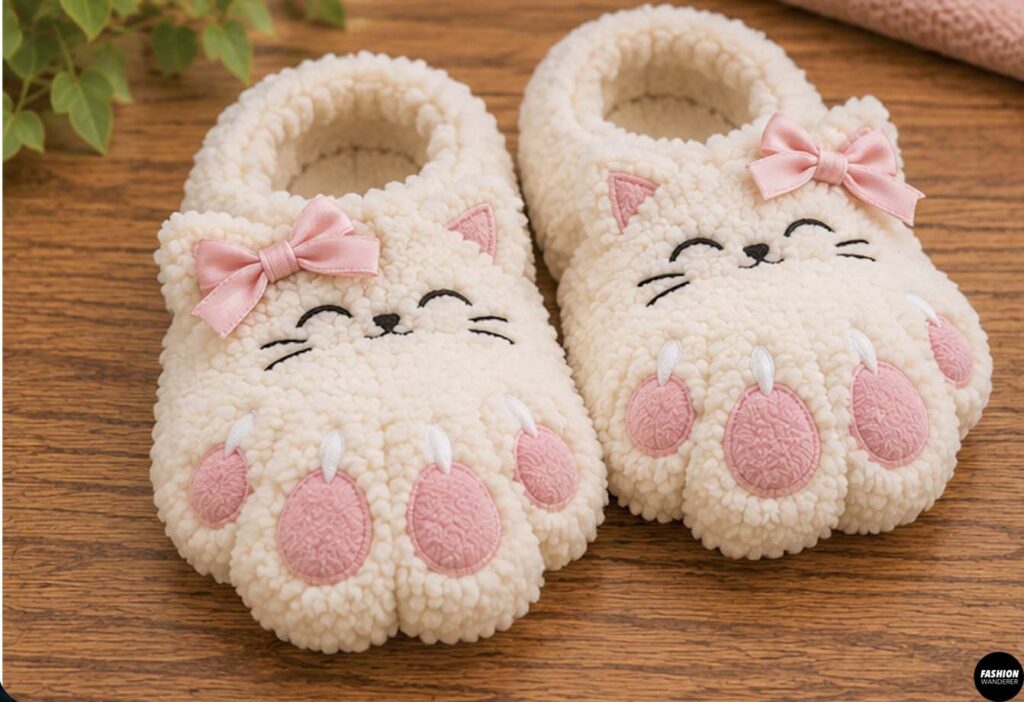
Cat paw slippers are ideal if you want something cute without adding large animal heads.
Use black, white, gray, orange, or pastel fleece.
Step 1: Create a Rounded Upper
Draft a slipper upper that completely covers the toes.
Cut two mirrored pieces for each slipper.
Add batting behind the upper to create a chunky paw shape.
Step 2: Add Paw Pads
Cut one large rounded pad and four small toe pads from contrasting fleece or felt.
Pink works beautifully for white or gray slippers, while black paw pads look cute on orange or cream fabric.
Arrange the pads across the top of the slipper.
Sew close to the edges.
Step 3: Add Tiny Claws
For a playful look, cut tiny triangular claws from felt.
Place them along the front edge of the upper.
Baste them in place before attaching the sole.
Step 4: Assemble and Stuff
Sew the upper to the sole.
Before completely closing the slipper, add a small amount of fiberfill between the outer fabric and lining around the toe.
Do not overstuff.
You want a soft chunky shape that remains comfortable to walk in.
4. DIY Chubby Duck Plushie Slippers – Free Sewing Pattern
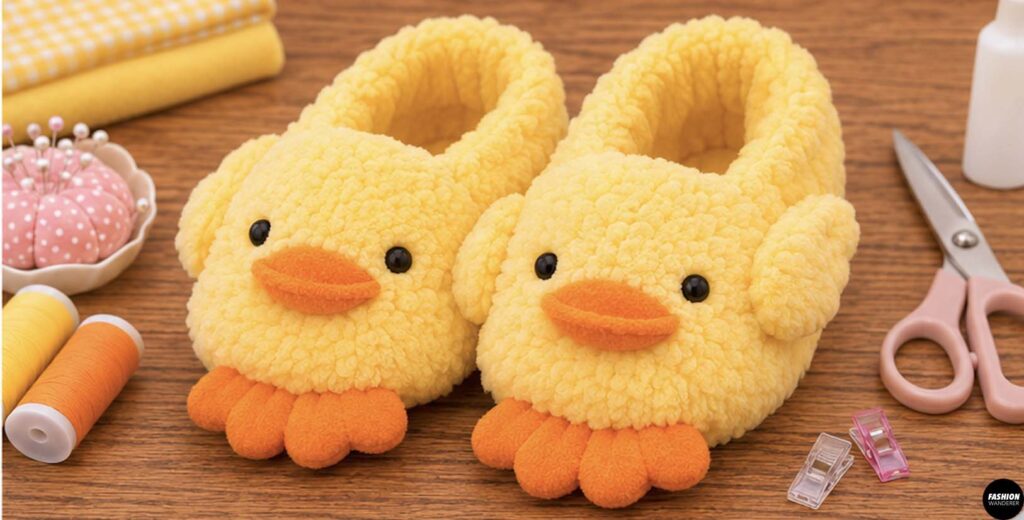
These yellow duck slippers are ridiculously cute and make a fun spring, Easter, or birthday gift.
Step 1: Cut the Duck Slipper
Use bright yellow fleece or minky for the main slipper.
Cut your usual sole and upper pieces.
Cut two orange felt beaks and four small orange wing or foot details if desired.
Step 2: Make the Duck Face
Attach two small black felt eyes.
Cut two orange beak pieces.
Sew them together around the curved edge, leaving the back open.
Add a tiny amount of stuffing.
Hand stitch or machine stitch the beak onto the center front of the slipper.
Step 3: Add Side Wings
Cut two small rounded wing shapes for each slipper.
Sew pairs together, turn them right side out, and lightly stuff.
Attach one wing to each side of the slipper upper.
Step 4: Finish the Slippers
Add cushioning to the sole and sew everything together.
The combination of the rounded yellow upper and puffy orange beak creates the signature chubby duck look.
5. DIY Kawaii Frog Plushie Slippers – Free Sewing Pattern
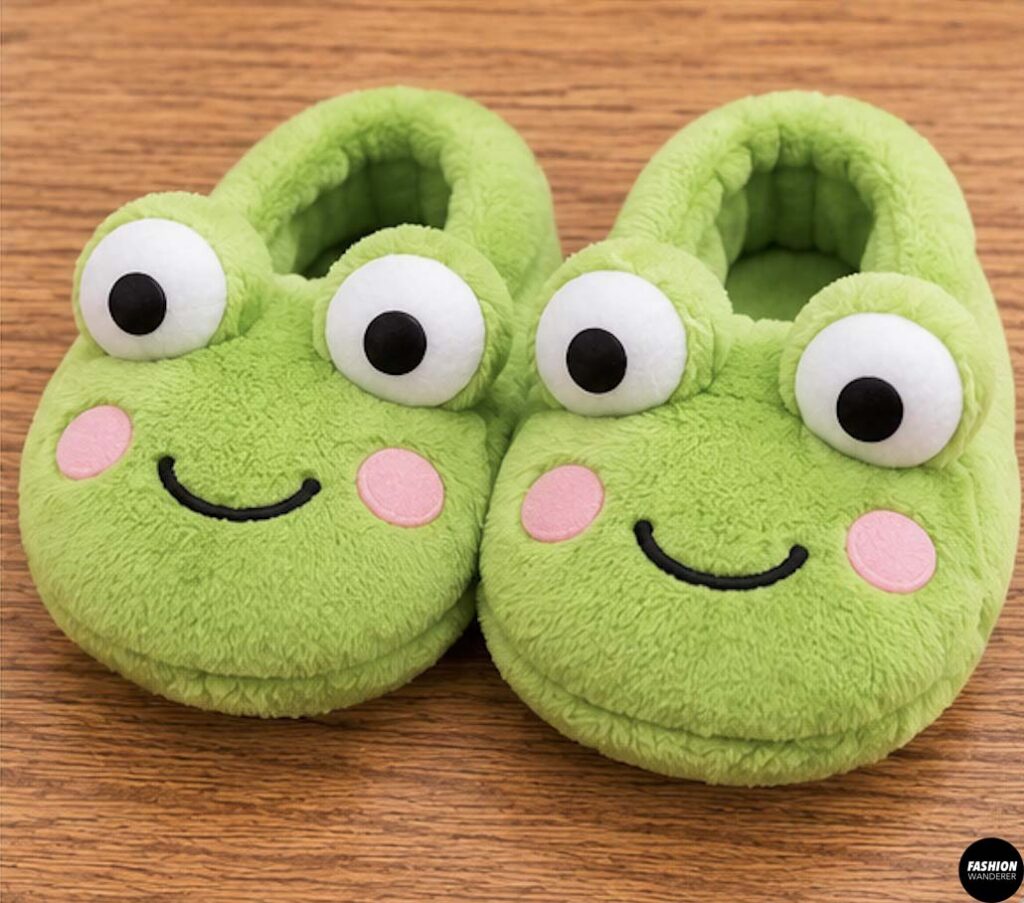
Kawaii frog slippers are perfect for anyone who loves playful handmade accessories.
Use light green, sage, mint, or bright frog-green fleece.
Step 1: Make the Frog Eyes
Cut four green circles approximately 2 to 3 inches wide.
Sew them into pairs.
Turn right side out and stuff lightly.
Add smaller white and black felt circles to create oversized cartoon eyes.
Step 2: Attach the Eyes
Position the stuffed eyes along the top edge of the slipper upper.
Baste them firmly in place.
The eyes should stand upright once the slipper is finished.
Step 3: Add the Frog Face
Embroider a simple curved smile across the front.
For an extra kawaii detail, add two tiny pink felt circles for cheeks.
Step 4: Sew the Slipper Together
Attach the frog upper to the padded sole.
Add your lining and nonslip bottom.
Check that the stuffed eyes feel secure before closing the final opening.
Tips for Sewing Plush Slippers
When sewing thick fleece or minky, use sewing clips instead of pins whenever possible. A walking foot can also help feed bulky fabric evenly through your machine.
Keep bulky seams trimmed and avoid overstuffing animal details. Plushie slippers should look puffy while still feeling comfortable and lightweight.
You can also personalize these patterns with embroidered names, bows, tiny crowns, hearts, seasonal colors, or matching pajama accessories.
Final Thoughts
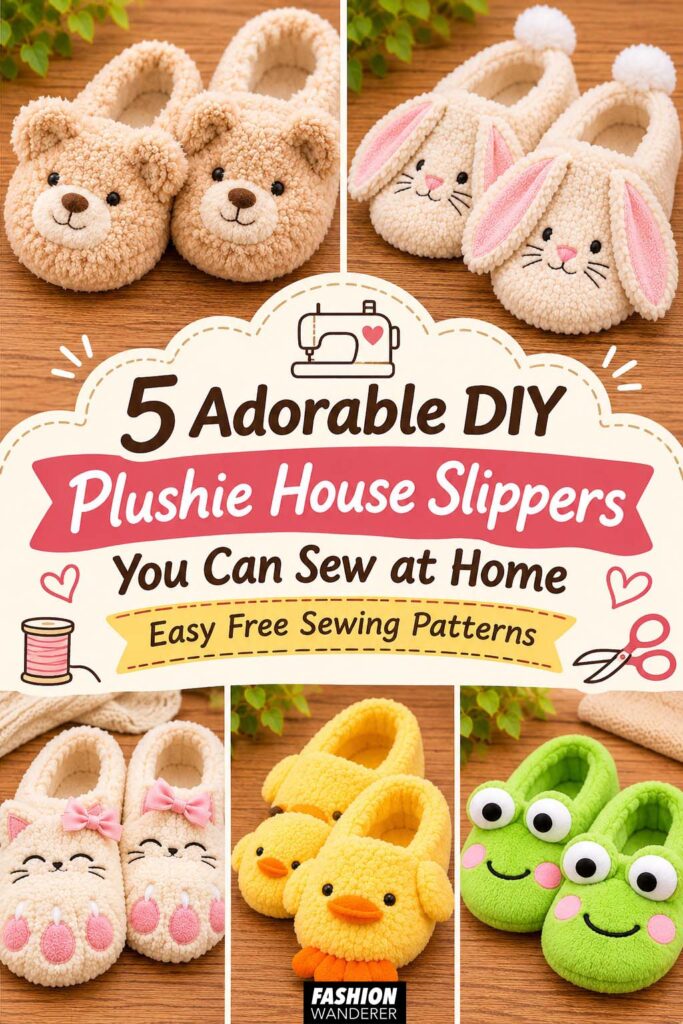
These DIY plushie house slippers prove that practical sewing projects do not have to look boring. From cuddly teddy bears and floppy bunny ears to chunky cat paws, cheerful ducks, and kawaii frogs, each design can be customized with different colors, fabrics, and facial expressions.
They are also fantastic scrap-friendly projects if you already have small pieces of fleece, minky, felt, or batting left from previous sewing projects.
Make one pair for yourself, sew matching versions for friends or family, or turn the designs into adorable handmade gifts. Once you understand the basic slipper construction, you can easily create dozens of your own plush animal variations.