
Want to look stylish for Thanksgiving dinner without spending a fortune on a new outfit? Before shopping for another fall wardrobe piece, take a look inside your closet. That oversized sweater, old plaid skirt, or forgotten maxi dress might be exactly what you need to create a gorgeous Thanksgiving outfit.
These Thanksgiving dinner outfit upcycles turn ordinary, outdated clothing into stylish, expensive-looking pieces using simple sewing techniques and a little creativity.
From a feminine peplum blouse made from a men’s flannel shirt to a cozy color-block cardigan, these budget-friendly DIY fashion projects are perfect for family gatherings, Friendsgiving celebrations, and holiday dinners.
The best part? Most of these transformations can be completed in just a few hours using clothes you already own.
Why Upcycle Your Thanksgiving Outfit?
Thanksgiving fashion is all about comfortable layers, warm autumn colors, and effortless style.
Instead of purchasing expensive holiday outfits, upcycling lets you create something unique while saving money.
These projects are especially great because:
- They’re budget-friendly and use existing clothing.
- They’re beginner-friendly, with simple sewing techniques.
- They create fashionable, boutique-inspired outfits.
- They reduce clothing waste.
- They can be customized to fit your personal style.
Ready to transform your old clothes into a beautiful Thanksgiving wardrobe? Here are five easy sewing upcycles worth trying.
1. Old Men’s Flannel Shirt to Feminine Peplum Blouse – Thanksgiving Upcycle
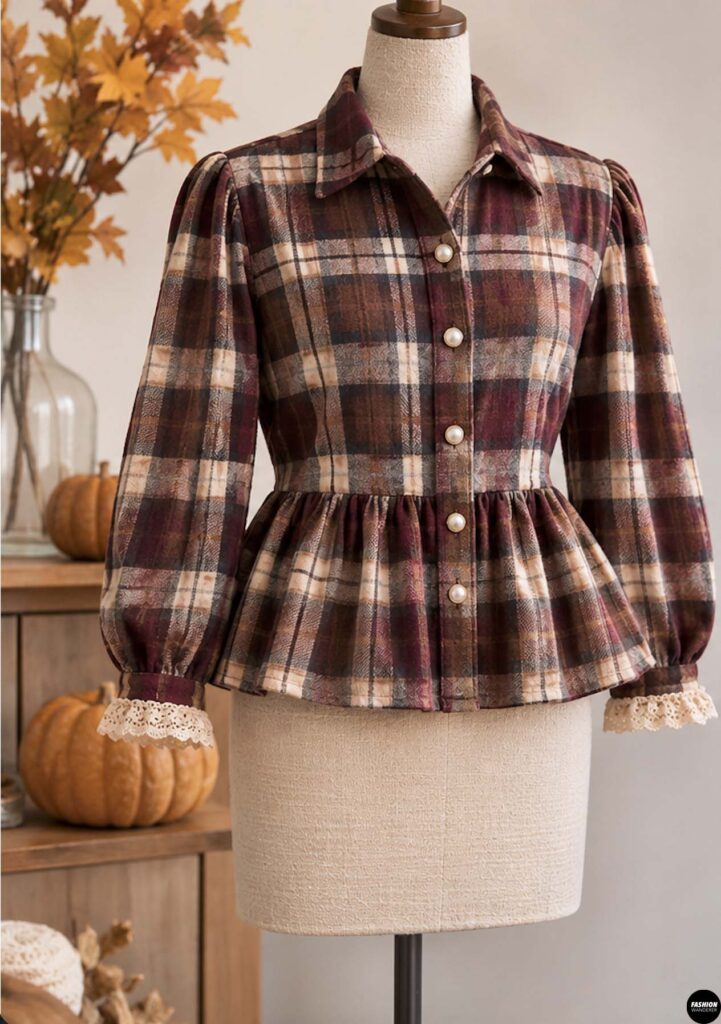
An oversized men’s flannel shirt can become a romantic, feminine peplum blouse that looks adorable with fitted jeans, trousers, or a midi skirt.
Choose a flannel in warm fall colors such as burgundy, camel, rust, forest green, or chocolate brown.
Skill Level: Beginner to intermediate
Estimated Time: 1½–2 hours
Materials You’ll Need
- One oversized men’s flannel shirt
- Sewing machine
- Matching thread
- Fabric scissors
- Measuring tape
- Fabric marker
- Pins or sewing clips
- Elastic, optional
- Iron
Step-by-Step Tutorial
Step 1: Prepare the Flannel Shirt
Wash and iron the shirt. Try it on and mark your natural waistline, allowing a little extra length for a comfortable fit.
Step 2: Cut the Shirt at the Waist
Lay the shirt flat and draw a horizontal cutting line approximately 1 inch below your marked waistline.
Cut across the shirt carefully, preserving the bottom portion for the peplum.
Step 3: Prepare the Peplum Ruffle
Remove the curved hem from the lower section if necessary.
Measure the bottom edge of the cropped shirt.
You want the peplum strip to be approximately 1½ to 2 times that measurement for a gathered effect.
Use the leftover flannel fabric and, if needed, additional matching fabric from the sleeves to create a longer strip.
Step 4: Gather the Peplum
Sew two rows of long gathering stitches along the upper edge of the peplum strip.
Pull the bobbin threads gently until the gathered edge matches the circumference of the blouse.
Step 5: Attach the Peplum
Place the gathered strip against the shirt’s lower edge with right sides facing.
Match the side seams and pin evenly.
Sew using a ⅜-inch seam allowance.
Step 6: Finish the Blouse
Finish the raw seam allowances, hem the peplum, and press gently.
For a flattering silhouette, you can taper the side seams slightly or add narrow waist ties.
Thanksgiving Styling Tip: Pair your flannel peplum blouse with dark-wash straight-leg jeans, ankle boots, and simple gold jewelry.
2. Oversized Sweater to Cozy Off-Shoulder Thanksgiving Top
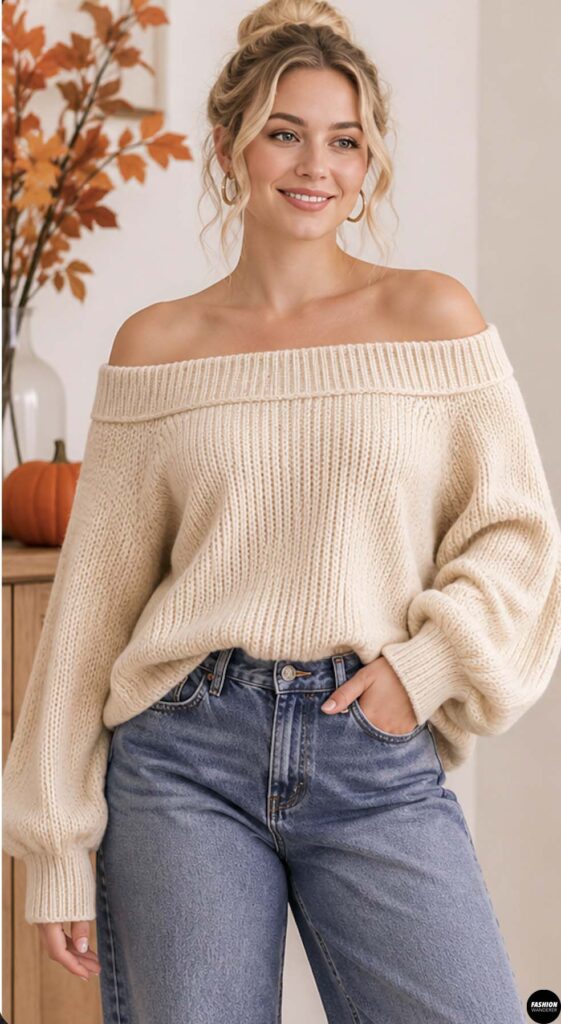
Turn an old oversized sweater into a soft, elegant off-shoulder top that looks like something from a trendy boutique.
This easy sweater upcycle creates a relaxed silhouette that’s perfect for a cozy Thanksgiving dinner.
Skill Level: Beginner
Estimated Time: 45–90 minutes
Materials You’ll Need
- Oversized sweater
- Sewing machine
- Ballpoint needle
- Matching thread
- Fabric scissors
- Measuring tape
- Knit elastic
- Pins or sewing clips
- Fabric marker
Step-by-Step Tutorial
Step 1: Check the Sweater Fit
Try on the sweater and decide how low you want the neckline.
Mark the desired neckline across the front, shoulders, and back.
Make sure the opening will comfortably stretch over your shoulders.
Step 2: Mark the Cutting Line
Lay the sweater flat.
Draw a smooth neckline curve connecting your markings.
Allow extra fabric for a folded elastic casing.
Step 3: Stabilize the Knit
For loosely knitted sweaters, sew a narrow zigzag stitch just below the cutting line before trimming.
This helps prevent the knit stitches from unraveling.
Step 4: Cut the Neckline
Carefully cut along the marked neckline.
Avoid stretching the sweater as you work.
Step 5: Create an Elastic Casing
Fold the neckline edge toward the wrong side to form a casing wide enough for your elastic.
Stitch around the neckline using a stretch stitch, leaving a small opening.
If the sweater is too bulky to fold neatly, attach a separate knit band instead.
Step 6: Insert Elastic
Measure elastic around your shoulders at the desired neckline position.
Thread it through the casing, adjust for comfort, and sew the ends together.
Close the casing opening.
Step 7: Finish and Style
Try on the sweater and adjust the neckline so it sits evenly.
Pair it with a satin midi skirt, tailored trousers, or dark denim.
Style Tip: Cream, oatmeal, chocolate brown, and burgundy sweaters create a particularly elegant Thanksgiving look.
3. Old Maxi Dress to Romantic Thanksgiving Midi Dress
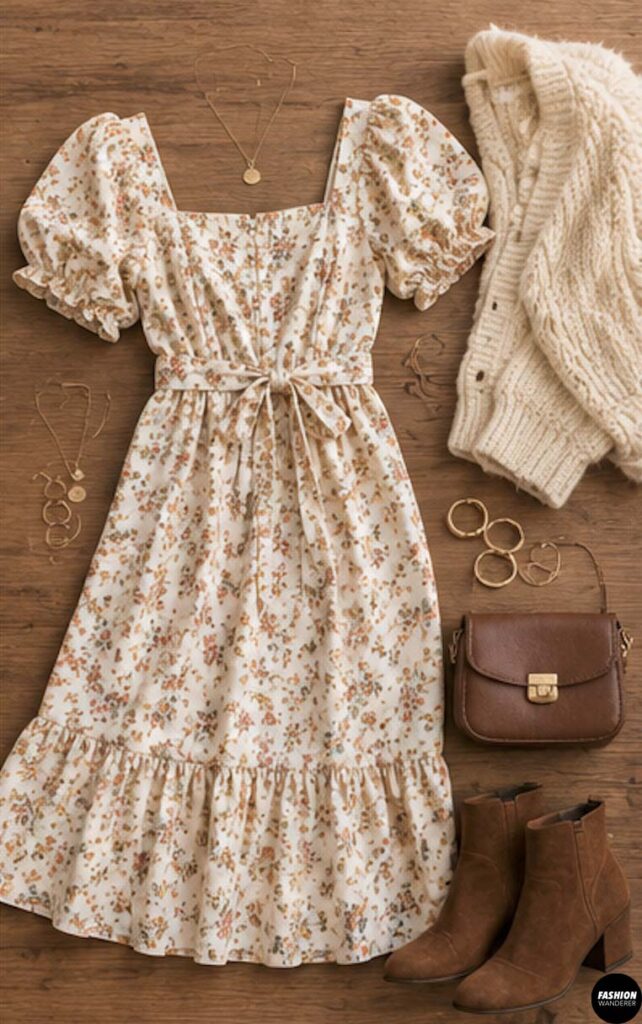
Have an old maxi dress that’s too long or no longer feels fashionable?
Transform it into a romantic midi dress with a flattering waist, softly flowing skirt, and beautiful fall-inspired silhouette.
Skill Level: Beginner
Estimated Time: 1–2 hours
Materials You’ll Need
- Old maxi dress
- Sewing machine
- Matching thread
- Fabric scissors
- Measuring tape
- Fabric marker
- Elastic, optional
- Pins or clips
- Iron
Step-by-Step Tutorial
Step 1: Try On the Maxi Dress
Put on the dress and determine your preferred midi length.
A romantic midi dress typically falls somewhere between the knee and ankle.
Mark the new hemline while standing naturally.
Step 2: Cut Away Excess Length
Lay the dress flat.
Measure evenly from the original hem or another consistent reference point.
Mark a cutting line approximately 1 inch below your desired finished length.
Cut away the excess fabric and save it.
Step 3: Create a Waist Tie
Use the leftover fabric to cut two long strips.
Fold each strip lengthwise with right sides together.
Sew along the long edge and one short end.
Turn right side out and press.
Step 4: Attach the Waist Ties
Try on the dress and mark your preferred waist position.
Attach the ties securely at the side seams, reinforcing the attachment points.
If the dress is very loose, take in the side seams slightly for a more defined shape.
Step 5: Hem the Dress
Fold the raw hem edge toward the wrong side.
Press, fold again to enclose the raw edge, and sew around the entire hem.
For knit dresses, use a stretch stitch or twin needle.
Step 6: Add Romantic Details
Use leftover fabric to create small sleeve ruffles, a soft neckline bow, or delicate fabric ties.
Keep the details subtle for a more expensive-looking finish.
Thanksgiving Styling Tip: Wear your new midi dress with knee-high boots, a cropped cardigan, and a simple pendant necklace.
4. Old Plaid Skirt to Modern Wrap Midi Skirt
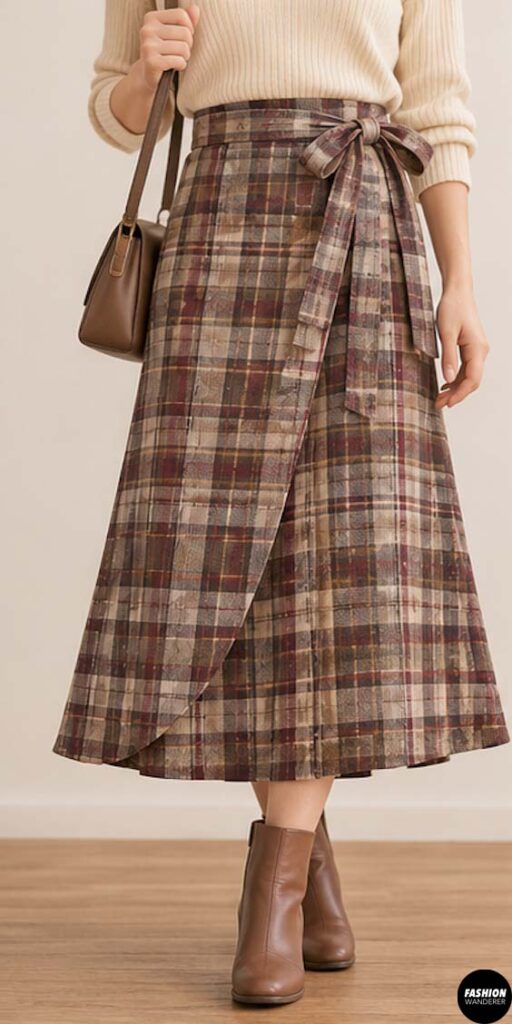
Plaid skirts are a classic fall wardrobe staple, but an outdated silhouette can make them feel old-fashioned.
With a few simple alterations, you can turn an old plaid skirt into a chic wrap-inspired midi skirt.
Skill Level: Intermediate
Estimated Time: 2–3 hours
Materials You’ll Need
- Old plaid skirt, preferably oversized or full
- Coordinating fabric if additional overlap is needed
- Sewing machine
- Matching thread
- Fabric scissors
- Measuring tape
- Pins or clips
- Lightweight interfacing
- Buttons or hook-and-bar closures
- Iron
Step-by-Step Tutorial
Step 1: Prepare the Skirt
Wash and press the skirt.
Try it on and mark your desired finished length.
For an elegant wrap style, a high-waisted midi silhouette works beautifully.
Step 2: Open a Seam
Carefully unpick one side seam or the center-front seam, depending on the skirt’s construction.
Preserve the waistband and existing closure pieces whenever possible.
Step 3: Create the Wrap Overlap
Wrap the skirt around your waist to determine how much fabric overlaps at the front.
Aim for approximately 6–8 inches of overlap, adjusted to your size and the skirt’s fullness.
If there isn’t enough fabric for secure coverage, add a matching or contrasting panel.
Step 4: Shape the Front Edges
Mark the new front edges.
Fold the raw edges inward and press.
Use lightweight interfacing to stabilize the closure areas.
Step 5: Finish the Wrap Edges
Sew a narrow double-fold hem or attach coordinating binding along both front edges.
Keep the stitching straight and neat.
Step 6: Add Secure Closures
Install an inside button or hook-and-bar closure at the waist.
Add an exterior button or additional closure to hold the overlapping panel securely.
Make sure the skirt stays covered when sitting, standing, and walking.
Step 7: Hem and Press
Adjust the hem to your desired midi length.
Press all seams and edges for a polished finish.
Thanksgiving Styling Tip: Style your wrap skirt with a fitted turtleneck, tall boots, and a structured handbag for an effortless designer-inspired outfit.
5. Two Old Sweaters to Color-Block Patchwork Cardigan
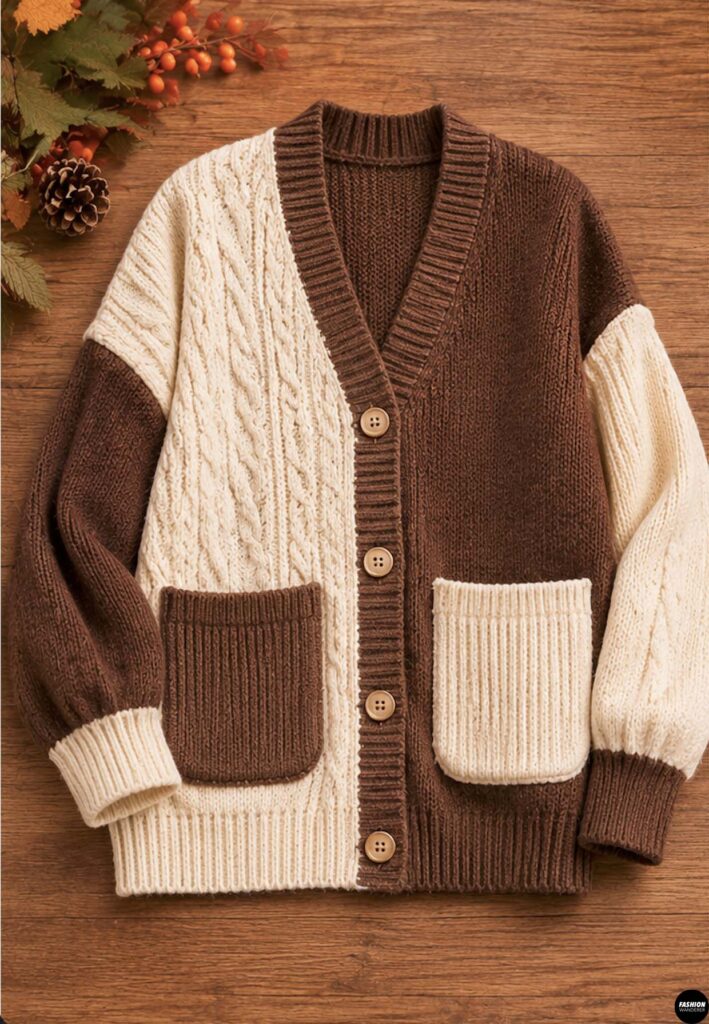
Why wear one old sweater when you can combine two into a stylish statement cardigan?
This creative DIY sweater upcycle transforms two contrasting sweaters into a cozy, color-block cardigan that looks completely unique.
Skill Level: Confident beginner
Estimated Time: 2–4 hours
Materials You’ll Need
- Two old sweaters in coordinating colors
- Sewing machine
- Ballpoint needle
- Matching thread
- Fabric scissors
- Measuring tape
- Fabric marker
- Sewing clips
- Seam ripper
- Lightweight knit interfacing
- Optional buttons or knit binding
Step-by-Step Tutorial
Step 1: Choose Your Sweaters
Select two sweaters with similar fabric weights and stretch.
For a sophisticated fall look, combine cream and brown, beige and burgundy, or camel and olive green.
Step 2: Plan the Color Blocking
Lay both sweaters flat.
Decide which sections you want to combine.
For example, use the body of one sweater with contrasting sleeves and a front panel from the other.
Step 3: Remove the Sleeves
Carefully unpick the armhole seams using a seam ripper.
Preserve the original sweater cuffs whenever possible.
Step 4: Cut the Contrasting Panels
Mark the sections you want to replace.
Stabilize any loose knit cutting lines before cutting.
Add approximately ⅜-inch seam allowances to the replacement panels.
Step 5: Sew the Patchwork Sections
Place coordinating panels right sides together.
Sew using a narrow zigzag or stretch stitch.
Press gently with a pressing cloth.
Step 6: Reassemble the Cardigan
Sew the shoulder and side seams.
Attach the contrasting sleeves, matching the underarm and shoulder points.
Check the overall fit.
Step 7: Create the Front Opening
If your sweater is a pullover, mark the center front.
Apply lightweight knit interfacing along both sides of the marking.
Stitch beside the marked line, then carefully cut down the center.
Step 8: Finish the Edges
Attach knit binding or repurposed ribbed fabric along the front opening.
Add buttons if desired.
Trim loose threads and gently press the finished cardigan.
Thanksgiving Styling Tip: Layer your patchwork cardigan over a simple white T-shirt with wide-leg jeans and loafers for an effortlessly chic fall outfit.
How to Make Your DIY Thanksgiving Outfit Look Expensive
The secret to making thrifted or upcycled clothing look designer-inspired is paying attention to the finishing details.
Choose rich autumn colors. Burgundy, chocolate brown, camel, cream, forest green, and muted rust instantly create a warm seasonal look.
Press every seam. Proper pressing makes handmade garments look more professionally constructed.
Keep proportions balanced. Pair oversized tops with fitted bottoms or flowing skirts with more structured tops.
Use simple accessories. Small gold earrings, leather-look belts, structured handbags, and classic boots can elevate an inexpensive outfit.
Focus on fit. Even a basic upcycled garment can look expensive when it fits comfortably and hangs beautifully.
Final Thoughts
You don’t need an expensive shopping trip to create a beautiful Thanksgiving dinner outfit.
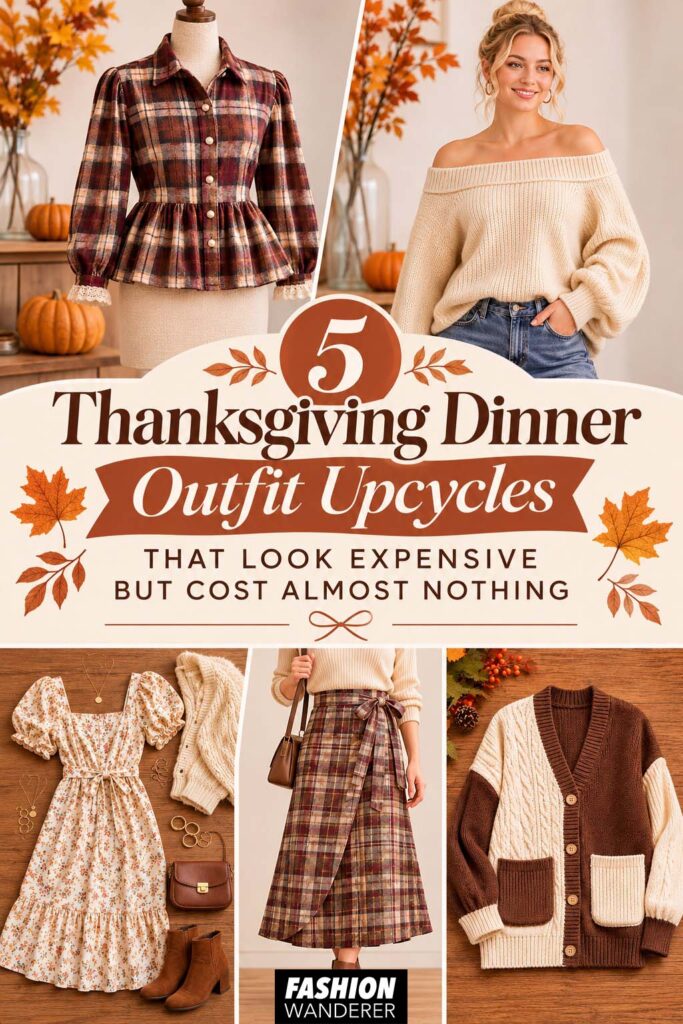
With these Thanksgiving clothing upcycle ideas, you can turn old sweaters, flannel shirts, dresses, and skirts into stylish holiday pieces using materials you already have.
Whether you love a romantic midi dress, a feminine flannel peplum blouse, or a cozy patchwork cardigan, each project offers a creative way to refresh your fall wardrobe.
So before spending money on a brand-new Thanksgiving outfit, open your closet and see what you can transform.
Your next favorite holiday look might cost almost nothing!