
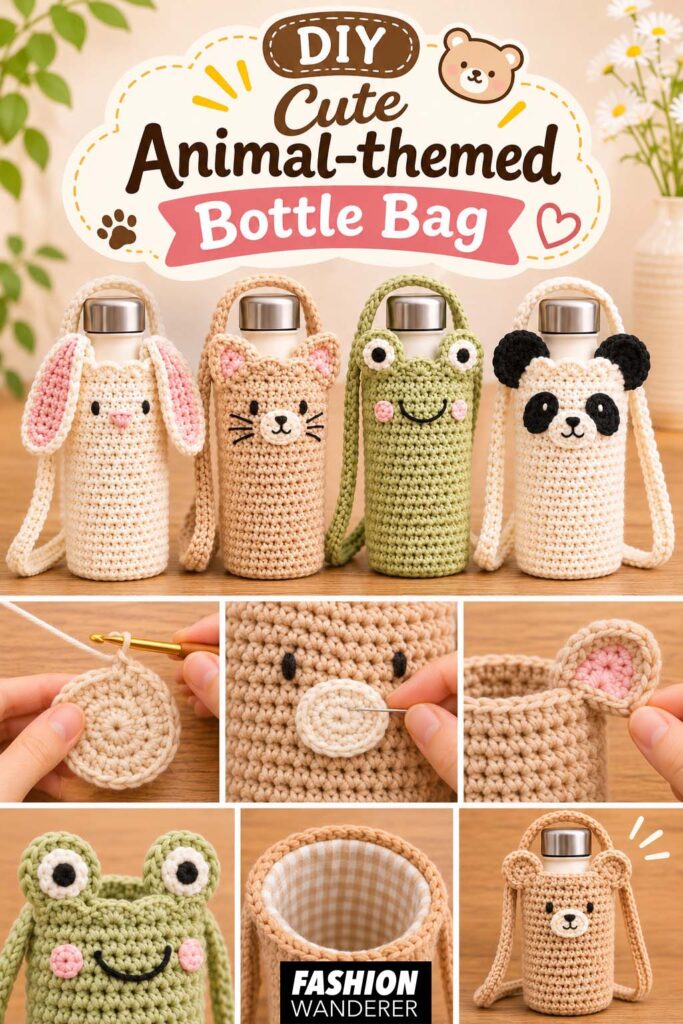
If you love practical crochet projects with a playful twist, this DIY cute animal-themed bottle bag is a fun project to add to your handmade accessories list. It is perfect for carrying a reusable water bottle on walks, errands, festivals, school runs, or casual outings, and the adorable animal face makes it much more charming than a plain bottle holder.
This beginner-friendly crochet bottle bag pattern uses simple stitches and basic shaping. Once you understand the construction, you can customize the design into a bear, cat, bunny, frog, panda, or almost any animal you like.
The pattern is worked from the bottom up in the round, then finished with a long crochet strap and small appliqué details for the face.
Materials You Will Need
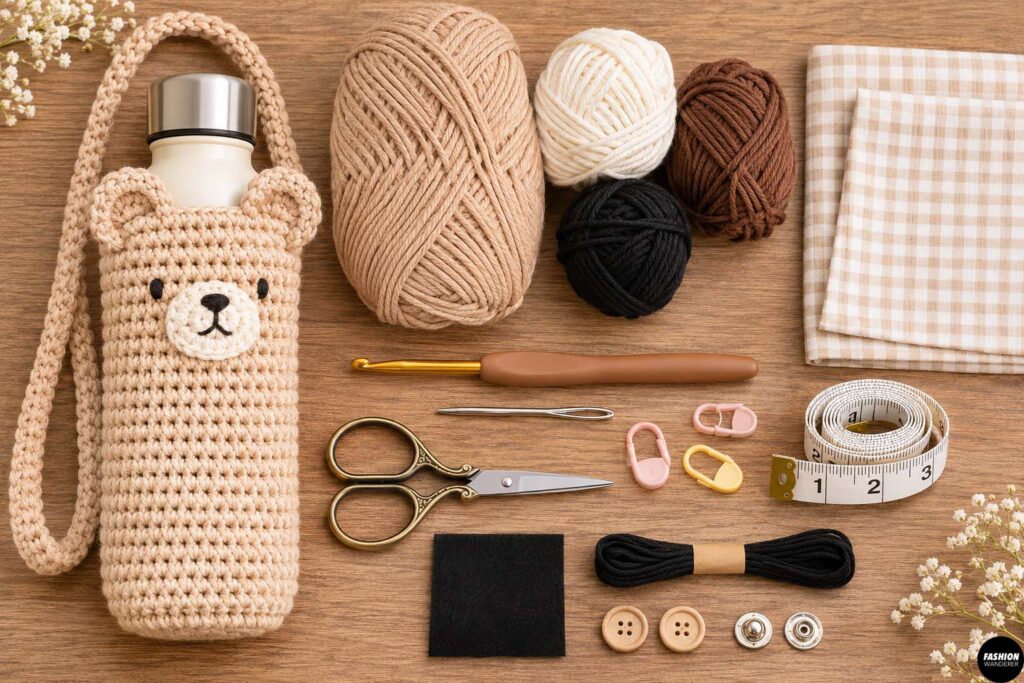
To make one crochet animal bottle bag, gather:
- 120 to 180 yards worsted weight cotton yarn
- Small amounts of contrasting yarn for ears and facial details
- 4 mm or 4.5 mm crochet hook
- Yarn needle
- Scissors
- Stitch markers
- Measuring tape
- Optional black felt
- Optional embroidery thread
- Optional small snap or button
- Optional fabric lining
Cotton yarn works especially well because it holds its shape and is strong enough to carry a filled bottle. Acrylic yarn can also be used, but choose one that is not overly stretchy.
For this tutorial, we will make a cute bear-themed bottle bag, but the base construction can be used for many different animals.
Finished Size
This pattern fits a standard reusable bottle approximately 2.5 to 3 inches in diameter and 8 to 10 inches tall.
The finished bag measures approximately:
- 4 inches wide
- 9 inches tall
- 40 to 44 inch strap
Adjust the size depending on your bottle.
Crochet Stitches Used
You will mainly use:
- Chain stitch
- Slip stitch
- Single crochet
- Half double crochet
- Single crochet increase
- Basic embroidery
A single crochet increase means working two single crochet stitches into the same stitch.
Animal-Themed Crochet Bottle Bag Pattern
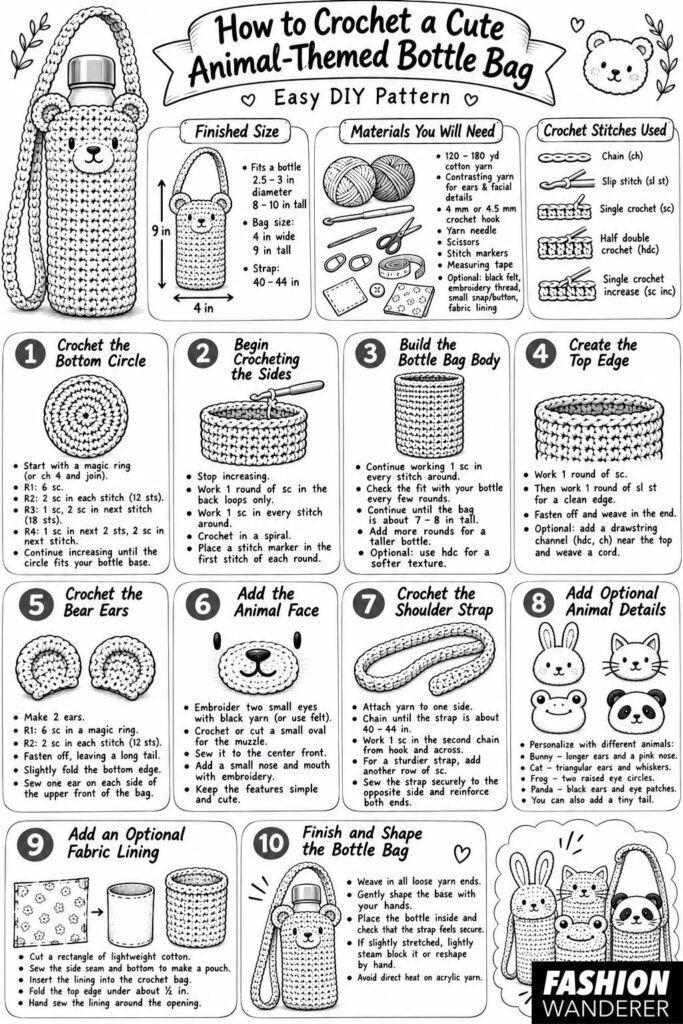
Step 1: Crochet the Bottom Circle
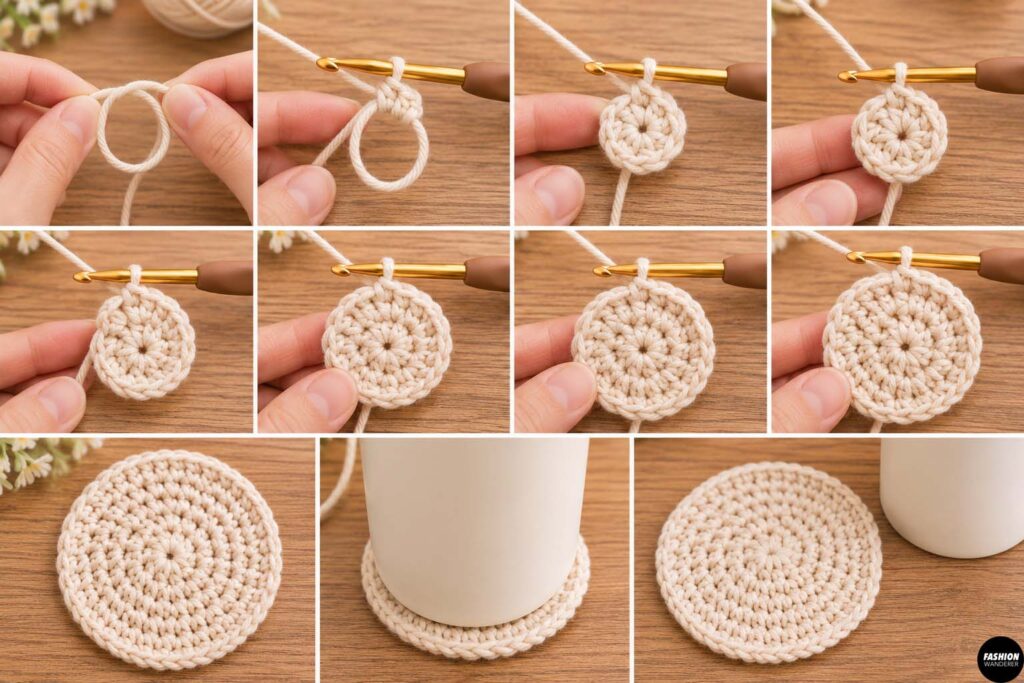
Begin with a magic ring.
If you are not comfortable using a magic ring, chain four and join the first chain with a slip stitch to form a small circle.
Round 1: Work 6 single crochet stitches into the ring.
Pull the yarn tail gently to close the center.
Round 2: Work 2 single crochet stitches into each stitch around.
You should now have 12 stitches.
Round 3: Work 1 single crochet into the first stitch and 2 single crochet into the next stitch.
Repeat around.
You should have 18 stitches.
Round 4: Work 1 single crochet into each of the next 2 stitches and 2 single crochet into the next stitch.
Repeat around.
Continue increasing until the circle is approximately the same width as the bottom of your bottle.
Lay the bottle on top of the crochet circle to check the size.
The circle should be slightly wider than the bottle base so the bag is not too tight.
Step 2: Begin Crocheting the Sides
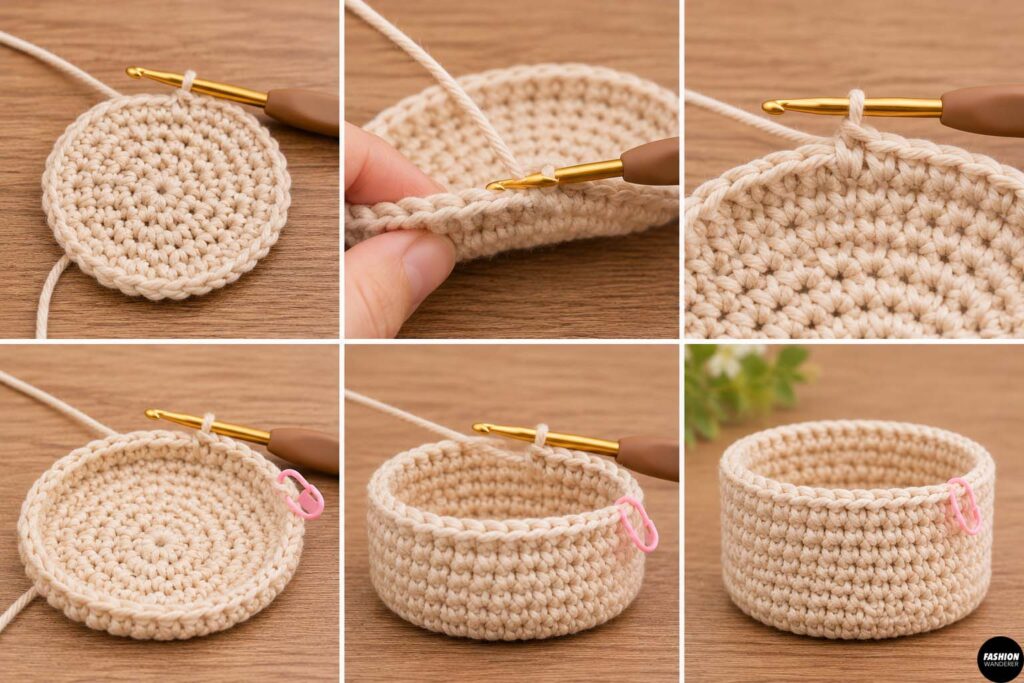
Once the base reaches the correct size, stop increasing.
Work one round of single crochet into the back loops only.
This creates a subtle ridge and helps the bottom turn upward.
For the next round, work one single crochet into every stitch.
Continue crocheting in a spiral.
Place a stitch marker in the first stitch of each round so you can easily keep track of your progress.
Step 3: Build the Bottle Bag Body
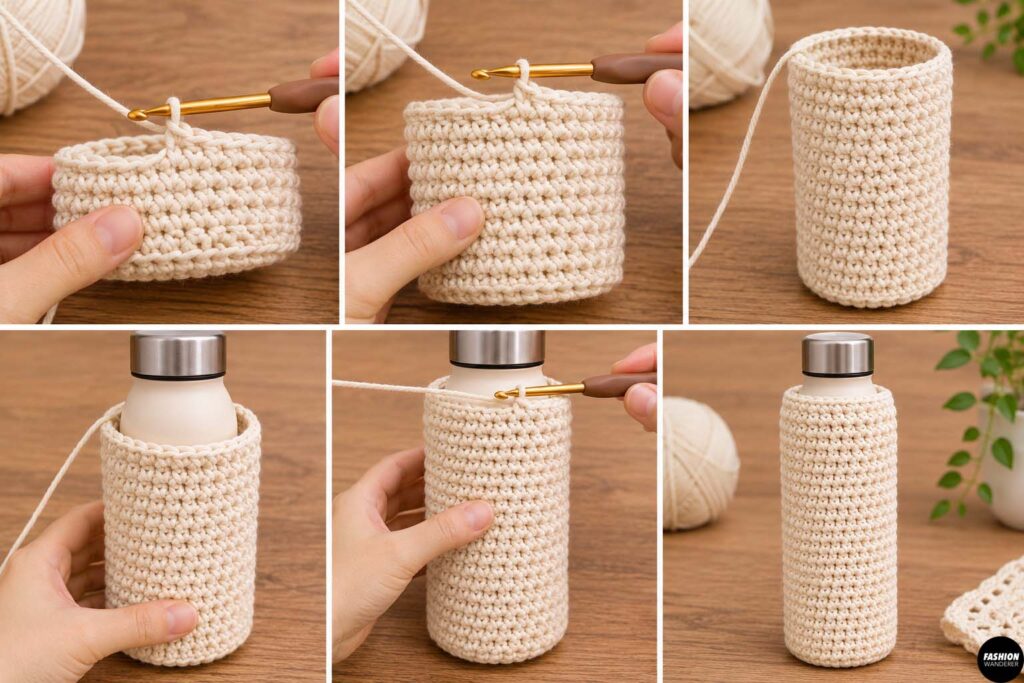
Continue working one single crochet into every stitch around.
Every few rounds, place the bottle inside the crochet piece to check the fit.
The bag should hug the bottle without stretching excessively.
Continue until the body reaches approximately 7 to 8 inches tall.
If you are using a taller bottle, simply add more rounds.
For a more textured bag, you can replace single crochet with half double crochet.
Just remember that half double crochet creates a slightly softer and stretchier fabric.
Step 4: Create the Top Edge
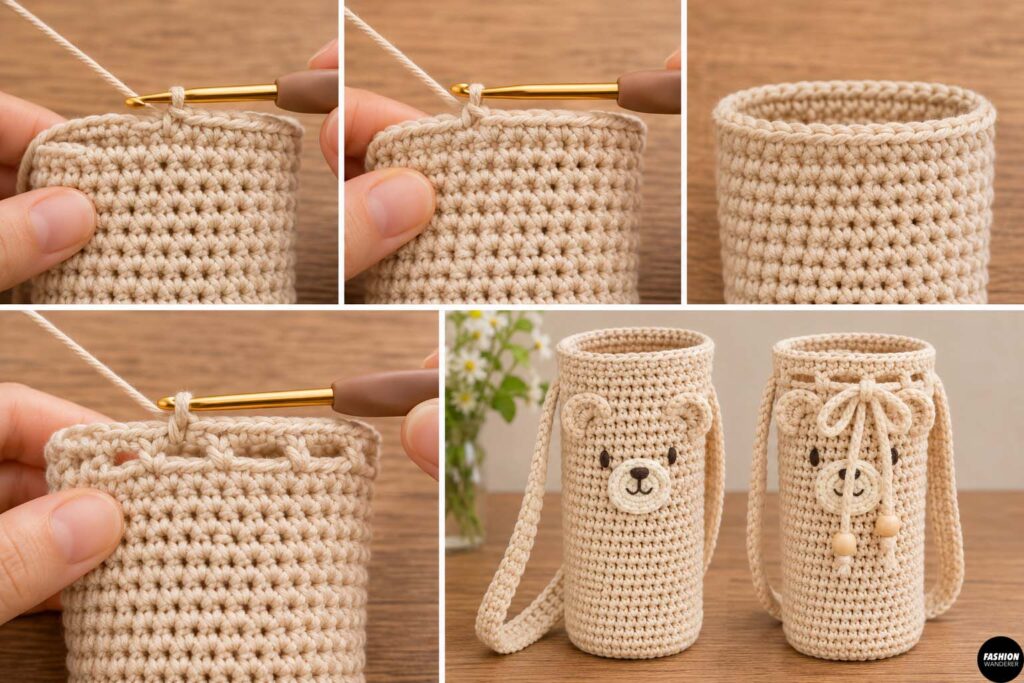
Once the bag reaches the desired height, work one round of single crochet.
Then work one final round of slip stitches for a clean finished edge.
Fasten off and weave in the yarn end.
If you want the bottle to feel extra secure, you can crochet a short drawstring channel near the top.
Simply alternate one half double crochet and one chain around the opening, then weave a crochet cord through the spaces.
Step 5: Crochet the Bear Ears
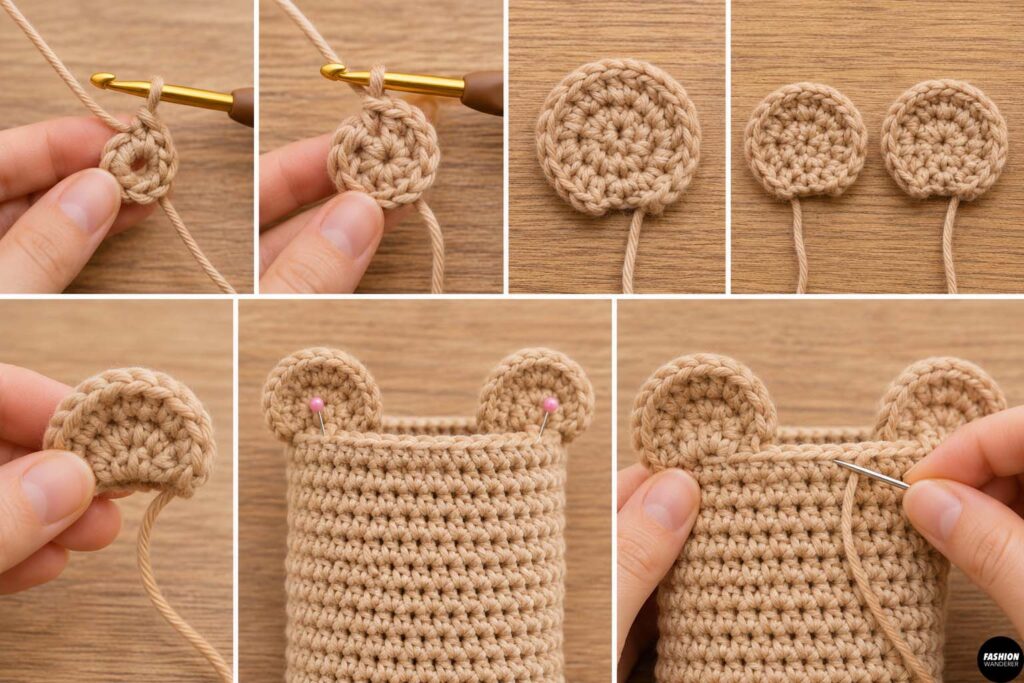
Make two ears.
Start with a magic ring.
Work 6 single crochet stitches into the ring.
Round 2: Work 2 single crochet stitches into each stitch around.
You should now have 12 stitches.
Fasten off, leaving a long yarn tail for sewing.
For a softer bear-ear shape, gently fold the bottom edge of each circle inward before attaching it.
Position one ear on each side of the upper front portion of the bottle bag.
Pin or hold them in place.
Use the long yarn tails and a yarn needle to sew the ears securely to the bag.
Step 6: Add the Animal Face
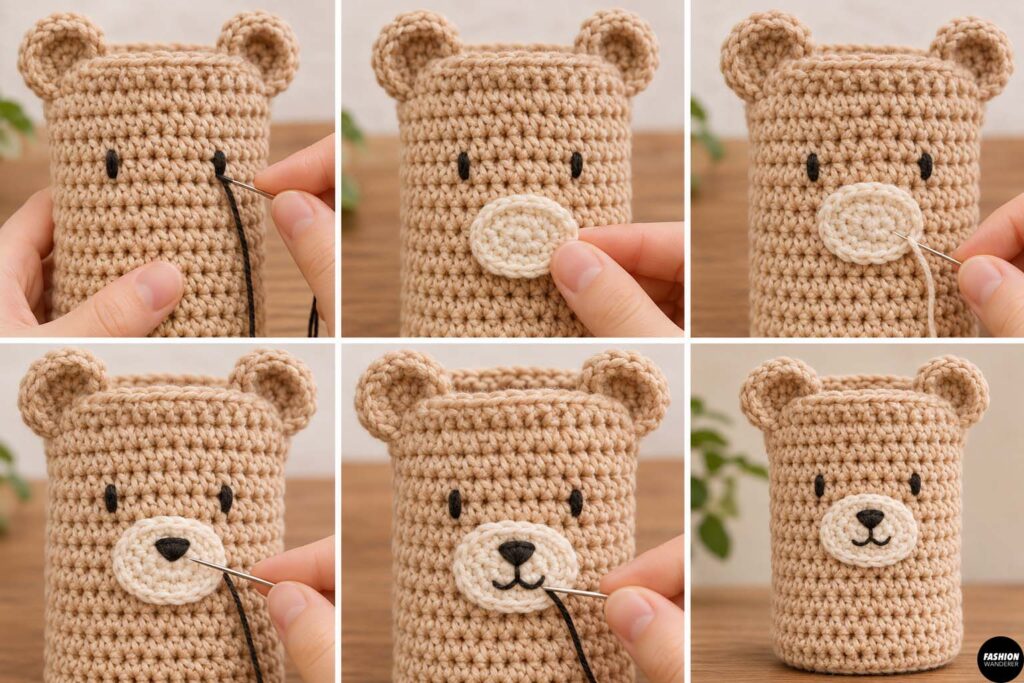
Now create the bear face.
For the eyes, embroider two small vertical stitches using black yarn.
You can also sew on small circles of black felt.
For the muzzle, crochet a tiny oval from cream or tan yarn, or cut a small oval from felt.
Sew it to the center front of the bag.
Add a small black nose and a short embroidered mouth.
Keep the facial features simple.
Small details usually look cuter and make the design feel more modern.
Step 7: Crochet the Shoulder Strap
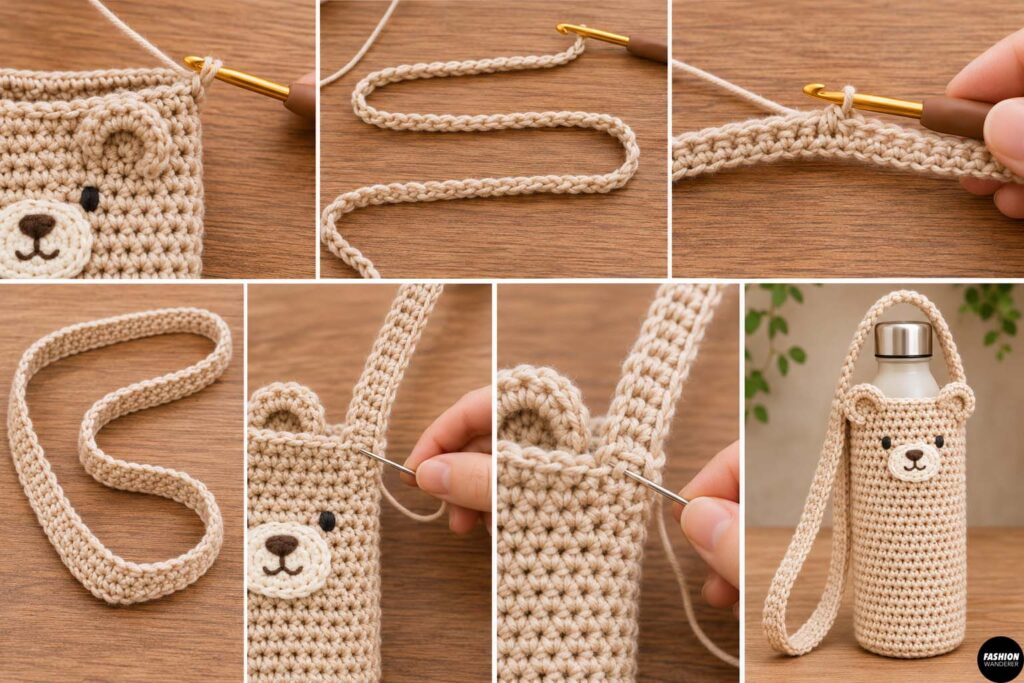
Attach your main yarn to one side of the bag.
Chain until the strap measures approximately 40 to 44 inches.
Adjust the length depending on whether you want a shoulder bag or crossbody bottle holder.
Turn and work one single crochet into the second chain from the hook.
Continue working one single crochet into each chain.
For a sturdier strap, work another row of single crochet.
Fasten off, leaving a long tail.
Sew the free end of the strap securely to the opposite side of the bag.
Reinforce both strap attachment points with several extra stitches.
This is important because a full water bottle can be heavy.
Step 8: Add Optional Animal Details
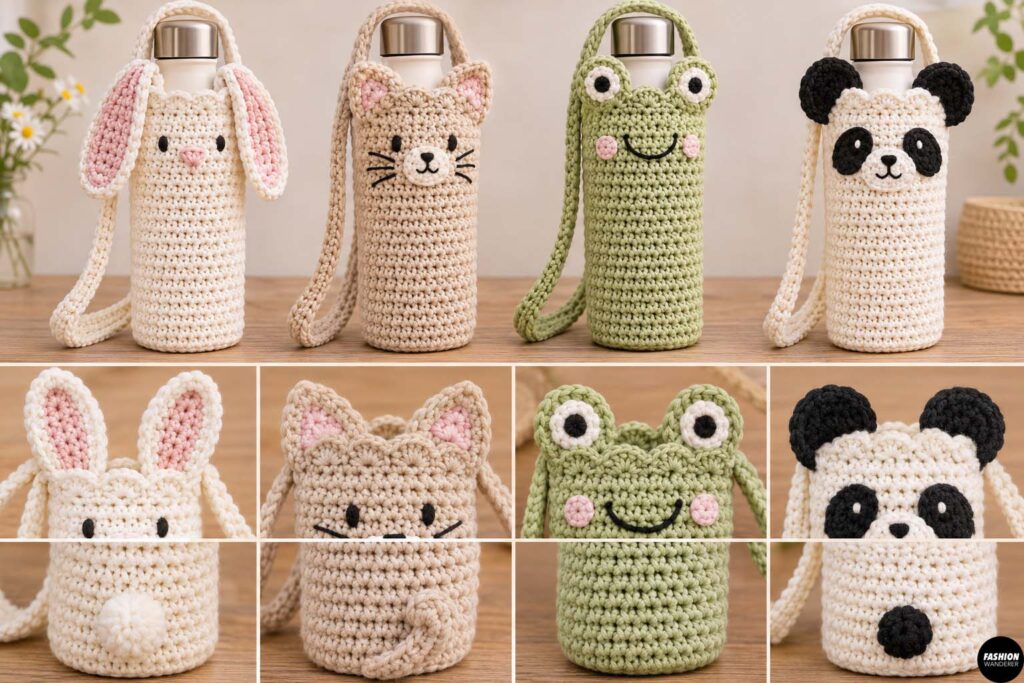
This is where you can personalize the design.
For a bunny bottle bag, crochet longer ears and add a small pink nose.
For a cat bottle bag, make triangular ears and embroider whiskers.
For a frog bottle bag, crochet two raised circles for eyes.
For a panda, use black ears and black eye patches.
You can even add a tiny tail to the back.
Step 9: Add an Optional Fabric Lining
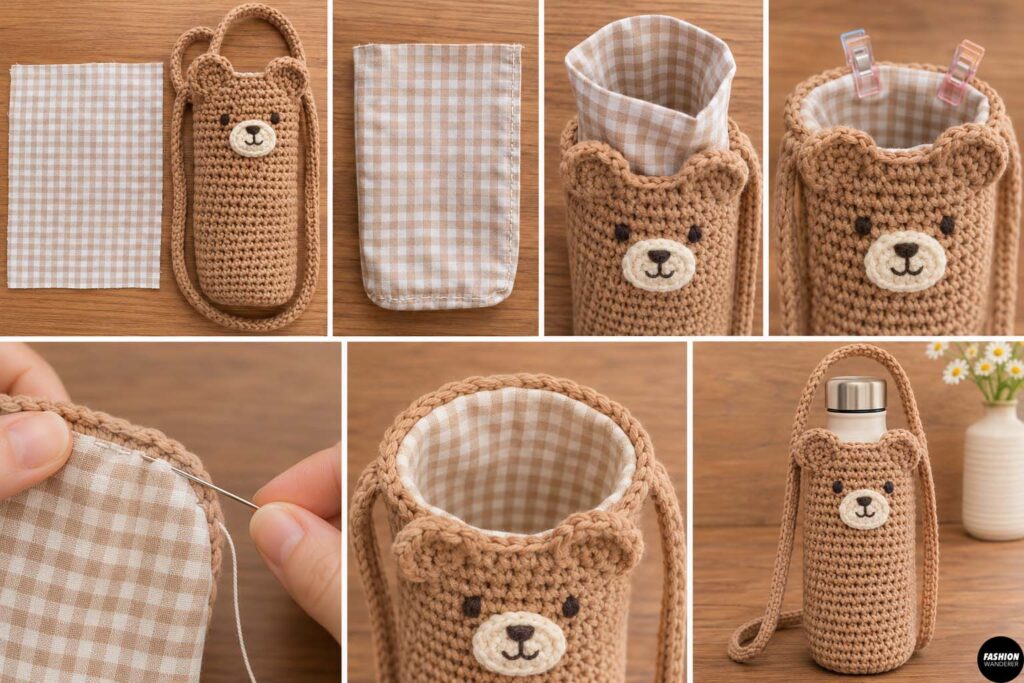
A lining is not required, but it helps prevent the crochet from stretching.
Cut a rectangle of lightweight cotton slightly larger than the bottle bag.
Sew the side seam and bottom edge to create a simple fabric pouch.
Insert the lining inside the crochet bag.
Fold the top edge under approximately ½ inch.
Hand sew the lining around the inside opening.
Keep the stitches small so they are not visible from the outside.
Step 10: Finish and Shape the Bottle Bag
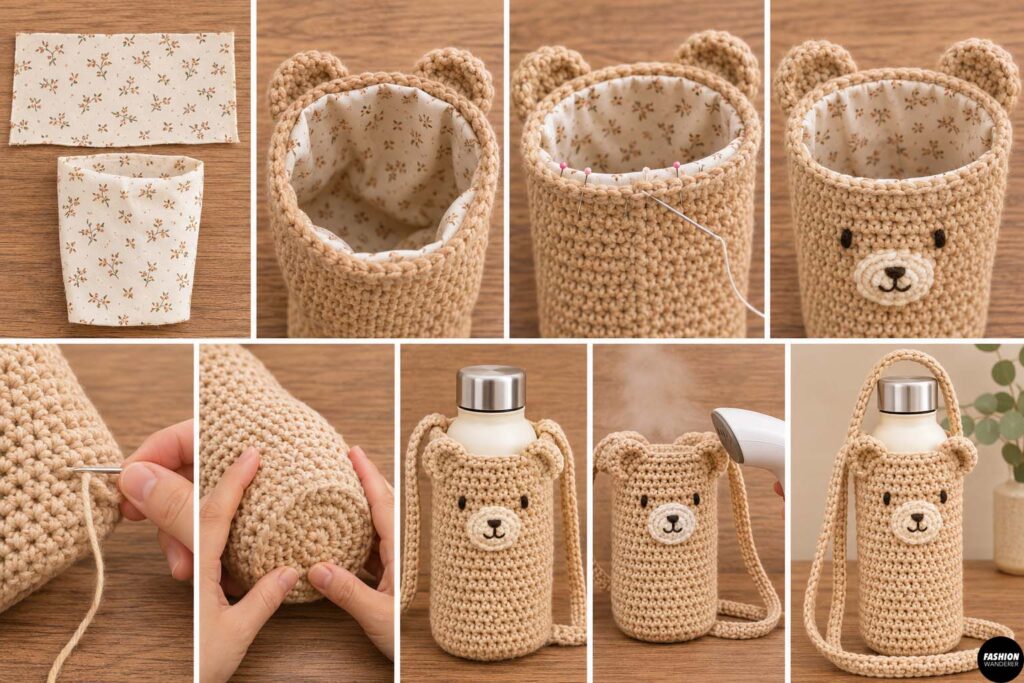
Weave in all loose yarn ends.
Gently shape the base with your hands.
Place the bottle inside and check that the strap attachment points feel secure.
If the bag is slightly stretched from handling, lightly steam block it or reshape it by hand.
Avoid applying direct heat to acrylic yarn.
Cute Animal Bottle Bag Ideas
Once you finish the basic pattern, try creating a whole collection.
Popular versions include bear, bunny, panda, frog, cat, puppy, fox, koala, and duck bottle bags.
Changing just the ears, colors, and facial features can completely transform the same basic crochet pattern.
Final Thoughts
This DIY animal-themed crochet bottle bag is a great project for beginners who want to make something practical, cute, and easy to customize.
The simple round base, straight crochet body, and basic shoulder strap make the construction approachable, while the animal details give the project personality.
Make one to match your favorite reusable bottle, create matching versions for kids, or turn them into handmade gifts.
Once you master the basic bottle bag shape, you can easily experiment with different animals, colors, yarn textures, and accessories to create your own collection of adorable crochet bottle holders.