
Do you have a drawer full of soft cotton tees you no longer wear? Instead of tossing them, turn them into adorable, custom-fit dog clothes!
This DIY dog clothes tutorial shows you how to upcycle old shirts into cozy tees, bandanas, and sweaters for your furry friend. Not only is this project budget-friendly, it’s an eco-friendly way to repurpose fabric and give your pup a fashion upgrade. Let’s dive in!
Why Make DIY Dog Clothes?
- Eco-friendly & Sustainable: Reduce textile waste by transforming old shirts into pet wear.
- Cost-effective: Skip boutique prices—most shirts cost $0!
- Custom Fit: Tailor to your dog’s exact measurements for ultimate comfort.
- Unique Style: Mix and match colors, prints, and embellishments.
What You’ll Need
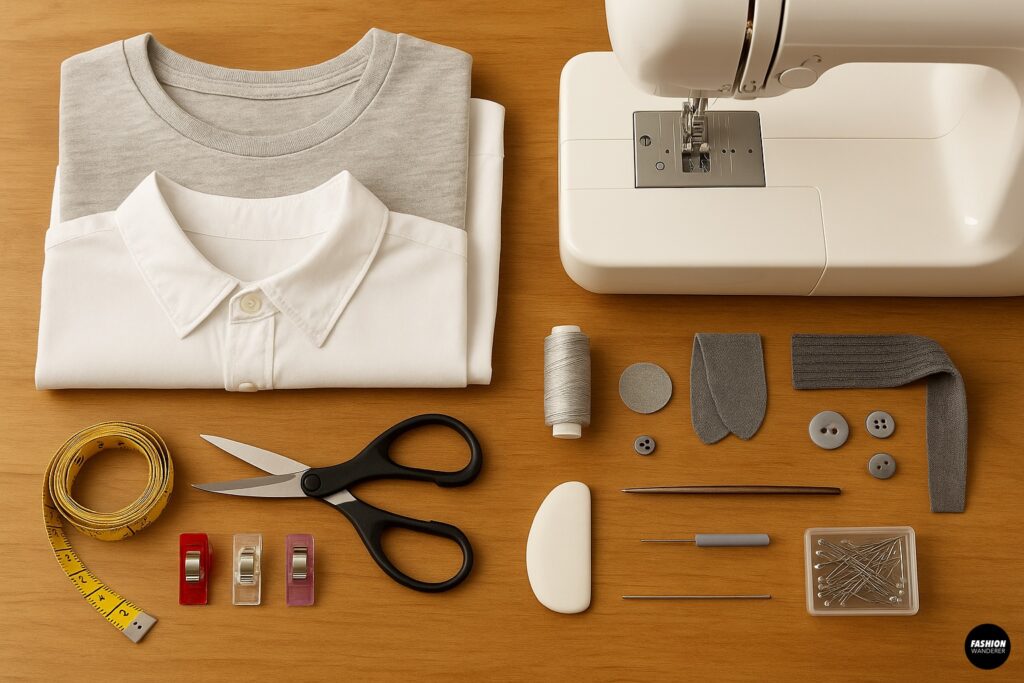
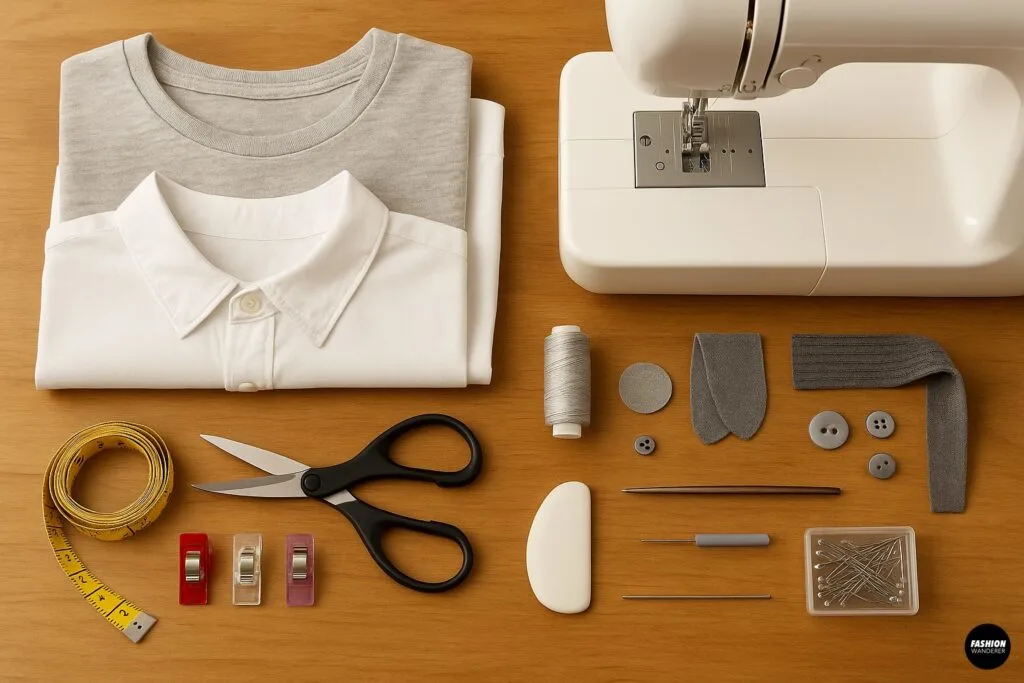
Gather these simple materials before you start:
- Old T-shirts or button-ups (cotton blends work best)
- Fabric scissors
- Sewing machine (or hand-sewing needles)
- Thread (matching or contrasting)
- Measuring tape
- Pins or fabric clips
- Fabric chalk or pencil
- Optional: Rib knit scraps (for cuffs), trim, patches, buttons
How to Make Dog Clothes from Old Shirts
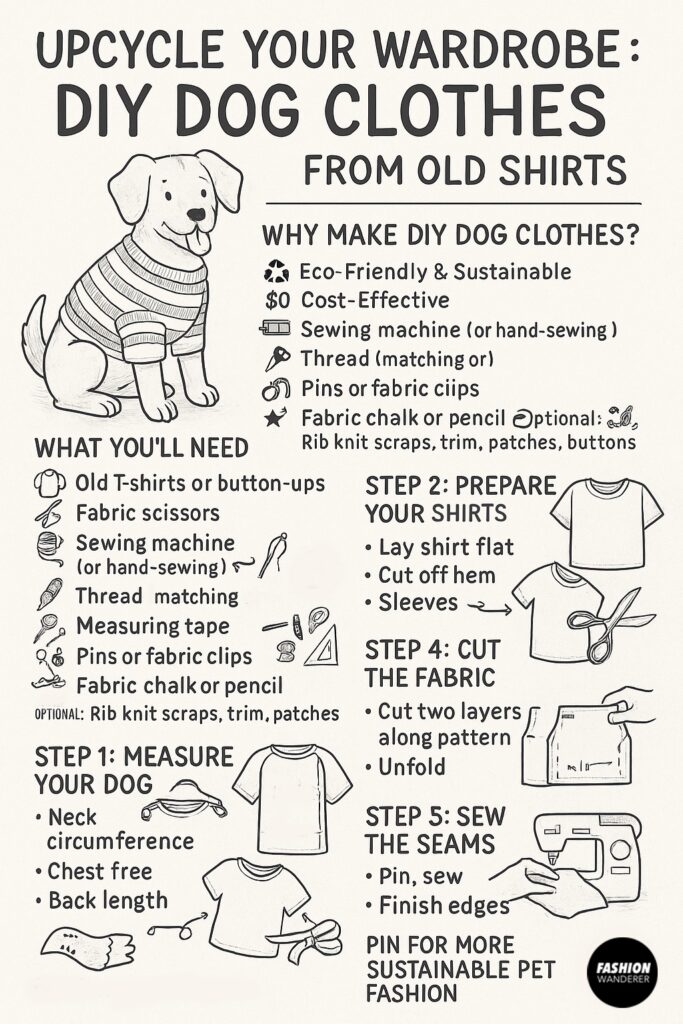
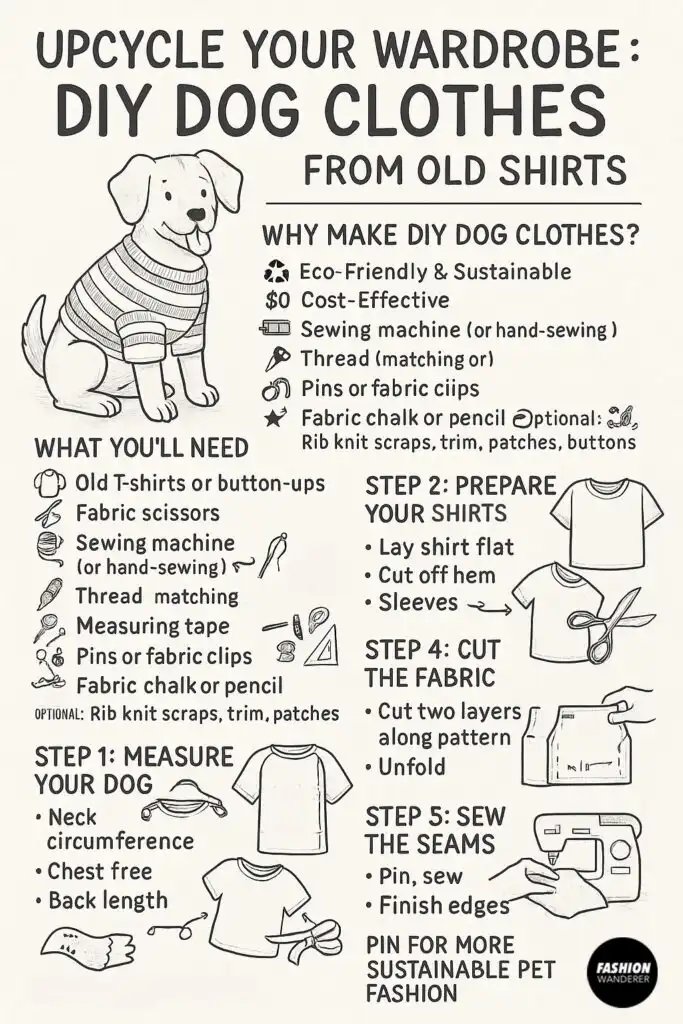
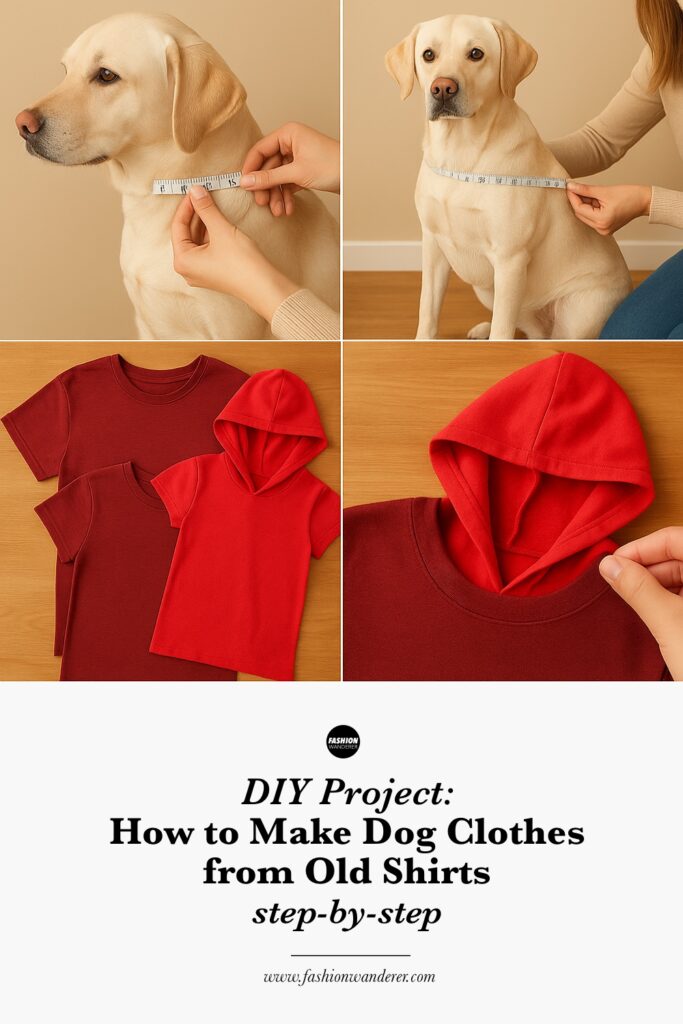
Step 1: Measure Your Dog
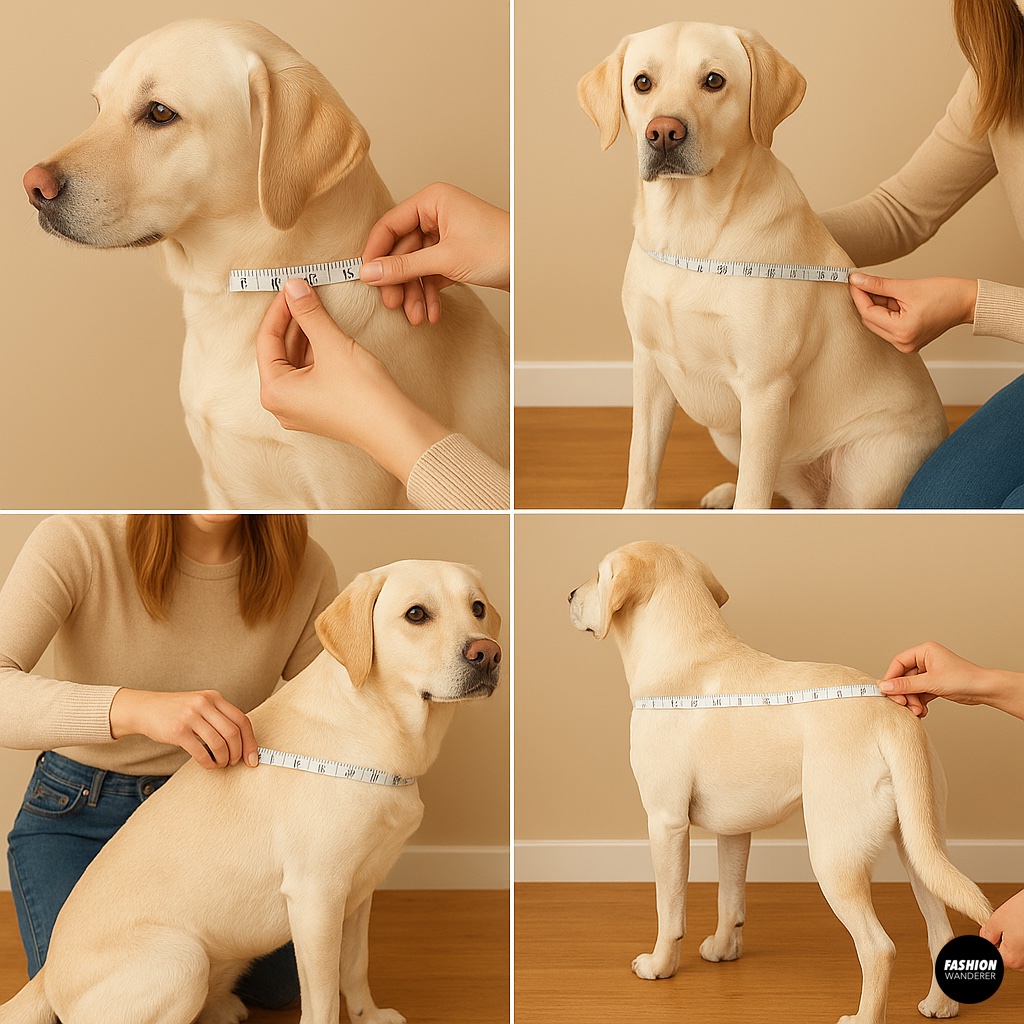

- Neck circumference: Wrap the tape around the base of the neck.
- Chest girth: Measure around the widest part of the ribcage, just behind the front legs.
- Back length: From the base of the neck (where the collar sits) to the start of the tail.
Tip: Allow 1–2 inches extra for ease of movement and seam allowances.
Step 2: Prepare the Shirt
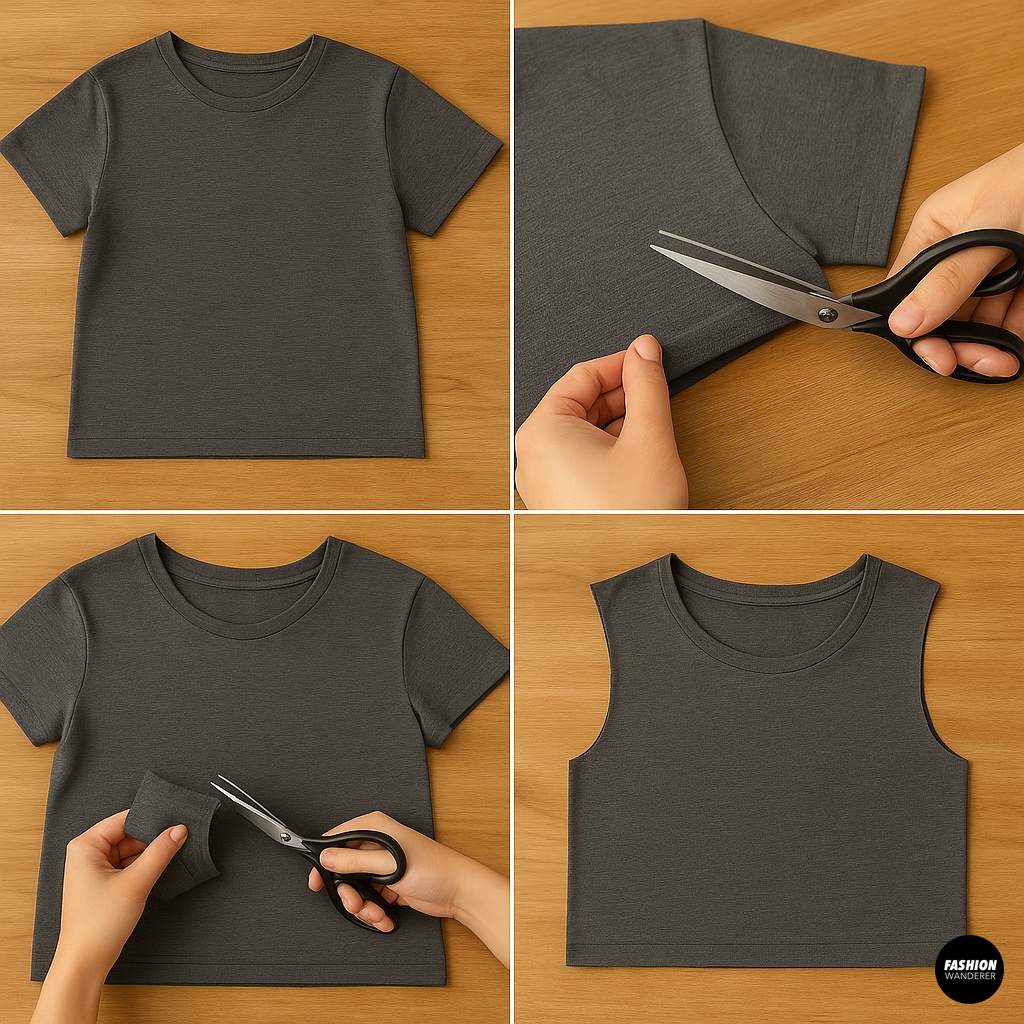
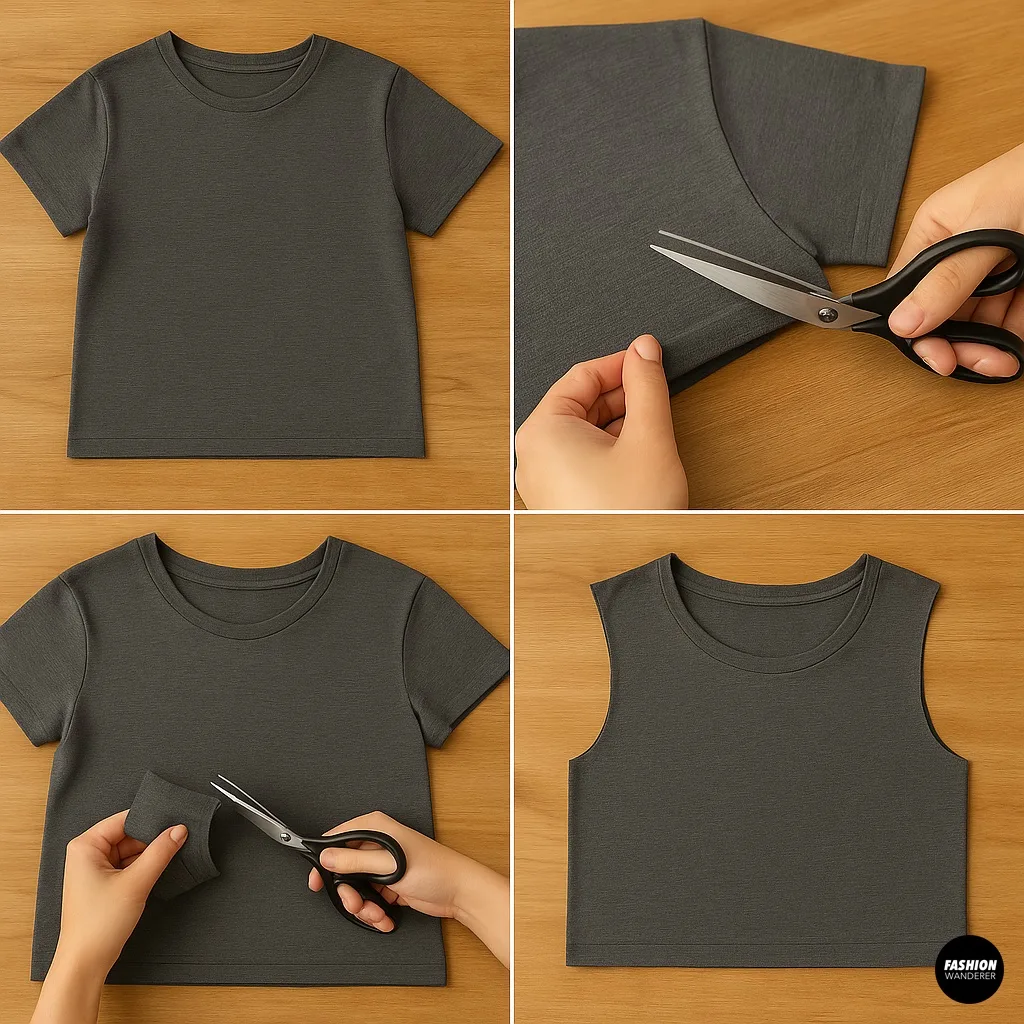
- Lay the shirt flat on a table, front side up.
- Cut off the hem at the bottom if it’s too tight around your dog’s chest.
- Remove sleeves (for simple tee style) by cutting along the seam line. For a sleeveless vest, cut deeper to create armholes.
Step 3: Create Your Pattern
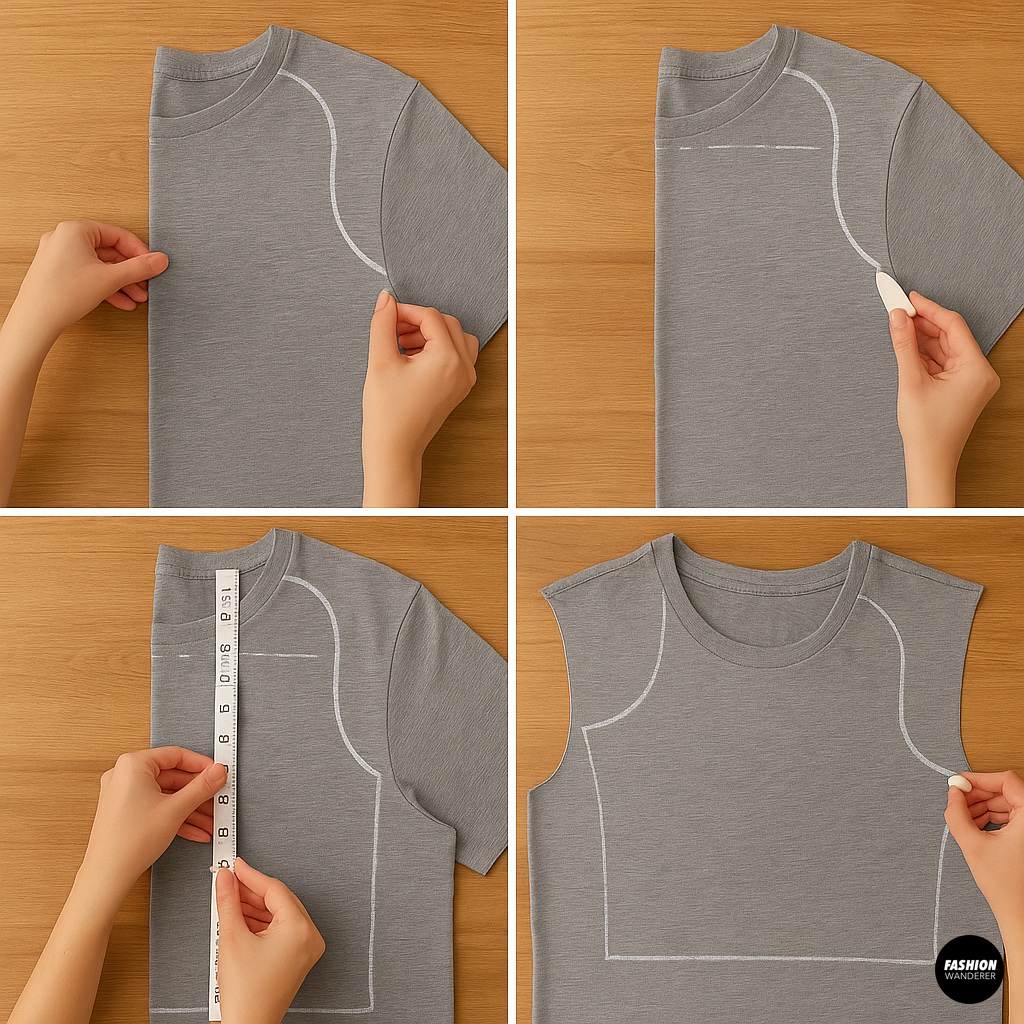
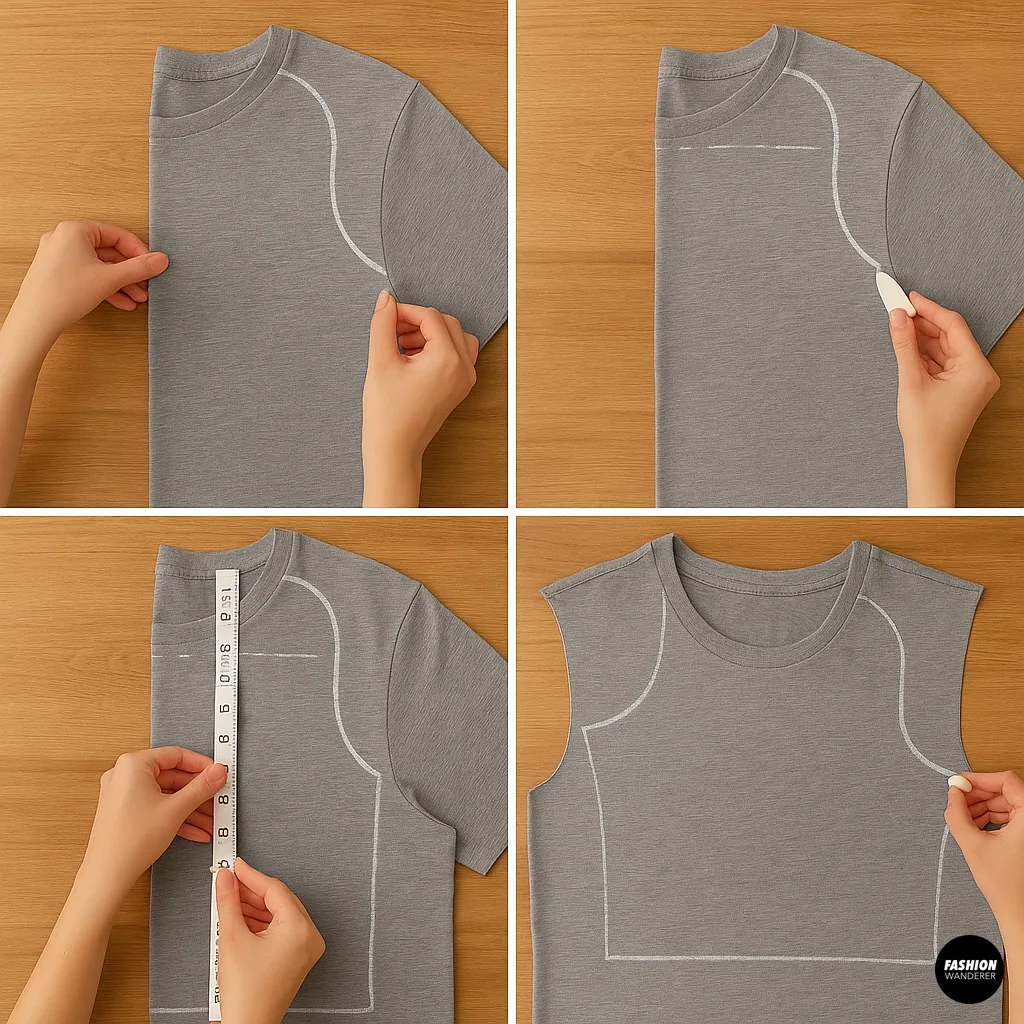
- Fold the shirt in half lengthwise.
- Place your dog measurements:
- Mark the neckline: Use the neck measurement + seam allowance to draw a half-oval at the top edge.
- Mark the chest width: Half of the chest girth + seam allowance, just below the neckline.
- Mark the back length: Measure down from the collar seam and mark the endpoint.
- Connect the marks with smooth, slightly curved lines to form the shoulders and side seams.
Pro tip: Use a gently curved ruler or freehand a soft curve—sharp angles can dig into your dog’s skin.
Step 4: Cut the Fabric
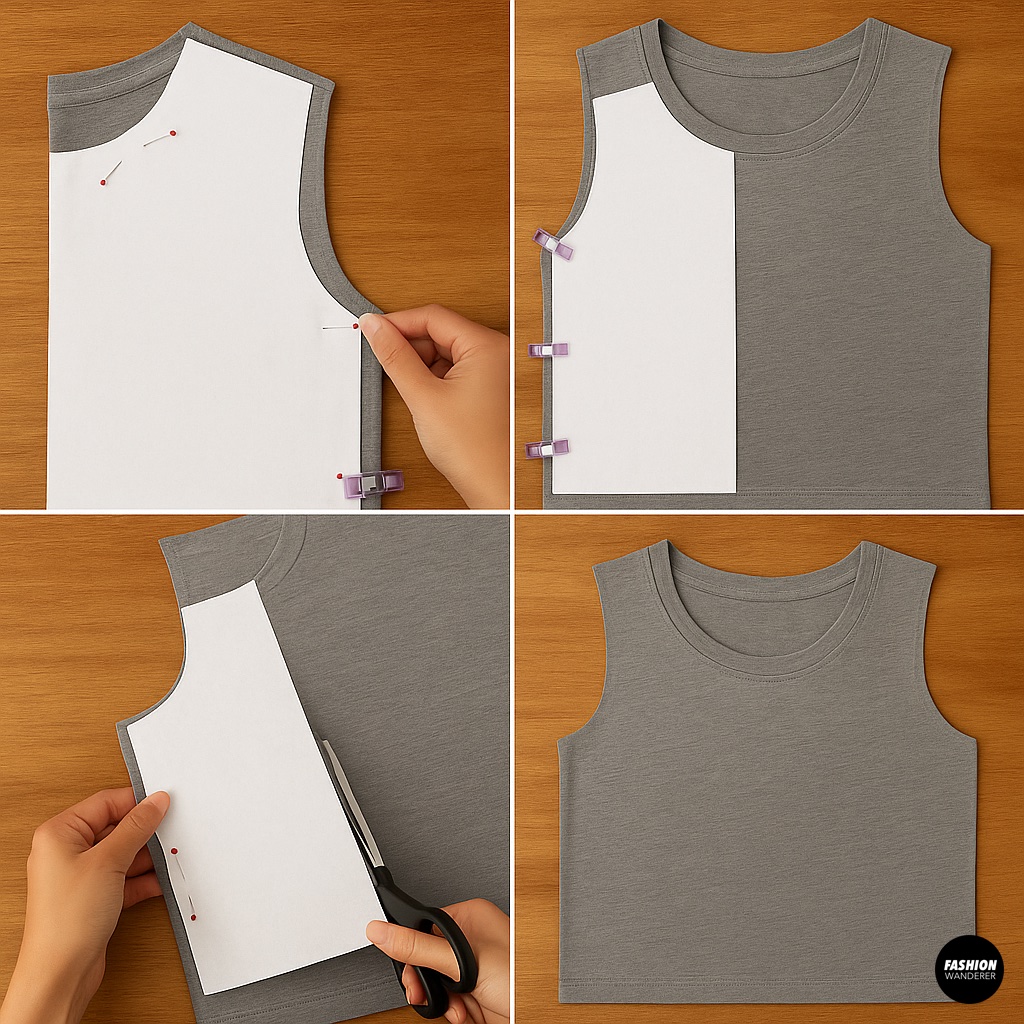

- Pin your pattern lines on the folded shirt.
- Cut along the lines, through both layers to create a mirror-image front and back.
- Unfold: You should now have one piece with a neck hole and side seams.
Step 5: Sew the Seams
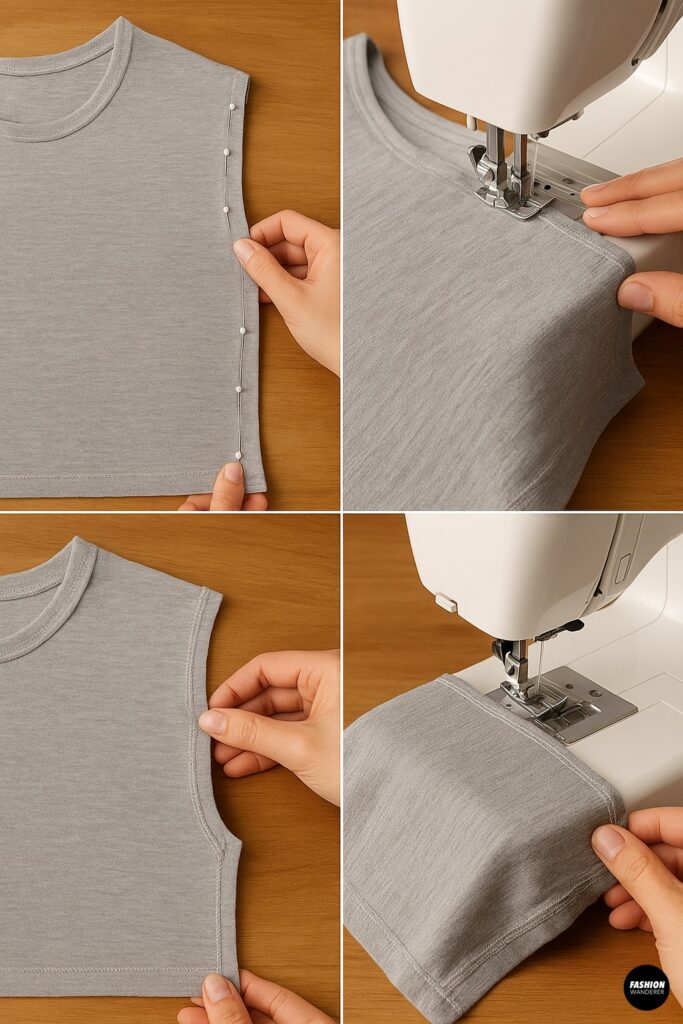
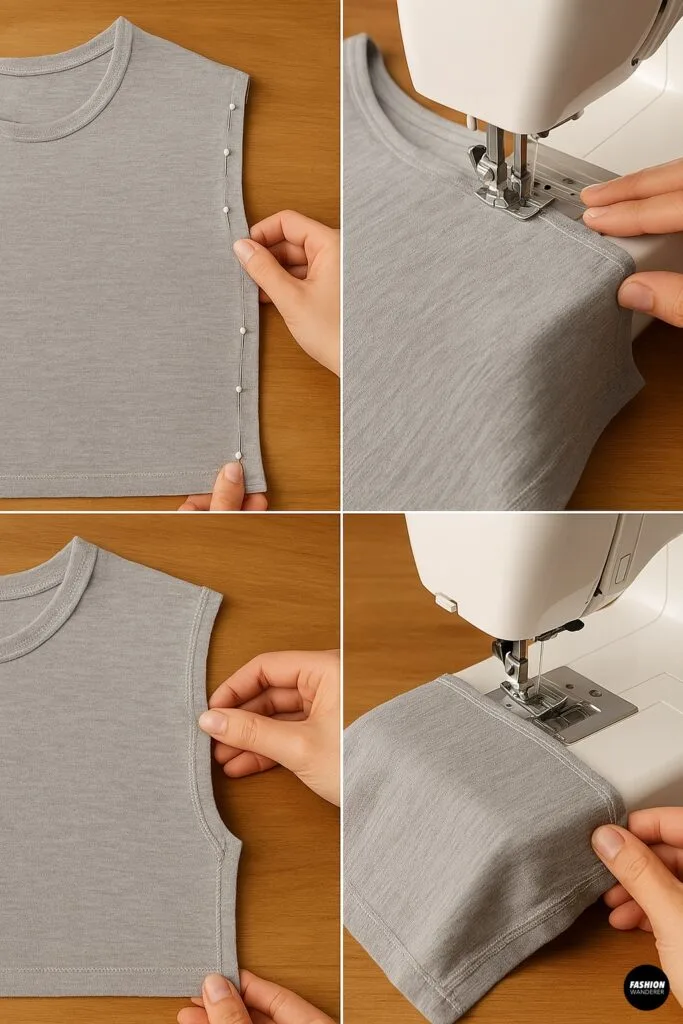
- Pin side seams: With right sides facing, pin the edges from the armhole down to the bottom hem.
- Sew using a stretch stitch or narrow zigzag (for knit fabrics) at ½” seam allowance.
- Finish raw edges with a serger or zigzag stitch to prevent fraying.
Alternative: Skip sewing by using no-sew fabric glue or fusible hem tape—ideal for quick fixes or beginners.
Step 6: Add Collar & Cuffs (Optional)

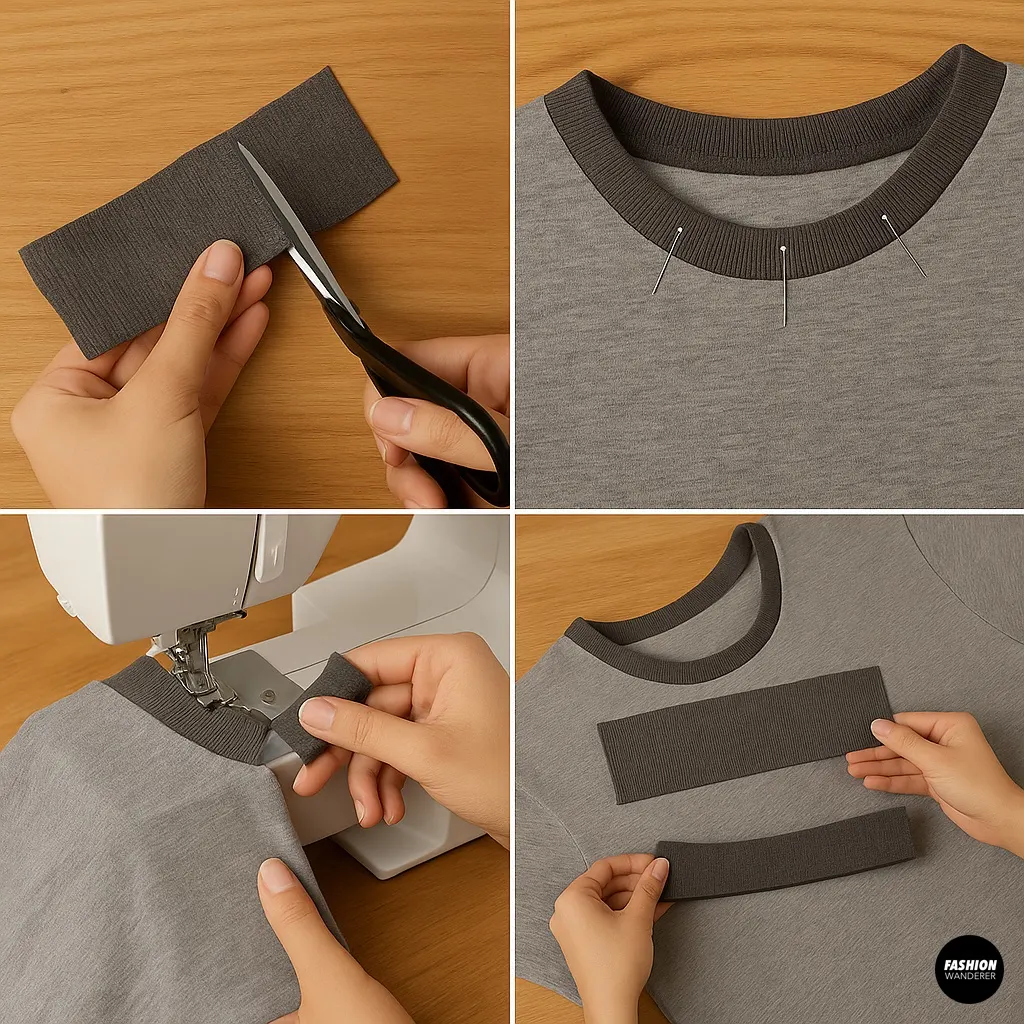
For a cozy neckline:
- Cut a strip of rib knit (width = neck circumference + 1″, height = 2–3”).
- Fold in half lengthwise, wrong sides together.
- Pin around the neckline, stretching slightly to fit.
- Sew with a stretch stitch.
For sleeves or leg cuffs:
- Cut strips to length (arm opening circumference + seam allowance).
- Repeat collar steps.
Step 7: Personalize Your Pup’s Gear
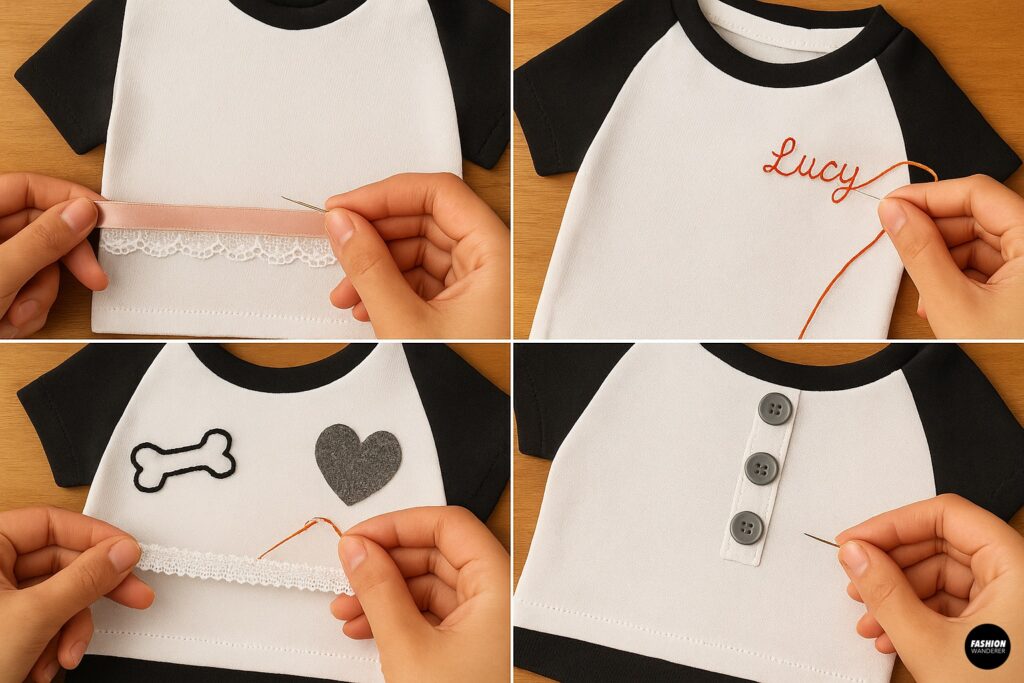

Give your DIY dog clothes some flair:
- Add trim: Sew on a ribbon or lace along the hem.
- Embroider initials: Use embroidery floss to stitch your dog’s name.
- Iron-on patches: Choose fun shapes—bones, hearts, stars.
- Button embellishments: Sew decorative buttons along the back.
Project Variations
1. No-Sew Bandana


- Cut a triangle out of the shirt’s body.
- Hem the two long sides with fabric glue or a quick stitch.
- Tie around your dog’s neck for instant style.
2. Cozy Hooded Vest
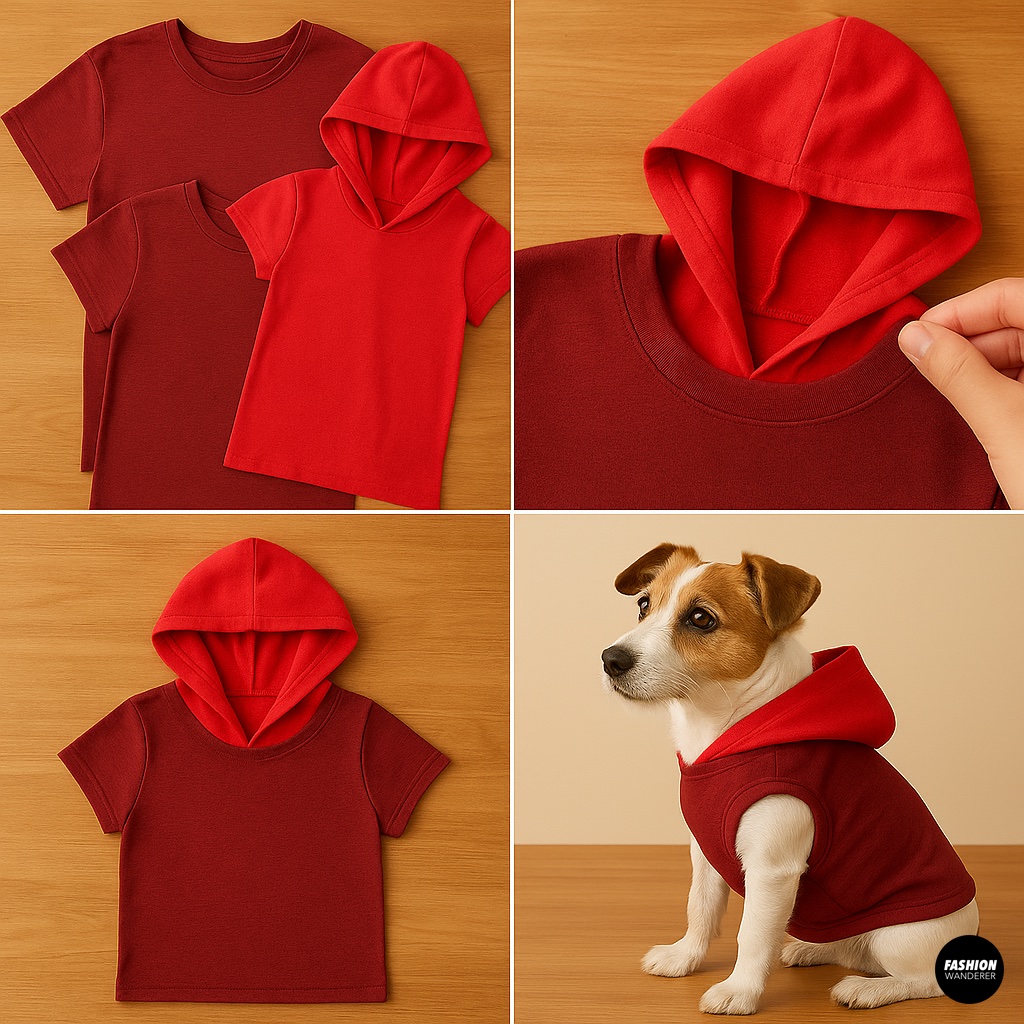

- Use the shirt’s hood or cut a hood from another shirt.
- Attach it at the neckline seam before finishing.
- Perfect for chilly walks!
3. Waterproof Dog Raincoat

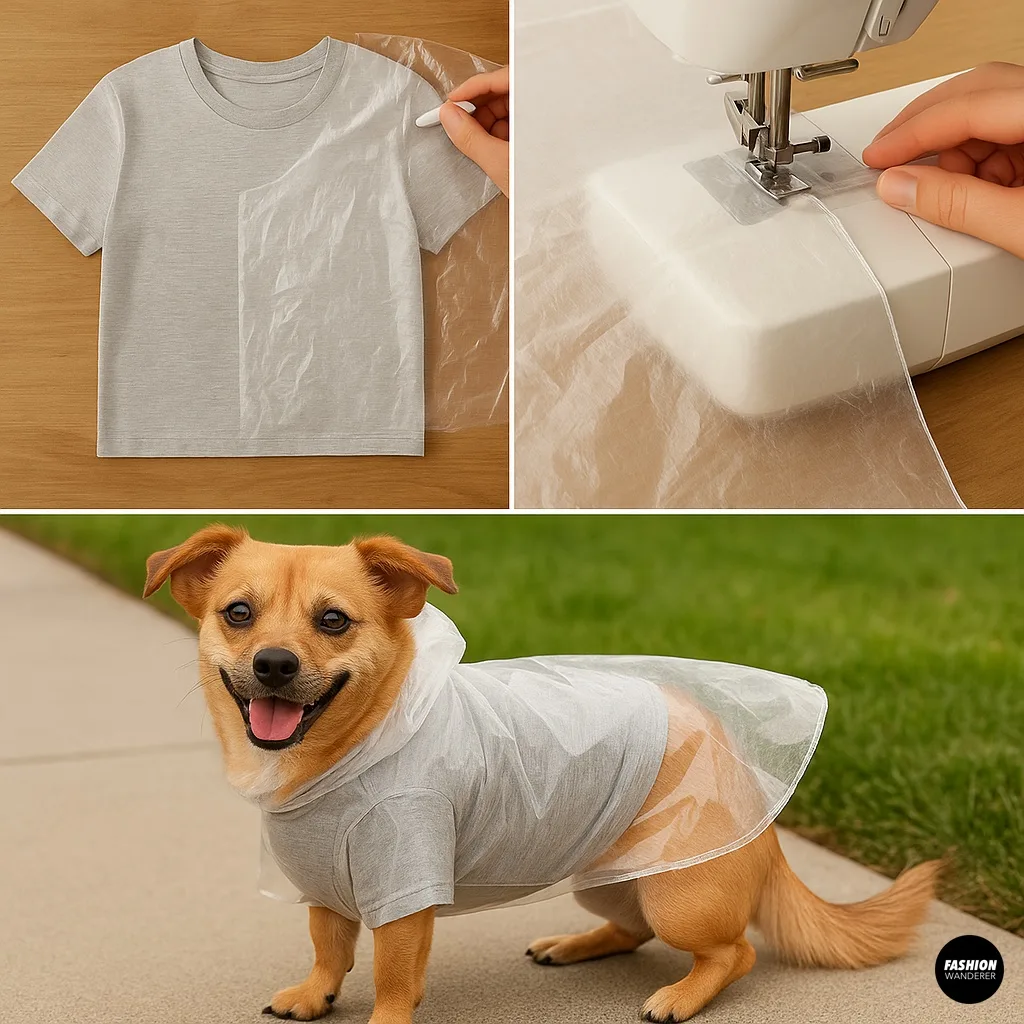
- Layer a thin plastic rain poncho under the shirt.
- Sew or glue at key seams for a water-resistant layer.
Care & Maintenance
- Wash on gentle cycle, cold water.
- Air-dry flat to maintain shape.
- Inspect seams regularly—reinforce if stitching loosens.
Benefits of Upcycling for Pet Fashion
- Environmental Impact: Diverts textiles from landfills.
- Economic Savings: A $0 project compared to $20+ retail dog tees.
- Creative Expression: Mix and match fabrics, prints, and textures.
Conclusion

Upcycling old shirts into DIY dog clothes is a fun, eco-friendly craft that keeps your pet warm and stylish without breaking the bank. With basic sewing skills and a few simple tools, you can create custom tees, bandanas, hoodies, and more—perfect for any season.
So, next time you clean out your closet, grab those retired tees and give them a second life as a fabulous fashion statement for your four-legged best friend!
Don’t forget: Pin this tutorial on Pinterest and subscribe to our newsletter for more sustainable pet fashion projects every month!
Trendy, Affordable Sewing Patterns for All Sizes


Tie Shoulder Jumpsuit Pattern


Palazzo Pants Sewing Pattern


Pocket Overall Romper Pattern


Wrap Maxi Skirt Sewing Pattern


Tie Back Top Sewing Pattern