
Whether you’re sewing a fitted tee, upcycling old shirts, or crafting cozy home goods, choosing the right T-shirt fabric is the foundation of every successful DIY project.
This T-Shirt Fabric 101 guide will walk you through the best types of fabrics for DIY, their pros and cons, and detailed, step-by-step tutorials to get you started. Let’s dive into the world of knit fabrics and make your next project a stitch above the rest!
Why Fabric Choice Matters for DIY
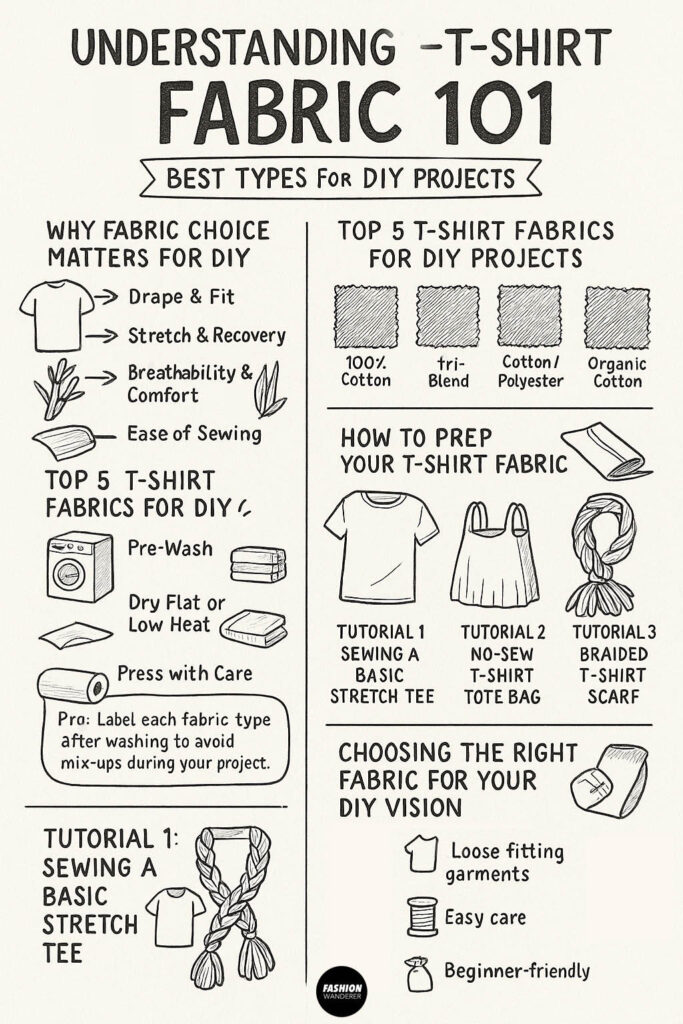
- Drape & Fit: Lightweight jerseys hug the body; heavier knits hold shape for structured pieces.
- Stretch & Recovery: Cotton/spandex blends bounce back; 100% cotton can sag over time.
- Breathability & Comfort: Natural fibers like organic cotton and bamboo feel soft and wick moisture.
- Ease of Sewing: Some knits require special machine needles and stitches; others are beginner-friendly.
Top 5 T-Shirt Fabrics for DIY Projects
| Fabric Type | Composition | Stretch | Best For |
| 100% Cotton Jersey | 100% Cotton | Low–Medium | Casual tees, basic tank tops |
| Cotton/Spandex (4-Way) | 95% Cotton, 5% Spandex | High | Fitted tees, activewear, athleisure |
| Tri-Blend Jersey | Cotton/Poly/Viscose | Medium | Soft tees, drapey tops, lounge wear |
| Bamboo/Cotton Blend | Bamboo Rayon/Cotton | Medium | Eco-friendly tees, baby clothes, scarves |
| Cotton/Polyester Blend | 60% Cotton, 40% Poly | Medium | Durable tees, graphic tees, accessories |
How to Prep Your T-Shirt Fabric
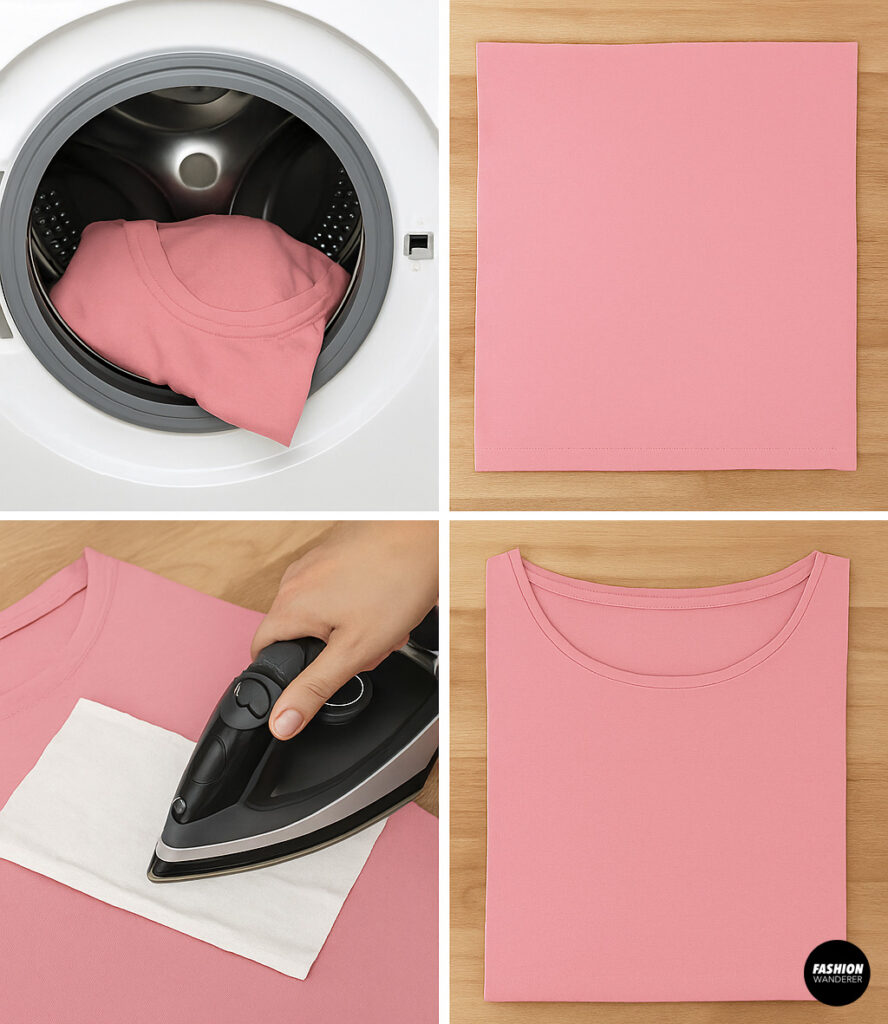

Before you cut or sew, proper preparation prevents shrinkage and distortion:
- Pre-Wash
- Machine-wash on gentle, cold cycle.
- Skip fabric softener to maintain stretch.
- Dry Flat or Low Heat
- Air-dry on a flat surface to preserve shape.
- If using dryer, tumble on low.
- Press with Care
- Use a steam iron set to “knit” or “synthetic.”
- Place a pressing cloth between iron and fabric to avoid shine.
Pro Tip: Label each fabric type after washing to avoid mix-ups during your project.
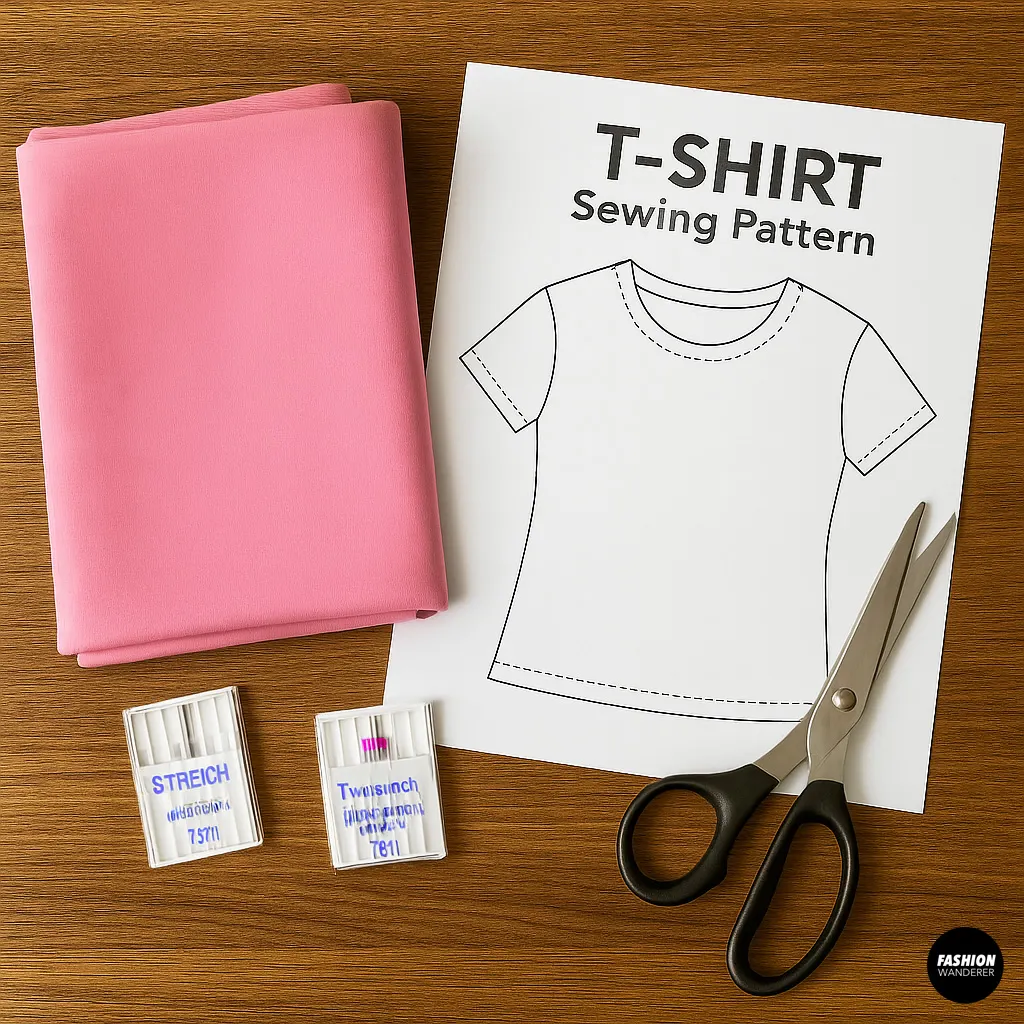
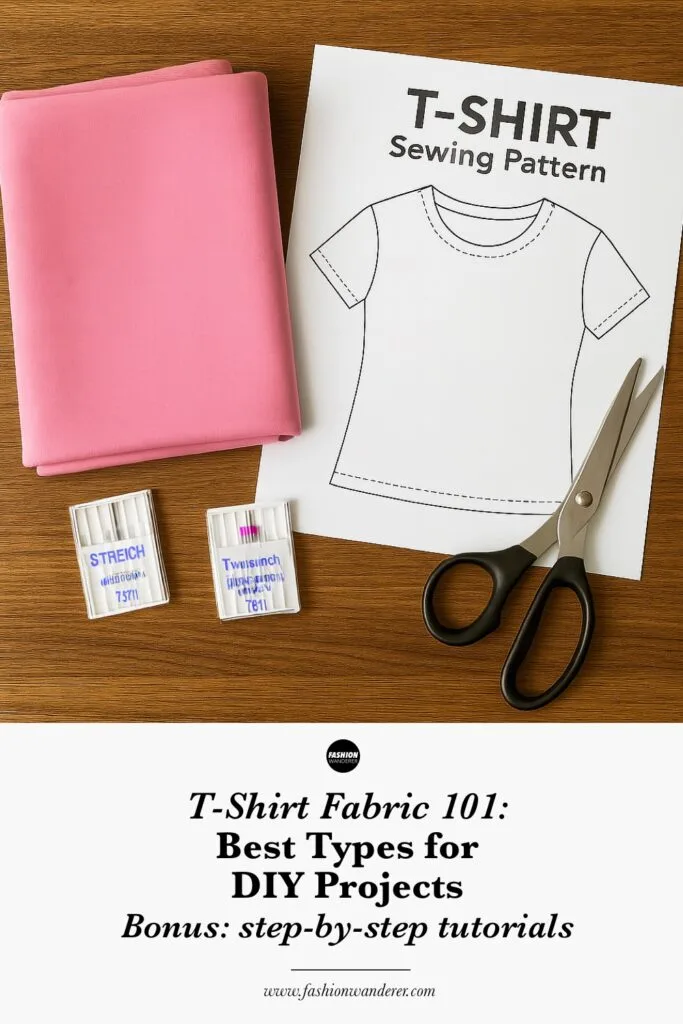
Step-by-Step Tutorial 1: Sewing a Basic Stretch Tee
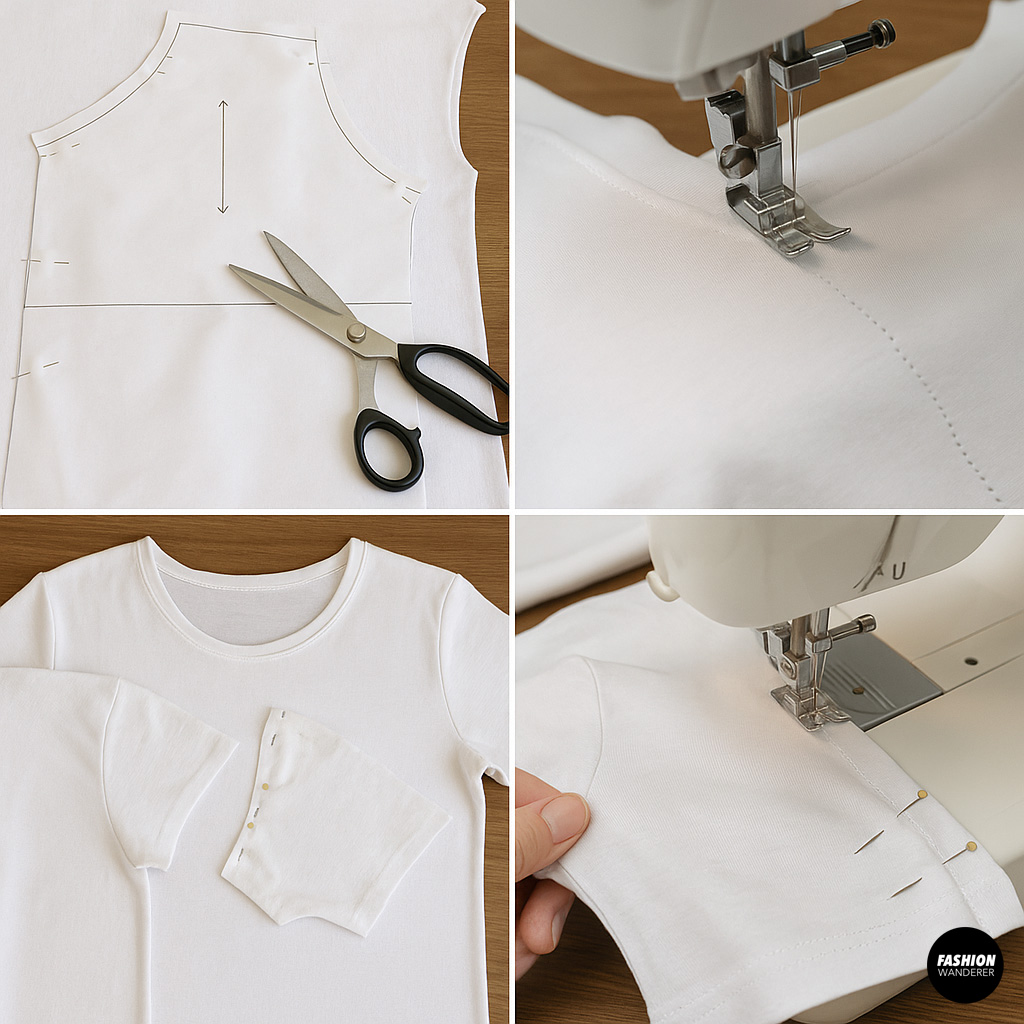

This project helps you learn to work with knits and stretch stitches.
You’ll Need:
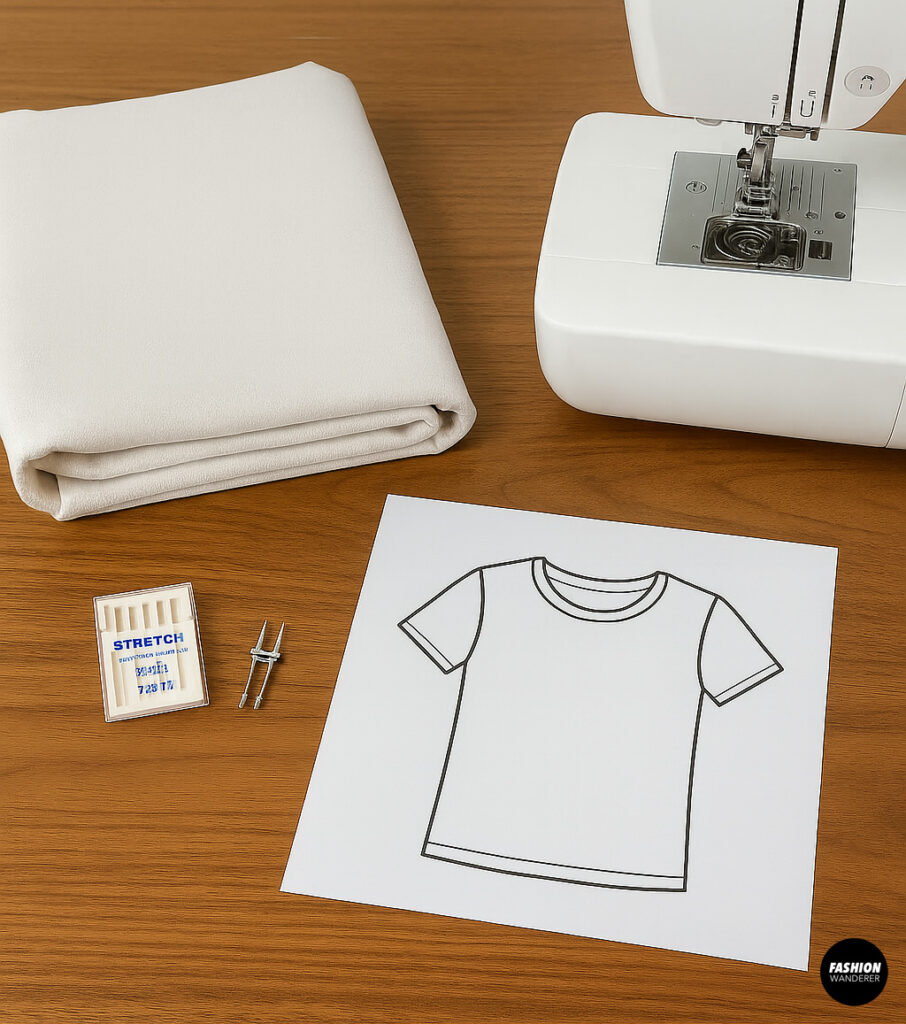

- 1 yard of Cotton/Spandex Jersey
- Ballpoint stretch sewing machine needle (size 75/11)
- Stretch or narrow zigzag stitch on your machine
- T-shirt sewing pattern (store-bought or printable PDF)
- Stretch twin-needle (optional for hems)
Steps:
- Cut Pattern Pieces
- Lay fabric on a flat surface, right side up.
- Pin your pattern following the grainline (parallel to selvage).
- Cut front, back, sleeves, and neckband.
- Stay-Stitch Neckline
- Using a straight stitch at ¼” from edge, sew around the neckline to stabilize.
- Shoulder Seams
- With right sides together, pin shoulders.
- Sew with stretch stitch at ½” allowance.
- Attach Sleeves
- Align sleeve notch to shoulder seam.
- Pin and sew around armhole with stretch stitch.
- Side Seams
- Fold tee right sides together, match underarm and side edges.
- Pin and sew in one continuous seam from sleeve to hem.
- Hem & Finish
- Fold bottom edge up ½”, press and pin.
- Topstitch with a twin-needle or narrow zigzag.
- Repeat on sleeve hems.
Congratulations—your perfectly fitted stretch tee is ready!
Step-by-Step Tutorial 2: No-Sew T-Shirt Tote Bag
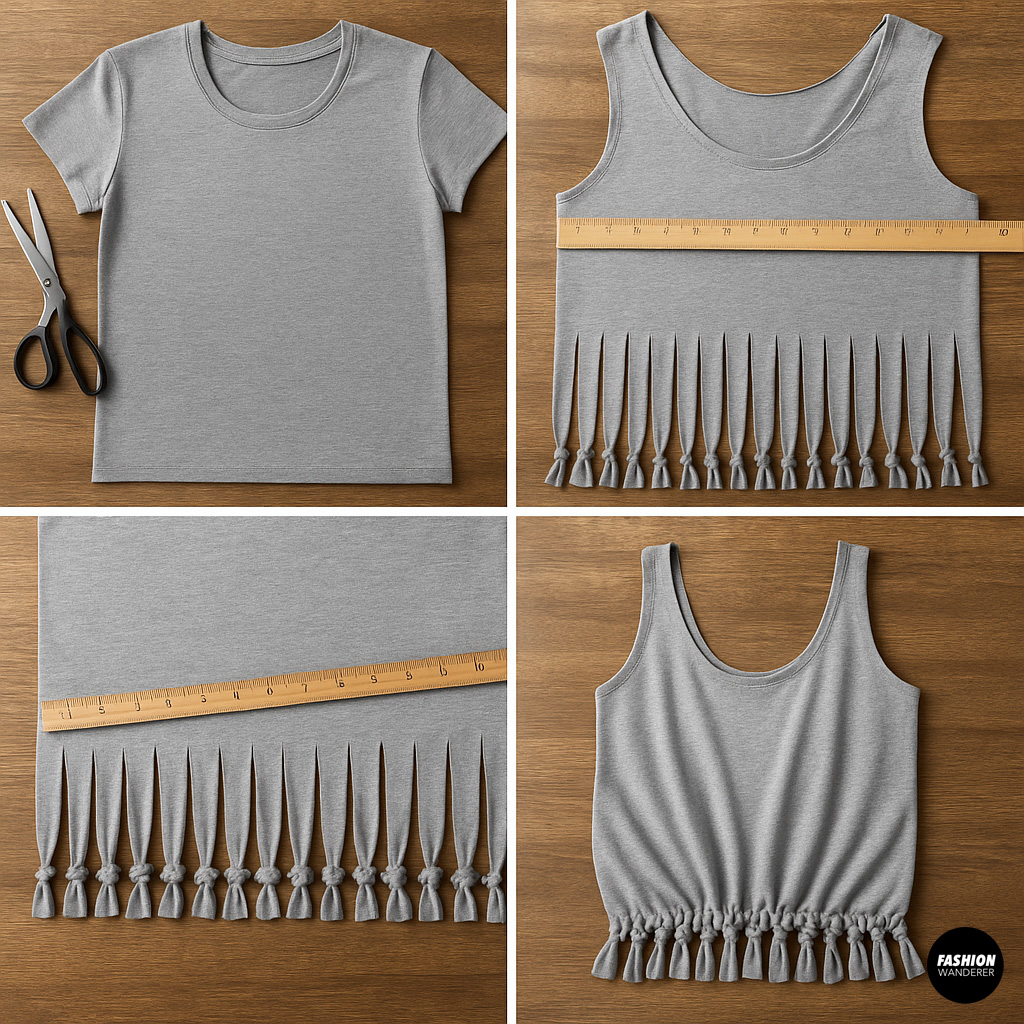
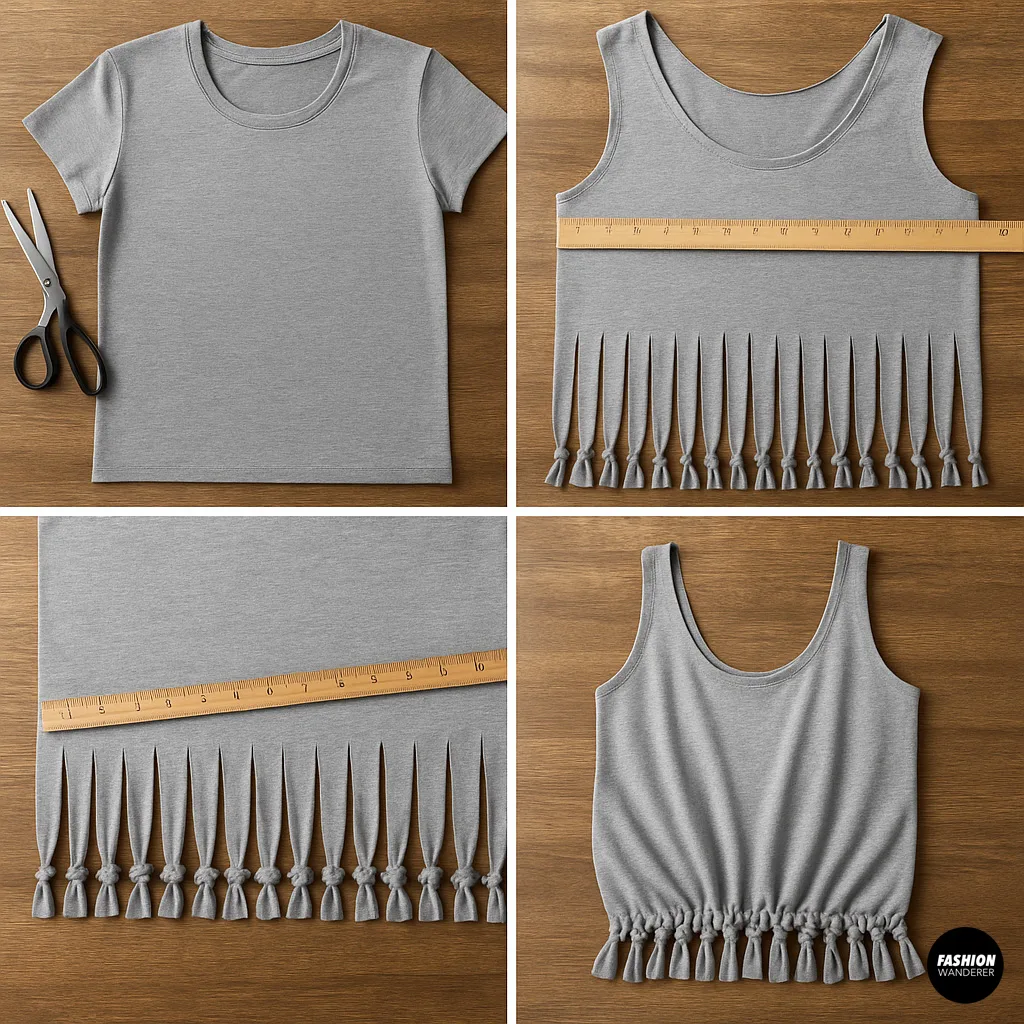
Transform a worn-out tee into a chic tote—no sewing required!
You’ll Need:

- Old 100% Cotton Jersey T-shirt
- Fabric scissors
- Ruler or measuring tape
- Chalk or fabric marker
Steps:
- Cut Off Sleeves & Neckline
- Lay shirt flat.
- Cut off sleeves along the seam.
- Cut a wider neckline (half-moon shape) for tote handles.
- Trim Bottom Fringes
- Measure 4″ up from hem.
- Cut slits 1″ apart across the width, stopping at the 4″ line.
- Knot the Fringe
- Tie each front-and-back pair of fringe strips together in a double knot.
- Continue across entire bottom edge.
- Turn Inside Out & Fill
- Flip the shirt inside out to hide knots.
- Turn right side out and your tote is ready to use!
This quick no-sew project yields a fun, reusable bag in under 30 minutes.
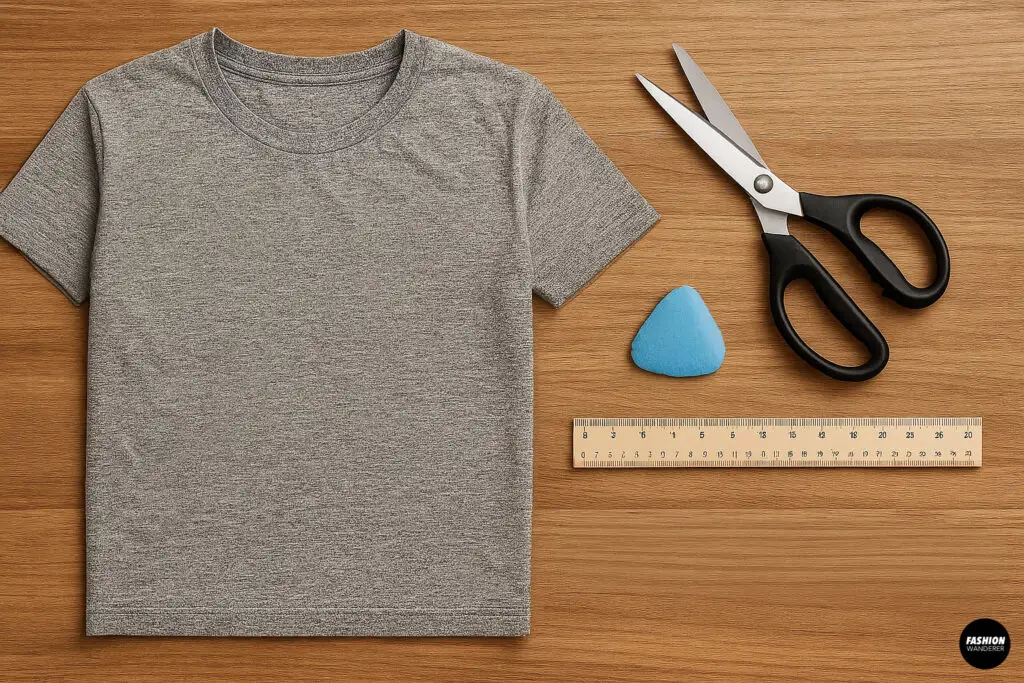
Step-by-Step Tutorial 3: Braided T-Shirt Scarf
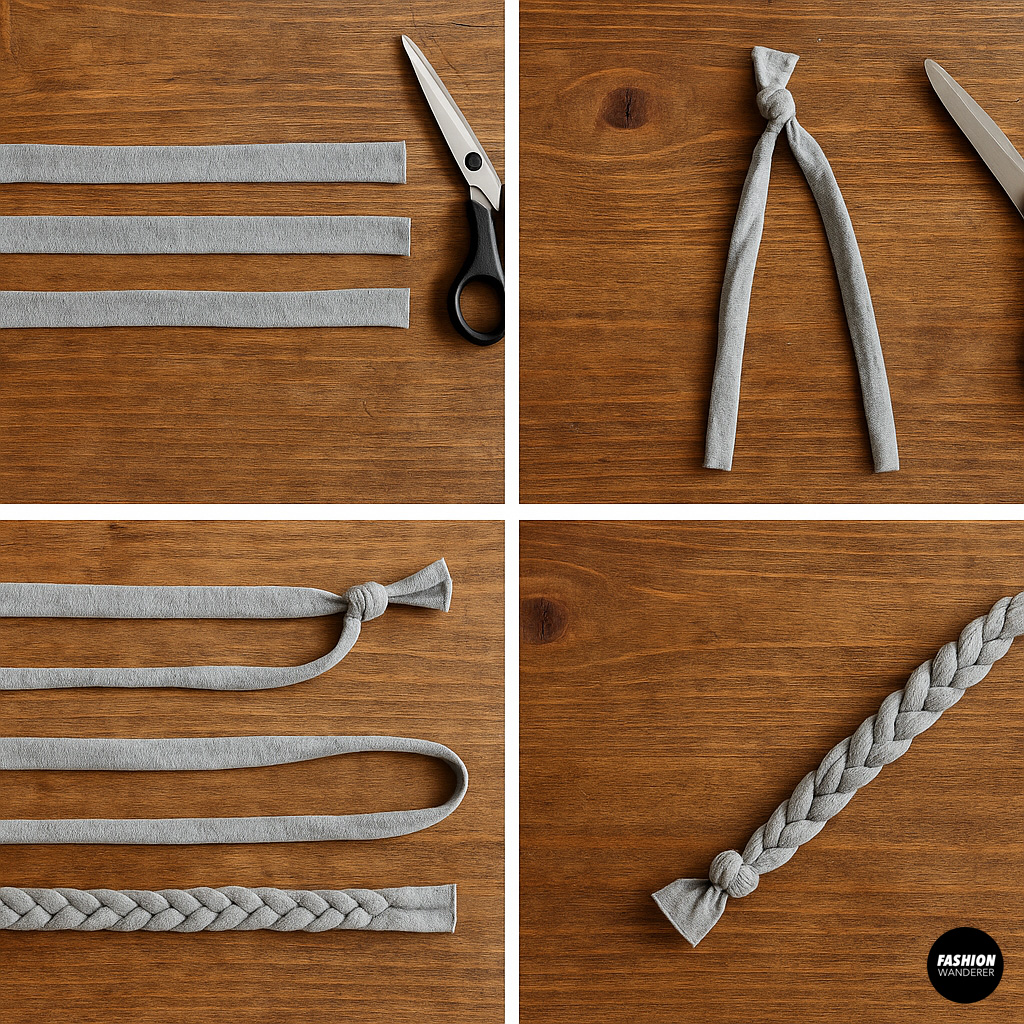
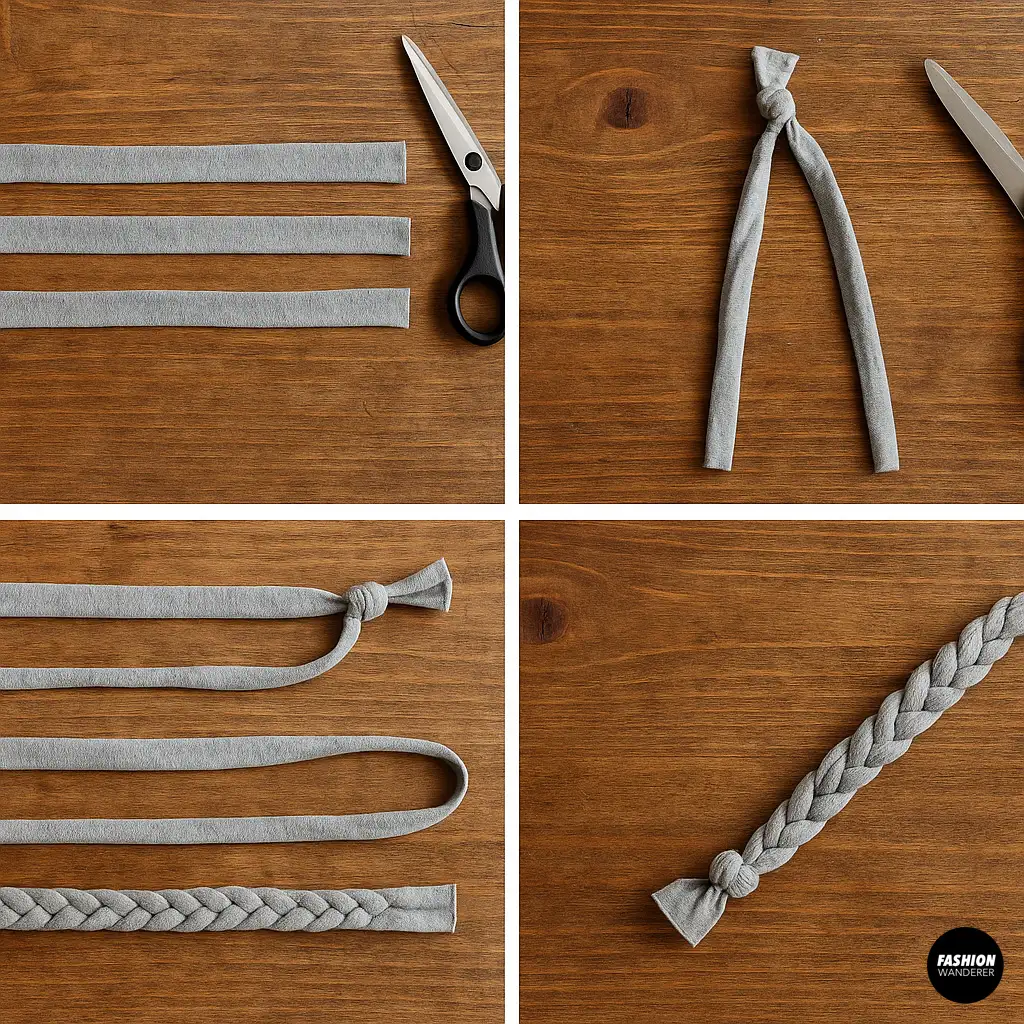
A stylish accessory made from scraps—perfect for tri-blend fabrics!
You’ll Need:
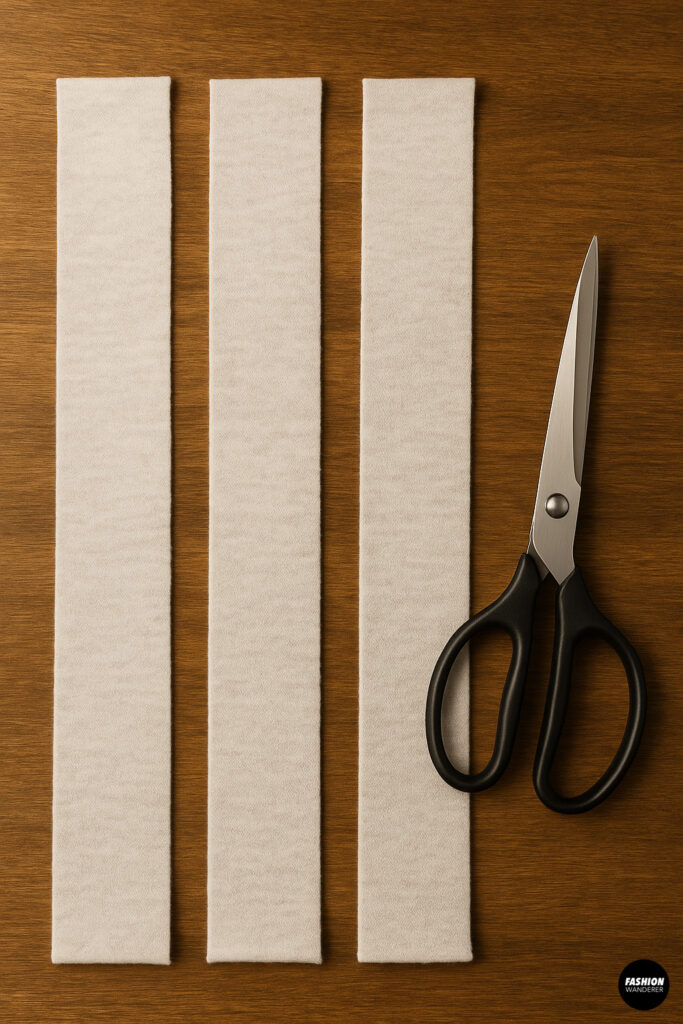

- Three 2″-wide strips of Tri-Blend Jersey (approx. 30″ each)
- Sharp fabric scissors
Steps:
- Prepare Strips
- Cut three strips from the shirt’s body or hem.
- Stretch each strip gently to curl edges inward.
- Tie Strips Together
- Knot one end of all three strips.
- Braid the Strips
- Braid tightly until you reach the other end.
- Finish with a Knot
- Tie a secure knot at the end of the braid.
- Tuck loose ends into the braid or trim close.
Slip this stretchy scarf over your head for an instant style boost!
Choosing the Right Fabric for Your DIY Vision

- Project Type:
- Close-fitting garments → Cotton/Spandex
- Flowy tops & drape → Tri-Blend or Bamboo blends
- Kids’ wear & towels → 100% Cotton jersey
- Skill Level:
- Beginner → Woven scraps, no-sew projects, cotton jerseys
- Intermediate → Stretch knits with zigzag/stretches stitches
- Advanced → Performance fabrics, multi-layered knit garments
- Care Requirements:
- Easy care → Polyester blends
- Eco-friendly → Organic cotton, bamboo rayon
- Durable → Cotton/Polyester blends
Conclusion

Armed with this T-Shirt Fabric 101 guide, you can confidently select the perfect knit for any DIY project—whether you’re sewing a fitted tee, crafting a no-sew tote, or braiding a cozy scarf. Experiment with 100% cotton, spandex blends, or tri-blends to discover your favorite feel and function.
Ready, set, create! Share your finished projects on social media with #FashionWandererOfficial and #TShirtFabric101 and inspire fellow makers to pick up their scissors and sewing machines.
Trendy, Affordable Sewing Patterns for All Sizes


Tie Shoulder Jumpsuit Pattern


Palazzo Pants Sewing Pattern


Pocket Overall Romper Pattern


Wrap Maxi Skirt Sewing Pattern


Tie Back Top Sewing Pattern