
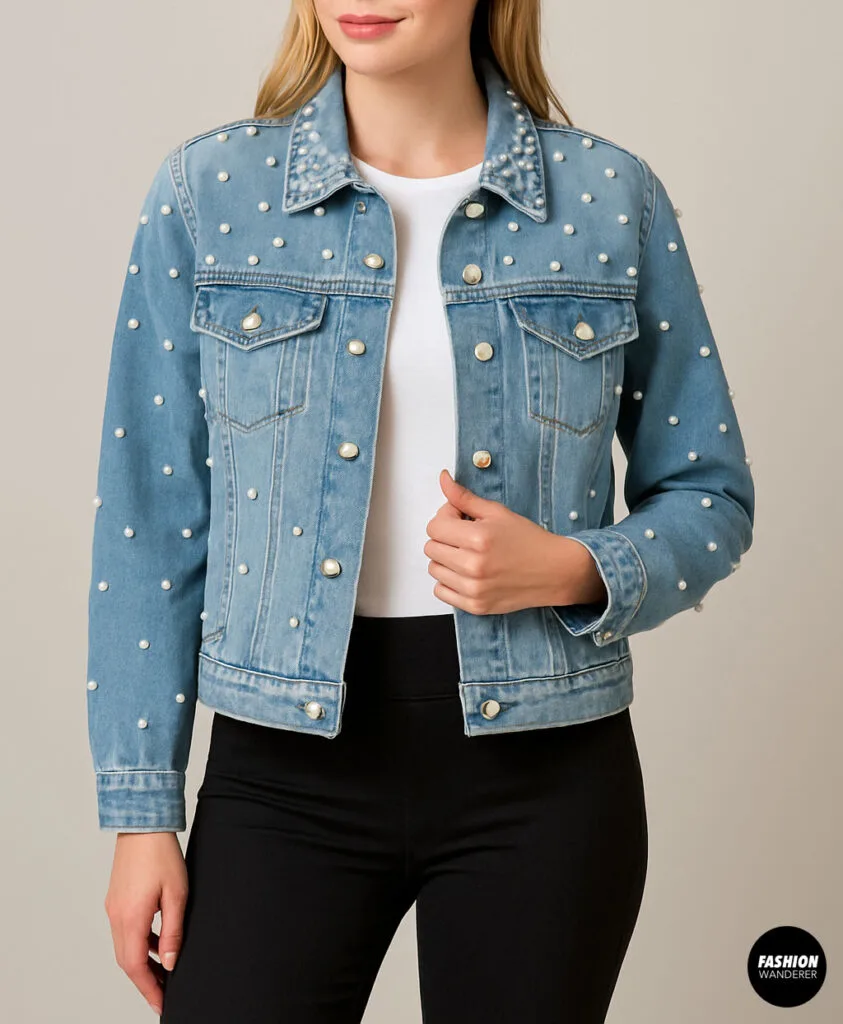
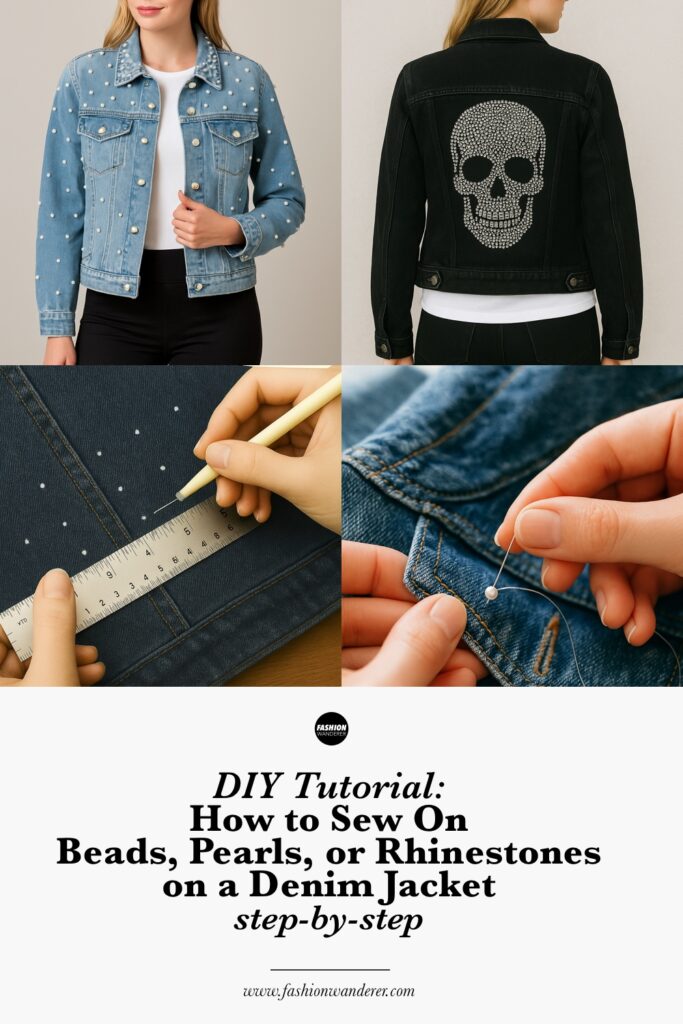
If you’re looking to elevate your basic denim jacket into a head-turning fashion statement, there’s nothing quite like hand-sewn embellishments. Beads, pearls, and rhinestones add sparkle, personality, and runway-worthy texture. Whether your vibe is glam rock, vintage chic, or girly glam, this DIY project can completely transform your jacket without needing a sewing machine.
In this tutorial, you’ll learn exactly how to hand-sew beads, pearls, and rhinestones onto denim using easy-to-follow steps, plus helpful tips to ensure your embellishments stay put and last through wear and wash.
Why Add Embellishments to a Denim Jacket?

Sewing on beads, pearls, and rhinestones is an easy and creative way to:
- Add a personal, luxurious touch to an old jacket
- Customize a store-bought piece for a one-of-a-kind look
- Highlight seams, collars, or back panels with shimmer
- Cover worn or stained areas with something fabulous
- Stay on trend with glam-core, Y2K, or vintage-inspired styles
You don’t need to be an expert sewist—just a bit of patience, a good needle, and a stylish vision.
Supplies You’ll Need
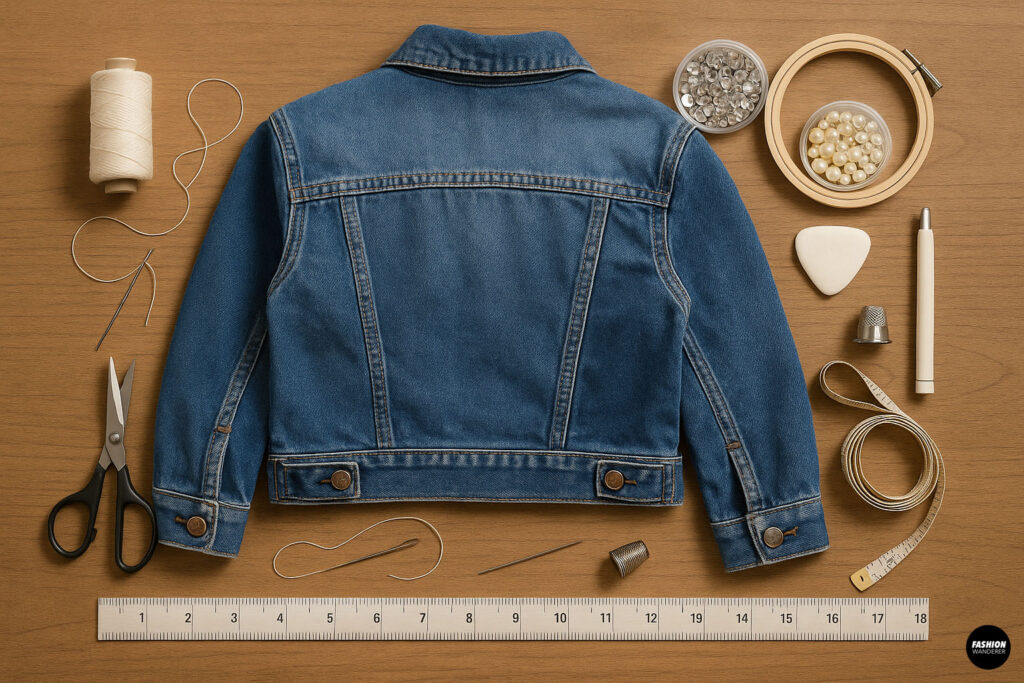
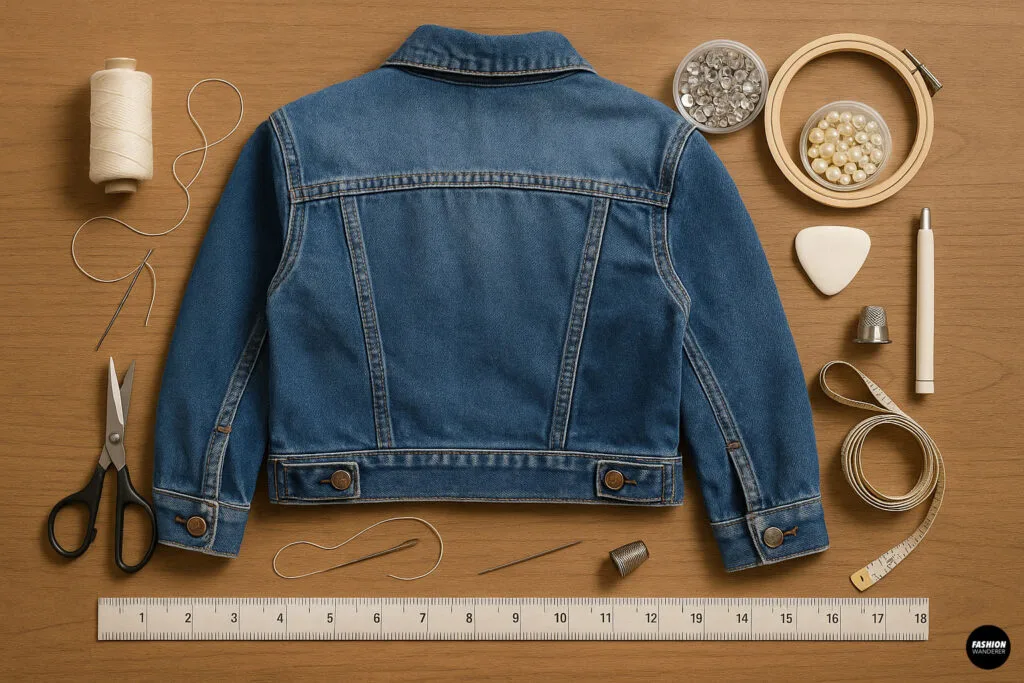
Before you begin, gather the following tools and materials:
- Denim jacket (clean, dry, and ironed)
- Beads, pearls, or rhinestones with holes (not flat-backs)
- Embroidery needle or fine hand sewing needle
- Strong polyester thread or invisible nylon thread
- Scissors
- Tailor’s chalk or removable fabric pen
- Thimble (optional but helpful)
- Small embroidery hoop (optional, for stabilizing fabric)
- Ruler or measuring tape (for even spacing)
Where to Embellish Your Denim Jacket
Not sure where to place your sparkle? Here are popular design ideas:
- Outline the collar, cuffs, or pockets
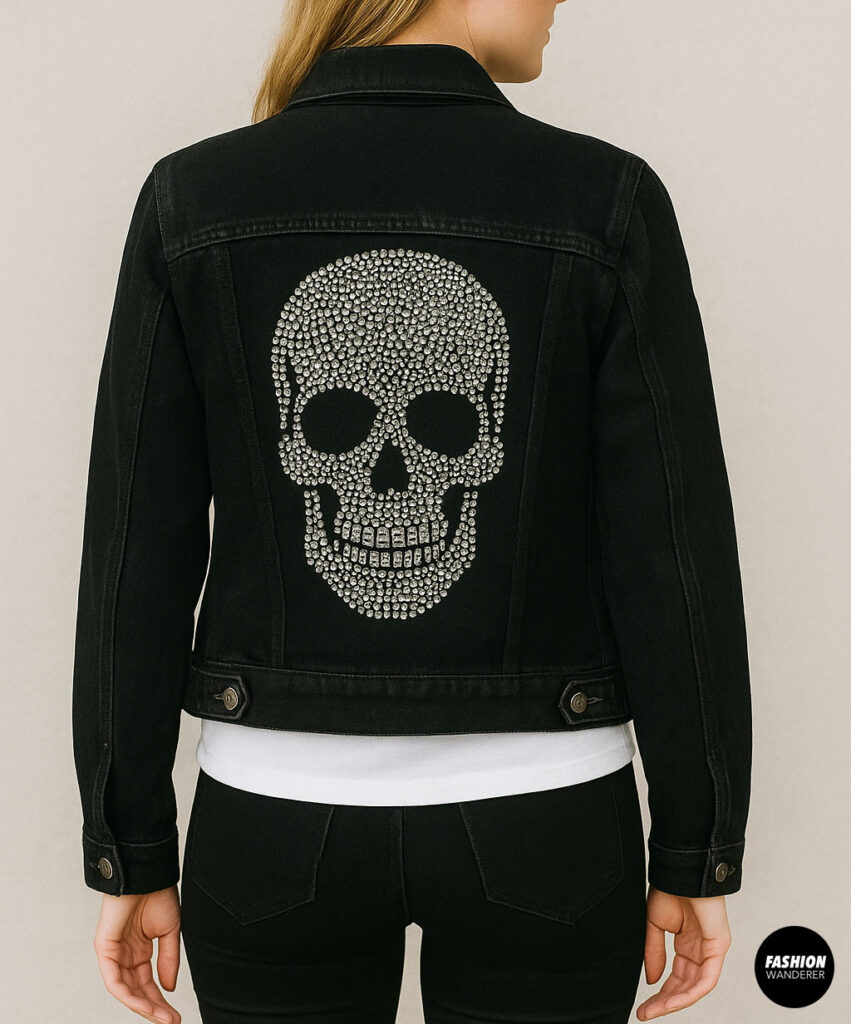
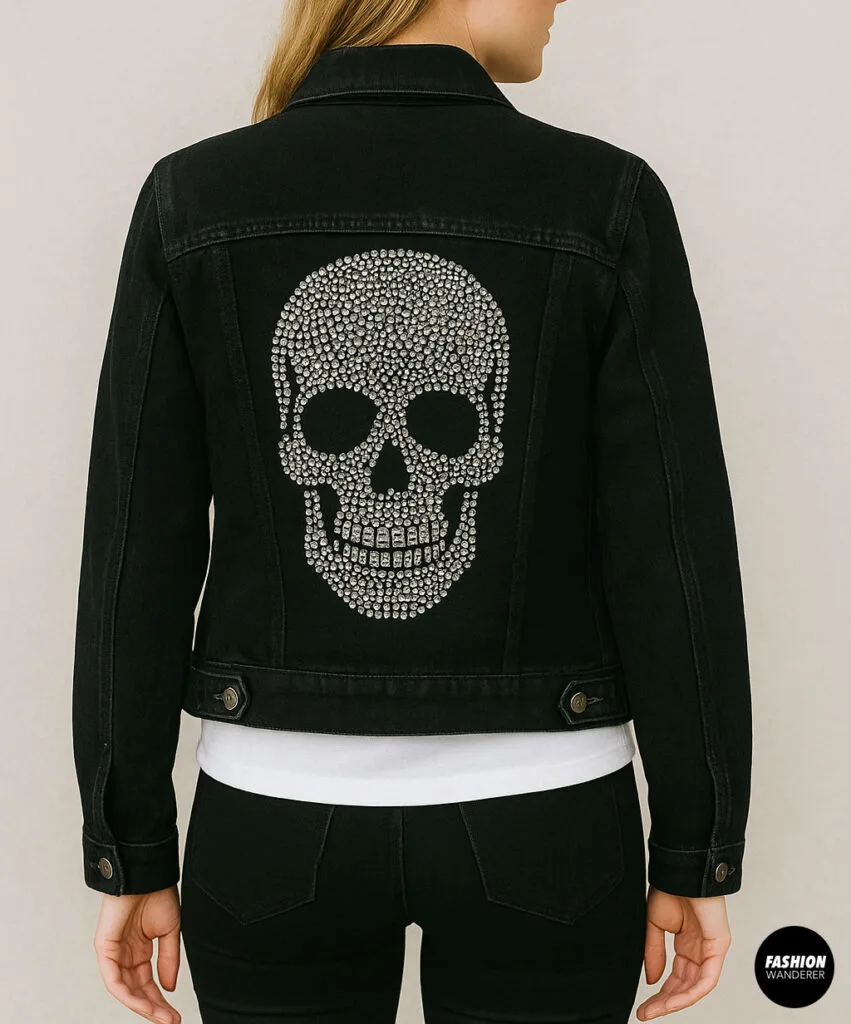
- Add a beaded motif or design on the back
- Scatter pearls across the shoulders or sleeves
- Create vertical rows down the front placket
- Form shapes like hearts, stars, or initials
Use tailor’s chalk to draw your design or mark your spacing before you start.
Step-by-Step: How to Sew Beads, Pearls, or Rhinestones on Denim

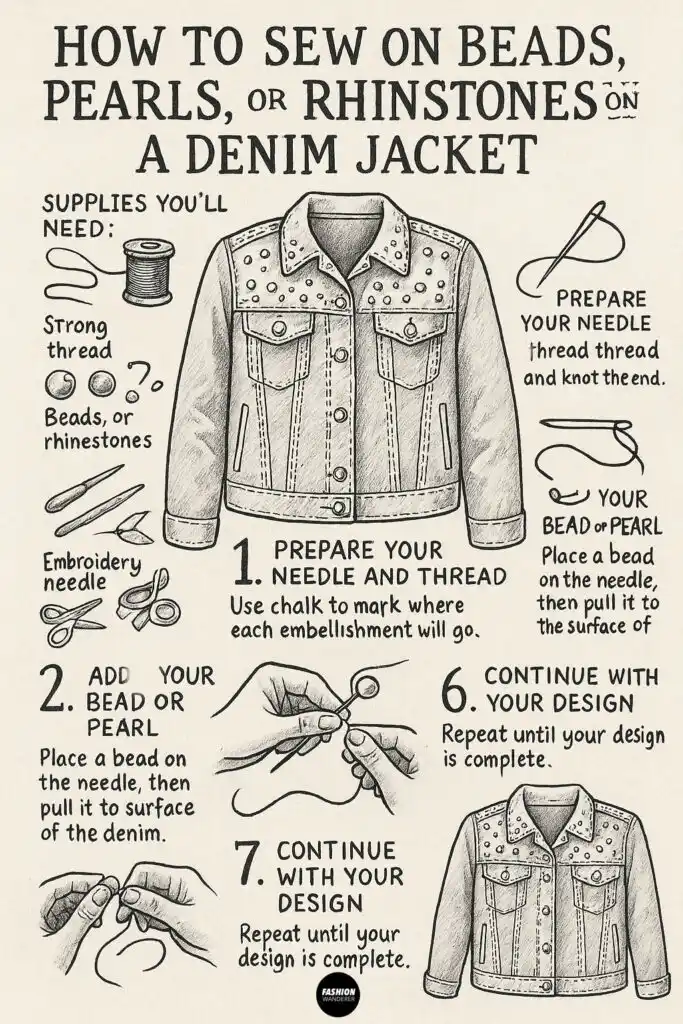
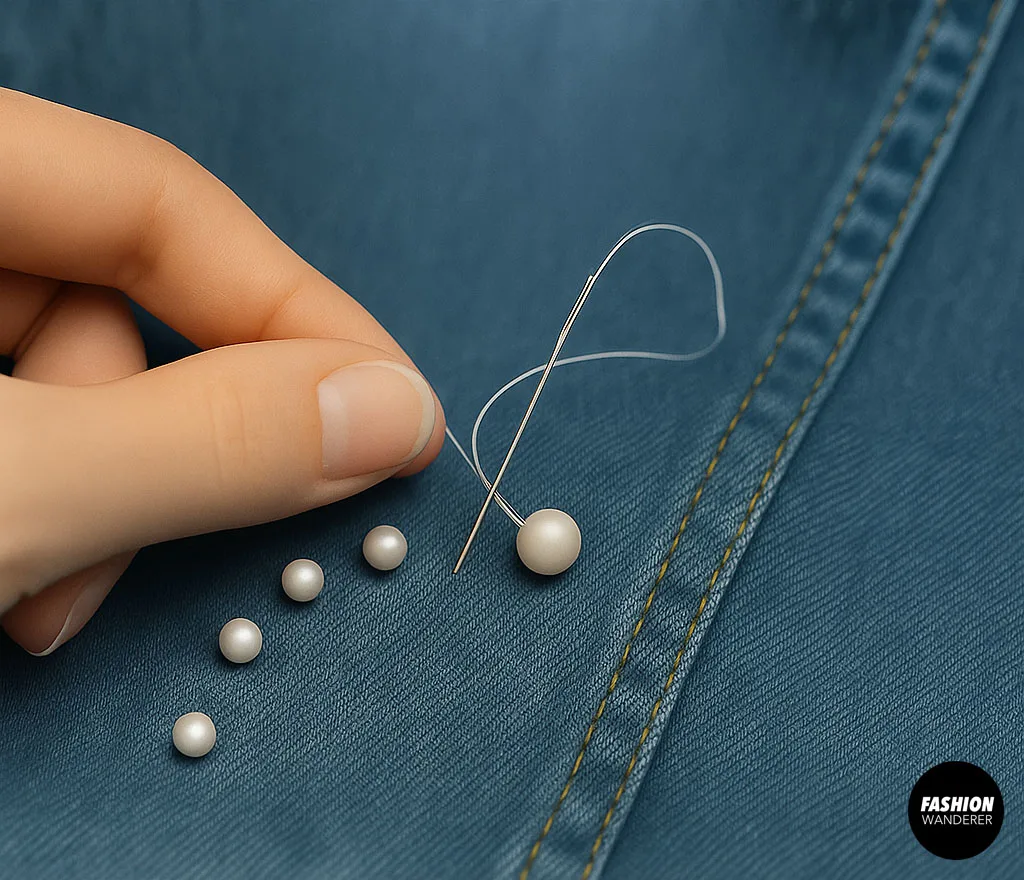
Step 1: Prepare Your Needle and Thread
Cut about 18–24 inches of strong polyester or nylon thread. Thread your needle and knot the end securely. You can double the thread for extra strength.
Pro tip: Use a thread color that matches your beads or the jacket. For nearly invisible stitches, opt for clear nylon thread.
Step 2: Mark Your Design
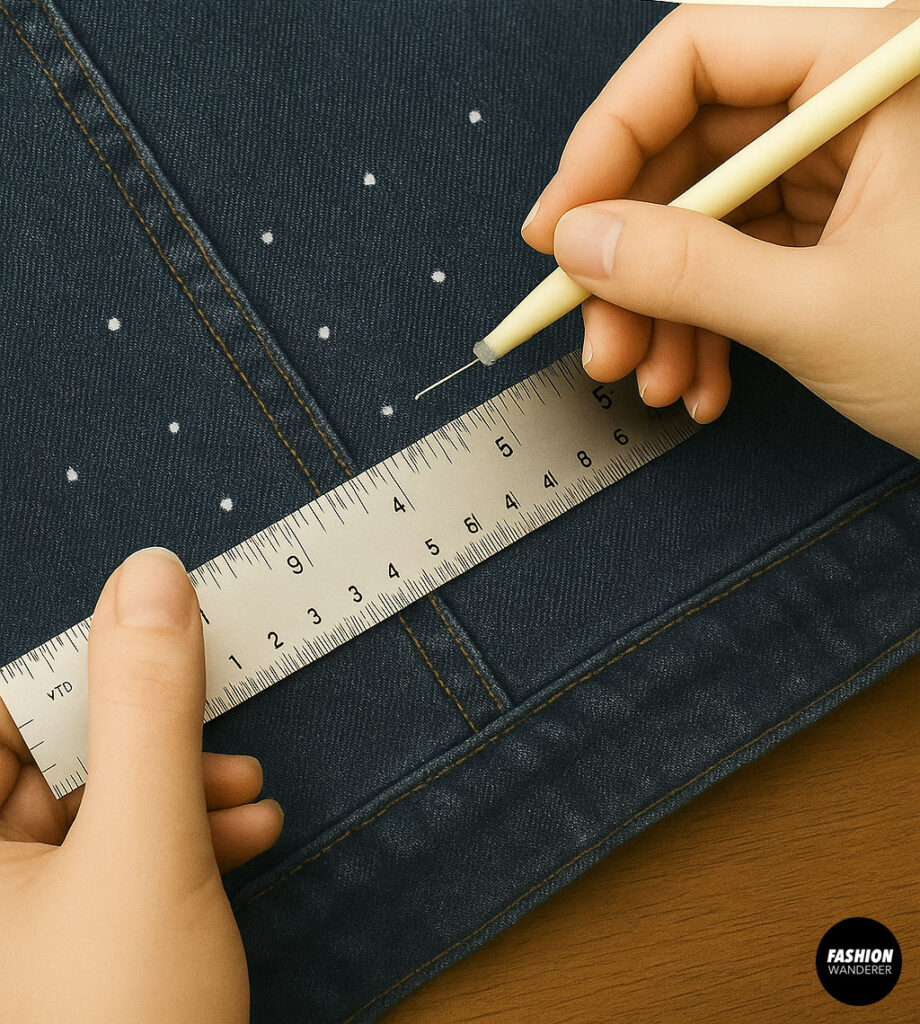

Use chalk or a fabric-safe marking pen to plan your layout. Lightly mark dots where each embellishment will go. Keep spacing consistent by using a ruler.
If you’re following a specific shape or border, draw the full outline.
Step 3: Insert the Needle from the Inside

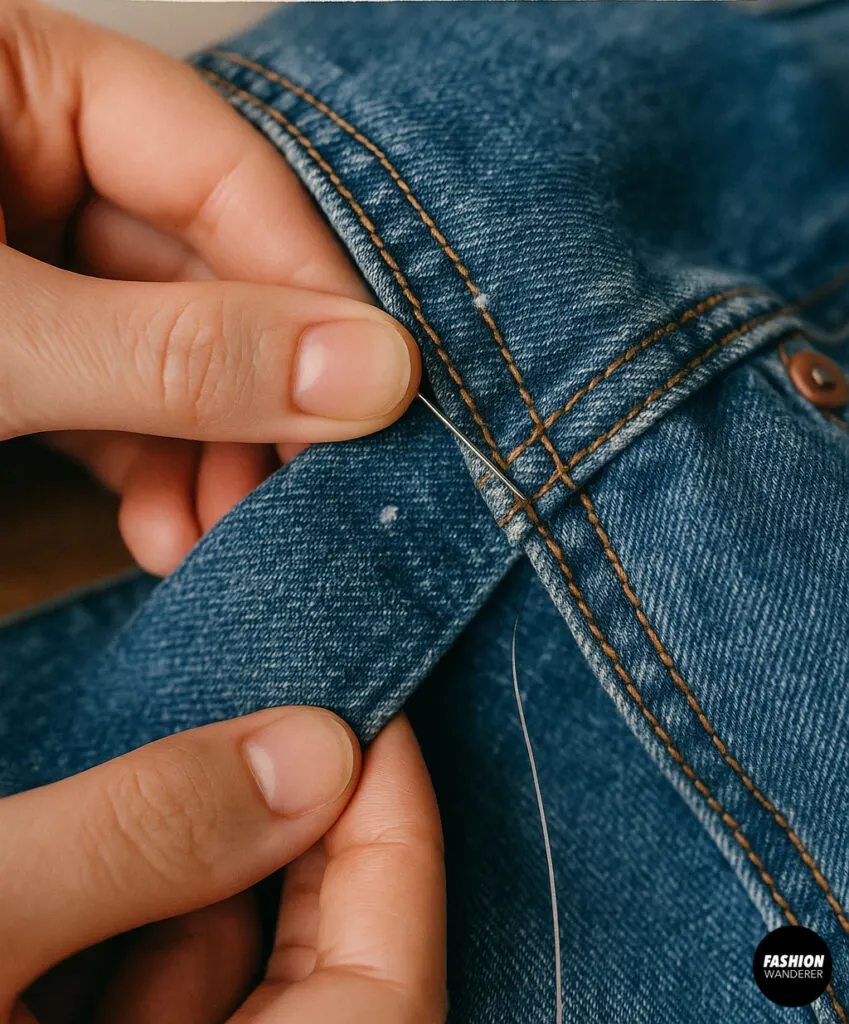
Starting from the wrong side of the fabric (inside the jacket), push your needle through to the front where your first mark is. Pull the thread all the way through until the knot catches.
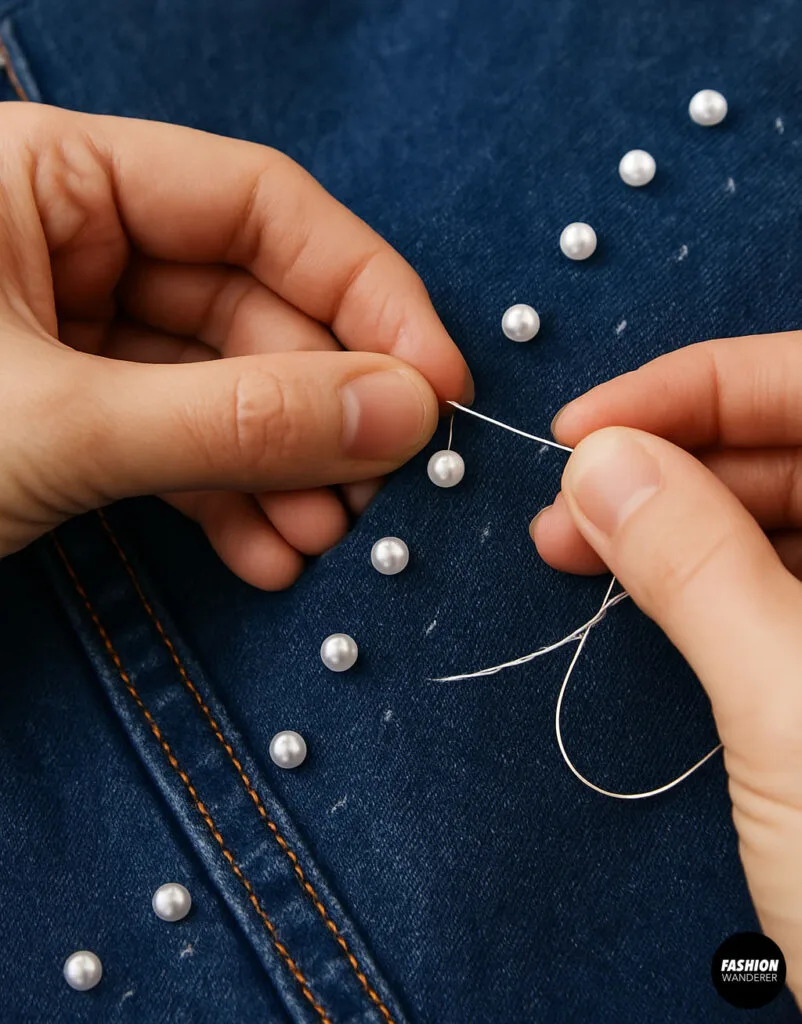
Step 4: Add Your Bead or Pearl

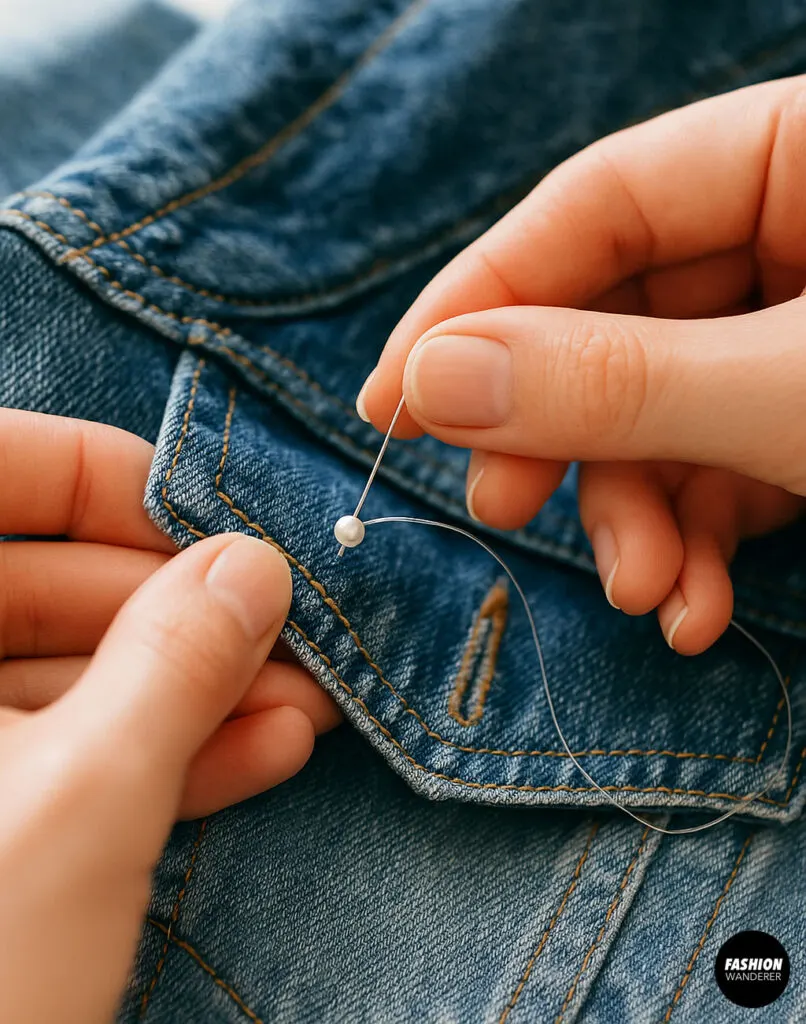
Slide a bead or pearl onto the needle and push it down the thread until it rests on the denim.
Now, bring the needle back down into the fabric just beside the entry point to secure the bead in place. Pull tight, but not so tight that the fabric puckers.
Step 5: Reinforce the Stitch
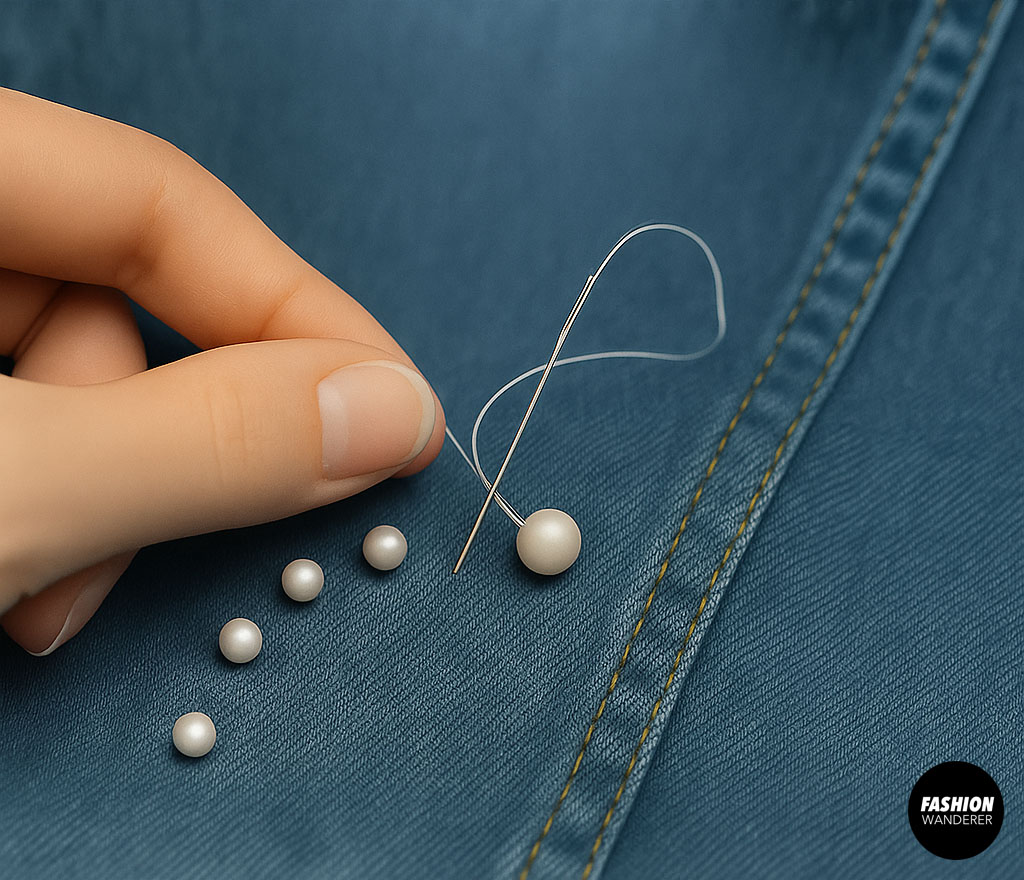
For extra security, especially on heavier beads or rhinestones, go back up through the same spot, through the bead again, and back down. Two to three passes per bead will help it stay put.
Optional: Knot the thread on the inside every few beads to secure small sections, especially if you’re doing a large design.
Step 6: Continue with Your Design

Repeat the process, following your chalk marks or traced pattern. Keep your tension even, and make sure your embellishments lay flat.
Take your time—it’s better to go slow and be precise than rush and need to redo sections.
Step 7: Finish and Secure the Thread

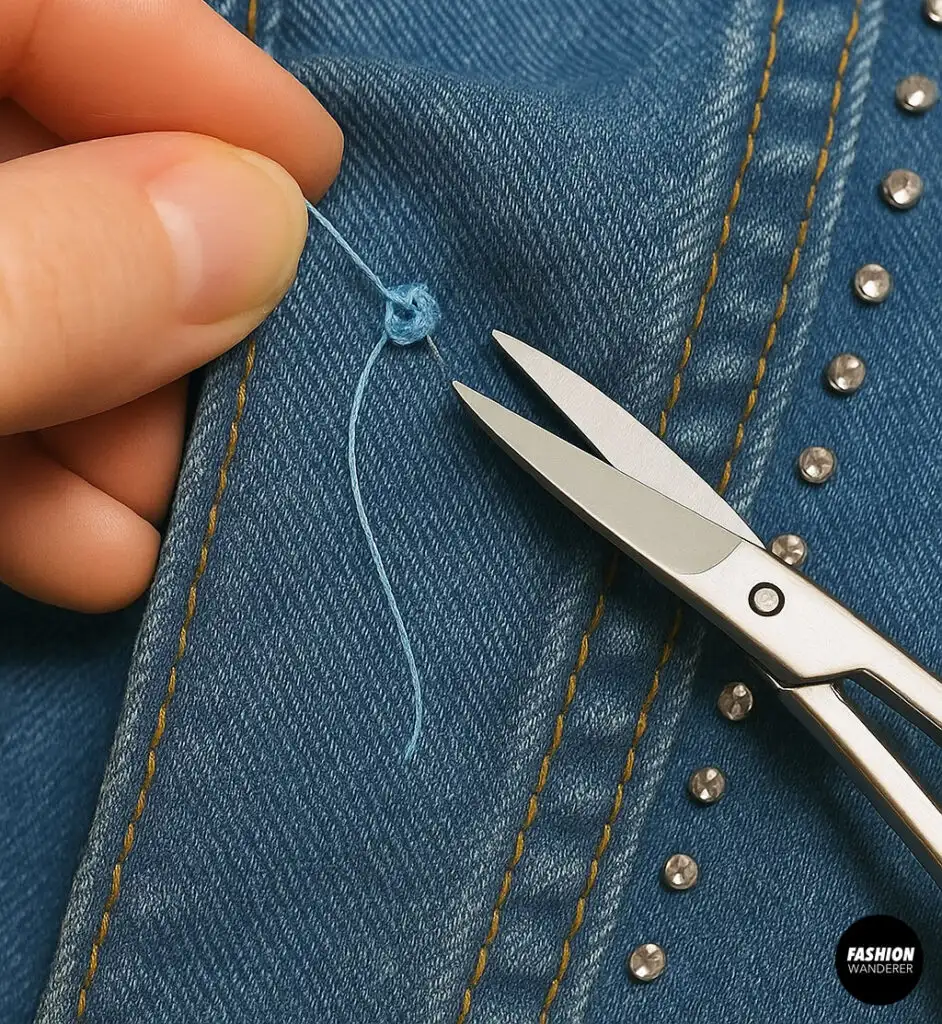
When you’re done or your thread runs short, knot it tightly on the inside of the jacket. For extra strength, dab the knot with a bit of clear nail polish or fabric glue to seal it.
Trim the excess thread neatly.
Tips for Sewing on Beads & Rhinestones
- Use a thimble if the denim is thick or your fingers get sore.
- Avoid areas that stretch, like elbows or shoulders if heavily embellished.
- Try asymmetrical placement for a modern, editorial vibe.
- Layer bead sizes or mix pearls and rhinestones for added texture.
- Hand wash or spot clean the jacket to preserve your work.
- Avoid hot irons or dryers, which can damage the embellishments.
Embellishment Layout Ideas
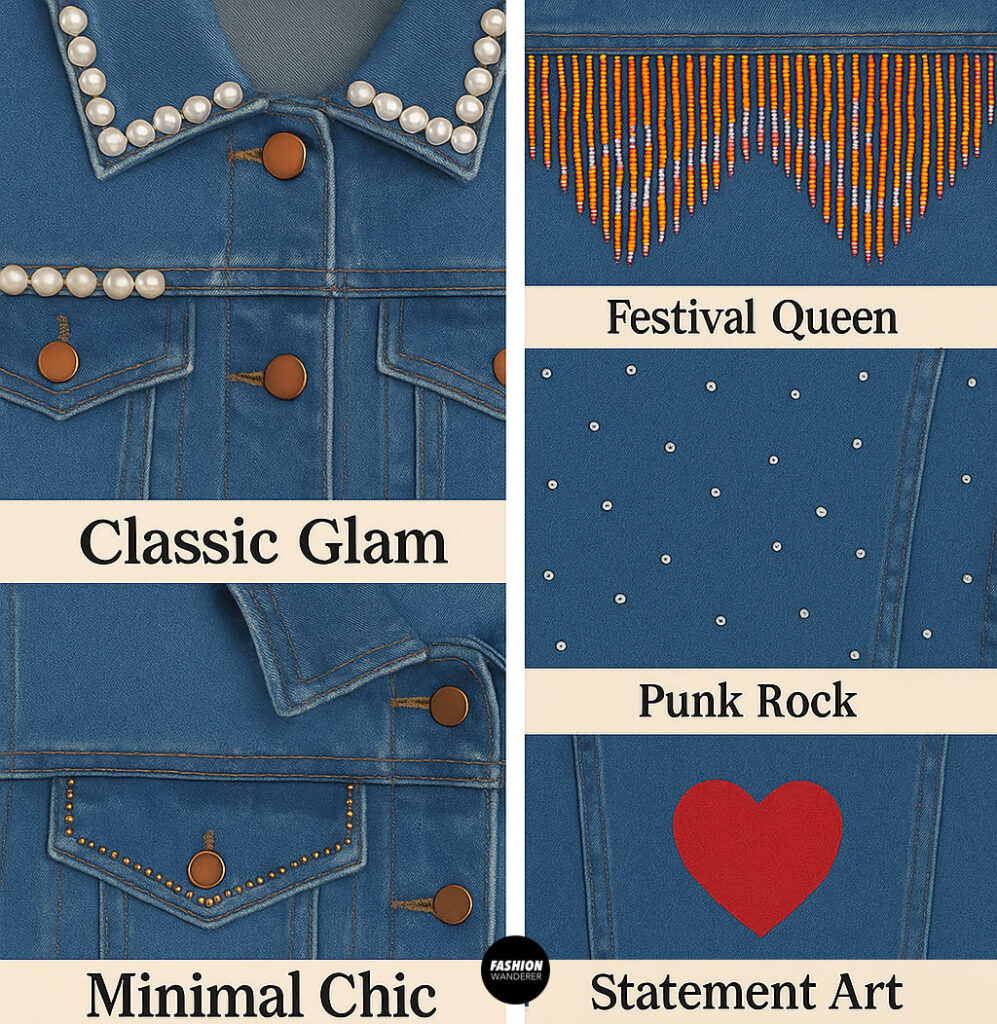
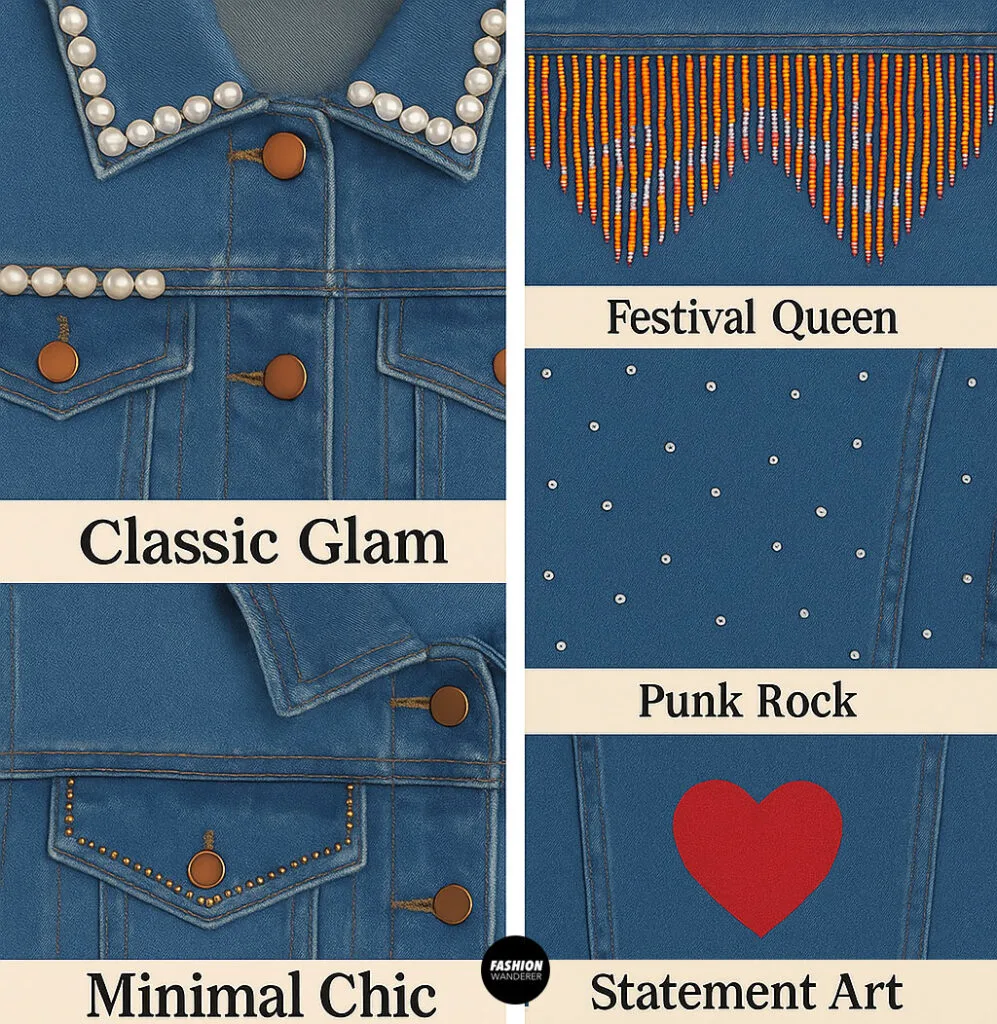
If you need inspiration, try one of these styles:
- Classic Glam: Rows of pearls along the collar and pocket flaps
- Festival Queen: Beaded fringe hanging from the sleeves or back yoke
- Punk Rock: Scatter rhinestones across the back or sleeve seamlines
- Minimal Chic: Tiny seed beads outlining the button placket
- Statement Art: Create a motif like a heart, skull, or lightning bolt
Flat-Back Rhinestones vs. Sew-On Styles
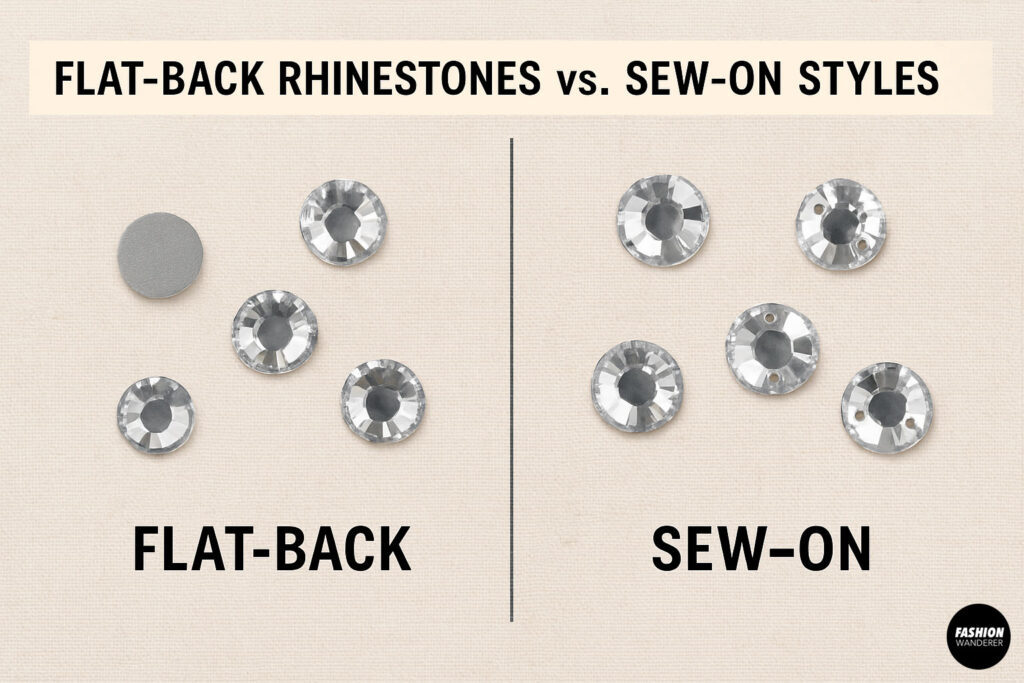
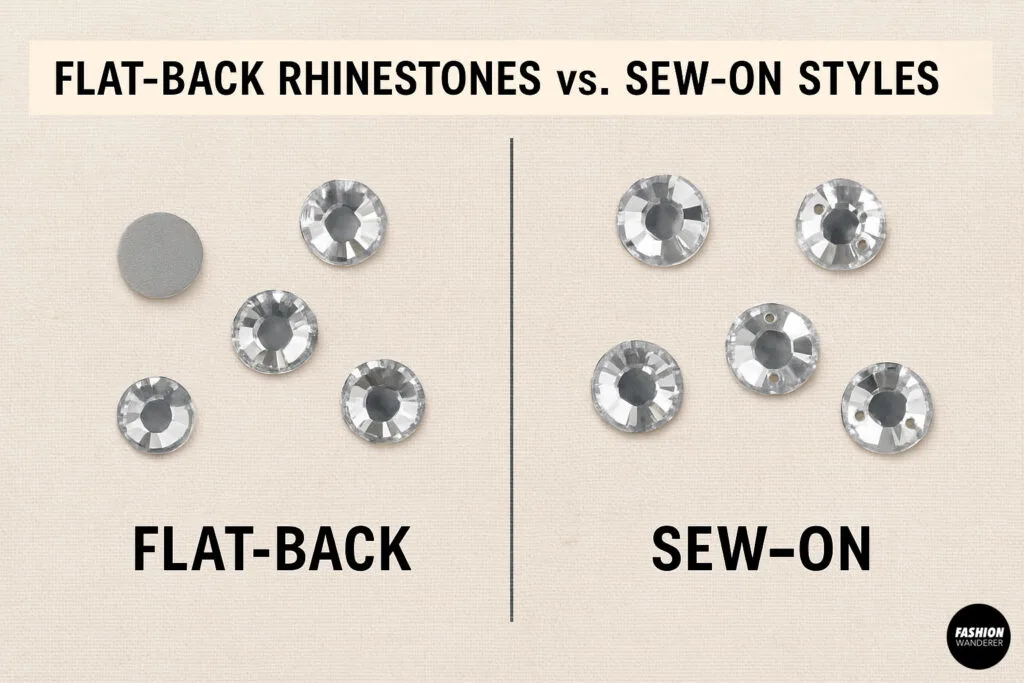
This tutorial covers sew-on rhinestones, which have holes for stitching. If you want to use flat-back rhinestones, you’ll need special glue (like E6000) or hot-fix tools. Sew-on styles are more secure and better for long-term wear, especially on denim.
Final Thoughts

Adding beads, pearls, or rhinestones to your denim jacket is a fun, fashionable way to refresh your wardrobe and make your style shine—literally! With just a few supplies and some creativity, you can turn a basic piece into a sparkling showstopper that reflects your personality.
Whether you’re stitching a subtle trim or going full glam with all-over embellishments, this DIY upgrade is surprisingly therapeutic and endlessly rewarding. So grab your needle, turn on your favorite playlist, and start stitching your sparkle story into denim!
Trendy, Affordable Sewing Patterns for All Sizes


Tie Shoulder Jumpsuit Pattern


Palazzo Pants Sewing Pattern


Pocket Overall Romper Pattern


Wrap Maxi Skirt Sewing Pattern


Tie Back Top Sewing Pattern