
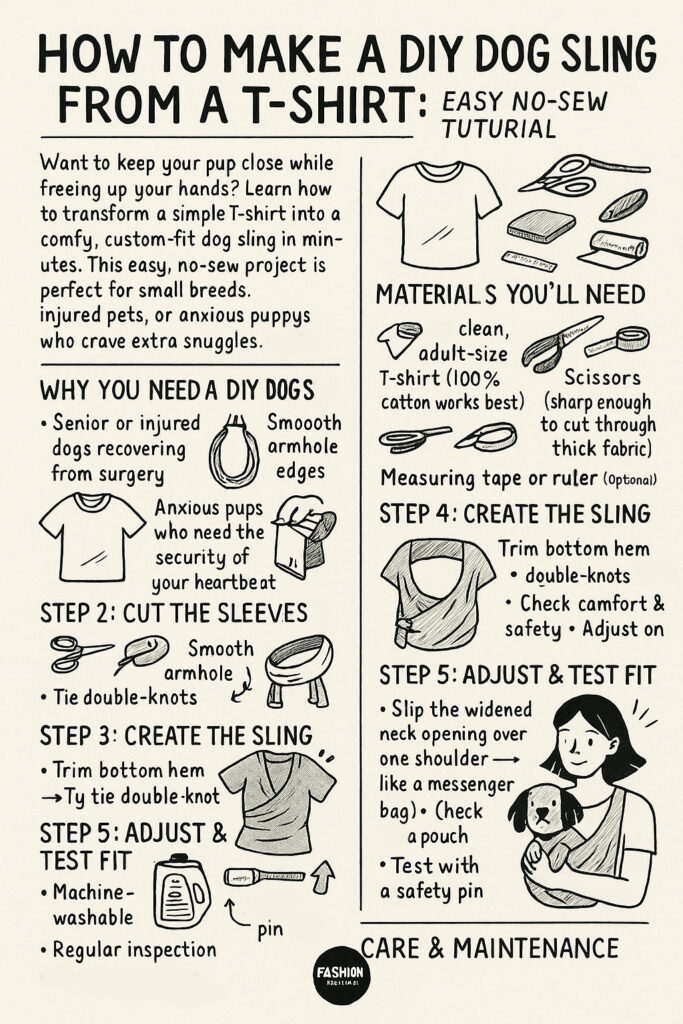
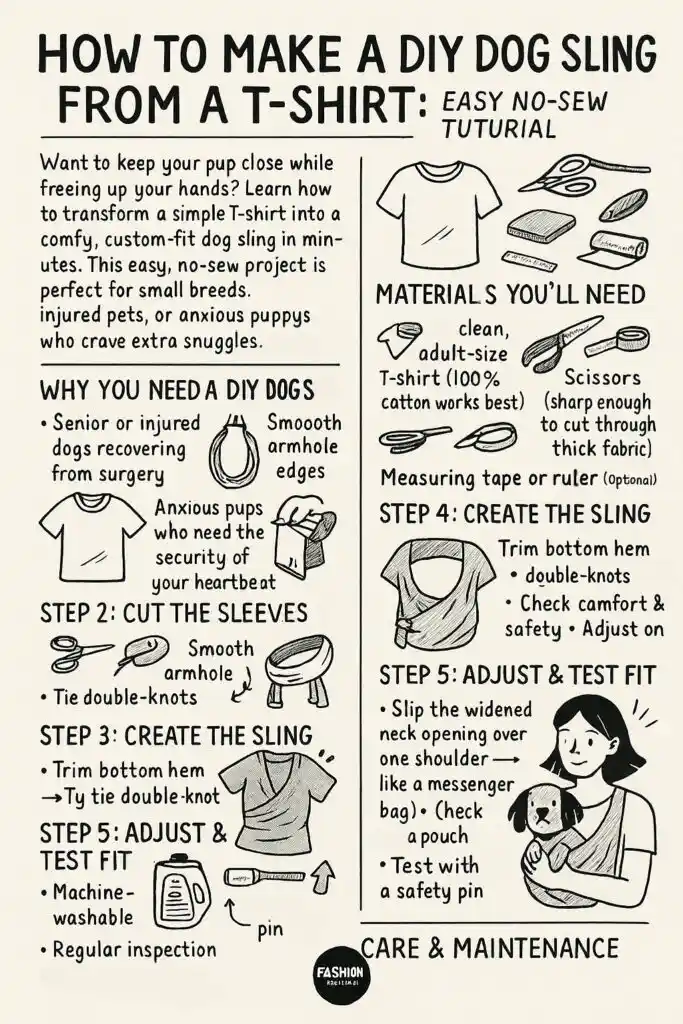
Want to keep your pup close while freeing up your hands? Learn how to transform a simple T-shirt into a comfy, custom-fit dog sling in minutes. This easy, no-sew project is perfect for small breeds, injured pets, or anxious puppies who crave extra snuggles.
Why You Need a DIY Dog Sling
Dog slings (also called puppy slings) offer hands-free carrying, bonding comfort, and gentle support—ideal for:
- Senior or injured dogs recovering from surgery
- Tiny breeds like Chihuahuas, Yorkies, or toy poodles
- Anxious pups who need the security of your heartbeat
- Busy pet parents who want to run errands safely with a furry passenger
Instead of spending $20–$40 on a commercial sling, repurpose an old T-shirt you already own. No sewing machine? No problem! This no-sew tutorial uses simple knots for a sturdy, adjustable carry.
Materials You’ll Need
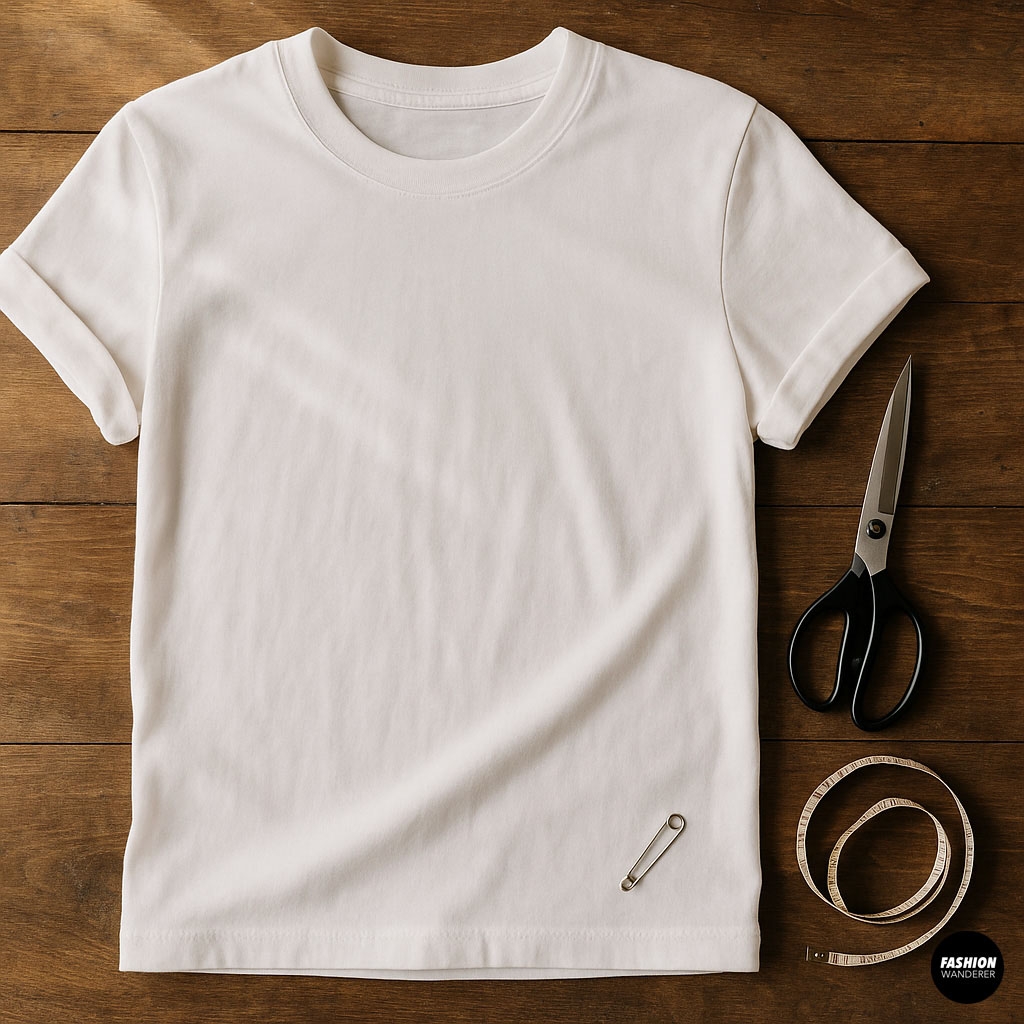
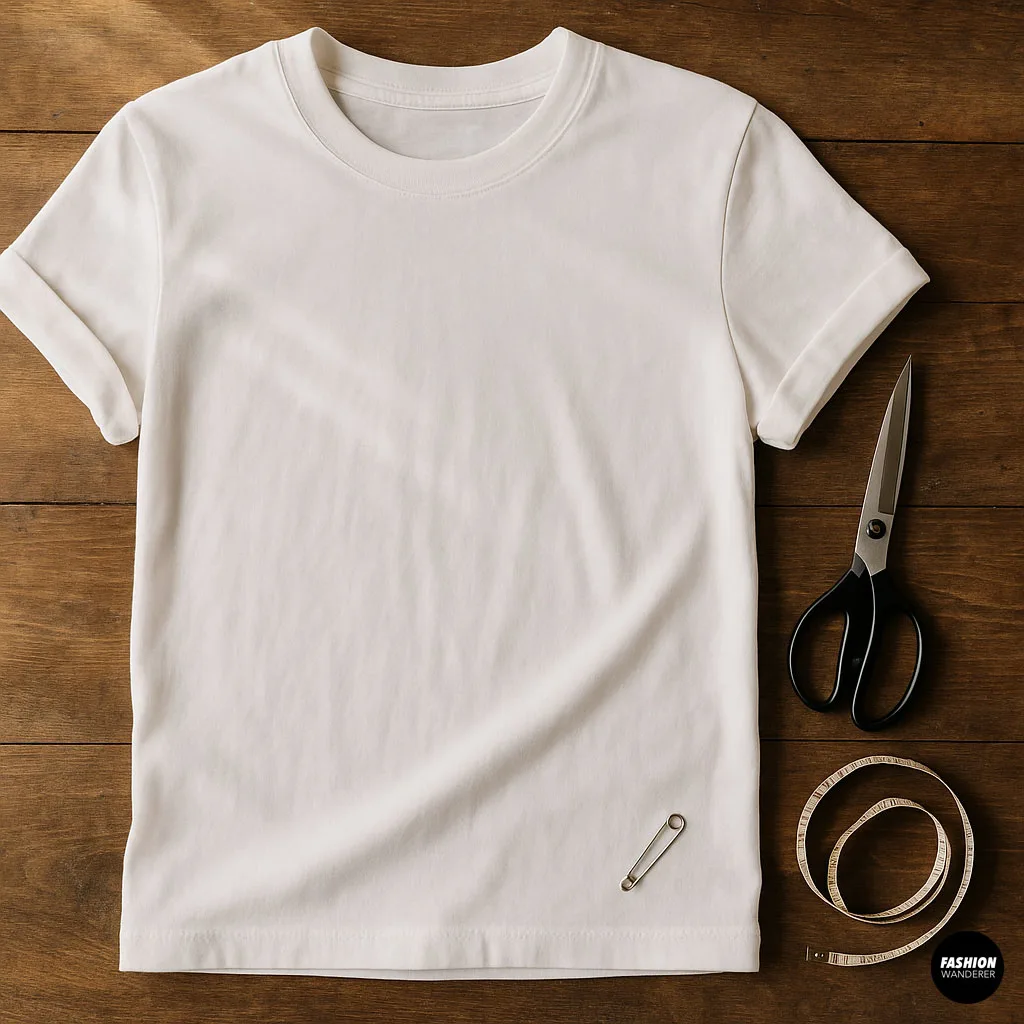
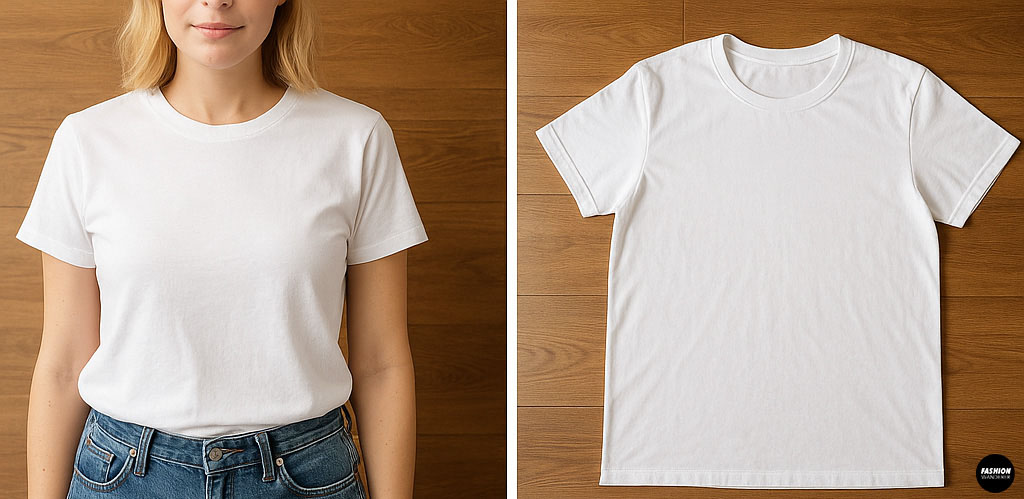
- One clean, adult-size T-shirt (100% cotton works best)
- Scissors (sharp enough to cut through thick fabric)
- Measuring tape or ruler (optional)
- Safety pin (optional, for adjusting fit)
Step by Step: How to Make DIY Dog Sling from T-Shirt
Step 1: Choose & Prep Your T-Shirt

- Pick the right T-shirt.
- A medium to large T-shirt will create a roomy sling. Avoid super-stretchy fabrics—they can overstretch under weight.
- Lay your T-shirt flat.
- Place it on a clean table or floor, smoothing wrinkles. Ensure the front (logo side) faces down so the seams at the back form the top of your sling.
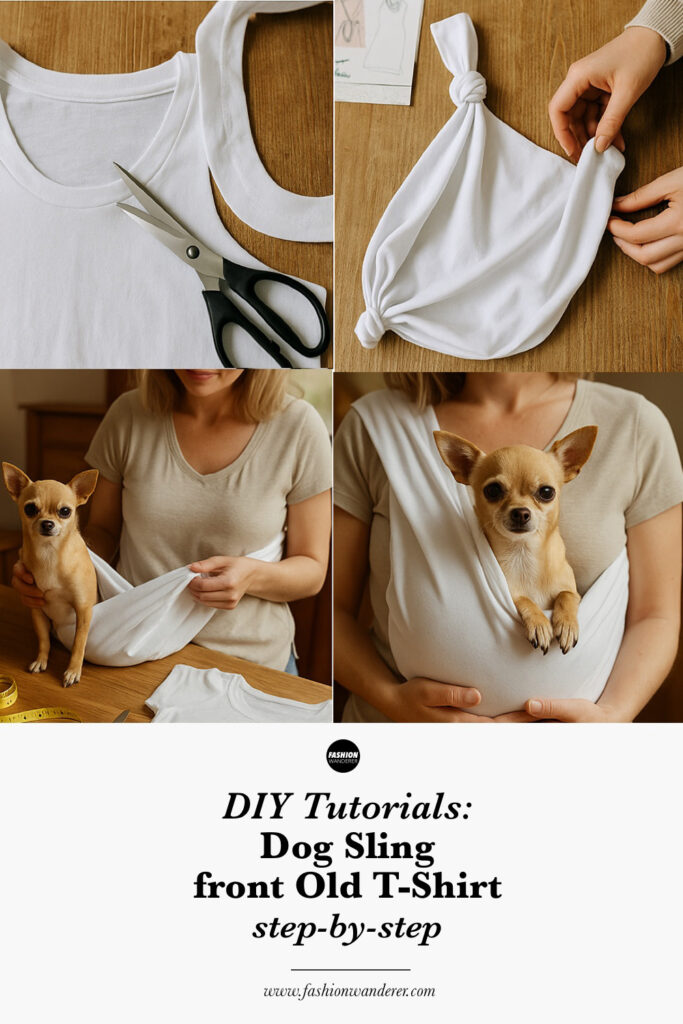
Step 2: Cut the Sleeves
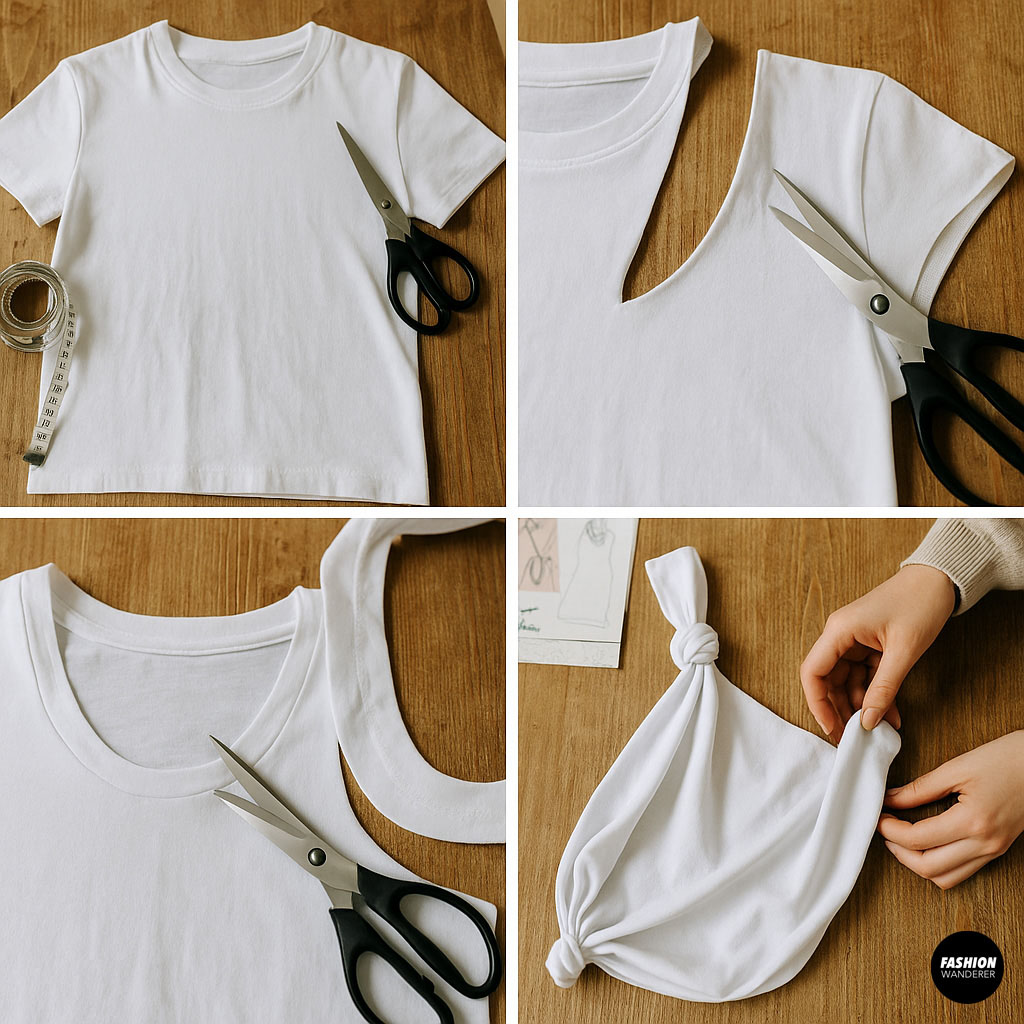
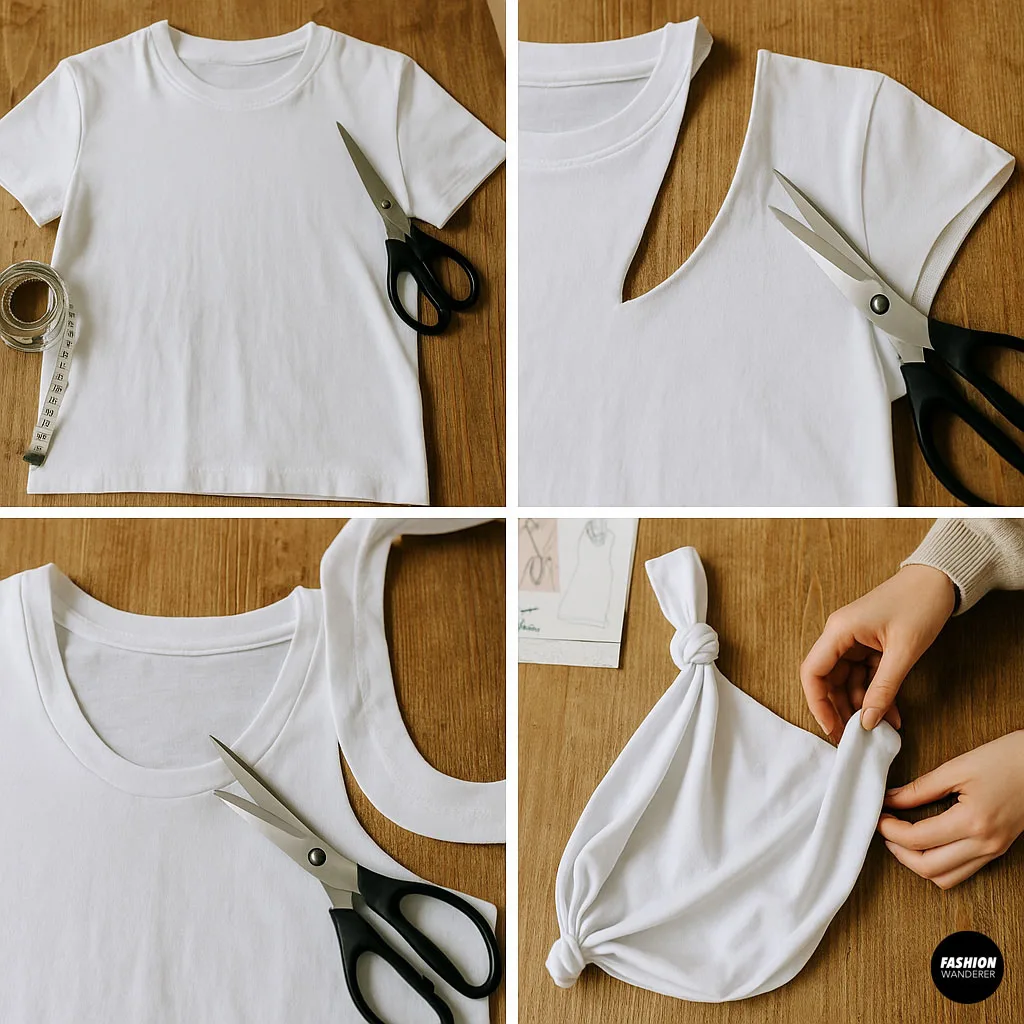
- Trim off sleeves.
- Use sharp scissors to cut along each sleeve’s seam close to the shoulder. Remove both sleeves completely.
- Smooth the armhole edges.
- If you prefer a neater look, trim any excess fabric to round out the armholes. These will become the sling’s shoulder straps.
Step 3: Cut the Neckline
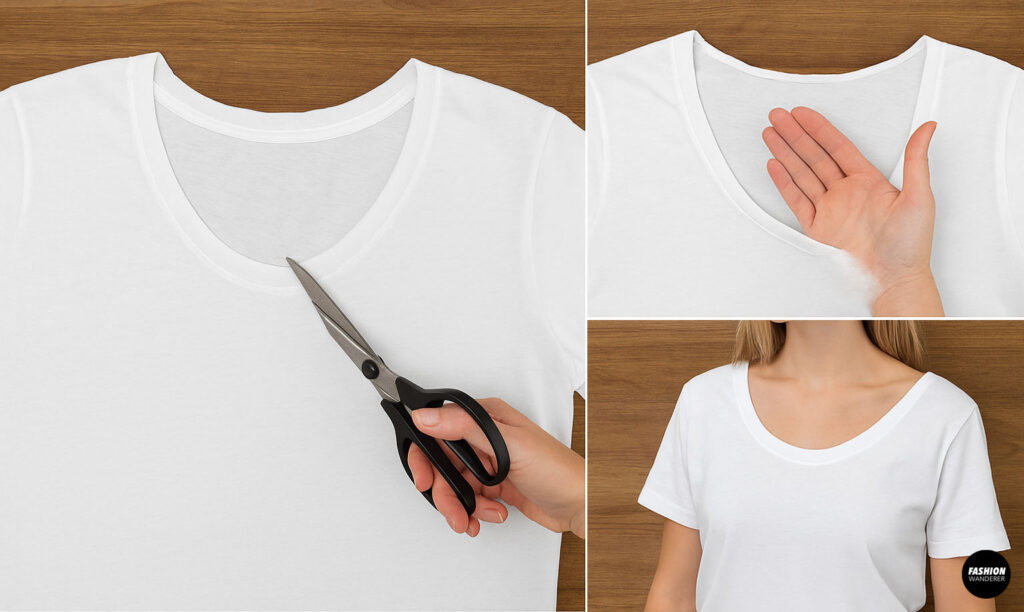

- Widen the neckline.
- Cut a gentle U-shape around the collar about 3–4 inches deep. Be careful to leave enough fabric between the neck opening and the shoulder seams—this forms the sling’s back panel.
- Test the opening.
- Slip the larger end of your hand through to ensure it’s wide enough for your body. You’ll wear the sling “over one shoulder, across your chest, and under the opposite arm.”
Step 4: Create the Sling Pouch
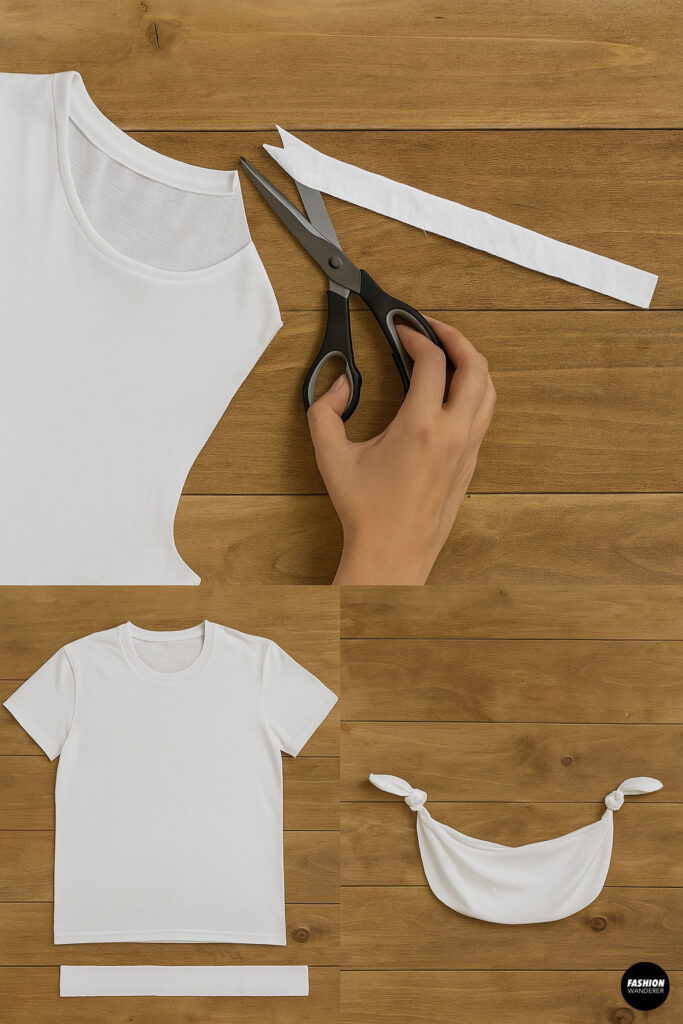
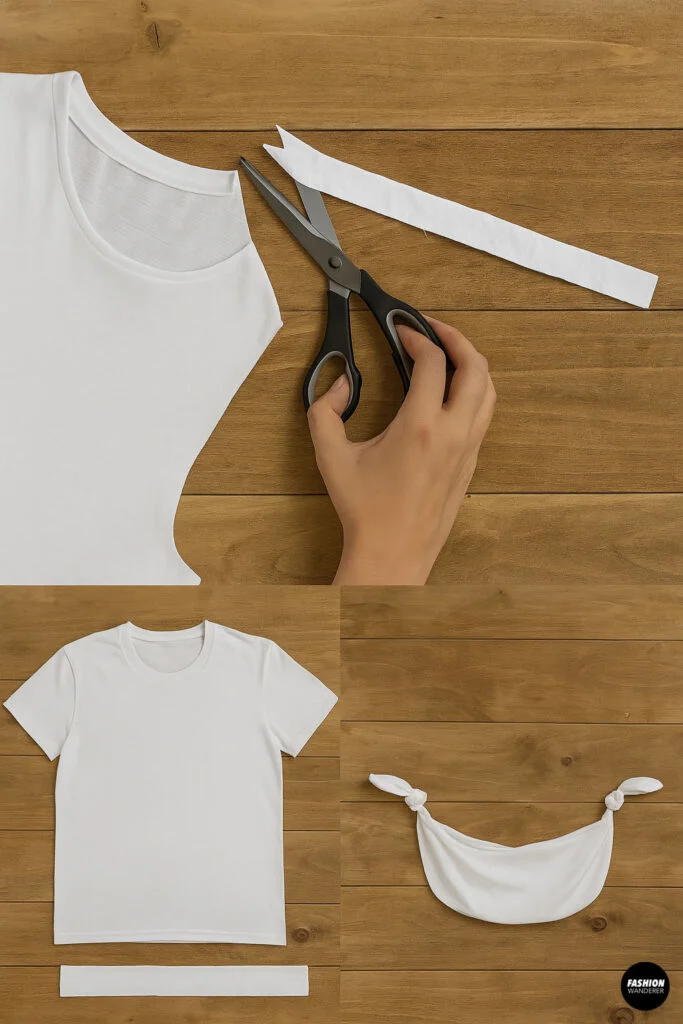
- Trim the bottom hem.
- Cut straight across just above the shirt’s hem, removing the final 2–3 inches of fabric. Keep the removed strip—the raw edge becomes the pouch opening.
- Tie the bottom corners.
- Identify the front and back bottom corners (the front was originally the shirt’s bottom hem; the back is where you opened the collar).
- Tie the front and back bottom corners together in a tight double-knot on each side. Leave a small gap (about 1–2 inches) between the knots on each side—this opening is where your pup’s head will peek through.
Pro Tip: If you need a snugger pouch, tie an extra knot closer to the corner’s tip. A looser pouch? Tie knots slightly further apart.
Step 5: Adjust & Test Fit
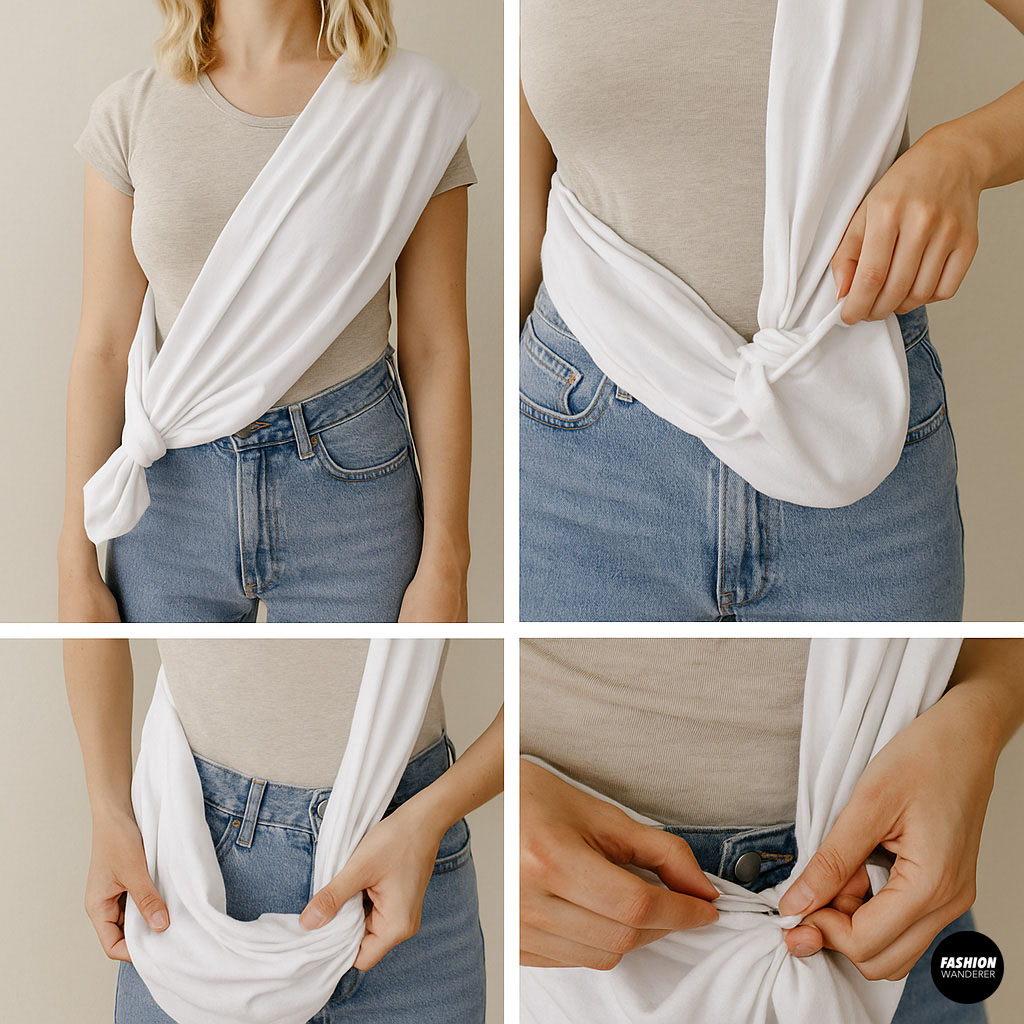

- Slip it on.
- Put the widened neck opening over one shoulder (like a messenger bag) and let the tied bottom corners rest on your opposite hip.
- Check the pouch.
- Reach into the bottom opening to feel the pouch’s depth—it should sit comfortably between your waist and mid-thigh. Adjust knot placement if it feels too high or low.
- Secure with a safety pin (optional).
- If you need extra reassurance that the knots won’t slip, insert a small safety pin through the knot’s loops.
Step 6: Insert Your Dog
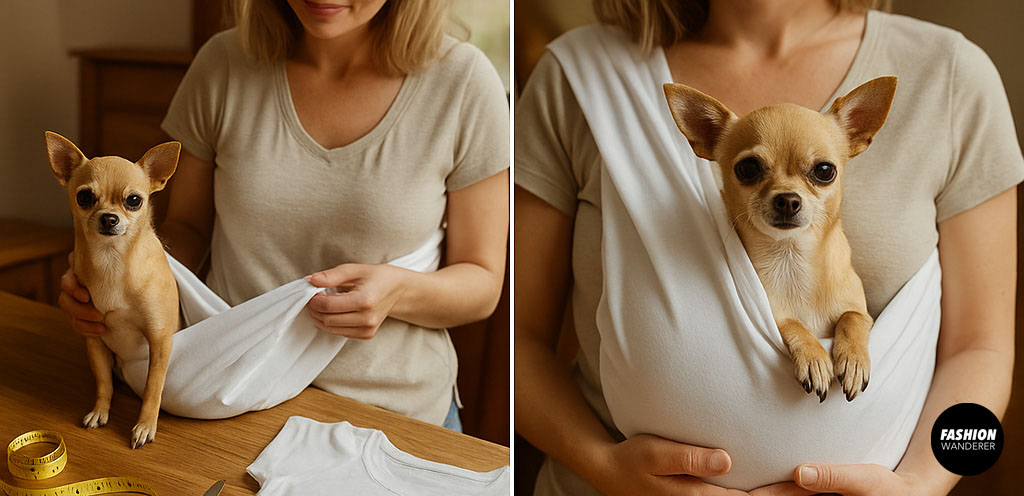

- Guide your pup in.
- Have your dog sit or lie beside you. Gently lift them into the pouch, head through the front gap and paws resting on the bottom edge.
- Ensure comfort & safety.
- Your dog’s body should be fully supported by the T-shirt fabric, with their neck comfortably above the front opening.
- Adjust on the go.
- Walk around, then stop and check that your pup’s weight is even. Re-tie or tighten knots as needed.
Care & Maintenance
- Machine-washable: Remove your dog, untie the knots, then toss the sling into a gentle cycle with cold water. Air-dry to prevent shrinkage.
- Inspect regularly: Check knots and fabric for wear. Replace the sling if seams start to stretch too thin.
- Customize: Decorate with fabric paint, patches, or extra t-shirt strips for a fun, personalized look.
Frequently Asked Questions
Q: What size dogs can use a T-shirt sling?
A: Best for small to medium toy breeds (up to ~15 lbs). Heavier pups may strain the T-shirt seams or your shoulder.
Q: Can I sew instead of knotting?
A: Absolutely! Sewing the bottom corners together with heavy-duty thread creates a more permanent pouch.
Q: Is this safe for long walks?
A: This sling is ideal for short errands or calming visits but not for extended hiking—your shoulder may fatigue.
Why This DIY Works for Pet Parents
- Cost-effective: No need to buy specialty gear—just repurpose an old T-shirt.
- Eco-friendly: Upcycling reduces waste and gives new life to forgotten clothing.
- Custom fit: Adjust knots to your body shape and your dog’s size.
- Bonding boost: Close contact releases calming endorphins for both you and your pup.
Final Thoughts

Making a DIY dog sling from a T-shirt is one of the easiest, most rewarding pet crafts you’ll try. In less than 10 minutes and with zero sewing, you’ll have a cozy, hands-free carrier that keeps your furry friend safe and snug. Perfect for the vet, the farmer’s market, or just lounging on the couch—your pup will love being right by your side.
So grab that old T-shirt, scissors, and safety pin, and get started on your no-sew dog sling today! 🐶👕✨
Trendy, Affordable Sewing Patterns for All Sizes


Tie Shoulder Jumpsuit Pattern


Palazzo Pants Sewing Pattern


Pocket Overall Romper Pattern


Wrap Maxi Skirt Sewing Pattern


Tie Back Top Sewing Pattern