
If you’re looking to upgrade your plain cotton T-shirts with dreamy color blends and soft watercolor vibes, ice dyeing is the technique you need to try.
It’s a no-stress, highly creative way to make every shirt a one-of-a-kind piece of wearable art. Perfect for warm weather crafting, tie-dye parties, or unique handmade gifts, ice dyeing uses melting ice to slowly disperse powdered dye across fabric—resulting in stunning and unpredictable patterns.
In this step-by-step tutorial, we’ll show you how to ice dye your tees with professional-looking results using simple materials and pro tips. Let’s get started!
✨ Why Ice Dyeing?
Unlike traditional tie-dye techniques, ice dyeing creates a watercolor or galaxy-like effect, blending colors in subtle, unpredictable ways. The melting ice carries powdered dye pigment across the fabric, allowing colors to pool, mix, and split into gorgeous variations. It’s also:
- Beginner-friendly
- Budget-friendly
- Great for upcycling old shirts
- Eco-conscious (minimal water used)
🧵 Supplies You’ll Need

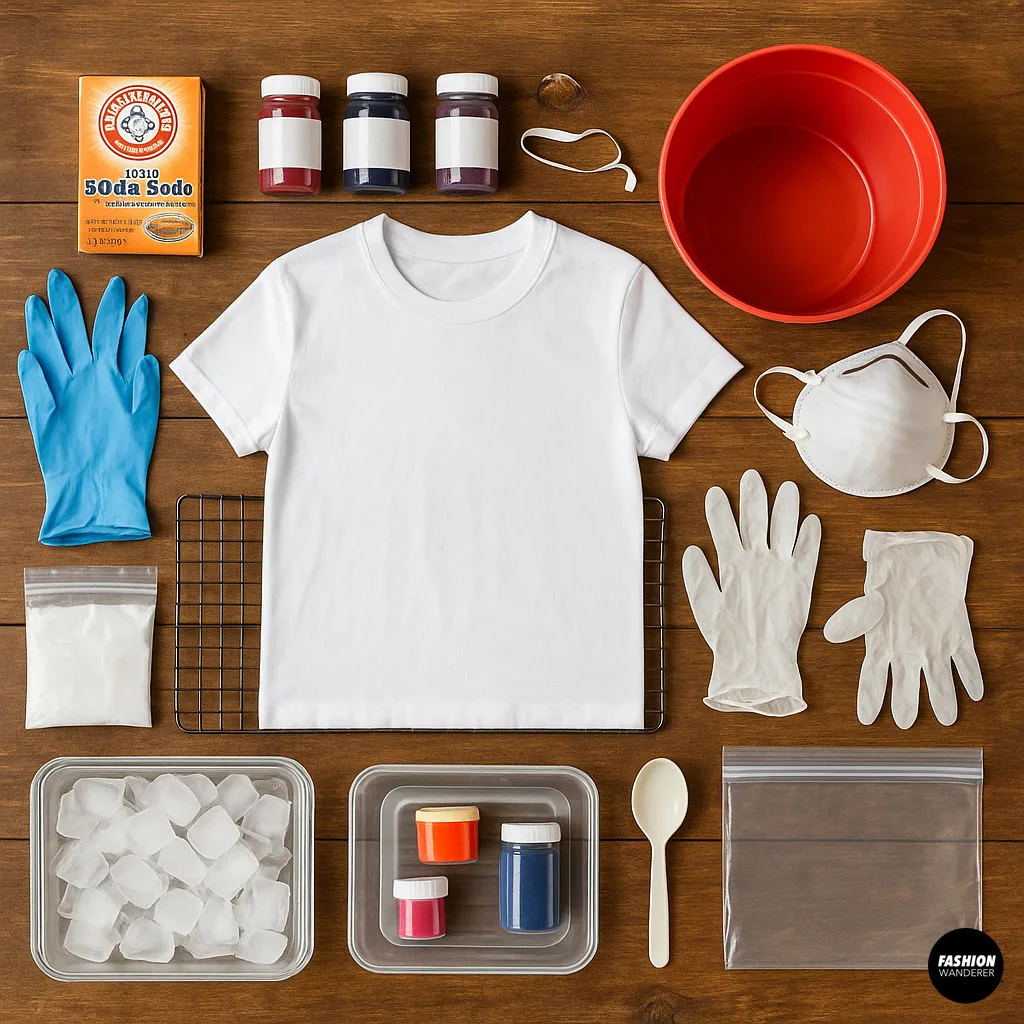
Gather these materials before you start:
- 100% cotton white or light-colored T-shirt
- Fiber-reactive powdered dye (Procion MX or similar)
- Ice (cubed or crushed)
- Wire rack and tray or bin (to catch melting dye)
- Rubber gloves
- Face mask or respirator (for handling dye powders)
- Soda ash (fixative)
- Bucket or sink (for soaking shirt)
- Plastic spoon or sifter (for sprinkling dye)
- Plastic bags or wrap (to cover while dye sets)
- Old clothes or apron (dye stains easily!)
Optional: squeeze bottles if layering techniques.
Step-by-Step: DIY Ice Dye T-Shirts
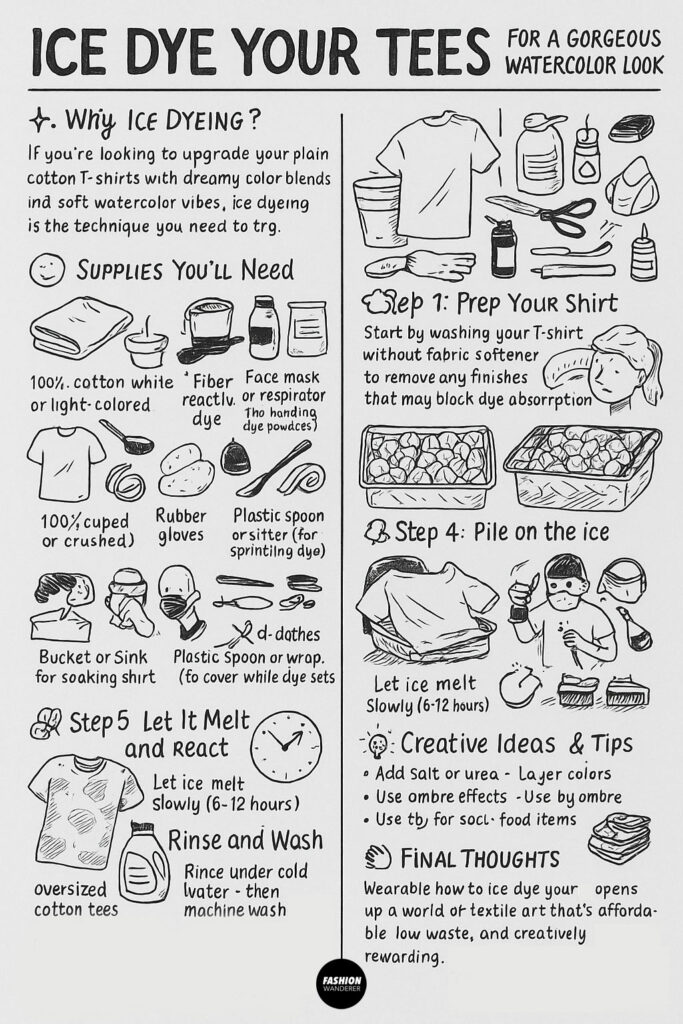
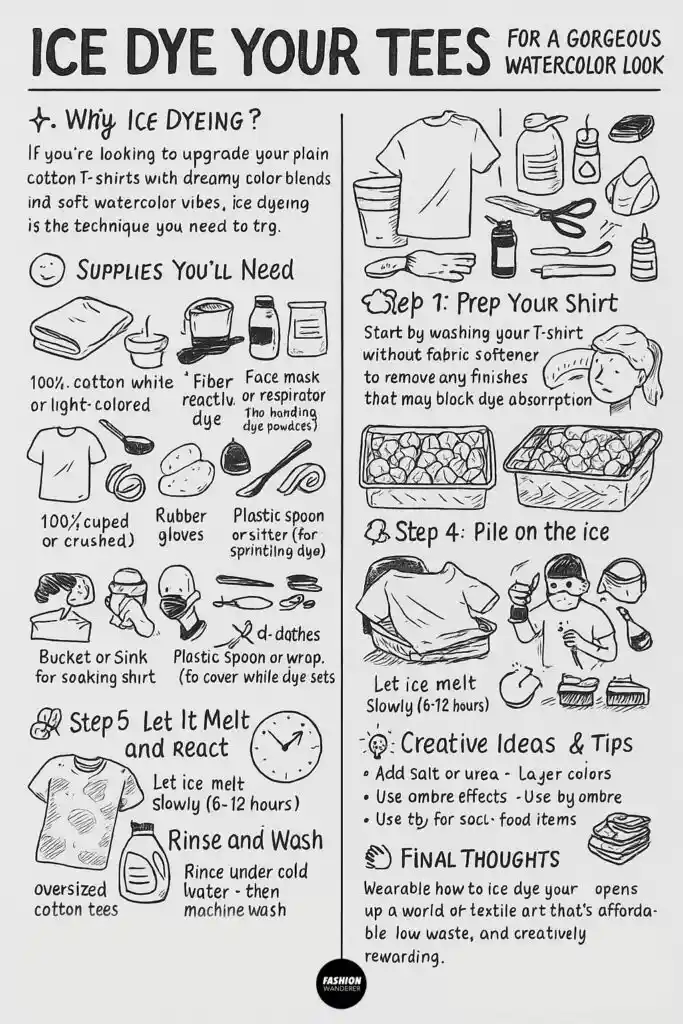
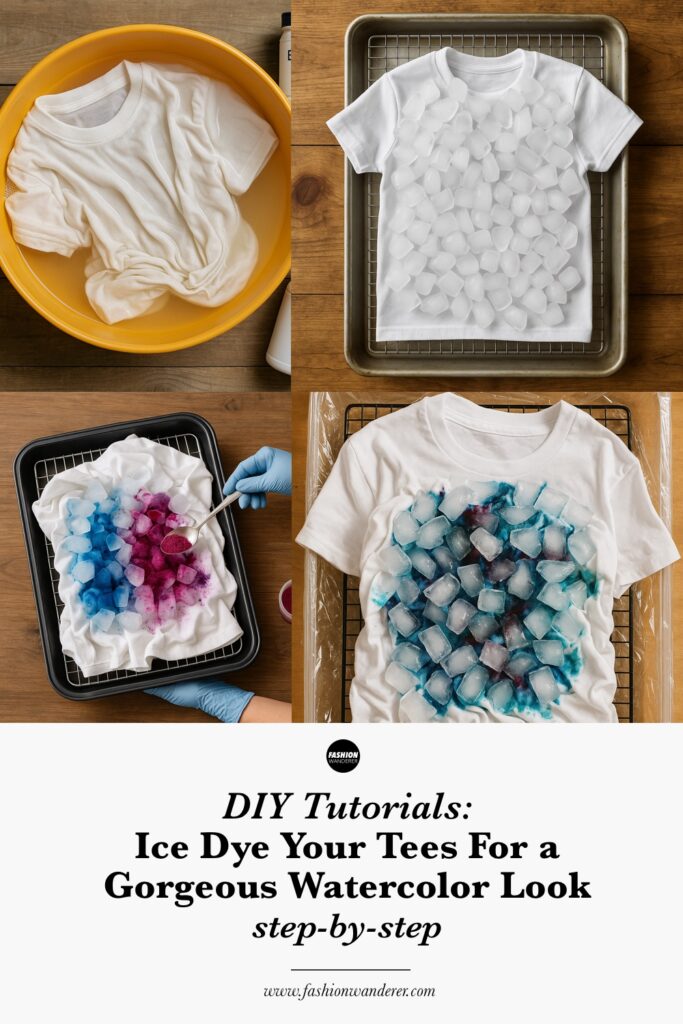
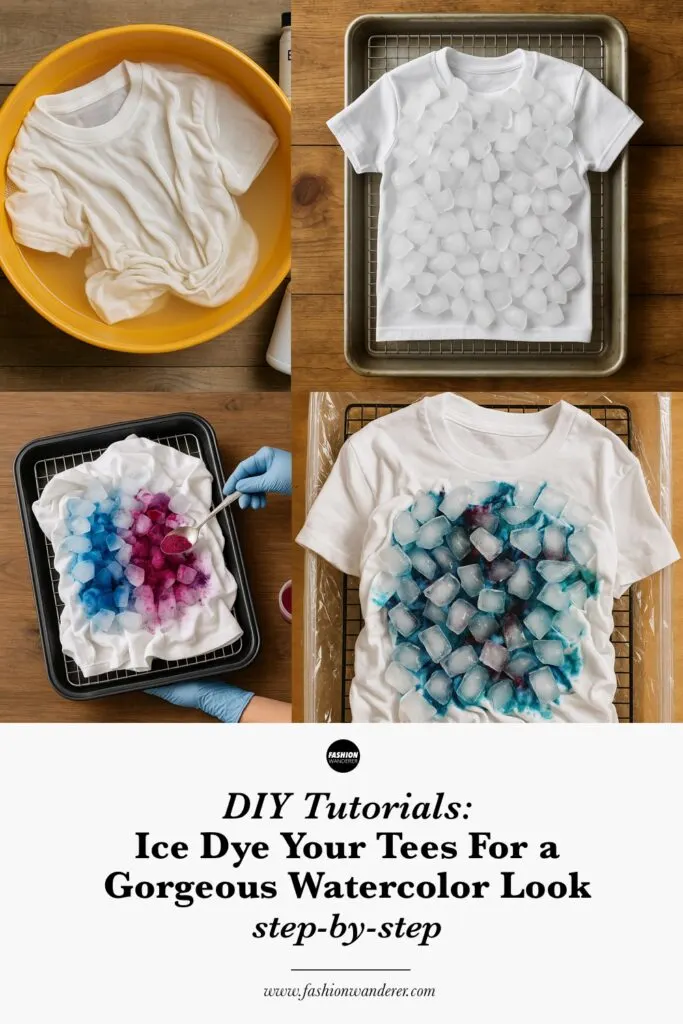
🧼 Step 1: Prep Your Shirt

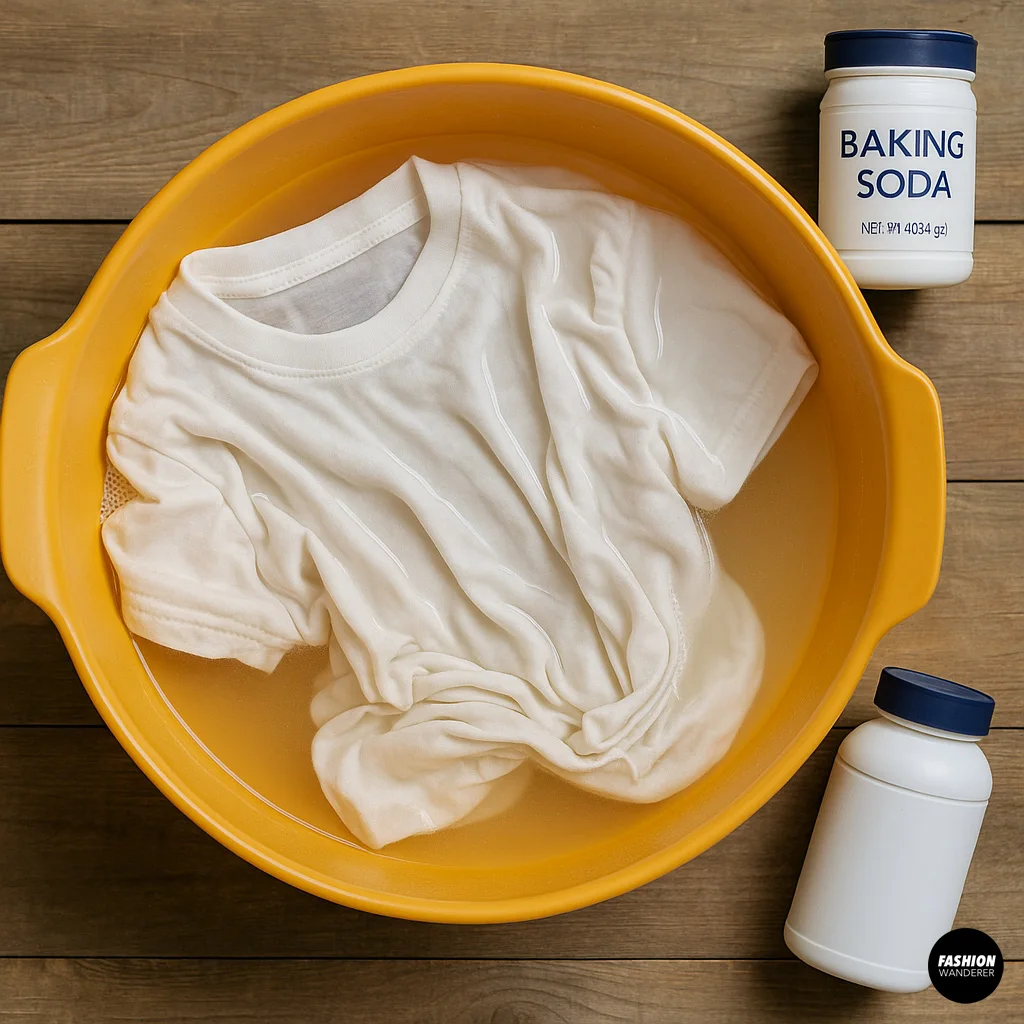
Start by washing your T-shirt without fabric softener to remove any finishes that may block dye absorption.
Next, soak the shirt in a soda ash solution for 15–30 minutes. Use 1 cup of soda ash per gallon of warm water. This helps the dye bond permanently with the fibers.
After soaking, wring out the shirt gently so it’s damp but not dripping.
🎨 Step 2: Set Up Your Dye Station

Ice dyeing is messy, so work outside or cover your surface with a tarp.
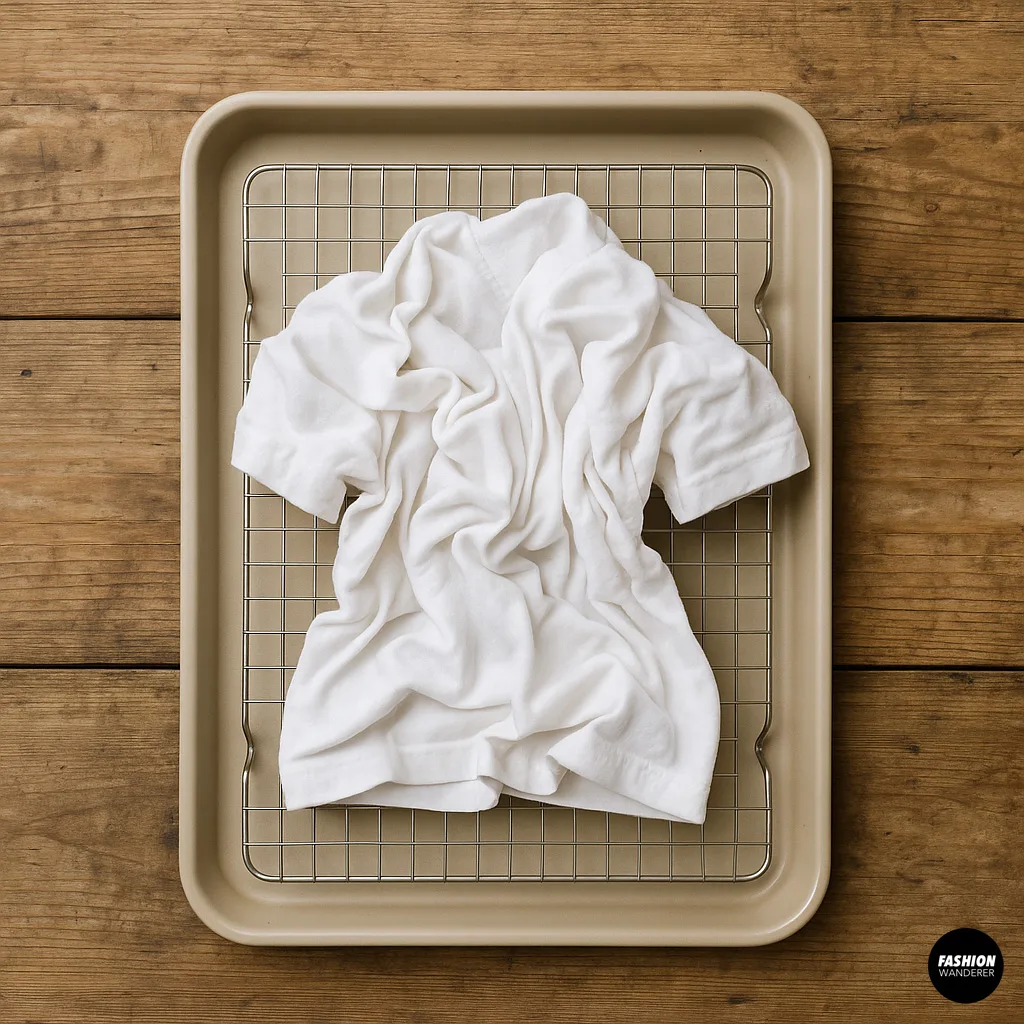
- Place a wire rack over a plastic tray or bin.
- Lay the damp shirt on the rack—crumple it, twist it, scrunch it into loose folds, or pleat it in fan shapes. The more surface variation, the more interesting the dye flow.
- Make sure the shirt isn’t lying in its own puddle. Elevating it helps the dye and water drain through for cleaner results.
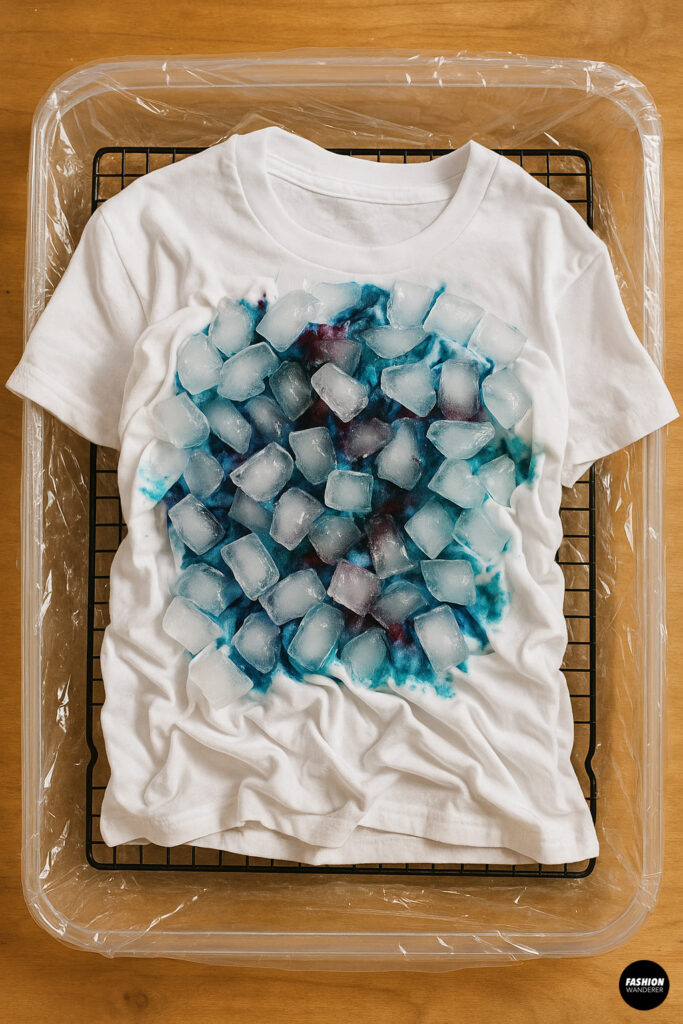
❄️ Step 3: Pile on the Ice
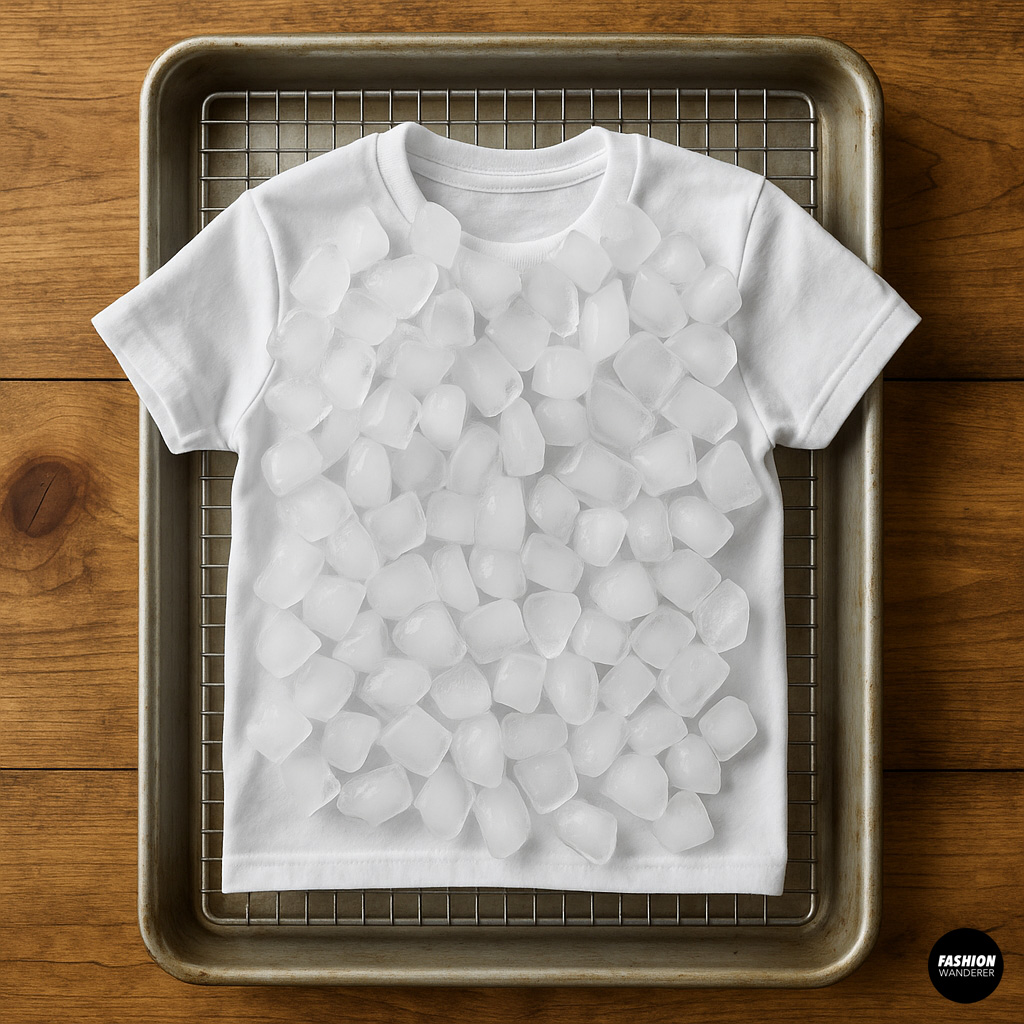
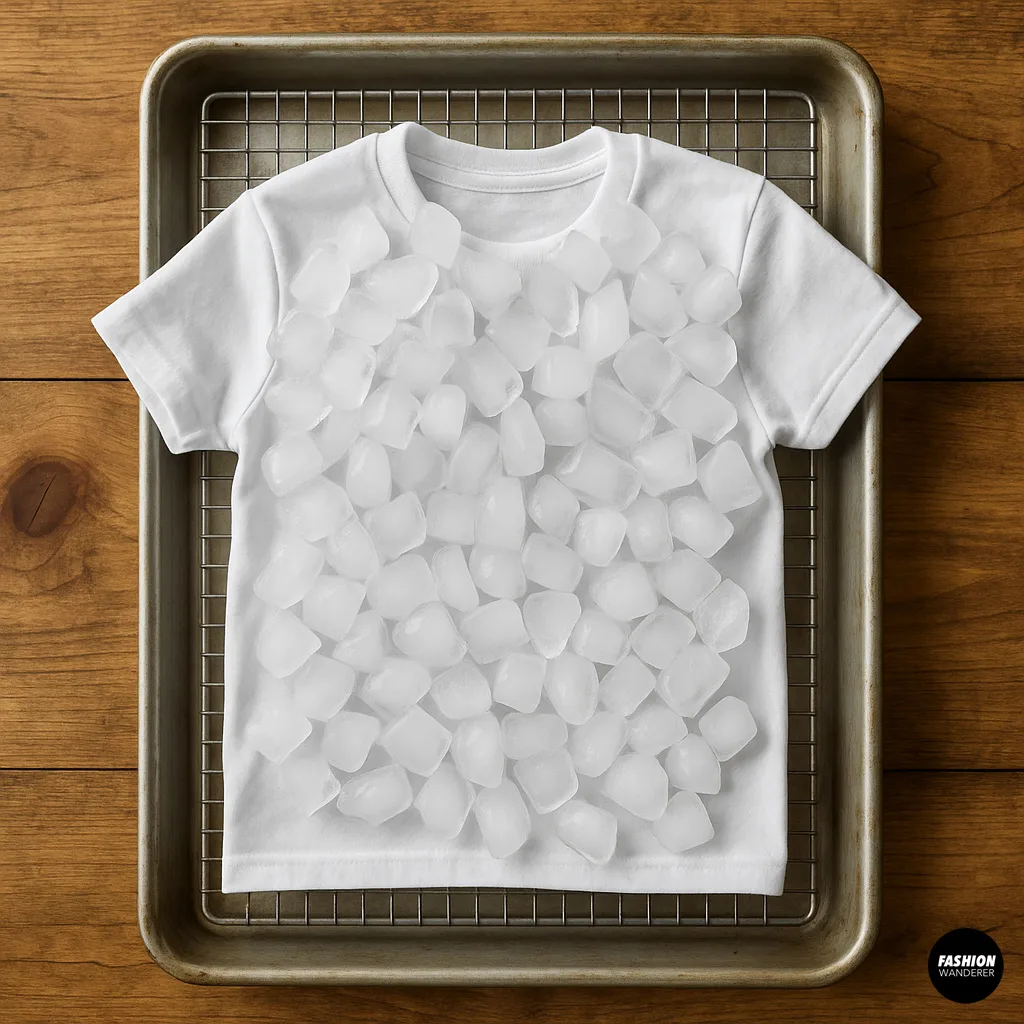
Cover the entire shirt with ice. Use either cubed or crushed ice (crushed melts faster and produces softer blends).
Ice should be layered evenly across the shirt, covering all fabric. Don’t press it down—allow it to sit lightly over the folds.
🌈 Step 4: Sprinkle the Dye Powder

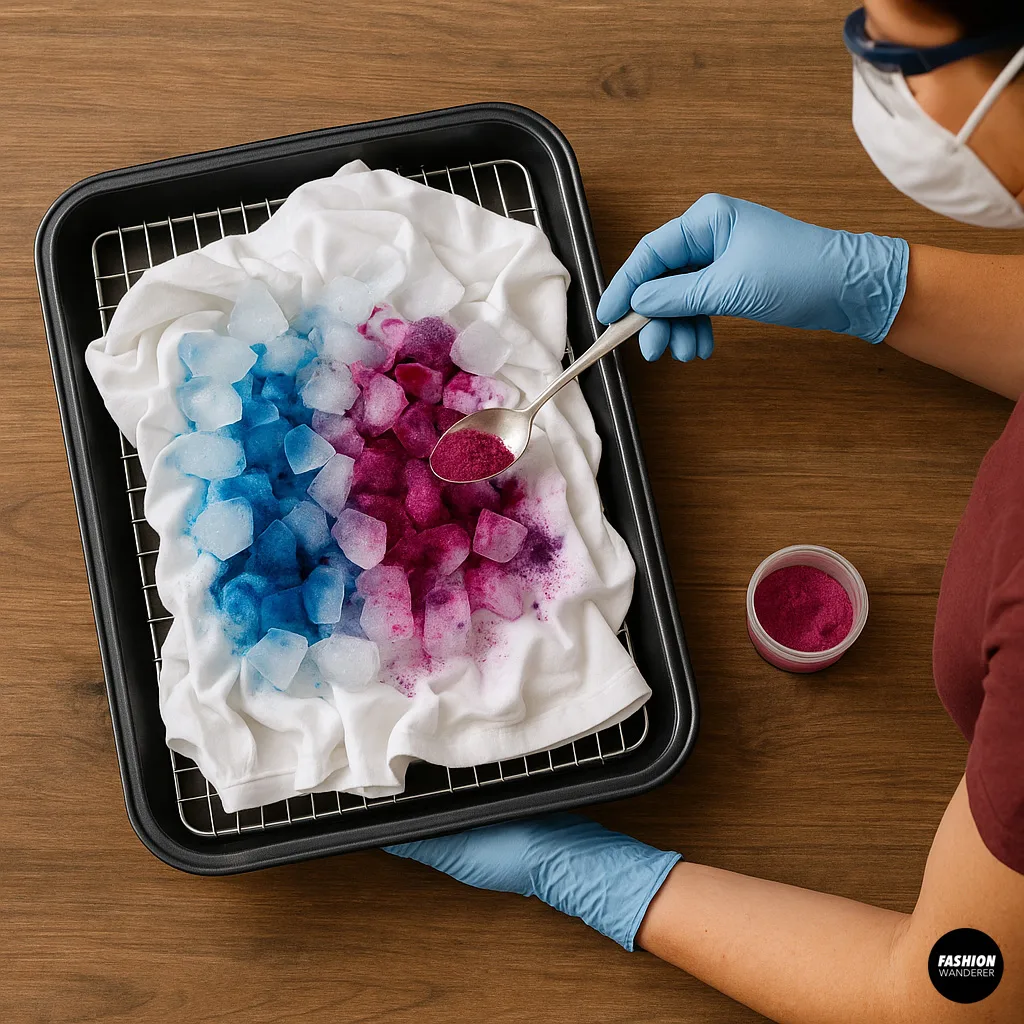
While wearing a mask and gloves, sprinkle small amounts of powdered dye over the ice. Use different colors in separate sections, or scatter randomly for a multicolor effect.
Tips for dye placement:
- Complementary colors (e.g., purple + yellow) may create browns where they overlap.
- Analogous colors (e.g., blue + green) blend more harmoniously.
- Leave some space between colors for clean contrasts or let them mix for watercolor transitions.
Use a spoon, sieve, or sifter for even application. A little dye goes a long way.
🕒 Step 5: Let It Melt and React
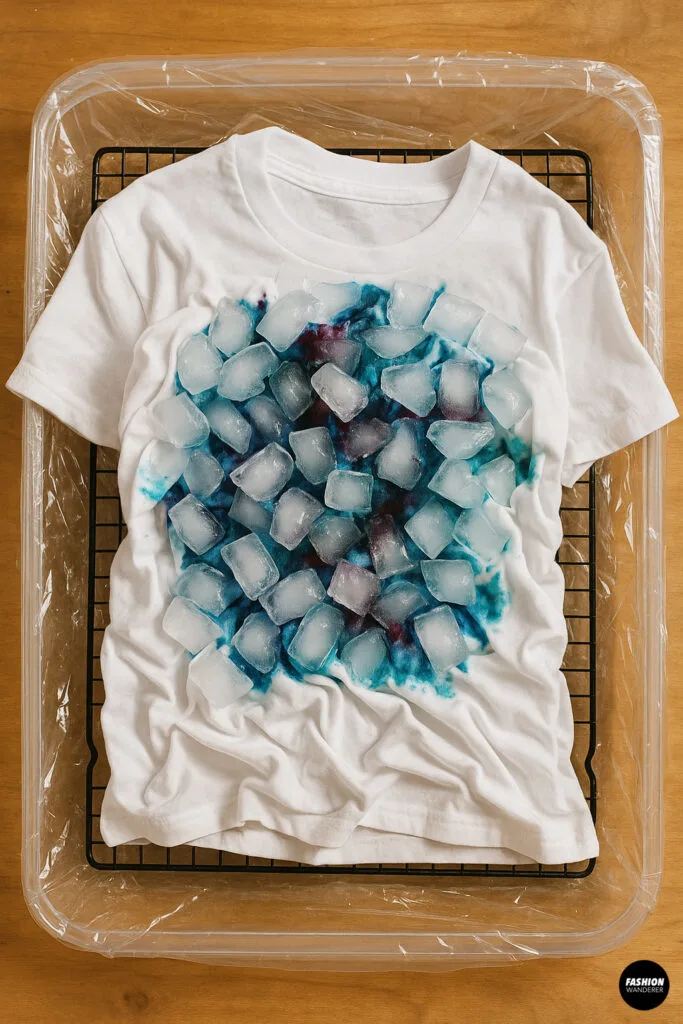
Let the ice melt slowly, undisturbed. This can take 6–12 hours depending on temperature and ice size.
Once fully melted:
- You can leave the shirt to sit for a few more hours to allow the dye to react.
- Optionally, cover the shirt with plastic wrap to keep it moist longer and encourage deeper saturation.
🧼 Step 6: Rinse and Wash
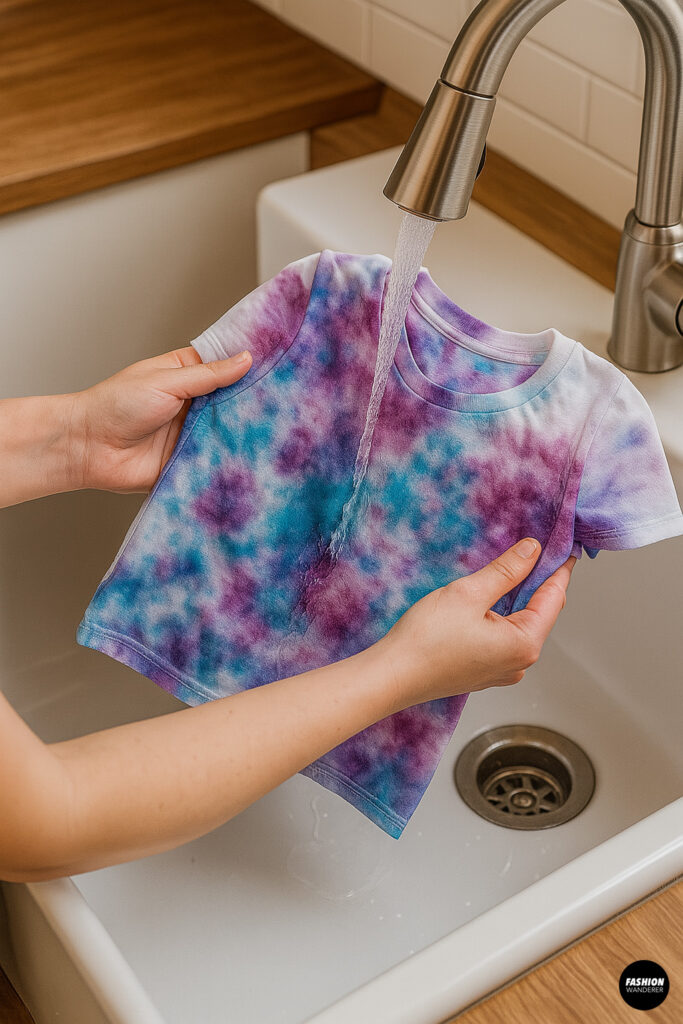

After the dye has set (ideally after 12–24 hours), it’s time to rinse:
- Remove the shirt from the rack and rinse under cold water until the water runs mostly clear.
- Follow up with warm water rinse, gently squeezing out excess dye.
- Machine wash the shirt alone in hot water with a small amount of detergent.
- Dry on low or hang dry.
Tip: Your first few washes may still release dye, so wash separately to avoid bleeding onto other garments.
💡 Creative Ideas & Tips
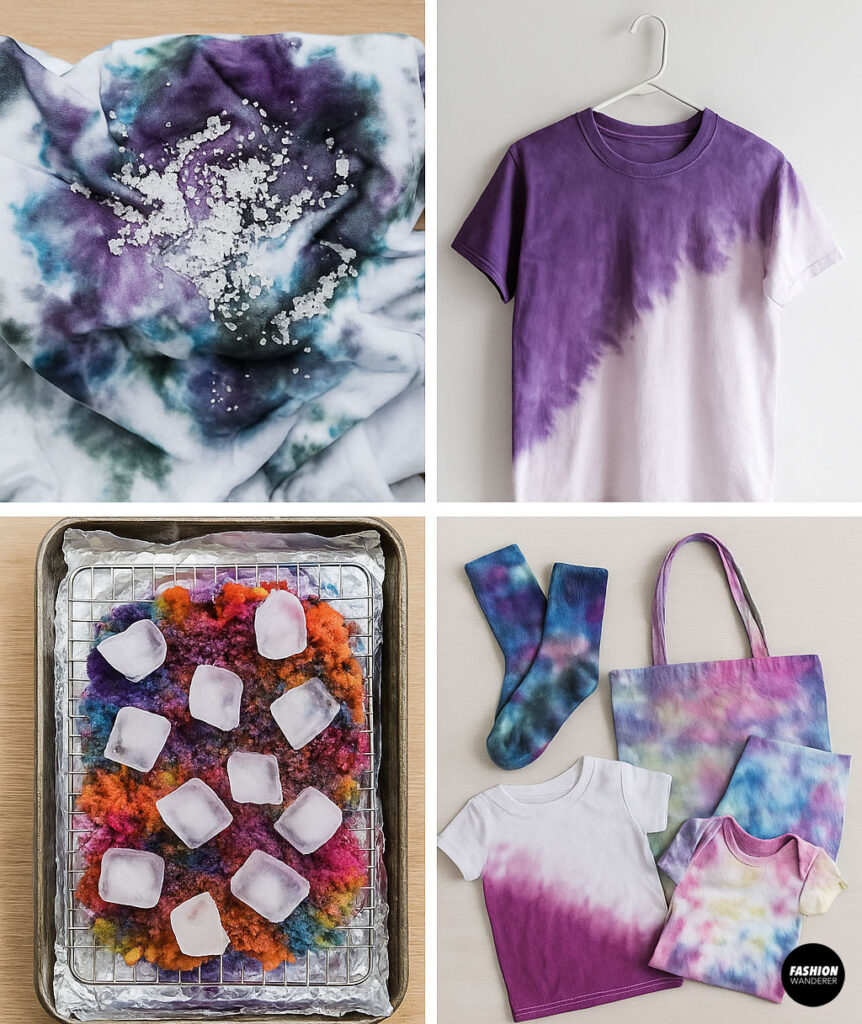

- Add salt or urea to intensify color vibrancy.
- Layer colors with a second round of ice dyeing for more depth.
- Try ombre effects by using more dye on one side of the shirt.
- Use this method for other items like socks, tote bags, scarves, and baby onesies.
👚 Best Shirt Styles for Ice Dyeing
- Oversized cotton tees
- Cropped tees or tanks
- Lightweight sweatshirts or long-sleeves
- Upcycled or thrifted basics
Look for pre-washed, 100% cotton or other natural fibers like rayon, linen, or bamboo. Synthetic fabrics won’t absorb dye as well.
👏 Final Thoughts: Wearable Watercolor Magic
Learning how to ice dye your tees opens up a world of textile art that’s affordable, low-waste, and creatively rewarding. Whether you’re a seasoned DIYer or just dipping your toes into fabric dyeing, this method delivers stunning results with minimal effort.
So pull out your plain shirts and turn them into vibrant, one-of-a-kind pieces. The beauty of ice dye is that no two tees will ever be the same—and that’s the magic of slow-melt creativity.
Trendy, Affordable Sewing Patterns for All Sizes


Tie Shoulder Jumpsuit Pattern


Palazzo Pants Sewing Pattern


Pocket Overall Romper Pattern


Wrap Maxi Skirt Sewing Pattern


Tie Back Top Sewing Pattern