
If you’ve got an old scarf lying around that you never wear, don’t toss it! Scarves are some of the most versatile pieces of fabric for upcycling projects. With their soft drape, pretty patterns, and generous size, scarves can easily be transformed into stylish accessories.
Recently, I grabbed a scarf from the back of my closet and turned it into a matching bag and headband set—and I can’t stop wearing them.
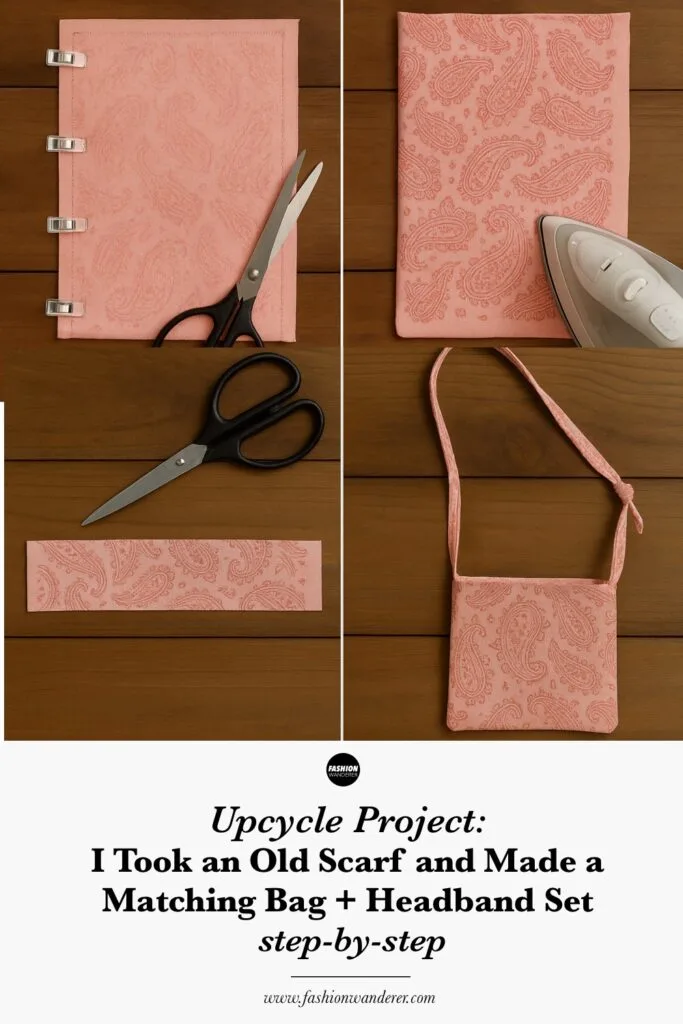
This beginner-friendly DIY accessory project is fast, fun, and perfect for upgrading your wardrobe on a budget. Follow along for a full step-by-step guide, plus tips for styling your new set.
Why Scarves Are Perfect for Upcycling
Scarves are a dream fabric for DIY fashion projects. Here’s why:
- Lightweight but durable: Great for accessories that need structure but not bulk.
- Variety: Patterns, florals, paisleys, solids—each scarf gives a different vibe.
- Budget-friendly: Use an old scarf you already own or pick one up at a thrift shop for under $5.
- Eco-conscious: Upcycling textiles reduces waste and gives forgotten pieces a new life.
Why I Love This DIY
This upcycled scarf set has quickly become one of my favorite DIY projects. It’s:
- Practical: A bag and headband are accessories I use daily.
- Stylish: The matching set looks intentional and fashion-forward.
- Affordable: I spent $0 because I already had the scarf!
- Eco-friendly: Instead of discarding the scarf, I gave it new life.
Every time I wear the set, people are surprised when I tell them it used to be a scarf.
What You’ll Need


- 1 lightweight scarf (at least 24×24 inches)
- Fabric scissors
- Measuring tape or ruler
- Sewing pins or clips
- Sewing machine (or needle & thread for hand-sewing)
- Optional: Fusible interfacing for bag structure
- 1 button, snap, or magnetic closure (optional for the bag)
- Elastic band (about ½ inch wide) for the headband
DIY Old Scarf into Matching Bag and Headband Set


Step 1: Prep Your Scarf


Lay your scarf flat on a table. Iron it if it’s wrinkled—this makes cutting and sewing much easier. Decide if you want to keep the original hem of the scarf or trim it off for a cleaner edge.
Step 2: Cut Fabric for the Bag


Measure and cut two rectangles from the scarf, each about 12×14 inches. These will be the front and back panels of your bag.
Optional: If your scarf is very thin, cut the same size pieces from fusible interfacing to add structure.
Step 3: Sew the Bag Panels


- Place the two rectangles right sides together.
- Pin along the sides and bottom, leaving the top open.
- Sew a straight stitch with ½-inch seam allowance.
- Turn right-side out and press with an iron.
Now you have the base of your bag!
Step 4: Add a Strap


Decide what kind of strap you’d like:
- Matching Fabric Strap: Cut a long strip from the scarf (about 4 inches wide, 30–40 inches long). Fold it in half lengthwise, right sides together, and sew along the edge. Turn inside out and press.
- Simple Knot Strap: Use a section of the scarf’s hem and tie it securely to each side of the bag.
Attach the strap by sewing it to the inside top corners of the bag. Reinforce with a few extra stitches.
Step 5: Finishing the Bag


Fold the top edge of the bag inward about ½ inch, then again ½ inch to encase raw edges. Sew around the top hem.
Optional: Add a button, snap, or magnetic closure to keep the bag secure.
Step 6: Cut Fabric for the Headband

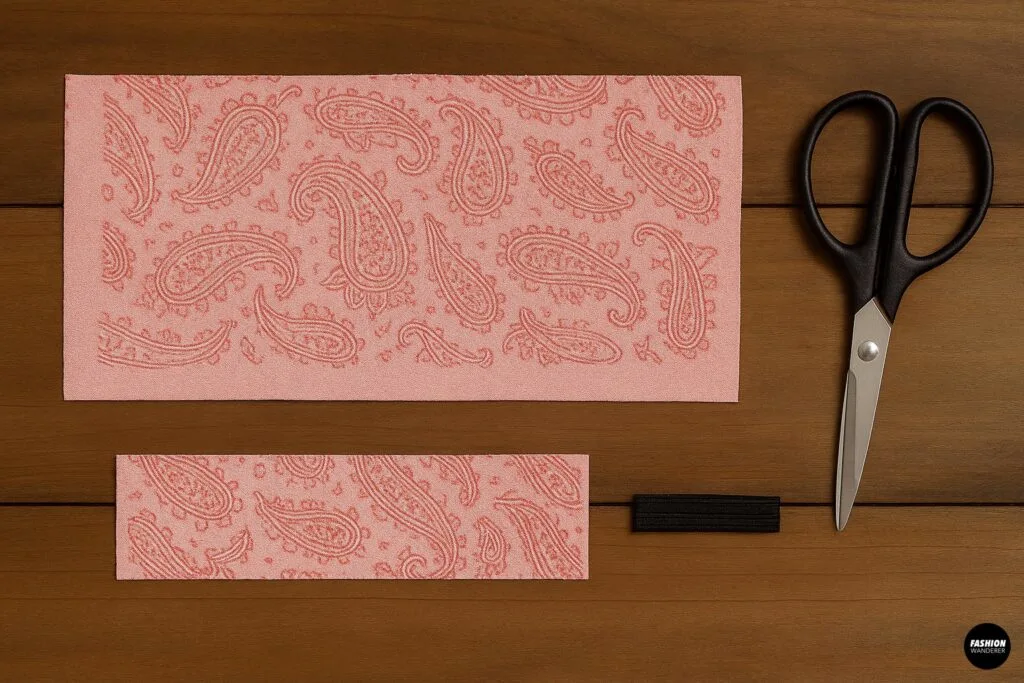
From the leftover scarf fabric, cut one strip about 18×4 inches (this will be the main band) and another smaller strip about 6×2 inches (to cover the elastic).
Cut a 6-inch piece of elastic (½ inch wide).
Step 7: Sew the Headband

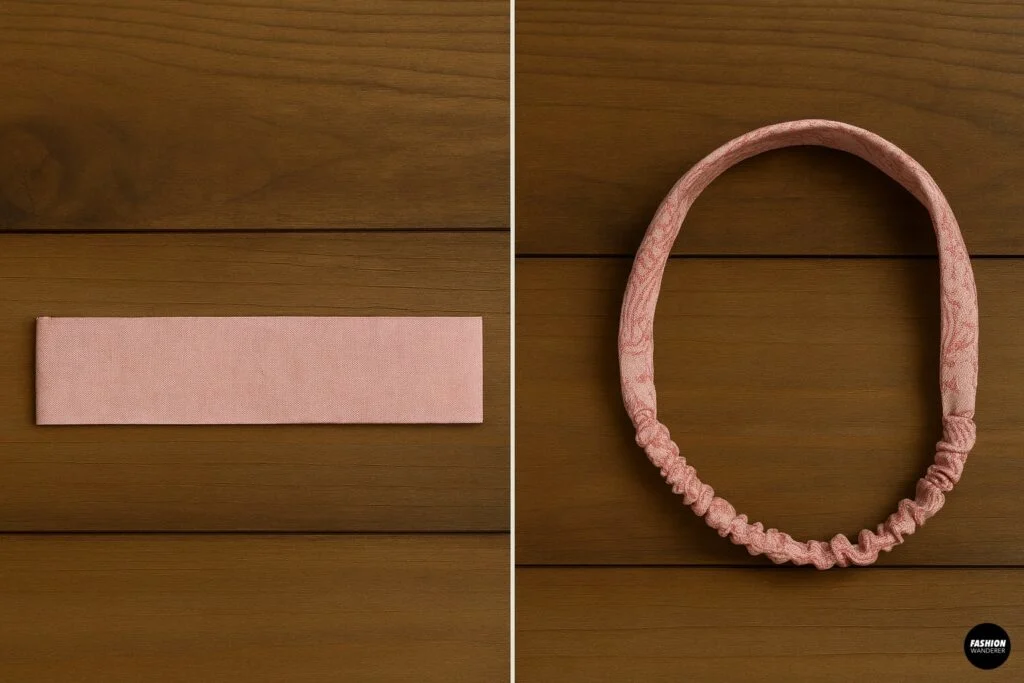
- Main Band: Fold the large strip in half lengthwise, right sides together, and sew along the edge. Turn right side out and press.
- Elastic Casing: Fold the smaller strip lengthwise, sew, and turn inside out. Insert the elastic into the casing and stitch the ends to secure.
- Assemble: Attach the elastic casing to the ends of the main band. Overlap the raw edges and sew securely.
You now have a soft, stretchy headband that matches your bag perfectly!
Extra Customization Ideas

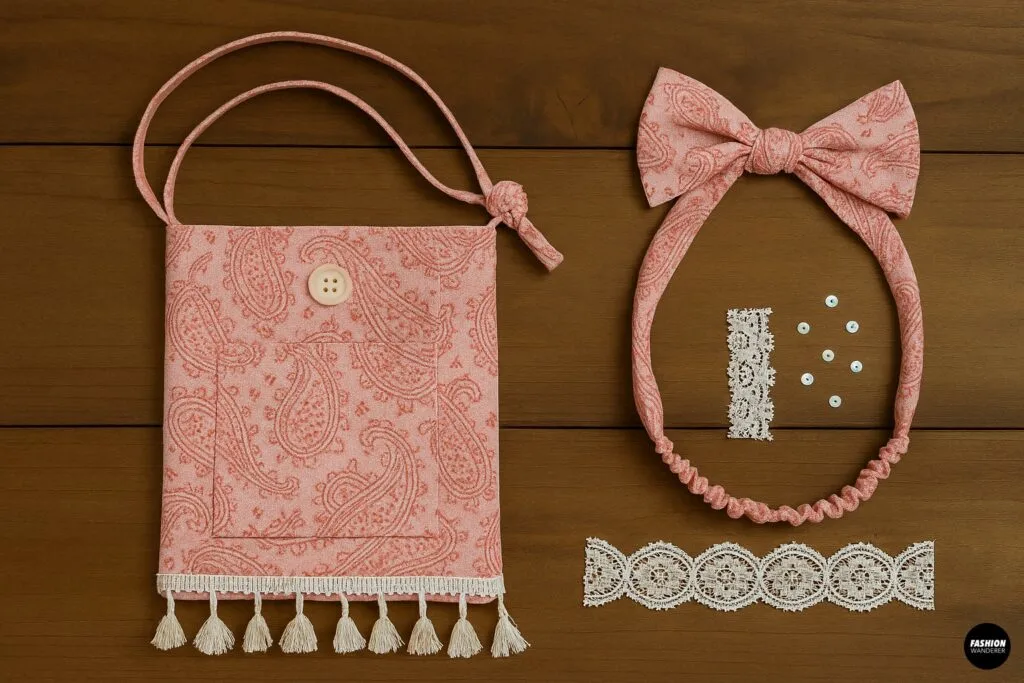
Want to make your scarf set unique? Try these fun add-ons:
- Tassels or Fringe: Add tassels along the bottom of the bag for a boho look.
- Patch Pocket: Use extra fabric to create a front pocket on the bag.
- Bow Headband: Leave extra length on the headband fabric to tie into a bow.
- Embellishments: Sew on beads, sequins, or lace trim for a one-of-a-kind finish.
How to Style Your Matching Bag + Headband

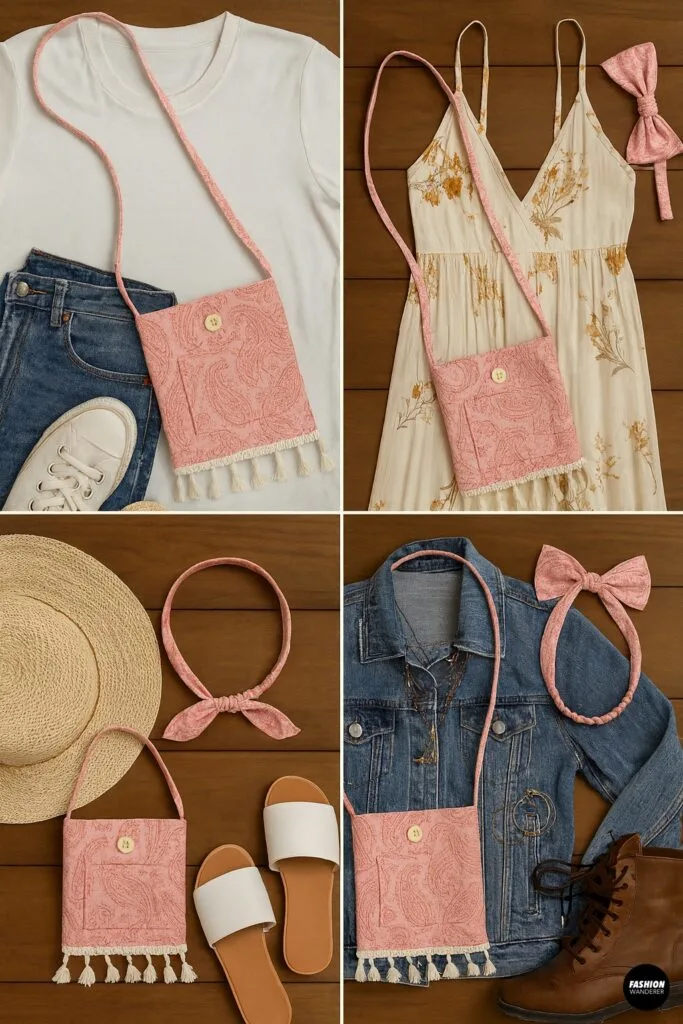
This set is versatile and can be styled in so many ways:
- Casual Everyday Look: Pair with jeans, a white tee, and sneakers.
- Boho Chic: Match with a flowy maxi dress and sandals.
- Beach Day: Use the bag as a lightweight tote and wear the headband to keep your hair back.
- Festival Vibes: Add layered jewelry and boots for a carefree, stylish outfit.
Care Tips
Since scarves are often delicate, hand wash your set in cold water with mild detergent. Lay flat to dry. Avoid wringing or twisting to keep the fabric’s shape intact.
Final Thoughts

Upcycling a scarf into a bag and headband set is a quick, beginner-friendly sewing project with big impact. It requires minimal materials, only a few stitches, and results in trendy, functional accessories you’ll love to wear.
So before you donate or toss that old scarf, think twice—it could become your next favorite DIY fashion statement. Whether you’re styling it for class, brunch, or a weekend trip, this matching set is proof that sustainable fashion is stylish, creative, and fun.
Trendy, Affordable Sewing Patterns for All Sizes


Tie Shoulder Jumpsuit Pattern


Palazzo Pants Sewing Pattern


Pocket Overall Romper Pattern


Wrap Maxi Skirt Sewing Pattern


Tie Back Top Sewing Pattern