
Fall fashion is all about cozy layers, earthy tones, and pieces that transition easily from the classroom to weekend outings. But what if I told you that your old button-up shirt—the one sitting in the back of your closet or borrowed from a thrift store—could become your new favorite fall wrap skirt?
That’s right. With just a few simple cuts and stitches, you can transform an oversized button-up into a chic, trendy skirt that pairs perfectly with boots, sweaters, and tights.
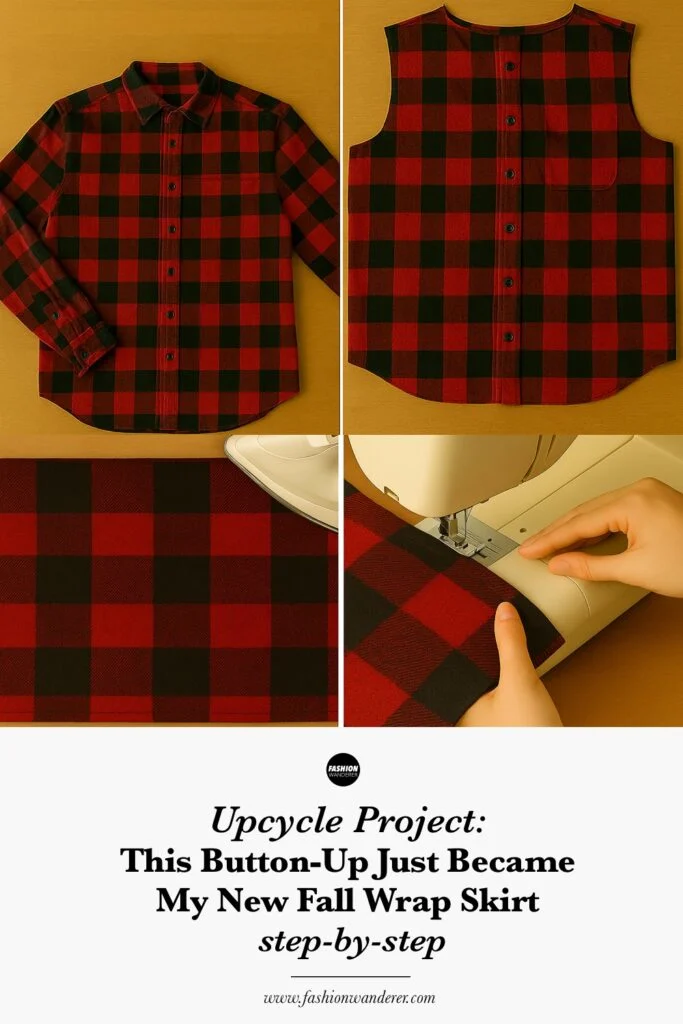
This beginner-friendly DIY is budget-conscious, sustainable, and packed with styling potential. Follow along as I show you exactly how I turned a basic button-up into my new fall wrap skirt.
Why a Button-Up Shirt Makes the Perfect Skirt
Before we dive into the tutorial, let’s talk about why button-ups are ideal for this transformation:
- Built-in buttons: No need to sew a closure from scratch. The shirt’s placket becomes the wrap detail of your skirt.
- Oversized fit: Larger men’s or thrifted shirts provide enough fabric to drape like a skirt.
- Variety: Plaid flannels, crisp cottons, or silky button-ups each create different vibes—grunge, classic, or polished.
- Eco-friendly: Upcycling reduces waste and gives neglected clothes a second life.
Why I Love This DIY
This button-up wrap skirt has quickly become my go-to fall piece. It’s:
- Affordable: Cost me nothing since I used a thrifted shirt.
- Unique: No one else has the exact same wrap skirt.
- Sustainable: A perfect upcycling project.
- Versatile: I can dress it up or down depending on the occasion.
Every time I wear it to class, I get compliments—and no one believes it started as a shirt.
What You’ll Need
- 1 oversized button-up shirt (men’s large or XL works best)
- Fabric scissors
- Tailor’s chalk or washable fabric marker
- Measuring tape
- Sewing pins or clips
- Sewing machine (or hand needle & thread if you prefer slow sewing)
- Optional: Elastic (for waistband), interfacing, or decorative trim
Step-by-Step Button-Up into Fall Wrap Skirt

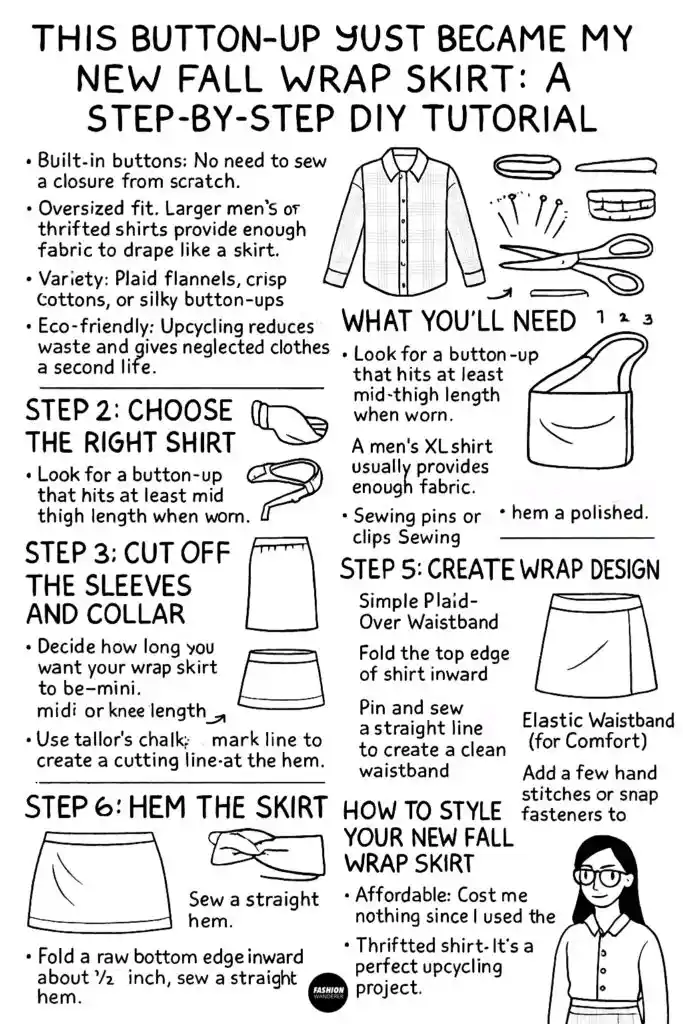
Step 1: Choose the Right Shirt

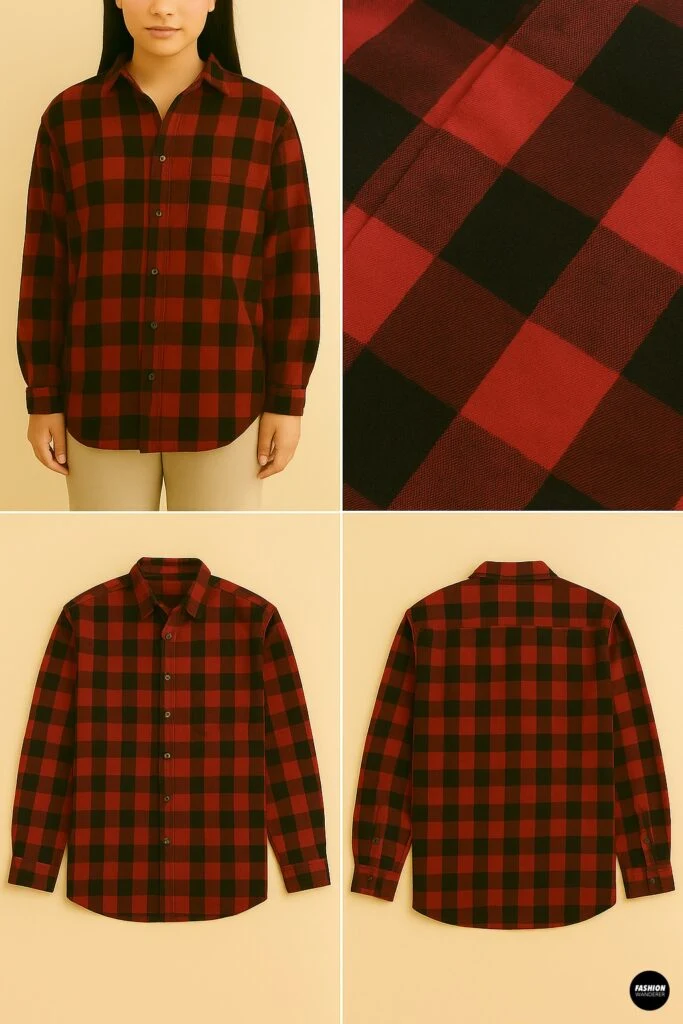
Look for a button-up that hits at least mid-thigh length when worn. A men’s XL shirt usually provides enough fabric. Cotton or flannel works well for structured skirts, while silky fabrics give more drape. This fall, plaid flannels and corduroy button-ups are especially on trend.
Step 2: Cut Off the Sleeves and Collar

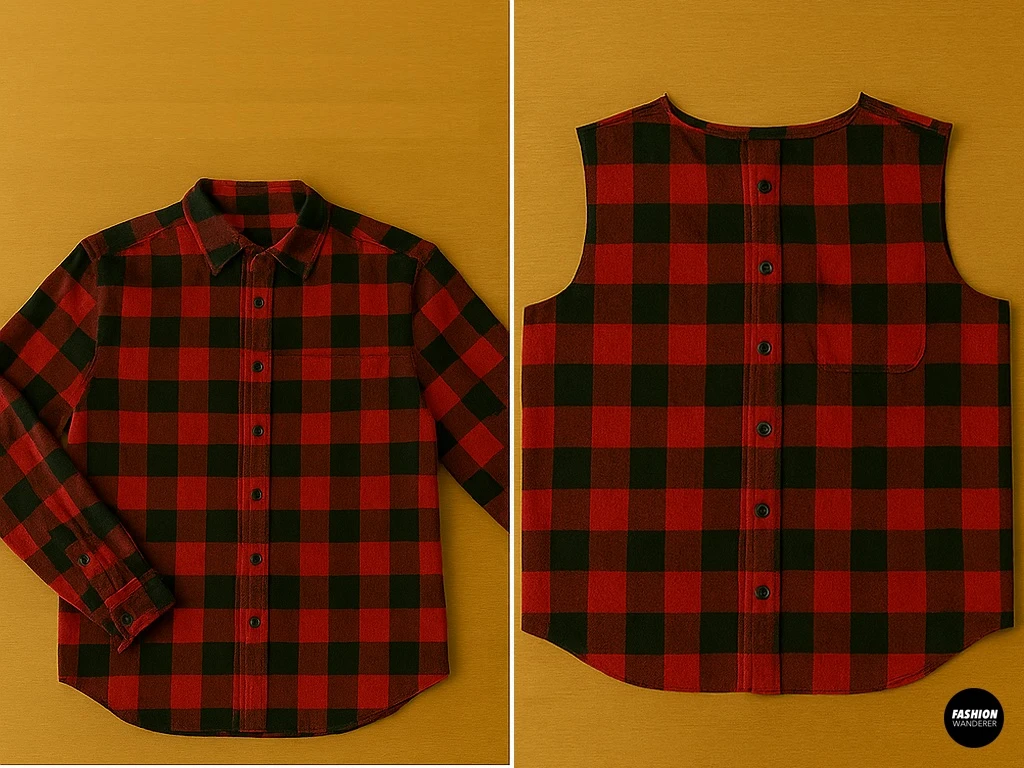
Lay the shirt flat on a table. Using fabric scissors, cut off the sleeves at the armholes. Next, remove the collar by cutting straight across the neckline. You should now have a shirt body that resembles a tube of fabric with a button placket down the center.
Pro Tip: Save the sleeves—you can use them later for patch pockets, ties, or even a matching headband.
Step 3: Determine Your Skirt Length

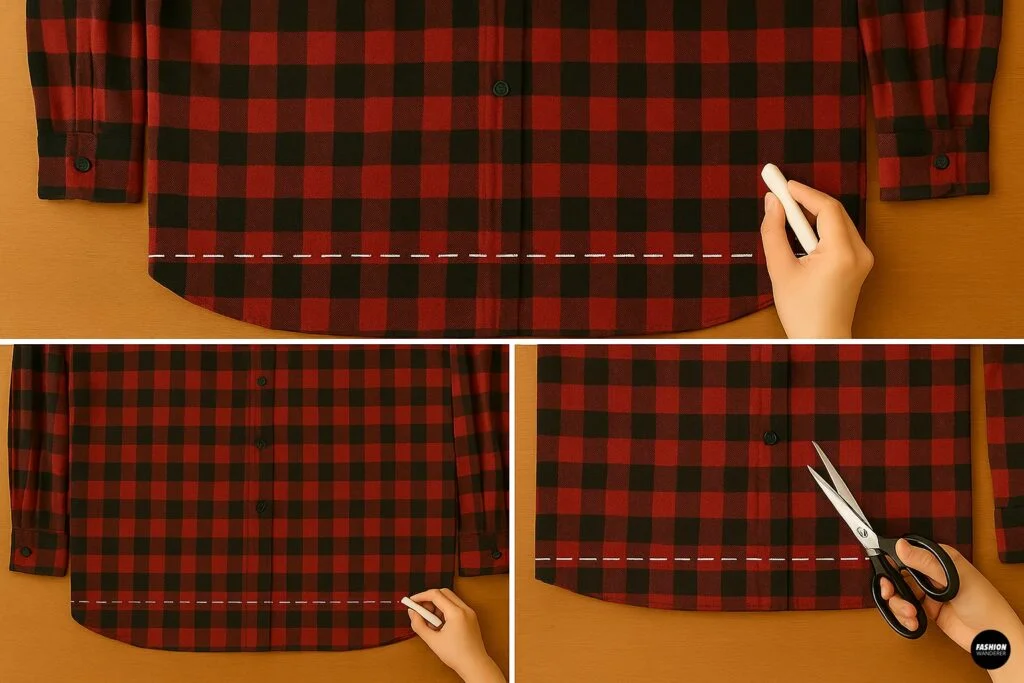
Decide how long you want your wrap skirt to be—mini, midi, or knee-length. Use tailor’s chalk to mark a cutting line at the hem. Add 1–2 inches for hemming. Cut straight across to even out the bottom edge.
Step 4: Fit the Waistband

Now that you have the basic skirt shape, it’s time to create a waistband. You have two options:
- Simple Fold-Over Waistband
- Fold the top edge of the shirt inward about 1 inch.
- Pin and sew a straight line to create a clean waistband.
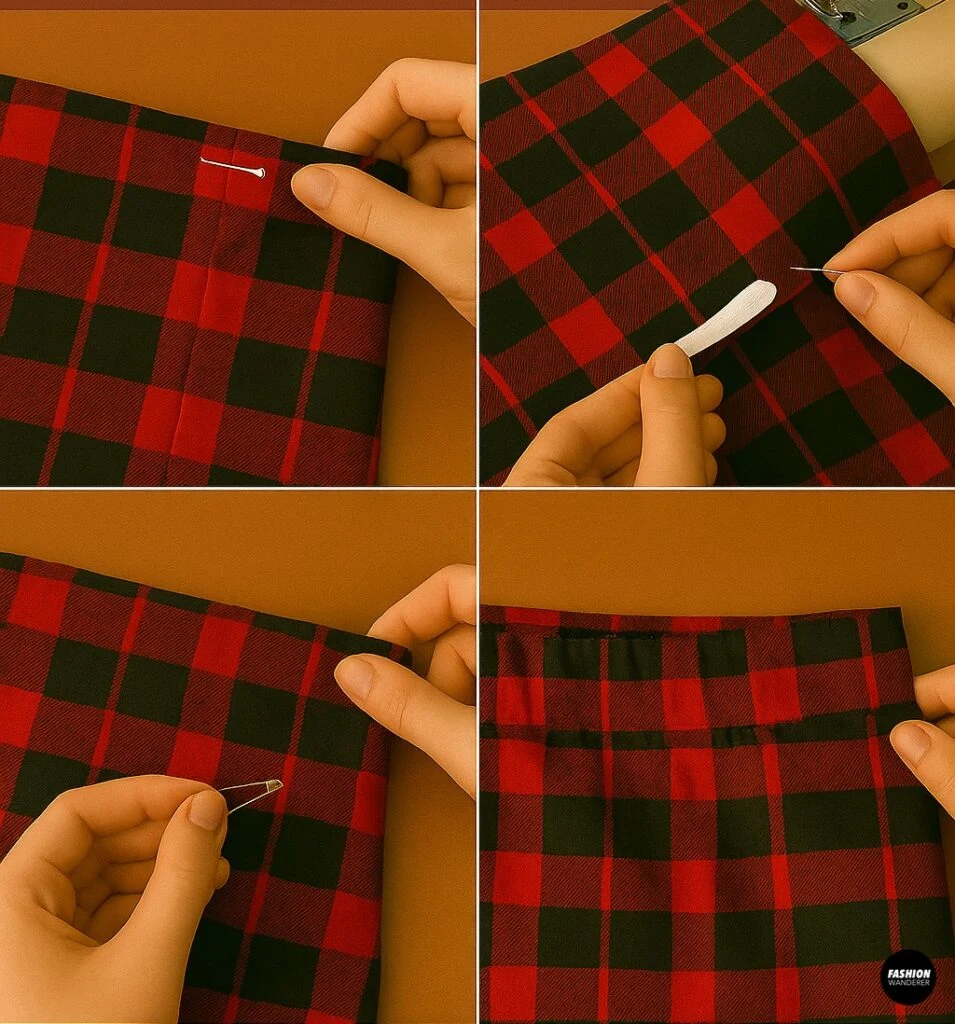
- Elastic Waistband (for Comfort)
- Fold the top edge over 1.5 inches to create a casing.
- Leave a small opening.
- Insert elastic (measured to your waist size) using a safety pin.
- Sew the opening closed.
Step 5: Create the Wrap Design

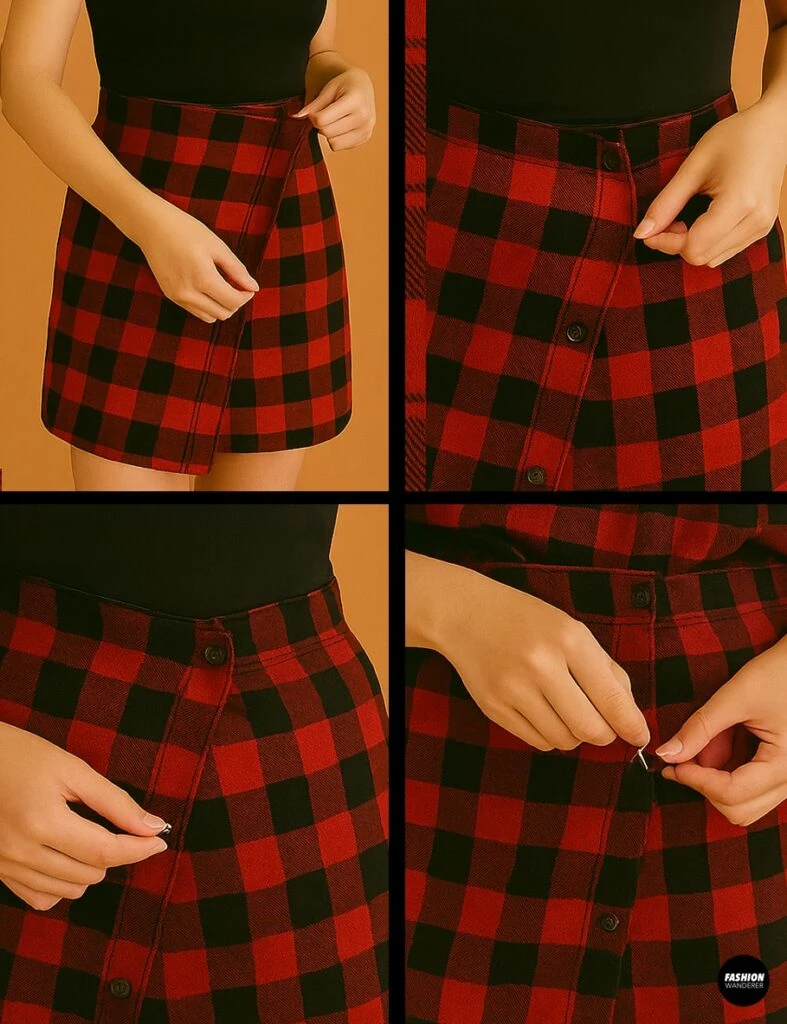
The magic of this skirt is in its wrap detail. Since the shirt already has a button placket, you’ll be repurposing it as the closure.
- Wrap the skirt around your waist so that the button placket overlaps slightly.
- Decide if you want it to close at the side or front.
- Mark where the overlap sits comfortably.
- Add a few hand stitches or snap fasteners to keep the overlap secure.
Step 6: Hem the Skirt

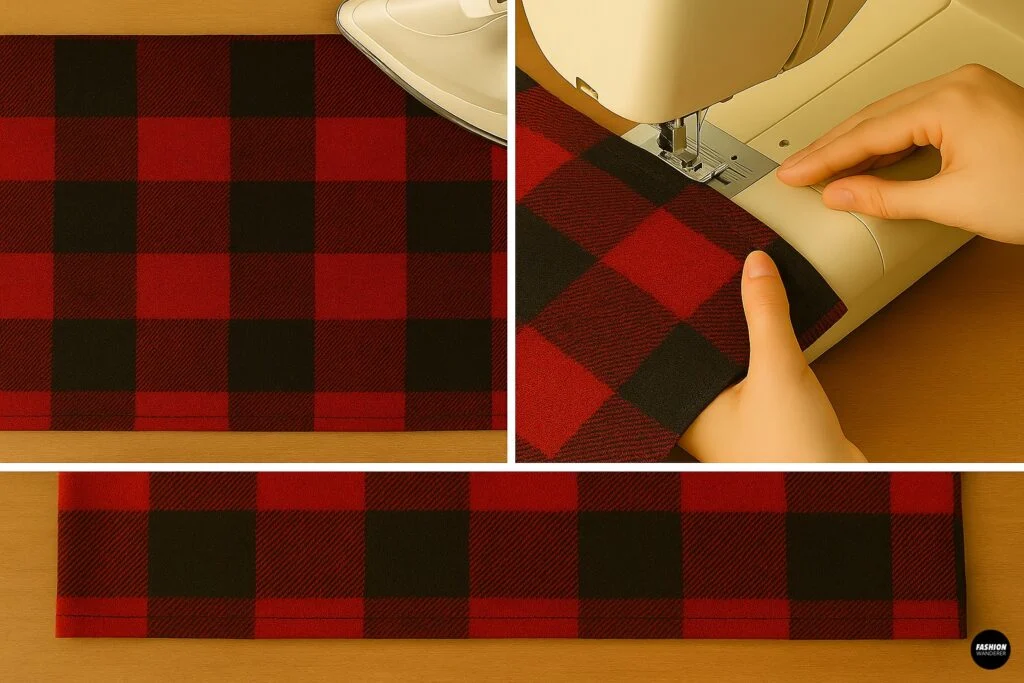
Fold the raw bottom edge inward about ½ inch, press with an iron, and sew a straight hem. This gives your skirt a polished, finished look.
Step 7: Add Extra Details (Optional)

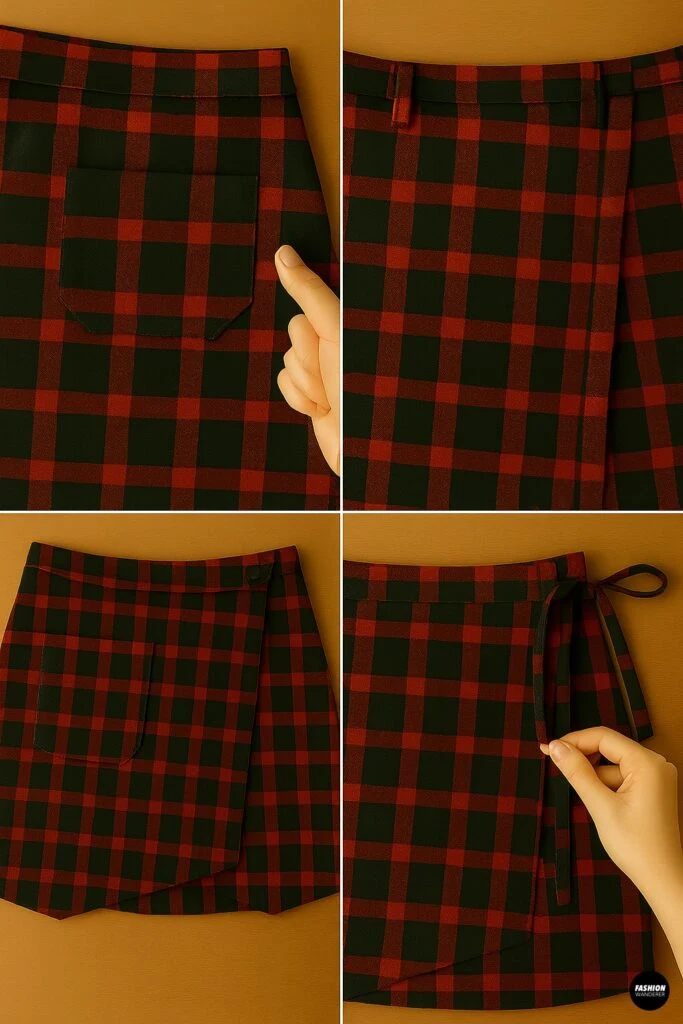
Want to make your wrap skirt unique? Try these customization ideas:
- Patch Pockets: Use leftover sleeve fabric to create big square pockets on the front.
- Belt Loops: Sew small strips of fabric along the waistband to hold a belt.
- Asymmetrical Hem: Keep the shirt tail shape for a high-low effect.
- Ties: Add fabric ties to the waistband for extra security and style.
How to Style Your New Fall Wrap Skirt

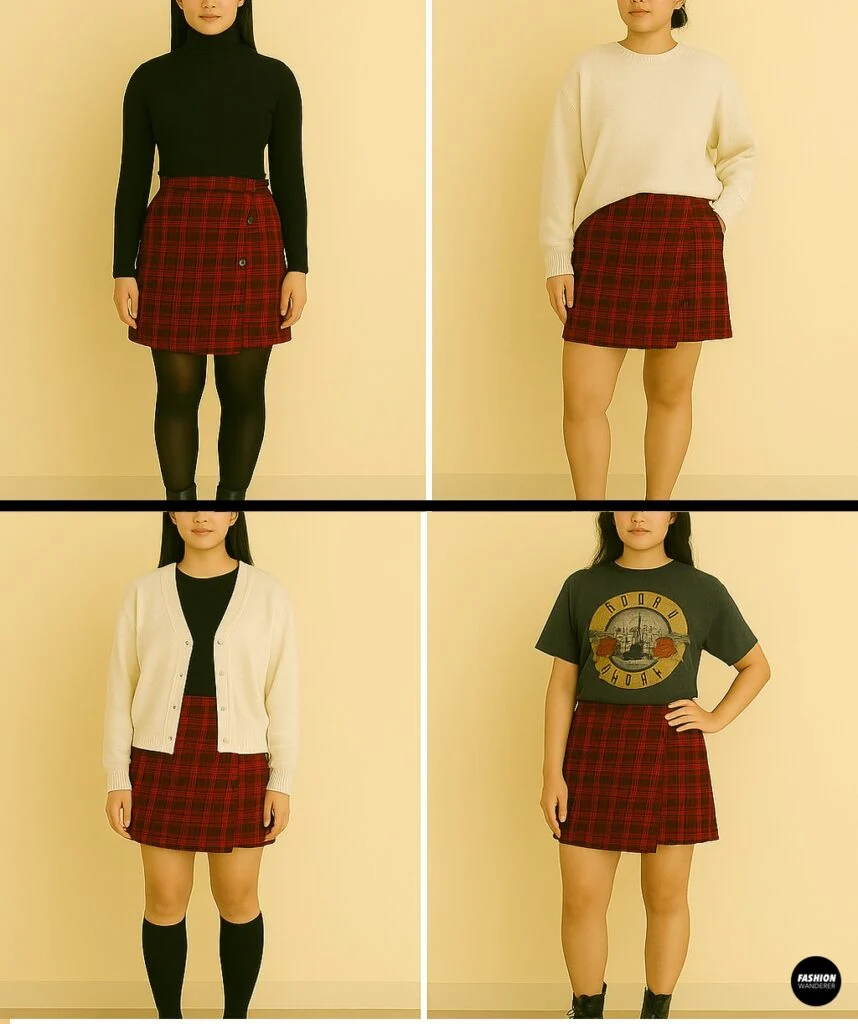
The best part about this DIY project is styling it! Here are a few outfit ideas:
- Classic Fall Look: Pair with a fitted turtleneck, tights, and ankle boots.
- Laid-Back Vibes: Wear with an oversized sweater and chunky sneakers.
- Preppy Edge: Style with knee-high socks and a cardigan.
- Grunge Inspired: Go for a plaid flannel wrap skirt with a band tee and combat boots.
Care Tips
Since this skirt started as a shirt, care depends on the fabric. Most cotton button-ups are machine washable—just wash cold and hang dry to keep the shape intact. If you added elastic, avoid high heat in the dryer.
Final Thoughts

Turning a button-up shirt into a fall wrap skirt is one of the easiest and most stylish upcycles you can try. It requires minimal sewing, uses materials you probably already have, and results in a trendy skirt you’ll actually want to wear. Whether you’re heading to class, a coffee date, or just running errands, this skirt proves that sustainable fashion can be chic and practical.
So next time you’re cleaning out your closet or thrifting, don’t pass up those oversized button-ups. With just a few stitches, you can give them new life—and maybe even your new favorite fall outfit.
Trendy, Affordable Sewing Patterns for All Sizes


Tie Shoulder Jumpsuit Pattern


Palazzo Pants Sewing Pattern


Pocket Overall Romper Pattern


Wrap Maxi Skirt Sewing Pattern


Tie Back Top Sewing Pattern