
Looking to elevate a basic tank top into something dreamy and feminine? Adding ruffle sleeves to your favorite sleeveless tank is an easy, budget-friendly DIY that instantly injects a romantic vibe into your wardrobe.
Whether you’re prepping for a summer date night or just want to feel a little more playful on the weekend, this project is totally beginner-friendly and requires minimal sewing skills.
Follow along as we show you exactly how to transform any tank into a ruffled masterpiece!
Why You’ll Love This DIY Ruffle Sleeve Upgrade
- Instant Romantic Charm: Ruffles are synonymous with soft, flirty style—perfect for date night, brunch, or weekend strolls.
- Customizable Look: Choose the width, length, and volume of your ruffles to suit your taste. Keep them subtle or go all out!
- Cost-Effective Refresh: Breathe new life into an existing tank rather than buying a new blouse.
- No Pattern Needed: We’ll show you how to draft your ruffle with simple measurements—no complex patterns or cutting mats required.
DIY Ruffle Sleeve Tank Top Upcycle

Supplies You’ll Need

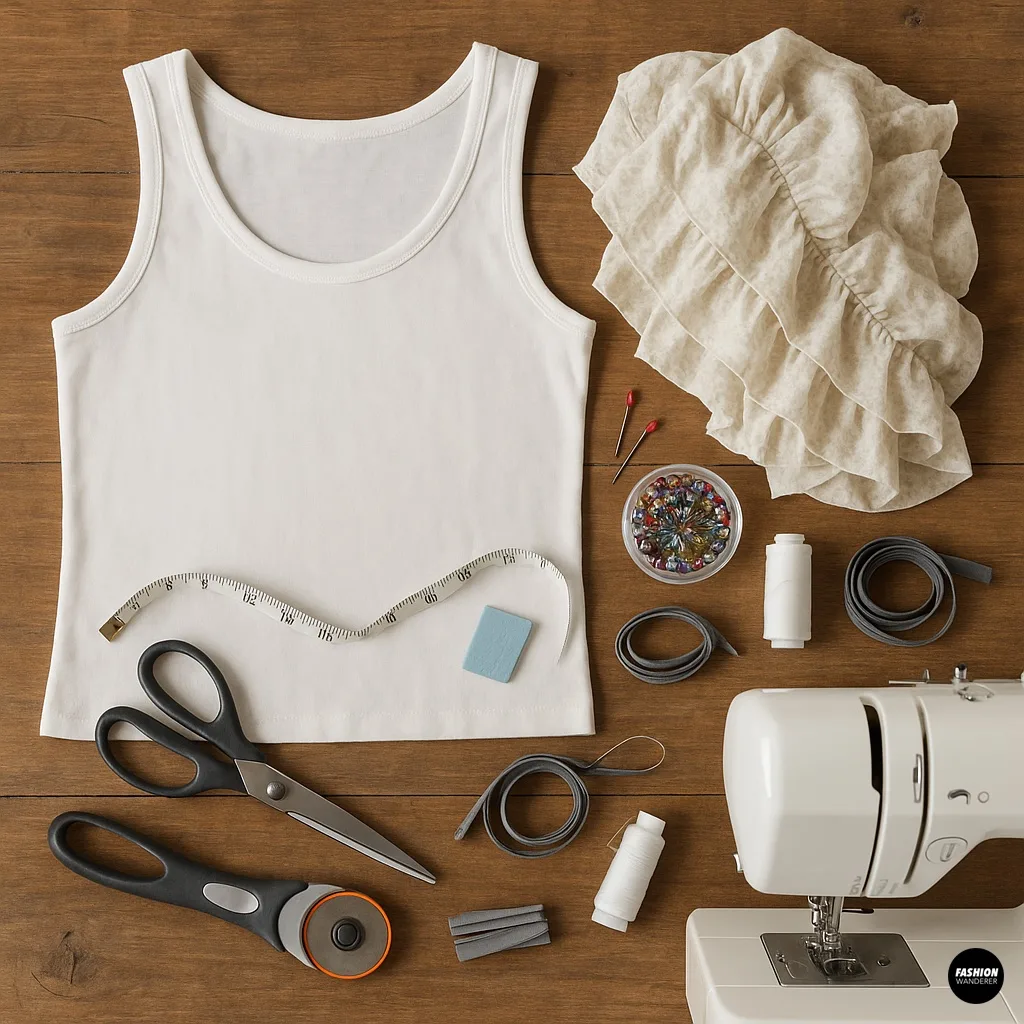
- One sleeveless tank top (cotton knit or lightweight jersey works best)
- Lightweight woven fabric for ruffles (cotton lawn, rayon challis, or chiffon)
- Fabric scissors or rotary cutter
- Measuring tape or ruler
- Tailor’s chalk or washable fabric marker
- Pins or fabric clips
- Sewing machine (or hand-sewing needle & thread)
- Matching thread
- Optional: coordinating bias tape for finishing
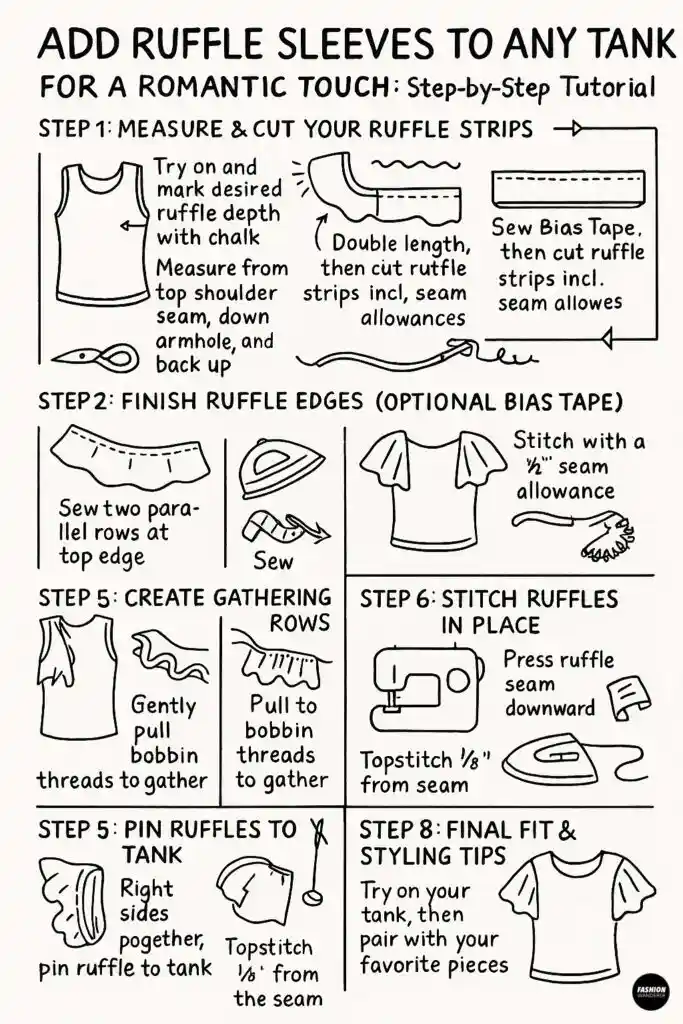
Step 1: Measure & Cut Your Ruffle Strips

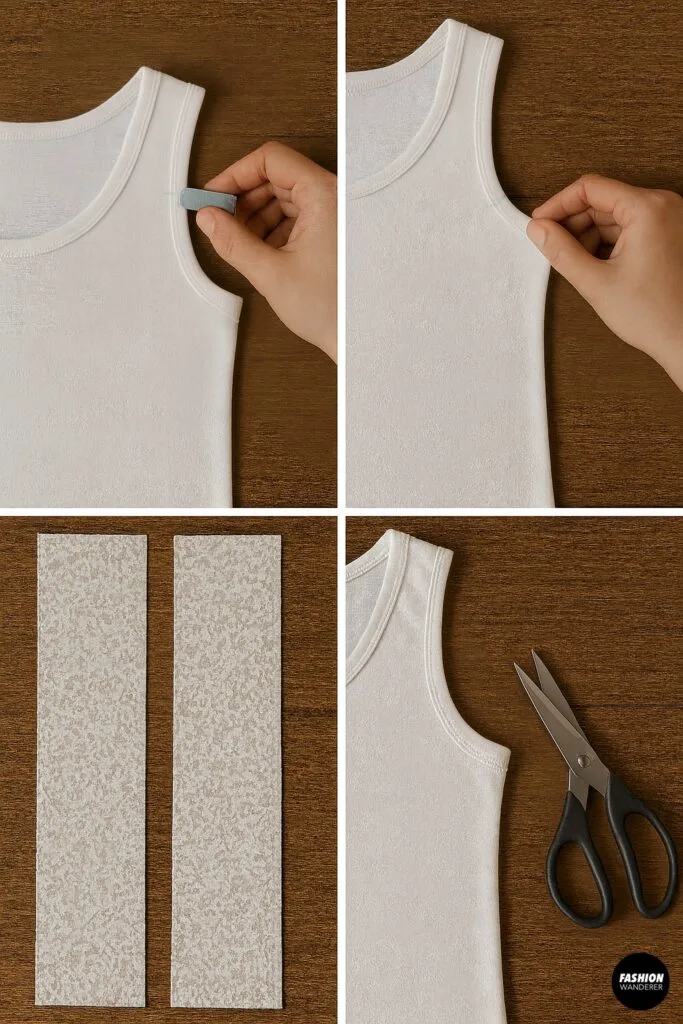
- Determine Ruffle Depth: Try on your tank and decide how deep you want the ruffle—typically 2–4 inches from the shoulder seam. Mark this measurement on your tank’s shoulder with chalk.
- Calculate Ruffle Length: Measure from the top shoulder seam, down the armhole, and back up to the opposite shoulder seam. Double this measurement to create a full, gathered ruffle.
- Cut Fabric Strips: From your chosen woven fabric, cut two long strips (one for each sleeve) to your calculated length plus ½” seam allowances. The width of each strip should be your desired ruffle depth × 2 (so it can fold in half), plus ½” seam allowances on top and bottom.
Example: If your armhole seam measures 16″ total and you want a 3″-deep ruffle:
- Ruffle length = 16″ × 2 = 32″ (+1″ for seams = 33″)
- Ruffle strip width = (3″ depth × 2) + 1″ = 7″
Step 2: Finish Ruffle Edges (Optional Bias Tape)

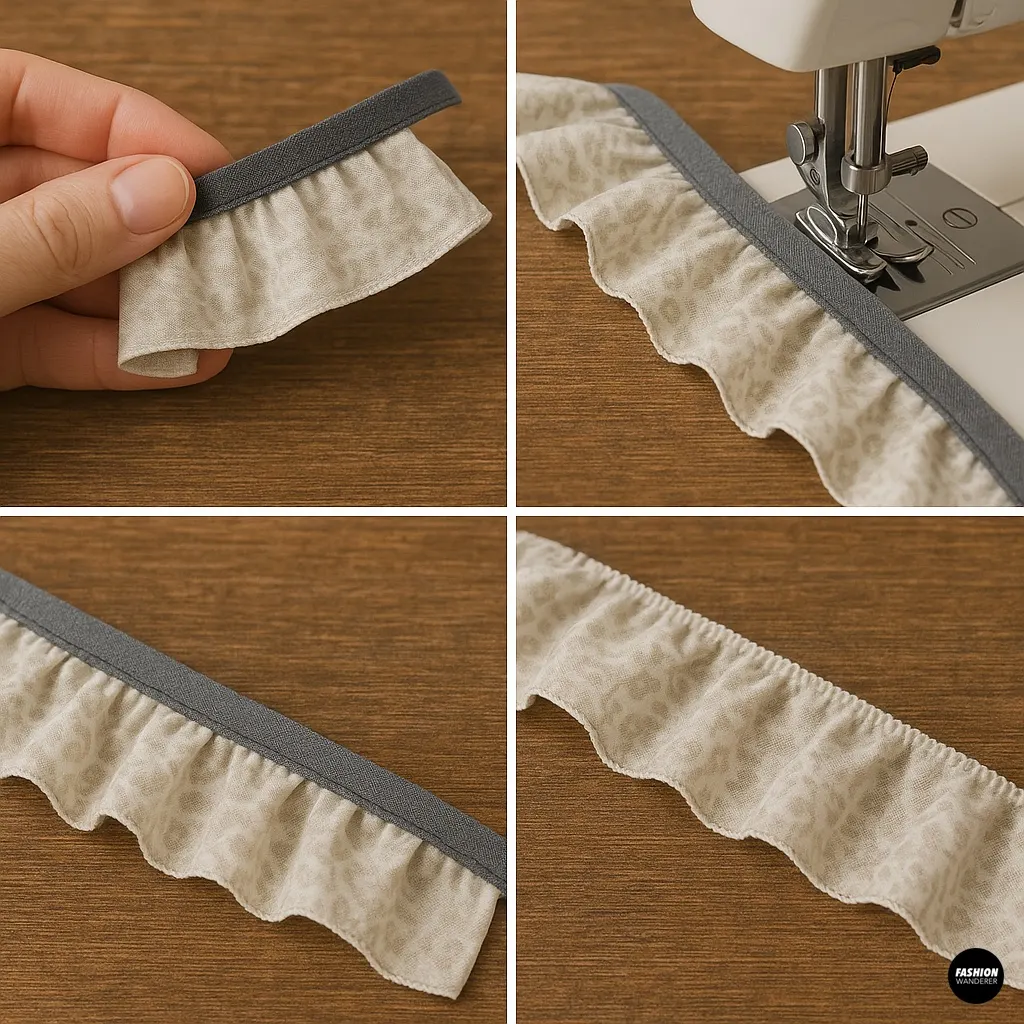
- If you prefer a crisp edge, bind both long sides of each strip with bias tape. Simply sandwich the raw ruffle edge inside the bias tape and stitch along the fold.
- For a softer frill, skip bias tape and simply finish raw edges with a narrow zigzag or serged seam.
Step 3: Create Gathering Rows

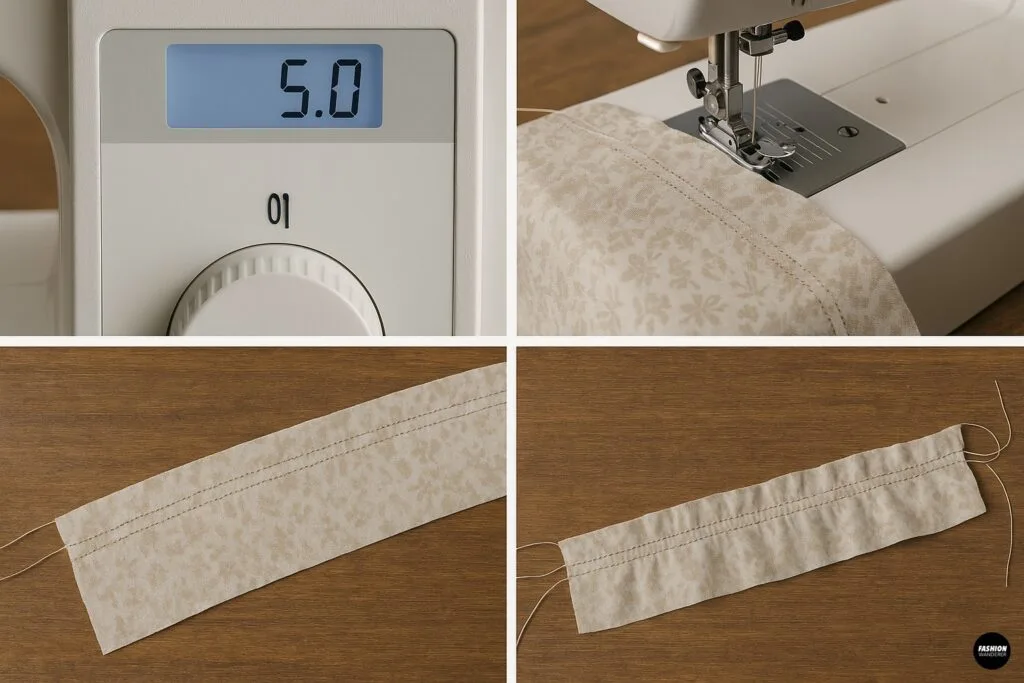
- Set Up Gathering Stitches: On your sewing machine, select the longest straight-stitch length (4.0–5.0 mm).
- Sew Two Parallel Rows: Stitch two parallel lines of gathering stitches down the top raw edge of each ruffle strip—one ⅛” from the edge and one ⅜” from the edge—leaving long thread tails at each end.
Step 4: Gather Your Ruffles

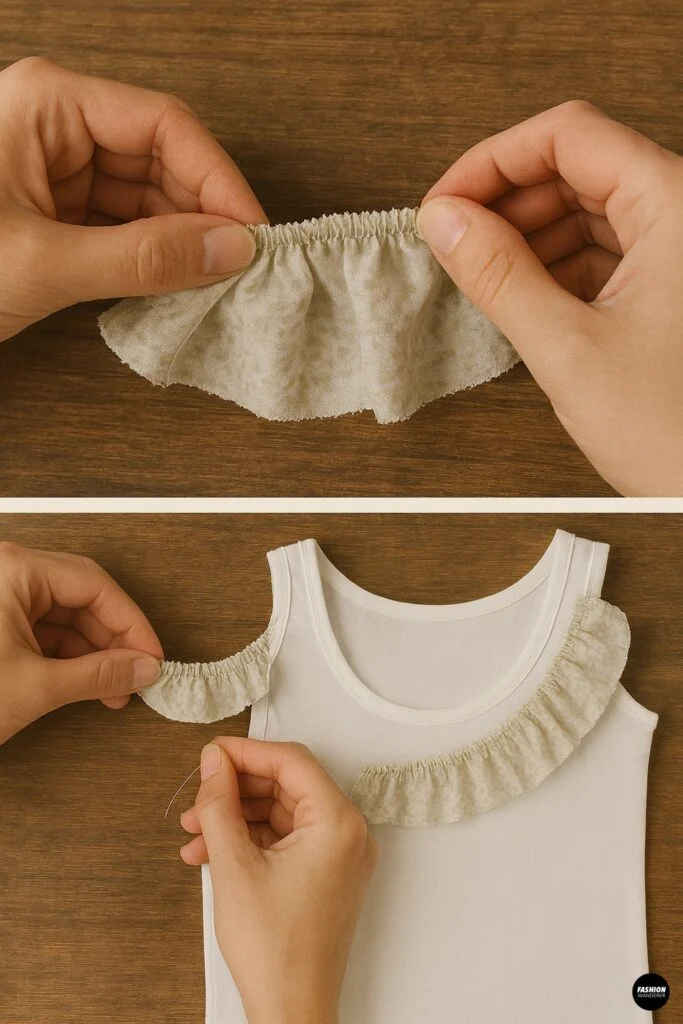
- Pull Bobbin Threads: Gently tug the bobbin (bottom) threads of each row to gather the fabric evenly.
- Match to Armhole: Adjust the gathers so the ruffle’s total length matches the armhole seam length on your tank. Distribute gathers to look full and uniform.
- Secure Gathers: Tie off the thread tails at each end to lock your gathers in place.
Step 5: Pin Ruffles to Tank

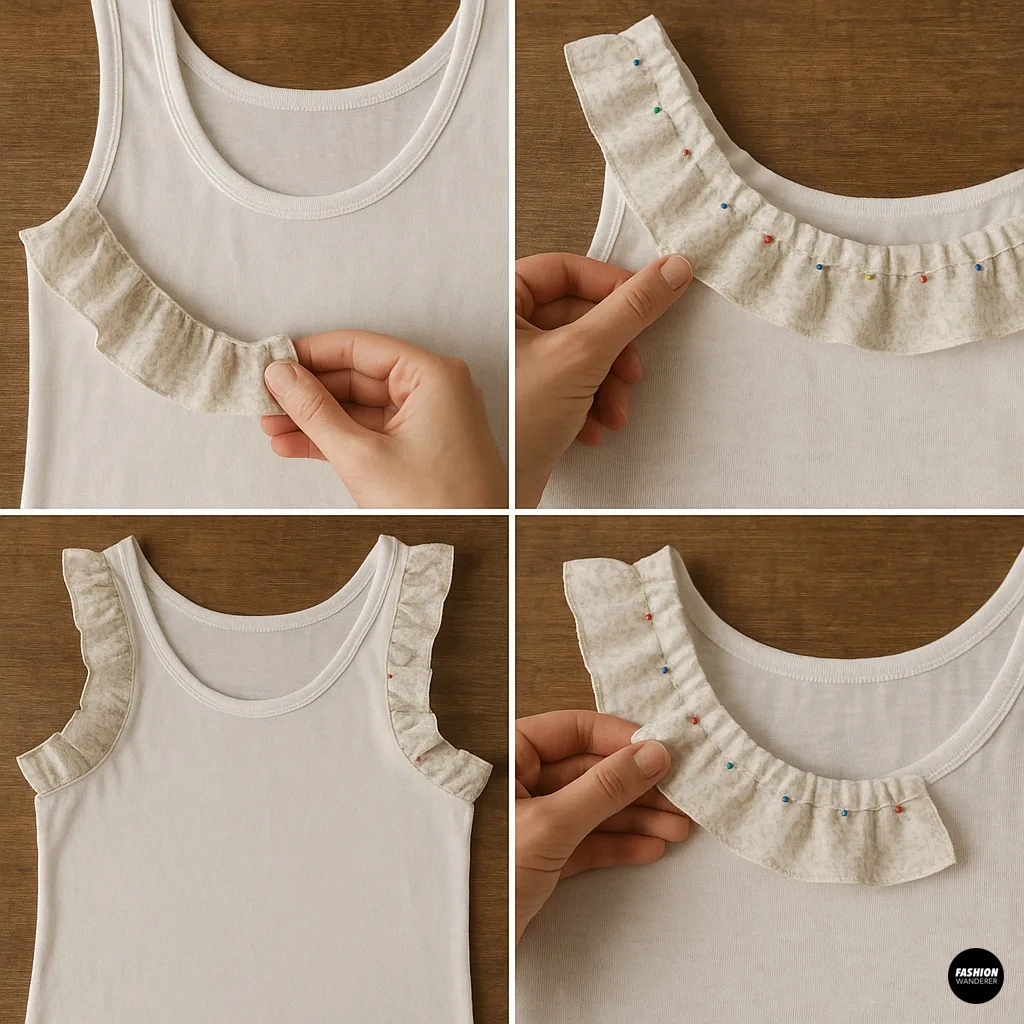
- Right Sides Together: With the tank turned inside-out, align the raw gathered edge of one ruffle to the armhole seam, matching CF shoulder to CF shoulder.
- Even Distribution: Pin or clip the ruffle in place, adjusting gathers to fill the seam without puckers.
- Repeat: Do the same for the opposite armhole and ruffle strip.
Step 6: Stitch Ruffles In Place

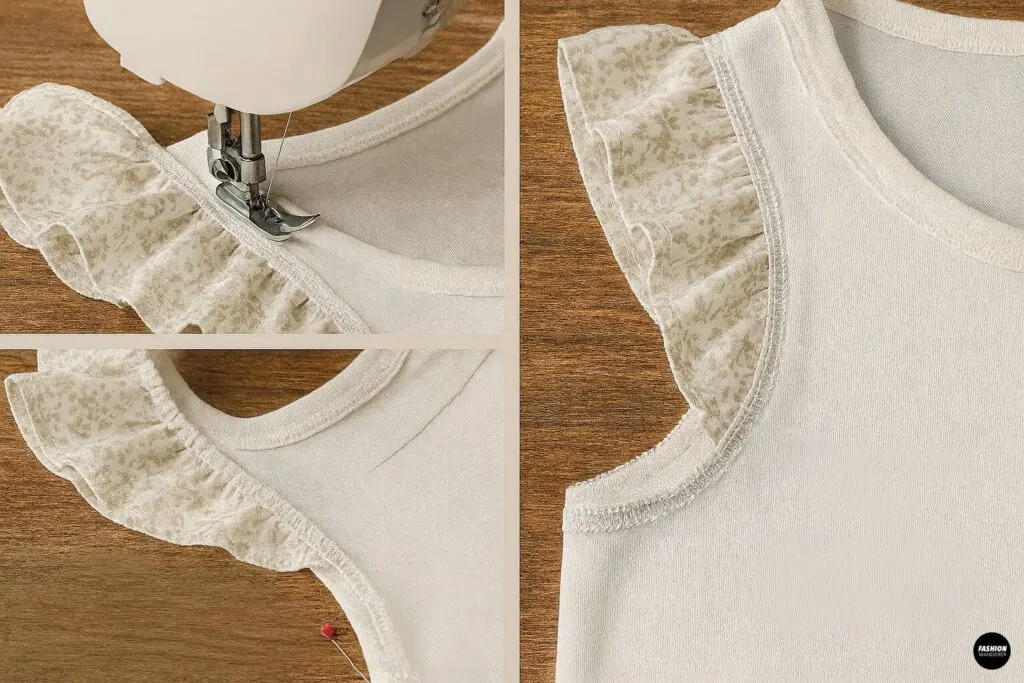
- Sew Seam: Using a ½” seam allowance, stitch the ruffle to the armhole seam. Backstitch at each end for security.
- Finish Raw Edges: Trim seam allowances if needed, then finish with a zigzag or serger to prevent fraying. Press the seam toward the tank body.
Step 7: Press & Topstitch (Optional)

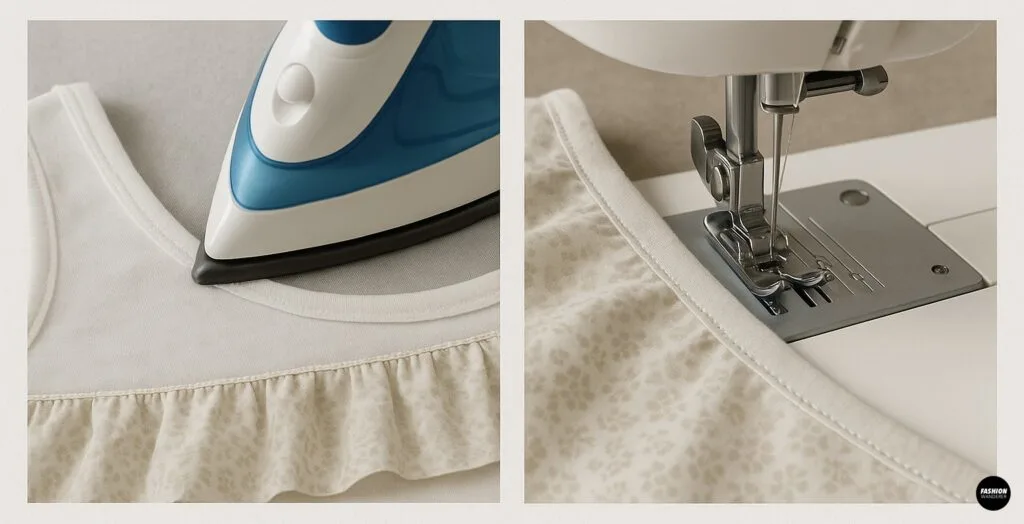
- Press: Gently press the ruffle seam toward the tank body, taking care not to flatten your gathers.
- Topstitch: For a more polished finish, topstitch ⅛” from the seam on the ruffle side, securing the seam allowance down and adding a decorative detail.
Step 8: Final Fit & Styling Tips

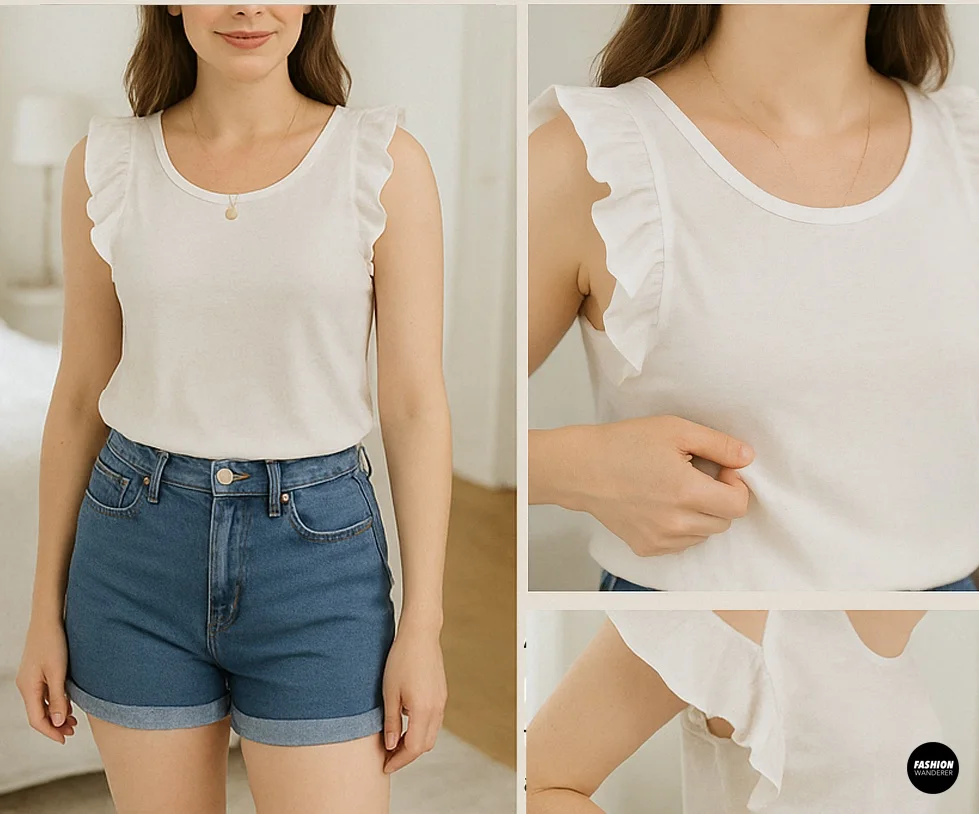
- Try It On: Slip into your newly ruffled tank. Check for evenness of gathers and comfort of fit around the arms.
- Adjust if Needed: If the ruffle feels too tight or too loose, unpick a few stitches at the side seam, ease the gathering, then resew.
- Style It: Pair your romantic tank with high-waisted denim shorts and sandals for a weekend brunch or with a midi skirt and heels for date night. Add a delicate pendant necklace to complete the look.
Extra Variations & Customizations

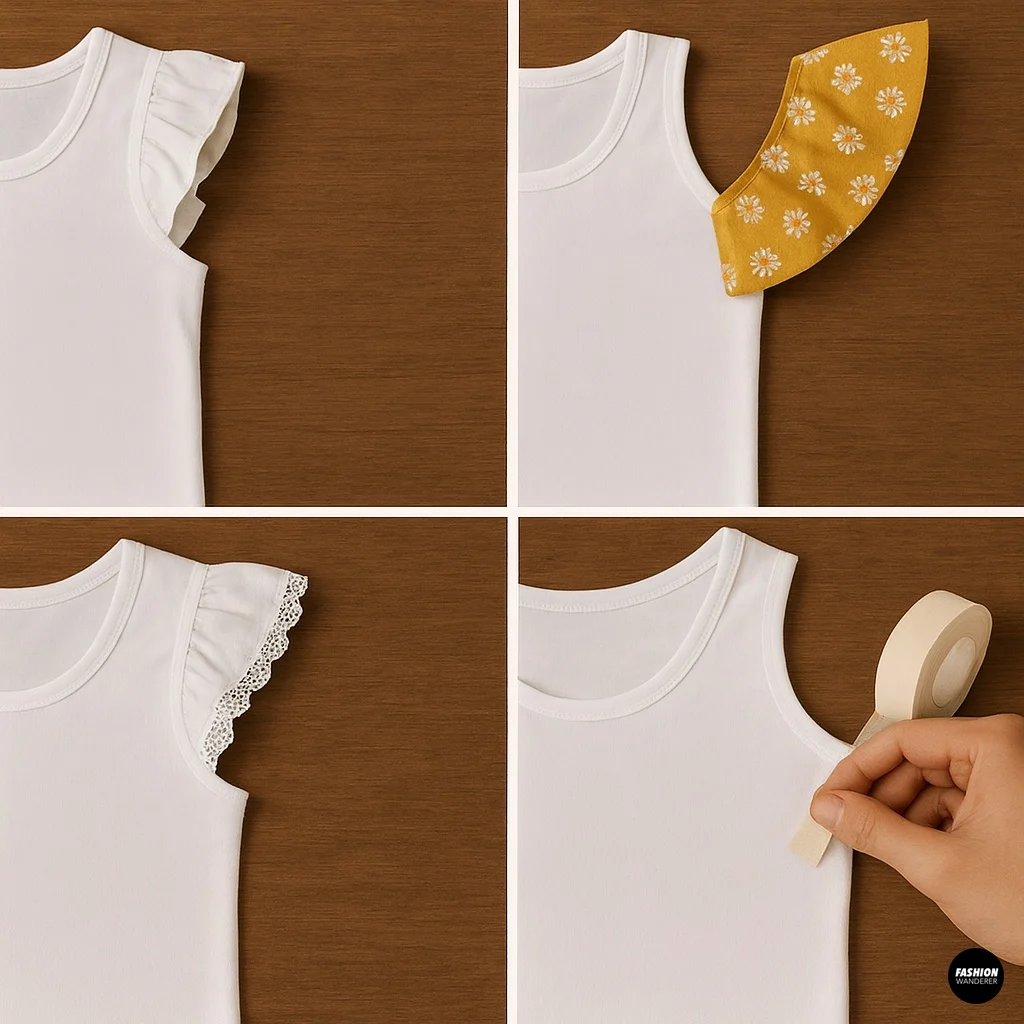
- Double-Layer Ruffles: For ultra-voluminous sleeves, cut two narrower ruffle strips and layer one atop the other before gathering.
- Contrast Fabric: Use a bold print or contrasting color for the ruffle to make it pop.
- Lace Trim: Finish the ruffle edge with lace trim or crochet trim for a vintage-inspired finish.
- No-Sew Option: Attach iron-on fabric tape in place of sewing if you have very lightweight fabric and want a quick no-sew hack.
Wrapping Up


With just a few simple steps and under an hour of hands-on time, you can upgrade any basic tank top into a flirty, romantic statement piece by adding ruffle sleeves. This beginner-friendly DIY is perfect for anyone who loves one-of-a-kind, sustainable fashion.
Next time you’re browsing your closet for something new to wear, remember that a little fabric and some creative gathering stitches can make all the difference.
Ready to flutter into summer? Grab a tank, pick your ruffle fabric, and let’s sew those sleeves into something magical!
Trendy, Affordable Sewing Patterns for All Sizes


Tie Shoulder Jumpsuit Pattern


Palazzo Pants Sewing Pattern


Pocket Overall Romper Pattern


Wrap Maxi Skirt Sewing Pattern


Tie Back Top Sewing Pattern