
Looking for the ultimate easy DIY wardrobe upgrade? Learn how to make a flowing boho kimono from a bedsheet — no pattern, no fuss! This beginner-friendly tutorial transforms an old or thrifted sheet into a stylish layering piece perfect for festivals, beach days, or casual everyday outfits.
Whether you’re into sustainable fashion or just love that breezy, bohemian aesthetic, this no-sew or minimal-sew project gives you big impact with minimal effort. Let’s dive into the steps to create your own dreamy kimono robe from a flat sheet.
Why You’ll Love This DIY Kimono
- Budget-Friendly: Upcycle what you already have
- Sustainable Style: Reduce waste and fast fashion impact
- No Pattern Needed: Just cut rectangles and sew a few seams!
- Beginner Friendly: Perfect first project for new sewists
- Size-Inclusive: Adjustable fit for all body types
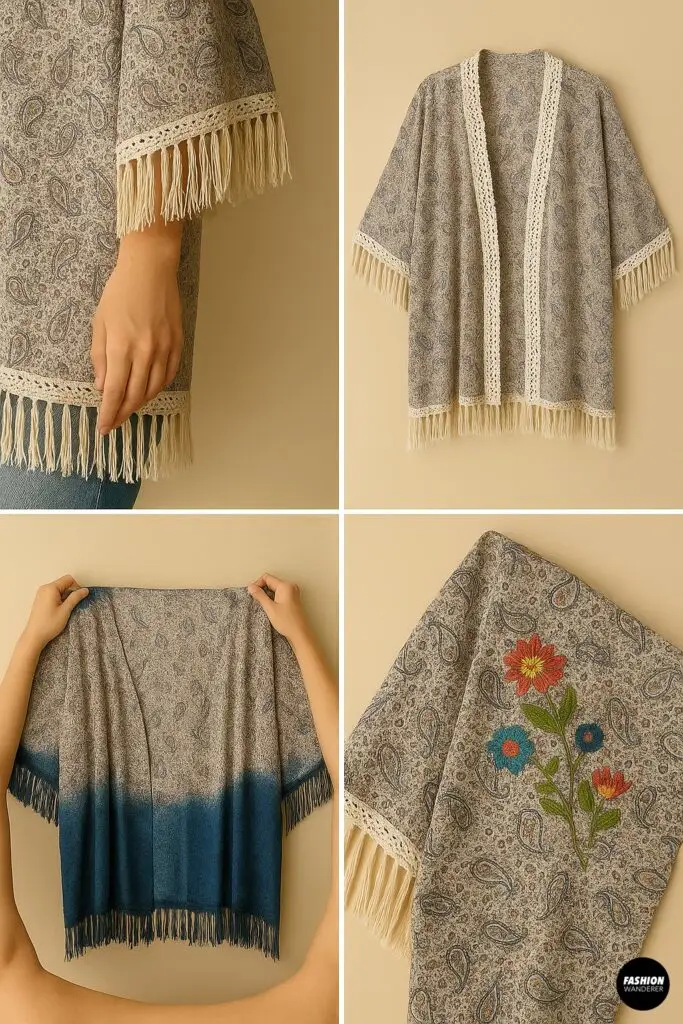
- Customizable: Add trim, fringe, or dye to match your style
Step-by-Step Tutorial

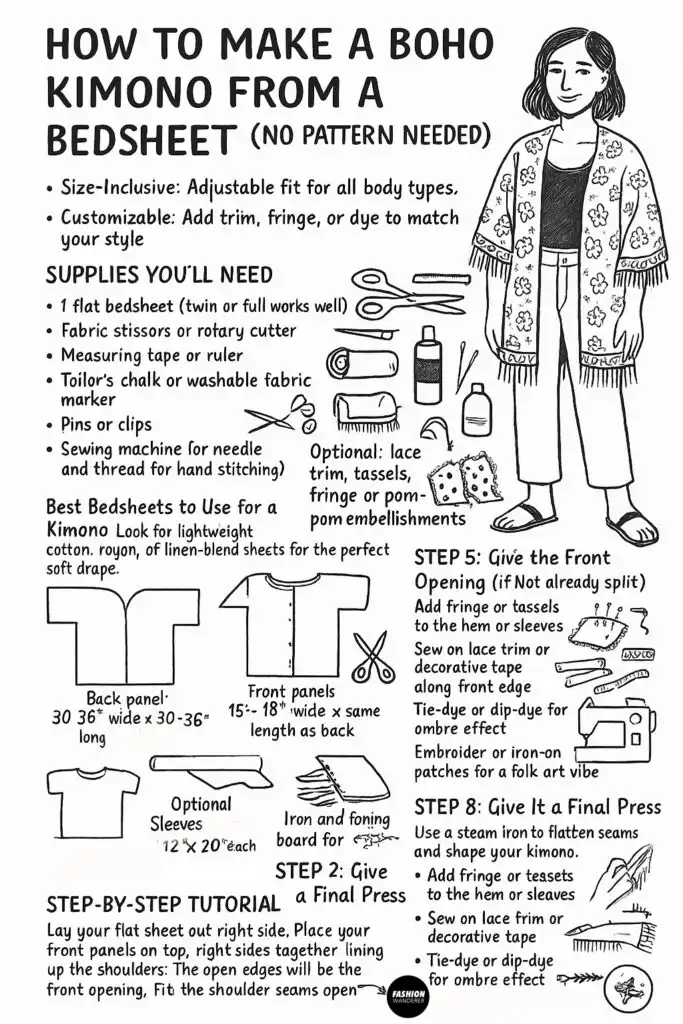
Supplies You’ll Need

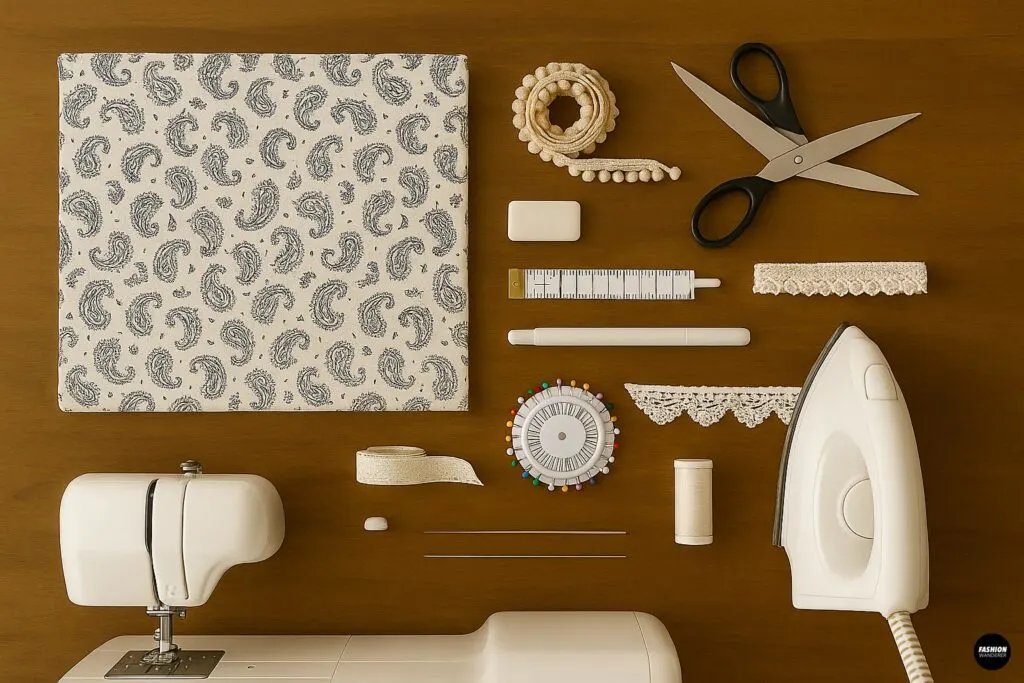
- 1 flat bedsheet (twin or full works well)
- Fabric scissors or rotary cutter
- Measuring tape or ruler
- Tailor’s chalk or washable fabric marker
- Pins or clips
- Sewing machine (or needle and thread for hand-stitching)
- Optional: lace trim, tassels, fringe, or pom-pom embellishments
- Iron and ironing board for crisp seams
Best Bedsheets to Use for a Kimono
Look for lightweight cotton, rayon, or linen-blend sheets for the perfect soft drape. Avoid fitted sheets, flannel, or stiff percale blends. Bold prints, vintage florals, tie-dye patterns, or even solid colors with texture all make beautiful finished pieces.
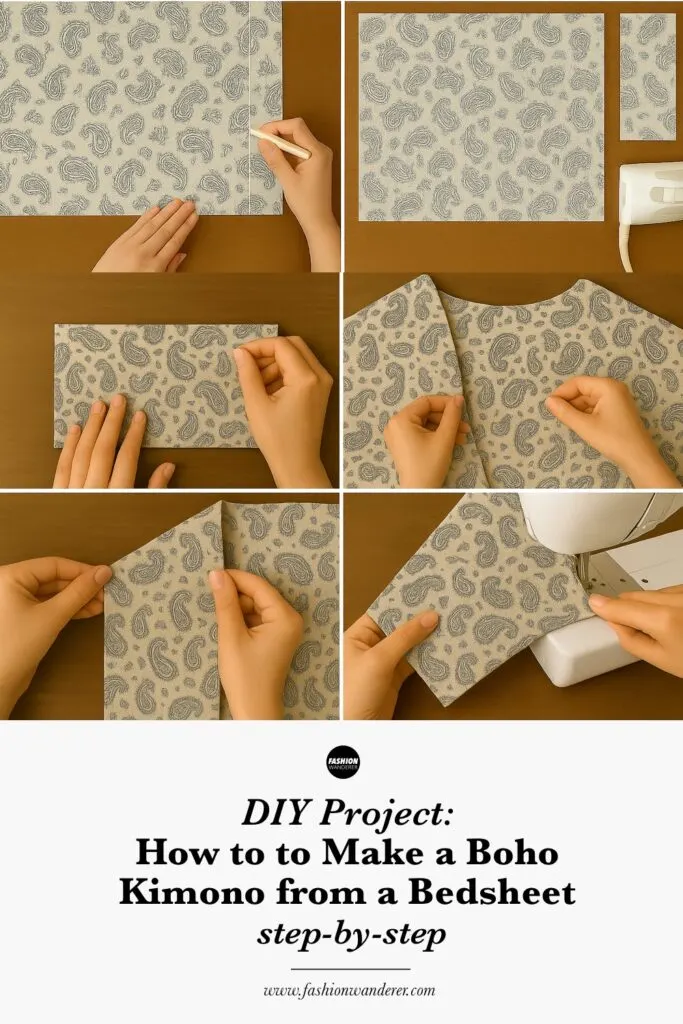
Step 1: Measure and Cut Your Fabric

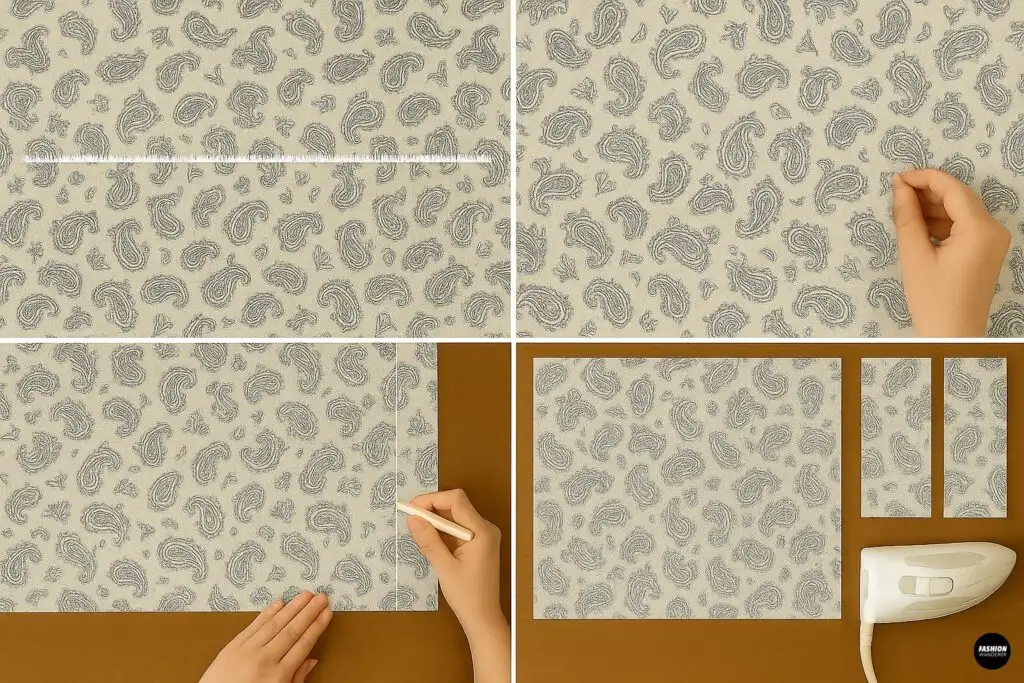
Lay your flat sheet out fully. You’ll cut three key pieces:
- Back Panel: 30–36″ wide x 30–36″ long (adjust based on your height)
- Front Panels (2): 15–18″ wide x same length as back
- Optional Sleeves: Two rectangles, 12″ x 20″ each
Use tailor’s chalk or fabric marker to mark and cut your rectangles. No pattern needed—just a ruler and steady hand!
Pro tip: Fold the fabric in half lengthwise to ensure even cuts for both sides.
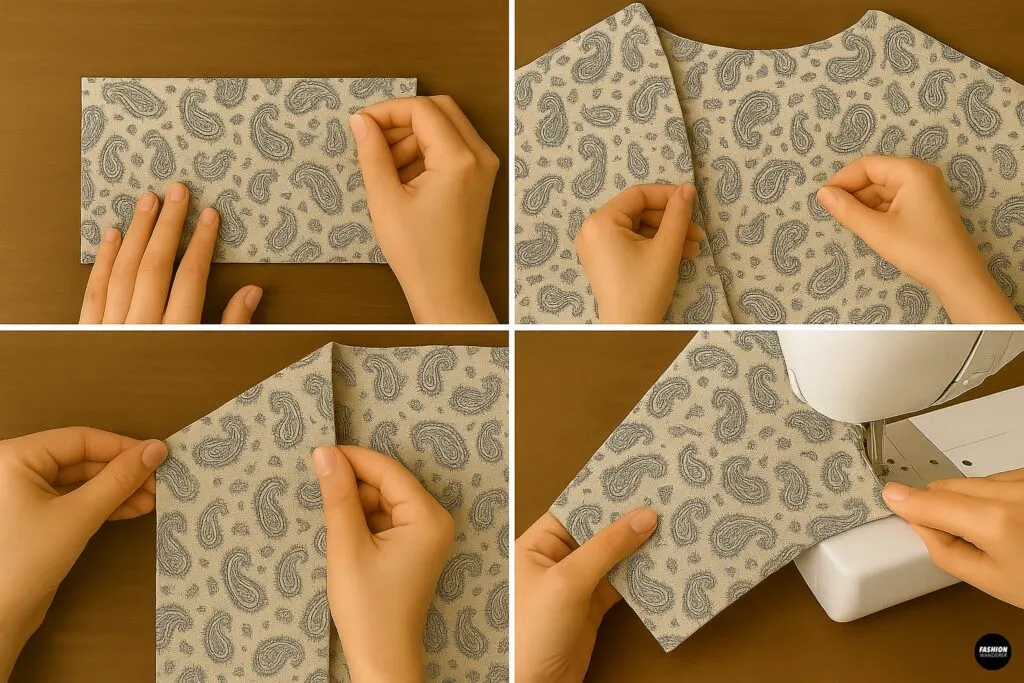
Step 2: Assemble the Body

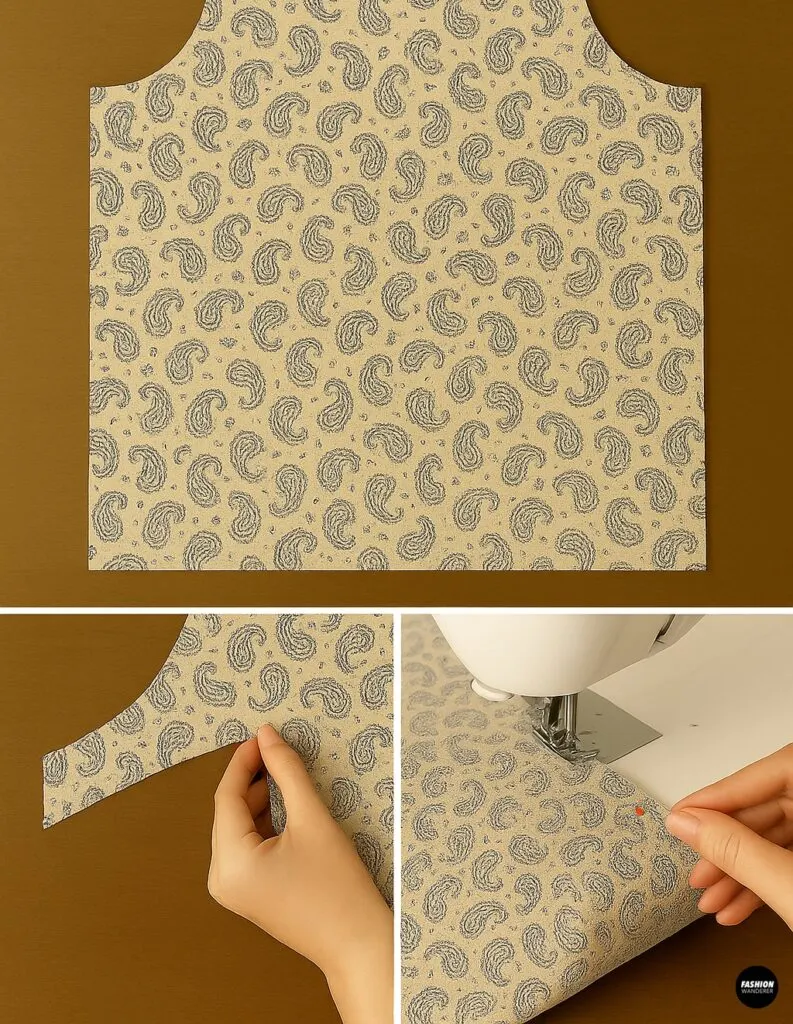
Lay the back panel flat, right side up. Place your front panels on top, right sides together, lining up the shoulders. The open edges will be the front opening.
Pin the shoulder seams together (short top edges) and sew with a ½” seam allowance.
Finish with a zigzag stitch or serger if desired. Press seams open for a neater look.
Step 3: Add the Sleeves (Optional)

To add sleeves for a more dramatic boho kimono silhouette:
- Fold each sleeve piece in half lengthwise to find the center.
- Match center of sleeve to shoulder seam.
- Pin sleeve to the armhole opening, right sides together.
- Sew across with a ½” seam allowance.
Repeat for both sleeves.
Step 4: Sew the Side Seams

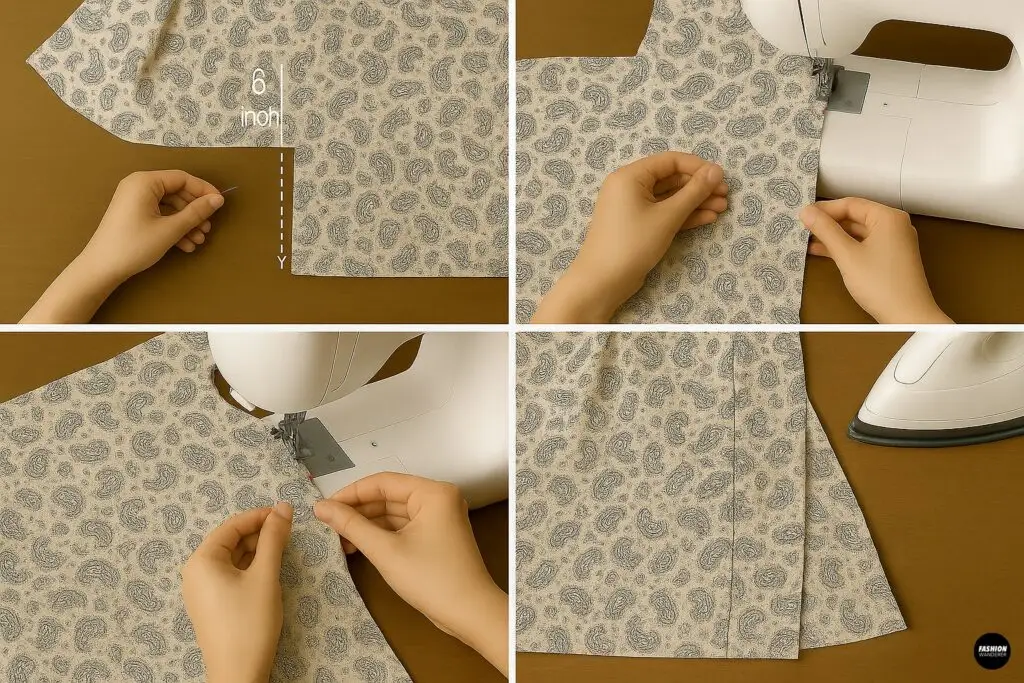
With the kimono body right sides together, pin and sew each side seam—from the bottom of the sleeve to the hem. If you skipped sleeves, just sew the side seams of the body panels.
Leave 8–10 inches open at the bottom of each side seam for breezy slits (optional but comfy and stylish).
Finish raw edges if desired and press seams flat.
Step 5: Cut the Front Opening (If Not Already Split)

If you used a large rectangle for the front (instead of two separate panels), cut it vertically down the center to create the front opening. Press both raw edges inward by ½”, then again by another ½”, and topstitch to finish.
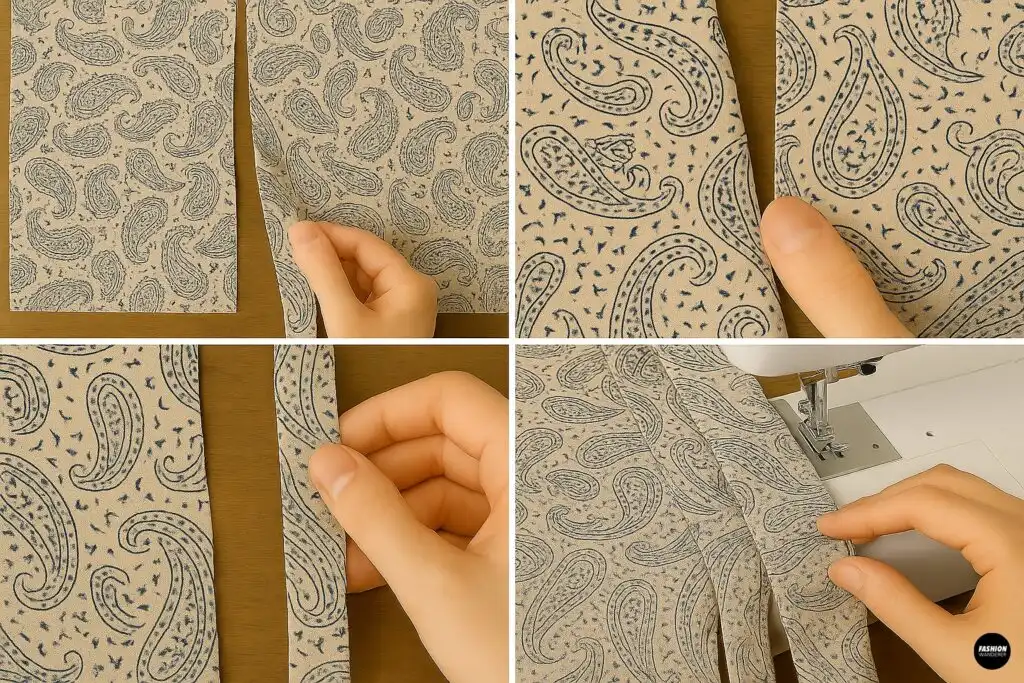
Step 6: Hem the Edges

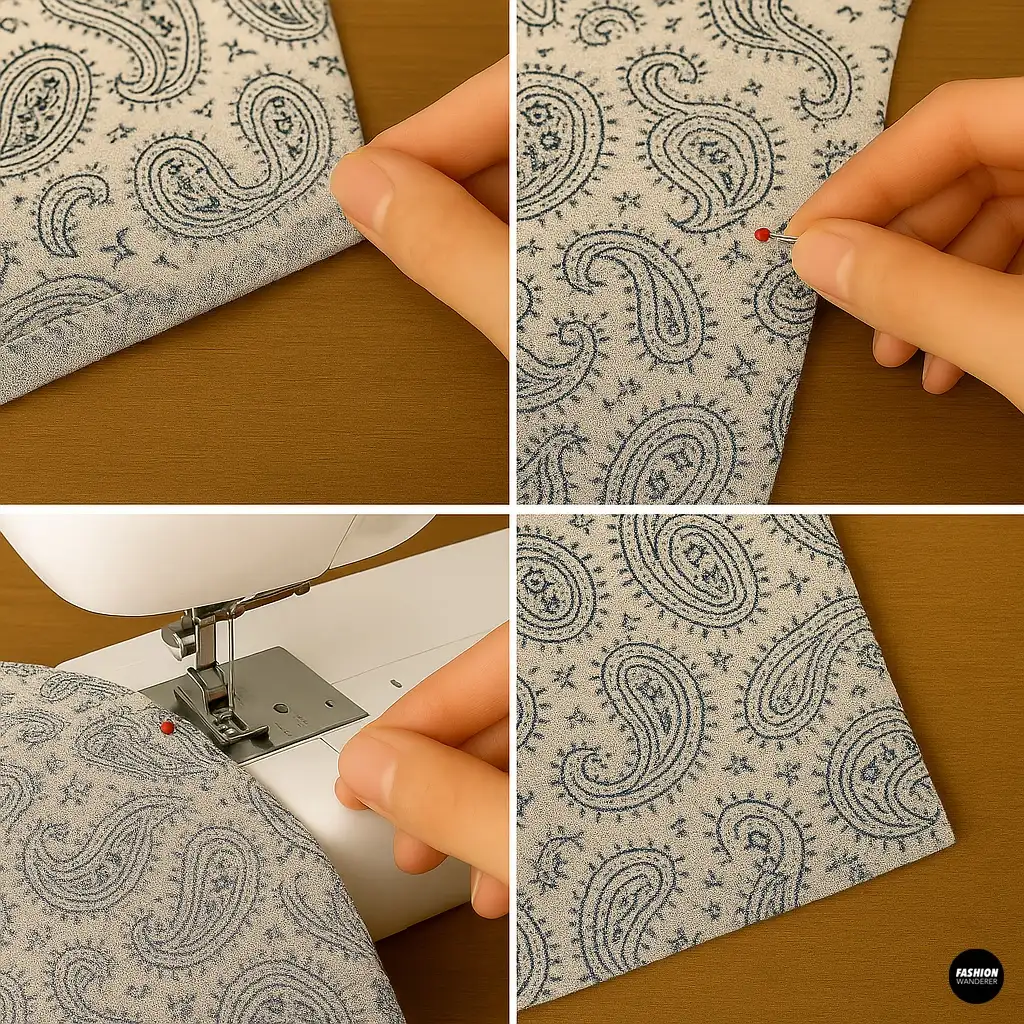
Hem the bottom, front opening, and sleeves (if added):
- Fold edges under ½”, then again another ½”
- Pin and topstitch all around
This gives your kimono a clean, professional finish.
Step 7: Embellish It! (Optional)

Now the fun part: style it your way!
- Add fringe or tassels to the hem or sleeves
- Sew on lace trim or decorative tape along the front edge
- Tie-dye or dip-dye for ombré effect
- Embroider or iron-on patches for a folk-art vibe
This is your canvas—make it your signature piece!
Step 8: Give It a Final Press
Use a steam iron to flatten seams and shape your kimono. This step really elevates the look from “handmade” to boutique-chic.
How to Wear Your DIY Boho Kimono

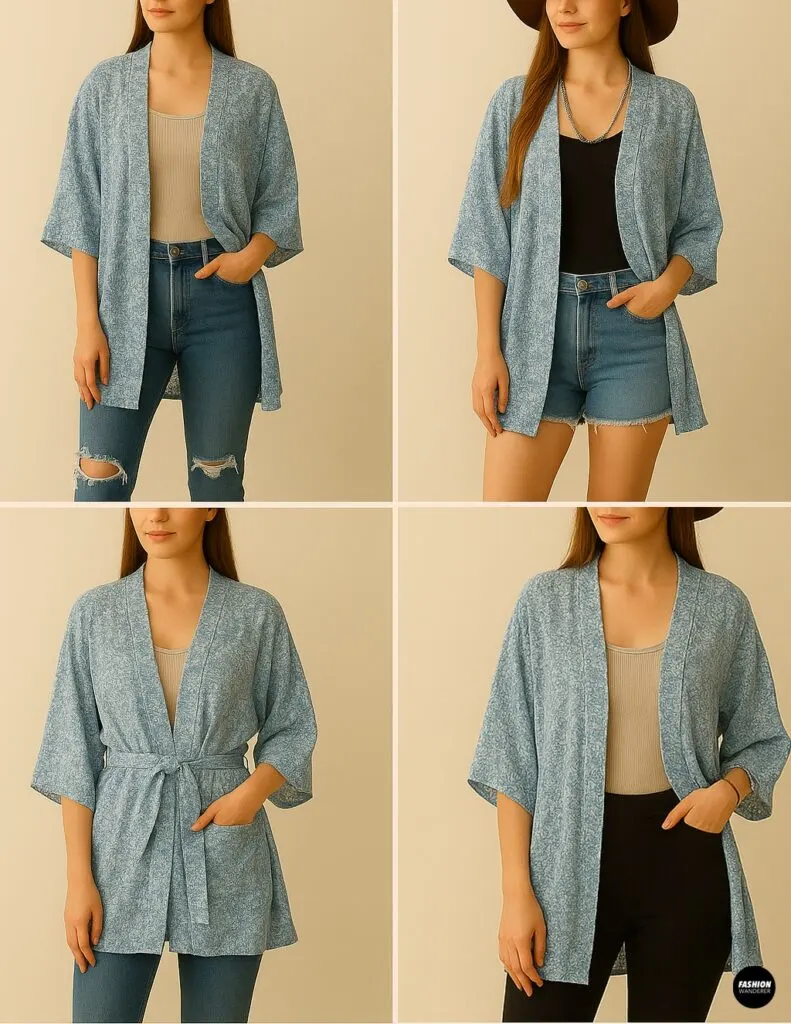
This bedsheet-to-kimono transformation is one of the most versatile pieces you’ll own. Here’s how to style it:
- Boho Casual: Pair with ripped jeans, tank top, and booties
- Beach Cover-Up: Throw over a bikini with sandals
- Festival Ready: Add a floppy hat, cutoffs, and layered jewelry
- Lounge Luxe: Belt it with a sash for a cozy robe vibe
- Layered for Fall: Wear over a long-sleeve tee and leggings
Tips for Sizing
- For petite frames, go with a 28–30″ length.
- For tall or plus-size bodies, use the full width of a twin or full sheet to create flow and coverage.
- You can crop it for a shorter style or leave it full-length for dramatic flair.
Care Instructions
- Machine wash cold, gentle cycle
- Hang dry or tumble dry low
- Press edges as needed to restore crisp hems
Since this is made from a bedsheet, it’s already pre-washed and broken in — bonus!
Final Thoughts: From Sheet to Street Style

Who knew a simple bedsheet could become your next favorite fashion piece? This DIY boho kimono tutorial shows that you don’t need a pattern, fancy tools, or expensive fabric to create something beautiful and wearable.
Whether you’re lounging at home, packing for a trip, or looking for a cute layering piece for date night—this kimono checks all the boxes: easy, breezy, boho-chic.
Trendy, Affordable Sewing Patterns for All Sizes


Tie Shoulder Jumpsuit Pattern


Palazzo Pants Sewing Pattern


Pocket Overall Romper Pattern


Wrap Maxi Skirt Sewing Pattern


Tie Back Top Sewing Pattern