
Turn jeans destined for the donation pile into a chic, hands-free accessory—no fancy tools required!
Upcycling is one of the most satisfying ways to breathe new life into worn-out clothing. In this tutorial, you’ll transform the sturdy pockets of an old pair of jeans into a stylish crossbody phone holder that’s perfect for errands, festivals, or everyday wear.
With minimal sewing skills and common household supplies, you’ll end up with a custom mini-bag that’s eco-friendly, budget-friendly, and endlessly customizable. Let’s get stitching!
Why You’ll Love This DIY Project
- Eco-Friendly Fashion: Diverts denim from landfills and reduces waste.
- Customizable Style: Play with pocket placement, hardware, and embellishments.
- Practical & Hands-Free: Keeps your phone secure and accessible on the go.
- Skill-Building: Great project for beginner sewers wanting to practice straight seams and hardware installation.
Step-By-Step Tutorial

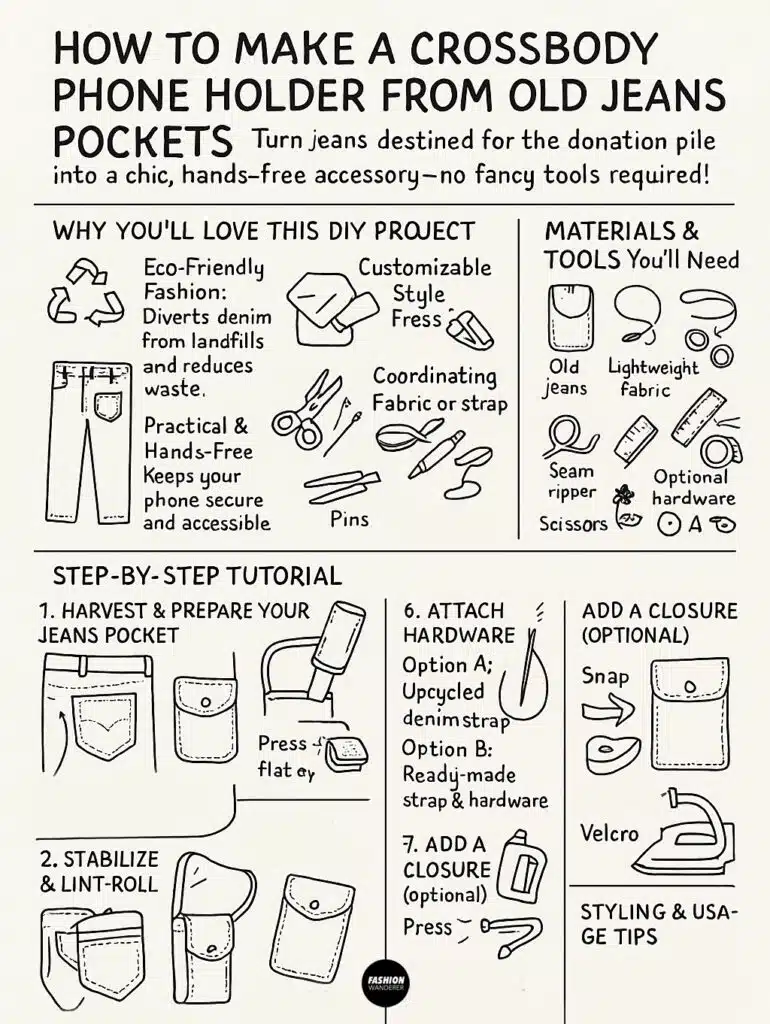
Materials & Tools You’ll Need

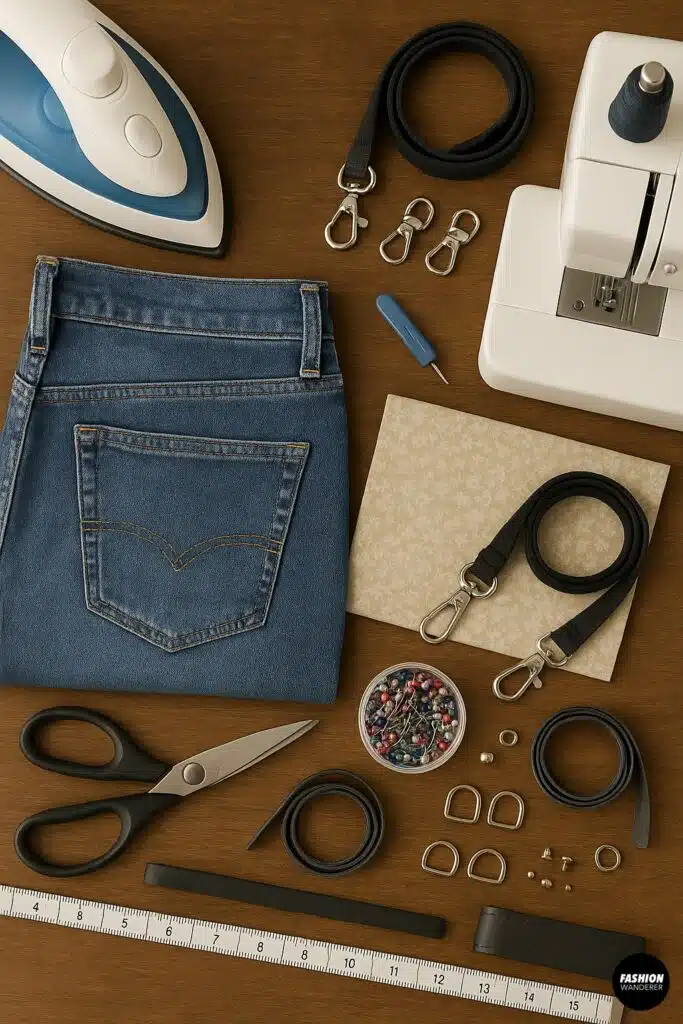
- Old jeans (one pair; make sure the back or front pockets are in good shape)
- Lightweight fabric for lining (cotton quilting fabric works well)
- Matching thread (denim-weight if possible)
- Coordinating fabric or leather scrap for the strap, OR ready-made crossbody strap
- Sewing machine (denim needle recommended)
- Scissors (fabric shears)
- Seam ripper (to remove pockets cleanly)
- Pins or fabric clips
- Measuring tape or ruler
- Iron & ironing board
- Optional hardware: D-rings, swivel hooks, rivets, or a snap closure
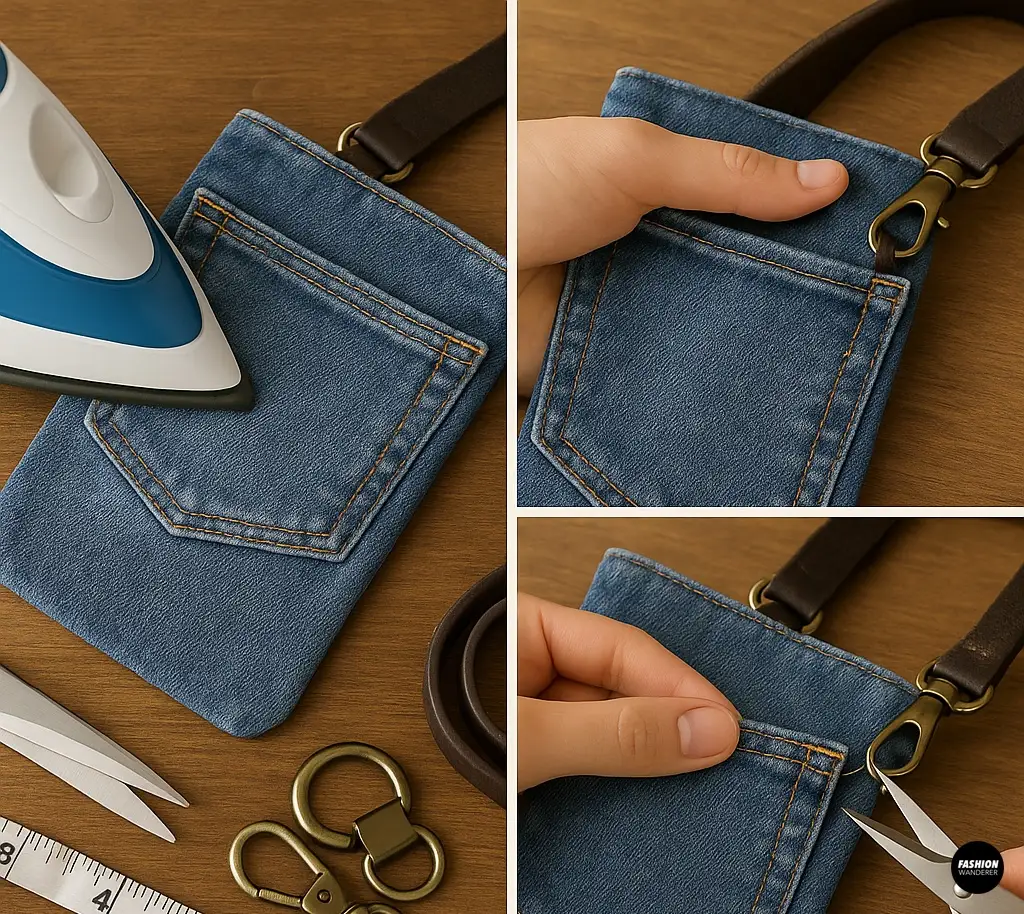
1. Harvest & Prepare Your Jeans Pockets

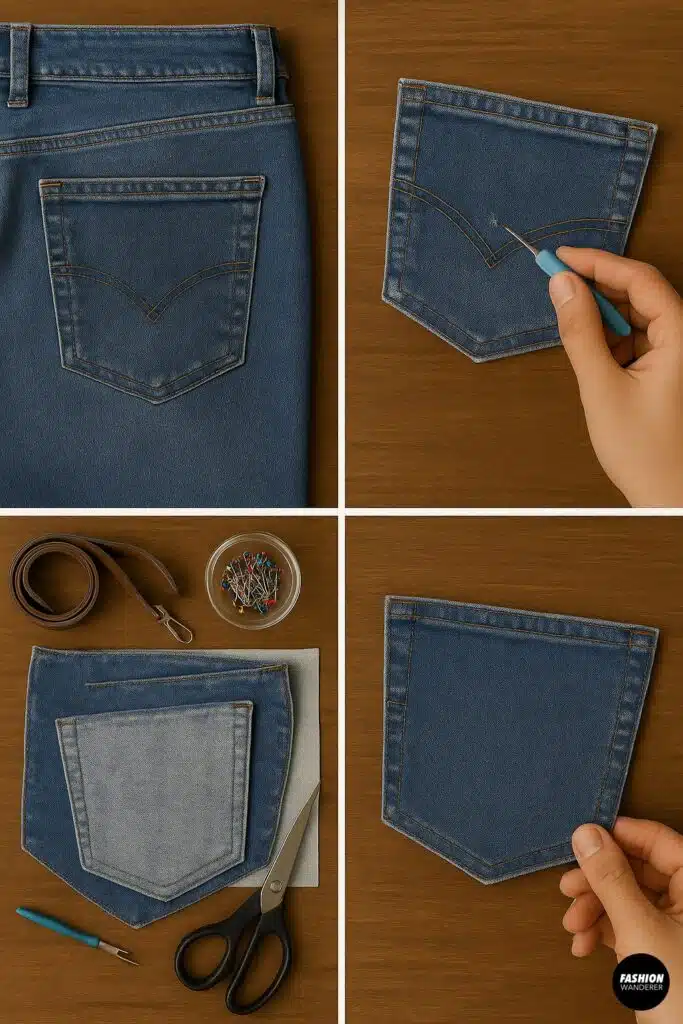
- Lay your jeans flat on a cutting surface and identify the pockets you want to use (back pockets give more structure; front pockets offer a curved shape).
- Working with a seam ripper, carefully remove the pocket from the jeans, keeping as much of the original topstitching intact as possible. Rip along the side and bottom seams, but leave the pocket’s original top edge.
- Trim excess denim from around the pocket, leaving about ¼”–⅜” seam allowance along the sides and bottom.
2. Stabilize & Lint-Roll

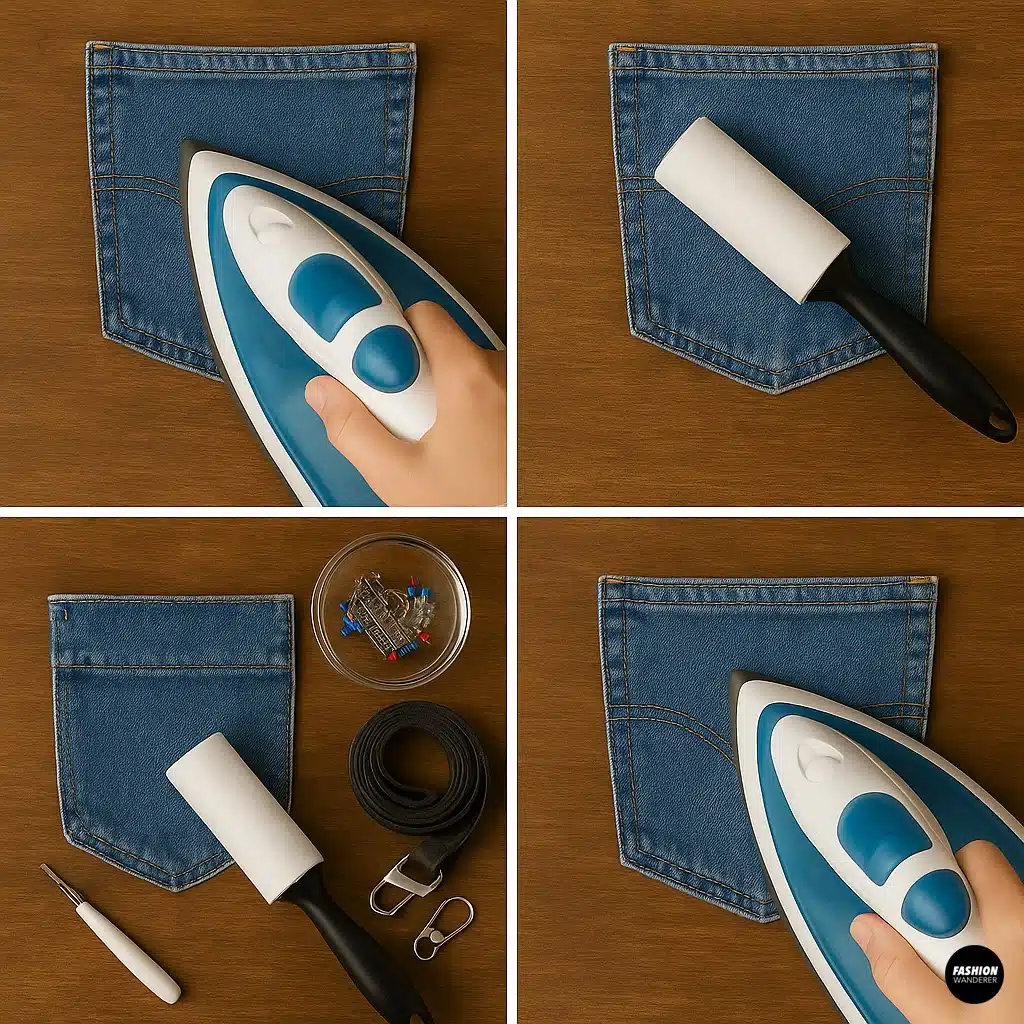
- Press each pocket flat, smoothing folds with a hot iron (use steam if needed).
- Run a lint roller or sticky tape over the denim to remove stray fibers and loose threads—this helps keep your lining clean.
3. Cut & Attach Lining

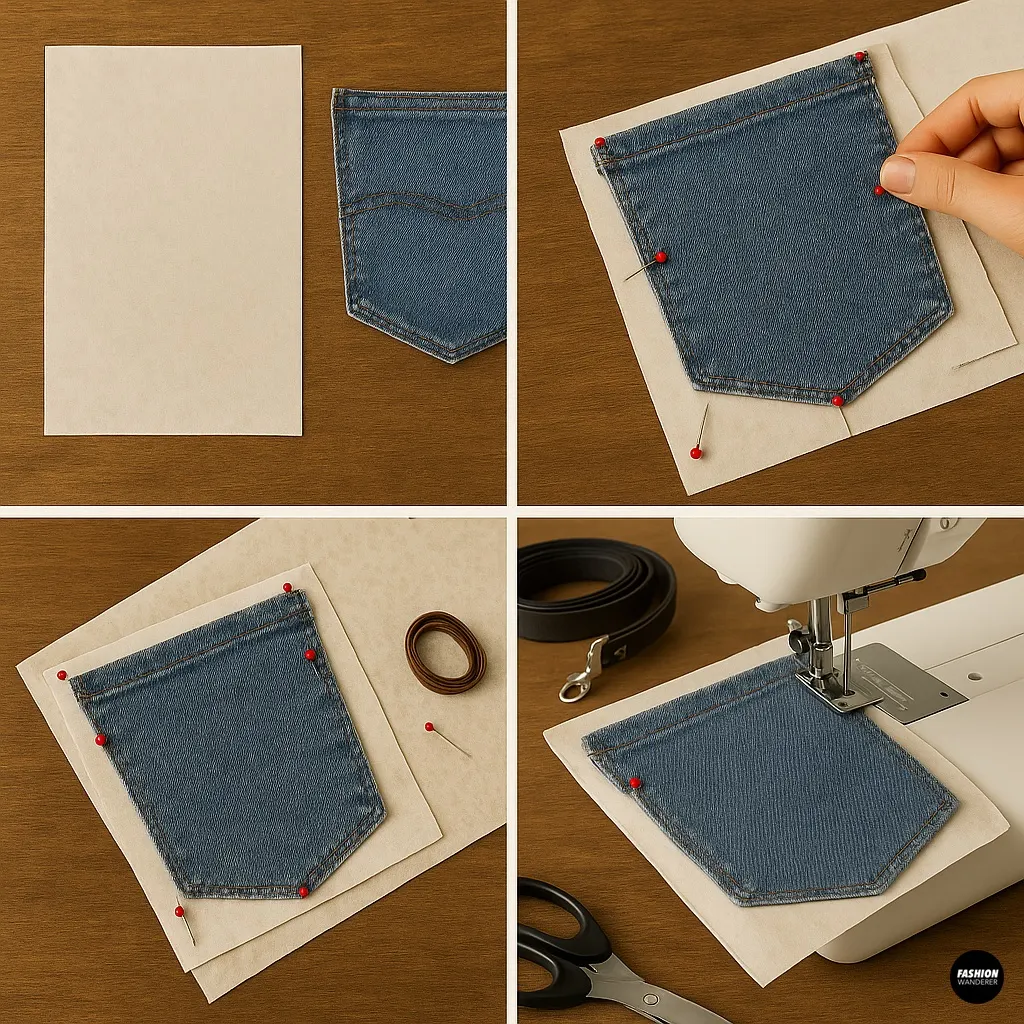
- From your lightweight cotton, cut a rectangle the same width as your denim pocket plus seam allowances, and tall enough to cover the pocket’s height plus a ⅜” hem at the top.
- Place pocket and lining right sides together, aligning raw edges on the sides and bottom. Pin or clip in place.
- Stitch around the sides and bottom with a ¼” seam allowance, using a denim needle and matching thread. Backstitch at both ends to secure.
4. Finish the Top Edge

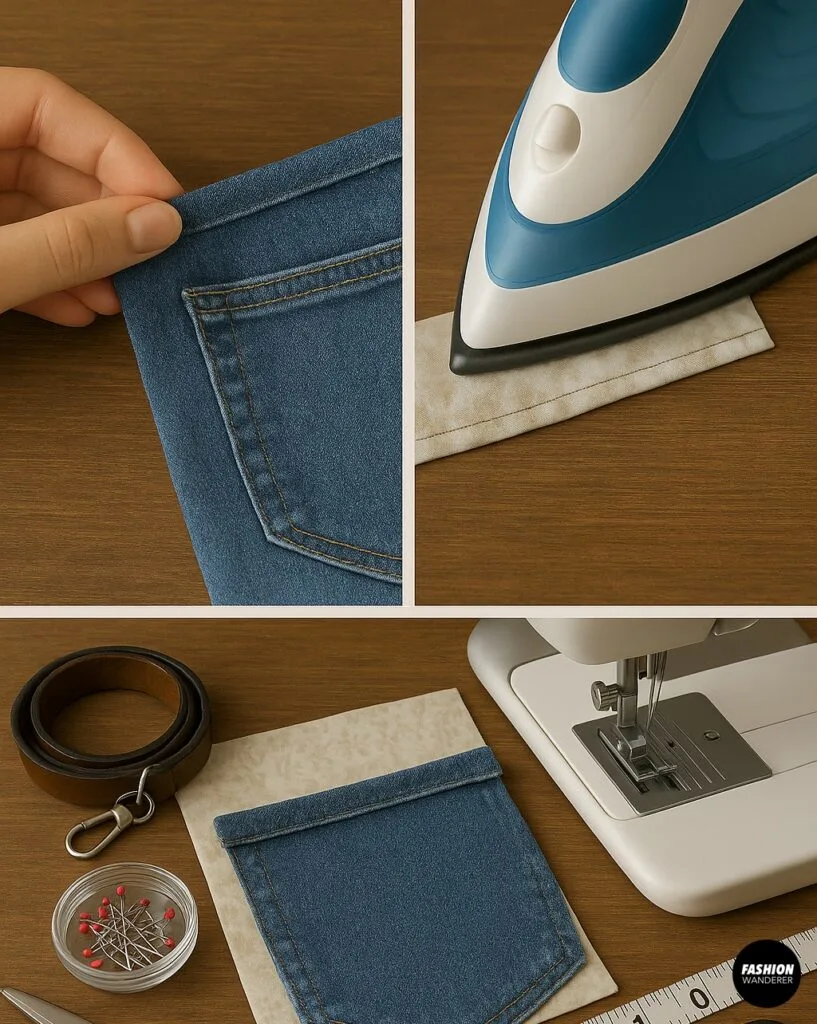
- Fold the raw top edges of both denim and lining inward by ¼” toward the wrong side.
- Press with the iron, then fold another ¼” to encase the raw edge completely.
- Topstitch ⅛” from the folded edge to create a neat, durable hem.
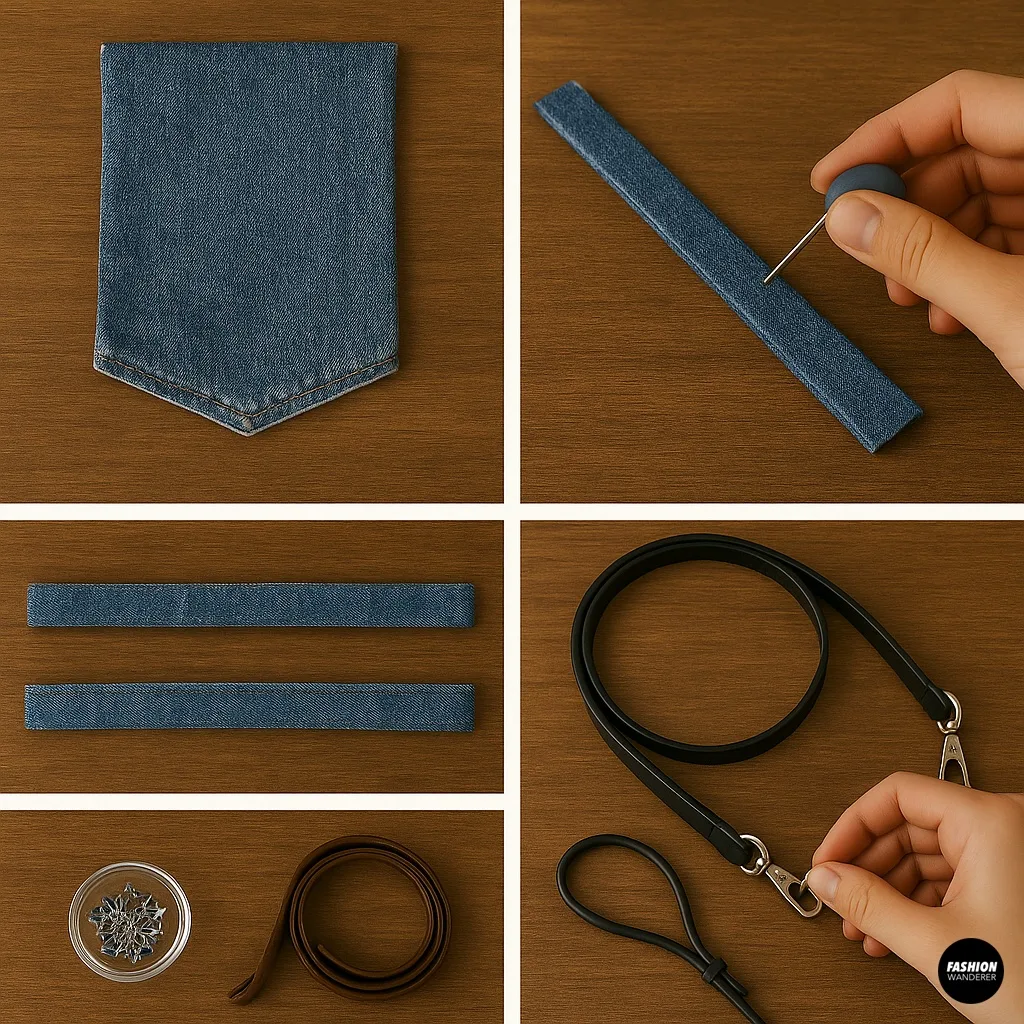
5. Create Your Crossbody Strap

You have two options:
- Option A: Upcycled Denim Strap
- Cut a long strip (about 2″ wide) from leftover jean leg fabric.
- Fold the strip in half lengthwise, right sides together, and stitch along the long edge with a ¼” seam allowance.
- Turn the tube right-side-out (use a safety pin to “fish” it through).
- Press flat, then topstitch along both long edges for strength and a polished look.
- Option B: Ready-Made Strap & Hardware
- Purchase a canvas or leather crossbody strap with swivel hooks.
- No sewing required—simply attach to your D-rings (see next step).
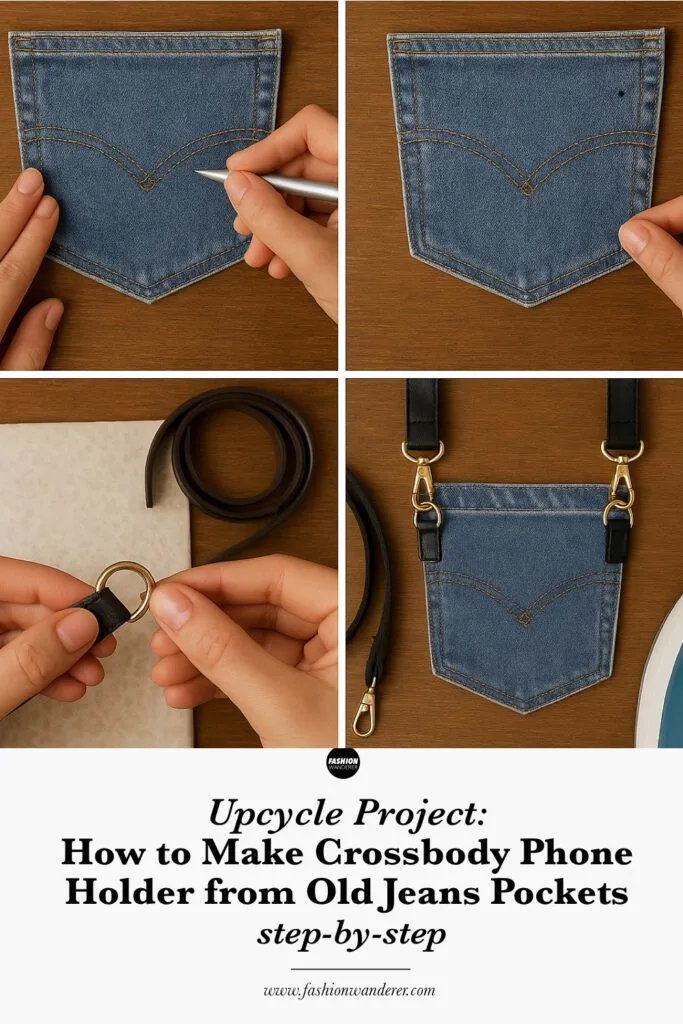
6. Attach Hardware & Strap

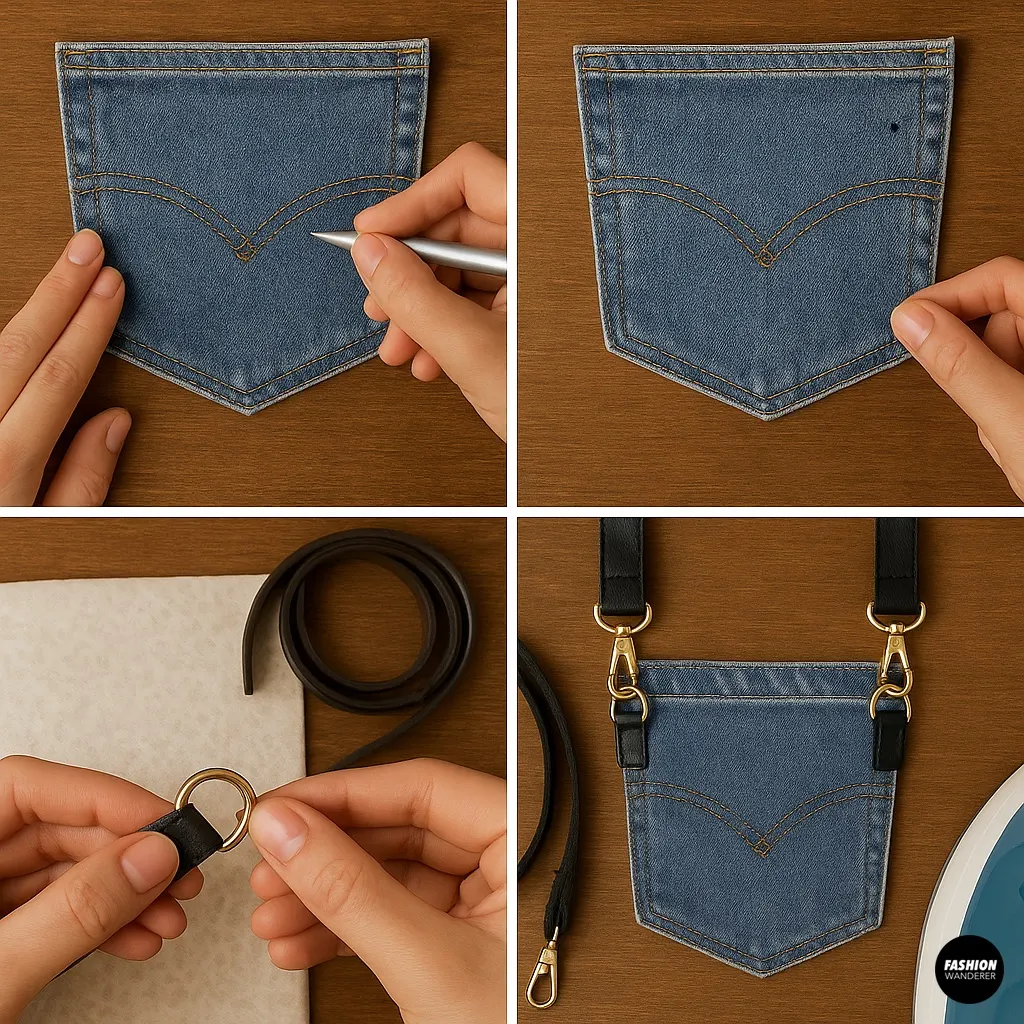
- Decide on pocket placement: center front is classic, or offset for an asymmetrical vibe.
- Mark two spots at the top corners of the pocket, ½” in from each side.
- If you’re using D-rings:
- Fold the end of your strap (denim or fabric) around the straight side of each D-ring by ½”, encasing it in the strap.
- Stitch the folded strap end securely to itself with a box-x stitch, or install a rivet for extra durability.
- If you have swivel hooks: clip them directly onto the D-rings on either side of the pocket top.
7. Add a Closure (Optional)


- Snap: Mark center front at the top of the pocket, punch a small hole through both denim and lining, and install a metal snap.
- Button & Loop: Sew a small button to the pocket front and attach a fabric loop to the back side of the lining’s top edge.
- Velcro: Stitch one side of a velcro strip to the pocket front and the other side to the lining.
8. Final Press & Quality Check

- Give the entire phone holder a final press, smoothing seams and strap.
- Test your stitching by gently tugging on the strap and pocket seams—everything should feel secure.
- Trim any stray threads for a clean professional finish.
Styling & Usage Tips

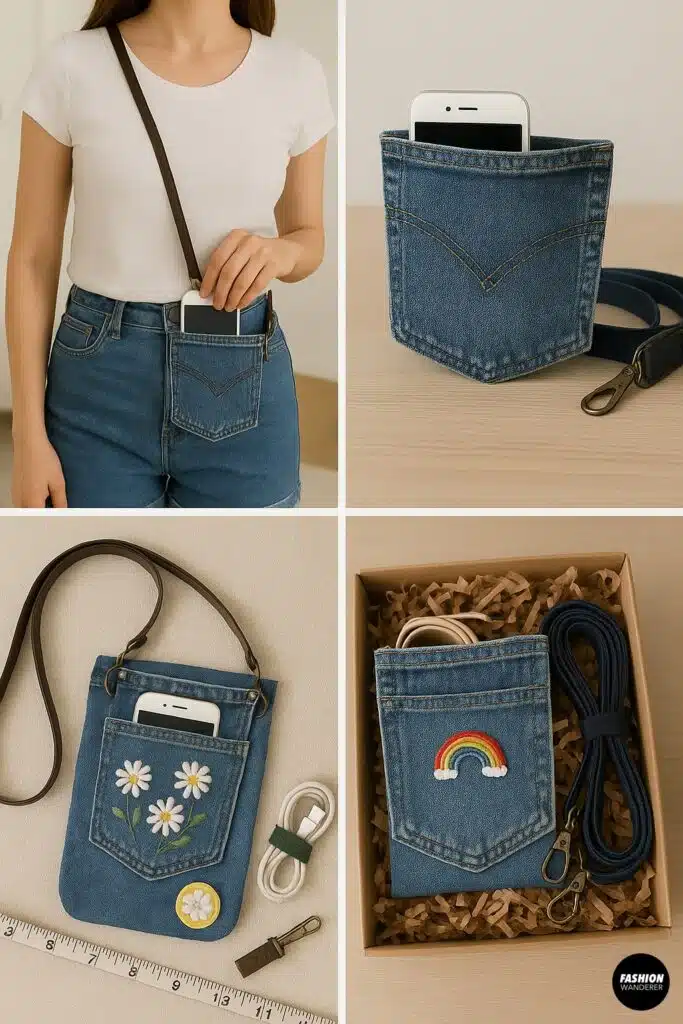
- Hands-Free Convenience: Wear it across your body at waist or hip height for quick phone access.
- Layering Pockets: Stitch two pockets back-to-back for a slim wallet sleeve plus phone holder.
- Personalize: Add embroidery, fabric paint, or iron-on patches to make it uniquely yours.
- Gift-Ready: Package with a coordinating phone grip or cable organizer for a thoughtful handmade gift.
Troubleshooting & Pro Tips

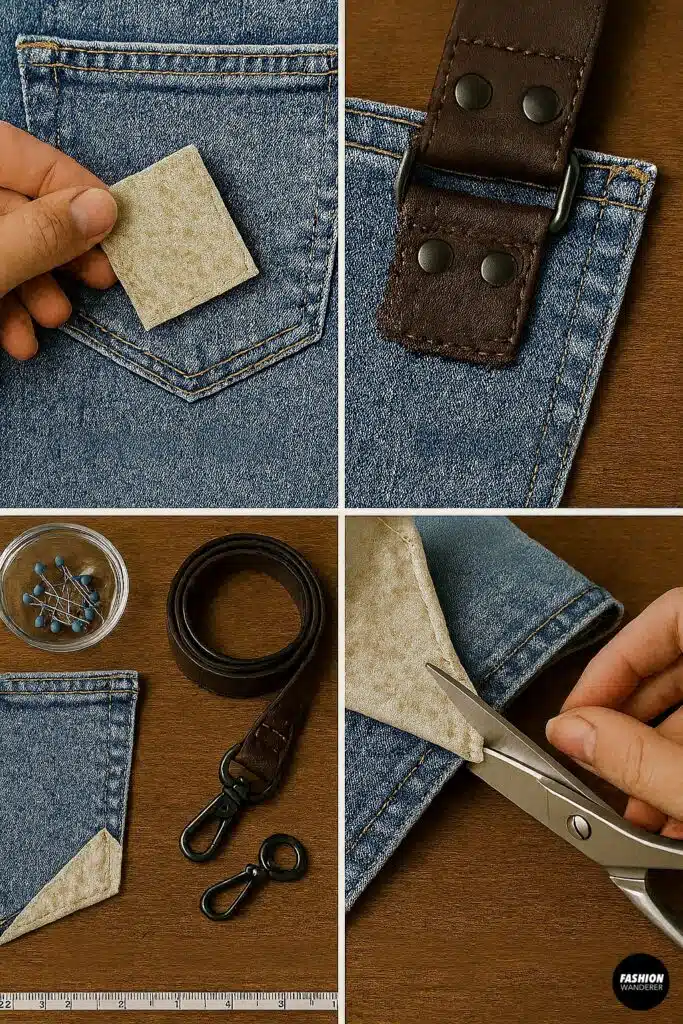
- Pocket Flare: If your pocket gapes at the bottom, add a small triangular gusset by stitching a 2″ square of fabric into the bottom corners.
- Strap Slip: Reinforce strap attachment with a second row of stitching or metal rivets.
- Bulk Reduction: Trim lining edges close to the seam allowance to minimize thickness around the topstitch.
Why This DIY Matters

Upcycling old jeans pockets into a crossbody phone holder isn’t just a fun weekend project—it’s a statement against fast fashion and textile waste. Each time you sling on your handmade holder, you’ll carry a small but powerful reminder of creativity, sustainability, and resourcefulness.
Ready to roll up your sleeves and sew? Gather those old jeans, fire up your machine, and in just a few simple steps, you’ll have a custom crossbody phone holder that’s as unique as you are. Happy sewing!
Trendy, Affordable Sewing Patterns for All Sizes


Tie Shoulder Jumpsuit Pattern


Palazzo Pants Sewing Pattern


Pocket Overall Romper Pattern


Wrap Maxi Skirt Sewing Pattern


Tie Back Top Sewing Pattern