
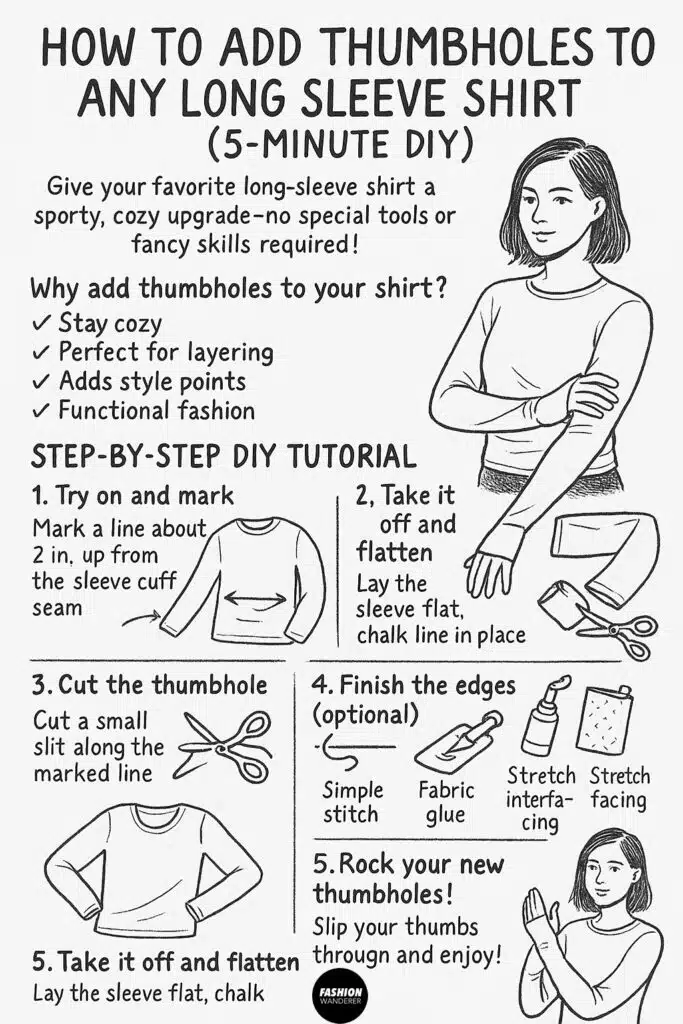
Give your favorite long-sleeve shirt a sporty, cozy upgrade—no special tools or fancy skills required!
Thumbholes are one of those clever little details that instantly elevate a basic long-sleeve tee into something sleek, comfy, and functional. Whether you’re heading to the gym, layering for chilly weather, or just want that extra touch of athleisure style, learning how to add thumbholes to your sleeves is a beginner-friendly DIY that takes just minutes—and delivers big results.
In this quick and easy tutorial, you’ll learn how to add thumbholes to any existing long sleeve shirt using minimal tools. You can either make simple slits for a no-sew version or reinforce them for extra durability. Ready to transform your wardrobe? Let’s dive in.
✂️ Why Add Thumbholes to Your Shirt?
Before we get into the steps, here’s why this 5-minute upcycle is so worth it:
- Stay cozy: Keeps hands warmer by extending sleeve coverage.
- Perfect for layering: Prevent sleeves from bunching under jackets or hoodies.
- Adds style points: Instantly gives your shirt a sporty, upgraded vibe.
- Functional fashion: Great for workouts, chilly morning walks, or just lounging in style.
- No special sewing skills needed: This is beginner-approved!
👕 Step-by-Step DIY Tutorial

🧰 Materials You’ll Need

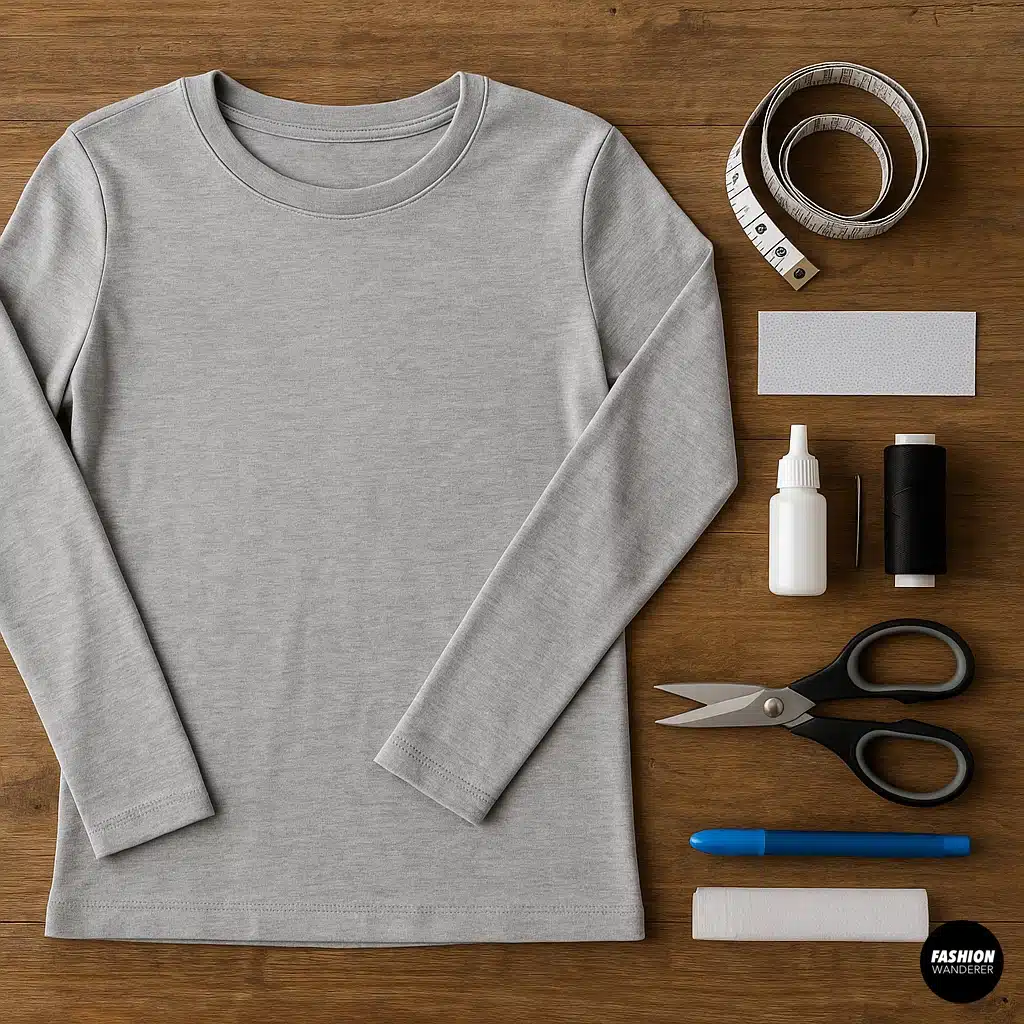
- Any long sleeve shirt (cotton or stretch-knit works best)
- Fabric scissors
- Measuring tape or ruler
- Tailor’s chalk or washable fabric pen
- Optional: Needle and thread or sewing machine (for reinforced option)
- Optional: Stretch interfacing or fabric glue (for added durability)
Step 1: Try On and Mark

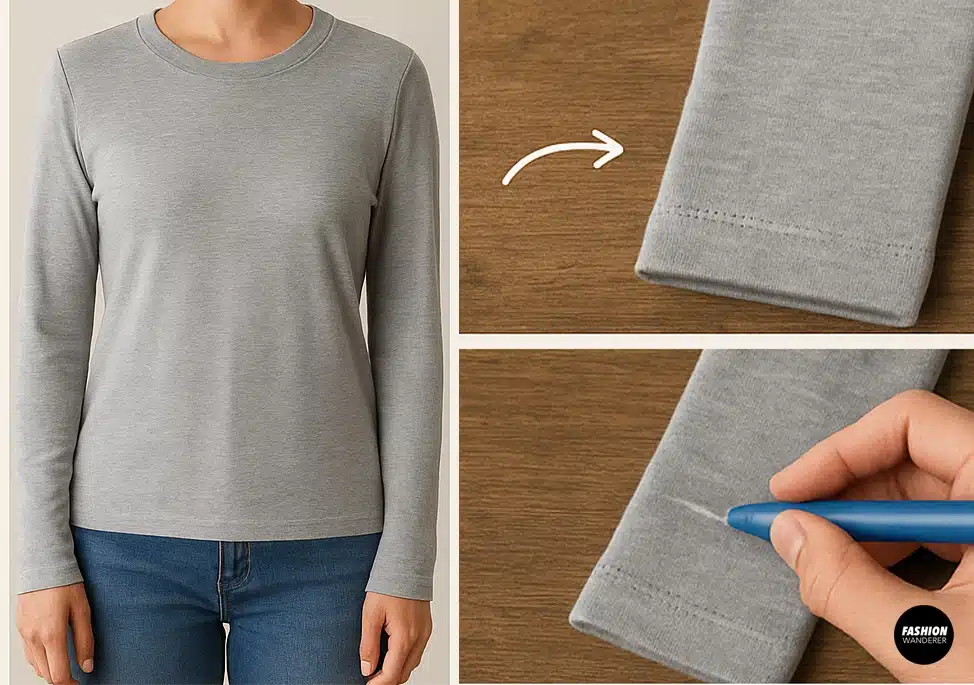
Put on your long-sleeve shirt to determine the ideal placement for your thumbhole.
Where should the hole go?
Thumbholes are typically centered about 2 inches (5 cm) up from the sleeve cuff seam and aligned with the side of your wrist where your thumb sits naturally.
Mark it:
Use tailor’s chalk or a washable marker to draw a short horizontal line (about ¾ to 1 inch long) where you want the opening to be.
🔍 Pro tip: Keep the mark slightly toward the inner wrist edge, not directly in the middle of the sleeve, for a more ergonomic fit.
Step 2: Take It Off and Flatten

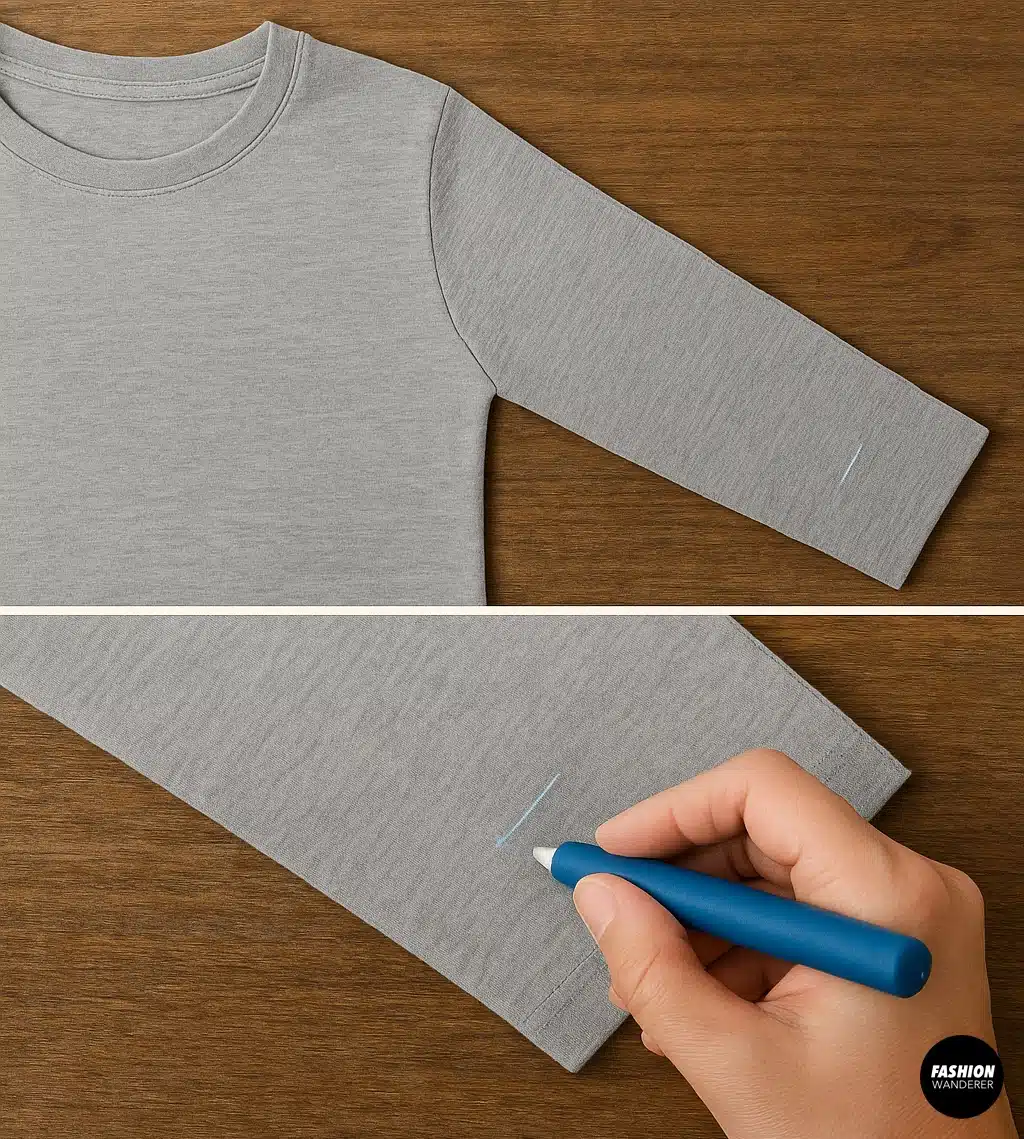
Carefully take off the shirt without smudging your mark. Lay the sleeve flat on a table, making sure it’s smooth and aligned.
Double-check the chalk line position. Repeat the same process on the other sleeve for symmetrical placement.
Step 3: Cut the Thumbhole

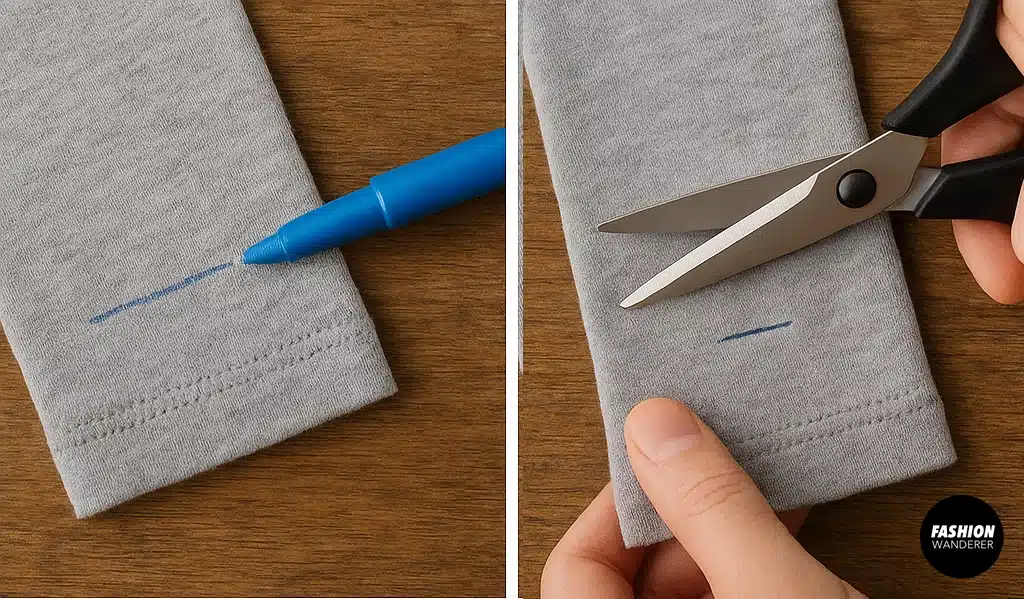
Using sharp fabric scissors, make a small, horizontal slit along the line you marked. Only cut through one layer of the fabric—don’t cut all the way through the sleeve.
Start small—you can always widen the hole slightly if needed.
🧼 Optional: Try on the shirt again and check the fit. Make adjustments as necessary.
Step 4: Finish the Edges (Optional but Recommended)
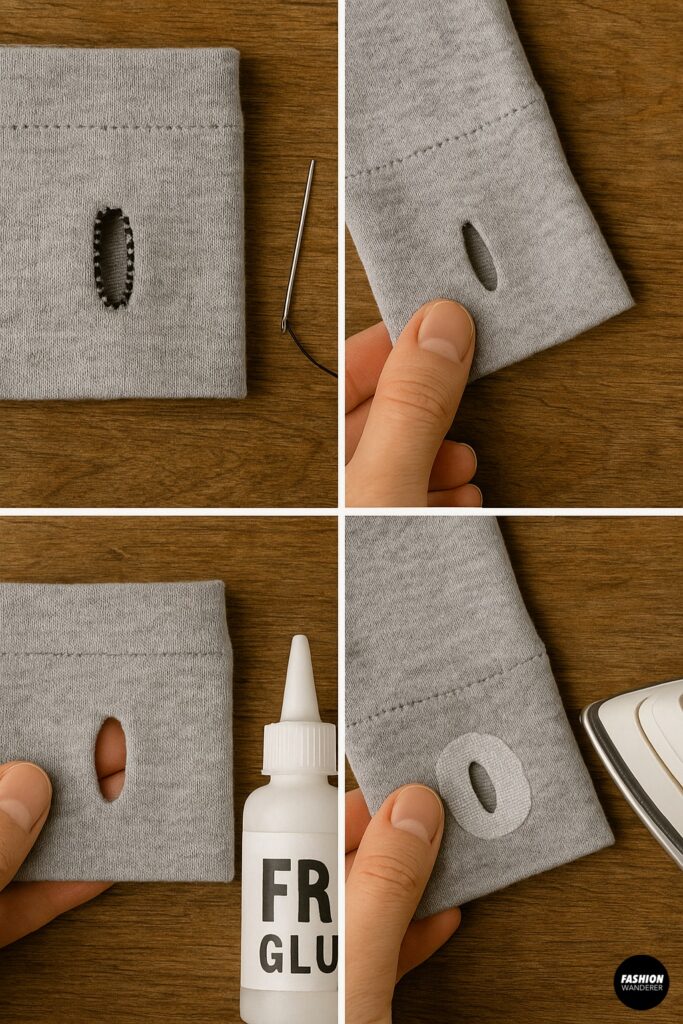

To prevent fraying or stretching out over time, you can reinforce the edges of the thumbhole.
Choose one of the following methods:
Option 1: Simple Stitch
Use a needle and thread to hand-stitch a small whipstitch or blanket stitch around the slit. You can also use a zigzag or stretch stitch on a sewing machine.
Option 2: Fabric Glue
Apply a thin line of fabric glue around the edge to seal the fibers.
Option 3: Stretch Interfacing
Cut a small oval of lightweight stretch interfacing and iron it to the inside of the cuff around the slit.
🎯 Optional style tip: Stitch a contrasting thread color around the slit for a fun pop of detail!
Step 5: Rock Your New Thumbholes!

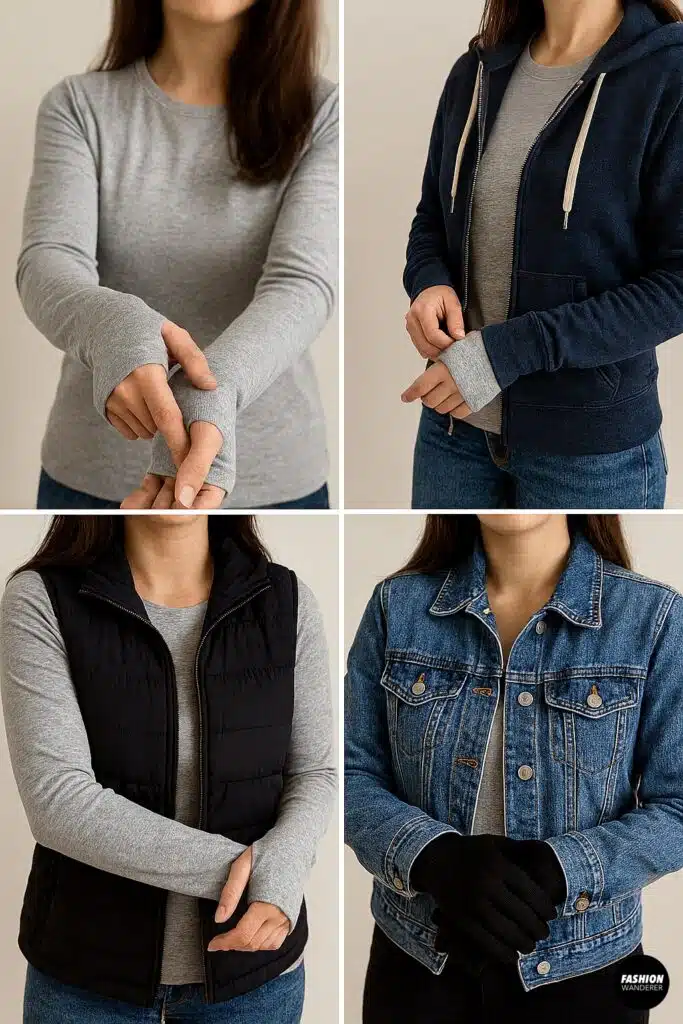
Slip your thumbs through the new holes and enjoy the comfort and style boost. The thumbholes should hug your hand without feeling too tight or pulling on the sleeve.
Wear it under hoodies, activewear vests, denim jackets, or even layer with gloves for extra warmth on chilly days.
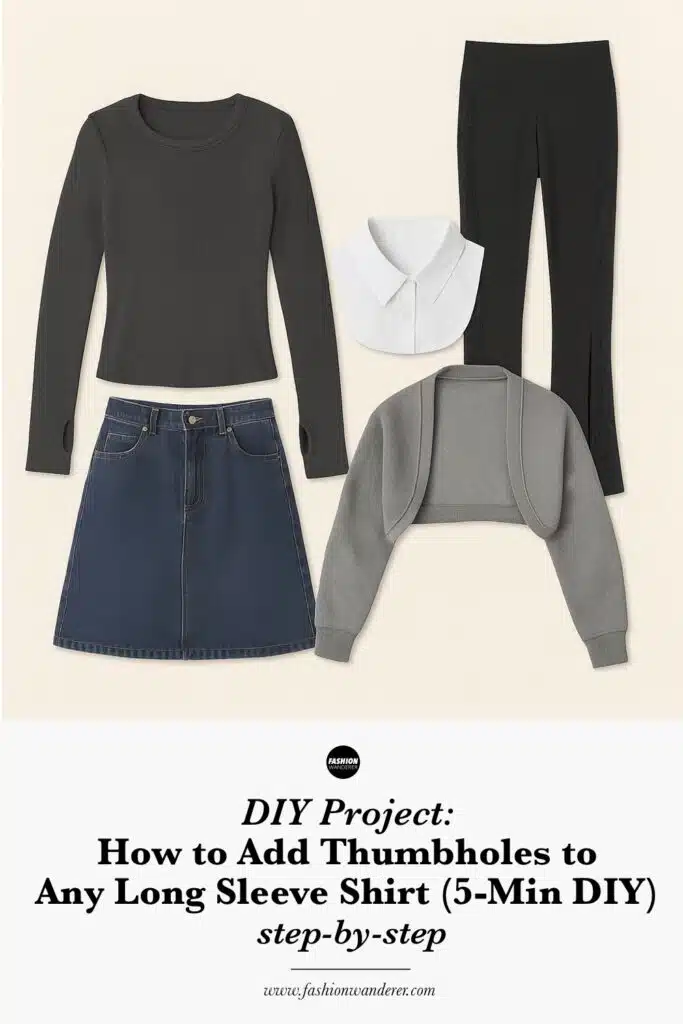
🧵 Bonus: Turn This Into a Whole Look


Love the vibe? Try pairing your DIY thumbhole shirt with:
- Upcycled leggings with slits or lace panels
- Denim skirt or wide-leg pants for a contrast of casual and elevated
- DIY faux collar for a layered look (no sewing required!)
- Recycled sweatshirt shrug for a balletcore or gym-ready aesthetic
♻️ Sustainable and Stylish
This thumbhole hack isn’t just trendy—it’s eco-friendly, too. By updating a shirt you already own, you:
- Extend the life of your garment
- Avoid unnecessary waste
- Customize it to your personal fit and style
- Save money (no need to buy new athletic wear)
🧠 Common Questions
Can I do this on a sweater or sweatshirt?
Yes! The method works on thicker knits too—just use sharp scissors and consider reinforcing the edges to prevent fraying.
Will the thumbhole stretch out over time?
Unfinished slits can stretch, which is why we recommend reinforcing with stitches or glue if you want it to last longer.
Can I make vertical thumbholes?
Yes, although horizontal slits are more ergonomic. If you prefer vertical openings, test placement and make sure they don’t tug on the seam.
📌 Final Thoughts
Adding thumbholes to any long sleeve shirt is a fast, fun, and functional DIY that instantly boosts your everyday wardrobe. In under five minutes, you’ll turn a basic tee into something cozy, practical, and perfectly on trend.
Whether you’re styling for a casual day out or layering up for chilly evenings, thumbholes offer that extra touch of intention and polish. Plus, this beginner-friendly hack is a great entry point if you’re new to sewing or garment upcycling!
📌 Pin This Tutorial
Save this quick guide for your next DIY fashion session:
“How to Add Thumbholes to Any Long Sleeve Shirt (5-Minute DIY)”

Trendy, Affordable Sewing Patterns for All Sizes


Tie Shoulder Jumpsuit Pattern


Palazzo Pants Sewing Pattern


Pocket Overall Romper Pattern


Wrap Maxi Skirt Sewing Pattern


Tie Back Top Sewing Pattern