
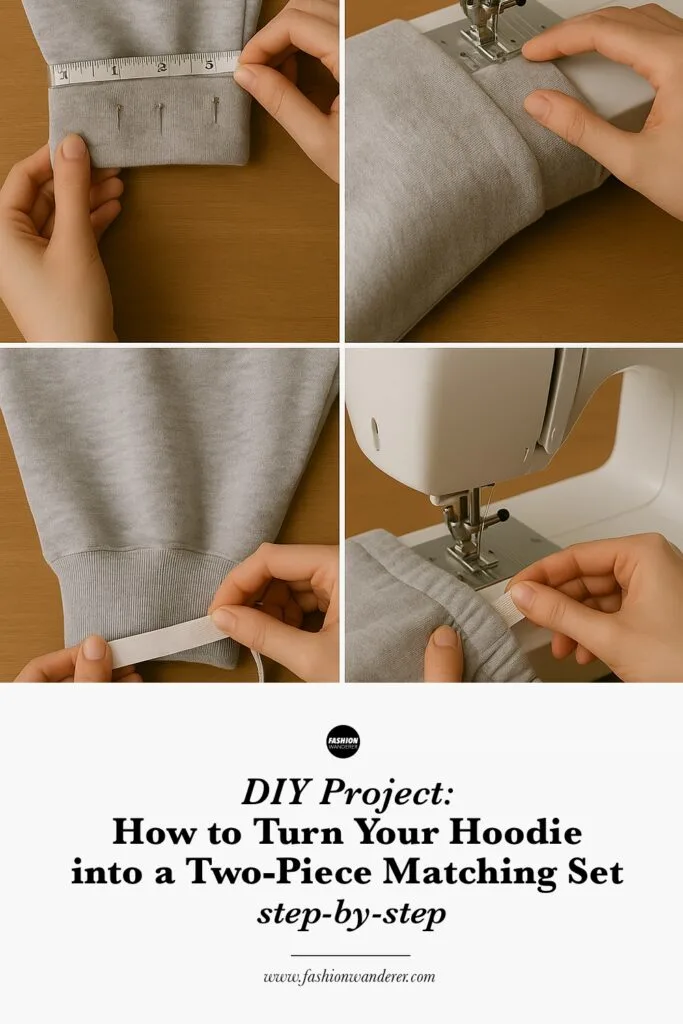
Upcycling your favorite hoodie into a chic two-piece matching set is one of the hottest DIY trends right now—and it’s surprisingly easy! Whether you’re looking for a cozy co-ord for lounging or a cute athleisure look, this project will help you transform a plain hoodie into a stylish top-and-skirt (or jogger) combo.
With just a few simple tools and materials, you’ll have a custom fit, head-to-toe ensemble that’s both sustainable and totally on-trend. Let’s dive in!
Why You’ll Love This Project
- Eco-Friendly Wardrobe Refresh: Give a tired hoodie new life instead of tossing it.
- Custom Fit & Style: Control the length, silhouette, and details to suit your body and taste.
- Budget-Friendly Fashion: Skip expensive co-ords—make your own for a fraction of the cost.
- Beginner-Friendly: No advanced sewing skills required; perfect for first-time refashions.
- Fast Results: From prep to final touches, you can complete this DIY in 1–2 hours.
DIY Transform Hoodie into a Two-Piece Set

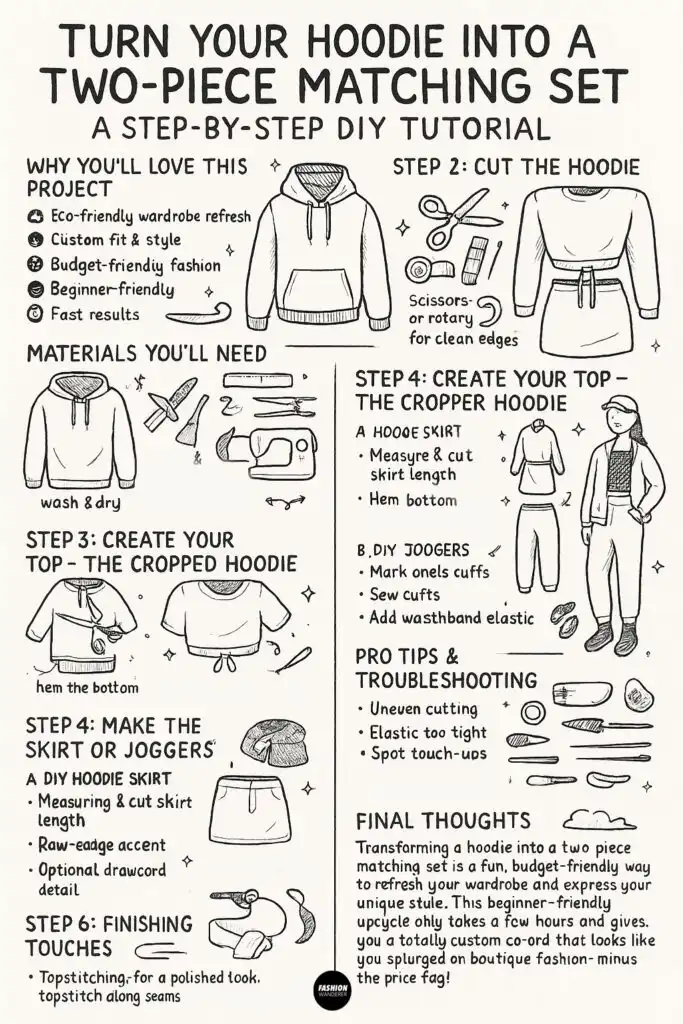
Materials You’ll Need

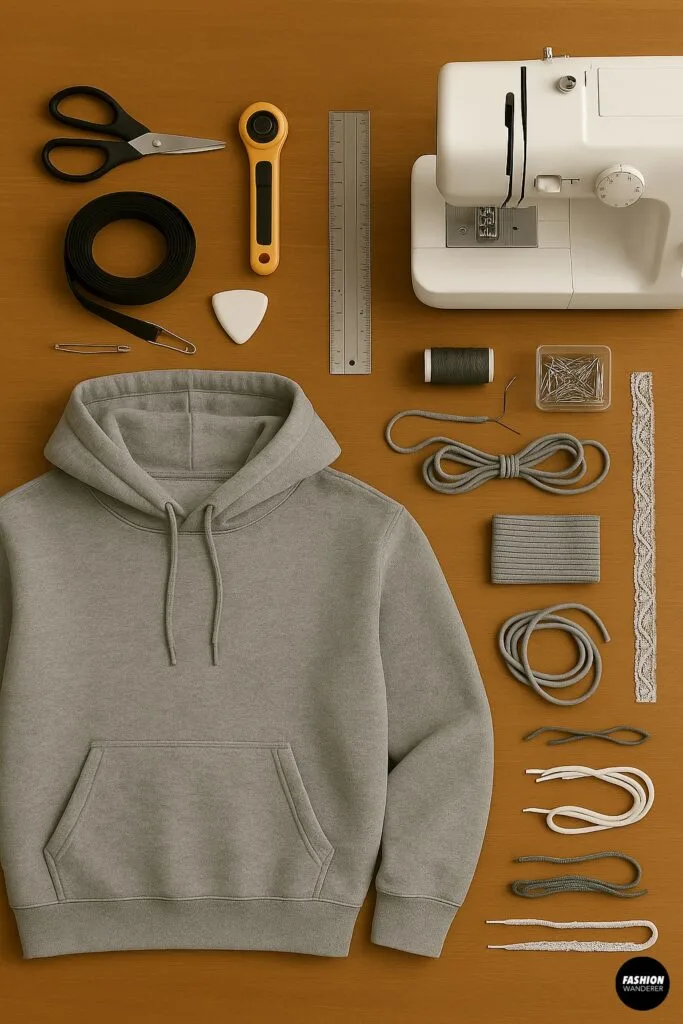
- One oversized or standard hoodie (preferably cotton blend)
- Scissors or rotary cutter for clean edges
- Ruler or measuring tape
- Tailor’s chalk or washable fabric marker
- Elastic band (1″–2″ wide, length = waist measurement minus 1″)
- Safety pin (to thread elastic)
- Sewing machine or needle & strong thread
- Pins or clips
- Optional embellishments: Rib knit scraps, drawcord, or lace trim
Step 1: Prep & Plan Your Cut

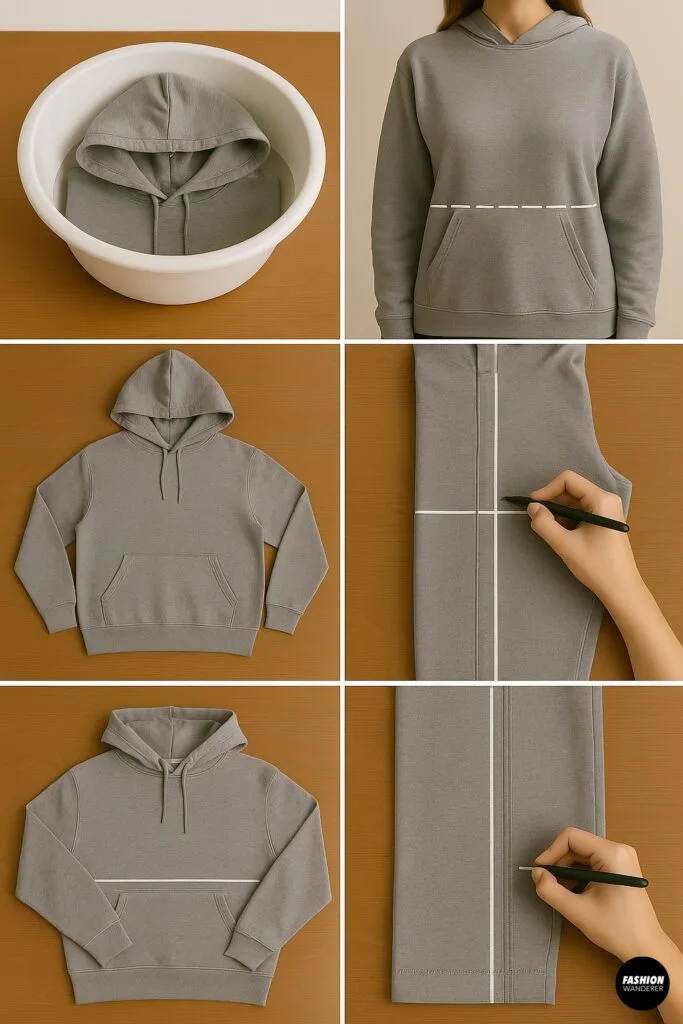
- Wash & Dry: Pre-wash your hoodie to remove any shrinkage surprises.
- Decide Your Silhouette: Will you create a high-waisted skirt, fitted mini, or cozy joggers?
- Lay Flat: Smooth the hoodie on a large table or floor, front side up, with the hood folded out of the way.
- Mark Your Cut Line:
- For a Skirt/Short Set: Mark a horizontal line just below the kangaroo pocket (around the natural waist).
- For Joggers: Mark vertical lines from underarm seams down each side to the hem.
Use chalk to draw a straight line across both front and back panels—double-check symmetry by folding in half and matching edges.
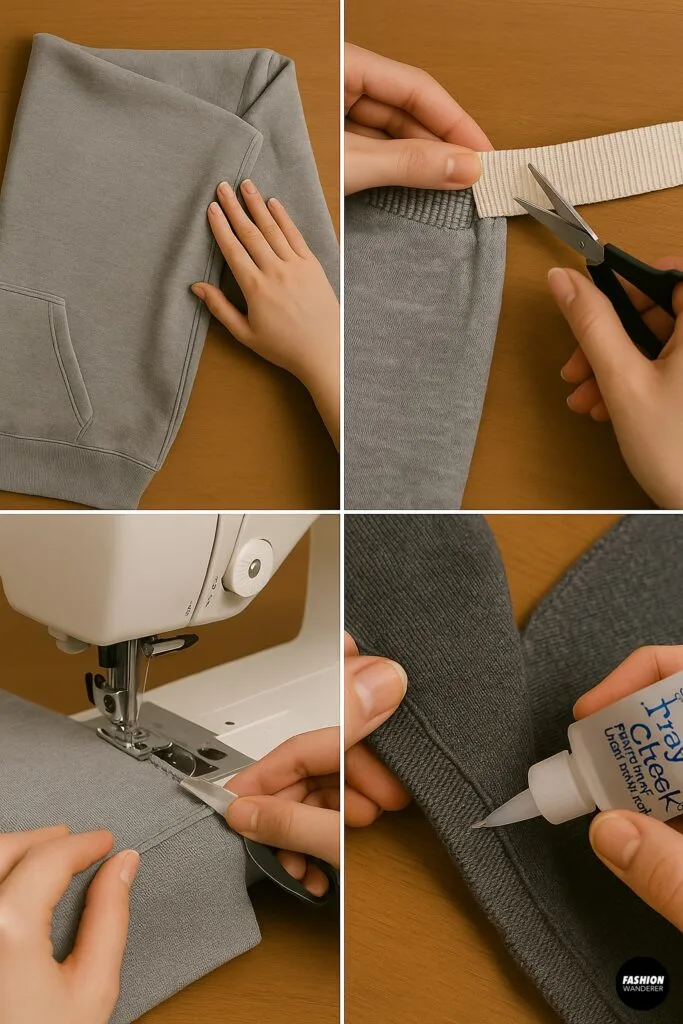
Step 2: Cut the Hoodie

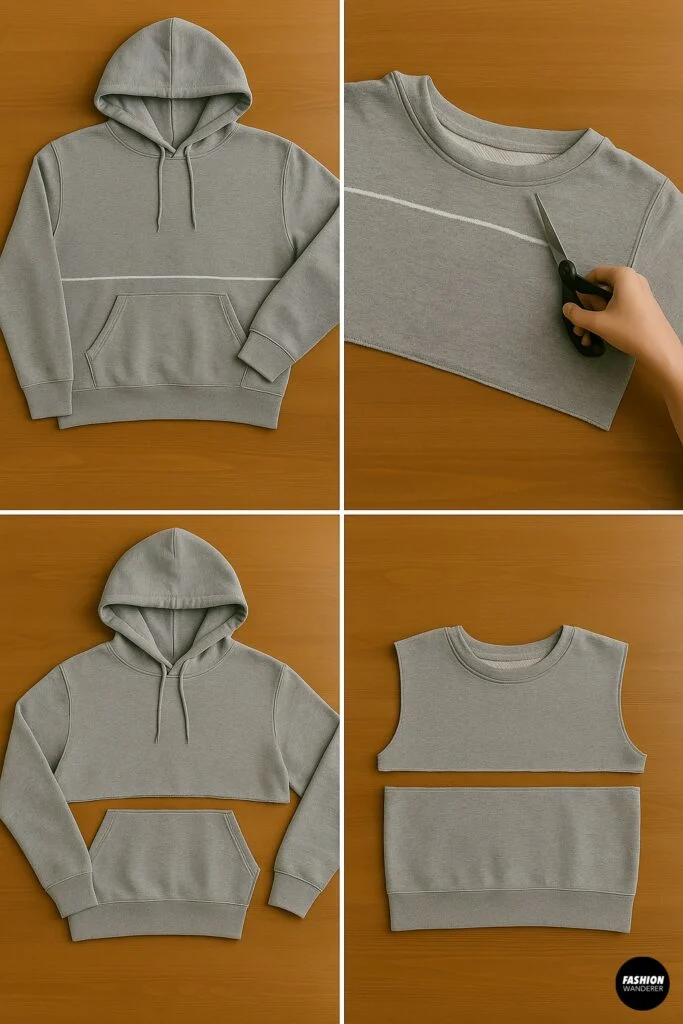
- Cut Carefully: Using sharp scissors or a rotary cutter, follow your chalk line to remove the top portion (for skirt) or side panels (for joggers). Keep the cut edges as even as possible.
- Save the Remnants: That top portion (hood + torso) becomes your new crop top! The bottom becomes the skirt or jogger panels.
Step 3: Create Your Top—The Cropped Hoodie

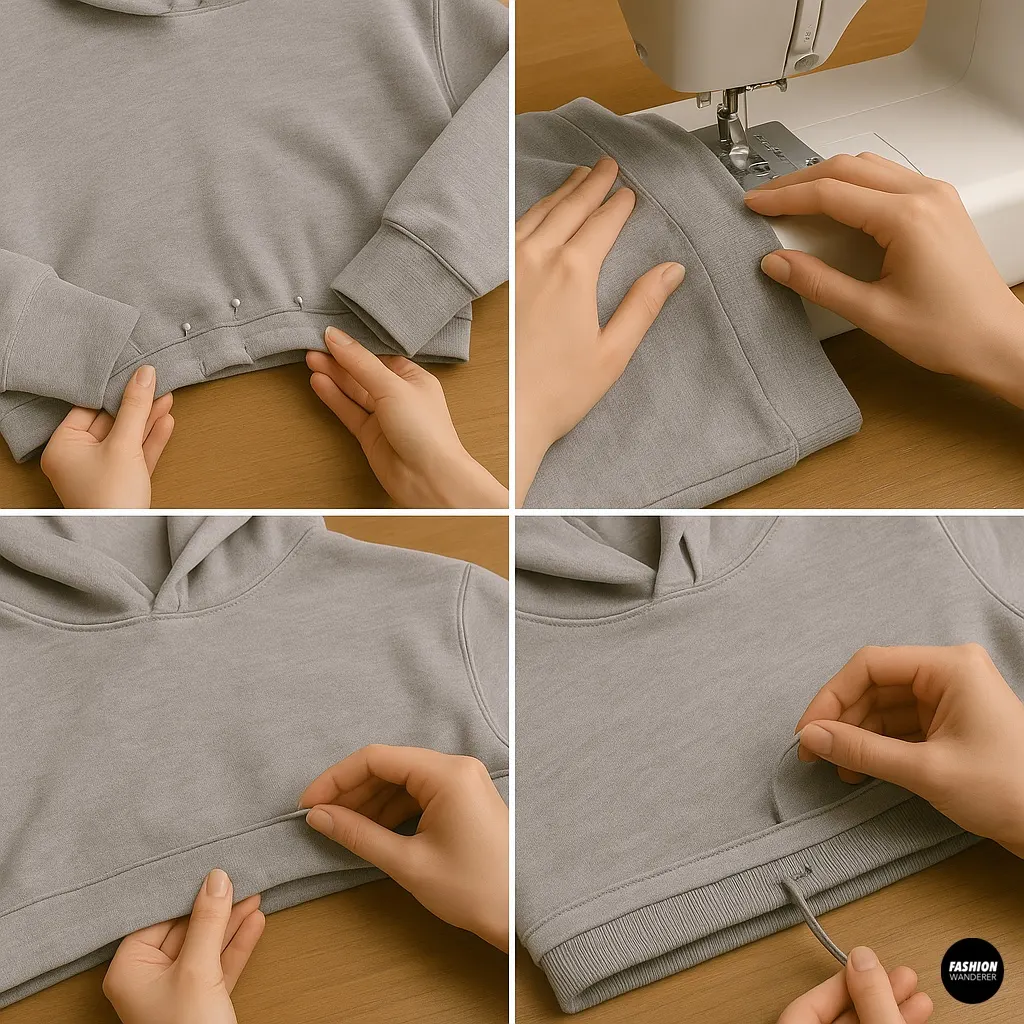
- Hem the Bottom Edge:
- Fold & Pin: Fold the raw edge up ½″, then another ½″ to encase the edge. Pin or clip in place.
- Sew: Use a stretch stitch (or zigzag) to sew the hem so it still stretches.
- Optional Drawcord Detail: If you love ruching, add a drawcord tunnel:
- Sew a 1″ strip of rib knit or leftover hood fabric as a casing just above the hem, leaving a small opening to thread your cord.
- Thread your drawcord with a safety pin, adjust, and tie ends.
Your hoodie crop top is complete—pair it with your newly tailored bottoms!
Step 4: Make the Skirt or Joggers
DIY Hoodie Skirt

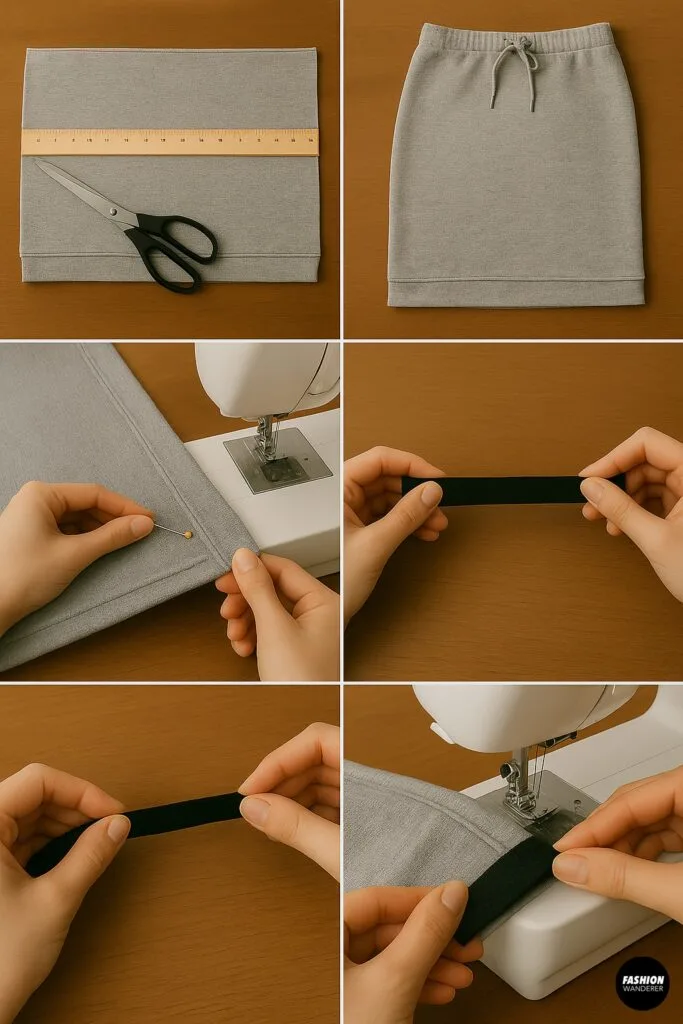
- Measure & Cut Skirt Length: Lay the bottom piece flat, measure from waist to desired skirt length, add 1″ for hem. Mark and cut.
- Hem the Bottom: Fold ½″ twice, pin, and stitch with a stretch stitch.
- Add Elastic Waist:
- Measure Elastic: Wrap elastic around your waist, subtract 1″ for snugness.
- Thread Elastic: Attach a safety pin and thread through the original waistband casing.
- Sew Elastic Ends: Overlap ½″ and zigzag stitch to secure.
- Close Opening: Sew the casing closed.
DIY Joggers

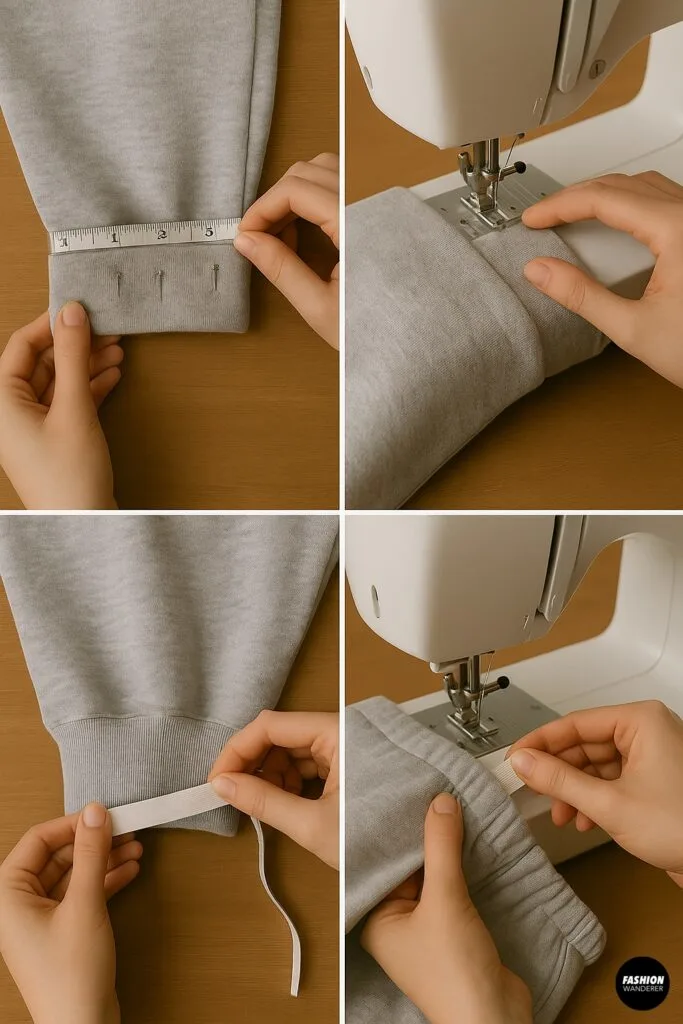
- Mark Ankle Cuffs: Decide how wide you want your cuff—2″–3″ is typical. Fold up hem allowance and pin on each leg.
- Sew Cuffs: Stitch with a stretch stitch to form ankle cuffs.
- Add Waistband Elastic: Same method as the skirt—open the waistband seam slightly, insert elastic, sew, then close seam.
Step 5: Finishing Touches

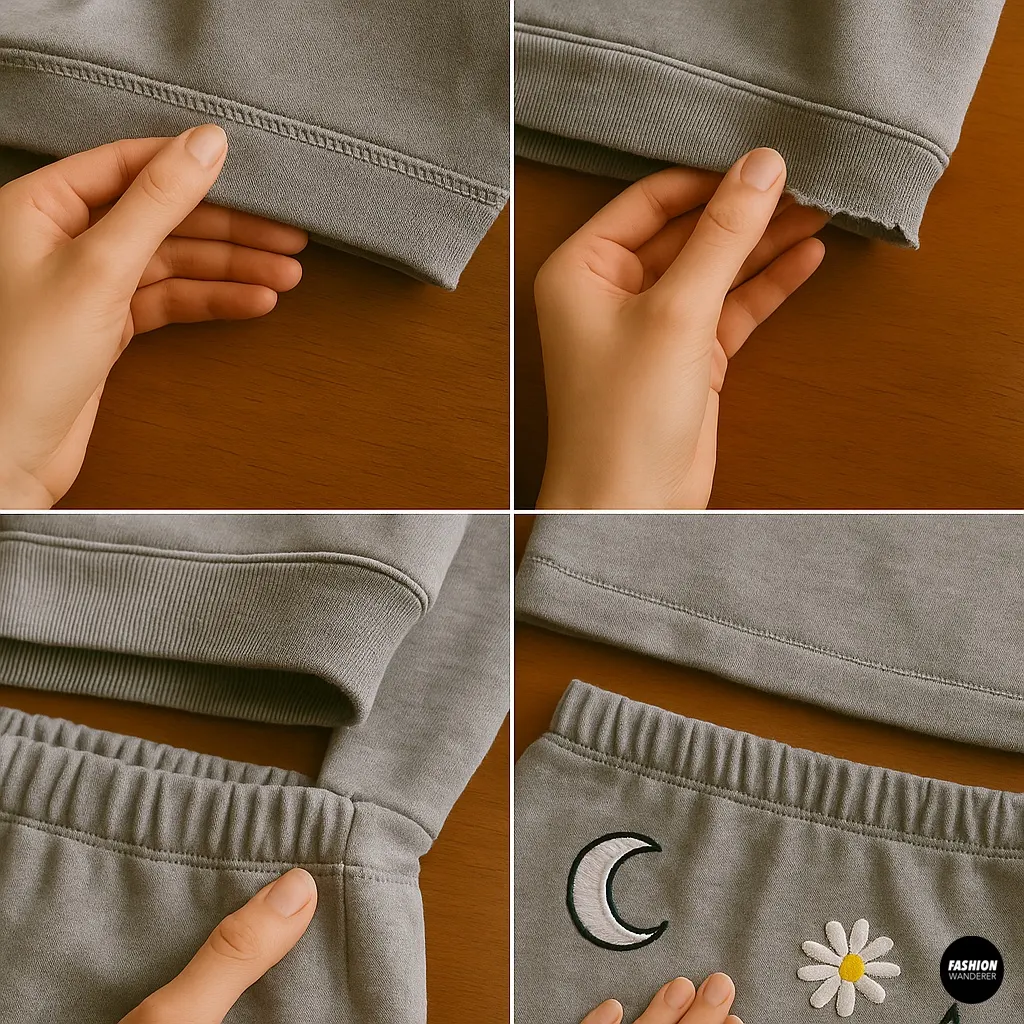
- Topstitching: For a polished look, topstitch along seams with contrasting thread.
- Raw-Edge Accent: If you love grunge style, leave the crop-top hem or skirt hem raw—cotton knits roll nicely for a casual vibe.
- Embellishments: Add iron-on patches, embroidery, or fabric paint to personalize.
Step 6: Style Your Two-Piece Set

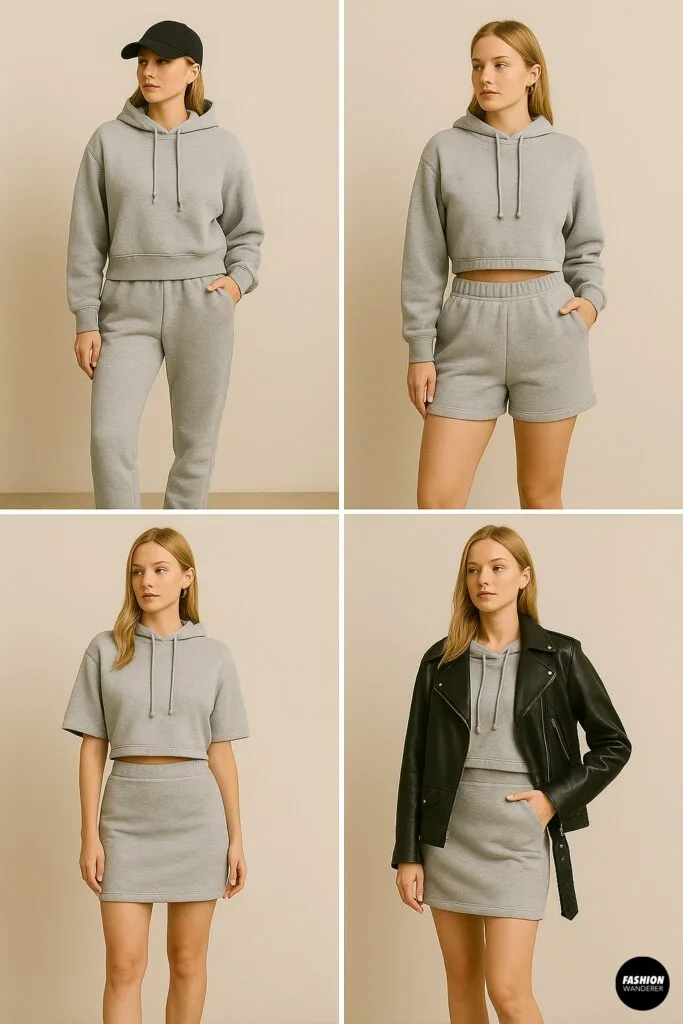
- Casual Errands: Wear your co-ord with chunky sneakers and a baseball cap.
- Lounge Day: Pair the crop top with the joggers and fuzzy slides for ultimate comfort.
- Night Out: Tuck the cropped hoodie into the skirt, add ankle-strap heels and statement earrings.
- Layered Looks: Throw on an oversized trench or leather jacket for extra edge.
Pro Tips & Troubleshooting

- Uneven Cutting: Fold your hoodie in half and ensure edges align before cutting.
- Elastic Too Tight: If you experience discomfort, unstitch elastic, trim by ¼″, and re-sew.
- Seam Puckering: Use a walking foot or increase stitch length slightly on your machine.
- Fabric Fray: Knits don’t fray much, but if yours does, apply a light bead of fray check along raw edges.
Care & Maintenance
- Wash Gently: Turn your set inside out; machine wash cold on gentle cycle.
- Air Dry: Lay flat or hang to preserve elasticity and shape.
- Avoid Bleach: Harsh chemicals can break down fibers and fade colors.
- Spot Touch-Ups: Keep leftover fabric scraps or thread for patching any pulls or loose stitches.
Final Thoughts

Transforming a hoodie into a two-piece matching set is a fun, budget-friendly way to refresh your wardrobe and express your unique style. This beginner-friendly upcycle only takes a few hours and gives you a totally custom co-ord that looks like you splurged on boutique fashion—minus the price tag!
Ready to tackle your favorite hoodie? Gather your supplies, follow these steps, and get ready to rock your new DIY two-piece set with pride. Happy sewing—and even happier styling!
Trendy, Affordable Sewing Patterns for All Sizes


Tie Shoulder Jumpsuit Pattern


Palazzo Pants Sewing Pattern


Pocket Overall Romper Pattern


Wrap Maxi Skirt Sewing Pattern


Tie Back Top Sewing Pattern
Dani taylor
Sunday 14th of June 2026
This post is an excellent inspiration! Thank you for sharing the creative idea!