
If you’re aiming for a beautifully clean finish on garments, necklines, or armholes—especially in lightweight fabrics—invisible binding is a technique worth mastering. Often used in high-end fashion and couture sewing, invisible (or concealed) binding creates a sleek edge with no visible topstitching from the outside of the garment. It’s perfect for blouses, dresses, fine knits, or any sewing project where you want a smooth, refined result.
In this post, you’ll learn how to sew invisible binding with clear, beginner-friendly instructions, plus pro tips to help you get that flawless, hidden finish every time.
✂️ What Is Invisible Binding?
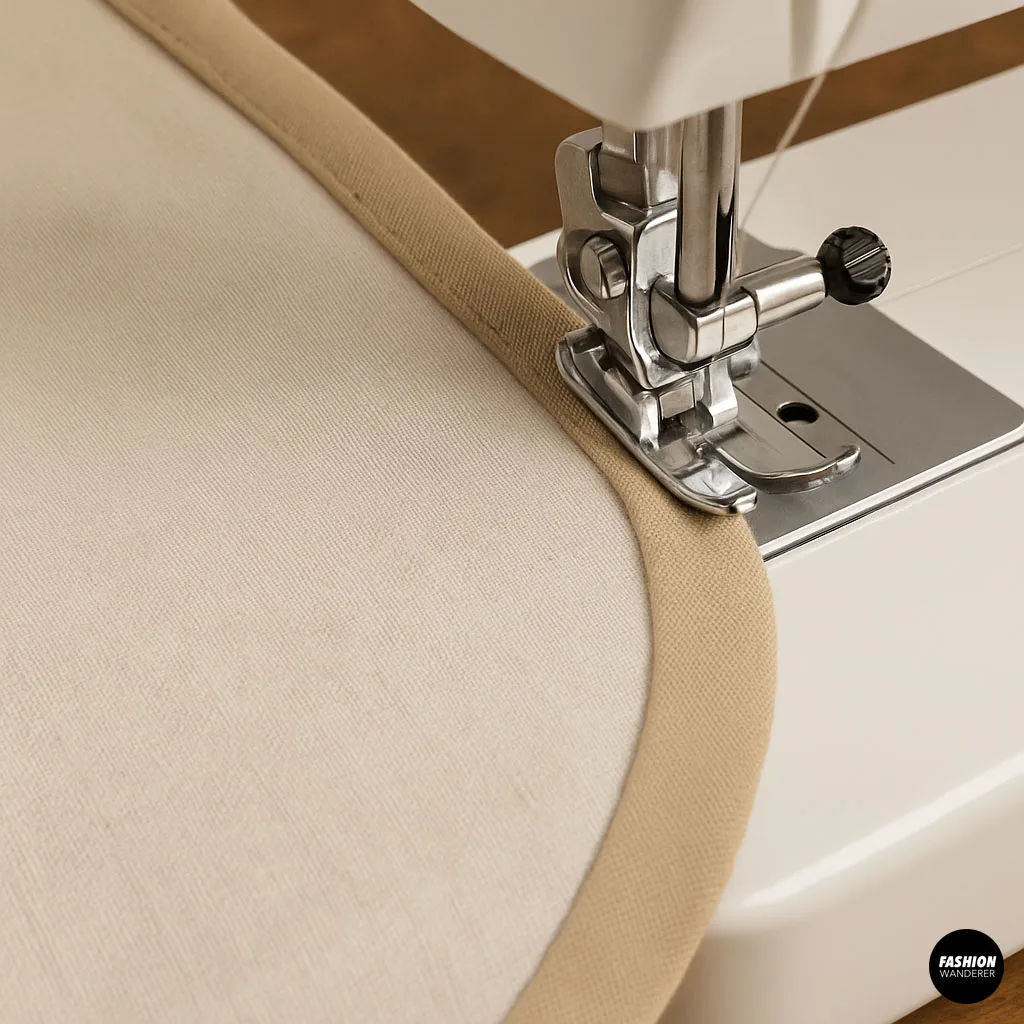
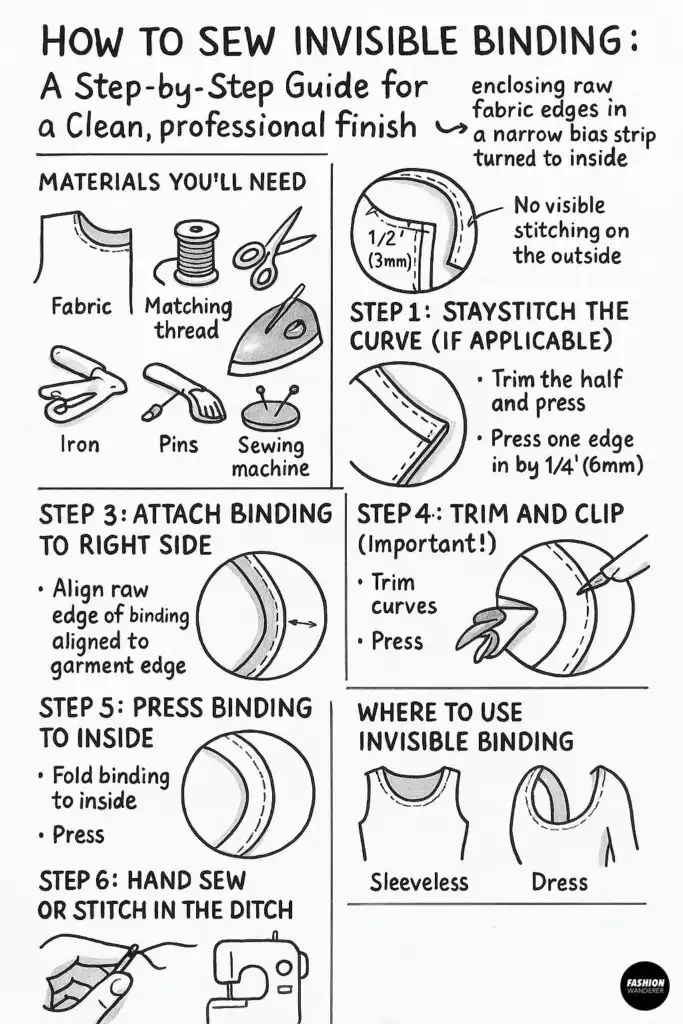
Invisible binding is a method of finishing raw fabric edges by enclosing them in a narrow bias strip and stitching in a way that leaves no visible stitching on the outside. Unlike traditional bias binding, which is topstitched and visible, invisible binding is sewn in the seam and turned completely to the inside.
🧵 When to Use Invisible Binding
This technique is ideal for:
- Necklines and armholes on woven garments
- Lightweight or sheer fabrics where topstitching may detract from the look
- Unlined garments needing a clean interior finish
- Garments with a minimalist, seamless appearance
🪡 Materials You’ll Need
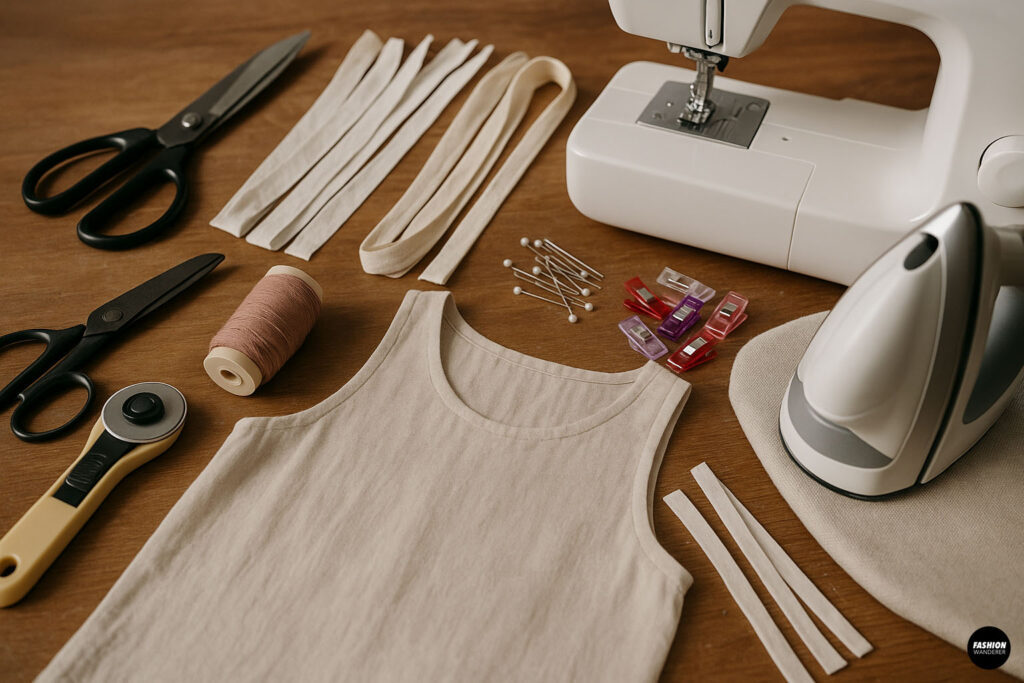

Before you begin, gather these supplies:
- Your garment or fabric sample
- Matching thread
- Fabric scissors or rotary cutter
- Pins or fabric clips
- Lightweight fabric for binding (e.g., lawn, voile, or self-fabric cut on the bias)
- Iron and ironing board
- Sewing machine (a straight stitch foot is fine)
💡 Pro Tip: Always prewash your fabrics to avoid shrinking after sewing.
📏 How to Cut Binding Strips
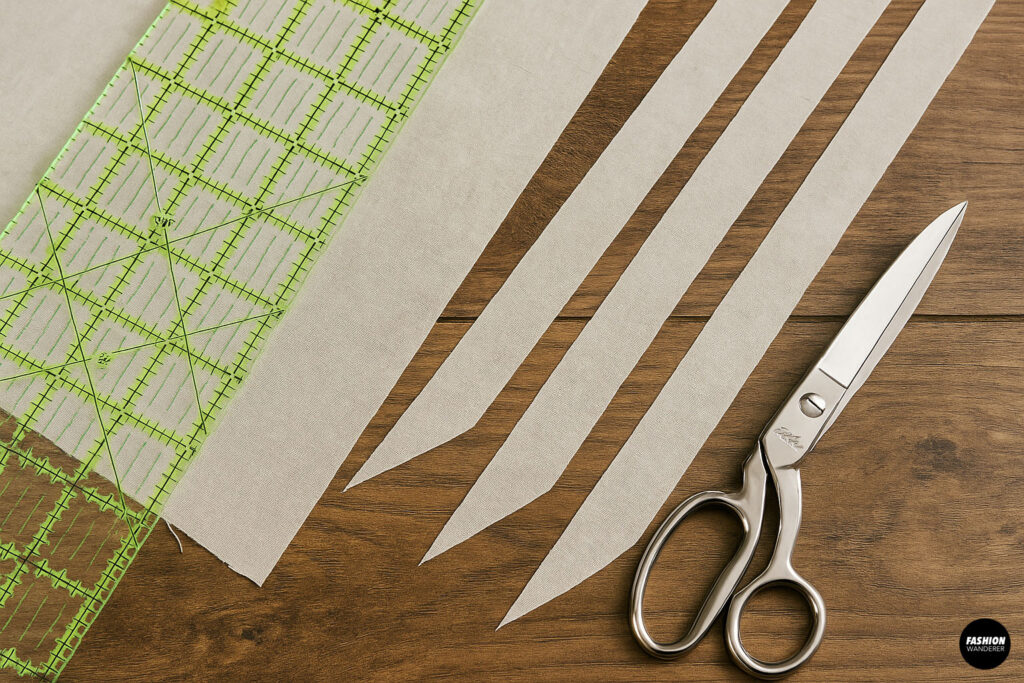

- Cut bias strips of fabric 1” to 1.25” wide, depending on your fabric thickness.
- Bias-cut strips (at a 45-degree angle to the grainline) curve easily and lay flat around armholes and necklines.
- You’ll need enough strip length to go all the way around the edge you’re binding, plus a couple of inches extra.
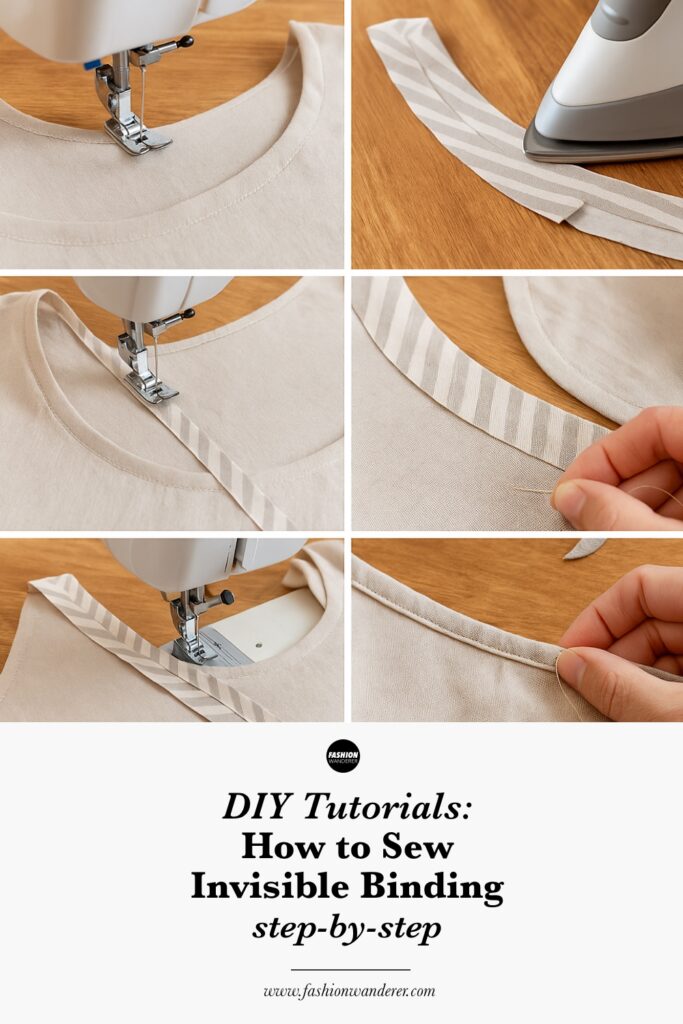
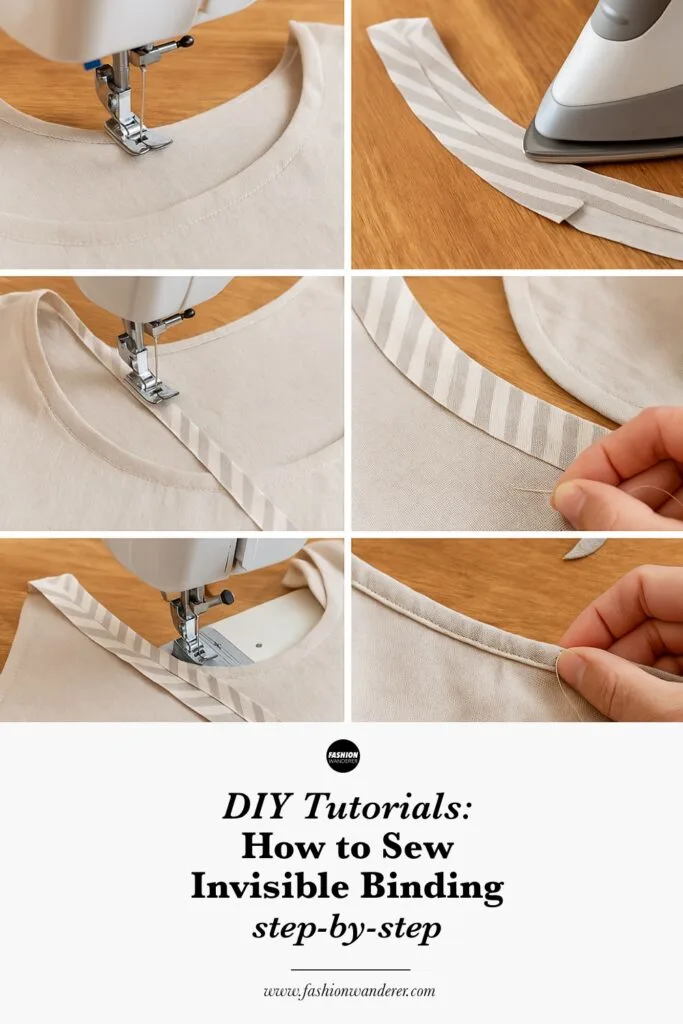
✅ Step-by-Step Tutorial: How to Sew Invisible Binding

Step 1: Staystitch the Curve (If Applicable)
Before attaching binding, staystitch curves like necklines or armholes. Use a ⅛” (3 mm) seam allowance just inside your final seam line to prevent stretching.
Step 2: Prepare the Binding Strip
- Fold your bias strip in half lengthwise with wrong sides together and press.
- Unfold, then press one long edge in by ¼” (6 mm) toward the wrong side. This folded edge will be your final finish.
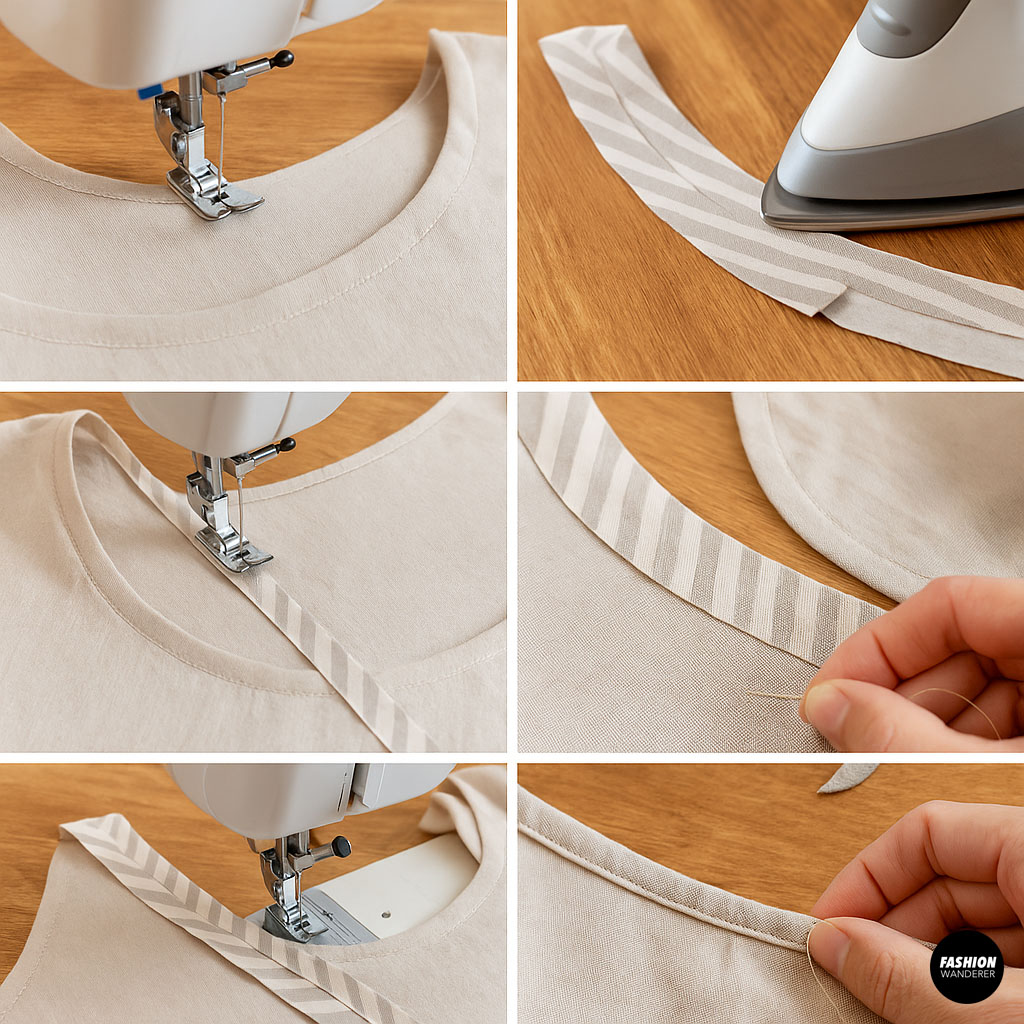
Step 3: Attach Binding to Right Side
- With right sides together, align the raw edge of the binding strip to the raw edge of your garment.
- Pin or clip in place along the neckline, armhole, or hem.
- Sew with a ¼” seam allowance, using a straight stitch.
💡 Stitch slowly around curves to keep your seam accurate.
Step 4: Trim and Clip (Important!)
- Trim the seam allowance to reduce bulk—especially if using thicker fabrics.
- On curves, clip the seam allowance every inch or so to help the binding lie flat when turned inside.
Step 5: Press Binding to Inside
- Press the binding and seam allowance away from the garment.
- Then fold the binding completely to the wrong side, enclosing the seam allowance.
- The folded edge of the binding should just cover the stitch line on the inside.
Step 6: Hand Sew or Stitch in the Ditch
You have two options for finishing the binding:
Option A: Hand Stitch (for true invisible finish)
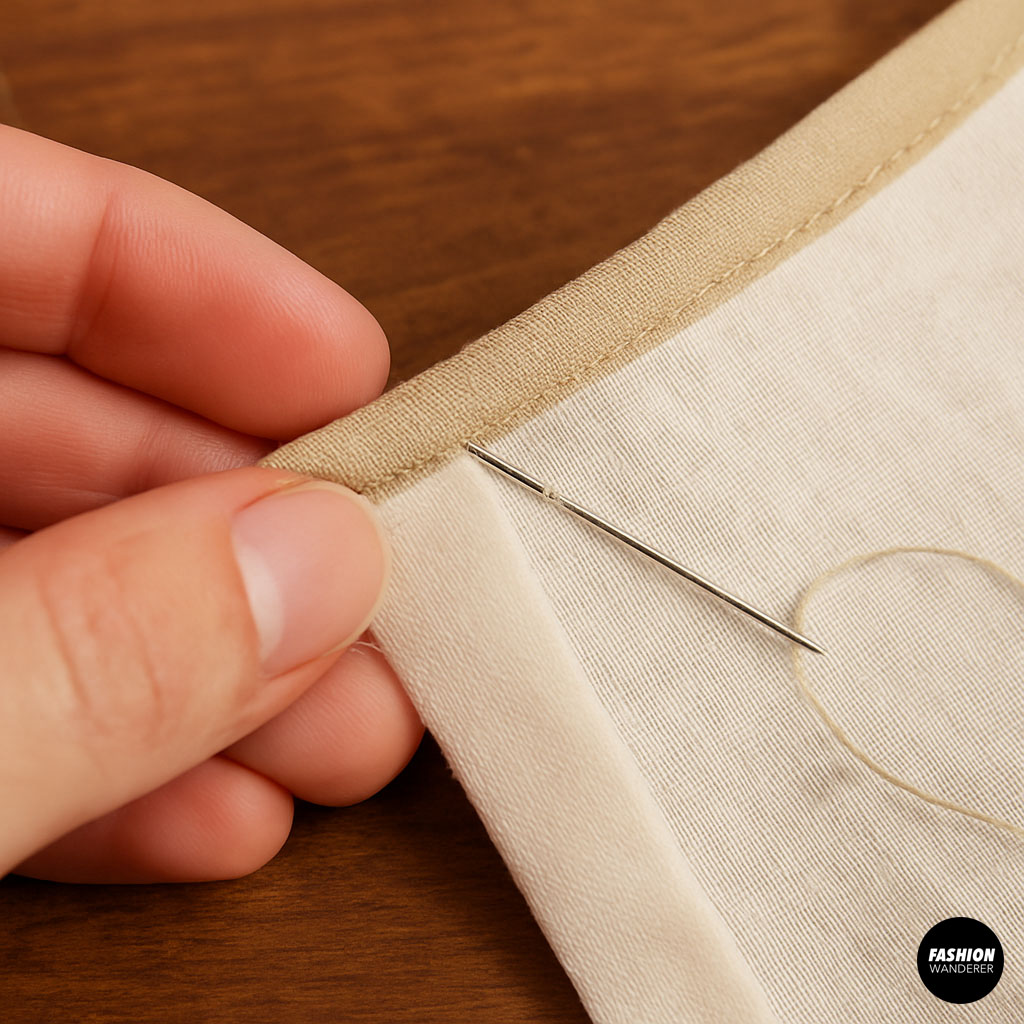

- Using a slip stitch or blind stitch, sew the folded edge of the binding to the garment on the wrong side.
- Take small stitches and secure every ¼”–½” for durability.
Option B: Stitch in the Ditch

- From the right side, stitch directly into the seam line (the “ditch”) where the binding is attached.
- Catch the edge of the binding underneath without stitching visible on the front.
✅ This option is faster and machine-friendly but may not be 100% invisible depending on fabric thickness and thread color.
👚 Where to Use Invisible Binding
Here are some garment areas where invisible binding adds professional polish:
| Garment Feature | Why Use Invisible Binding |
| Necklines | Smooth, minimal finish without facing bulk |
| Armholes | Great for sleeveless tops or dresses |
| Keyhole openings | Clean look for blouse back details |
| Hems on sheer fabric | Prevents bulky double folds on delicate fabric |
| Unlined jackets | Gives a neat inner finish on edges and facings |
🧼 How to Care for Garments with Invisible Binding
- Hand wash or gentle cycle recommended for delicate fabrics and hand-sewn finishes.
- Press with care—use a pressing cloth to protect binding stitches.
- Avoid tugging or pulling around the edges, especially on curves.
🧵 Pro Tips for a Perfect Finish
✔ Use a matching or fine contrast thread to blend with your garment.
✔ Press carefully at each stage—this ensures a smooth fold and professional edge.
✔ Practice on a fabric scrap to test your stitch placement and binding width.
✔ For curves, always clip seam allowances and use bias strips for best results.
✔ Invisible binding is perfect for pattern hacks or modifying facings into cleaner finishes.
🪡 Final Thoughts

Mastering how to sew invisible binding takes a bit of patience, but the result is a professional, elegant edge you’ll be proud of—without bulky seams or visible topstitching. This technique is ideal for both beginners looking to elevate their finishes and experienced sewists seeking couture-level details.
Ready to upgrade your sewing? Try invisible binding on your next blouse, dress, or sleeveless top—it’s the secret touch that takes your handmade garments to the next level.
Trendy, Affordable Sewing Patterns for All Sizes


Tie Shoulder Jumpsuit Pattern


Palazzo Pants Sewing Pattern


Pocket Overall Romper Pattern


Wrap Maxi Skirt Sewing Pattern


Tie Back Top Sewing Pattern