
Jeans are the ultimate wardrobe staple—comfortable, versatile, and effortlessly cool. But when the waist doesn’t fit quite right, even your favorite pair can end up collecting dust.
Learning how to tailor the waist of jeans is a simple, cost-effective way to breathe new life into your denim. In this tutorial, you’ll discover precise, step-by-step instructions for altering your jeans’ waist, complete with insider tips and tricks to ensure a perfect fit.
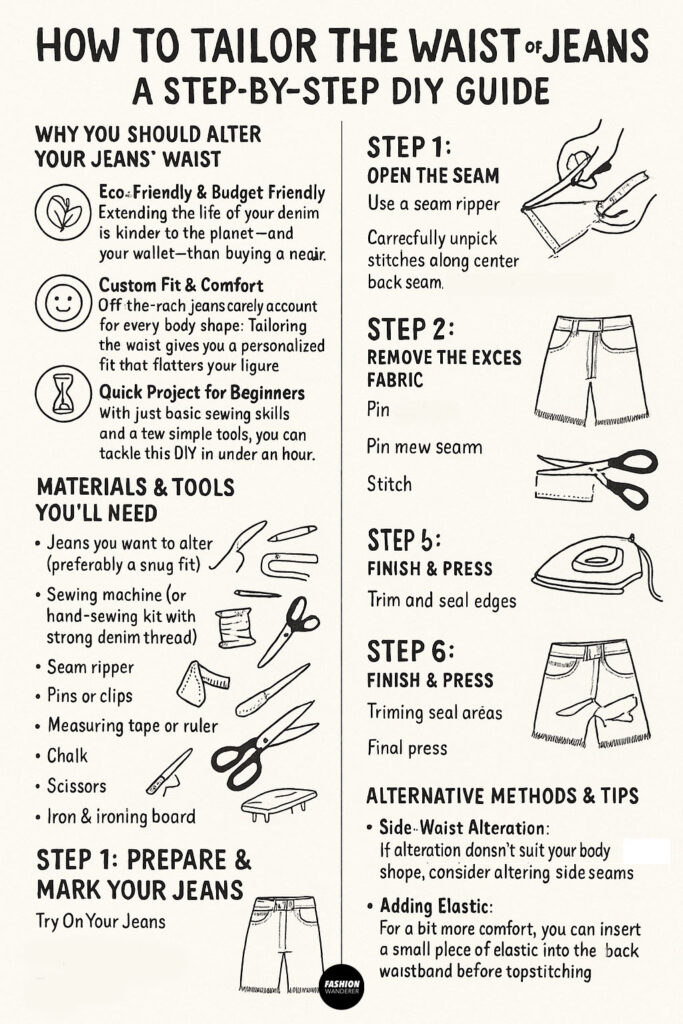
Why You Should Alter Your Jeans’ Waist
- Eco-Friendly & Budget-Friendly
- Extending the life of your denim is kinder to the planet—and your wallet—than buying a new pair.
- Custom Fit & Comfort
- Off-the-rack jeans rarely account for every body shape. Tailoring the waist gives you a personalized fit that flatters your figure and stays put all day.
- Quick Project for Beginners
- With just basic sewing skills and a few simple tools, you can tackle this DIY in under an hour.
Materials & Tools You’ll Need
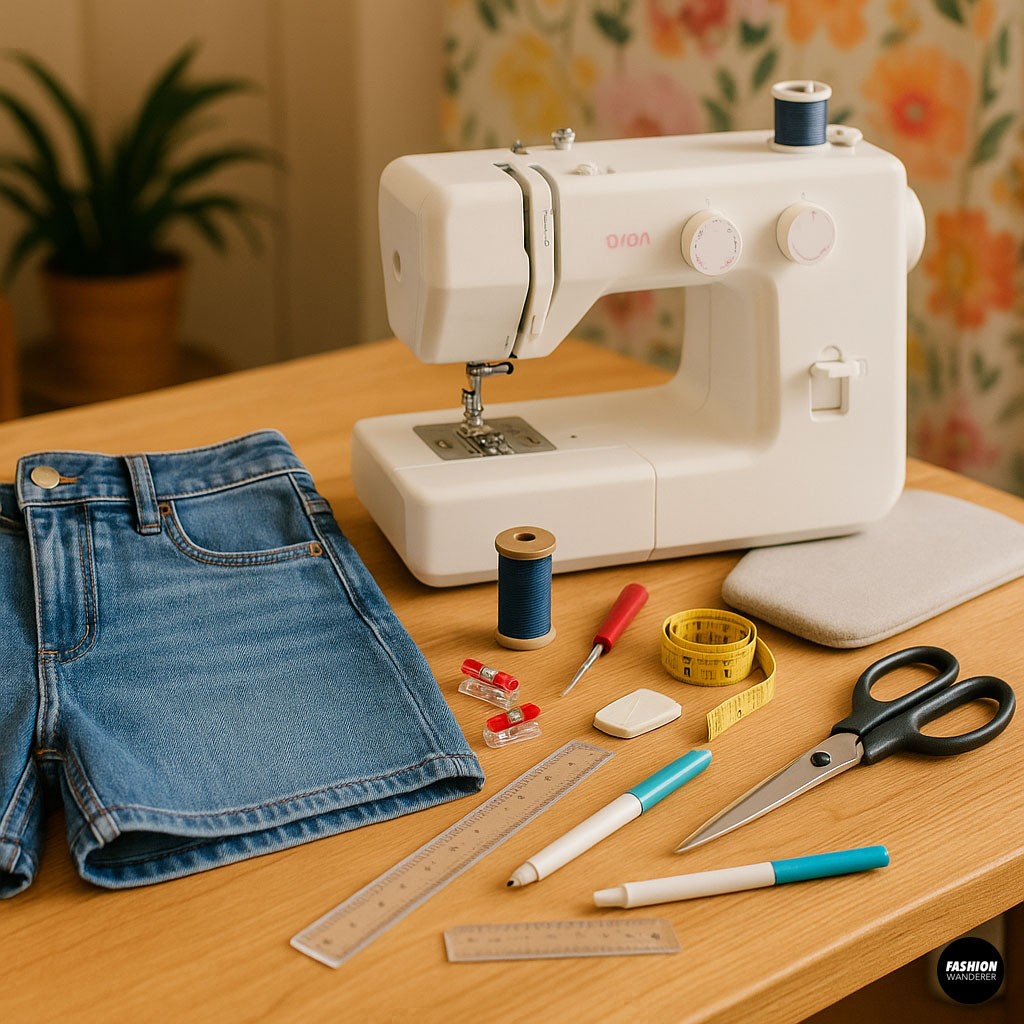

- Jeans you want to alter (preferably a snug fit in the hips)
- Sewing machine (or hand-sewing kit with strong denim thread)
- Seam ripper
- Pins or clips
- Measuring tape or ruler
- Chalk or fabric marker
- Scissors
- Iron & ironing board
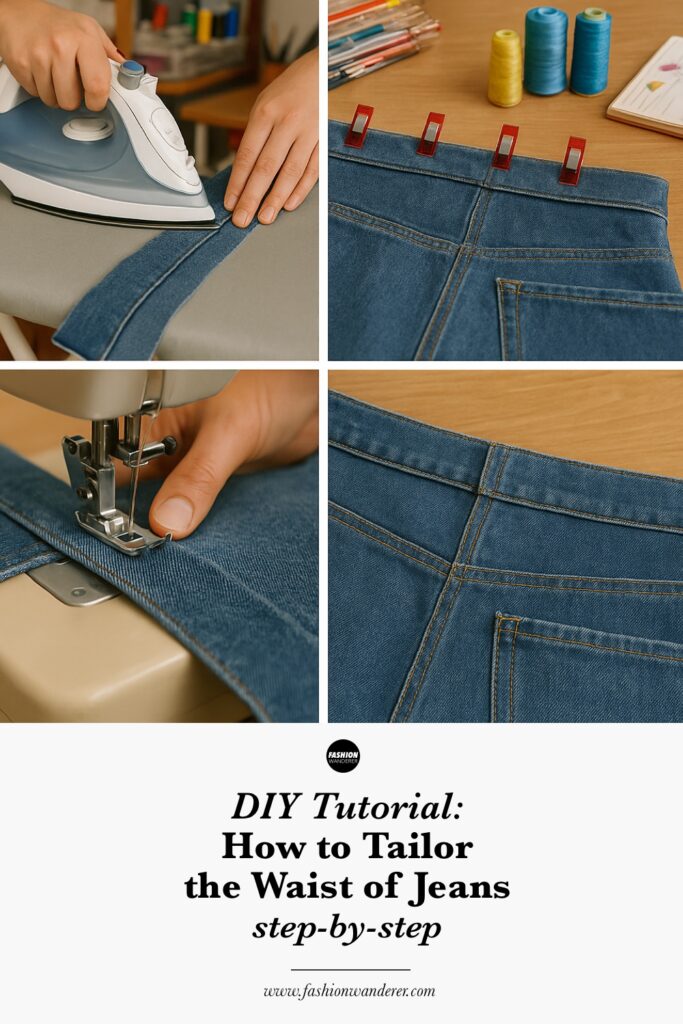
DIY Tailor the Waist of Jeans

Step 1: Prepare & Mark Your Jeans

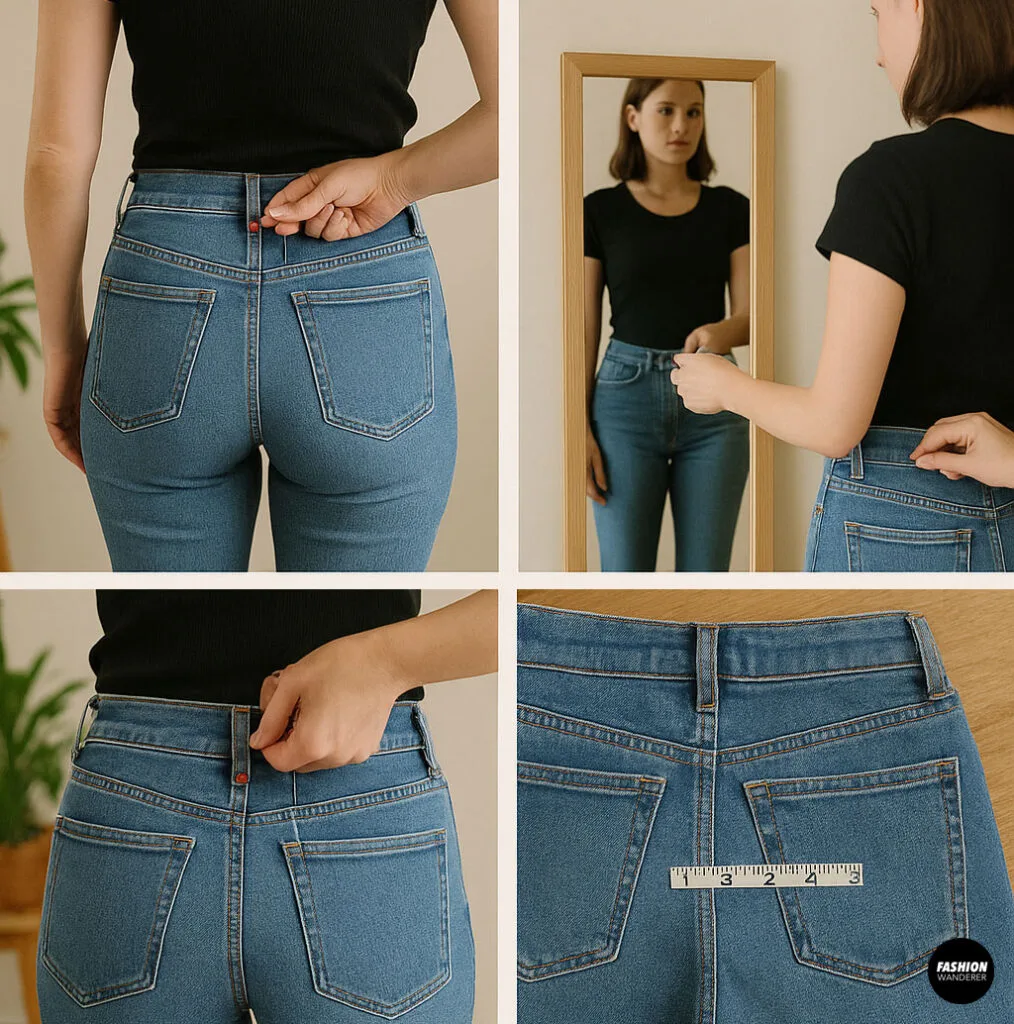
- Try On Your Jeans
- Put on the jeans and button them. Pinch the excess fabric at the center back waist to determine how much you need to take in—usually between 1–3 inches total (½–1½ inches per side).
- Mark the Excess
- Stand in front of a mirror. Ask a friend to pin two evenly spaced tucks at the center back waistband. Alternatively, use chalk to draw two vertical lines from waistband down into the yoke (the triangular panel at the back).
- Measure Your Alteration
- Remove the jeans and lay them flat. Measure the distance between your chalk lines. Divide that measurement by two—that’s how much fabric you’ll remove from each side of the center back seam.
Pro Tip: Always over-pin slightly; you can trim more later if needed, but you can’t add fabric back once it’s cut!
Step 2: Open the Seam
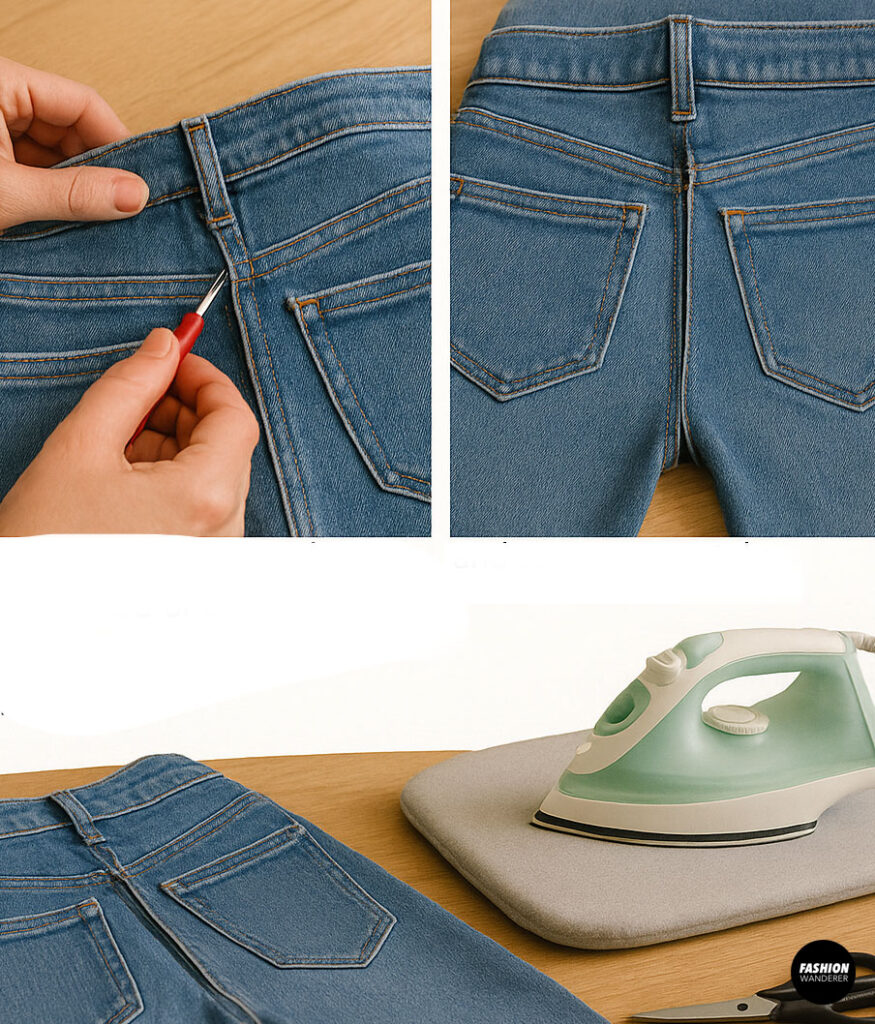

- Use a Seam Ripper
- Carefully unpick the stitches along the center back waistband and yoke seam, extending roughly 6–8 inches downward or until you reach the amount you need to remove.
- Press Open
- Gently press the opened seam allowance flat with an iron. This will make it easier to cut and resew accurately.
Step 3: Remove the Excess Fabric
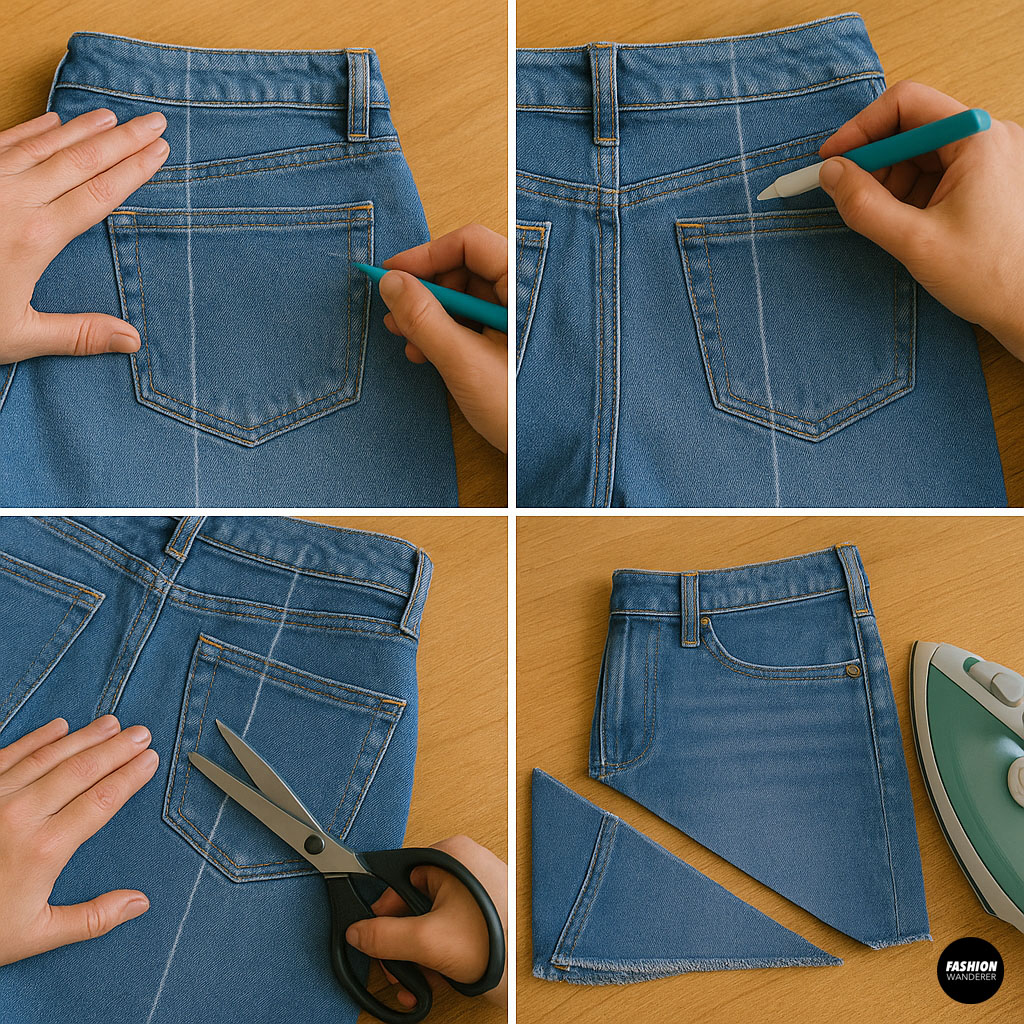

- Mark Your Sewing Line
- Fold the jeans so the two chalk lines meet exactly. Using a ruler, draw a straight line connecting the bottom of the yoke to the top of the waistband. This is your new seam line.
- Cut Carefully
- Trim the excess denim outside your marked line, leaving a ⅝-inch seam allowance between the new cutting edge and the seam line.
Safety Note: Quality denim scissors or shears will give you the cleanest cut—avoid dull blades that may fray the fabric.
Step 4: Sew the New Seam
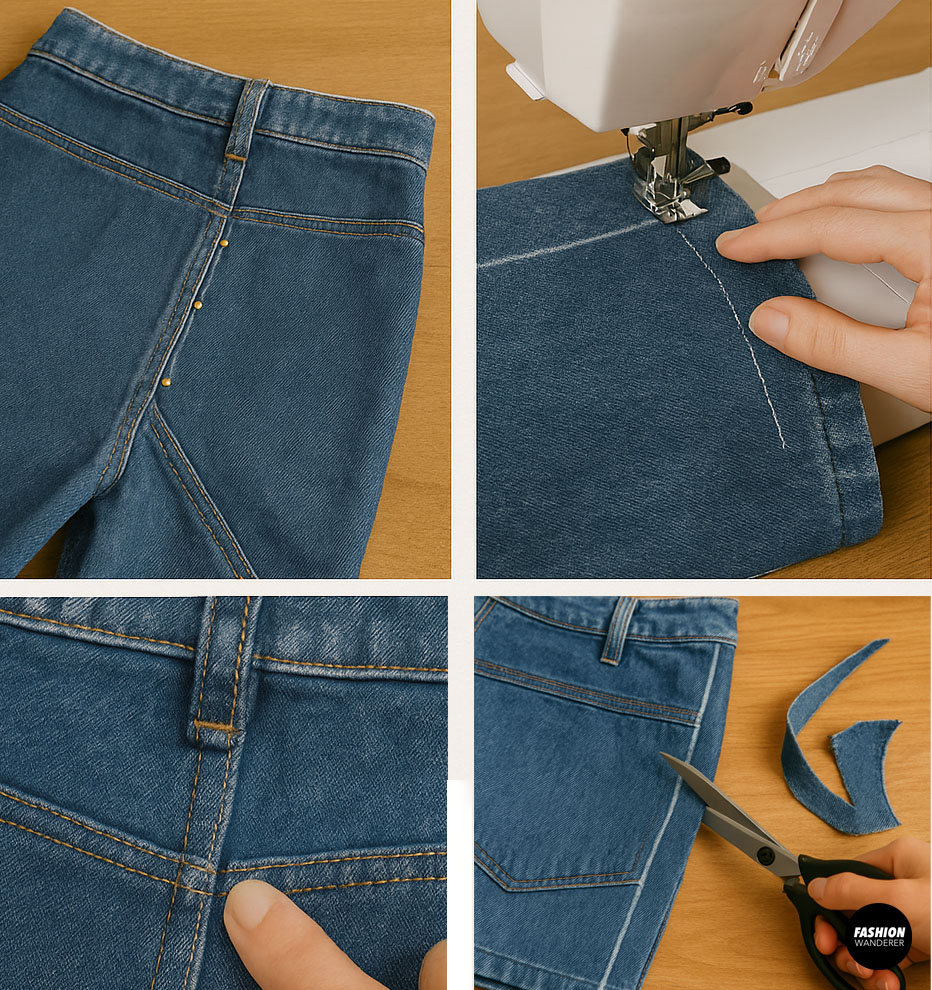
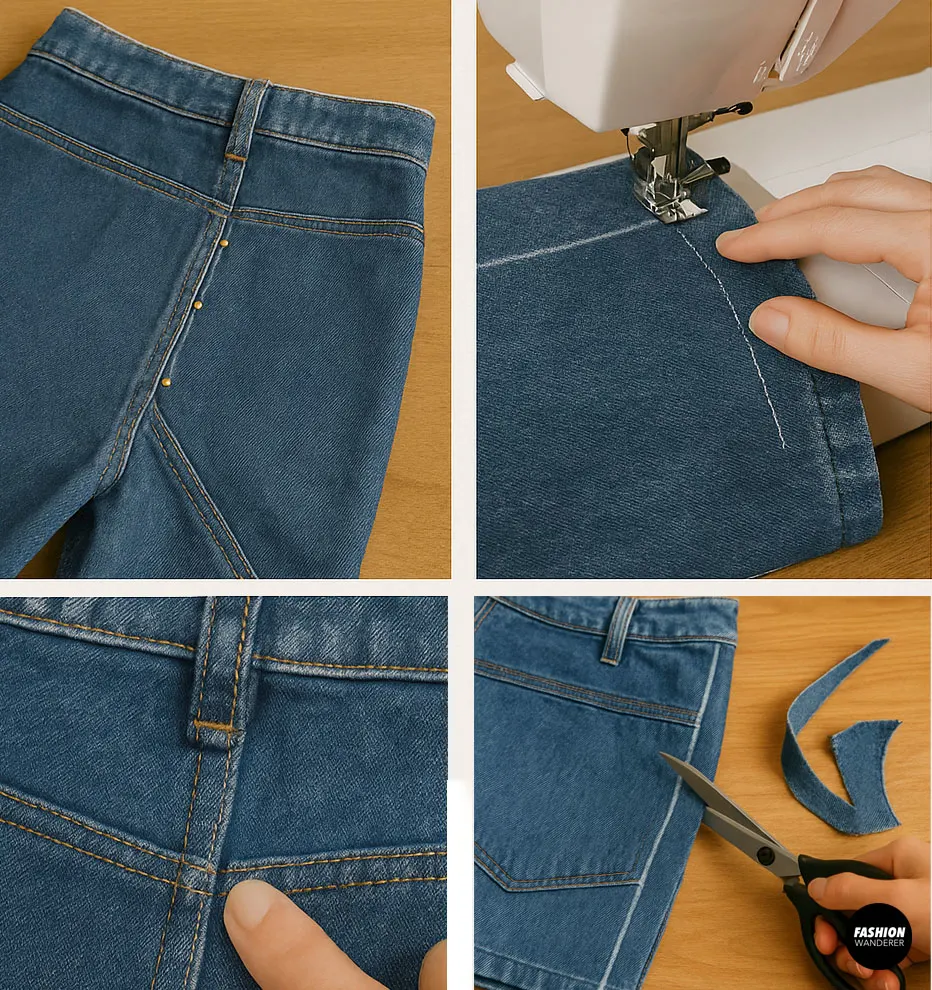
- Pin the New Seam
- Align the raw edges along your marked sewing line. Pin or clip in place, making sure the fabric lies flat with no puckers.
- Stitch
- Using a denim needle and strong thread, sew along your marked line with a ⅝-inch seam allowance. Backstitch at the beginning and end for security. Sew at a medium length (about 2.5 mm) to handle the thick denim.
- Reinforce the Yoke
- At the point where the yoke meets the waistband, sew a small bar tack (stitched back and forth 5–7 times) for extra strength.
Insider Tip: Use a contrasting thread for a faux-designer look or match your original topstitching for a seamless finish.
Step 5: Reattach & Topstitch the Waistband
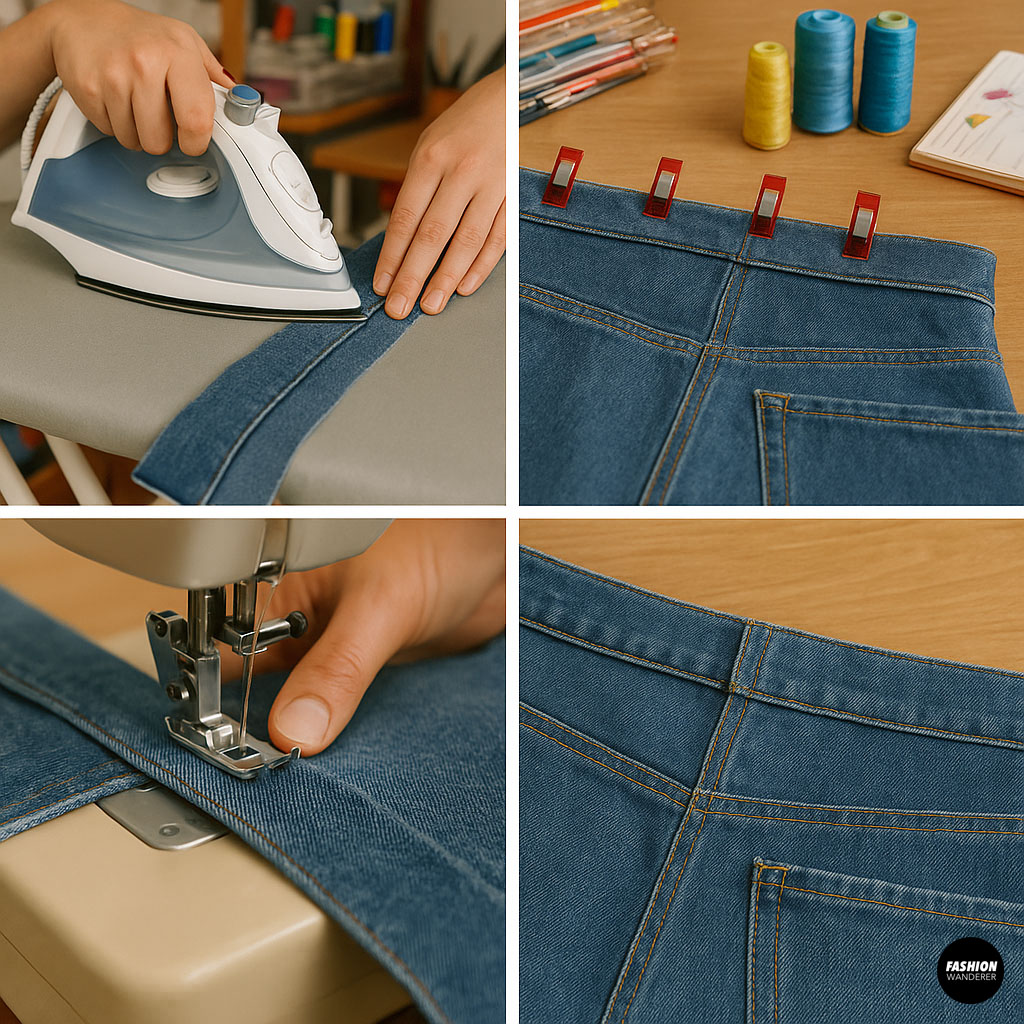

- Press the Seam
- Open your new seam and press each side of the seam allowance toward the center back.
- Re-pin the Waistband
- Fold the waistband back over the seam allowance. Pin or clip it in place, ensuring the original waistband line is preserved.
- Topstitch
- Using a topstitch needle, stitch close to the original waistband seam (about ⅛ inch away) to secure the altered waistband. Keep your stitching line straight by following the original puckers or using a seam guide.
Step 6: Finish & Press

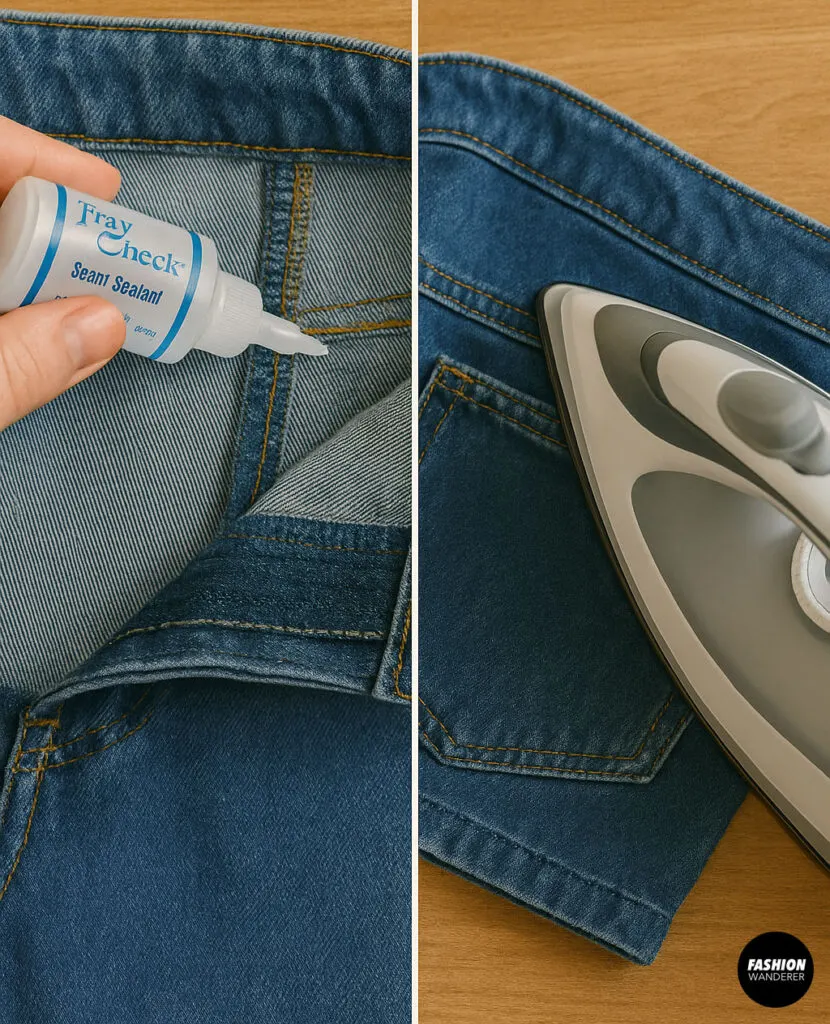
- Trim & Seal Edges
- Trim any stray threads. If you notice any fraying inside, apply a small line of fray check or clear nail polish.
- Final Press
- Press the entire altered area with steam to settle the new seams neatly.
Alternative Methods & Tips
- Side-Waist Alteration: If the back alteration doesn’t suit your body shape, consider altering the side seams instead. The steps are the same, but you’ll open the side seam from waistband to hip.
- Adding Elastic: For a bit more comfort, you can insert a small piece of elastic into the back waistband before topstitching—especially helpful for high-rise jeans.
- Belt Loops: When removing excess fabric, you may need to trim and reattach belt loops. Simply unpick, reposition, and stitch them back in place.
Common Pitfalls & Troubleshooting
- Uneven Waistband: If the waistband puckers after topstitching, resew with a walking foot to feed layers evenly.
- Jeans Too Tight in Hips: Only adjust the waist—if the hips feel snug, consider sizing up and then taking in the waist.
- Visible Alteration: To disguise the seam, use a double-needle topstitch or imitate the original chain-stitch look.
Why DIY Jeans Alterations Are Worth It
- Cost Savings: Professional tailoring can cost $20–$50. DIY tailoring costs only thread and a bit of time.
- Sustainable Fashion: Mending and adjusting extends your jeans’ lifespan—good for your budget and the planet.
- Skill Building: Once you master how to alter jeans waist, you can tackle other customizations like tapering legs or hemming to shorts.
Final Thoughts
Mastering how to tailor the waist of jeans empowers you to achieve the perfect fit every time. Whether your denim is vintage-inspired or brand new, a quick waist alteration takes under an hour and elevates your style. Grab your sewing machine, a seam ripper, and a pair of old jeans—it’s time to DIY your way to a flawless fit!
Quick Recap:
- Mark excess at center back.
- Open seam and remove fabric.
- Sew new seam.
- Topstitch waistband.
- Press and finish.

Now slip into your perfectly tailored jeans with confidence—and show off that flawless silhouette!
Trendy, Affordable Sewing Patterns for All Sizes


Tie Shoulder Jumpsuit Pattern


Palazzo Pants Sewing Pattern


Pocket Overall Romper Pattern


Wrap Maxi Skirt Sewing Pattern


Tie Back Top Sewing Pattern