
Are you tired of those old leggings sitting in your drawer, barely worn or stretched out? Instead of tossing them away, why not give them a fresh, fashionable new life? One of the coolest upcycling projects you can try is turning your old leggings into a trendy crop top — and best of all, no sewing is required!
This no-sew crop top DIY is perfect for beginners and anyone looking to revamp their wardrobe sustainably, saving money while reducing textile waste. Plus, it’s a quick project that can be done in under 30 minutes with just a pair of scissors and some creativity.
In this blog post, I’ll guide you through the step-by-step process of transforming old leggings into a stylish crop top, share tips for customizing your design, and answer common questions. Ready to turn your leggings into a chic, comfy top? Let’s dive in!
Why Upcycle Leggings into a Crop Top?
Upcycling is all about reimagining and repurposing old clothes to create something fresh and useful. There are several reasons why turning leggings into a crop top is such a fantastic idea:
- Saves money — No need to buy a new top when you already have fabric at home.
- Eco-friendly — Reduces textile waste and supports sustainable fashion.
- Custom fit — Leggings’ stretchy fabric molds perfectly to your body.
- No sewing needed — Simple cutting and tying techniques make this accessible for everyone.
- Unique style — You can customize length, straps, and fit to suit your vibe.
Step-by-Step Tutorial: Turn Old Leggings into a No-Sew Crop Top

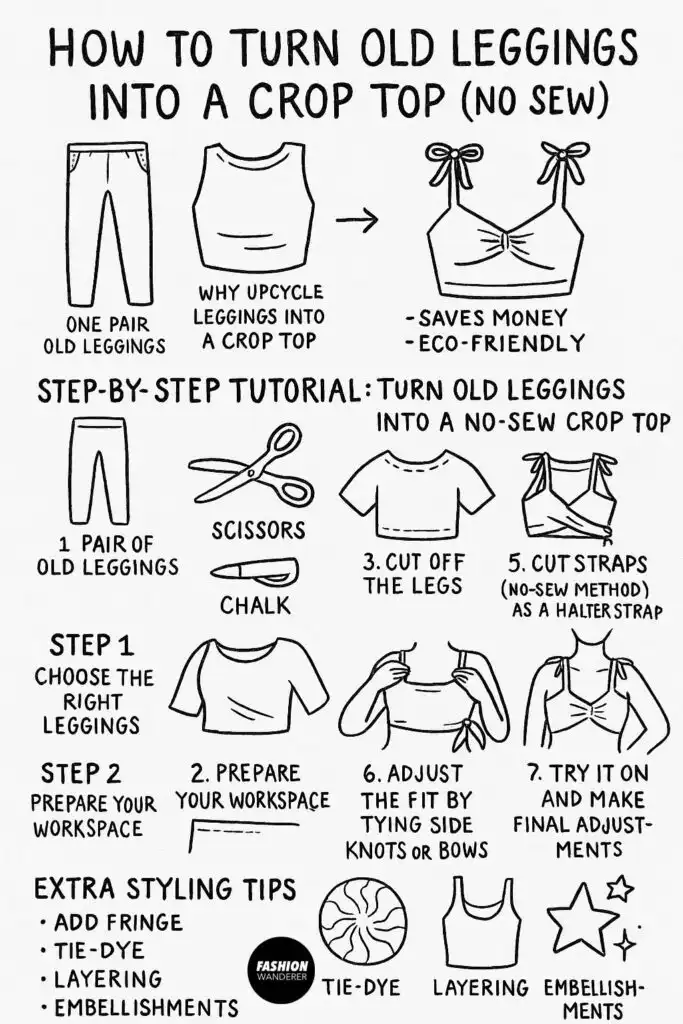
What You’ll Need
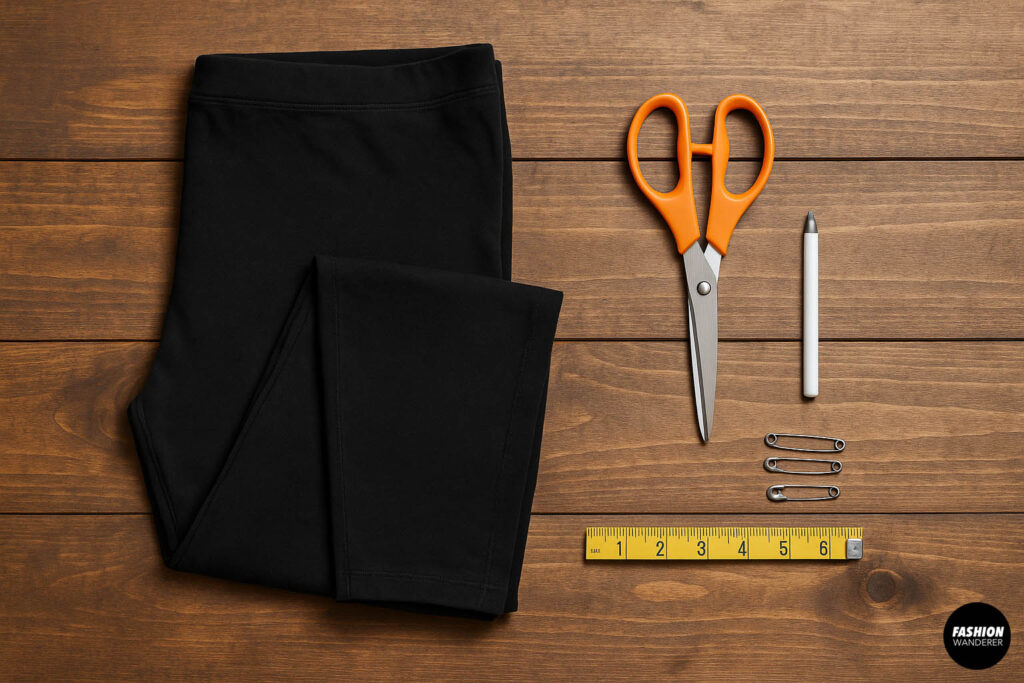
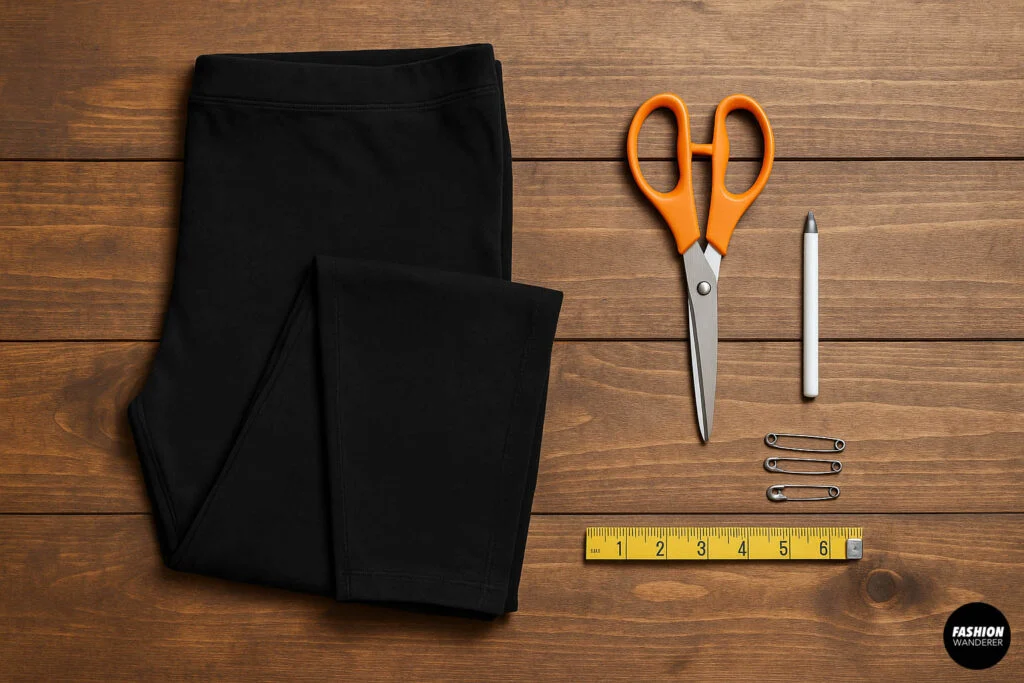
Before starting, gather these materials:
- One pair of old leggings (preferably made from stretchy cotton/spandex blend)
- Sharp fabric scissors or rotary cutter
- Chalk or washable fabric marker (optional for marking cuts)
- Measuring tape or ruler (optional)
- Safety pins (optional for adjusting before cutting)
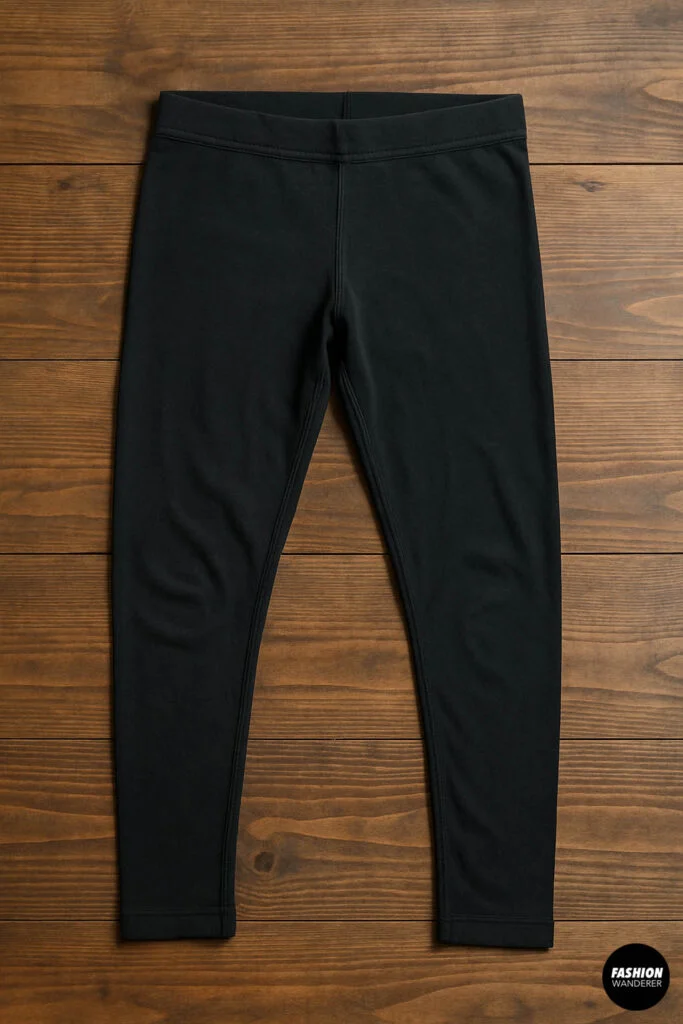
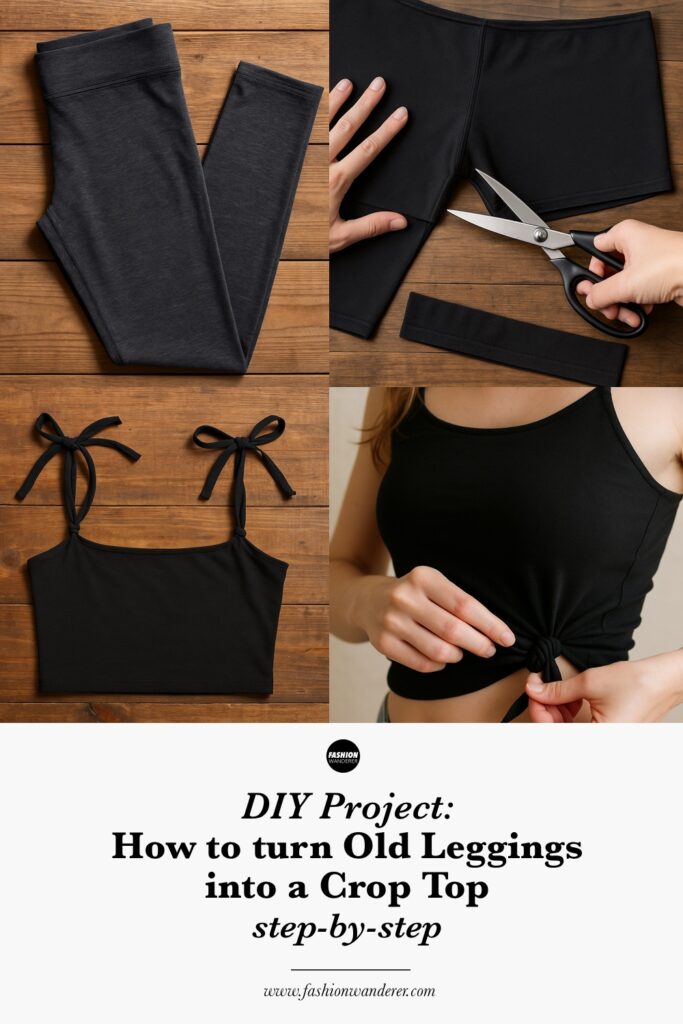
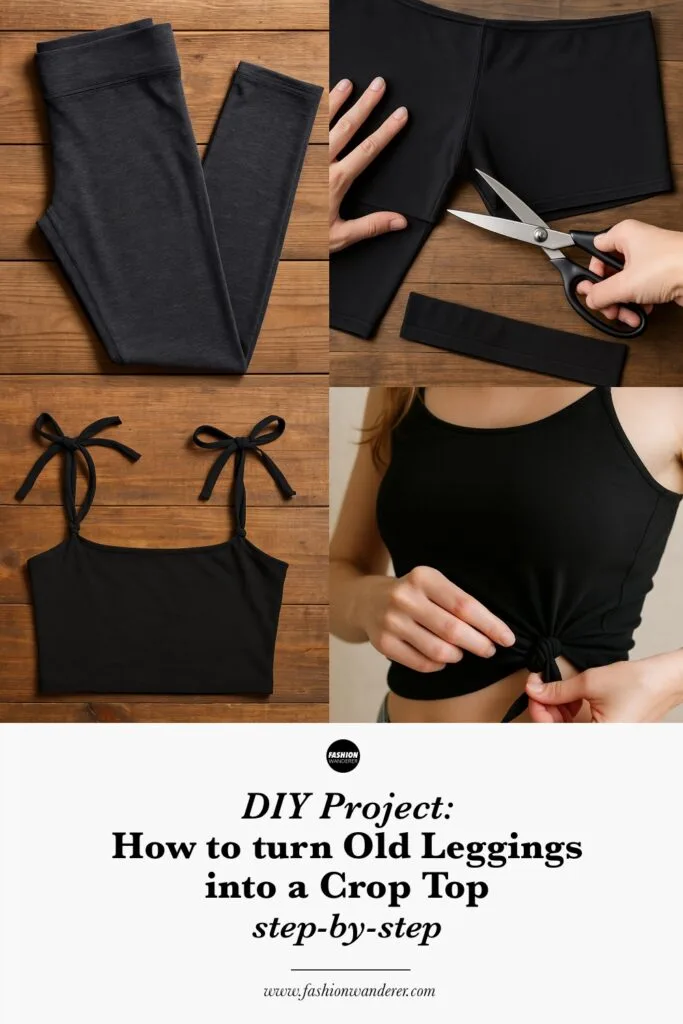
Step 1: Choose the Right Leggings

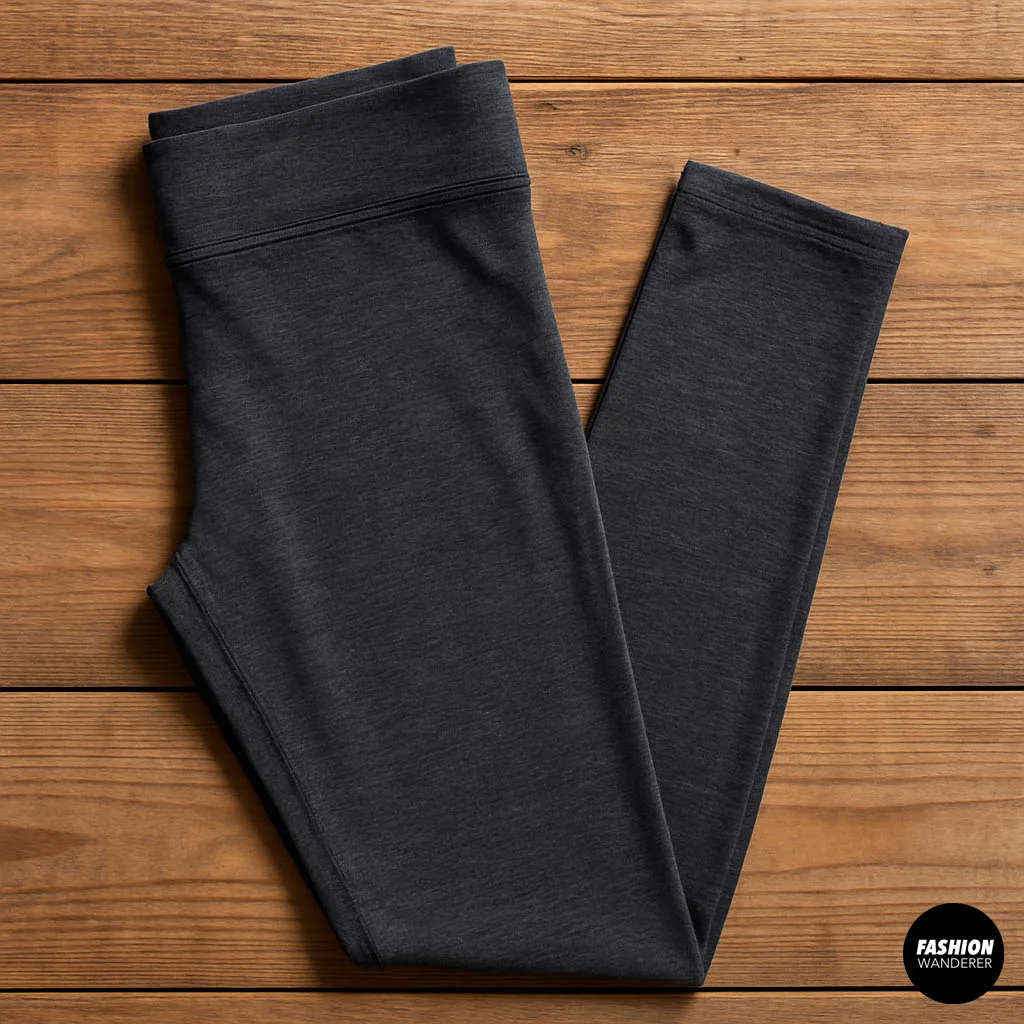
Pick leggings that have good stretch and are in decent condition. Avoid heavily worn or torn pairs unless you’re okay with a distressed look. Solid colors or fun patterns both work well — think about what crop top style you want!
Step 2: Prepare Your Workspace

Lay your leggings flat on a clean, flat surface like a table or floor. Smooth out wrinkles so you get even, clean cuts. You can also turn leggings inside out if you want cleaner edges on the outside.
Step 3: Cut Off the Legs

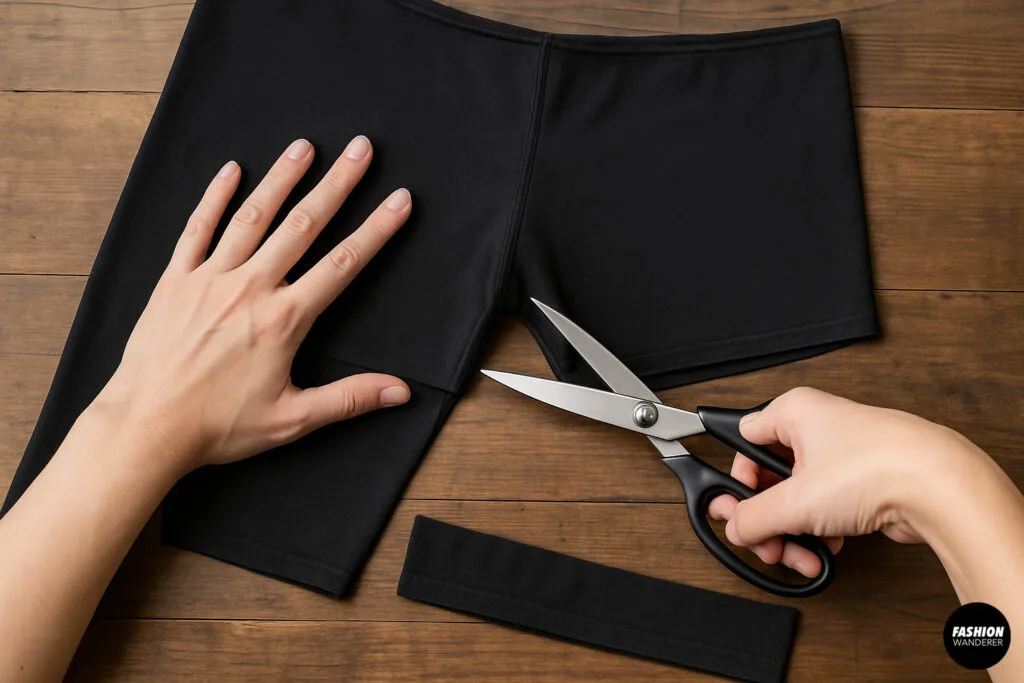
Using your scissors, cut straight across both legs just below the crotch seam to remove the bottom part. This will create the basic crop top body.
- Optional: If you want a longer crop top, cut higher up.
- Tip: Cut slowly and evenly to keep the edges straight.
Step 4: Create the Top Edge

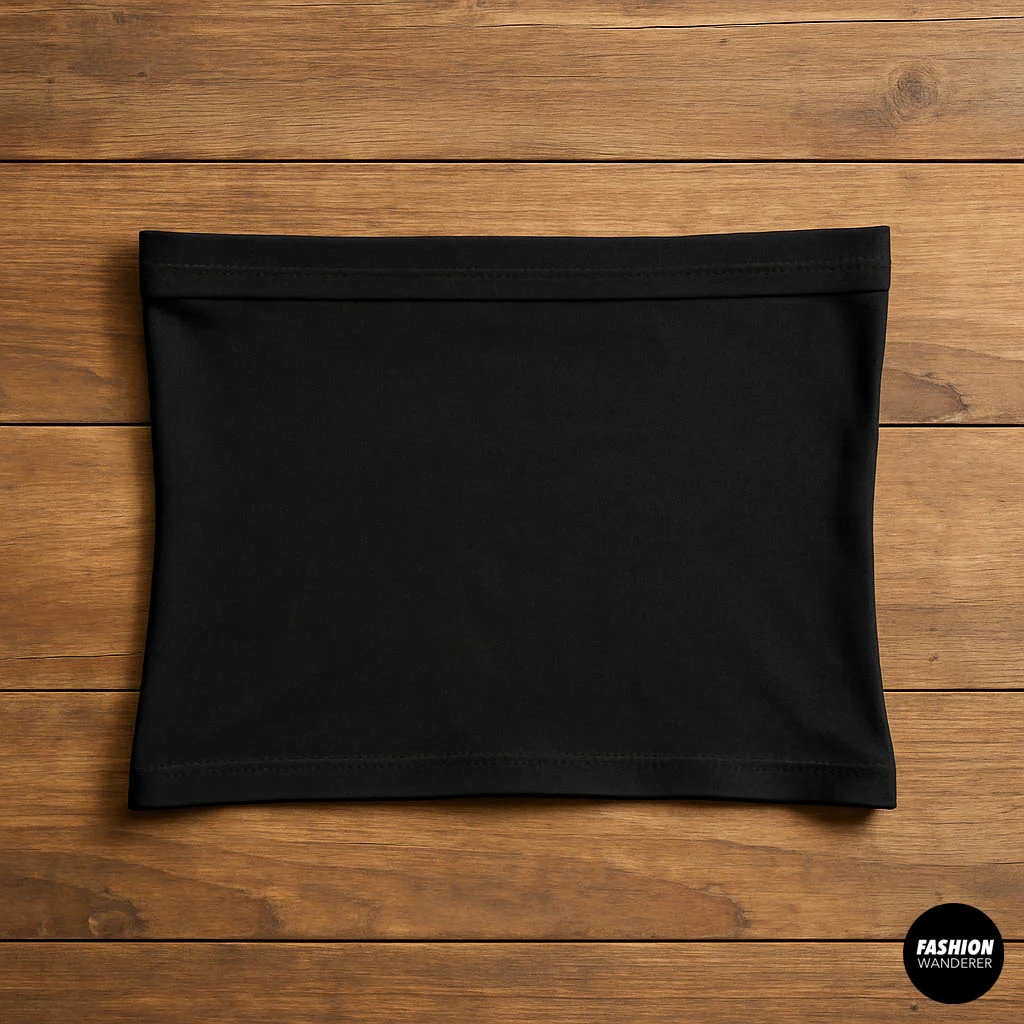
Flip the cut piece so the cut edge is now at the top. This edge will be the top of your crop top (where your chest will be).
- If the waistband of the leggings is wide and stretchy, you can leave it intact to provide extra support.
- Otherwise, trim a bit of the waistband off if you want a thinner band.
Step 5: Cut Straps (No-Sew Method Options)
You have a few easy ways to create straps without sewing:
Option A: Make Shoulder Straps from Leggings Fabric
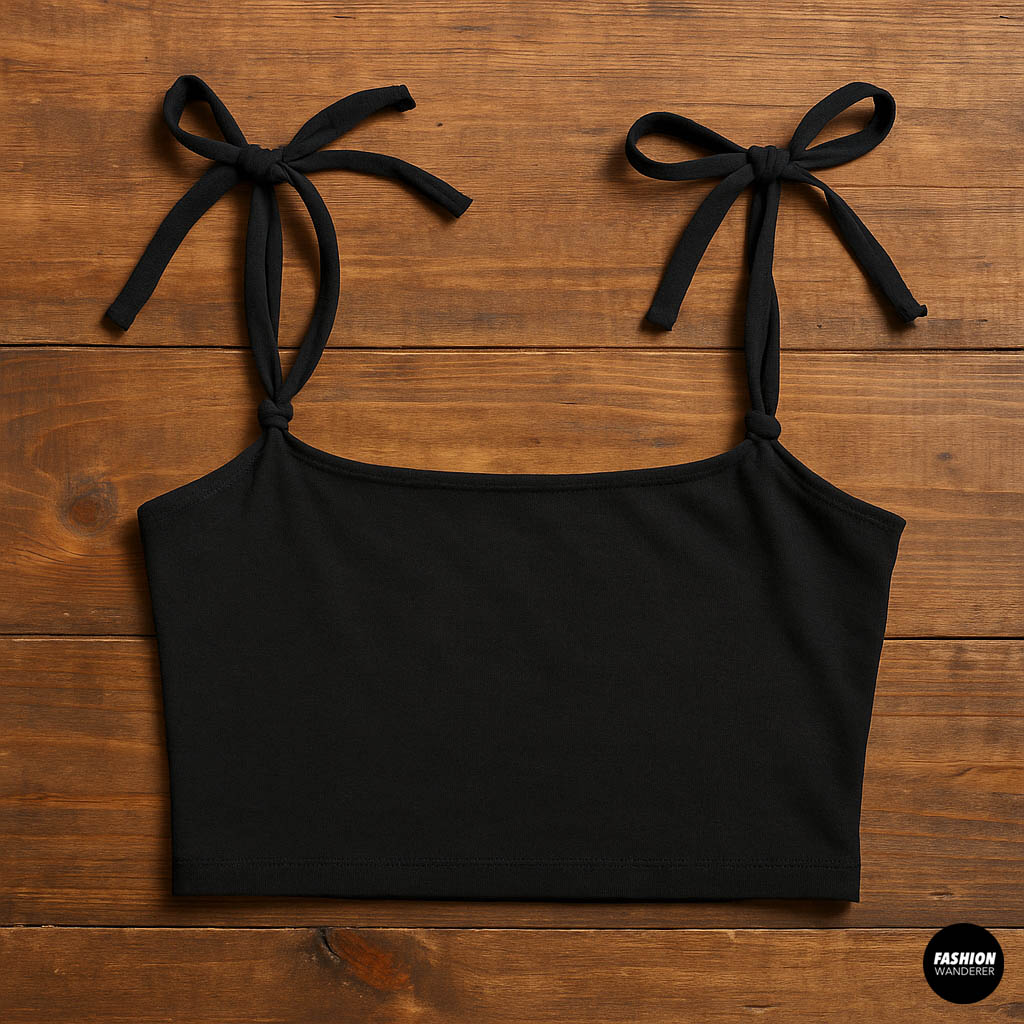

- Cut two long strips (about 1–2 inches wide) from the leftover fabric (legs or waistband).
- Tie or knot each strip at the front and back of the top edges to create adjustable shoulder straps.
- You can braid multiple strips for a decorative touch.
Option B: Use Existing Waistband as a Halter Strap
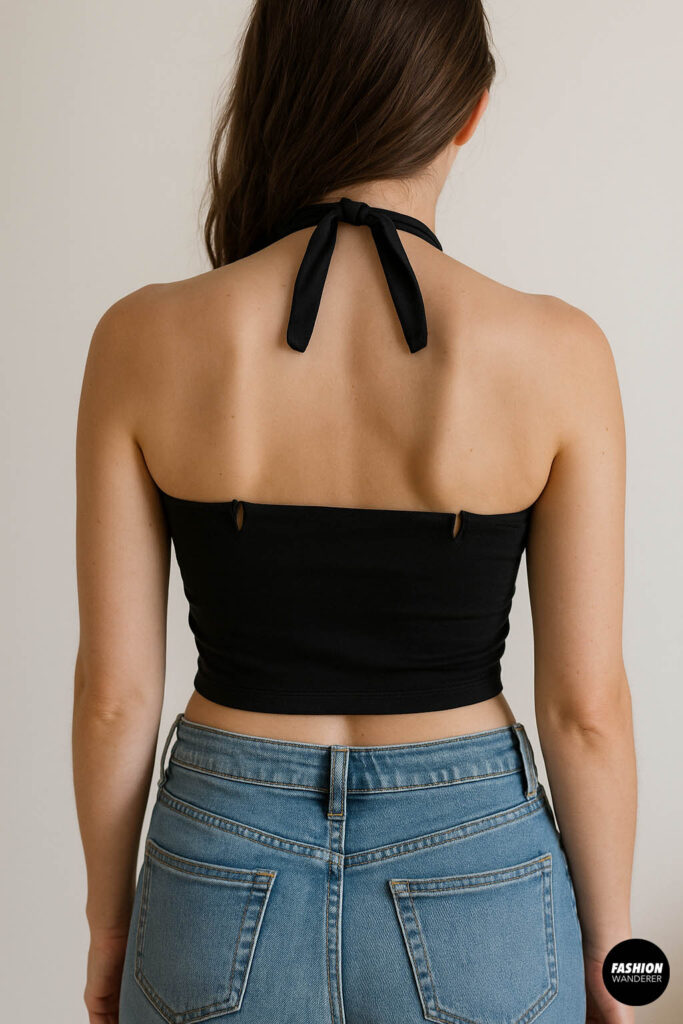

- If the waistband is intact, cut slits on either side of the top edge and pull the waistband up to create a halter neck.
- Tie the waistband behind your neck.
Step 6: Adjust the Fit by Tying Side Knots or Bows
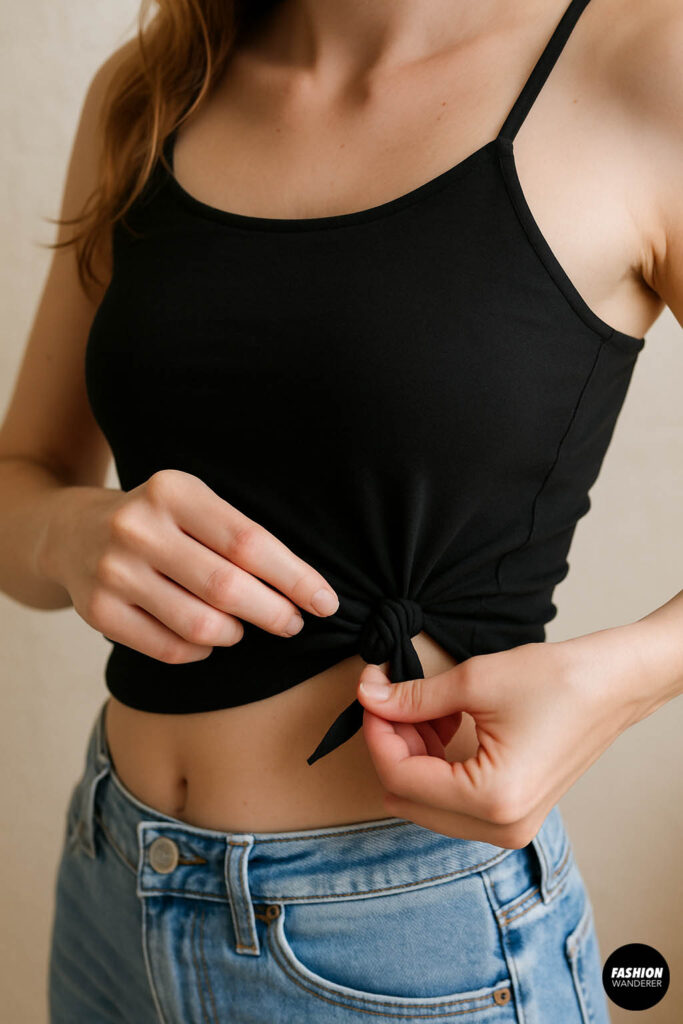

If your crop top feels loose around the chest, gather fabric at the sides and tie small knots or bows to tighten the fit. This adds a cute detail and customizes the shape.
Step 7: Try It On and Make Final Adjustments
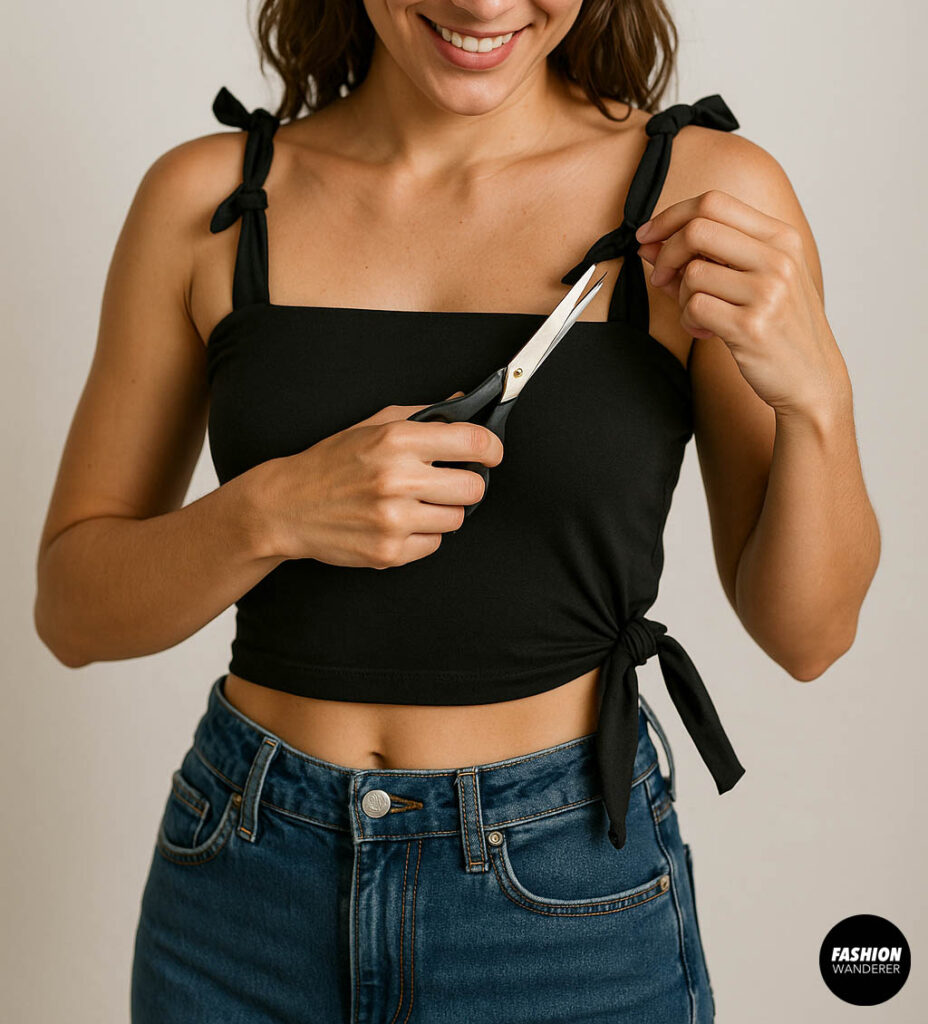

Put your new crop top on! Check how it fits:
- If straps feel loose, retie or adjust knots.
- Trim any excess fabric for comfort or style.
- Add more knots or fabric strips for decorative flair.
Extra Styling Tips for Your No-Sew Crop Top
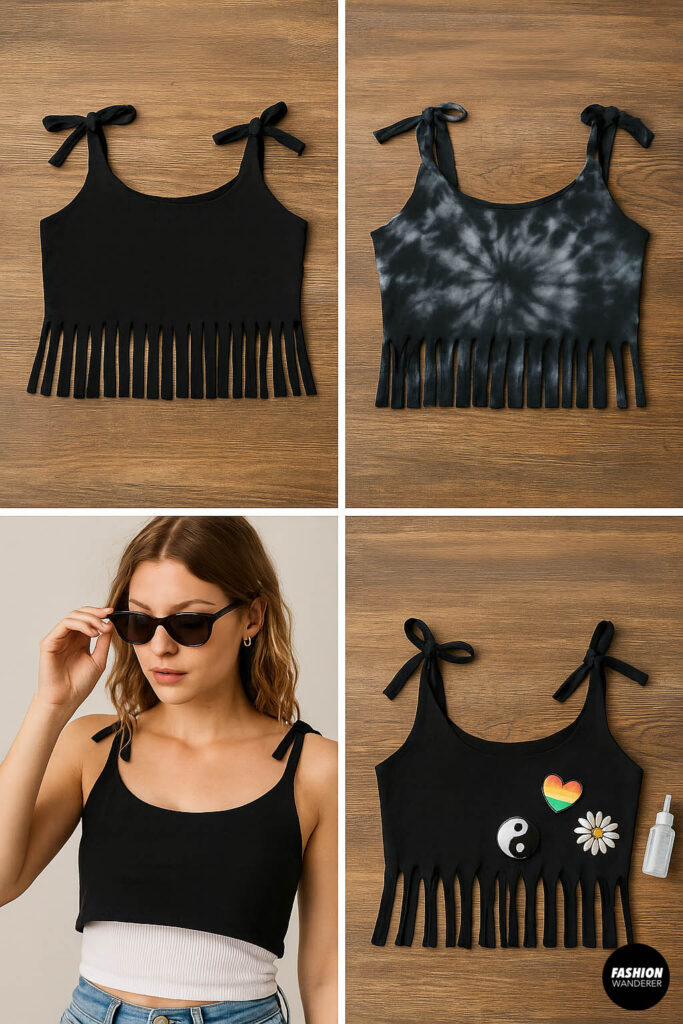

- Add fringe: Cut small slits along the bottom edge for a fun fringed look.
- Tie-dye: Use fabric dye to customize the color before or after cutting.
- Layering: Wear over a tank or bralette for a layered summer look.
- Embellishments: Glue or iron-on patches, beads, or fabric paint to personalize.
FAQ About Turning Leggings Into Crop Tops
Q: Will this crop top hold up without sewing?
A: Yes! Stretchy leggings fabric naturally clings to your body, and secure knots hold everything in place. For extra security, you can reinforce knots with fabric glue.
Q: Can I use any leggings?
A: Cotton/spandex blend leggings work best because they’re stretchy and breathable. Avoid thick or stiff leggings like fleece-lined ones for this project.
Q: How do I wash my no-sew crop top?
A: Hand wash or machine wash on gentle cycle inside out. Air dry to preserve knots and fabric shape.
Q: Can I make straps wider or thicker?
A: Absolutely! Use multiple fabric strips braided or sewn together, or repurpose leggings waistband fabric for thicker straps.
Why You’ll Love This DIY Upcycle Project
- It’s beginner-friendly: No sewing skills required—just scissors and creativity.
- It’s fast: Finish your crop top in less than 30 minutes.
- It’s versatile: Use leggings with fun prints or solid colors to match your style.
- It’s eco-conscious: You’re helping reduce waste by repurposing old clothes.
Final Thoughts
Turning old leggings into a no-sew crop top is an easy, budget-friendly way to refresh your wardrobe while embracing sustainability. With just a few simple cuts and ties, you can create a custom-fitted, trendy top that’s perfect for warm weather, festivals, or casual days at home.
Ready to give your old leggings new life? Grab your scissors and let your creativity flow — your next favorite crop top is just a few steps away!
Trendy, Affordable Sewing Patterns for All Sizes


Tie Shoulder Jumpsuit Pattern


Palazzo Pants Sewing Pattern


Pocket Overall Romper Pattern


Wrap Maxi Skirt Sewing Pattern


Tie Back Top Sewing Pattern