
Looking to elevate your plain basic tee into a stylish, feminine wardrobe staple? Adding lace inserts is one of the easiest and most elegant DIY fashion hacks — and the best part? You don’t need a sewing pattern!
Whether you’re a beginner or seasoned sewist, this no-pattern tutorial will guide you step-by-step to transform your basic tee with delicate lace detailing.
Why Add Lace Inserts to a Basic Tee?
Lace inserts add texture, breathability, and a romantic touch to simple tees. They’re perfect for upgrading everyday wear into chic casual or even date-night-ready outfits. Plus, this project:
- Requires no pattern — perfect for beginners
- Uses minimal sewing skills or even no-sew methods
- Allows customization — add lace anywhere you want: shoulders, sleeves, side panels, or neckline
- Saves money by upcycling old tees or lace remnants
- Gives your wardrobe a unique, personalized touch
Ready to dive in? Here’s how you can add lace inserts to your basic tee step-by-step!
Step by Step: DIY Lace Inserts on T-Shirt
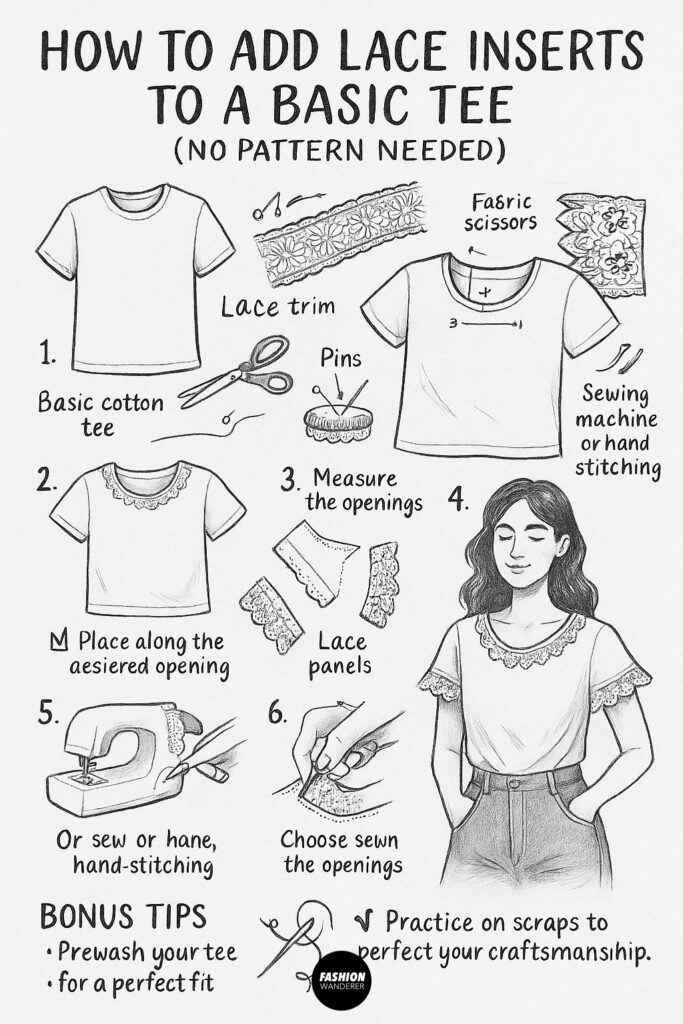

What You’ll Need
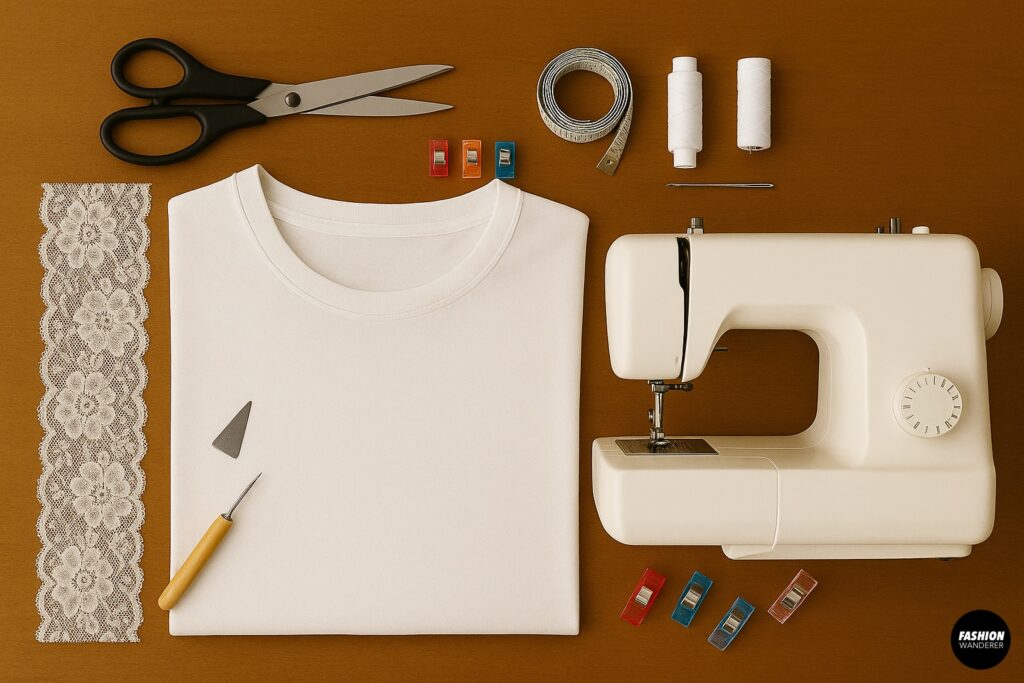

Before you start, gather your supplies:
- A basic tee (preferably cotton or cotton blend)
- Lace trim or lace fabric (choose stretch lace for knit tees)
- Fabric scissors
- Pins or fabric clips
- Sewing machine or hand sewing needle and thread
- Matching thread
- Fabric chalk or erasable fabric marker
- Seam ripper (optional)
- Measuring tape or ruler
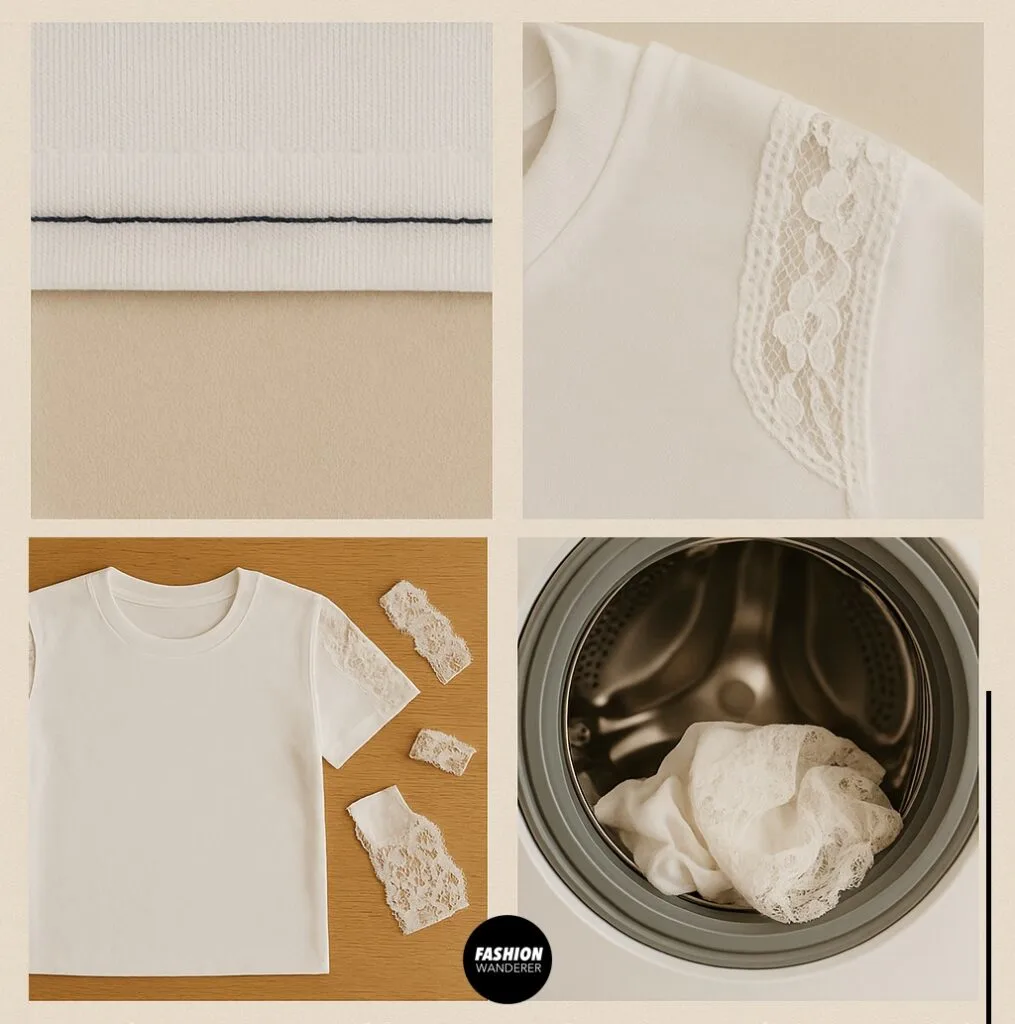
Step 1: Choose Your Tee and Lace

Select a tee that fits well but has room for inserting lace panels. Stretch cotton tees work best since they blend nicely with lace inserts without puckering. Pick lace that complements your style — floral lace, geometric patterns, or scalloped edges all work beautifully.
Tip: If you want a seamless look, choose stretch lace that matches the color of your tee.
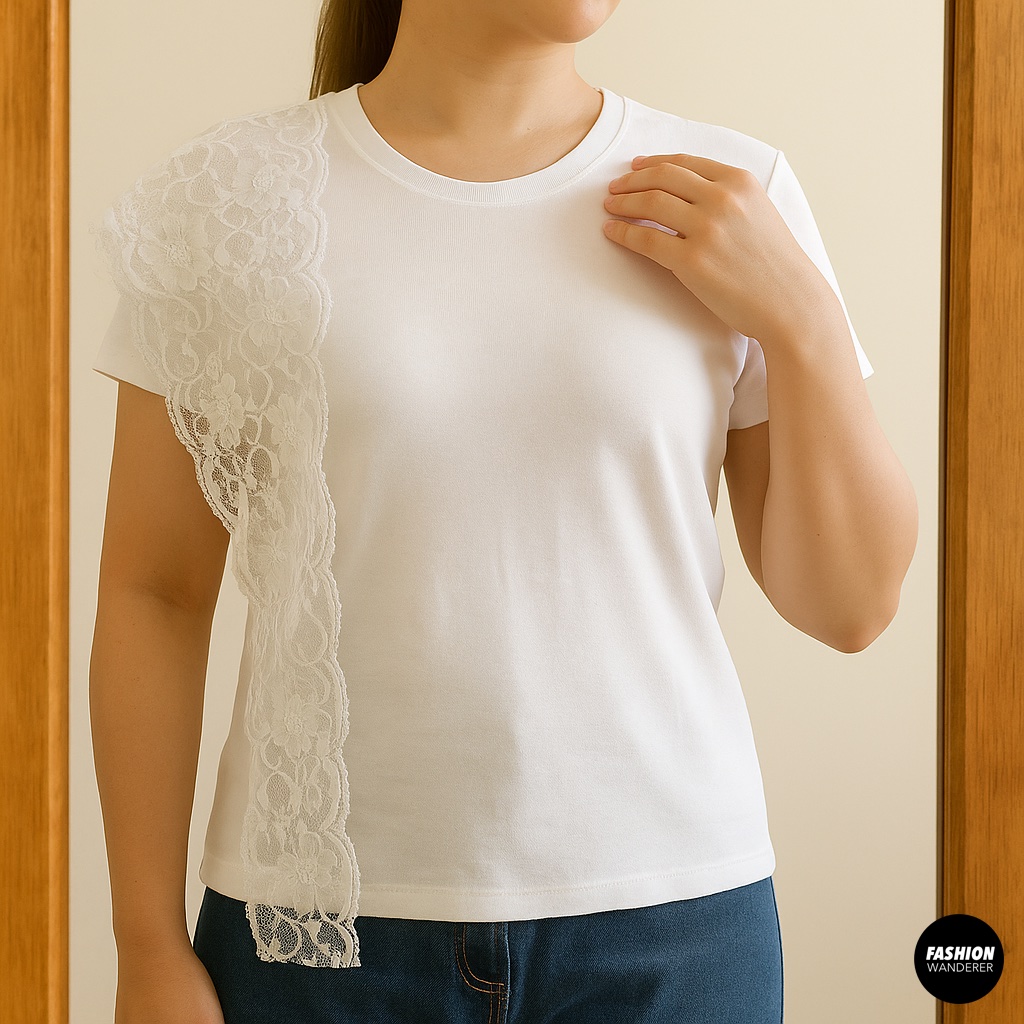
Step 2: Decide Where to Add Lace Inserts


Common and stylish places to add lace inserts on a tee include:
- Along the shoulders or upper sleeves
- Side panels from underarm to hem
- Around the neckline or collarbone
- Back yoke or panel
Use a mirror to try on your tee and mark where you want the lace inserts. For beginners, shoulder or sleeve inserts are easiest.
Step 3: Measure and Mark the Lace Insert Area


Lay your tee flat on a table. Use measuring tape to mark the width and length of the lace insert area on the tee using fabric chalk. For example, mark a 2-3 inch wide panel from shoulder seam down the sleeve or a side panel.
Keep your marks clean and precise — this guides your cutting.
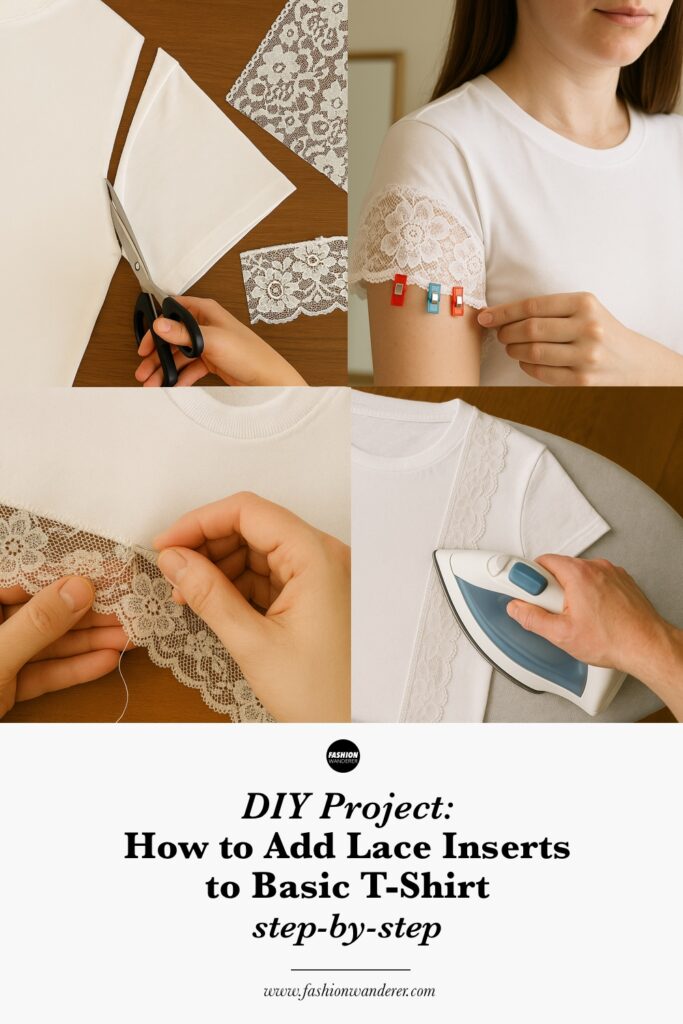
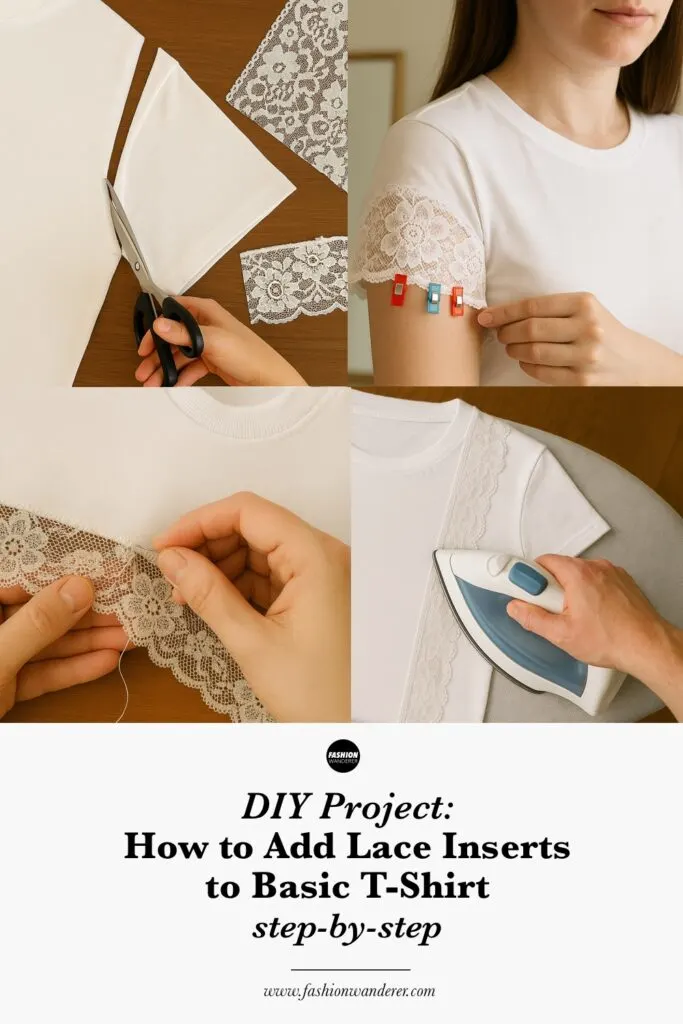
Step 4: Cut Along the Marked Area


Using sharp fabric scissors, carefully cut along your chalk markings. You’re creating an opening where your lace panel will be sewn in.
Tip: Cut slowly to avoid jagged edges, especially if your fabric is stretchy.
Step 5: Prepare Your Lace Inserts

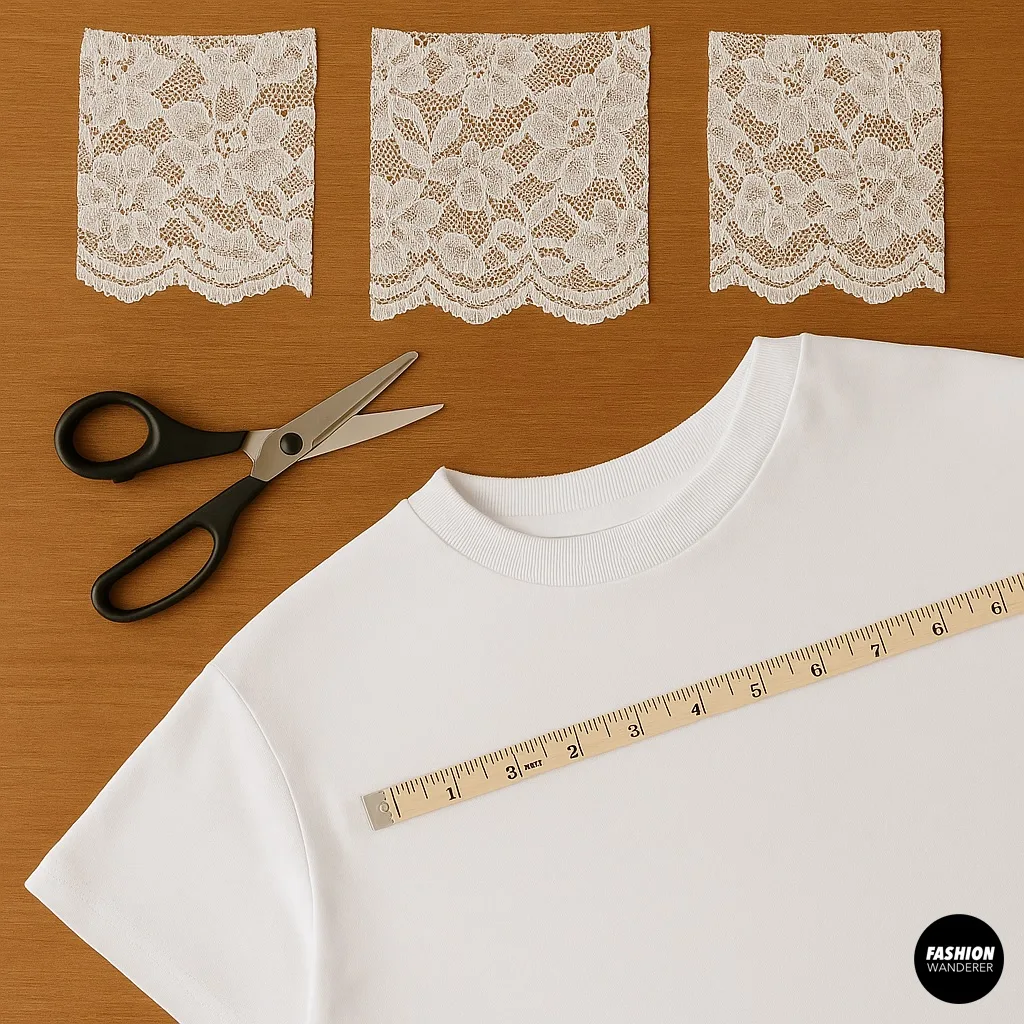
Cut lace strips or panels that are slightly larger (about ¼ inch wider on all sides) than the openings you cut in your tee. This allows seam allowance for sewing.
If you’re using lace trim with scalloped edges, position it so the scallops align with the tee’s edge for a pretty finish.
Step 6: Pin the Lace Inserts in Place


Place the lace panel underneath the tee opening so it fully covers the cut area. Pin or clip the lace to the tee fabric, matching the edges carefully.
Double-check on yourself or with a mirror that the lace lies flat and looks balanced.
Step 7: Sew the Lace Inserts
If you have a sewing machine:
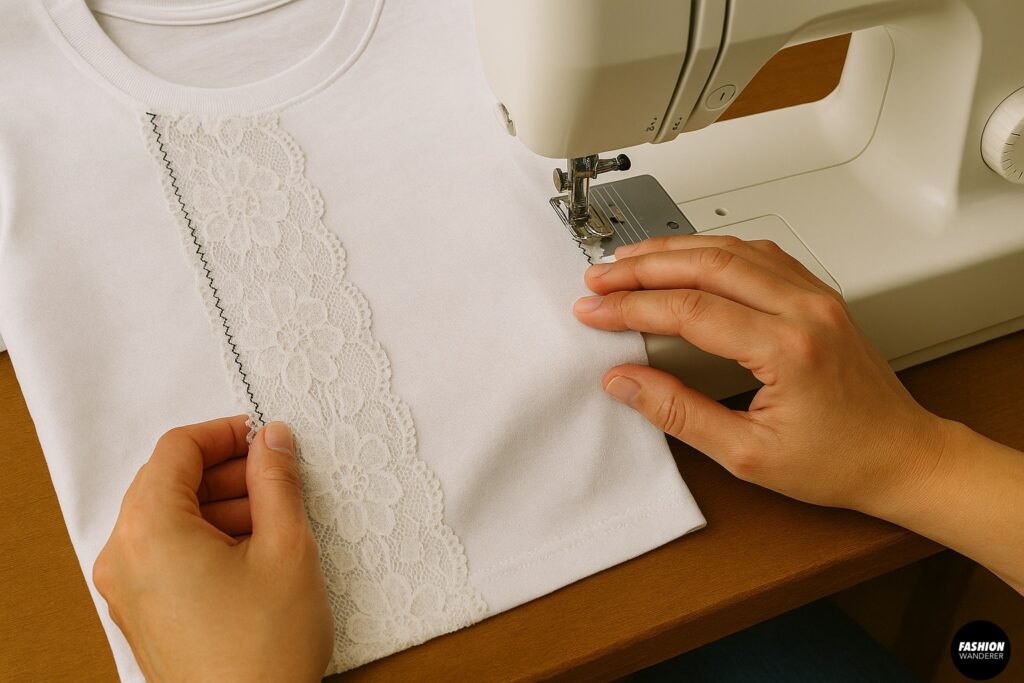
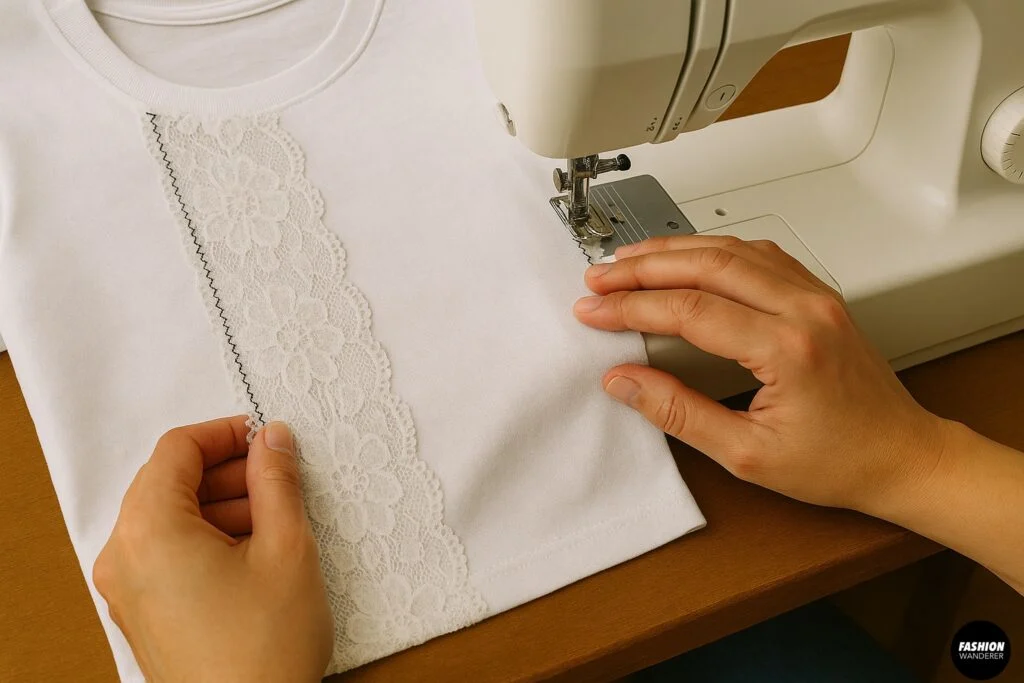
- Use a stretch stitch or narrow zigzag stitch to sew the lace in place.
- Sew slowly around the edges, making sure to catch both the tee fabric and lace.
- Backstitch at the start and end to secure.
If sewing by hand:

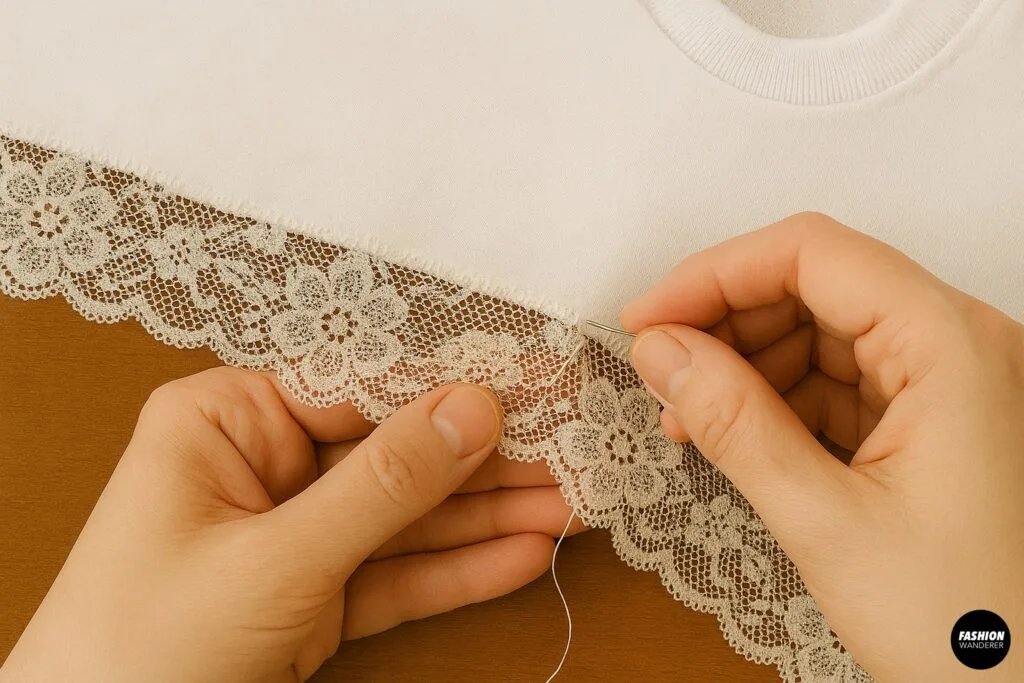
- Use a small running stitch or whip stitch along the edge.
- Keep stitches neat and consistent for a clean finish.
Optional No-Sew Method:
If you prefer no-sew, use a strong fabric glue or fusible bonding tape to attach the lace panels. Follow product instructions carefully, and always do a patch test first to ensure durability.
Step 8: Finish the Edges

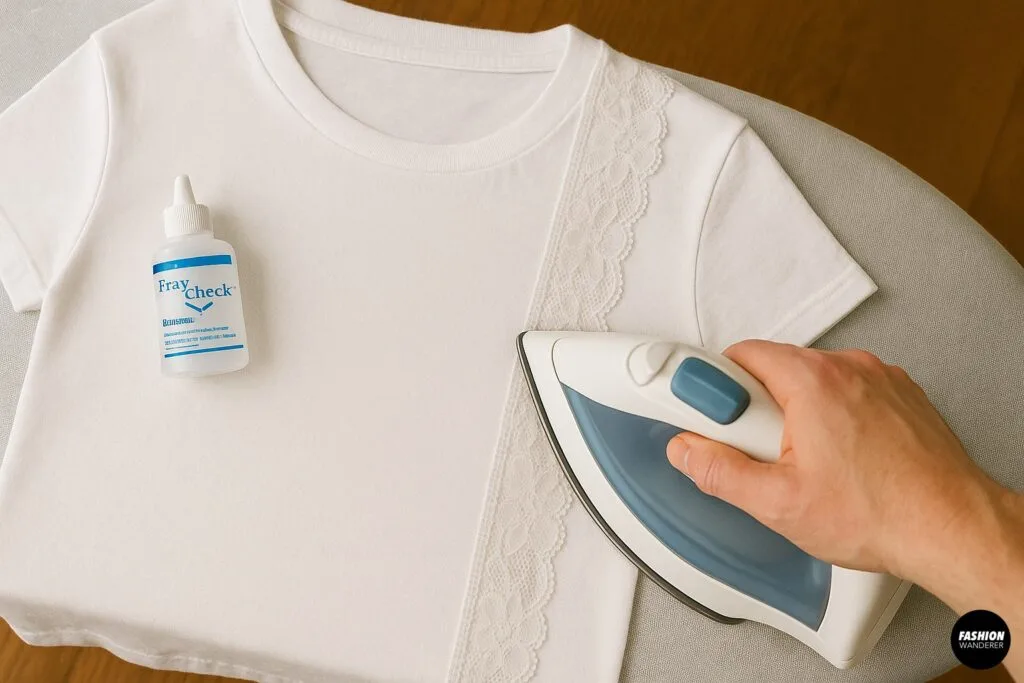
To prevent fraying, fold the lace edges under slightly and sew again if needed, or use fray check liquid along raw edges.
Press the seams lightly with an iron (check lace and fabric heat settings first) to smooth everything flat.
Step 9: Final Fit and Styling


Try on your upgraded tee and admire your handiwork! The lace inserts should add subtle texture and style without bulk.
Pair your new lace-insert tee with jeans, skirts, or layered under jackets for an effortlessly chic look.
Bonus Tips for Success

- Use matching thread for invisible seams or contrast thread for decorative stitching.
- Stretch lace works best for knit tees to maintain flexibility.
- Use lace scraps to add extra trims on sleeves or neckline.
- Always prewash your tee and lace before sewing to prevent shrinking later.
- Practice on scrap fabric if you’re new to sewing lace.
Why DIY Your T-Shirts?
Adding lace inserts yourself lets you customize fashion to your taste and body shape. It’s a fun, creative way to refresh your wardrobe sustainably, saving money and reducing waste.
With just basic sewing tools and no patterns, you can give your favorite tees a designer-inspired upgrade that feels totally unique.
Conclusion
Adding lace inserts to a basic tee is an easy and rewarding DIY project that anyone can do — no pattern required! From measuring and cutting to sewing or gluing lace panels, each step is simple and customizable.
Ready to try it out? Gather your tee, lace, and sewing supplies and create your own one-of-a-kind lace-inserted tee today. Share your projects and inspire others with your fashionable DIY skills!
If you enjoyed this tutorial, don’t forget to check out more sewing and upcycling ideas on our blog, and follow us on social media for the latest DIY fashion trends.
Trendy, Affordable Sewing Patterns for All Sizes


Tie Shoulder Jumpsuit Pattern


Palazzo Pants Sewing Pattern


Pocket Overall Romper Pattern


Wrap Maxi Skirt Sewing Pattern


Tie Back Top Sewing Pattern