
When it comes to DIY fashion, upcycling old textiles is one of the most rewarding ways to create something stylish while reducing waste. Bed sheets, in particular, are perfect for sewing projects: they’re lightweight, durable, and usually come in fun patterns or solid colors that can be transformed into fashionable pieces.
Today, we’ll walk through how to make a ruffled tier skirt from old bed sheets—a versatile, flowy garment that’s comfortable, chic, and budget-friendly.
Whether you’re refreshing your summer wardrobe or looking for a cozy layering piece, this DIY ruffled skirt tutorial will guide you through each step in detail. Let’s dive in!
Why Make a Ruffled Tier Skirt from Bed Sheets?
- Eco-Friendly Upcycle – Give new life to old linens instead of tossing them.
- Budget-Friendly – No need to buy new fabric—use what you already have.
- Custom Fit – Tailor the waistband and length to your exact measurements.
- On-Trend Style – Tiered skirts are timeless, and ruffles add a feminine, boho vibe.
- Beginner-Friendly – With straight seams and gathering stitches, this project is perfect for all sewing levels.
Materials You’ll Need

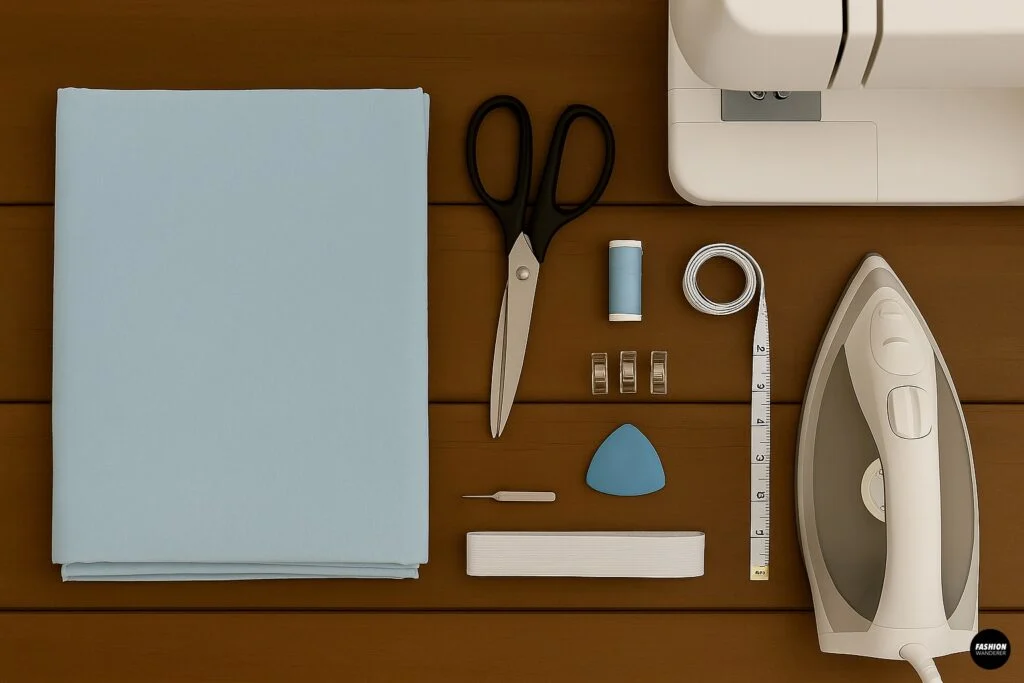
- 1 old bed sheet (twin size or larger works best for a full skirt)
- Fabric scissors or rotary cutter
- Measuring tape
- Tailor’s chalk or washable fabric marker
- Sewing pins or clips
- Sewing machine (or needle and thread for hand-sewing)
- Elastic band (1–2 inches wide for waistband)
- Matching thread
- Iron and ironing board
Step-by-Step Tutorial: Old Bed Sheets into Ruffled Tier Skirt

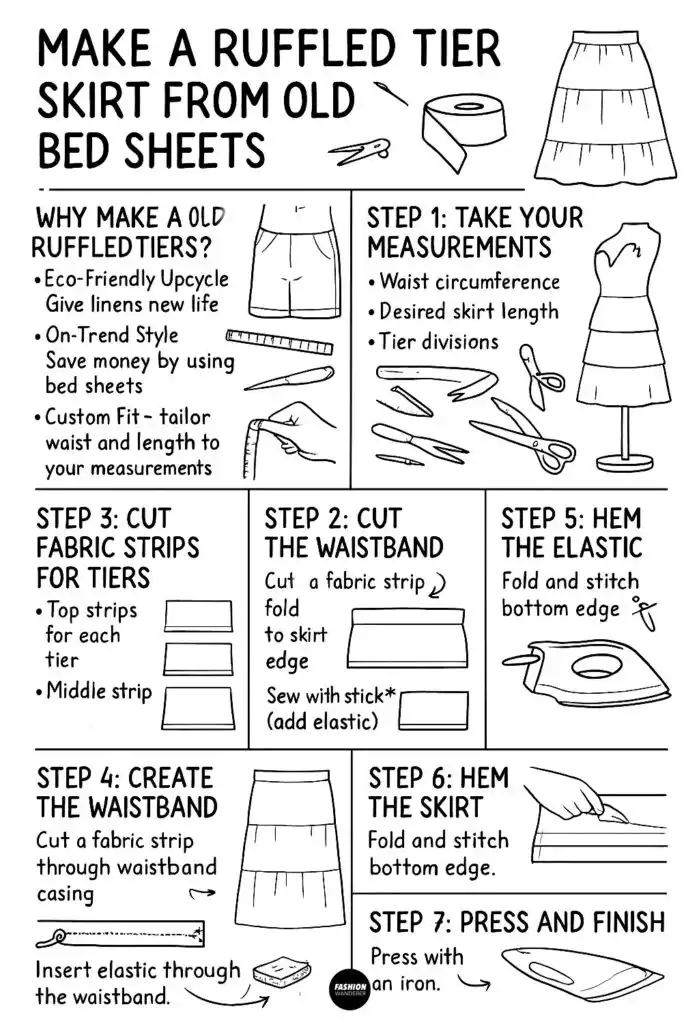
Step 1: Take Your Measurements

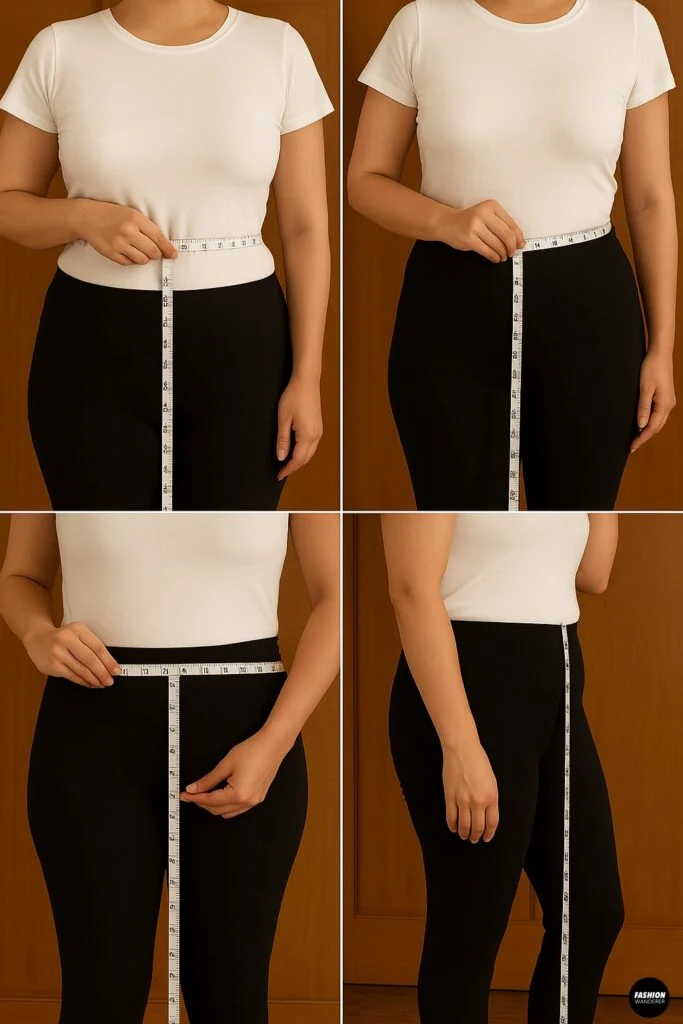
Before cutting, measure:
- Waist circumference – This will determine the length of your elastic.
- Desired skirt length – Decide how long you want the skirt to be (mini, midi, or maxi).
- Tier divisions – Ruffled skirts typically have 2–4 tiers. Divide your total skirt length into equal or varied sections depending on how dramatic you want the ruffles.
Pro Tip: Each tier should be wider than the one above it—usually 1.5 to 2 times wider—to create fullness.
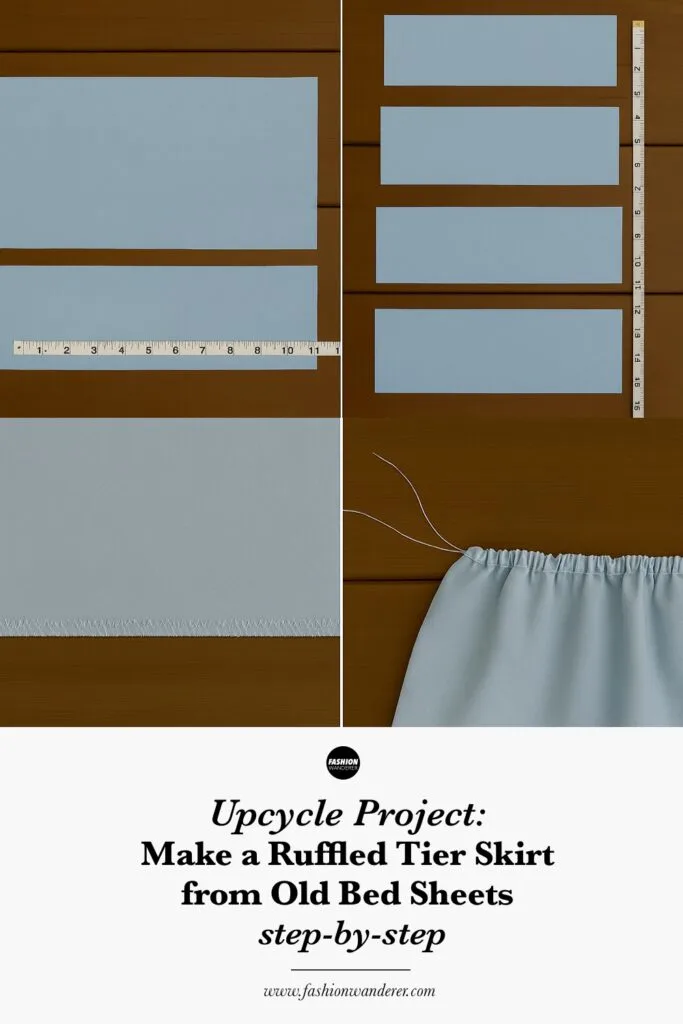
Step 2: Cut Fabric Strips for Tiers

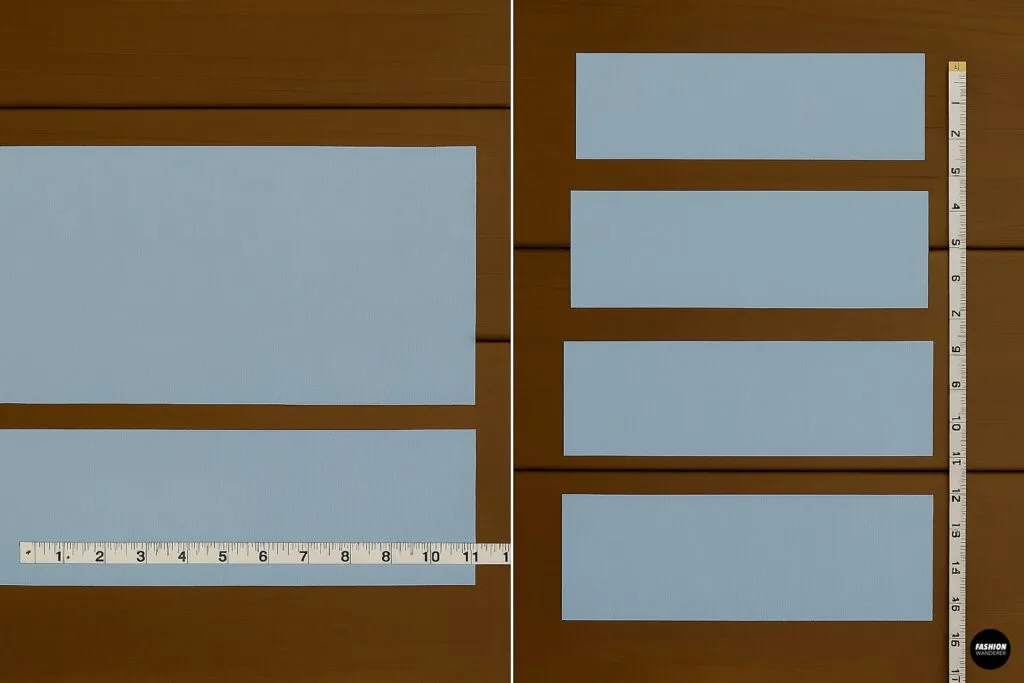
Using your measurements:
- Top Tier: Cut a rectangle the width of your waist × the desired height for the first tier (add 1 inch for seam allowance).
- Middle Tier(s): Cut strips 1.5–2 times wider than the top tier, with the height equal to your next tier measurement.
- Bottom Tier: Cut the widest strip—this creates the flowy ruffled hem.
If your bed sheet isn’t wide enough, join fabric strips together with seams to create the necessary width. Press seams open for a smooth finish.
Step 3: Sew the Tiers Together

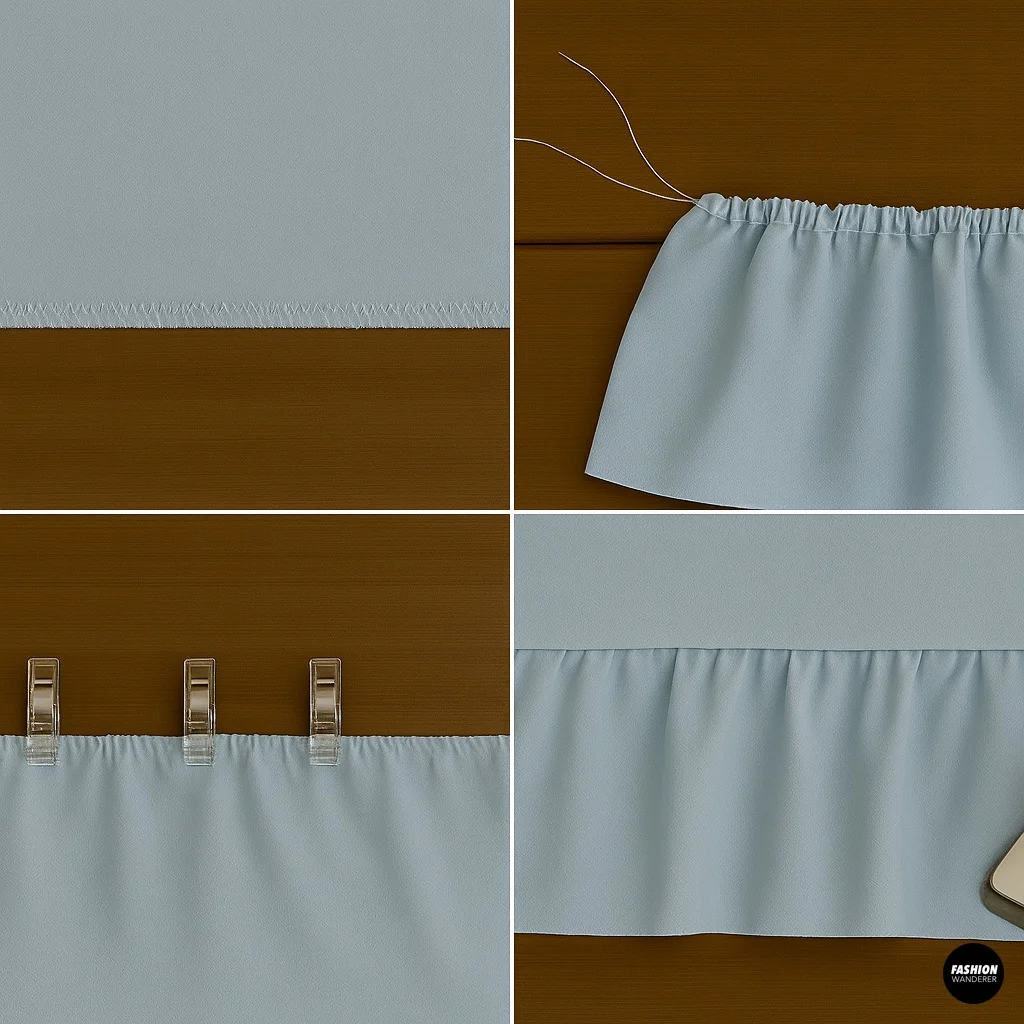
- Finish raw edges – Use a zigzag stitch or serger to prevent fraying.
- Gather fabric – For each tier, sew a long basting stitch along the top edge. Pull threads gently to gather fabric until it matches the width of the tier above it.
- Attach tiers – Place gathered edge of the lower tier against the bottom edge of the tier above it, right sides together. Pin or clip evenly.
- Sew seam – Stitch together, then press seam upward.
Repeat this process until all tiers are connected, forming the full skirt body.
Step 4: Create the Waistband

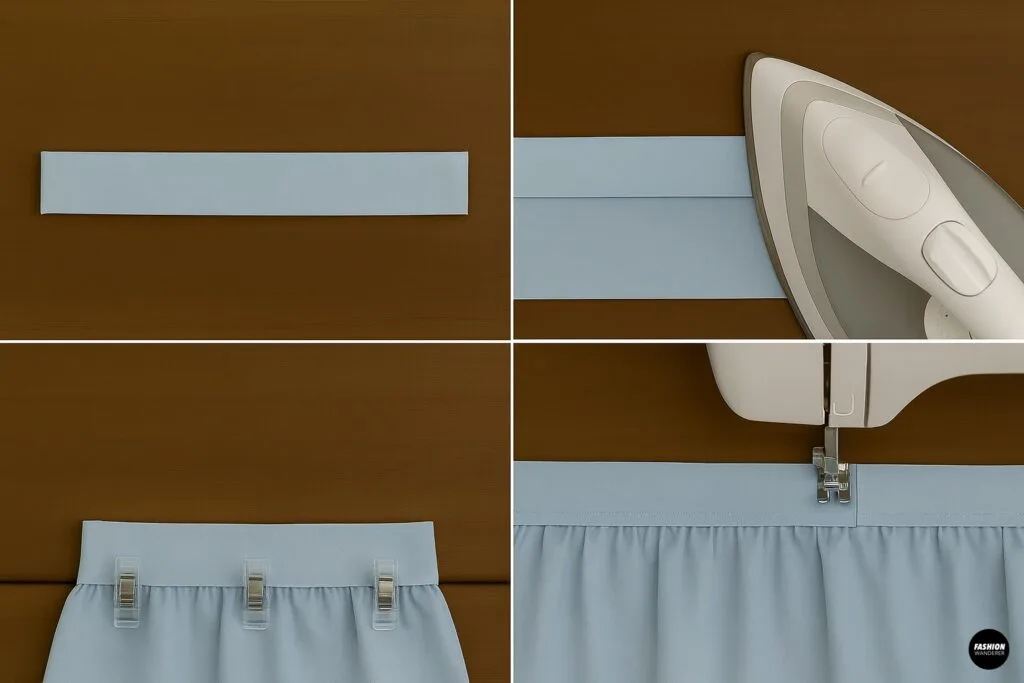
- Cut a strip of fabric for the waistband—length equal to your waist + 1 inch seam allowance, width double the width of your elastic + 1 inch.
- Fold waistband in half lengthwise, wrong sides together, and press.
- Sew the waistband to the top edge of the skirt, leaving a small opening to insert elastic.
Step 5: Insert the Elastic

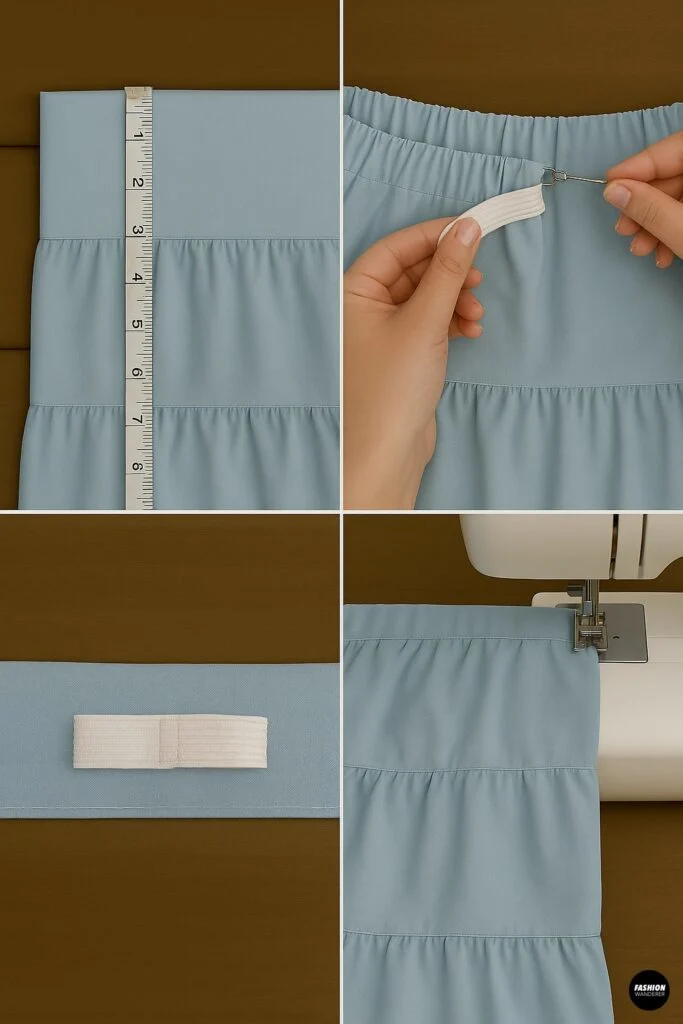
- Cut elastic to your waist measurement minus 1–2 inches for stretch.
- Use a safety pin to guide elastic through waistband casing.
- Overlap elastic ends by 1 inch, sew securely.
- Close the opening in the waistband with a straight stitch.
Now you have a stretchy, comfortable waistband!
Step 6: Hem the Skirt

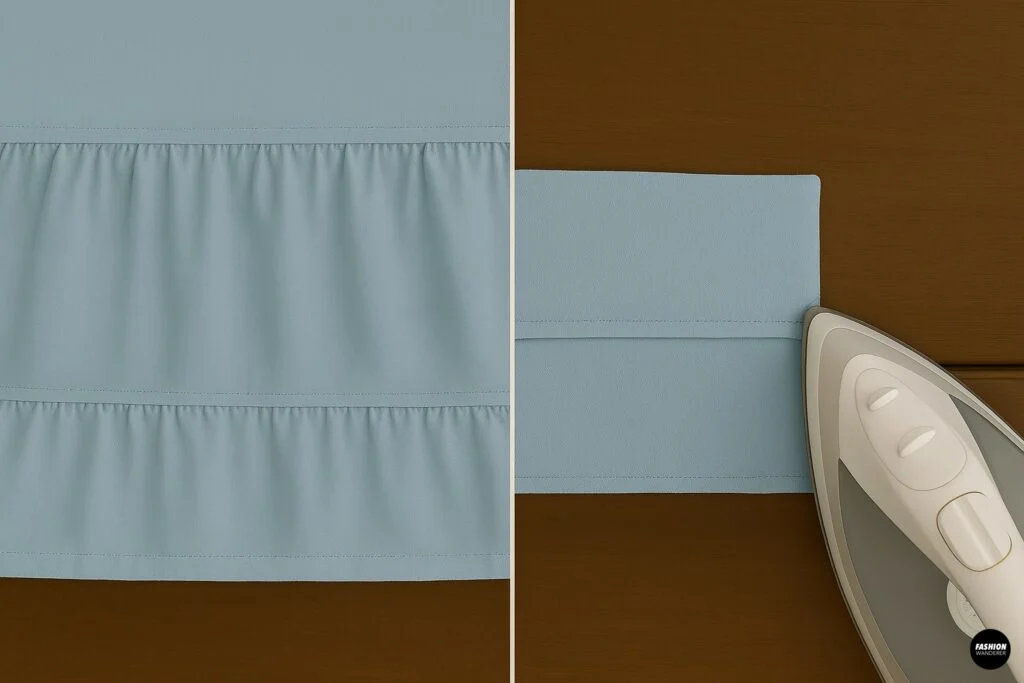
Fold the raw edge of the bottom tier under ¼ inch, press, then fold again ½ inch. Sew a neat hem all the way around. For a delicate look, you can also finish with lace trim or bias tape.
Step 7: Press and Finish

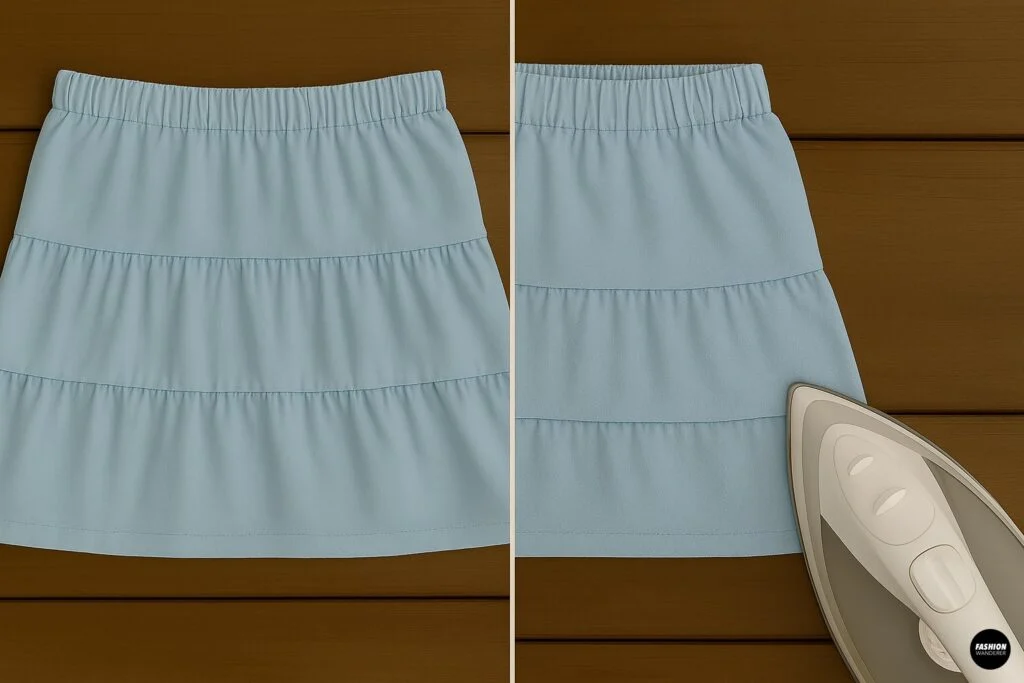
Give your skirt a final press with the iron to set seams and smooth gathers. Try it on—you’ve just made a ruffled tier skirt from bed sheets!
Optional Customizations

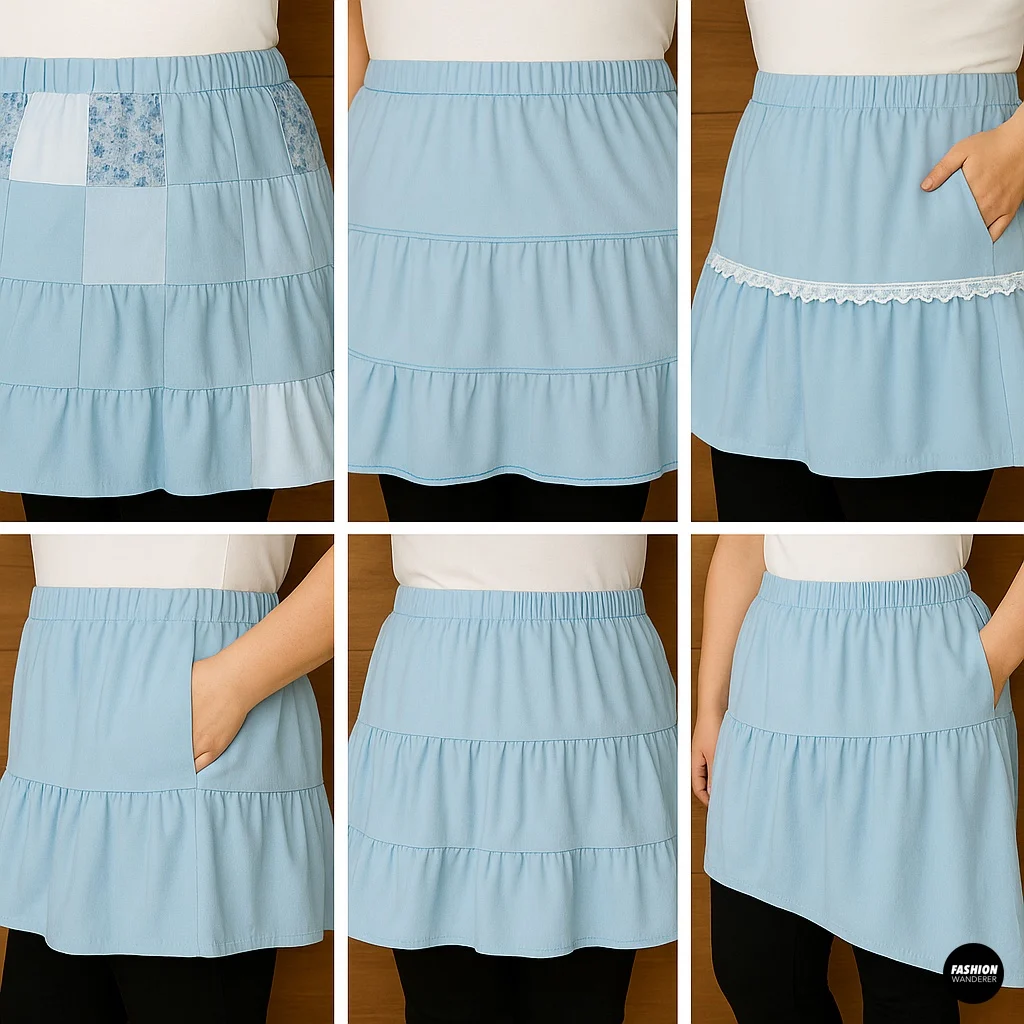
Want to add your own flair? Try these ideas:
- Patchwork Style: Mix and match different sheets for a boho, cottagecore vibe.
- Contrast Stitching: Use brightly colored thread to highlight seams.
- Trim and Lace: Add lace, pom-poms, or ribbon to the bottom hem for extra detail.
- Pockets: Sew in-seam pockets using extra fabric scraps.
- High-Low Hem: Cut the bottom tier with a curve for an asymmetrical effect.
How to Style Your DIY Ruffled Tier Skirt

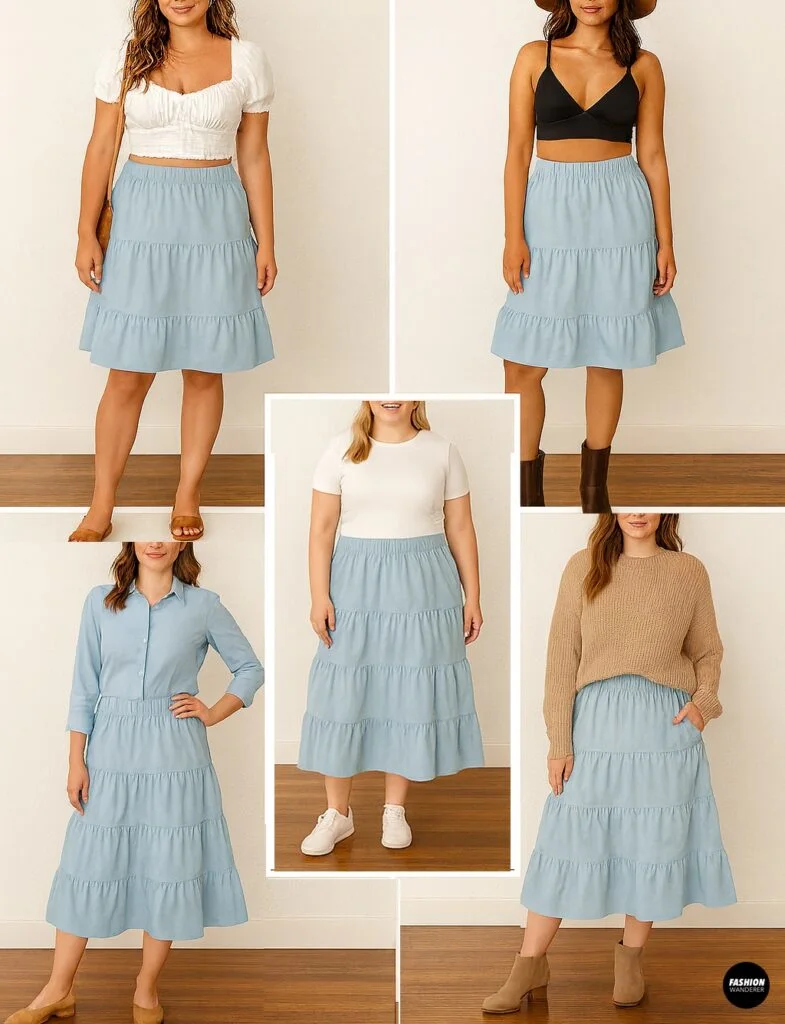
This skirt is incredibly versatile. Here are some outfit ideas:
- Boho Chic: Pair with a cropped peasant blouse, layered necklaces, and sandals.
- Casual Everyday: Style with a fitted tee and sneakers for a laid-back look.
- Summer Festival: Add a bralette top, floppy hat, and boots.
- Office-Friendly: Tuck in a button-up shirt and wear with flats or heels.
- Layered Fall Look: Throw on a chunky knit sweater and ankle boots.
Care Tips
To keep your DIY ruffled skirt in top shape:
- Wash on a gentle cycle in cold water.
- Hang dry or tumble dry on low.
- Iron on low heat if needed.
- Store on a hanger to keep ruffles from crushing.
Final Thoughts

Transforming old bed sheets into a ruffled tier skirt is a fun, sustainable project that combines practicality with fashion. Not only will you save money and reduce waste, but you’ll also end up with a one-of-a-kind garment that fits your style perfectly.
With just some cutting, gathering, and simple sewing, you can create a statement piece that’s as versatile as it is eco-friendly.
So, next time you think about tossing out those faded sheets, grab your scissors and sewing machine instead—you might just make your new favorite skirt!
Trendy, Affordable Sewing Patterns for All Sizes


Tie Shoulder Jumpsuit Pattern


Palazzo Pants Sewing Pattern


Pocket Overall Romper Pattern


Wrap Maxi Skirt Sewing Pattern


Tie Back Top Sewing Pattern