
It seems like the belt bag trend is picking up and not disappearing anytime soon. In this DIY tutorial, I will be making a raffia crochet belt bag to add to my capsule wardrobe collection.
The DIY tutorial also includes a matching raffia crochet headband pattern. Have fun with this beginners crochet project and make a few things that every woman should have in her closet.
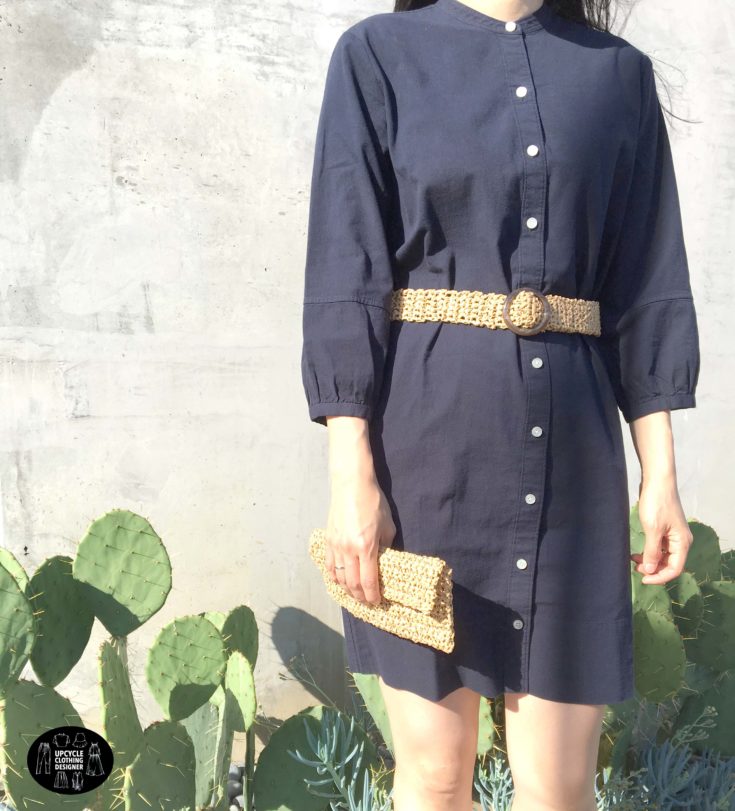
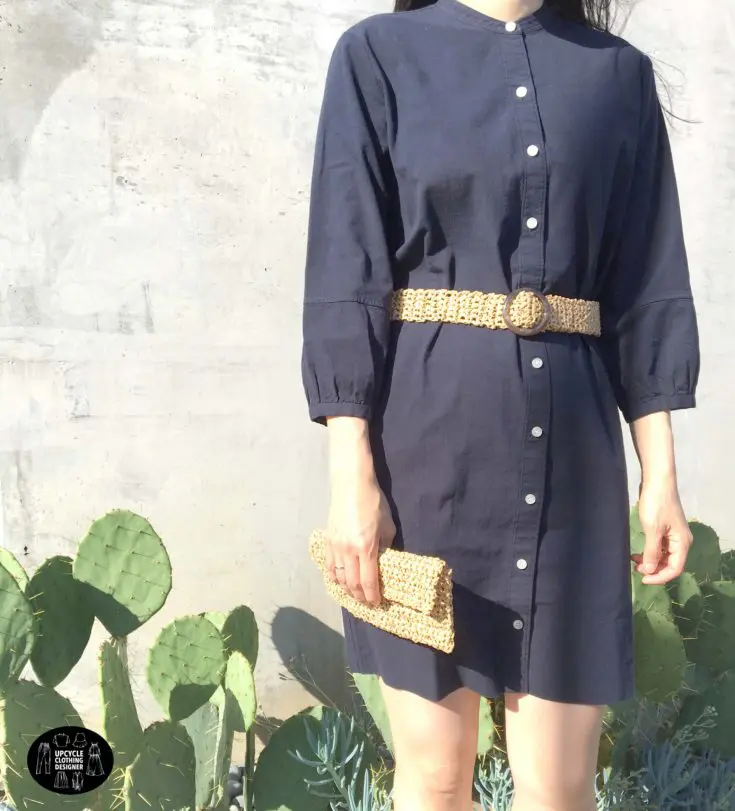
Adding crochet accessories to your wardrobe is an easy way to spice up any outfit idea. I matched this raffia crochet belt bag with an Everlane cotton weave collarless shirtdress. The opulent navy color provided a delicate contrast with the natural raffia.


How To Single Crochet Chain Stitch With Raffia
- Start a single crochet chain stitch by making a slipknot loop around three fingers. Then, pass the hook through the loop to pick up the yarn. This is referred to as a yarn over, and you’ll see this noted in written crochet patterns as abbreviated (yo).
- Pull the yarn through the loop and then pick up the yarn again with a (yo).
- Continue this sequence until you have the correct number of chain stitches required for the width of the pattern.
- To work the second row, you need to make one stitch and then insert the hook into the 1st chain. Next, yarn over and then pull the hook through the 2 loops.
- Continue this sequence until you reach the starting side. Then, turn the work around to begin the next row.


The chain stitch technique will be used in each step of this raffia crochet belt bag tutorial. The first row and second rows are challenging, but after the third and forth row you’ll begin to notice a consistent pattern developing. It’s very satisfying to see the results as the pattern continues growing.
How To Make A Raffia Crochet Belt Bag
Start your own raffia crochet belt bag by following the instructions below. The video tutorial demonstrates each step of the process, and the written instructions expand on each step along the way. In addition, there are step-by-step pictures that help to further explain the methods and techniques used to make this raffia belt bag pattern.
The video tutorial provides visual instructions that walk you through each step of this raffia crochet belt bag. Don’t hesitate to reach out if you have any questions about this beginner crochet project or the pattern discussed in the tutorial. Leave a comment below and ill be sure to answer your question as best as possible.
I chose to work with natural colored recycled raffia for this DIY project. However, ill leave that final decision up to you. Add this crochet accessory to your favorite outfit ideas to look even more stylish.
Follow the detailed instructions to begin a single crochet chain stitch using raffia. Continue along to copy the raffia belt bag pattern provided, and finish by making a belt bag strap. Lets get started!
Tools
- 4.5 mm Crochet Hook
- No. 16 Steel Yarn Needle
Instructions
How to make a raffia crochet belt
- For this raffia crochet belt pattern, you will need 5 single crochet chain stitches across. Begin a single chain crochet stitch as instructed above.
- Continue the single crochet chain stitch until you reach about 35 inches long. Consider adjusting the length of the belt to fit your waistline.
- At the end of the row, cut the thread about twice the width of the belt. Then, pull the thread completely through the last loop.
- To finish the raffia crochet belt strap, you need to secure the end of the ribbon. From the second to last row, you’ll start weaving the remaining raffia back through until you reach the end of the other side.
Helpful hint: Use your crochet hook or even substitute for a thick needle if you wish. It’s ok to go above or below the rows to thread through to the end. Your goal is to thread through each column from one side to the other side in order to secure the ribbon. - To attach the belt buckle to the belt strap, select a buckle that works with your design. I chose a brown marble resin style buckle because it looks really pretty together with the natural recycled raffia ribbon.
- Simply slide the raffia crochet belt strap over the middle bar of the buckle. Then, fold over the tail end about 1¼”.
- Use a no. 16 steel yarn needle and thread it with a 10” long strand of raffia ribbon. Hand sew the strap to secure the buckle in place.
- Start on one end of the row and zigzag through each side using a slipstitch until you reach the other end. I reversed back to the start position in order to double stitch the buckle and ensure that it firmly held in place.
- Hold the belt side ways so it’s easy to see both end holes. You’ll zigzag the thread through both sides by using a slipstitch. This is an easy and quick way to join both sides together.
Pro tip: When I reached the end of the row, I doubled back to secure the stitches by going back to the side in which I began.
How to make a raffia crochet bag
- For this raffia crochet bag pattern, you will need 24 single crochet chain stitches across. Begin a single chain crochet stitch as instructed above.
- Continue the single crochet chain stitch until you reach about 11 inches long. Consider adjusting the width and length of the belt bag to fit the size of your cell phone and coin purse.
Helpful hint: I ended up with a large rectangle shaped crochet that was 11” by 8”. - At the end of the row, cut the thread about twice the width of the belt bag. Then, pull the thread completely through the last loop.
- To form the bag shape, double fold the large raffia crochet rectangle. The top flap closure was folded at the 3” mark, and the bag pocket was folded at the 7” mark
- To sew the side seams of the bag, thread a thick needle with raffia ribbon. Then, hand sew each side seam by individually zigzagging through the front and back of the bag with a slipstitch. End the ribbon by weaving through the lip of the bag opening to secure.
Pro tip: Carry the bag as a clutch if you don’t want to add belt loops at this point. - To add belt loops to the bag, single crochet chain stitch a strap that is 3 chains wide and 2 1/2 inches long. Thread a thick needle with raffia ribbon, and position the belt loops about 1 1/4" away from the side and 3/4" away from top and bottom. Then, place the other belt loop at an equal distance away from the other side.
Pro tip: Use the extra raffia ribbon to double weave through the belt loops to firmly secure in place. - To add a button clasp to the belt bag, use a needle and clear or same color thread to hand sew the snap button to the bag. Measure towards the center of the bag opening and attach the snap button in an adjoining position.
Notes
Use the raffia crochet belt bag as a clutch, or simply attach it to your raffia crochet belt using the loops to keep your hands-free and look stylish everyday.
Have you ever tried crochet before?
Give it a shot because its really not as hard as you may think!
Share your cute raffia crochet belt bag designs with us!
#FashionWanderer
Trendy, Affordable Sewing Patterns for All Sizes


Tie Shoulder Jumpsuit Pattern


Palazzo Pants Sewing Pattern


Pocket Overall Romper Pattern


Wrap Maxi Skirt Sewing Pattern


Tie Back Top Sewing Pattern
Lucy
Tuesday 14th of December 2021
Hello! Thank you for helpful video - love this pattern. Can’t wait to make it. How many skeins of raffia did you use? Thank you!
Soonjoo
Wednesday 15th of December 2021
Hi Lucy, I’m happy you love this tutorial! This is my favorite clutch/belt bag that I wear with casual dresses or outfits. In this tutorial, I used 1/4” width twine raffia ribbon. I got 218 yards in a roll, but only used less than half of the skein. This is one I used for the tutorial: https://amzn.to/3yvFE7u Hope this answers your questions. - Soonjoo