
For the off the shoulder balloon sleeve blouse, I used a pleated midi ditzy floral skirt. The pleating detail was super cute, and it was perfect for a flowy blouse with a pretty silhouette.
This pleated off shoulder top is a perfect piece that every women must have in her closet. However, there are plenty of inspirations and refashion skirt into top ideas to try next.
Continue reading this tutorial to understand how to turn a skirt into an off the shoulder top.


Off the shoulder tops are so fun and a guaranteed fashion trend you cannot ignore. If you’re looking for a quick beginners project, learn how to cut off shoulder t-shirt using a quick no sew alteration.
Develop new skills by recycling old clothes into upcycled clothing. It’s exciting to wear something that you have made. You get to customize the fit and include finishing details that might not otherwise be found.

The pleated detail and vertical texture creates a positive association for the finished garment. For this refashion tutorial, I used the elastic waistband around the shoulders to create a perfect fit.
You may also enjoy this upcycle tutorial for making a diy off the shoulder t-shirt without sewing.


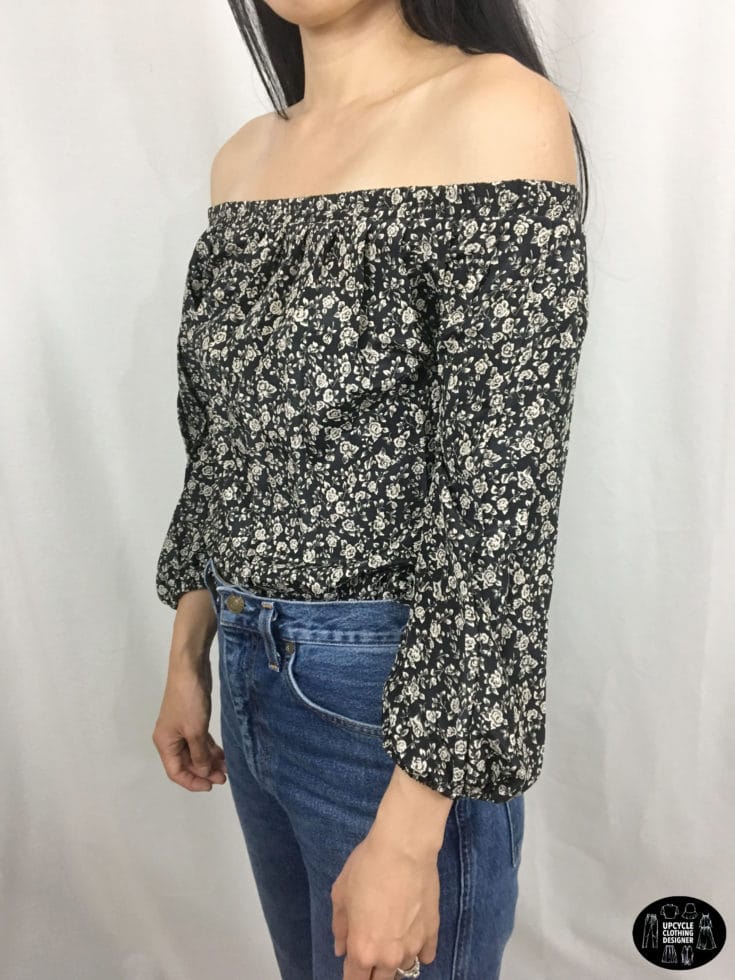
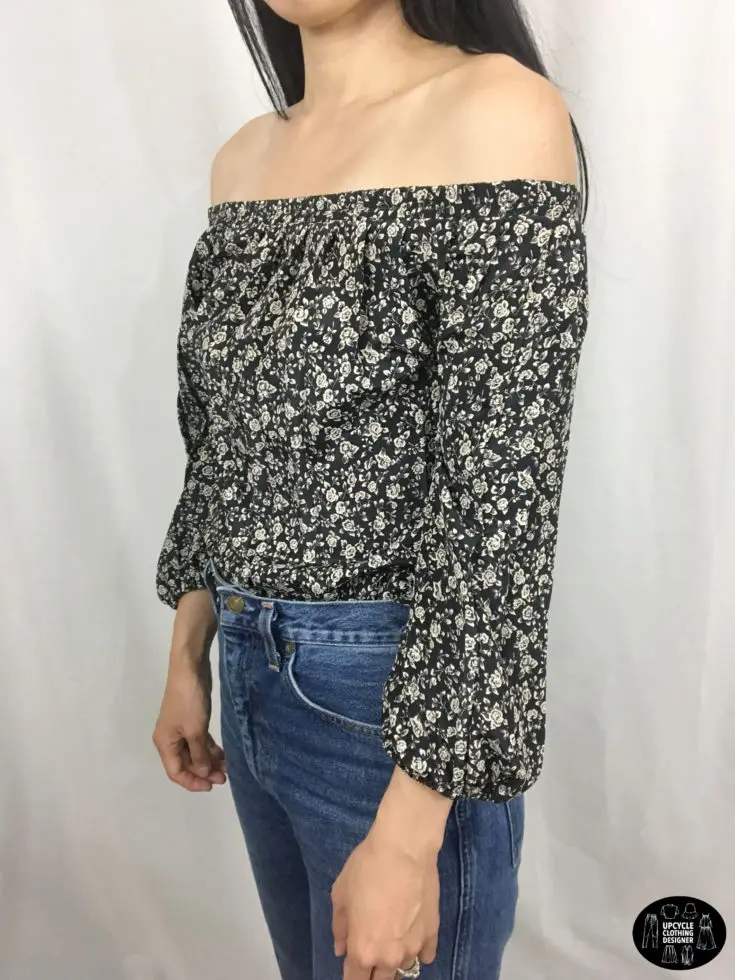
The off the shoulder balloon sleeve turned out to be super cute and looks gorgeous with denim jeans or shorts. Furthermore, the elastic band around the shoulders securely hugs the body and gives an elegant look to the top.
I absolutely love how this top turned out! Follow the step-by-step guide and instructional video to refashion your old skirt into an off the shoulder top.
More skirt into top upcycle designs:
Skirt Into An Off The Shoulder Top
For the off the shoulder balloon sleeve blouse, I used this pleated midi ditzy floral skirt. Because of pleating detail, I though it would be perfect for a pretty blouse with a flowy silhouette. Follow along with this tutorial to understand how to turn a skirt into an off the shoulder top.
This pleated off shoulder top is perfect to add to your capsule wardrobe collection. Off the shoulder tops are so fun to wear, and also brighten up an outfit to make it look super cute. Have fun with this DIY off the shoulder top and add it to your personalized collection.
For this refashion tutorials, I kept the elastic waistband and used it to snug around my shoulders. Therefore, make sure yours fits perfectly around the shoulders before starting the transformation.
The pleats were an attractive feature, so I maintained the vertical texture and transformed the skirt into a DIY off the shoulder top with 3/4 sleeves. Follow the step-by-step instructions to recreate this stylish look for yourself.
Materials
- Old Skirt
- ¾" Elastic Band
Tools
- Sewing Machine
- Fabric Chalk
- Loop Turner
- Measuring Tape
- Ruler
- Scissors
- Straight Pins
Instructions
- Flip the skirt inside out and flatten the hemline. Measure from one side seam to the other so that you know exactly how wide it is. Mine was 38” across.
- Next, pin along the hemline to secure the front and back piece together.
- For the top length, measure 21” down from the waistband and mark with chalk. Draw a dotted line across the skirt and cut.
- For the armhole opening, measure 8” from each side seam and mark with chalk. The arms will be cut from the top bodice.
- For the body opening, measure 22” and mark with chalk.
- For the sleeve length, measure 5” down from the waistband and mark with chalk. Then, draw a straight line with a ruler. Do the same on the other side. Cut along the straight chalk mark until the 5” point.
Sewing tip: Pin along both sides of the straight line to secure the front and back piece for cutting. It’s slightly challenging because it has pleating, but try to flatten as you pin the pieces together. - To sew the sleeves and side seam, ¼” topstitch under the armhole and along the sides.
- To sew the hemline, double fold ¼” and edge topstitch.
- For the sleeve opening, use a 6 ½” long piece of ⅝” width elastic. Overlap the elastic band about ½”, and then double topstitch to make a circle.
Helpful hint: Stretch the elastic to make sure it doesn’t pop. - Slide the elastic ring over the right side of the sleeve opening, and then topstitch the middle of the band.
Stretch the elastic as you go around the sleeve. Double fold to cover the elastic band, and edge topstitch to secure.
Notes
I love how this off the shoulder balloon sleeve blouse turned out. The top is so pretty to wear with denim jeans or shorts.
In addition, the elastic around the shoulder and arms snug very nicely to give the top a flowy and elegant look.
Recommended Products
As an Amazon Associate and member of other affiliate programs, I earn from qualifying purchases.


Trendy, Affordable Sewing Patterns for All Sizes


Tie Shoulder Jumpsuit Pattern


Palazzo Pants Sewing Pattern


Pocket Overall Romper Pattern


Wrap Maxi Skirt Sewing Pattern


Tie Back Top Sewing Pattern
Priscilla
Thursday 16th of April 2020
My daughter found an off shoulder top but its a 3x and wants to make it her size how can i do that with out ruining the blouse?
Soon Joo Uh
Thursday 16th of April 2020
Does the original off the shoulder top have an elastic opening? If so, take the elastic out and measure your daughter shoulder circumference, chest and arms. Then, add 3” to those measurements on both sides. Take apart the side and sleeve seams on the top. Cut to subtract the new measurements from the original garment. Sew back together by reattaching the side and sleeve seams. Match the elastic to the new shoulder circumference. Insert the elastic band into the tunnel and complete the finishing details. Hopefully these tips were helpful for you. Please share the results with me!