
If you have a denim jacket that’s seen better days, don’t toss it just yet. Visible mending is a creative way to repair rips, holes, and worn areas while transforming your denim into a unique fashion statement.
Instead of hiding flaws, visible mending highlights them with decorative stitches, colorful patches, and playful designs. This sustainable fashion trend is part repair, part personalization—and the best part is, you don’t need to be an expert sewist to get started.
In this tutorial, I’ll show you step-by-step how to mend your denim jacket using different visible mending techniques including running stitch, sashiko embroidery, darning, appliqué patches, embroidered motifs, and reverse patching. By the end, you’ll have a one-of-a-kind jacket that not only lasts longer but also shows off your personality and creativity.
Why Try Visible Mending on Denim Jackets?
- Sustainable fashion choice: Extends the life of your favorite jacket.
- Budget-friendly DIY: No need to buy new clothes—just repair what you already own.
- Personalized style: Every embroidery stitch and appliqué patch tells a story.
- Beginner friendly: Even simple hand stitches look beautiful and modern.
Whether you’re fixing a ripped elbow, covering frayed cuffs, or just want to add some flair, visible mending is a stylish and eco-conscious choice.
Tools & Materials You’ll Need

Before starting, gather these supplies:
- Denim jacket in need of repair
- Fabric patches (denim scraps, cotton prints, or decorative fabric)
- Embroidery floss or heavy thread (assorted colors)
- Hand sewing needles or embroidery needles
- Scissors or fabric snips
- Thimble (optional but helpful for thick denim)
- Darning mushroom or small bowl (for knit-like repairs)
- Chalk or washable marker (for marking stitches)
- Iron-on stabilizer or fusible webbing (optional for reinforcement)
Step-by-Step Visible Mending Techniques
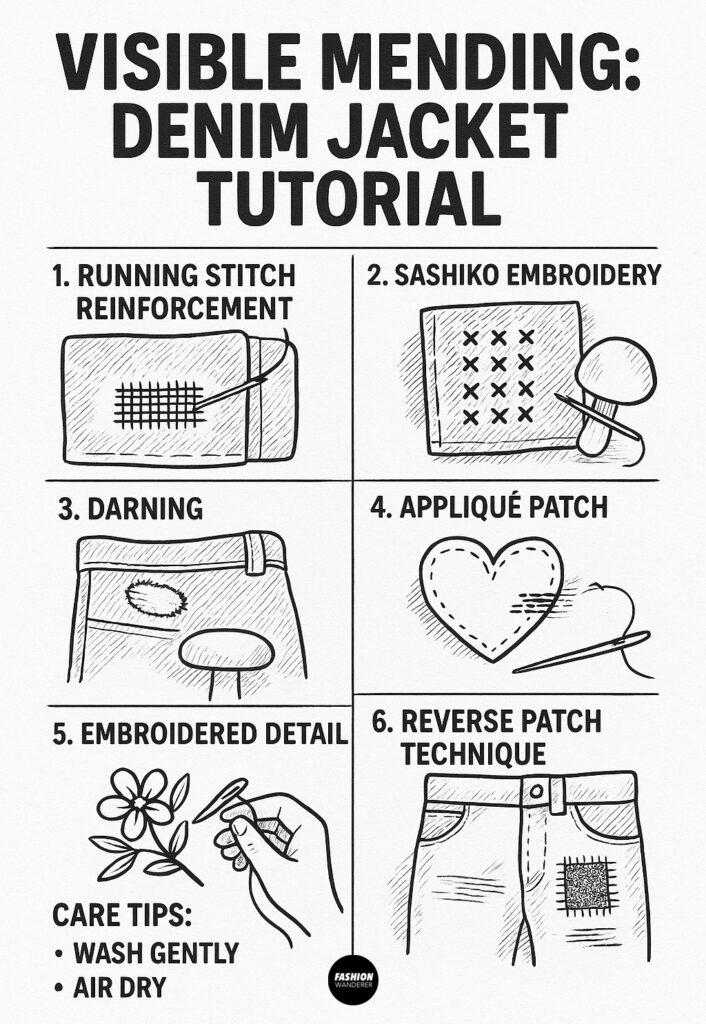
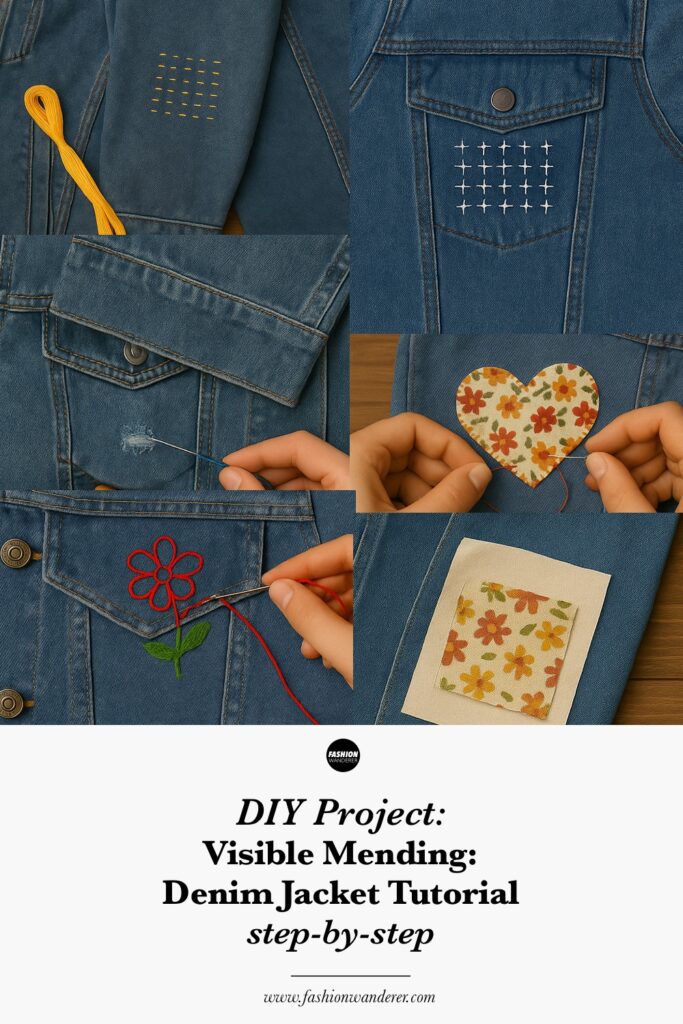
1. Running Stitch Reinforcement
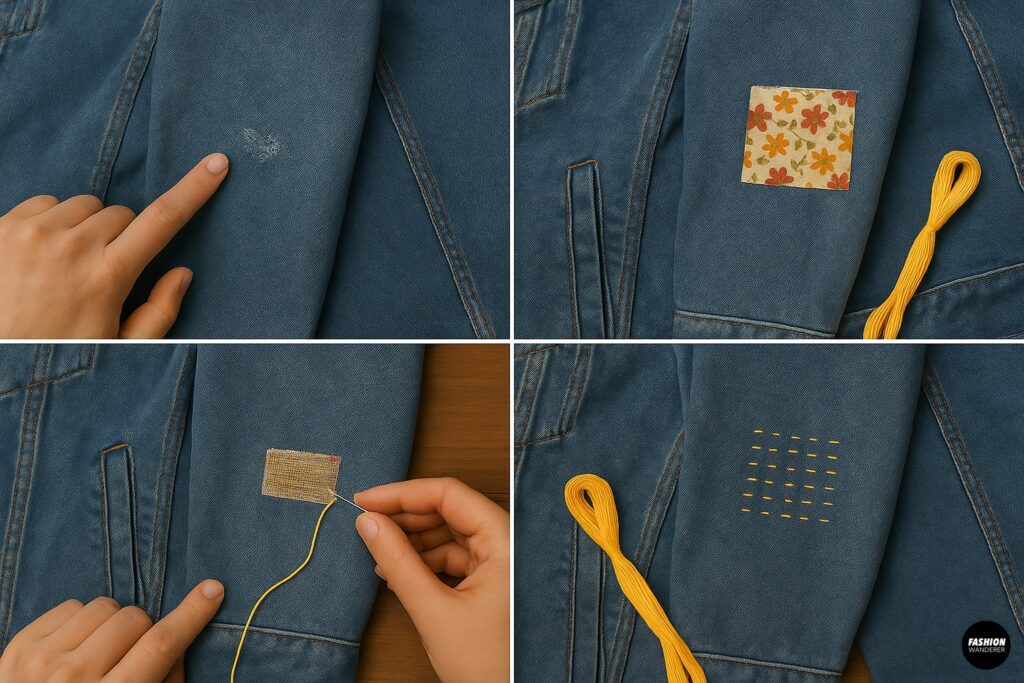
Perfect for small rips or thin spots on elbows and cuffs.
- Trim any loose threads around the tear.
- Place a fabric patch behind the worn area.
- Thread a needle with embroidery floss in a contrasting color.
- Sew evenly spaced running stitches across the rip, anchoring the patch underneath.
- Repeat in parallel rows until the patch feels secure.
Style tip: Use bright thread colors like yellow, red, or green to create a graphic grid effect.
2. Sashiko Embroidery

A traditional Japanese repair technique that’s both functional and decorative.
- Mark a grid of small crosses or lines around the damaged area using chalk.
- Place a piece of denim or cotton fabric behind the rip.
- Using a long needle, sew straight stitches following your grid.
- Repeat until you’ve covered the entire section.
Style tip: White sashiko stitches on indigo denim give a bold, classic look, but you can experiment with colorful thread for a modern twist.
3. Darning for Frayed Spots
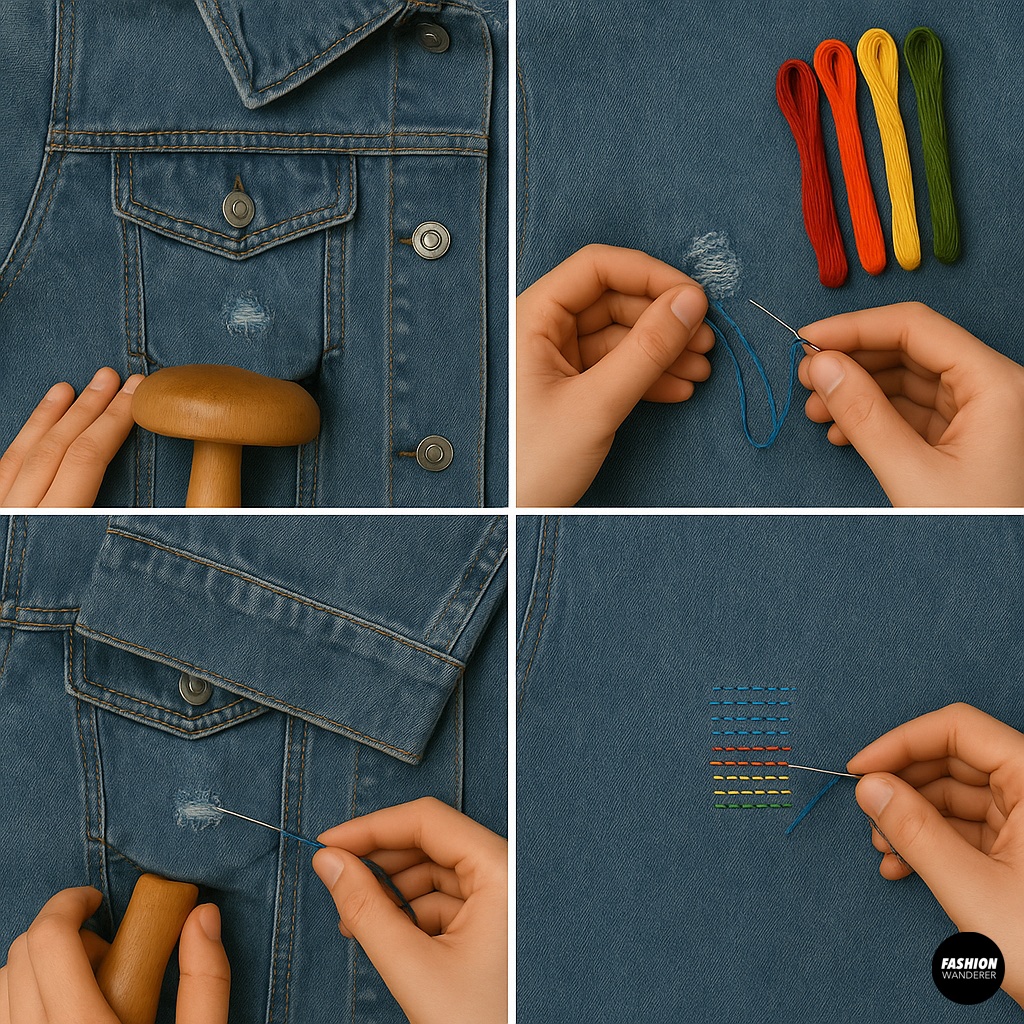
Darning is ideal for thinning fabric near seams or around pocket corners.
- Place your jacket over a darning mushroom or small bowl to stretch the fabric.
- Thread yarn or embroidery floss in a matching or contrasting shade.
- Stitch vertical lines across the hole, extending slightly beyond the edges.
- Weave horizontal lines over and under the vertical stitches to create a woven patch.
Style tip: Use rainbow yarn for playful visible mending that turns a rip into a mini piece of art.
4. Appliqué Patches
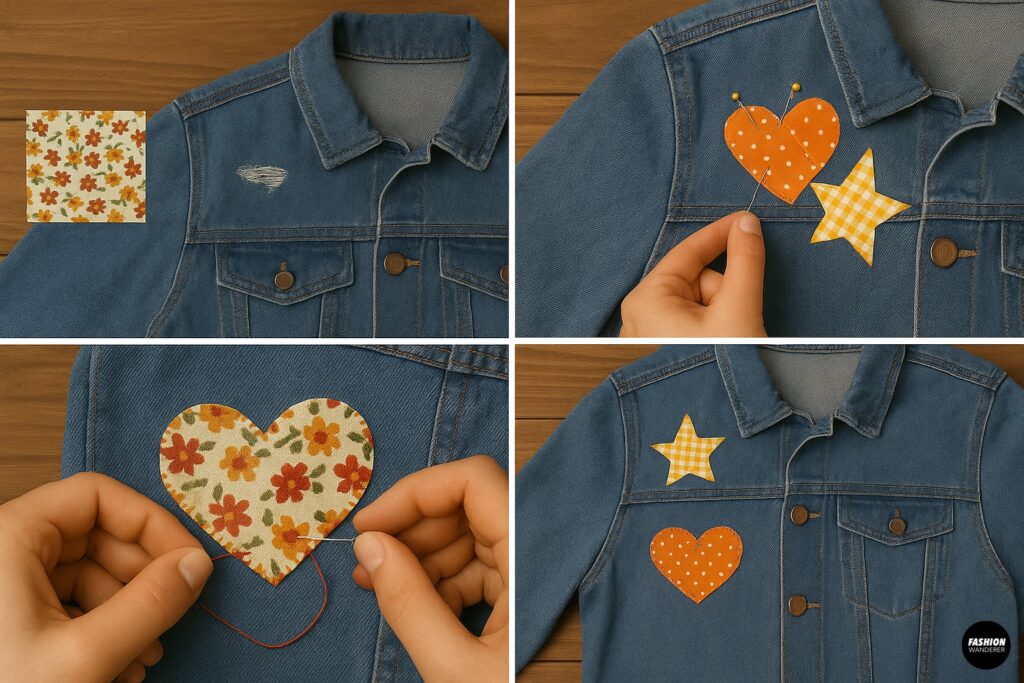
Fun and customizable, appliqué patches let you cover large holes or just add decoration.
- Cut a patch into a shape (heart, star, circle, or square).
- Pin it over the rip or worn area.
- Thread a needle with coordinating or contrasting floss.
- Sew around the edges using a whip stitch or blanket stitch.
Style tip: Mix floral fabrics, polka dots, or bold geometric patterns to create a statement jacket.
5. Embroidered Detail
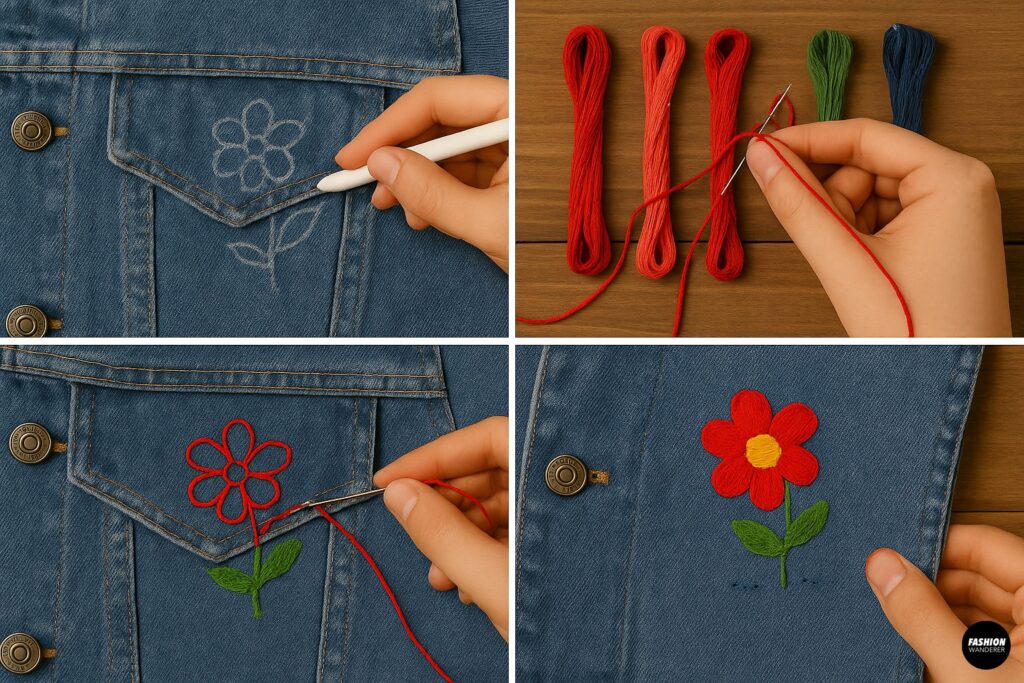
Turn a repair into artwork with hand embroidery.
- Draw a simple design with chalk, such as flowers, stars, or geometric motifs.
- Use embroidery floss to outline your drawing with backstitches or chain stitches.
- Fill in areas with satin stitch for bold blocks of color.
- Secure the back with small knots.
Style tip: Add embroidered vines, flowers, or even your initials to personalize your denim jacket.
6. Reverse Patch Technique
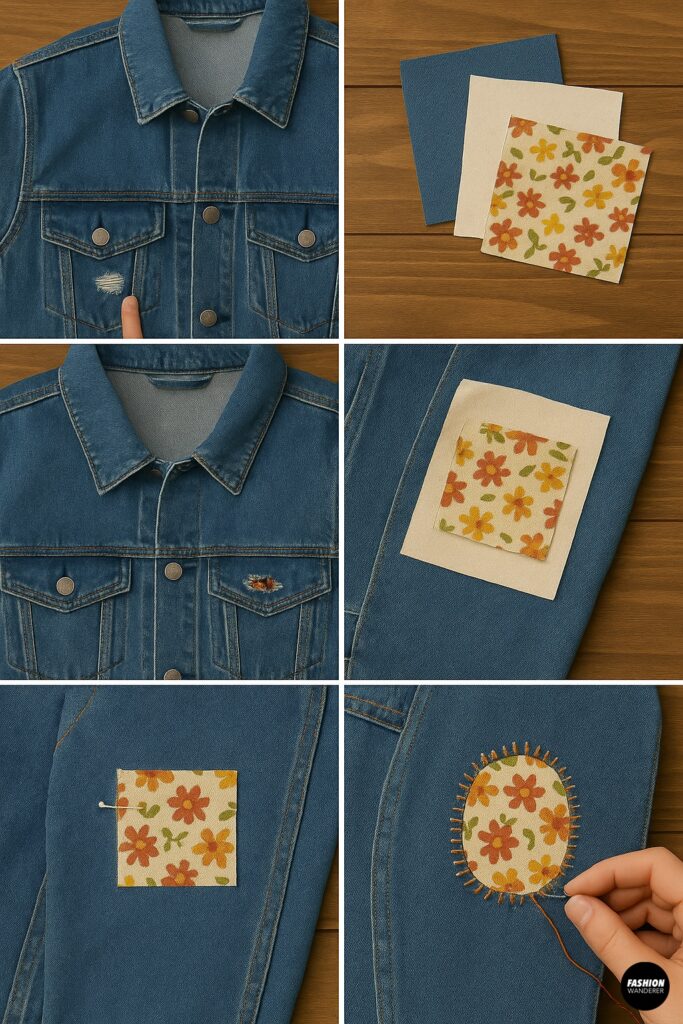
Great for large holes where you want fabric peeking through.
- Cut a fabric patch slightly larger than the hole.
- Place it inside the jacket so the pattern shows through the tear.
- Pin in place and secure with running stitches around the edge of the hole.
- Trim any fraying threads for a clean finish.
Style tip: Use floral or brightly patterned fabric under torn elbows or back panels for a pop of color.
Care Tips for Your Mended Jacket
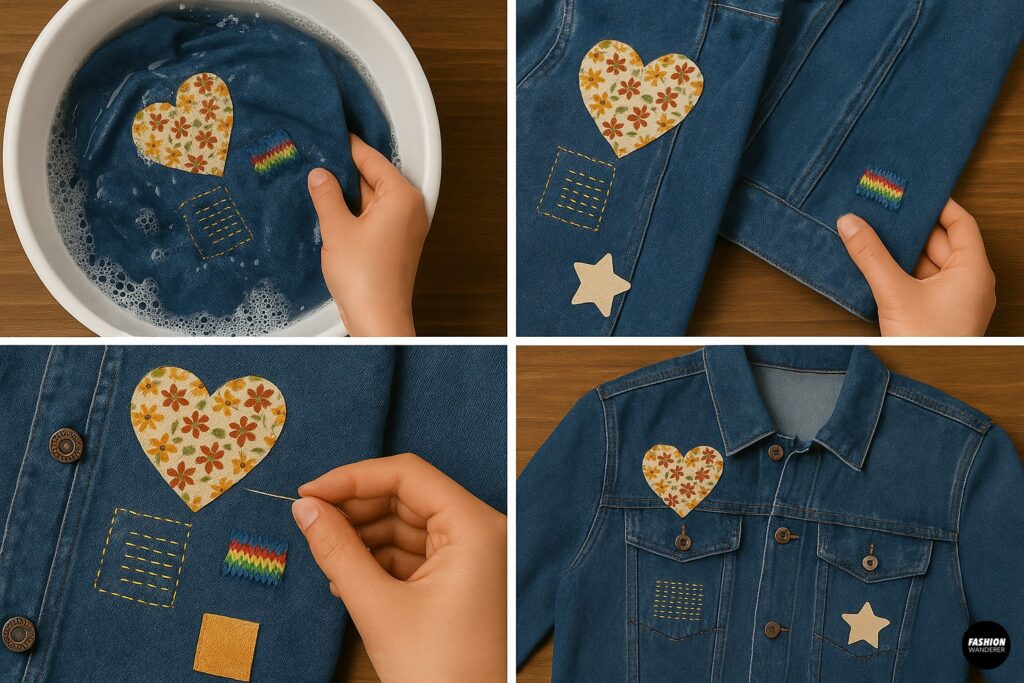
- Wash gently: Hand wash or use a delicate cycle to protect your stitches.
- Air dry: Avoid high heat that could damage patches or embroidery.
- Reinforce as needed: If stitches loosen over time, simply add more rows.
- Wear with pride: Each repair adds character to your jacket.
Creative Variations to Try
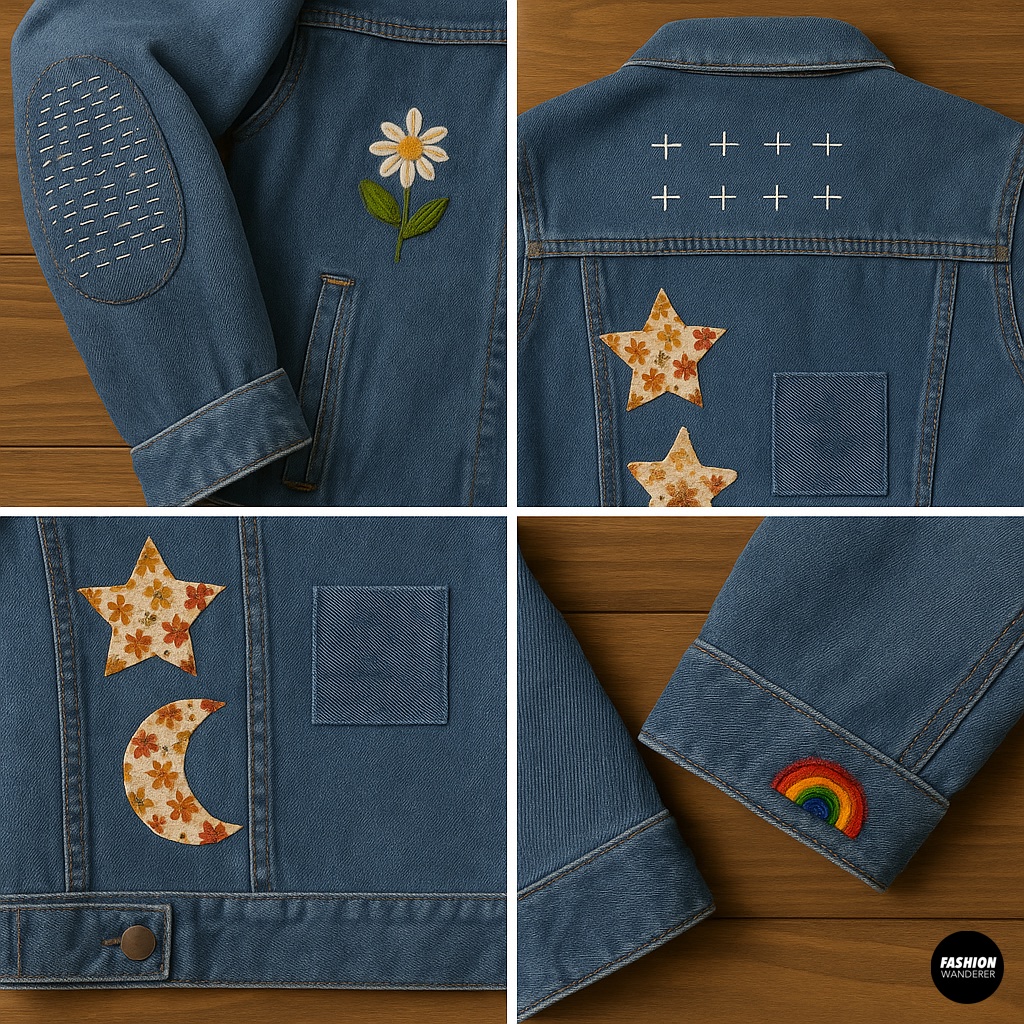
- Combine multiple techniques in one jacket—running stitch on elbows, sashiko on the back, and embroidery on cuffs.
- Use neon thread or metallic floss for eye-catching streetwear vibes.
- Add patches in fun shapes like stars, moons, or butterflies to make your jacket unique.
- Layer denim on denim for a rugged, utilitarian look.
Final Thoughts
Visible mending isn’t just about fixing—it’s about celebrating imperfections and telling your story through stitches. A denim jacket is the perfect canvas because the sturdy fabric pairs beautifully with embroidery floss, patches, and decorative stitching.
By using these techniques, you’ll not only extend the life of your jacket but also create a custom piece of wearable art. So grab your needle and thread, pick out some colorful patches, and give your old denim jacket a second life. With visible mending, every stitch is a style statement.