
Got an oversized T-shirt hiding in your closet? Instead of donating it, turn it into an adorable twirly play dress for your little girl! This beginner-friendly upcycle t-shirt project is a fun way to transform an old adult T-shirt into a comfortable everyday dress that’s perfect for playground adventures, school, vacations, or lounging at home.
This simple sewing project requires only basic sewing skills, making it ideal for beginners who want to practice sewing while creating something practical and cute. Best of all, knit T-shirts don’t fray, so the project comes together quickly with minimal finishing.
Whether you’re recycling a favorite graphic tee or using a thrift store find, this DIY twirly dress is an affordable, eco-friendly sewing project that kids will love to wear. Here are more kids’ t-shirt upcycle sewing projects for endless creative expression!
Why You’ll Love This DIY Project
- Perfect beginner sewing project
- Great way to recycle oversized T-shirts
- Comfortable stretchy knit fabric
- Budget-friendly upcycle
- Soft and breathable for everyday wear
- Customizable with ruffles, pockets, bows, or appliqués
- Makes a beautiful handmade gift
Supplies You’ll Need
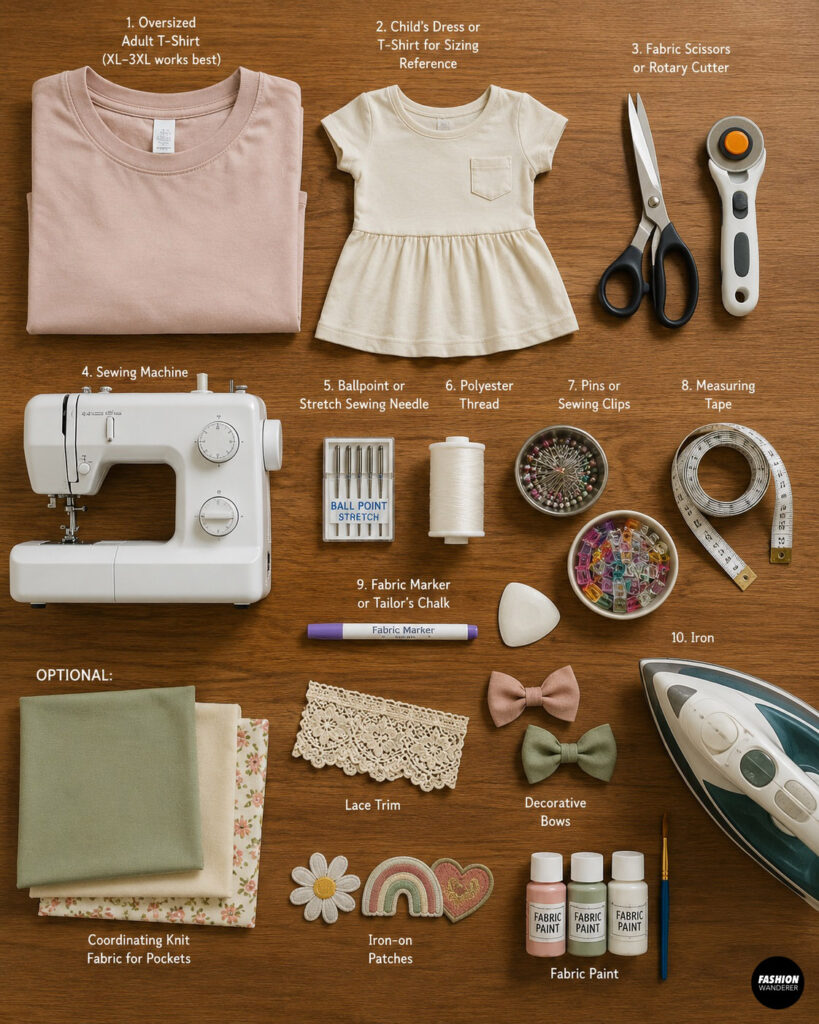
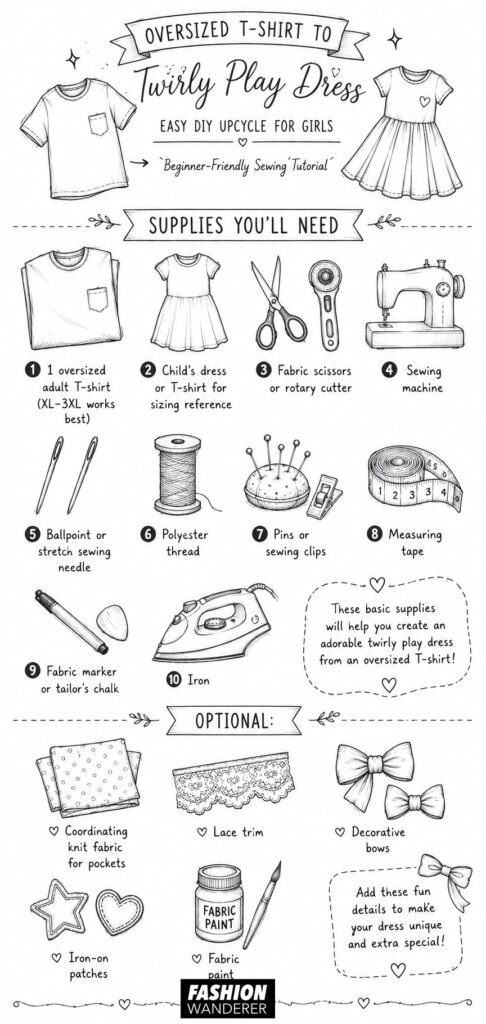
- 1 oversized adult T-shirt (XL–3XL works best)
- Child’s dress or T-shirt for sizing reference
- Fabric scissors or rotary cutter
- Sewing machine
- Ballpoint or stretch sewing needle
- Polyester thread
- Pins or sewing clips
- Measuring tape
- Fabric marker or tailor’s chalk
- Iron
Optional:
- Coordinating knit fabric for pockets
- Lace trim
- Decorative bows
- Iron-on patches
- Fabric paint
Finished Measurements
Since every child is different, use an existing dress that fits well as your pattern.
Recommended finished length:
- 2–3 years: 20–21 inches
- 4–5 years: 23–25 inches
- 6–7 years: 26–28 inches
- 8–10 years: 29–32 inches
The skirt should be approximately 1.5–2 times wider than the bodice for maximum twirl.
Upcycle Tee Shirt into Twirly Play Dress
Step 1: Prepare the T-Shirt
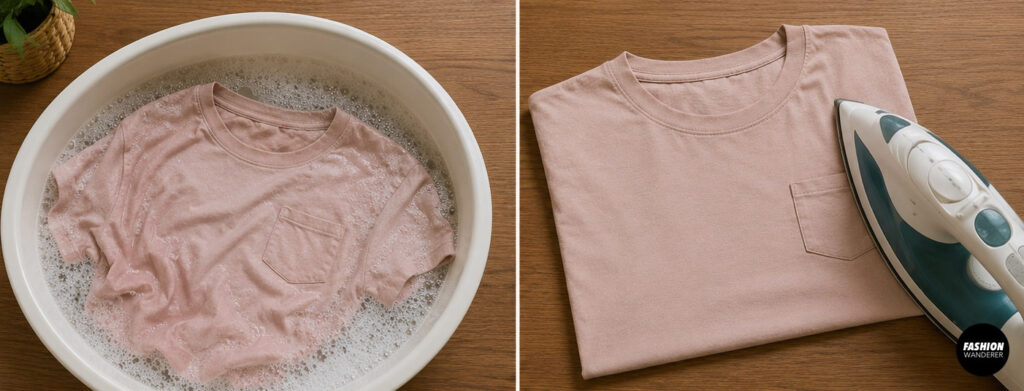
Wash, dry, and iron the T-shirt before cutting.
Lay it flat on your work surface and smooth out all wrinkles.
Choose which part of the shirt you want to feature. Graphic prints, embroidery, or logos can become the centerpiece of the dress.
Step 2: Cut the Bodice
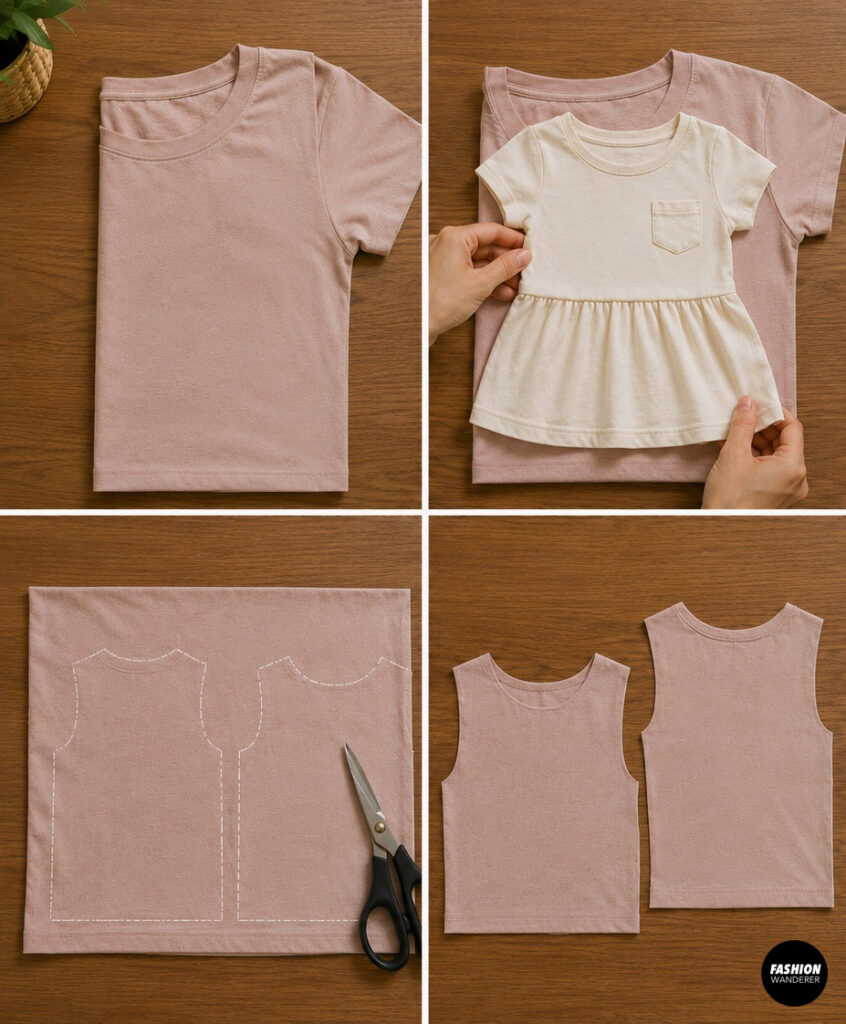
Fold the shirt in half with right sides together.
Place a child’s well-fitting T-shirt on top.
Trace around it, adding approximately:
- ⅜ inch seam allowance
- Extra length if desired
Cut:
- Front bodice
- Back bodice
Keep the original neckline whenever possible. This saves time because it’s already professionally finished.
Step 3: Create a Full Twirly Skirt
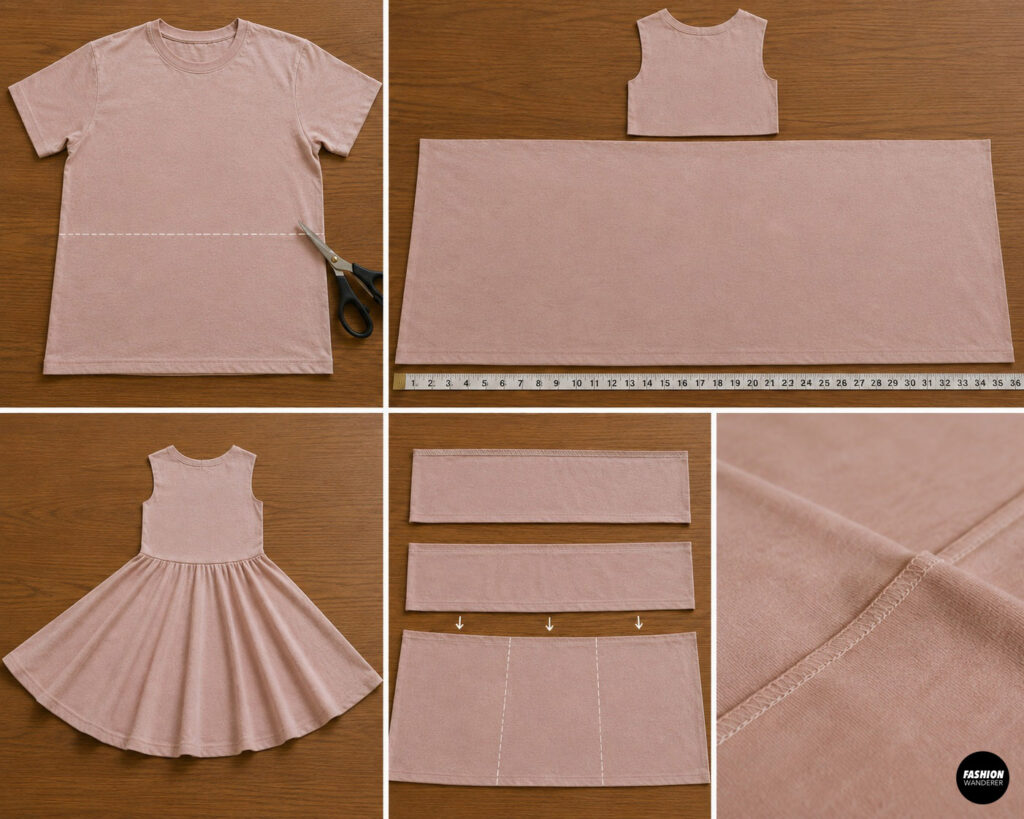
Use the remaining lower portion of the oversized T-shirt.
Cut one large rectangle.
The width should measure approximately:
- 1½ to 2 times the bodice width
The extra fullness creates a beautiful twirling effect that kids love.
If the shirt isn’t wide enough, sew together additional fabric strips from the sleeves.
Step 4: Sew the Shoulder Seams
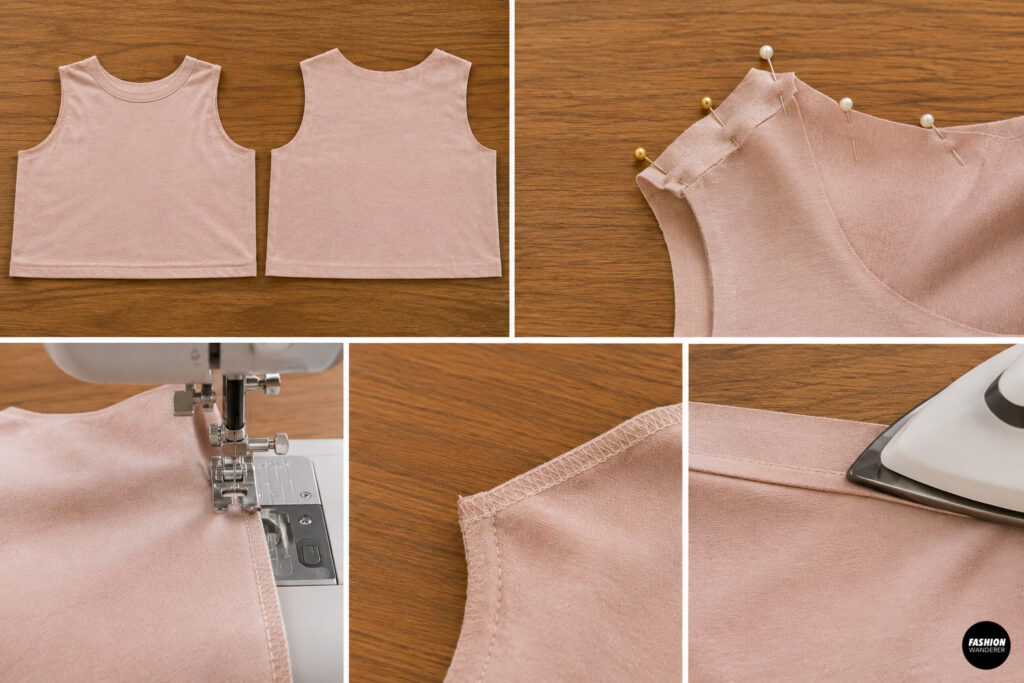
Place the front and back bodice pieces right sides together.
Pin the shoulder seams.
Sew using:
- Stretch stitch
- Narrow zigzag stitch
- Serger
Press the seams toward the back.
Step 5: Sew the Side Seams
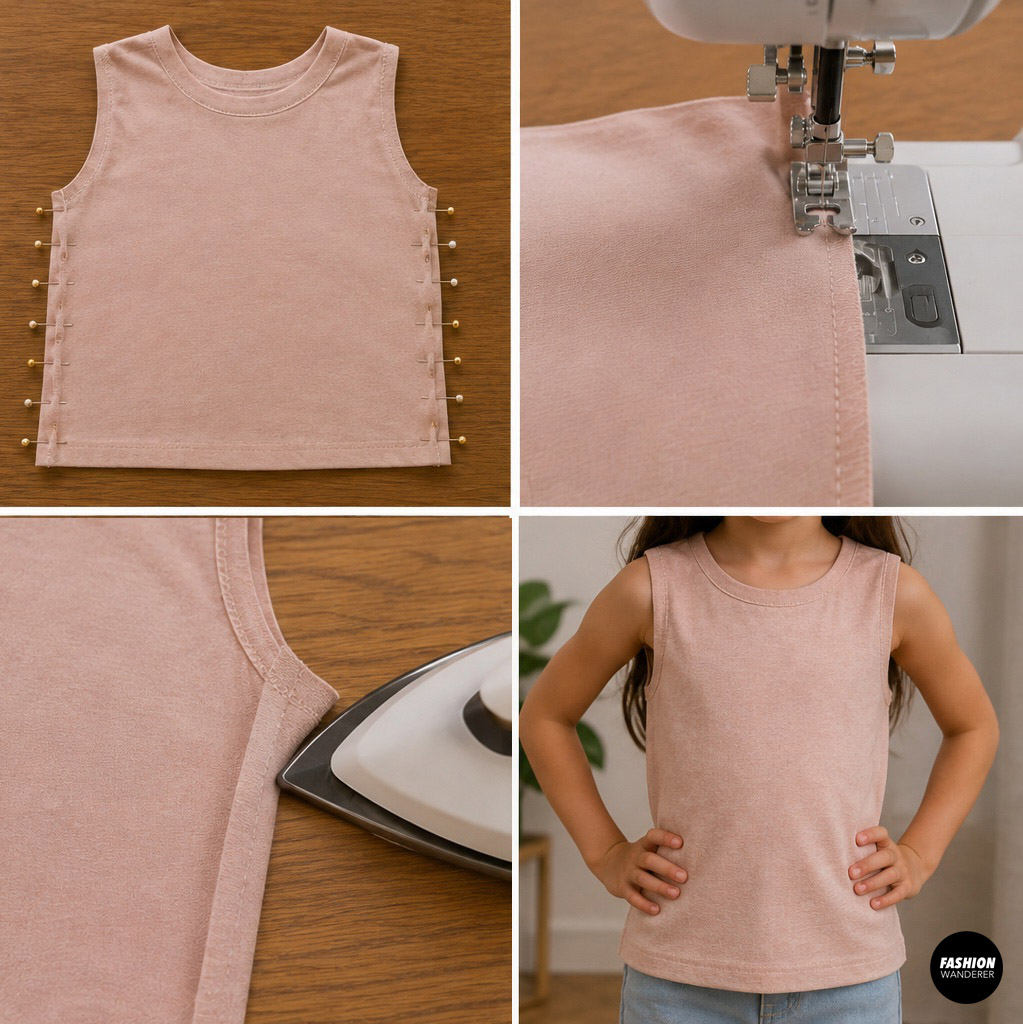
Align the side edges.
Pin from the armhole to the hem.
Sew both sides using a stretch stitch.
Press seams open or toward the back.
Try the bodice on the child if possible before attaching the skirt.
Step 6: Finish the Armholes
If you kept the original T-shirt sleeves attached, you may skip this step.
For sleeveless dresses:
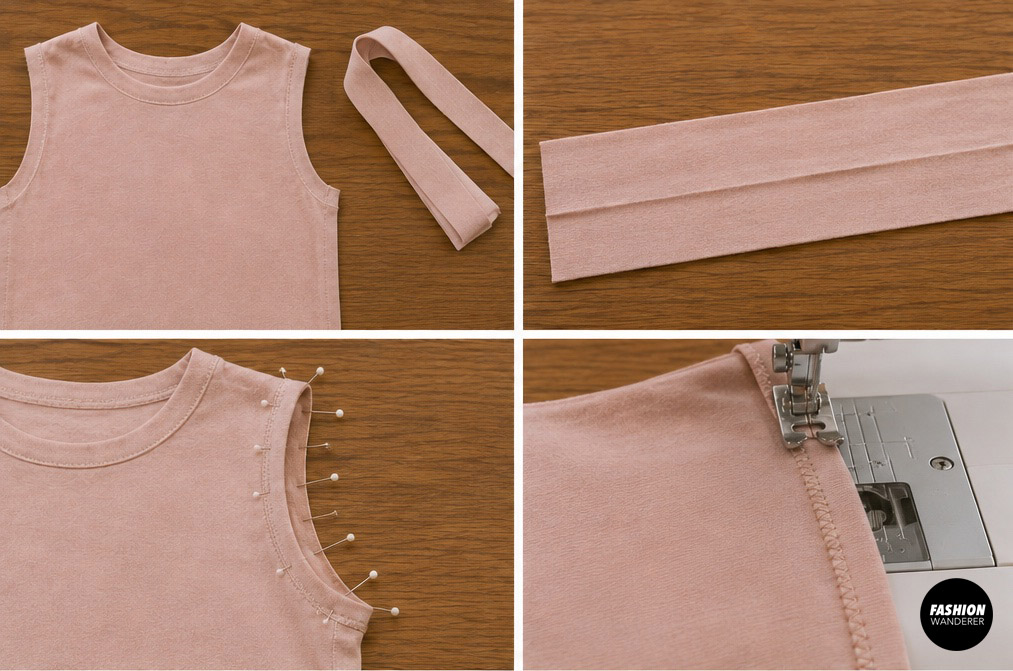
Cut knit binding strips approximately:
- 1½ inches wide
Fold each strip lengthwise.
Pin around each armhole with slight stretch.
Sew using a zigzag stitch.
Trim excess seam allowance.
Fold the binding inward and topstitch for a neat finish.
Step 7: Gather the Skirt
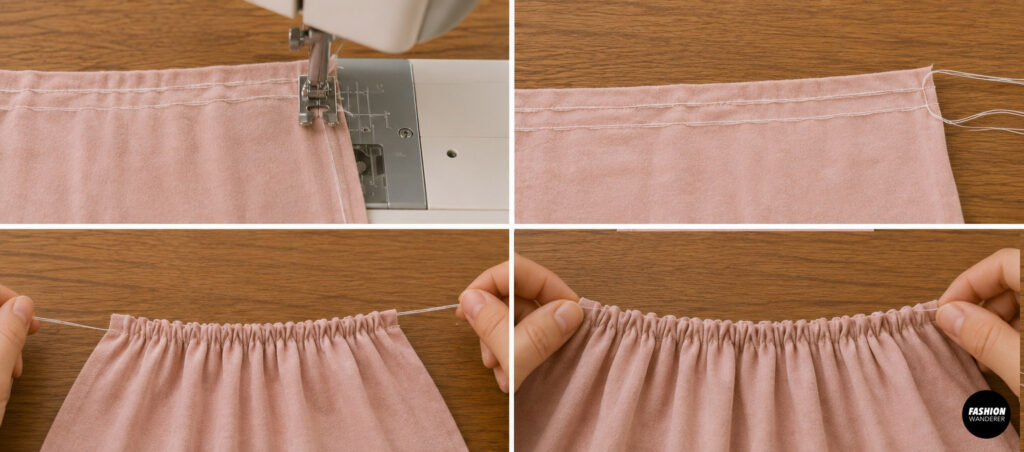
Using a long machine stitch, sew two rows of gathering stitches across the top edge of the skirt.
Do not backstitch.
Gently pull the bobbin threads until the skirt matches the width of the bodice.
Distribute the gathers evenly all the way around.
Step 8: Attach the Skirt
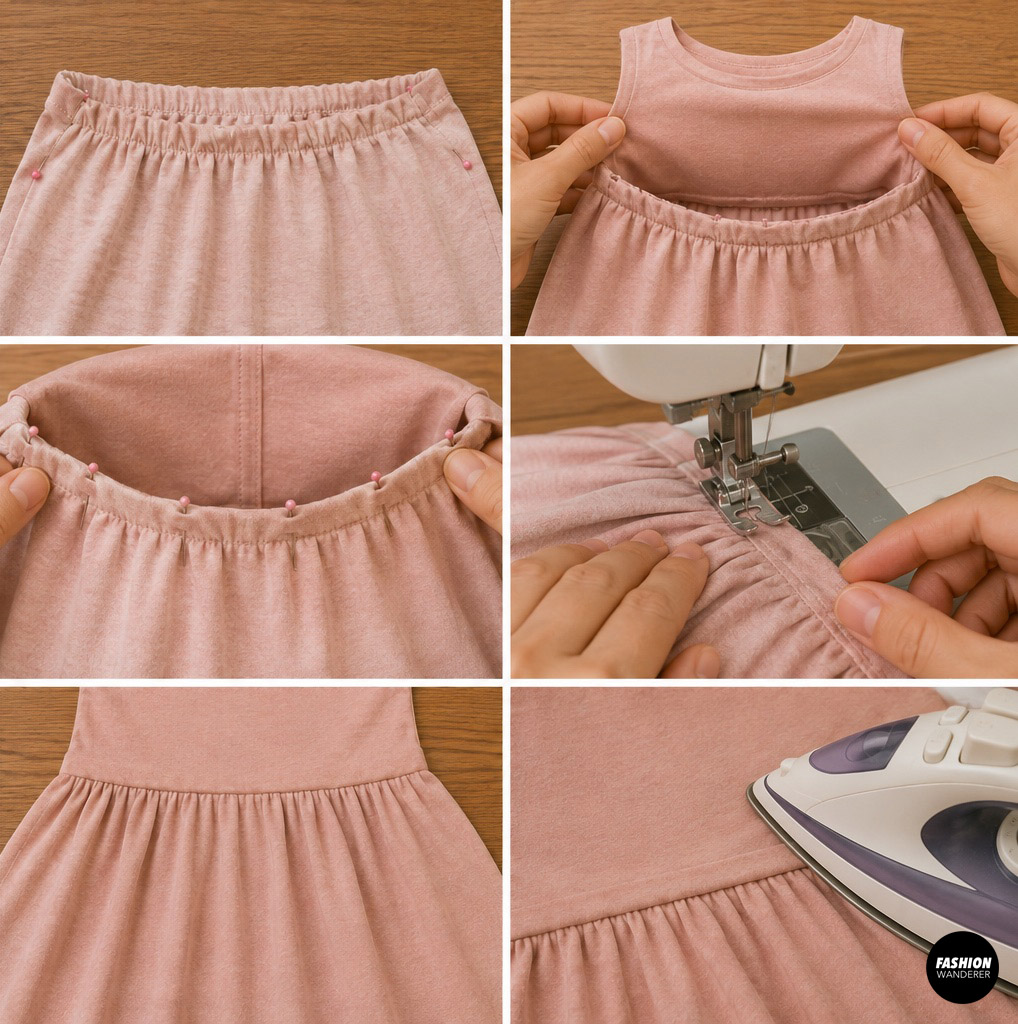
Turn the bodice right side out.
Keep the skirt wrong side out.
Insert the bodice inside the skirt so right sides are together.
Match:
- Side seams
- Center front
- Center back
Pin carefully.
Sew all the way around the waist using a stretch stitch.
Finish the seam with a serger or zigzag stitch.
Press the waist seam upward toward the bodice.
Step 9: Hem the Dress
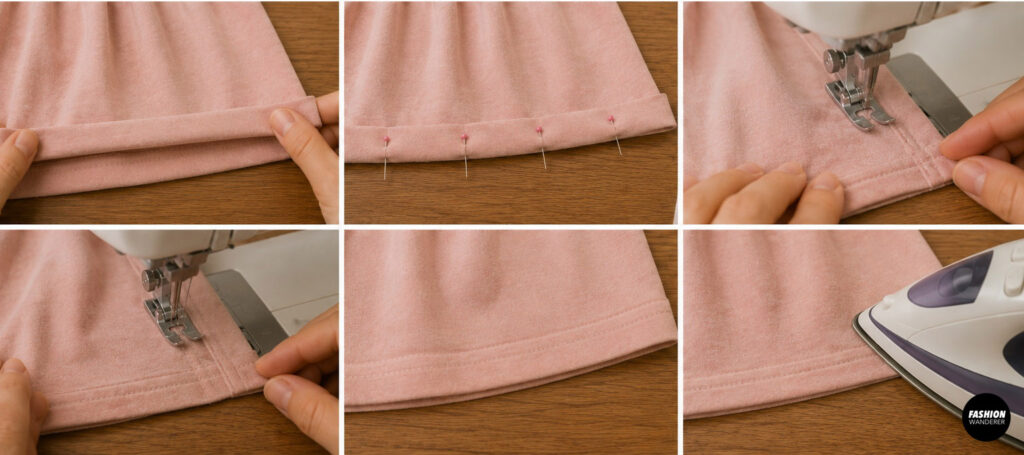
If you’re using the original T-shirt hem, you can leave it as-is.
Otherwise:
Fold the hem up ½ inch.
Press.
Fold another ½ inch.
Pin.
Topstitch using:
- Twin needle
- Stretch stitch
- Zigzag stitch
Press once more for a professional finish.
Step 10: Add Fun Details
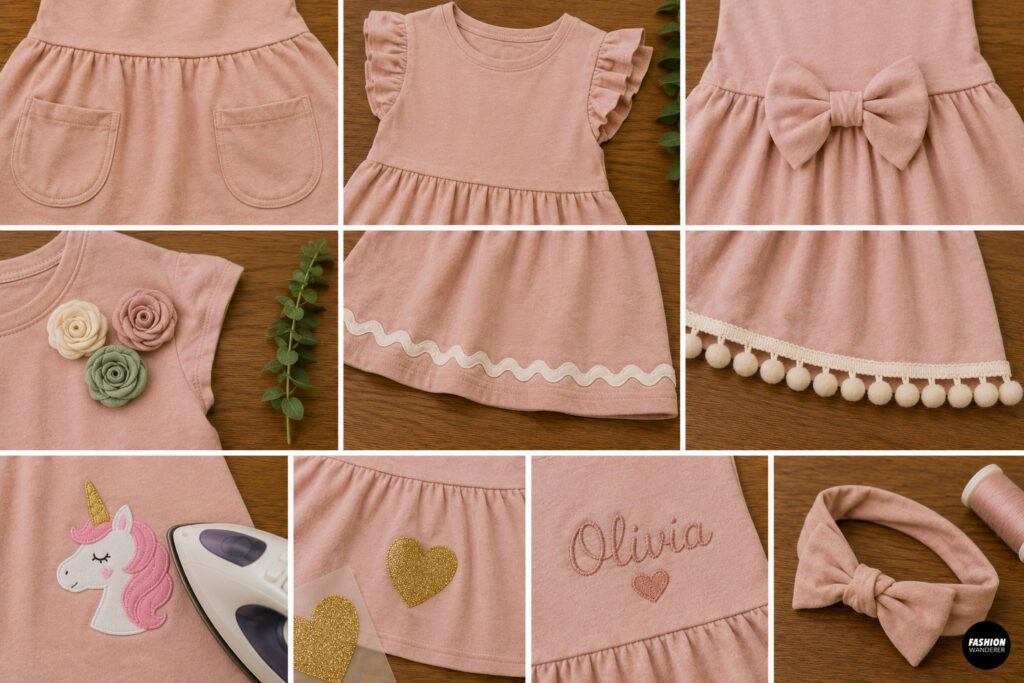
Now comes the creative part!
Personalize the dress with:
- Front pockets
- Ruffle sleeves
- Decorative bows
- Fabric flowers
- Ric-rac trim
- Pom-pom trim
- Iron-on appliqués
- Glitter heat transfer vinyl
- Embroidered name
- Matching fabric headband
Small details make every dress unique.
Beginner Sewing Tips
- Always use a ballpoint needle for knit fabrics.
- Avoid pulling the fabric while sewing.
- Press after every seam for a polished finish.
- Test your stitch on fabric scraps first.
- Use clips instead of pins if the knit fabric curls.
- Wash the finished dress before wearing to soften the seams.
Styling Ideas
Your finished twirly dress pairs beautifully with:
- White sneakers
- Canvas slip-ons
- Denim jacket
- Leggings
- Bike shorts underneath
- Sun hat
- Colorful hair bows
- Crossbody mini bag
For cooler weather, layer it over a long-sleeve shirt with tights and boots.
Frequently Asked Questions
What size T-shirt works best?
Adult XL through 3XL shirts provide enough fabric for most children’s dresses.
Can I use a graphic T-shirt?
Absolutely! Center the graphic on the bodice for a fun custom look.
Do knit fabrics fray?
No. Most jersey knit T-shirts won’t fray, making this project perfect for beginners.
Can I make it without a serger?
Yes. A regular sewing machine with a narrow zigzag or stretch stitch works perfectly.
How can I make the skirt even fuller?
Increase the skirt width to twice the bodice measurement or add gathered fabric panels.
Final Thoughts
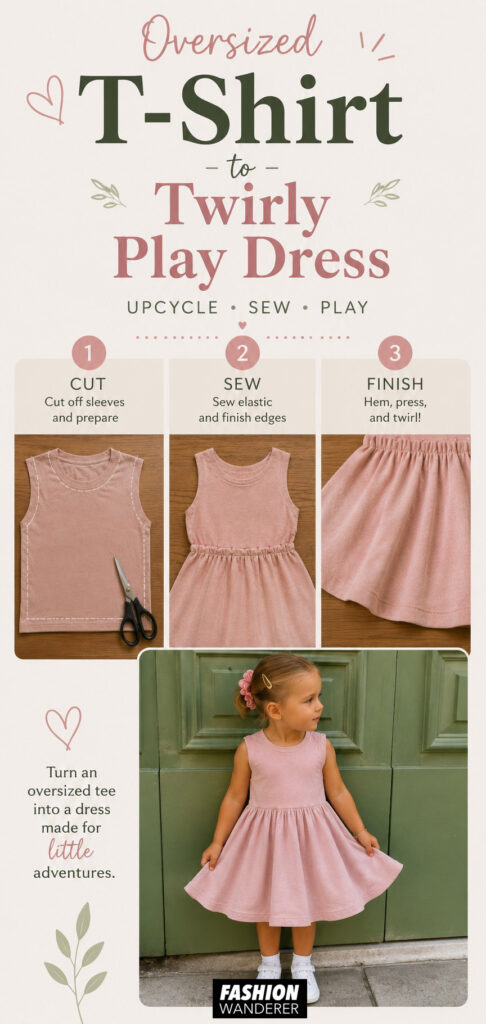
Transforming an oversized T-shirt into a twirly play dress is one of the easiest and most rewarding sewing upcycle projects for beginners. With just a few simple seams, you can create a soft, comfortable, and playful dress that girls will love to spin, twirl, and explore in.
Not only does this T-shirt into a dress project give new life to old clothing, but it also helps reduce fabric waste while encouraging creativity. Once you’ve made your first dress, you’ll be inspired to experiment with colorful graphic tees, striped shirts, seasonal prints, and fun embellishments to create a whole wardrobe of unique handmade play dresses. Happy sewing!