
Ready to give that old denim shirt a stylish new life? Turn it into a trendy halter top with this beginner-friendly, no-pattern-needed upcycle tutorial.
Whether you’re decluttering your closet or hunting for thrift-flip inspo, this project combines sustainable fashion with chic summer vibes. From casual daywear to music festival style, a DIY denim halter top is your go-to piece this season.
In this guide, you’ll learn how to transform a button-up denim shirt into a flattering halter silhouette with ties, clean finishes, and zero waste. Grab your scissors, and let’s upcycle!
Why You’ll Love This DIY Denim Halter Top
- Eco-Friendly & Budget-Smart: Reuse what you already own or thrifted.
- Custom Fit: Tailor the neckline and ties to your comfort.
- On-Trend Style: Perfect for summer layering or solo statement looks.
- No Pattern Required: Just basic sewing skills (or even hand-stitching!).
Step-by-Step Tutorial

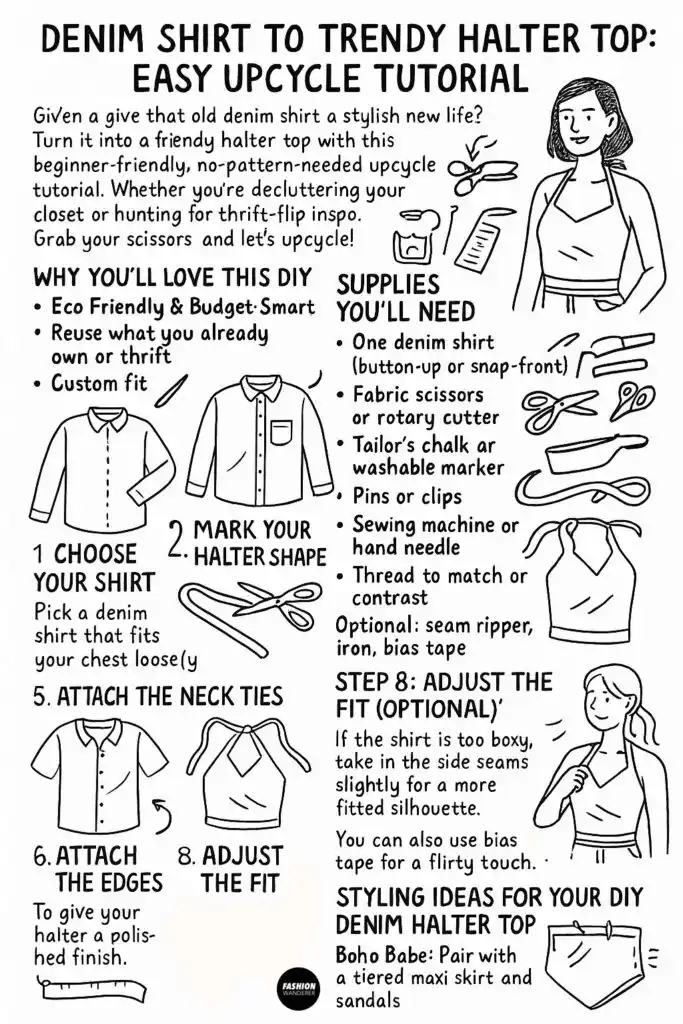
Supplies You’ll Need
- One denim shirt (button-up or snap-front)
- Fabric scissors or rotary cutter
- Tailor’s chalk or washable marker
- Measuring tape or ruler
- Pins or clips
- Sewing machine or hand needle
- Thread to match or contrast
- Optional: seam ripper, iron, bias tape
Step 1: Choose Your Shirt

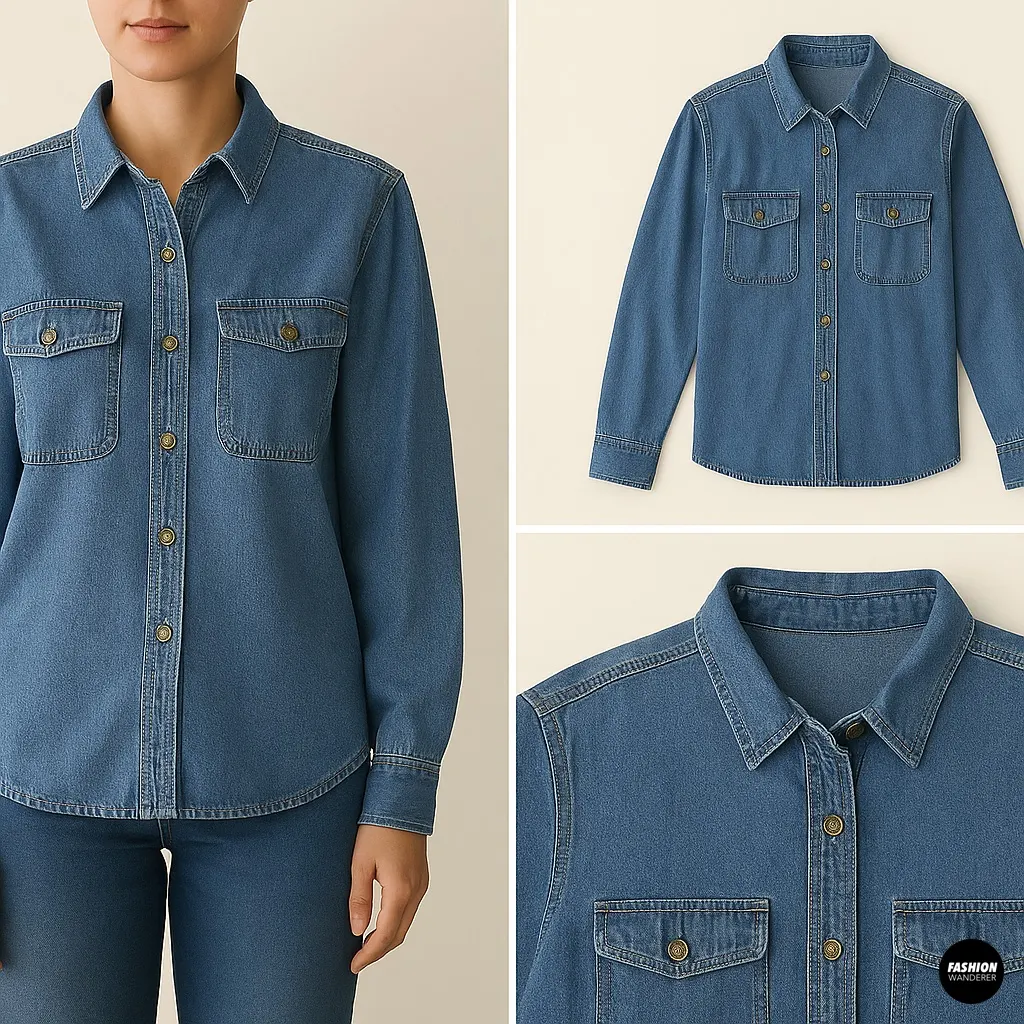
Pick a denim shirt that fits your chest loosely — either from your own closet or a thrift store. Light or medium-weight denim works best for comfort and ease of sewing. Avoid stretch denim or anything too stiff.
Pro tip: Short-sleeve and long-sleeve shirts both work — you’ll remove the sleeves in the next step.
Step 2: Remove the Sleeves

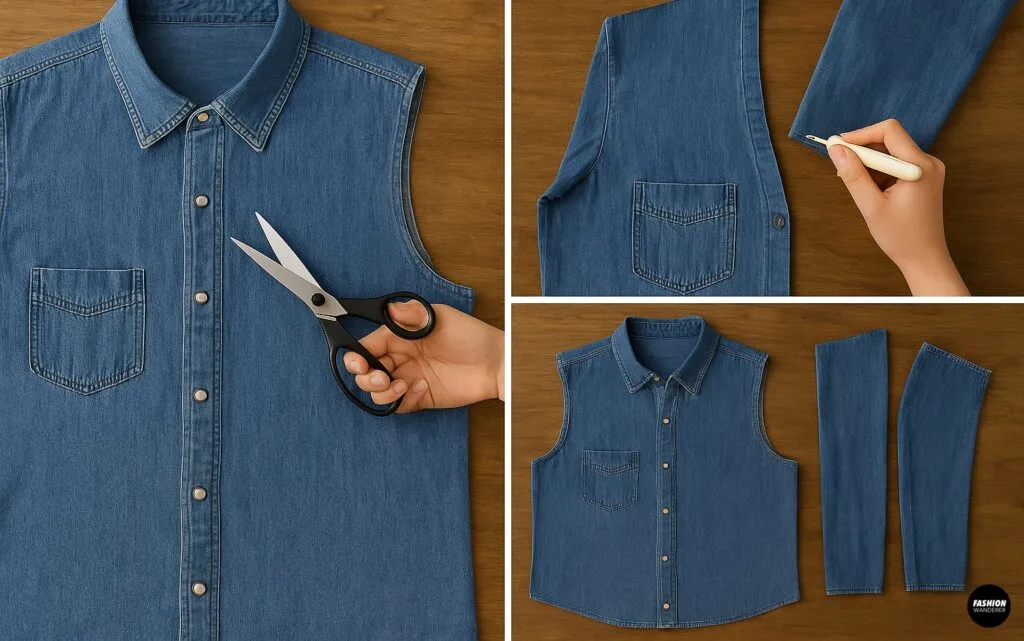
Use fabric scissors or a seam ripper to carefully cut off both sleeves along the armhole seams. Set the sleeves aside — you’ll use them to create halter ties later.
Make sure to smooth out the raw armholes for a clean base.
Step 3: Mark Your Halter Neckline
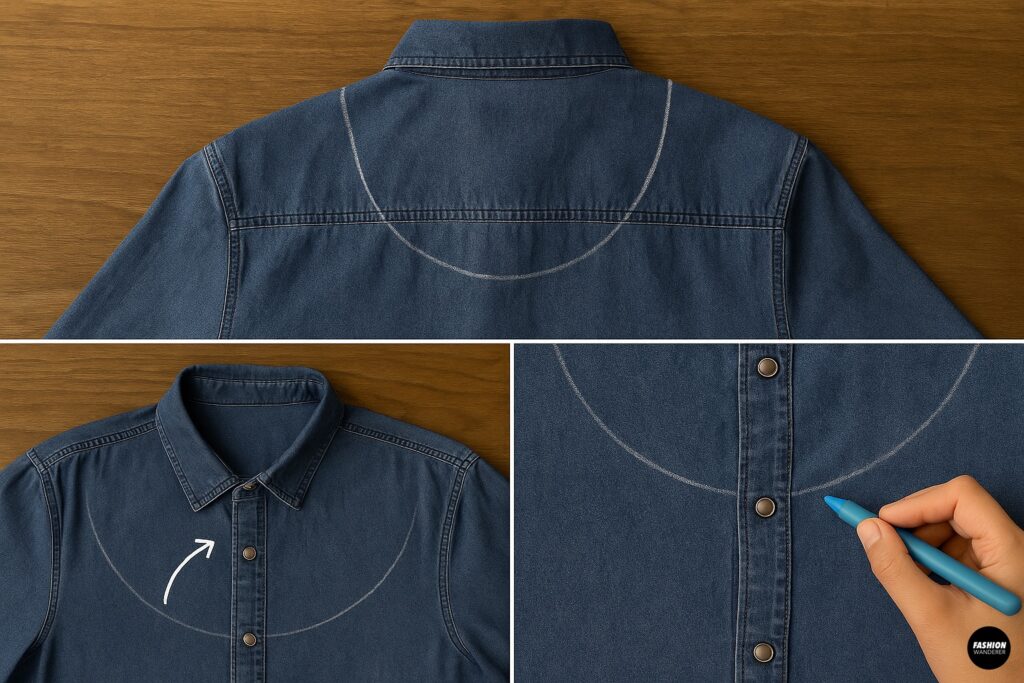

Lay the shirt flat, buttoned up, with the back facing down. Use tailor’s chalk to draw your halter shape. Here’s how:
- Start from each armhole seam (about 1” below the shoulder seam).
- Draw a curve toward the collar or just below it, creating a rounded halter neckline.
- The top back should remain mostly untouched.
Try it on and tweak the curve until it flatters your neckline.
Step 4: Cut the Halter Shape
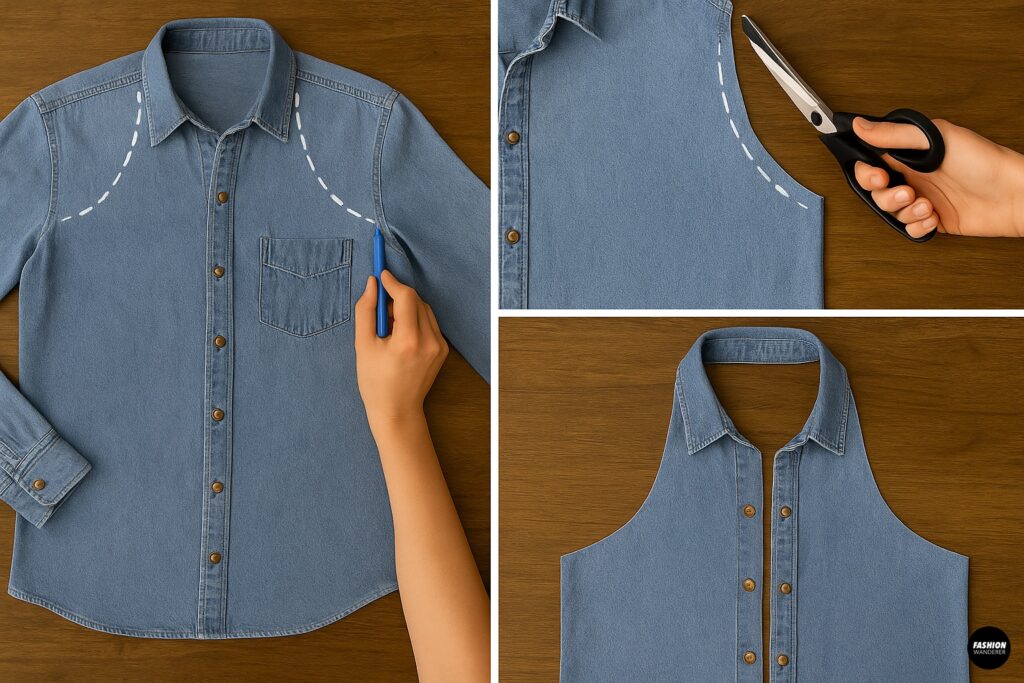

Cut along the chalk line through both front layers. You’ll be removing the collar and shoulder sections to reveal the halter neckline. Don’t worry about the raw edges — we’ll finish them next.
You should now have a sleeveless halter shape with an open neckline and original button placket down the front.
Step 5: Create the Neck Ties
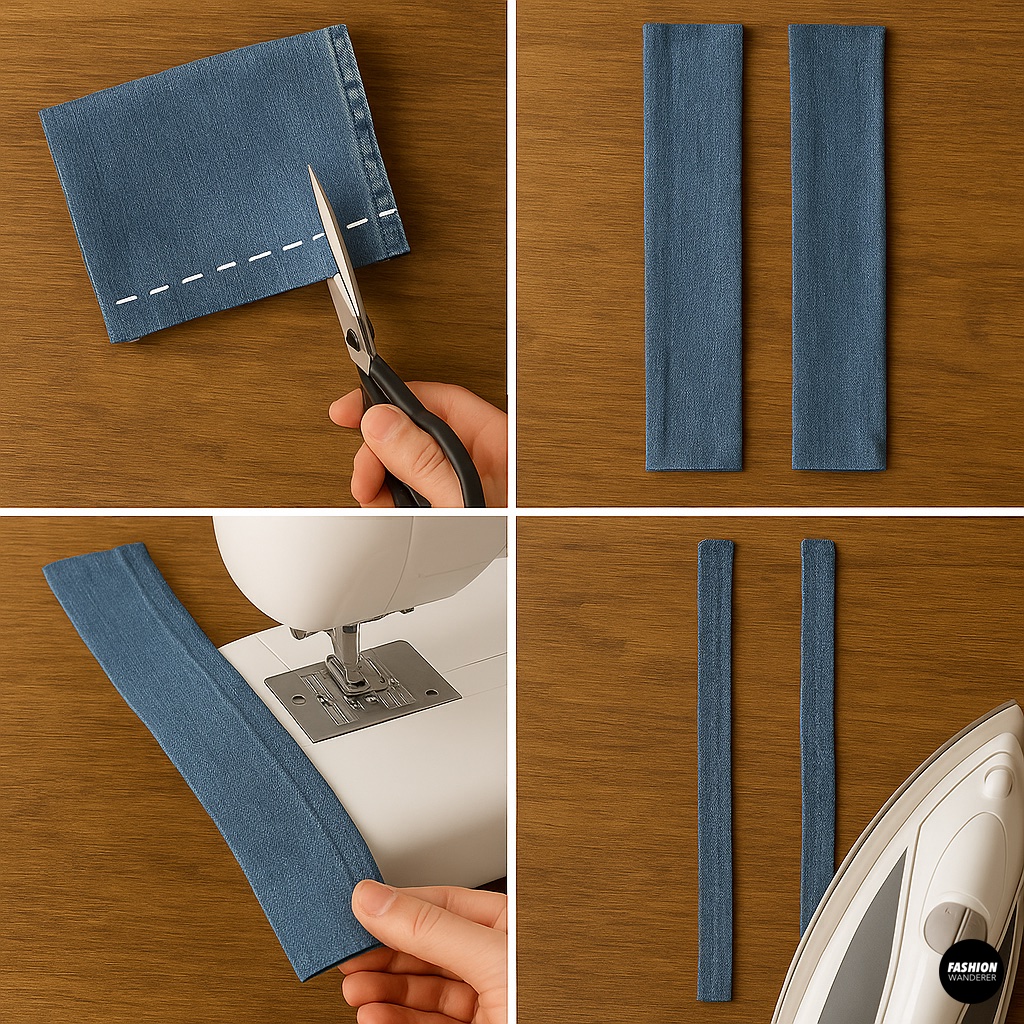

Grab one of the sleeves and cut two long strips, each about 2” wide and 14–18” long (depending on your preference).
Fold each strip in half lengthwise (right sides together), stitch along the edge, then turn right side out. Press with an iron for crisp, polished ties.
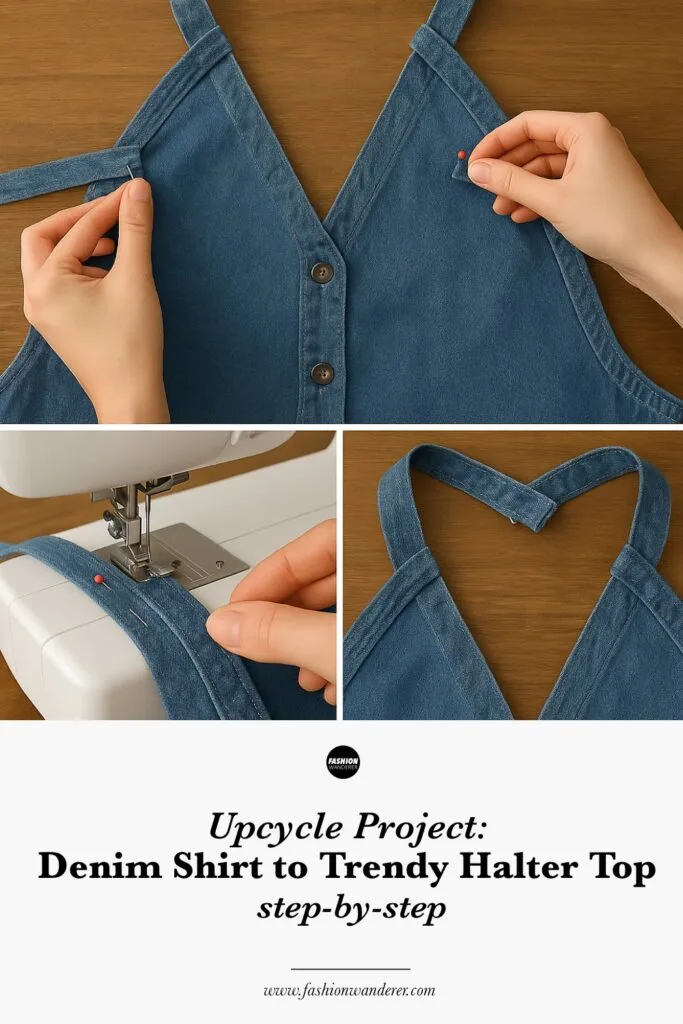
Step 6: Attach the Ties

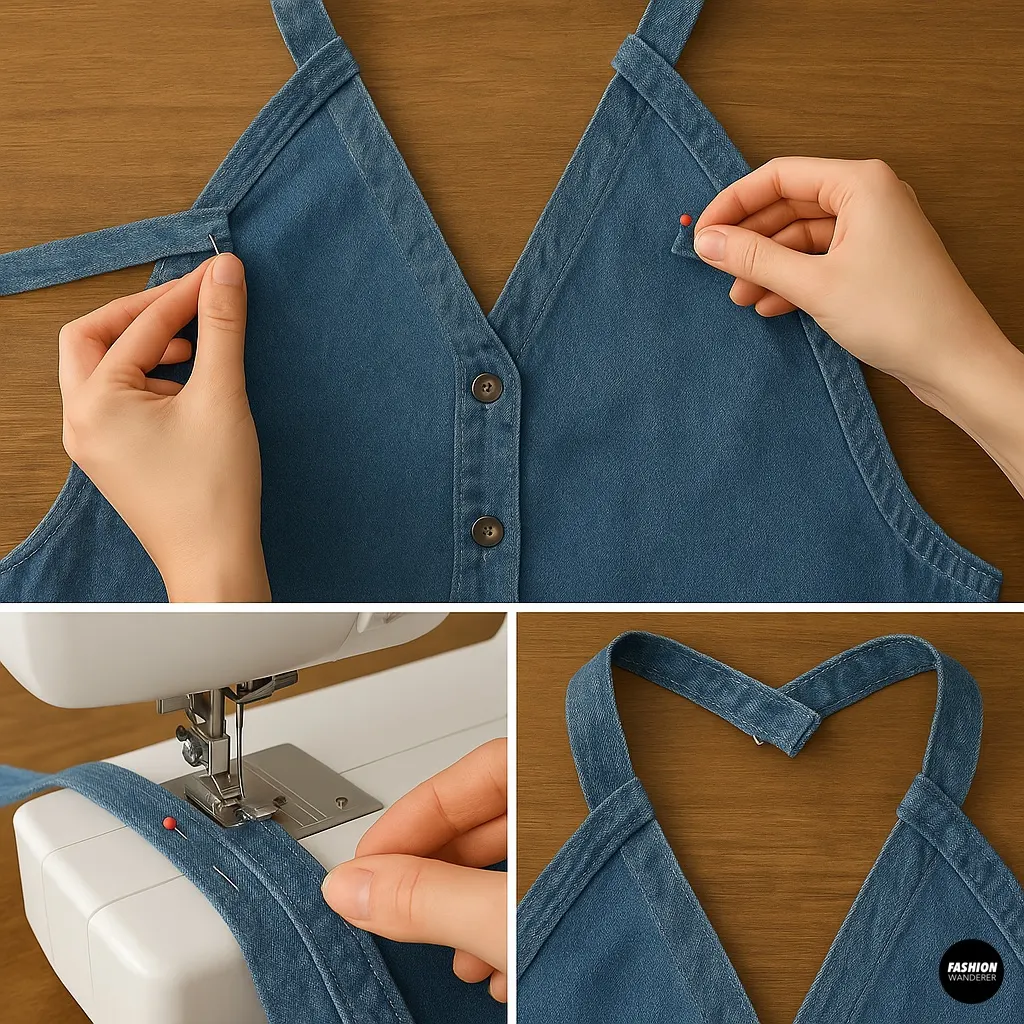
Pin each tie to the top front edges of your halter neckline. Sew securely in place using a straight stitch or zigzag for reinforcement.
These ties will fasten around your neck like a halter — adjust the length if needed before stitching.
Step 7: Finish the Edges

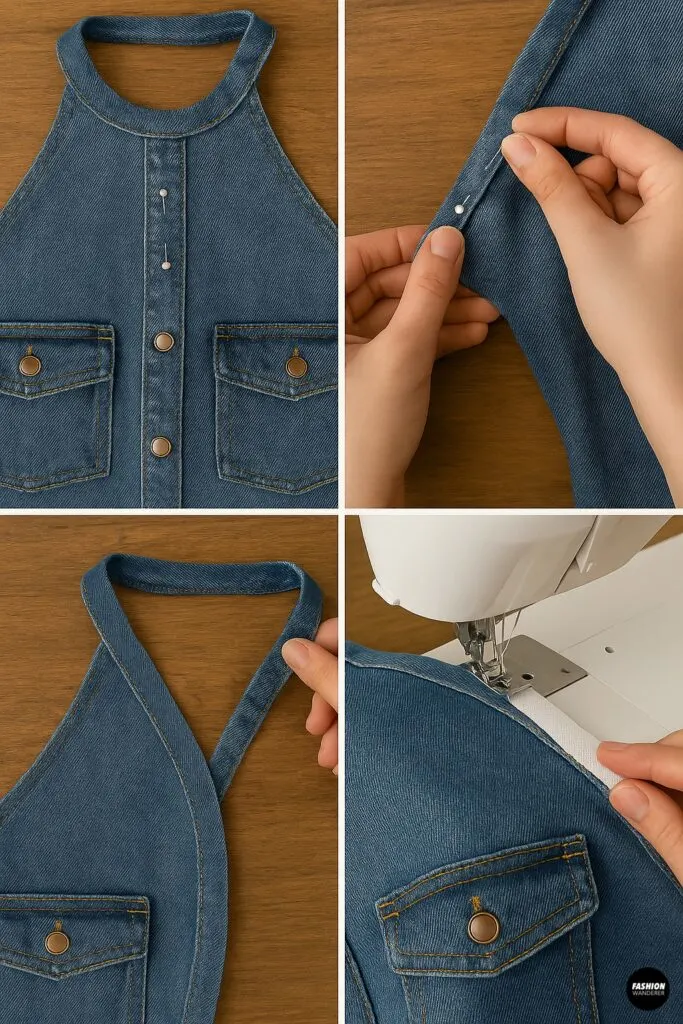
To give your halter a polished finish, fold the raw neckline edges inward by ¼”, then again by another ¼”. Pin and topstitch in place. You can also use bias tape for a cleaner finish or serge the edges if you prefer.
Repeat this step for the armholes as well — folding and stitching for a smooth look.
Step 8: Adjust the Fit (Optional)
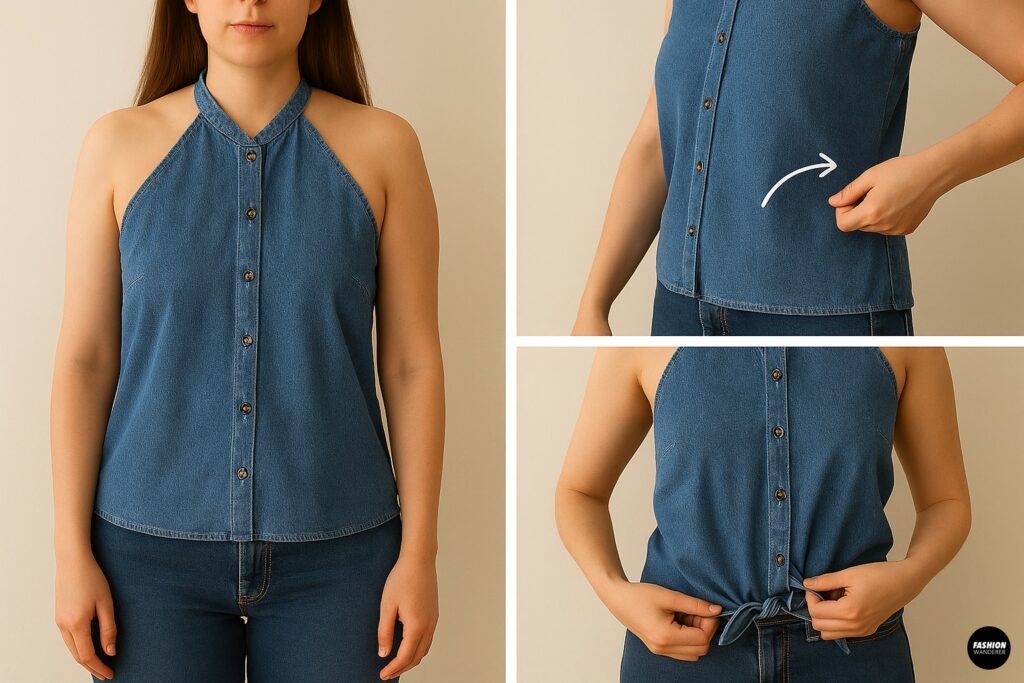

If the shirt is too boxy, take in the side seams slightly for a more fitted silhouette. You can also crop the hem or tie the bottom for a flirty touch.
Alternatively, leave the hem as-is for a relaxed, longer style.
Step 9: Press & Try It On!
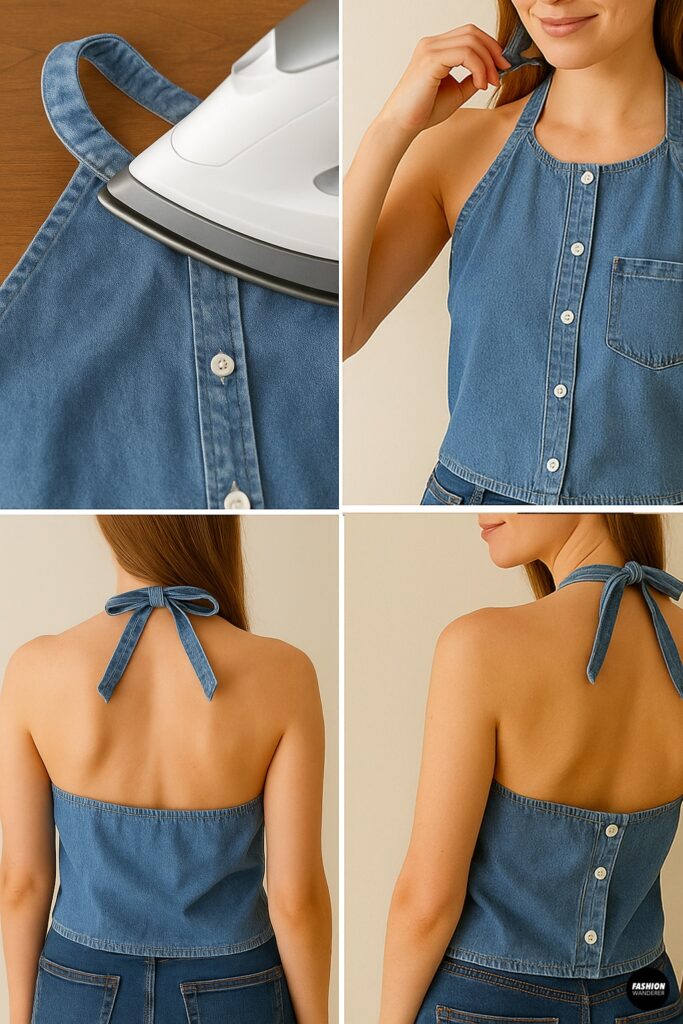

Give your new halter top a good press to crisp up the seams and ties. Try it on and adjust the necktie length as needed.
Layer over a bralette, bandeau, or go bold with an open back. Your upcycled halter top is ready to turn heads!
Styling Ideas for Your DIY Denim Halter Top
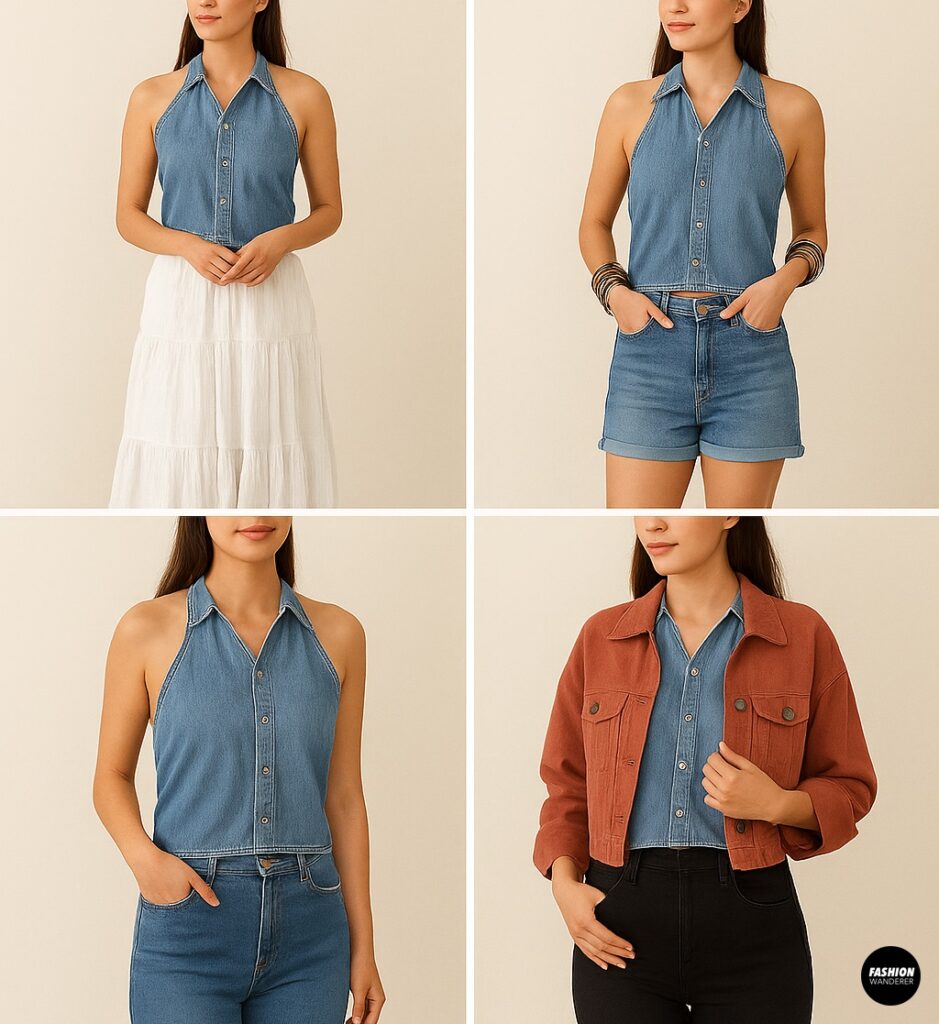
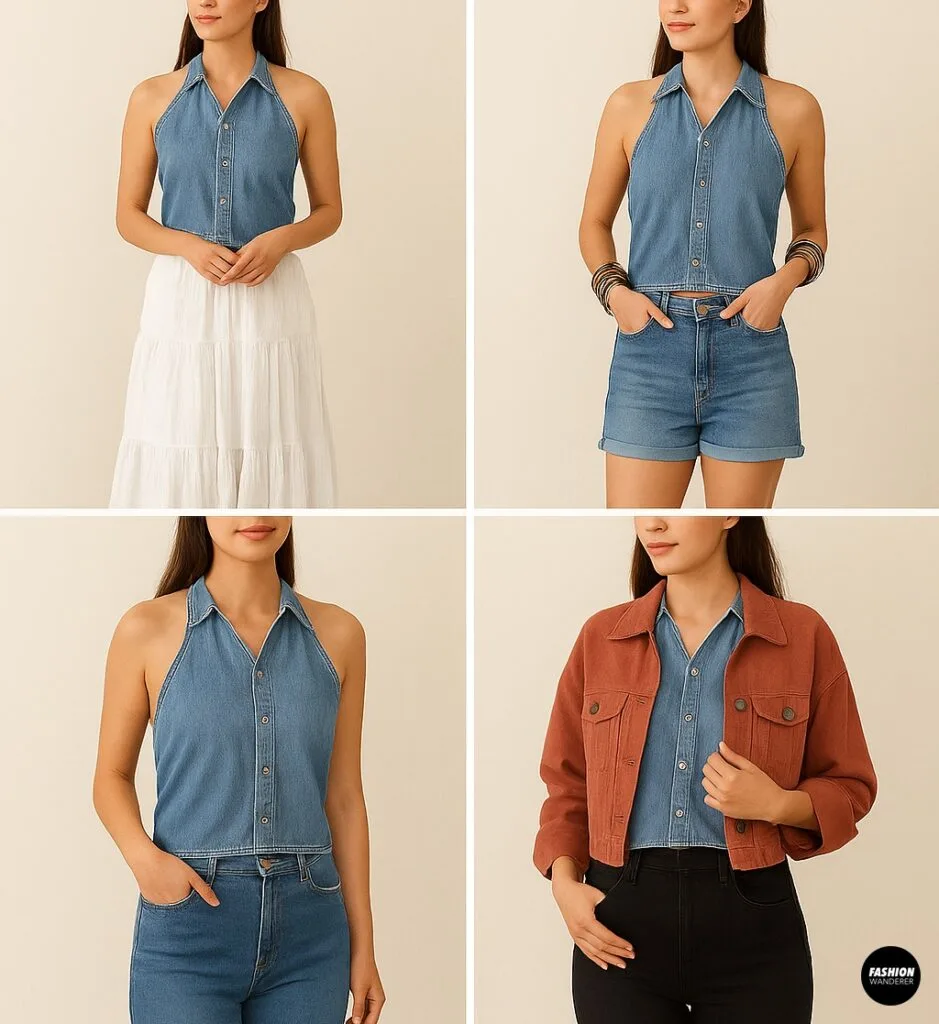
- Boho Babe: Pair with a tiered maxi skirt and sandals.
- Festival Look: Add cutoff shorts, ankle boots, and stacked bangles.
- Classic Casual: Style with high-rise jeans and sneakers.
- Layered Chic: Throw on a cropped jacket or kimono.
The denim fabric pairs well with both minimalist and maximalist styles — dress it up or down with ease!
Care Tips
- Wash in cold water on gentle cycle
- Air dry or tumble dry low
- Iron ties and neckline flat for best results
Final Thoughts: From Closet Castoff to Custom Statement Piece

There’s something incredibly satisfying about turning a forgotten denim shirt into something fresh, wearable, and uniquely yours. This upcycled halter top tutorial proves you don’t need a fancy pattern or tons of time to make fashion magic happen.
Whether you’re building your sustainable wardrobe or just love an easy weekend project, this DIY denim halter is one you’ll want to wear on repeat. Don’t forget to snap a pic and share your creation — #DIYHalterTop and @FashionWandererOfficial for a chance to be featured!
Trendy, Affordable Sewing Patterns for All Sizes


Tie Shoulder Jumpsuit Pattern


Palazzo Pants Sewing Pattern


Pocket Overall Romper Pattern


Wrap Maxi Skirt Sewing Pattern


Tie Back Top Sewing Pattern