
Learn how to tailor jeans at home with this detailed, beginner-friendly sewing tutorial. Whether you need to fix the length, taper the legs, or take in the waist, these easy-to-follow steps will help you achieve a perfect fit—and save money in the process!
Why You Should Tailor Your Jeans
Jeans are the backbone of any wardrobe—but off-the-rack denim rarely fits everyone perfectly. Tailoring your own jeans:
- Enhances comfort by eliminating bagginess or dragging hems.
- Extends the life of well-worn favorites rather than discarding them.
- Customizes style—from skinny to straight-leg, cropped to full length.
By learning how to tailor jeans, you’ll gain confidence with your sewing machine and create a personalized fit that flatters your body shape.
Step-by-Step: How to Tailor Jeans
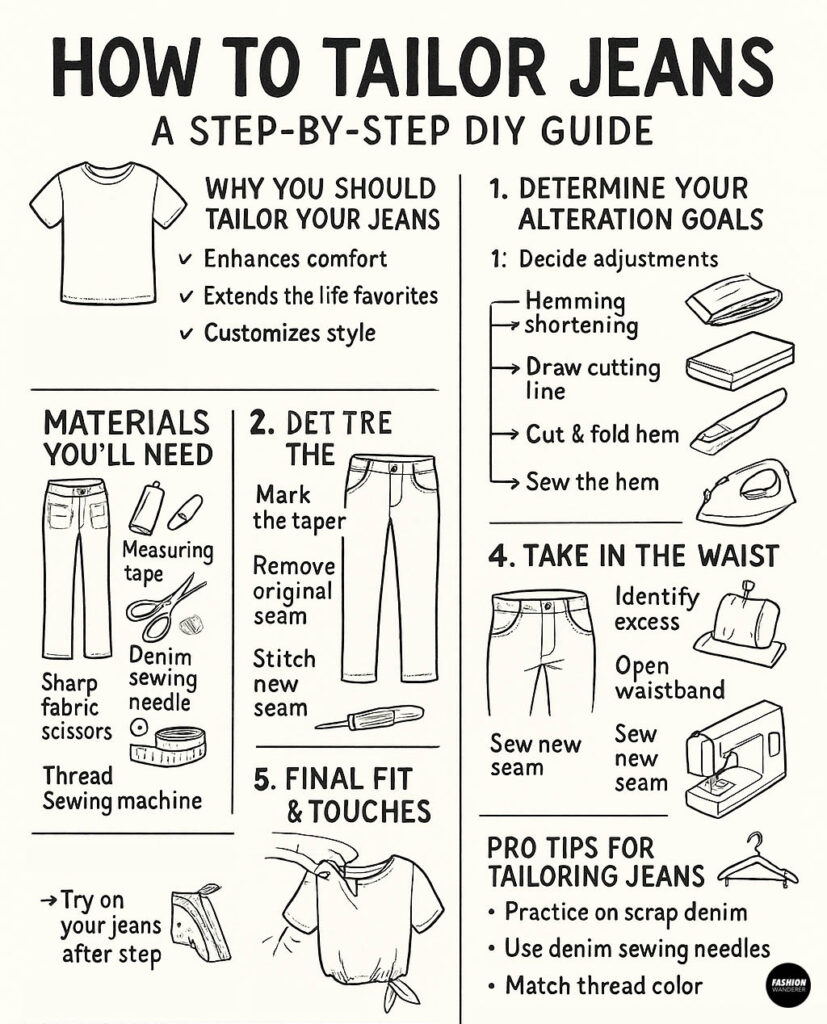
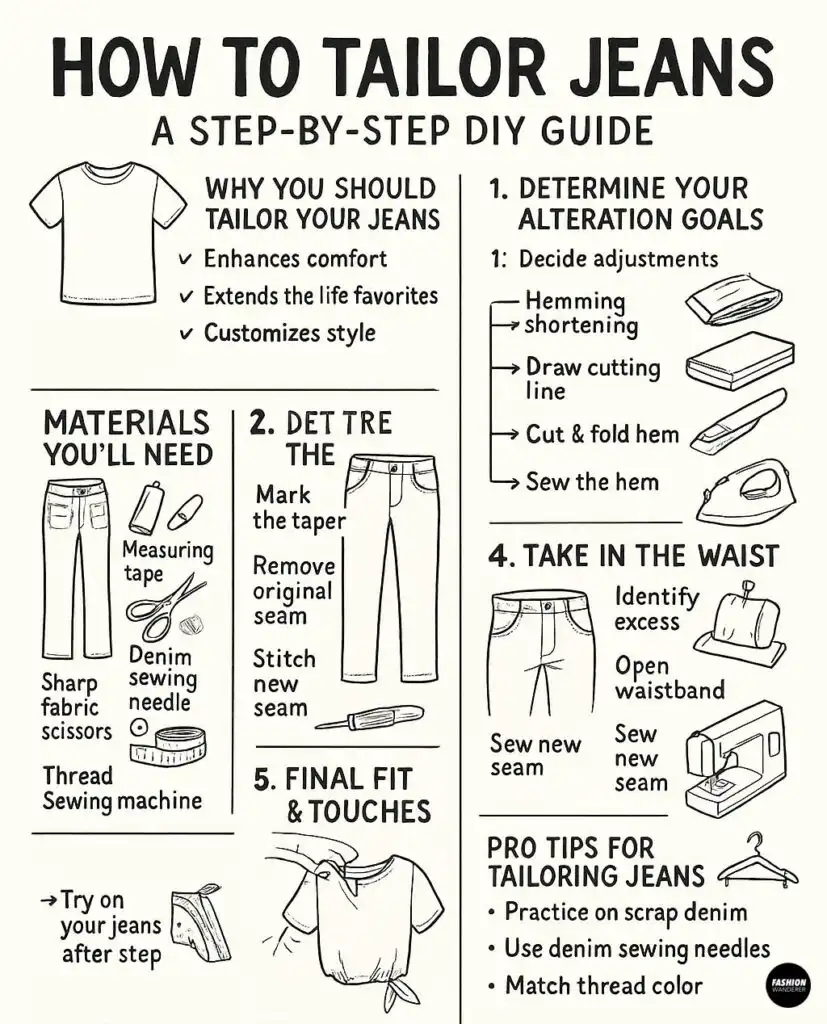
Materials You’ll Need

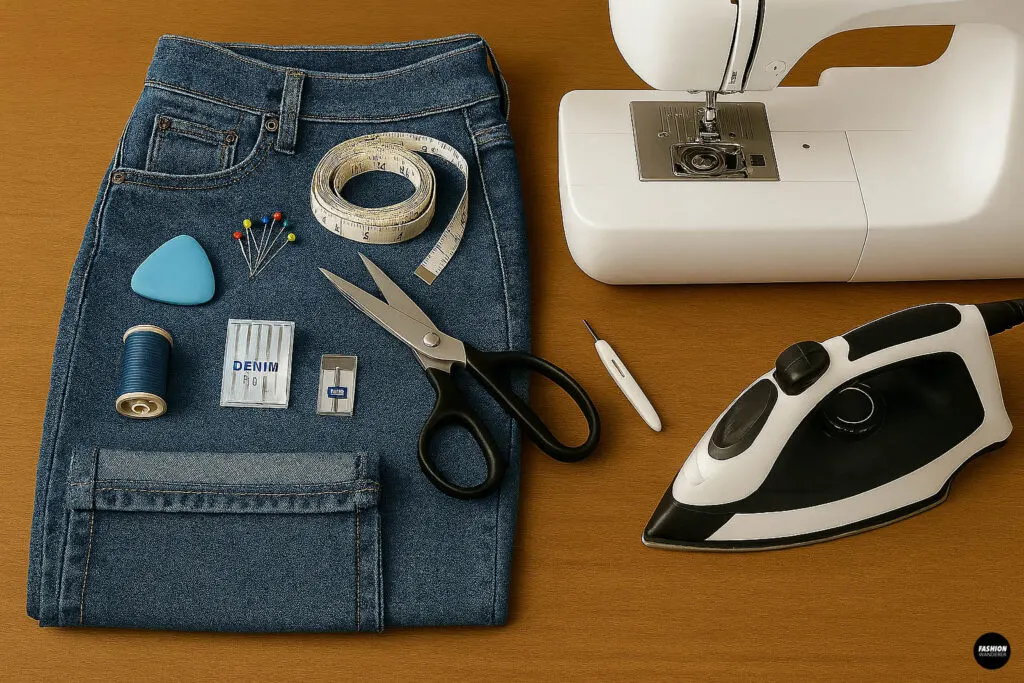
- Jeans (washed and dried)
- Measuring tape
- Tailor’s chalk or fabric marker
- Pins or fabric clips
- Sharp fabric scissors
- Denim sewing needle
- Thread (color-matched to your jeans)
- Sewing machine (with a denim-capable foot)
- Seam ripper
- Iron & ironing board
Step 1: Determine Your Alteration Goals


Before touching your sewing machine, decide which adjustments your jeans need:
- Hemming/shortening — for jeans that drag on the ground or bunch at the ankle.
- Tapering the legs — for a slimmer silhouette or to convert straight-leg to skinny fit.
- Taking in the waist — when the waistband gaps at the back or sides.
- Adjusting the rise — to shift between high-rise, mid-rise, or low-rise fits.
Focus on one alteration at a time for a cleaner, professional result.
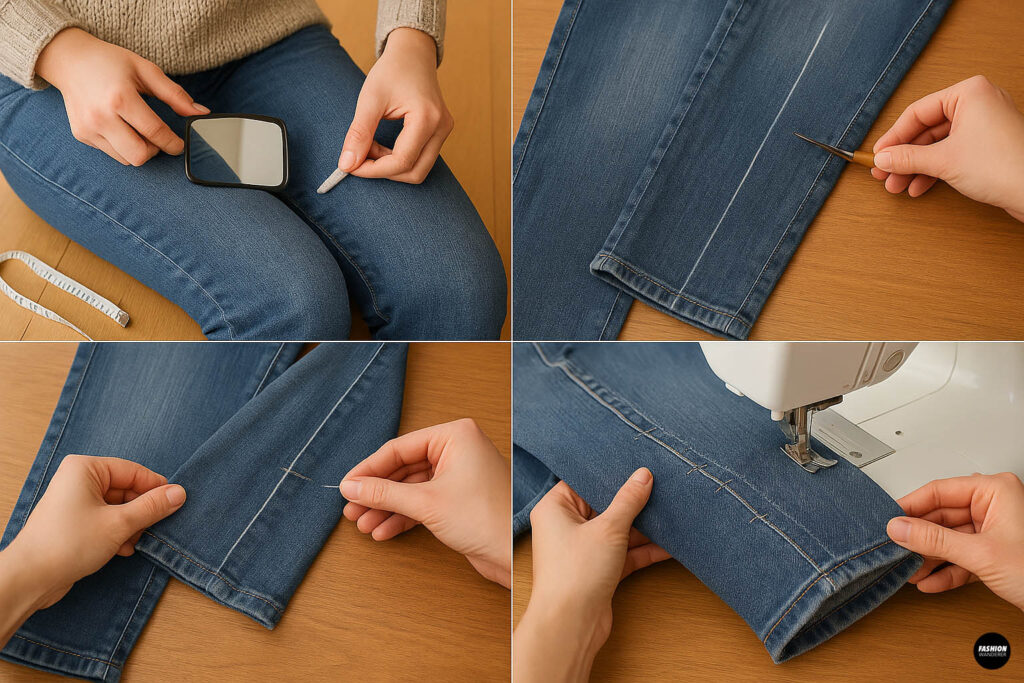
Step 2: Shortening & Hemming Jeans

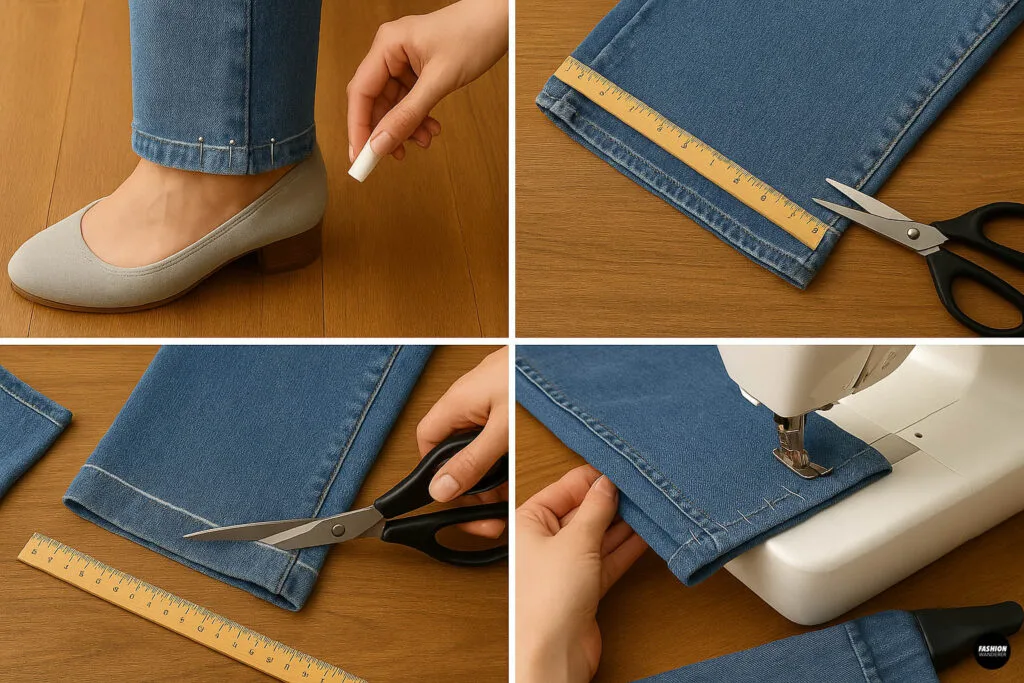
Measure Desired Length
- Try on your jeans with the shoes you plan to wear.
- Fold the hem up until you reach your ideal length.
- Mark with chalk at the point where the fold meets the pant leg—add 1” for the new hem allowance.
Prepare for Cutting
- Lay jeans flat on a table, smoothing out wrinkles.
- Draw a straight line across each leg at your chalk mark, using a ruler for precision.
Cut & Fold
- Cut along the line with fabric scissors.
- Fold the raw edge up twice—once to hide the raw edge, then again to enclose it.
- Press firmly with a hot iron to create a crisp hem fold.
Sew the New Hem
- Pin or clip the folded hem in place.
- Set your sewing machine to a straight stitch, 3 mm length.
- Stitch close to the inner fold, turning each leg inside out halfway to finish.
- Press again for a polished, factory-hem look.
Step 3: Tapering the Leg for a Slim Fit

Mark Your Taper
- Put on the jeans and pinch the excess fabric along the inner or outer leg seam.
- Hold a mirror or ask a friend to help mark how much you’d like to remove using chalk.
- Turn jeans inside out and draw a smooth taper line from the knee down to the ankle.
Remove the Original Seam
- Use a seam ripper to carefully unpick the existing hem and side seams for the length you’ll taper.
- Iron open the seams to flatten the fabric.
Stitch the Taper
- Pin along your drawn taper line on both legs.
- Sew a straight stitch about ¼” inside the chalk line.
- Try them on before cutting: the pinned seam will let you test the fit.
- Trim off the excess fabric, leaving a ½” seam allowance.
- Finish the raw edge with a zigzag stitch or serger to prevent fraying.
- Reattach and hem the bottom if you removed the hem in Step 2.
Step 4: Taking In the Waist

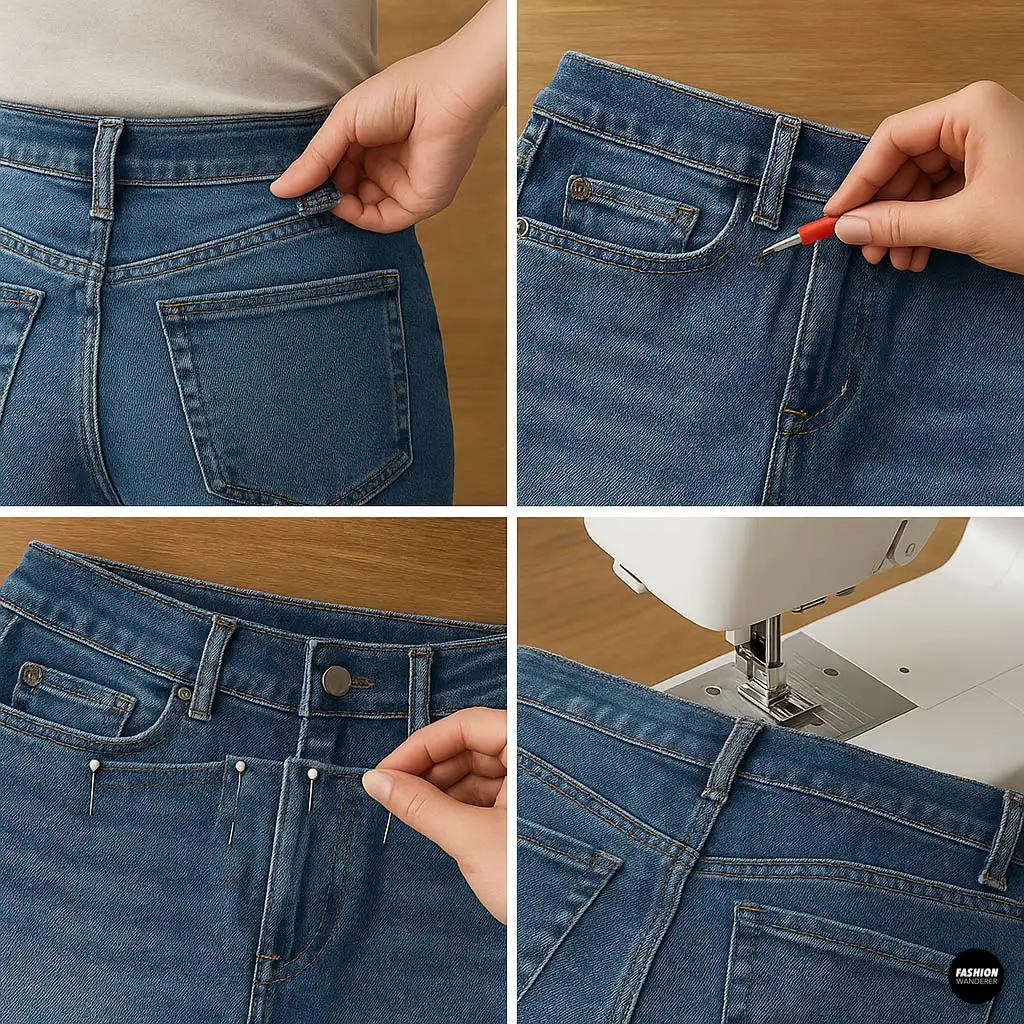
Identify Excess
- Fasten your jeans and stand in front of a mirror.
- Pinch the excess at the waistband’s back center or side seams.
- Mark the amount you want to remove (typically ½”–1” per side).
Open the Waistband
- Unpick the waistband stitching about 3” on either side of the back center seam using a seam ripper.
- Remove the belt loop(s) intersecting the seam and set aside.
Sew the New Seam
- Fold in the marked amount on each side and pin through all layers (including facing).
- Sew a straight stitch across the back seam, blending into the existing seams smoothly.
- Trim excess fabric and finish edges.
- Reattach belt loops and stitch the waistband back down.
- Press for a flat, professional finish.
Step 5: Final Fit & Finishing Touches

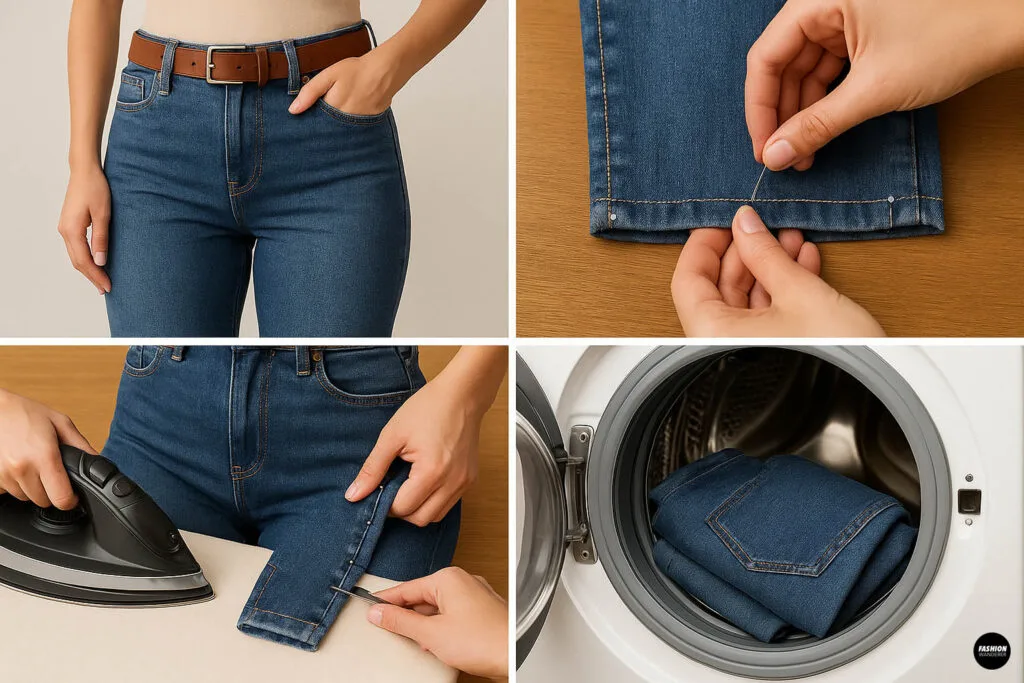
- Try on your tailored jeans with a belt—check for gaps, bunching, or uneven hems.
- Make minor tweaks with additional pinning and stitching if needed.
- Press all seams and hems thoroughly for a crisp look.
- Wash and dry on a gentle cycle to set your alterations in place.
Pro Tips for Tailoring Jeans

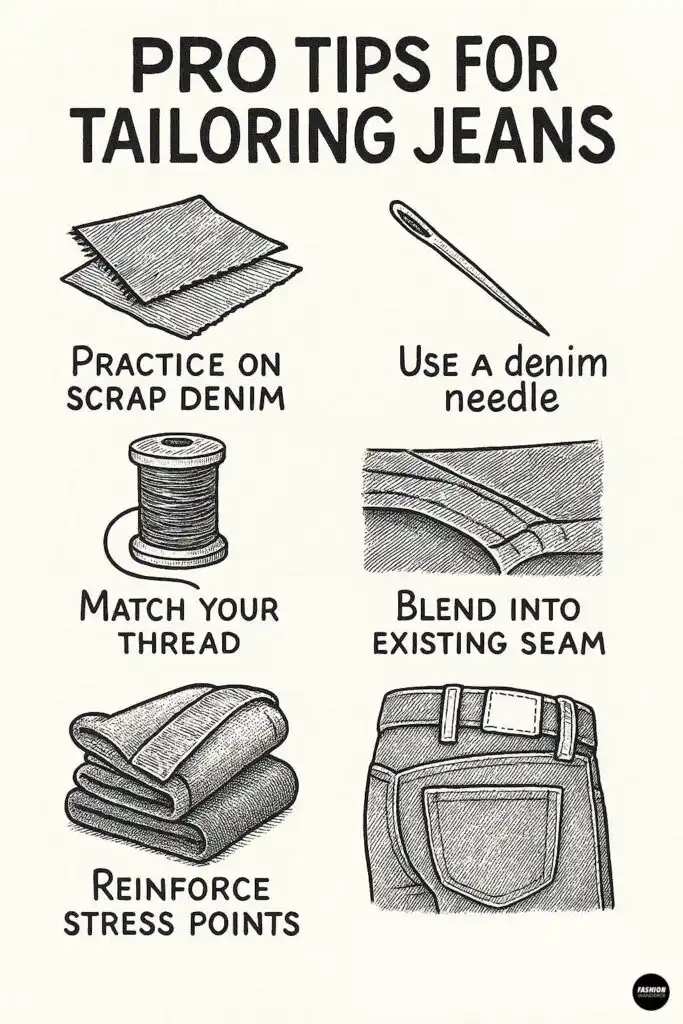
- Practice on scrap denim before working on your favorite pair.
- Use denim needles in your sewing machine to prevent skipped stitches.
- Match your thread to the jeans’ topstitch color for an invisible finish.
- Blend stitching lines by tapering stitches into existing seams.
- Reinforce stress points (pockets, belt loops) with bar tacks or backstitching.
Why DIY Jeans Alteration Pays Off


- Saves money compared to professional tailoring fees.
- Custom fit ensures comfort and confidence every time you wear them.
- Environmental impact: upcycle old jeans rather than buying new.
By mastering how to tailor jeans, you’ll unlock endless possibilities to refashion your denim collection. From precise hemming to slimming leg seams and perfecting that waist, DIY denim alteration is an invaluable skill for any closet curator.
Ready to get started? Pull out your favorite pair of jeans, gather your tools, and enjoy creating a custom fit that feels made just for you!
Trendy, Affordable Sewing Patterns for All Sizes


Tie Shoulder Jumpsuit Pattern


Palazzo Pants Sewing Pattern


Pocket Overall Romper Pattern


Wrap Maxi Skirt Sewing Pattern


Tie Back Top Sewing Pattern