
Transform your favorite tees into polished, layered looks in minutes—no sewing machine required!
Is your go-to T-shirt missing that finishing touch? A crisp collar instantly elevates a casual tee into a chic, put-together top you’ll wear on repeat.
The best part? You don’t need to break out your sewing machine—or even thread a needle—to add a faux collar to any T-shirt upcycle. With just a few simple supplies and these step-by-step tutorials, you can customize your Tee wardrobe in under 15 minutes.
Why You’ll Love Faux Collars
- Instantly elevated style: Get the look of a layered button-down without the bulk.
- No sewing skills required: Perfect for beginners—just glue and clip.
- Budget-friendly refresh: Revive plain or stretched-out tees for pennies.
- Endless customization: Mix and match collar shapes, fabrics, and trims.
DIY Faux Collar on Any Tee

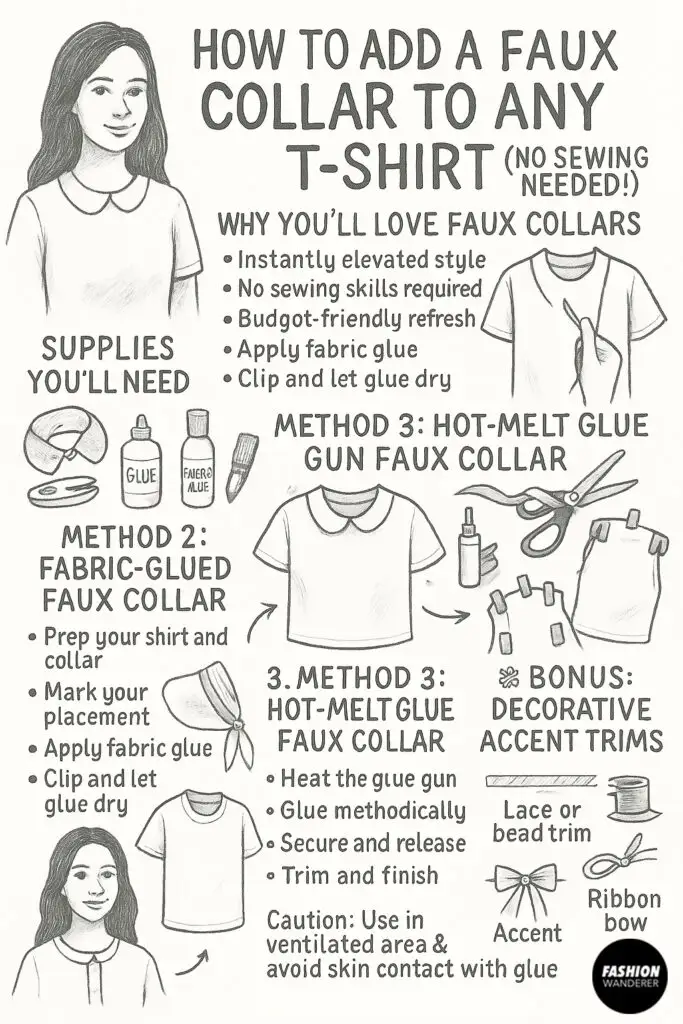
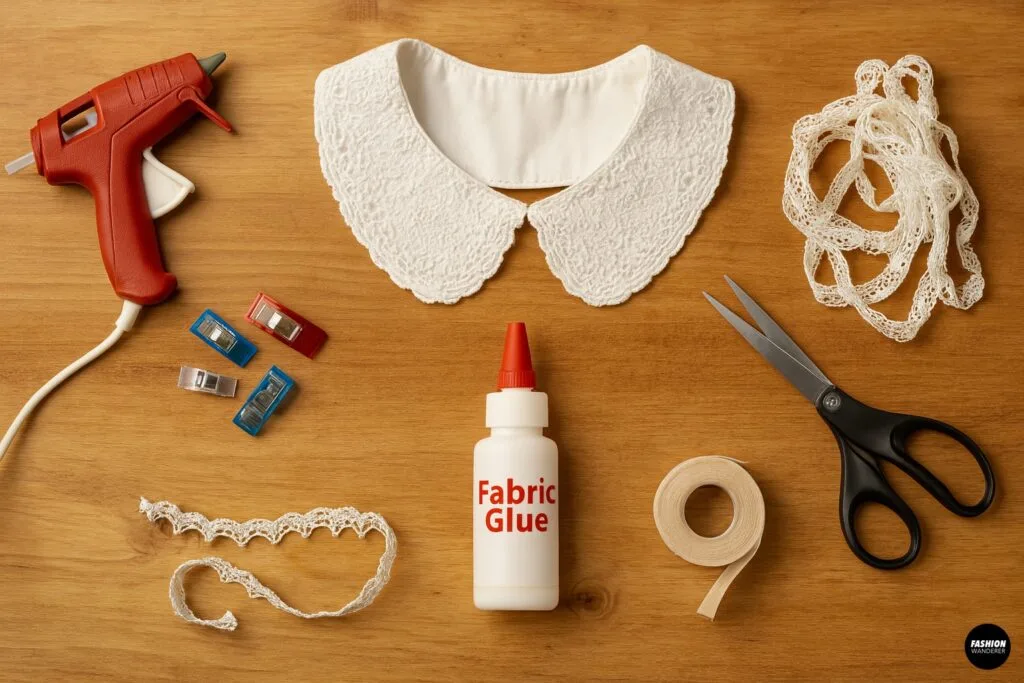
Supplies You’ll Need

| Item | Why You Need It |
| Pre-made detachable collars | Available in cotton, lace, knit, and more |
| Fabric glue or hot-melt glue gun | Bonds collar to shirt without stitches |
| Fabric clips or small safety pins | Holds collar in place while glue dries |
| Optional: decorative trim | Lace, ribbon, or beaded trim for accent |
| Scissors | Trim excess fabric or glue strings |
| Iron-on hem tape (optional) | Reinforce neckline for extra stability |
Pro Tip: Choose a collar that complements your tee’s fabric weight—a lightweight knit collar works best on jersey tees, while crisp cotton collars pair nicely with thicker shirts.
Method 1: The Quick-Clip Faux Collar

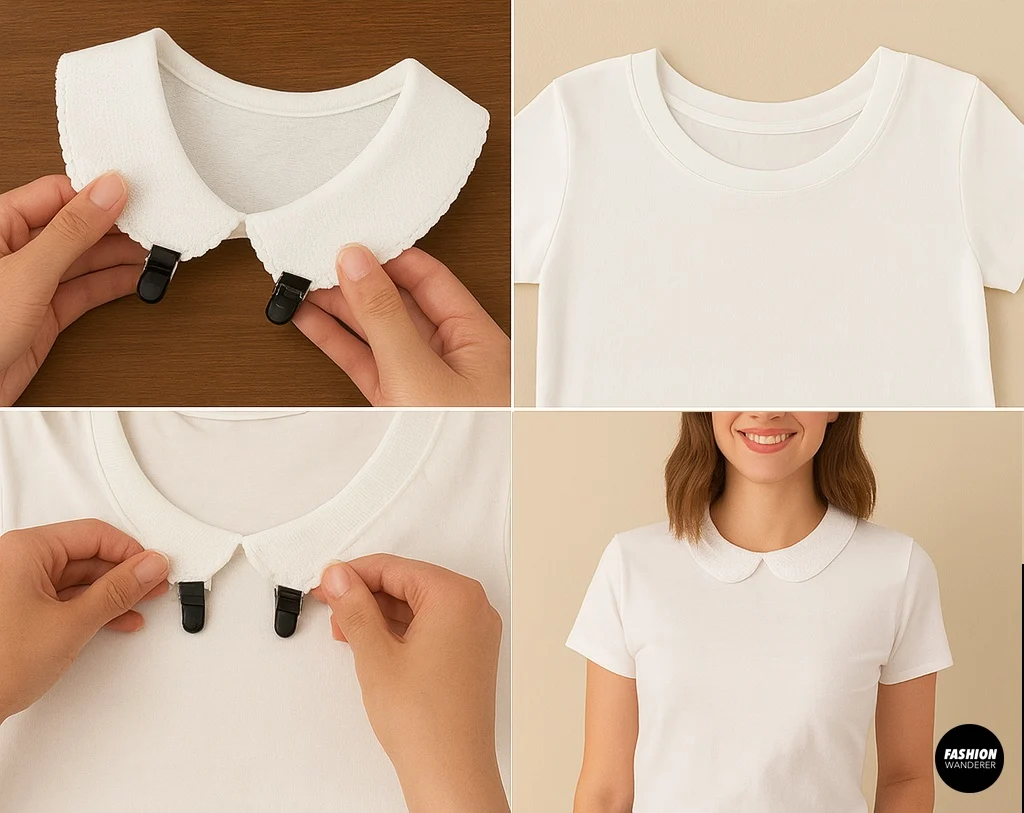
For super-fast styling, use a detachable collar with built-in clips or adjustable straps.
- Choose your collar
- Select a detachable collar in your desired style (Peter Pan, pointed, scalloped).
- Ensure the clips or straps match your tee’s neckline width.
- Position the collar
- Lay your T-shirt flat on a table.
- Center the collar around the neckline, with the front edges resting at your collarbone level.
- Clip in place
- Attach the built-in clips or straps evenly spaced around the neckline.
- Tug gently to confirm it sits flat against the shirt.
- Style and go
- Pop the tee on and adjust the collar so it peeks neatly above your neckline.
- Wear with jeans, leggings, or a skirt for an instant style upgrade!
Why It Works: No glue or tools—just clip and wear, perfect for quick outfit swaps.
Method 2: Fabric-Glued Faux Collar
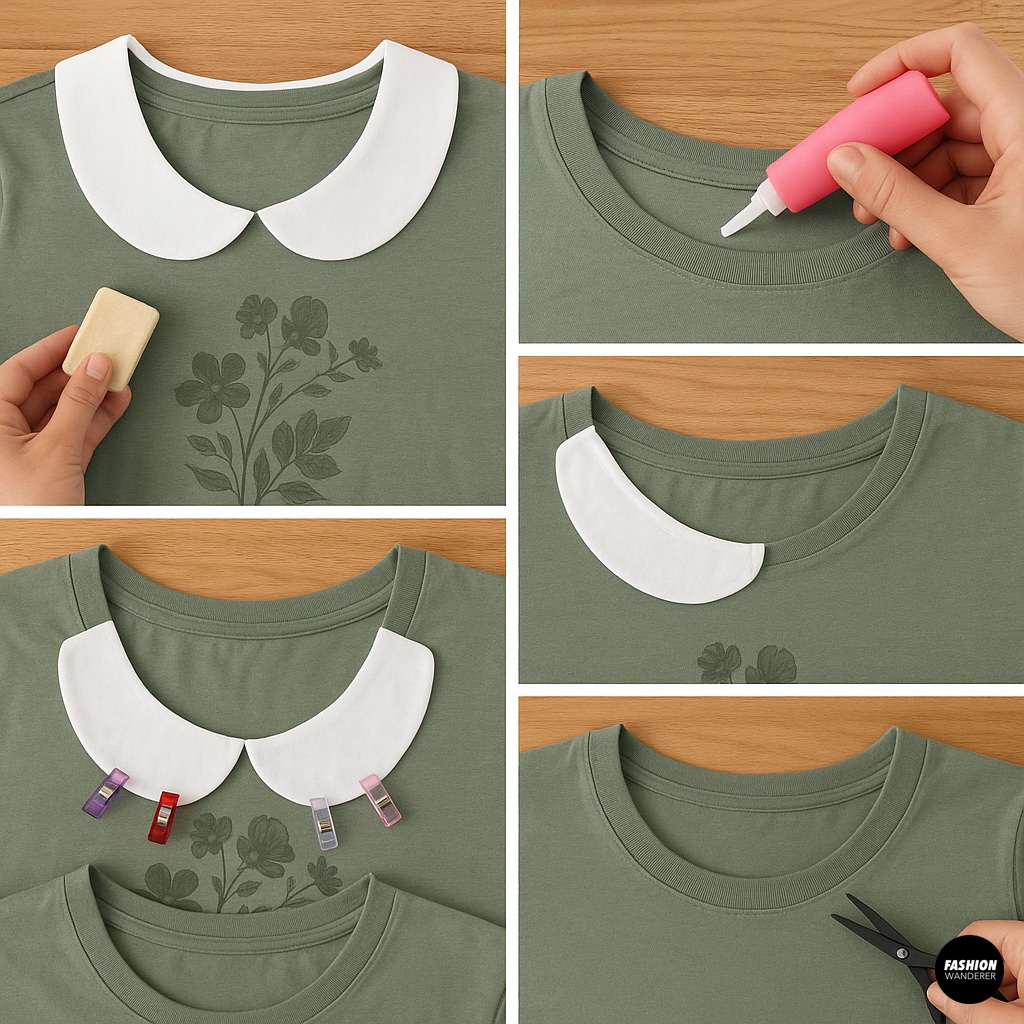
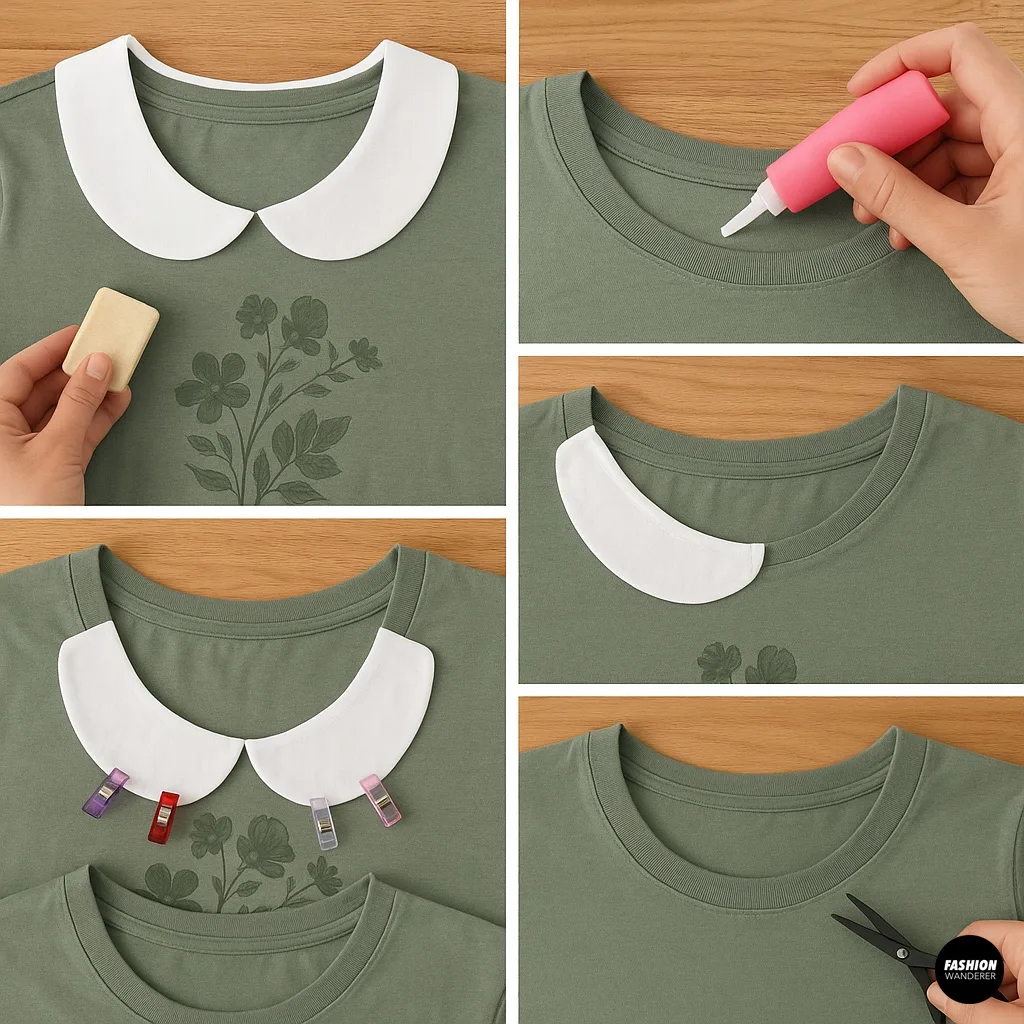
This technique uses fabric glue for a semi-permanent collar that feels integrated into your tee.
- Prep your shirt and collar
- Wash and dry both pieces to remove sizing or residue.
- Lay the T-shirt flat, printing side up.
- Mark your placement
- With tailor’s chalk or a washable marker, outline where the collar will sit (usually about 1″ inside the raw neckline seam).
- Use a ruler to ensure even spacing.
- Apply fabric glue
- Flip the collar wrong-side-up and run a thin bead of fabric glue along the outer edge only.
- Avoid over-gluing; a small amount ensures a neat bond.
- Adhere collar to shirt
- Carefully align the glued edge with your chalk guideline.
- Press firmly and clip every 1–2″ with fabric clips or pins.
- Let glue dry
- Follow the glue manufacturer’s instructions (typically 30–60 minutes).
- Remove all clips once the bond is secure.
- Tidy up
- Trim any stray glue strings or uneven edges with scissors.
- Flip your tee right-side-out; the collar should appear seamlessly attached.
Pro Tip: For extra durability, apply a thin line of iron-on hem tape underneath the glued edge before attaching the collar.
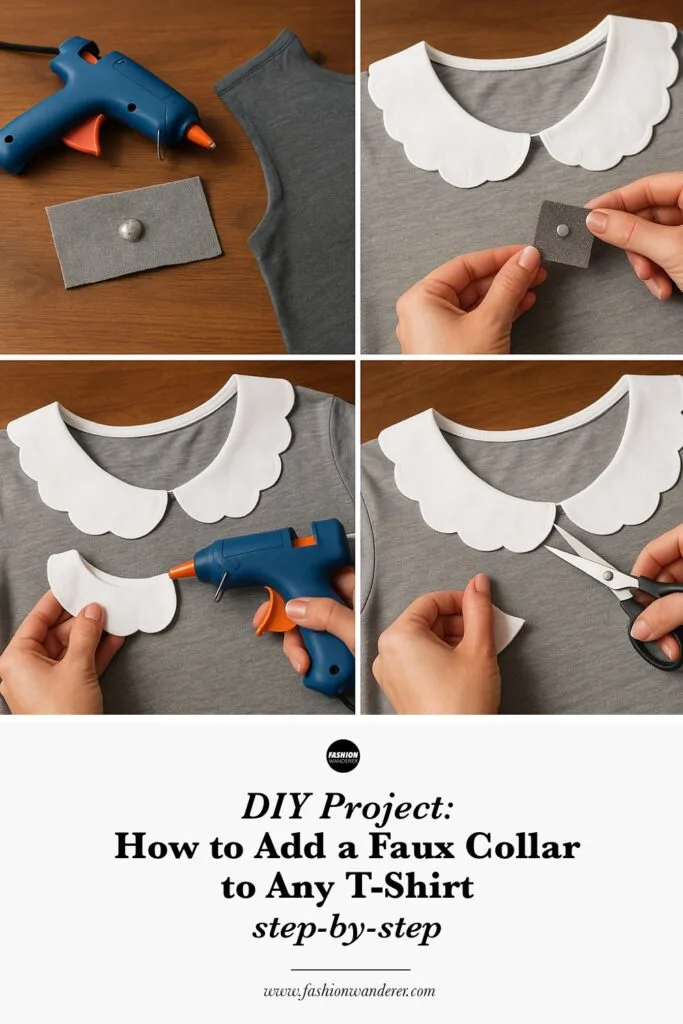
Method 3: Hot-Melt Glue Gun Faux Collar


When you need an ultra-quick fix that dries in seconds, a hot-melt glue gun is your best friend.
- Heat the glue gun
- Plug in and allow the glue gun to reach operating temperature (usually 3–5 minutes).
- Test glue placement
- On a scrap of fabric, practice a small dot of hot glue to gauge drying speed and bond strength.
- Glue methodically
- Squeeze a thin line of hot glue along the edge of the collar piece.
- Quickly press into position on the T-shirt neckline, smoothing with your fingers (use a scrap cloth to protect from glue burns).
- Secure and release
- Hold each section for 5–10 seconds until the glue sets.
- Work in small sections—hot glue sets rapidly, so pace yourself.
- Trim and finish
- Once cooled, carefully trim any strings or bumps with scissors.
- Inspect the bond; add more spots of glue if any edges lift.
Caution: Always use hot-melt glue in a well-ventilated area and avoid direct skin contact with molten glue.
Bonus: Decorative Accent Trims

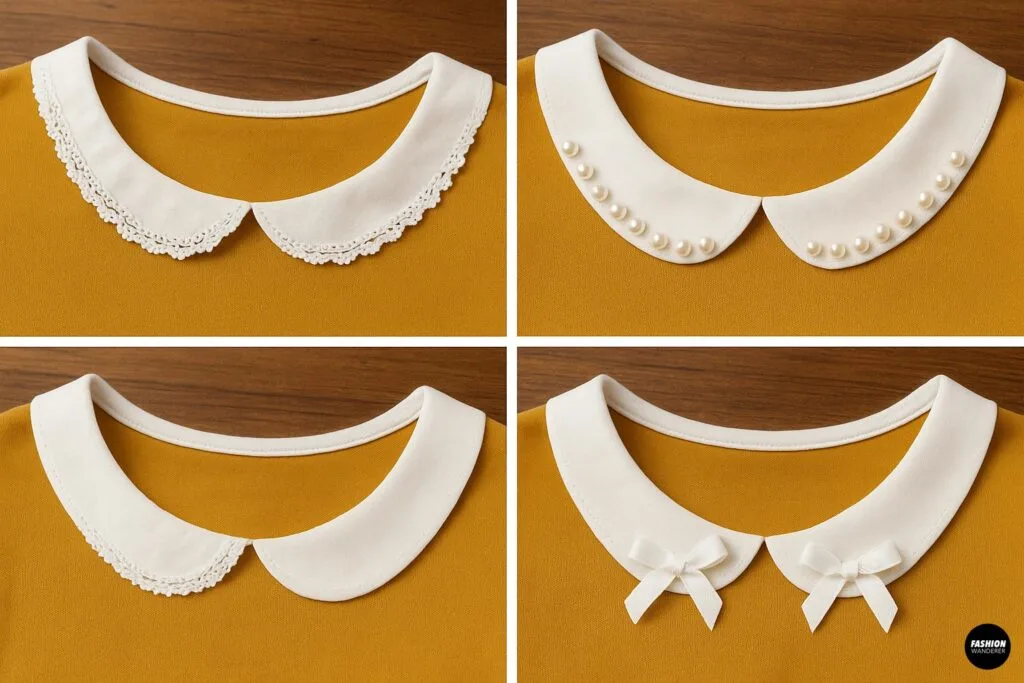
Want to add even more flair? After attaching your faux collar, consider these no-sew accent ideas:
- Lace overlay: Glue a narrow lace strip along the collar edge.
- Pearl or bead trim: Use fabric glue or hot-melt dots to affix decorative beads.
- Ribbon bow: Tie small bows at collar points and glue them down.
These embellishments elevate your DIY project into a bespoke boutique piece.
Caring for Your Faux-Collared Tees
- Hand wash or gentle cycle: Preserve glue bonds by washing inside out on a gentle cycle.
- Air-dry flat: Avoid heat in the dryer, which can weaken adhesive.
- Touch-up glue: If any edges lift after a few wears, reapply a tiny dot of glue.
Final Thoughts

Adding a faux collar to any T-shirt is a game-changer for your everyday wardrobe. Whether you choose quick-clip collars, fabric glue, or a hot-melt gun, these no-sew techniques require minimal supplies and deliver maximum impact. From professional office attire to weekend brunch looks, your newly elevated tees will be your go-to favorite.
Ready to DIY? Grab your supplies, pick your favorite collar style, and transform your tees into chic statements—no sewing needed!
Tag us on social @FashionWandererOfficial to share your faux collar creations and inspire the community.
Trendy, Affordable Sewing Patterns for All Sizes


Tie Shoulder Jumpsuit Pattern


Palazzo Pants Sewing Pattern


Pocket Overall Romper Pattern


Wrap Maxi Skirt Sewing Pattern


Tie Back Top Sewing Pattern