
Are you ready to refresh your wardrobe for 2025 with trendy, personalized t-shirts that showcase your unique style? T-shirts remain a fashion staple year after year, and 2025 is set to bring exciting new trends that you can easily create at home! Whether you’re an experienced sewer or a beginner, these DIY t-shirt trends combine creativity, style, and sustainability.
In this post, you’ll discover the hottest t-shirt trends for 2025 and detailed step-by-step tutorials to make them yourself. We are talking about next level t-shirt upcycle ideas, let’s dive in!
Why DIY T-Shirts Are Trending in 2025
The rise of sustainable fashion and personal expression continues to fuel DIY clothing projects. Making your own t-shirts:
- Saves money
- Reduces waste
- Gives you total control over your design and fit
- Allows you to experiment with textures, colors, and prints
Plus, DIY fashion is incredibly satisfying and fun!
2025 T-Shirt Trends You Can Make Yourself

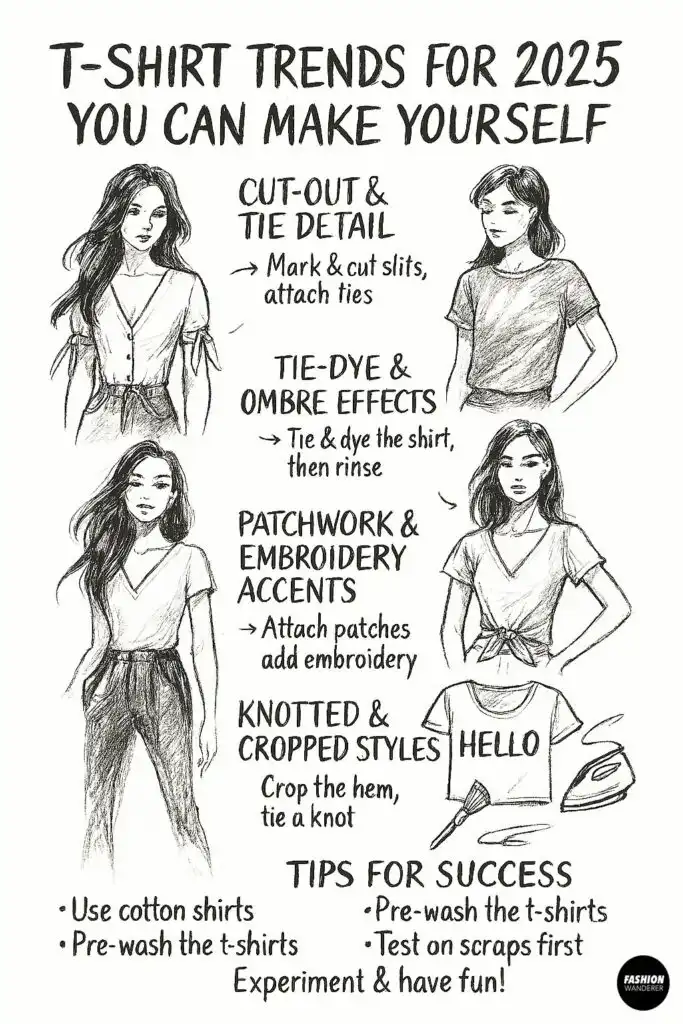
Here are the biggest DIY t-shirt trends of 2025, all of which can be customized easily at home:
1. Cut-Out & Tie Detail T-Shirts
Cut-outs and ties bring a playful and edgy vibe to basic tees. You can use t-shirt cutting ideas to add side slits, neckline cut-outs, or sleeve ties to transform a plain t-shirt.
Materials:

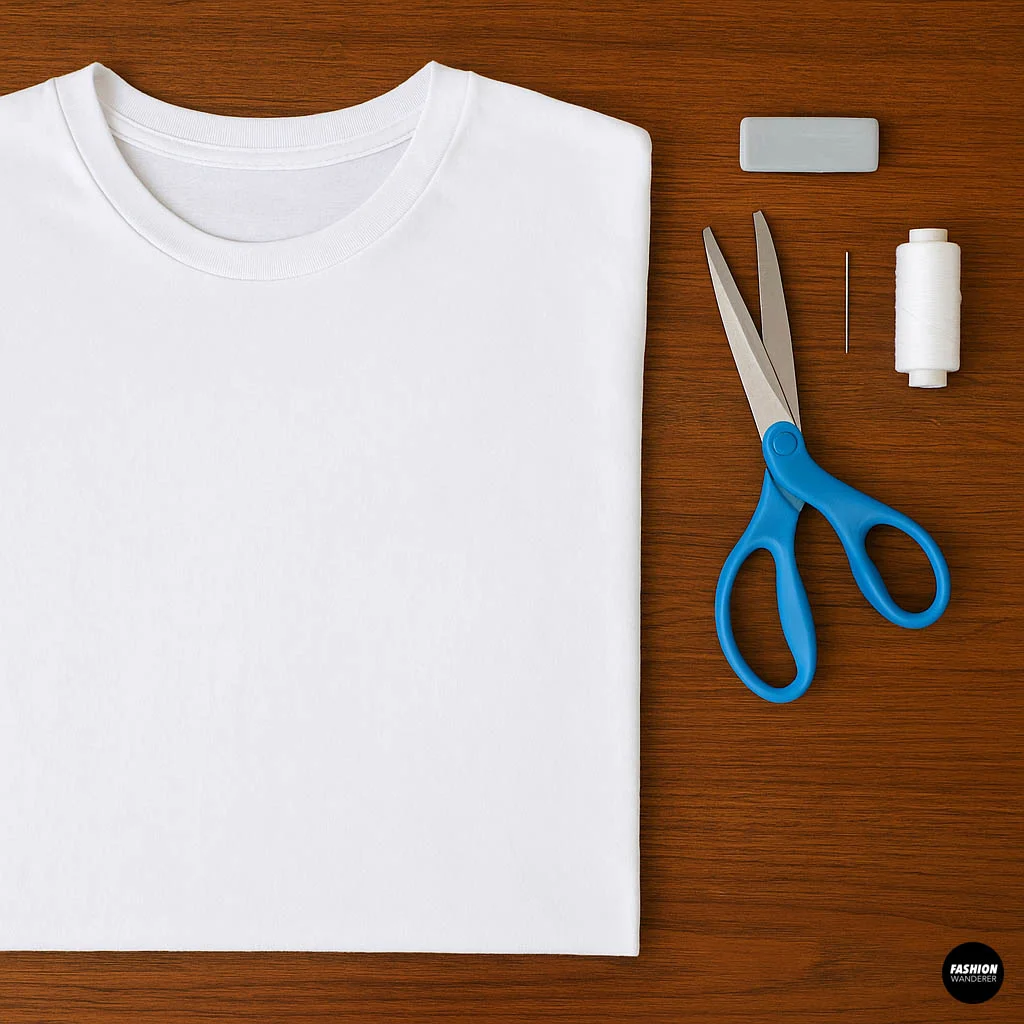
- Basic t-shirt
- Fabric scissors
- Chalk or fabric marker
- Needle and thread or sewing machine (optional)
Steps:

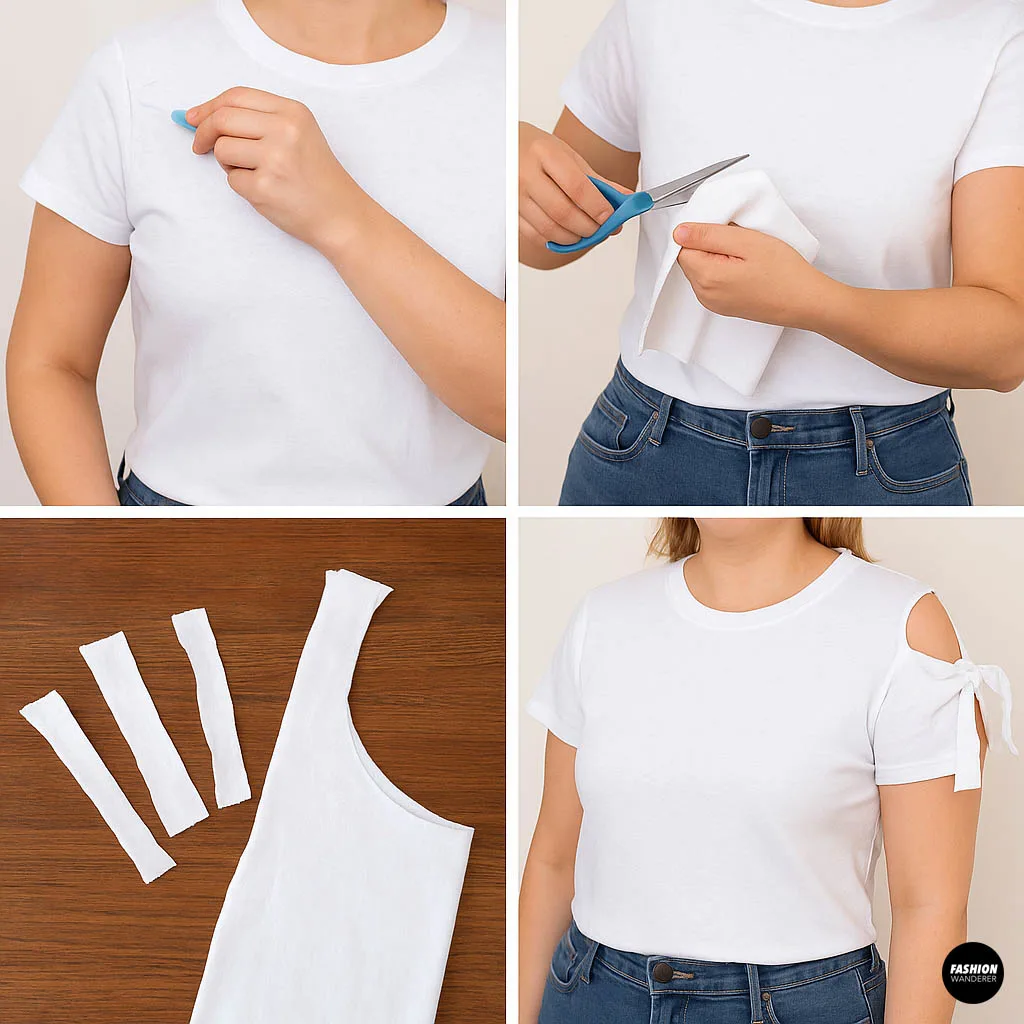
- Mark your design: Use chalk to outline where you want to create cut-outs or slits on your t-shirt. Popular spots are shoulders, sides, or the back neckline.
- Cut carefully: Cut along the chalk lines. For tie details, cut slits about 4-6 inches long.
- Make ties (optional): Cut long strips of fabric from an old t-shirt or matching fabric to use as ties.
- Attach ties: Sew or knot the fabric strips onto the cut slits for a tied-up look. You can also simply knot the t-shirt fabric itself if you prefer a no-sew method.
2. Tie-Dye & Ombre Effects
T-shirt tie-dye is evolving into sophisticated ombre and swirl effects for 2025. Using natural dyes or vibrant colors, you can create a custom shirt with eye-catching gradients.
Materials:

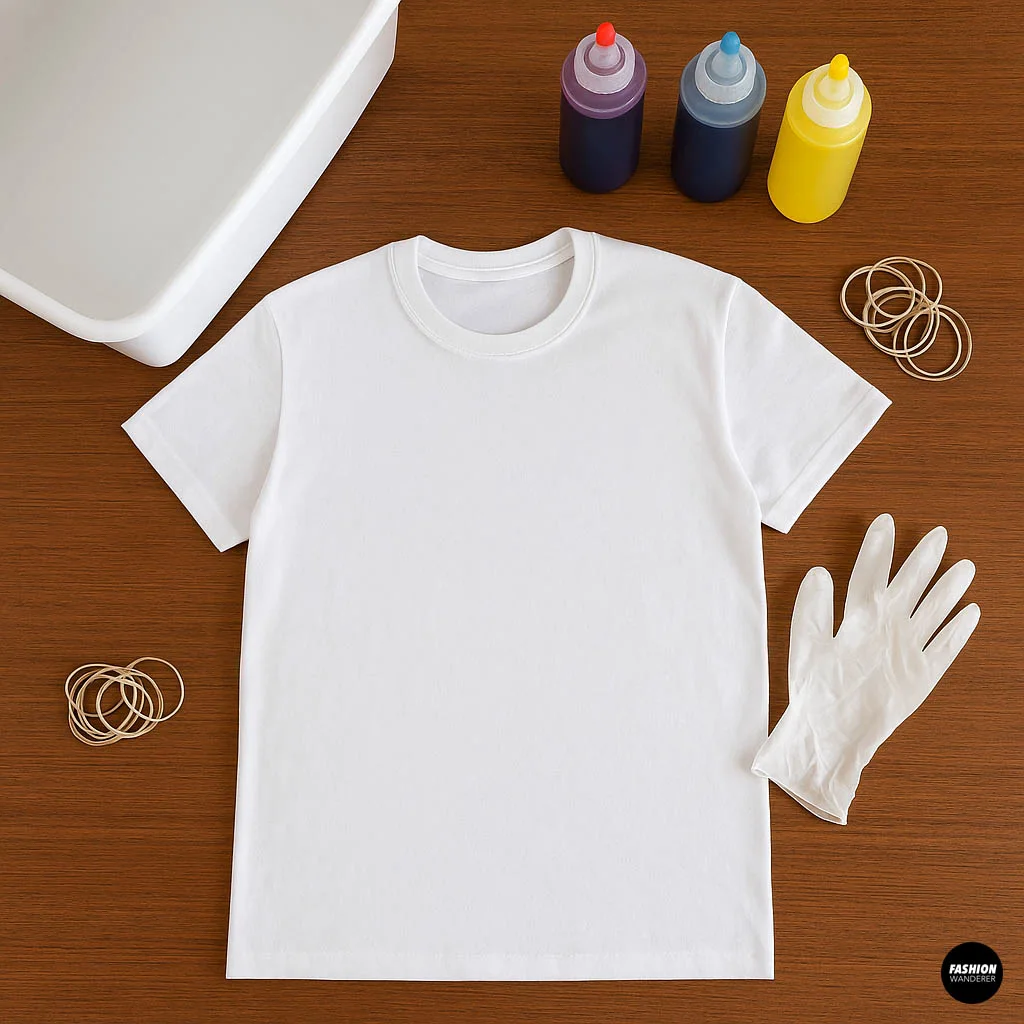
- White or light-colored cotton t-shirt
- Fabric dye (choose your colors)
- Rubber bands
- Plastic gloves
- Plastic squeeze bottles (optional)
- Large plastic bin or sink
Steps:

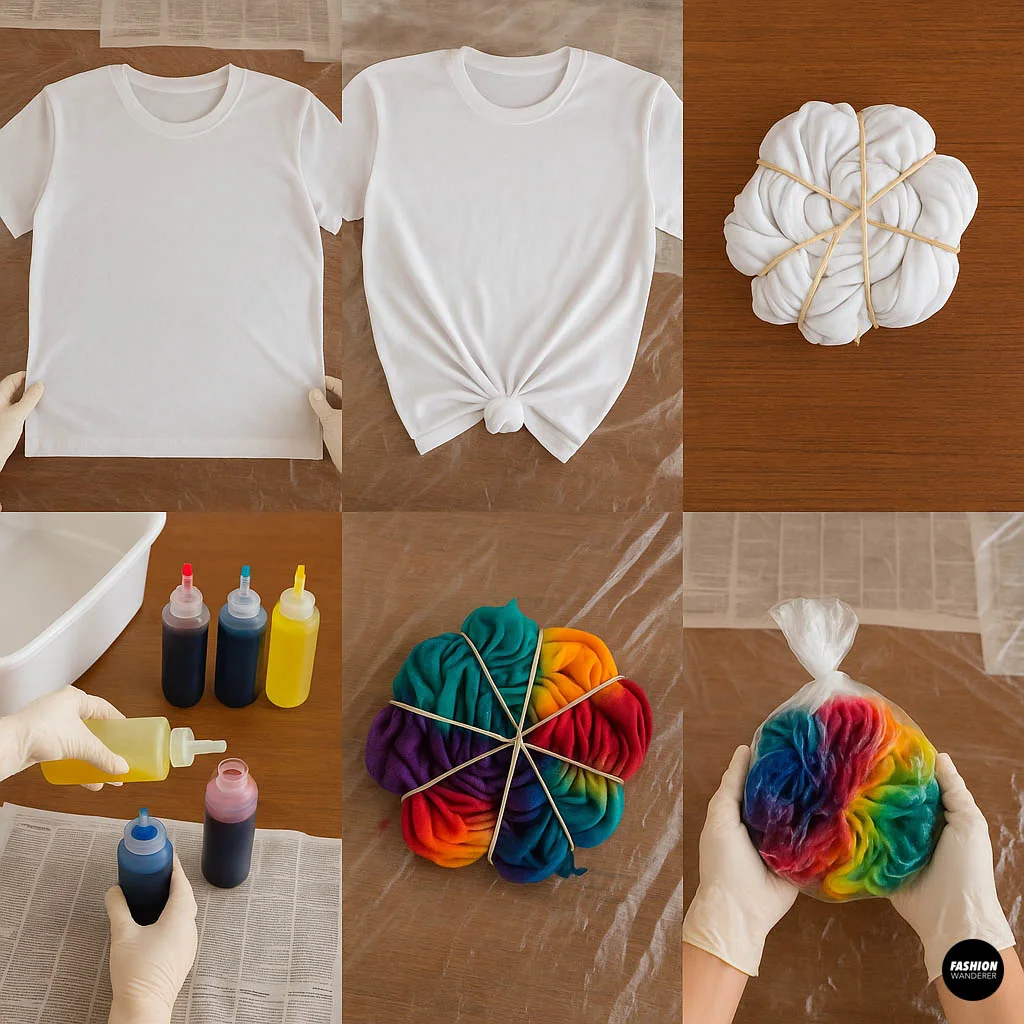
- Prepare your workspace: Cover surfaces with plastic or newspapers. Wear gloves.
- Pre-soak your shirt: Wet the shirt with water and wring out excess moisture.
- Tie the shirt: For classic spiral, pinch the center and twist tightly. Use rubber bands to secure. For ombre, scrunch the bottom half.
- Mix dye: Follow dye instructions, pour into bottles.
- Apply dye: Squeeze dye onto different sections of your shirt.
- Set and rinse: Wrap shirt in plastic and let it sit for 6-8 hours. Rinse under cold water until clear. Wash separately.
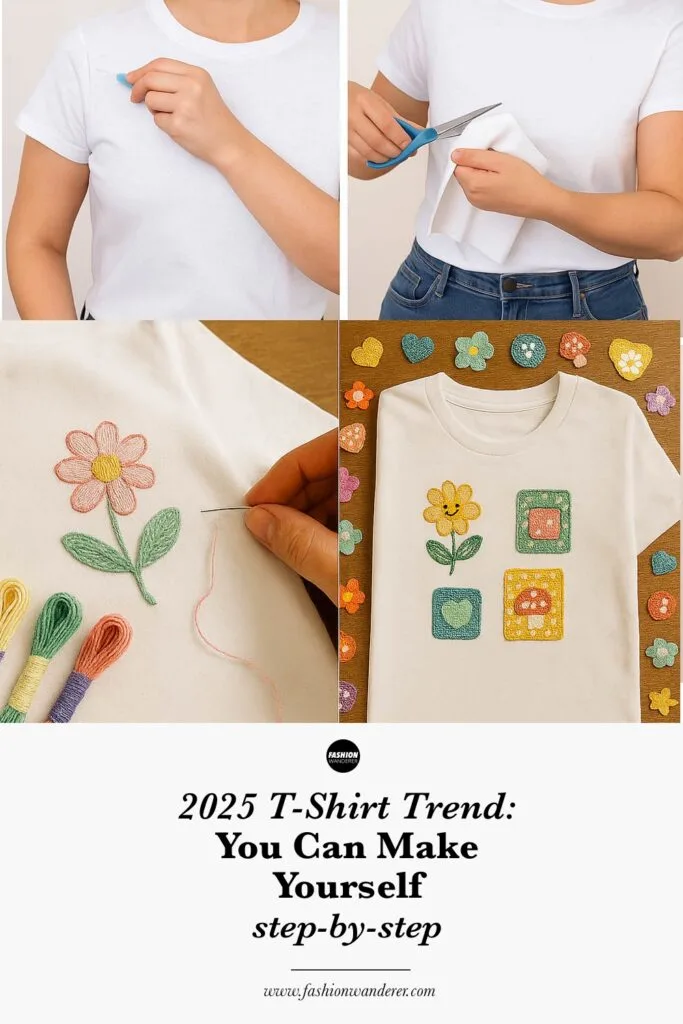
3. Patchwork & Embroidery Accents
Adding patchwork and embroidery is a chic way to personalize your tees. Floral motifs, geometric shapes, or even words make your t-shirt one-of-a-kind.
Materials:


- Basic t-shirt
- Embroidery thread and needles
- Fabric patches or scrap fabric pieces
- Fabric glue or sewing tools
Steps:

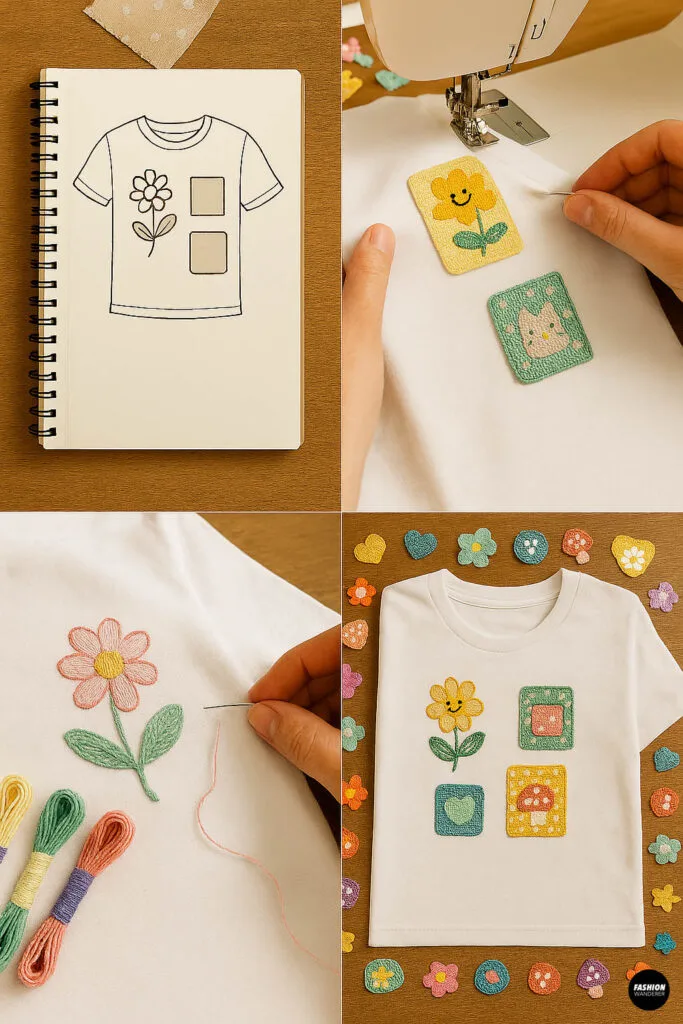
- Plan your design: Sketch where you want patches or embroidery on your shirt.
- Attach patches: Sew or glue patches onto the shirt. For raw edges, use a zig-zag stitch.
- Embroider: Use basic stitches like backstitch or satin stitch to add decorative details around patches or on other parts of the shirt.
4. Knotted & Cropped Styles
Cropped and knotted t-shirts are huge for 2025, especially with puff sleeves or balloon sleeves.
Materials:

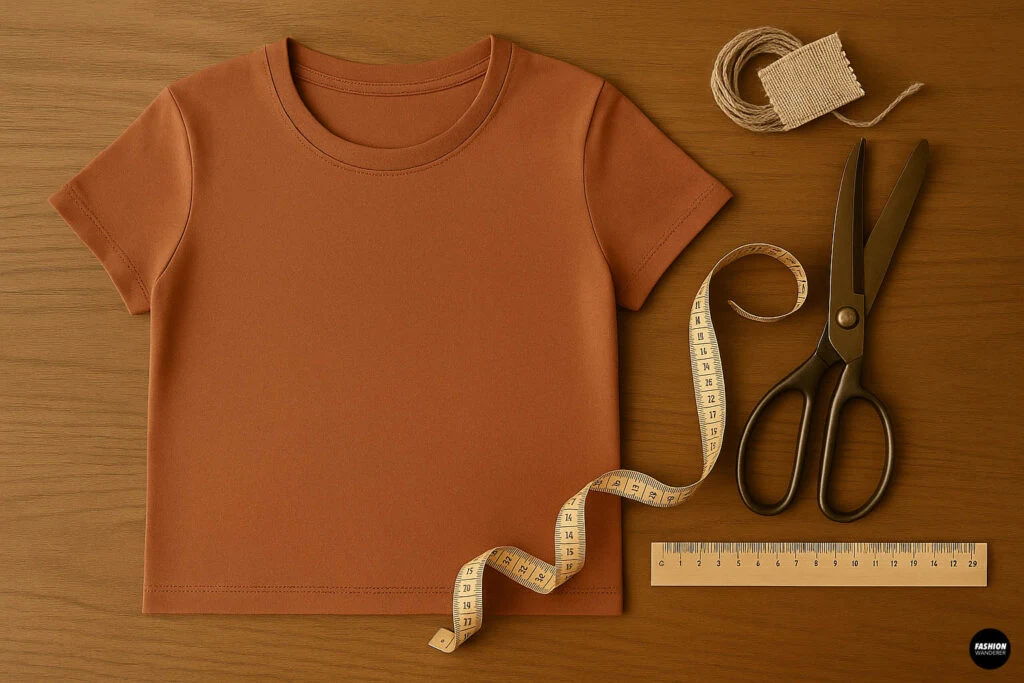
- Basic t-shirt
- Fabric scissors
- Measuring tape or ruler
Steps:

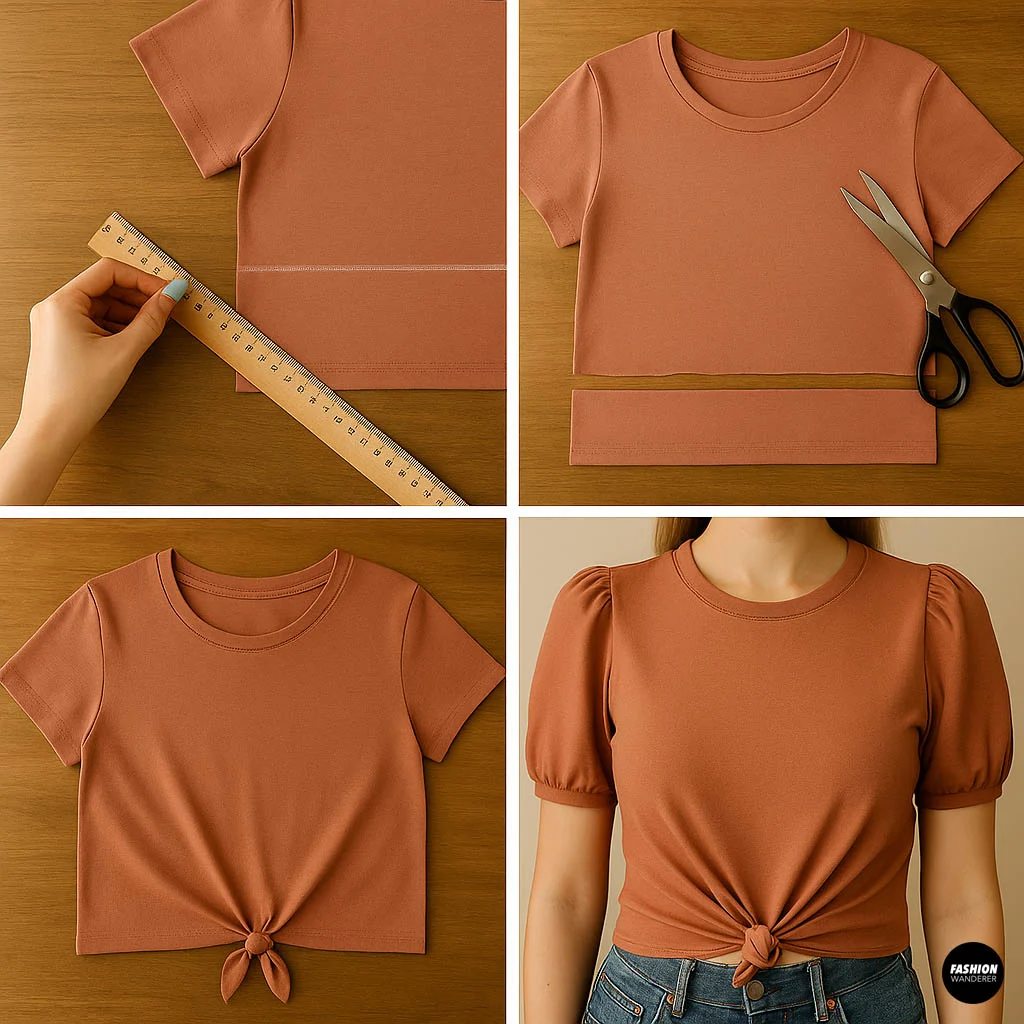
- Decide your crop length: Usually 10-12 inches from the bottom works well. Mark with chalk.
- Cut the hem: Cut straight across your chalk line.
- Create the knot: Twist or fold the bottom hem and tie a knot at the front, side, or back for a flattering cinched effect.
- (Optional) Add sleeves: If you want to DIY puff sleeves, cut extra fabric and sew on with gathers at the top for a trendy puff look.
5. Graphic Transfer & Painting
2025 is all about bold graphics and statement t-shirt painting. Using fabric paints or transfer paper, you can easily apply unique designs.
Materials:

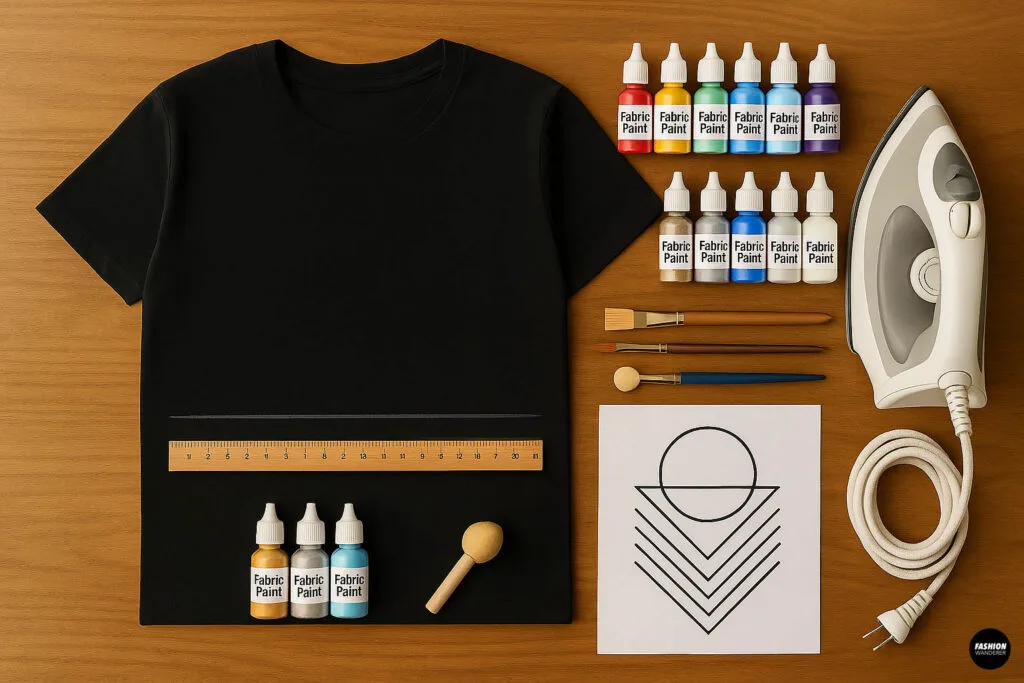
- Plain cotton t-shirt
- Fabric paints or iron-on transfer paper
- Paintbrushes or sponge
- Printed graphic design (for transfers)
- Iron (for transfers)
Steps:

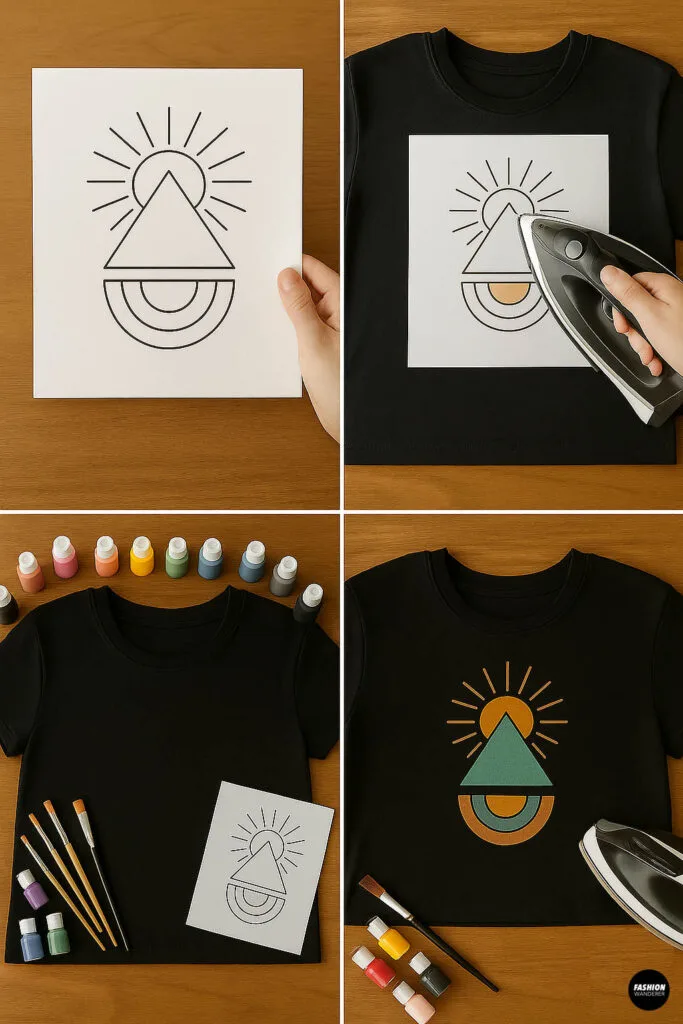
- Prepare your design: Print or draw your graphic on transfer paper.
- Position: Place your t-shirt on a flat surface, put transfer paper where you want the design.
- Iron on: Follow transfer paper instructions carefully.
- Paint option: Sketch your design lightly on the shirt and fill with fabric paint. Let dry completely before wearing or washing.
Tips for Success When Making Your Own T-Shirts
- Use 100% cotton t-shirts for best dye and paint results.
- Pre-wash shirts to avoid shrinkage later.
- Always test techniques on fabric scraps first.
- Follow all safety instructions on dyes and paints.
- Experiment with colors and designs — make it uniquely yours!
Where to Find Materials for DIY T-Shirts
- Fabric stores: For threads, patches, and plain t-shirts.
- Online craft retailers: Huge selections of embroidery kits, dyes, and paints.
- Thrift shops: Great source of affordable t-shirts to upcycle.
- Your own closet: Cut and repurpose old t-shirts or fabric scraps.
Final Thoughts: Start Your DIY T-Shirt Project Today!

T-shirts are more than just basics in 2025 — they’re a canvas for your creativity. Whether it’s a tie-dye experiment, bold cut-outs, or delicate embroidery, making your own t-shirt is a rewarding and sustainable way to stay stylish.
Ready to get started? Pick your favorite trend, gather your materials, and enjoy crafting your perfect 2025 t-shirt. Share your creations on social media to inspire others, and embrace the DIY fashion movement!
Trendy, Affordable Sewing Patterns for All Sizes


Tie Shoulder Jumpsuit Pattern


Palazzo Pants Sewing Pattern


Pocket Overall Romper Pattern


Wrap Maxi Skirt Sewing Pattern


Tie Back Top Sewing Pattern