
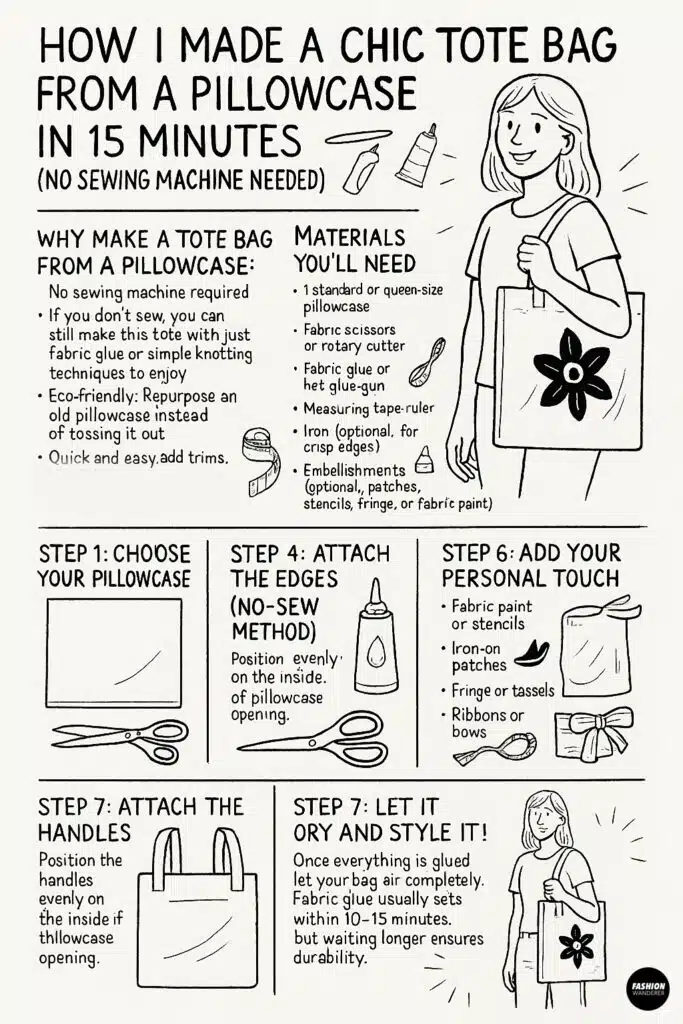
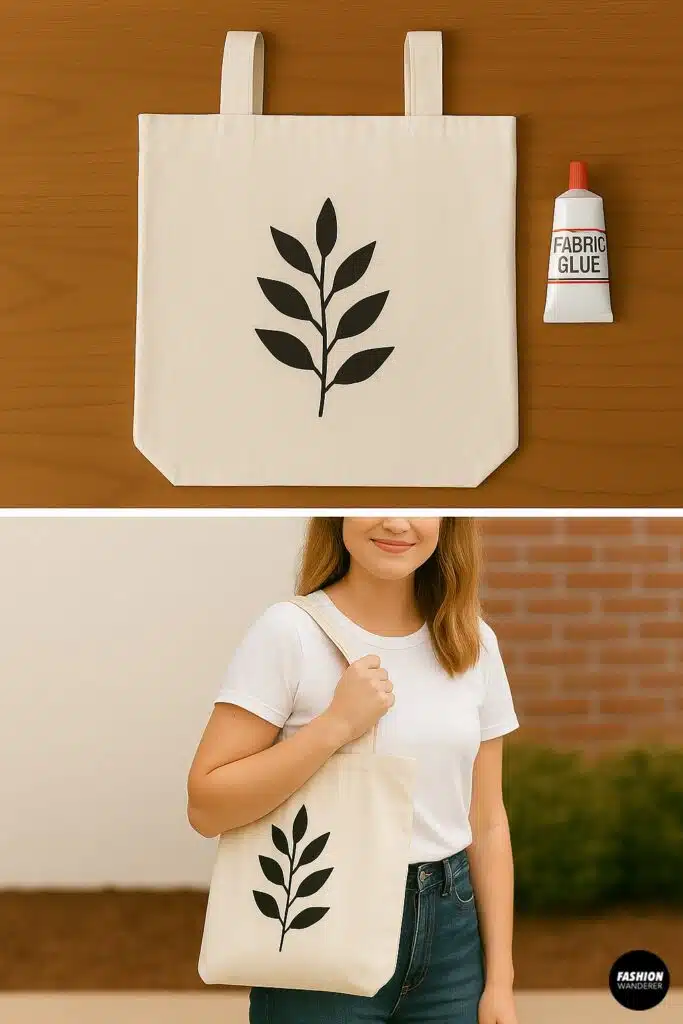
If you’re looking for a fun, fast, and stylish DIY project, you’ll love this no-sew tote bag tutorial. I made this chic tote bag from a pillowcase in just 15 minutes—no sewing machine required!
Whether you’re a beginner at crafting or just want a budget-friendly fashion fix, bag making is perfect. This tote bag design is eco-friendly, affordable, and turns an everyday household item into a trendy accessory.
In this step-by-step guide, I’ll show you how I transformed a simple pillowcase into a functional tote bag that’s perfect for errands, books, or even as a reusable shopping bag.
Why Make a Tote Bag from a Pillowcase?
Before diving into the steps, here are a few reasons why this project is worth trying:
- No sewing machine required: If you don’t sew, you can still make this tote with just fabric glue or simple knotting techniques.
- Beginner-friendly: It’s simple enough for kids, teens, and adults to enjoy.
- Eco-friendly: Repurpose an old pillowcase instead of tossing it out.
- Customizable: Add trims, fabric paint, or patches to personalize your bag.
- Quick and easy: The whole project takes about 15 minutes.
How Durable Is a No-Sew Tote Bag?
One question I had before starting this project was: will fabric glue really hold up? I tested mine by carrying books and groceries, and it worked surprisingly well. The trick is to use a strong glue designed for fabric and give it enough drying time.
If you want extra reinforcement, you can hand-sew small stitches at the handle base—but honestly, the no-sew version is sturdy enough for everyday use.
Materials You’ll Need

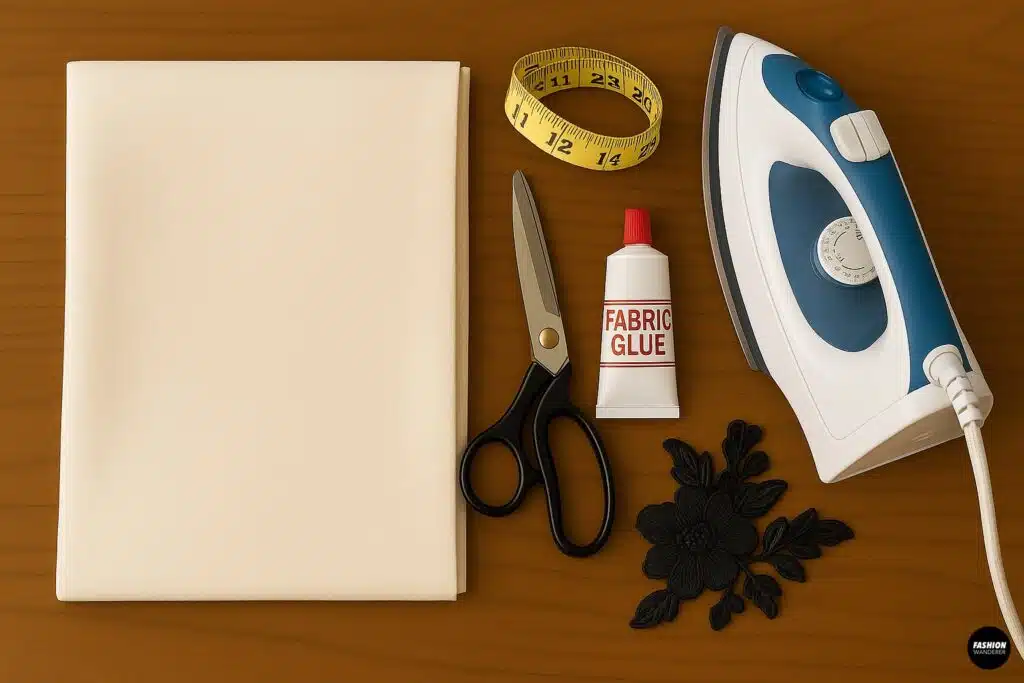
Here’s everything I gathered before starting my DIY pillowcase tote bag:
- 1 standard or queen-size pillowcase (cotton works best)
- Fabric scissors or rotary cutter
- Fabric glue or hot glue gun (for no-sew option)
- Measuring tape or ruler
- Iron (optional, for crisp edges)
- Embellishments (optional: patches, stencils, fringe, or fabric paint)
Step-by-Step Tutorial: How to Make a Chic Tote Bag from a Pillowcase

Step 1: Choose Your Pillowcase

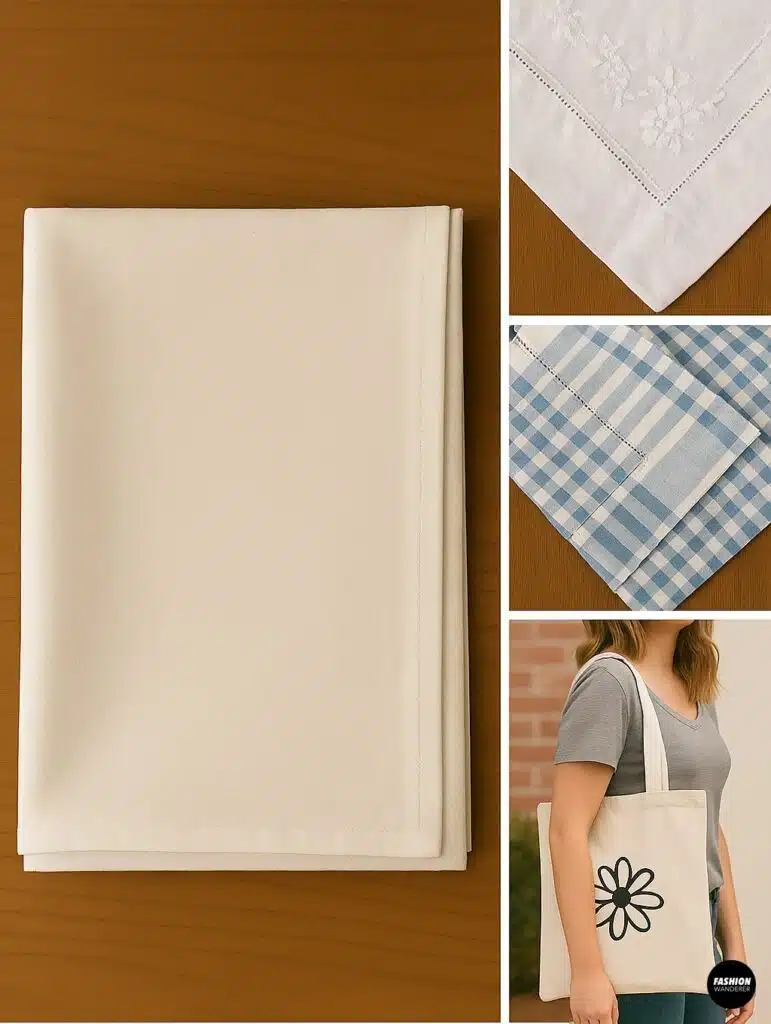
Pick a pillowcase in a sturdy fabric. Cotton or linen pillowcases are strong enough to hold weight while still being easy to cut and handle. I used a neutral cream pillowcase for a chic, minimalist vibe, but you could use a printed or patterned one for a bold fashion statement.
Tip: Wash and iron your pillowcase before starting so it’s clean, smooth, and ready to work with.
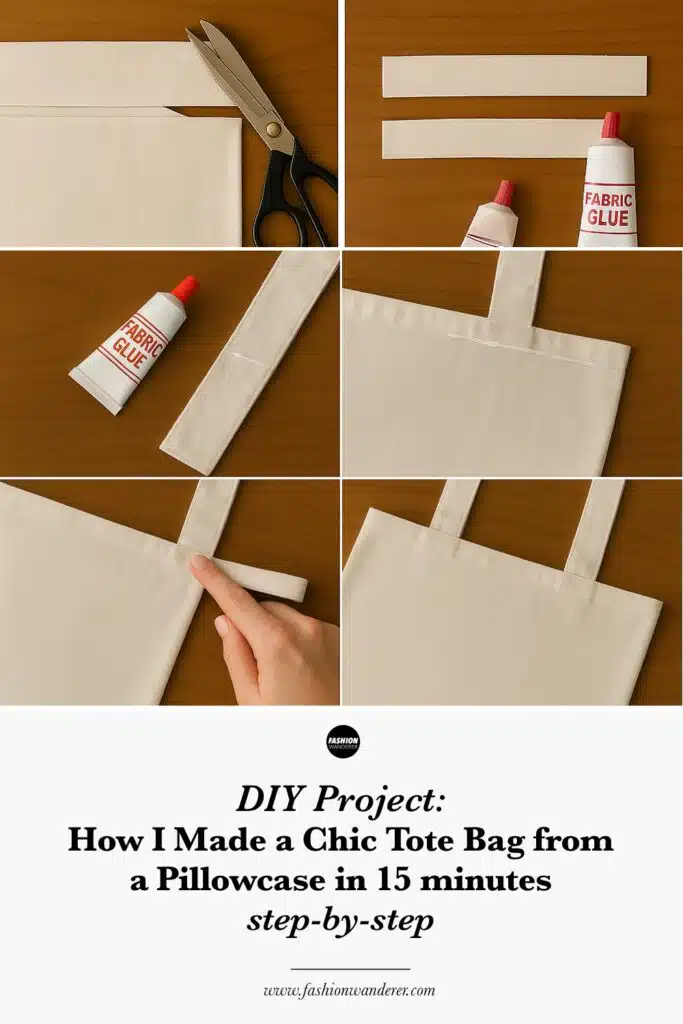
Step 2: Trim and Shape the Bag

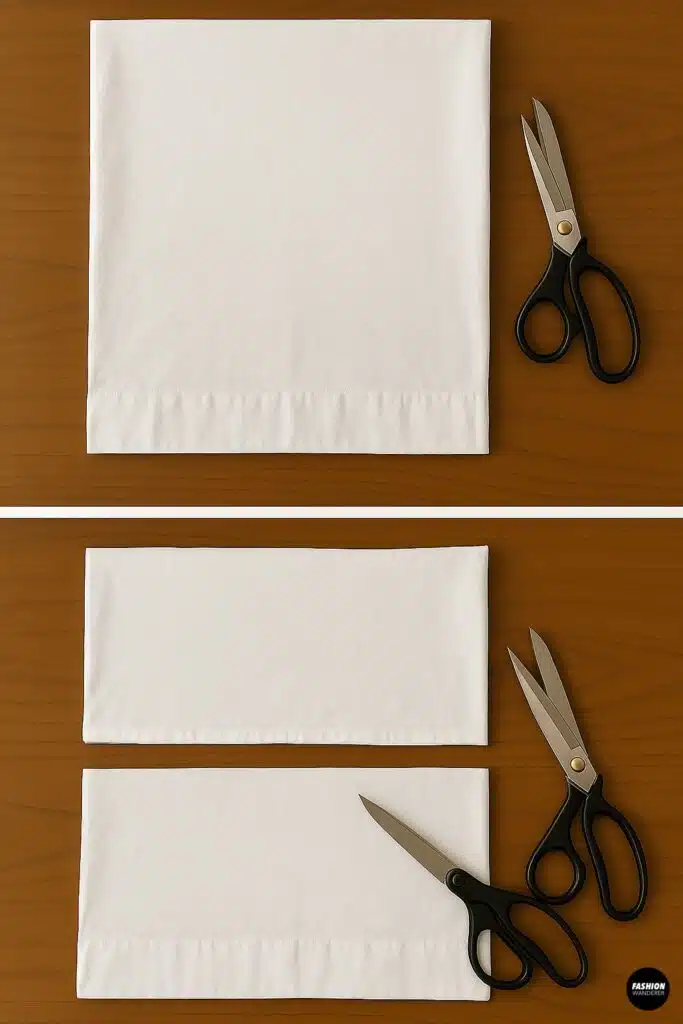
Lay the pillowcase flat on your work surface. Decide how tall you want your tote bag to be. If the pillowcase is too long, trim off the open end. Keep in mind that the bottom seam of the pillowcase will become the bottom of your tote—so you don’t need to sew or glue it shut.
I trimmed about 4 inches off mine to give it a more balanced, tote-like proportion.
Step 3: Cut the Handles

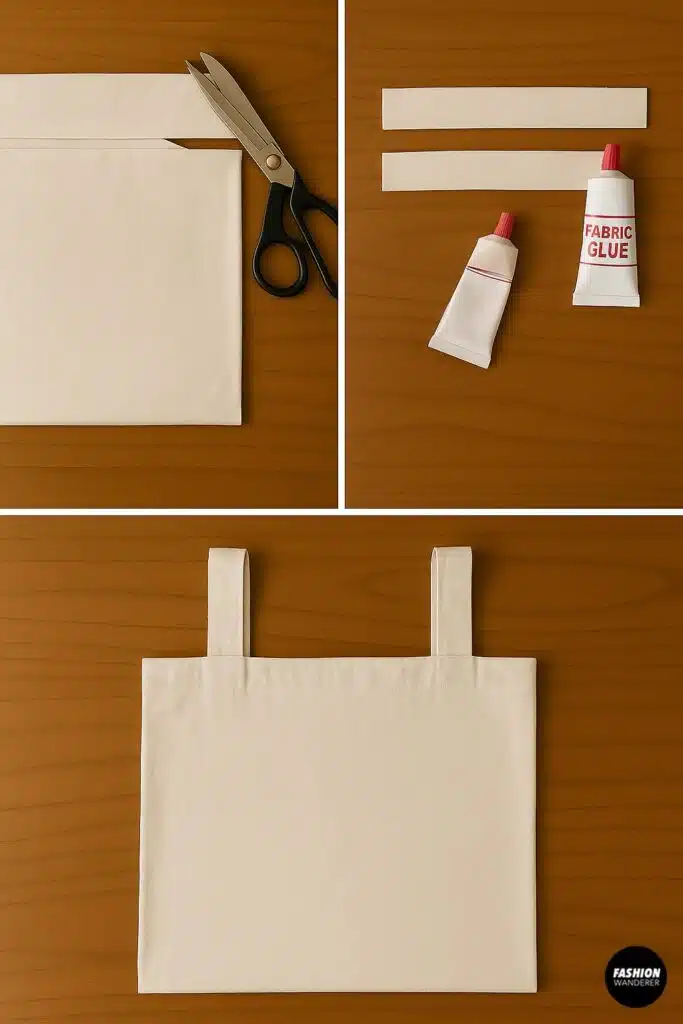
Next, you’ll create the straps for your bag. There are two easy options:
Option 1: Cut directly into the pillowcase
- From the open top edge of the pillowcase, cut two equal straps about 2 inches wide and 12–15 inches long.
- These will form the handles.
Option 2: Use the excess fabric you trimmed
- Cut two strips from the fabric you trimmed earlier.
- Glue or knot them securely to the bag’s opening.
I went with Option 2 because I wanted my straps to match and keep the bag’s opening sturdy.
Step 4: Secure the Edges (No-Sew Method)

Since we’re not using a sewing machine, fabric glue is our best friend here. Run a thin line of fabric glue along the raw edges of the cut straps and opening to prevent fraying. Press the edges down and let them dry for a few minutes.
Alternative: If you don’t have fabric glue, you can fold the edges over twice and use hot glue or even tie small knots at the ends to stop fraying.
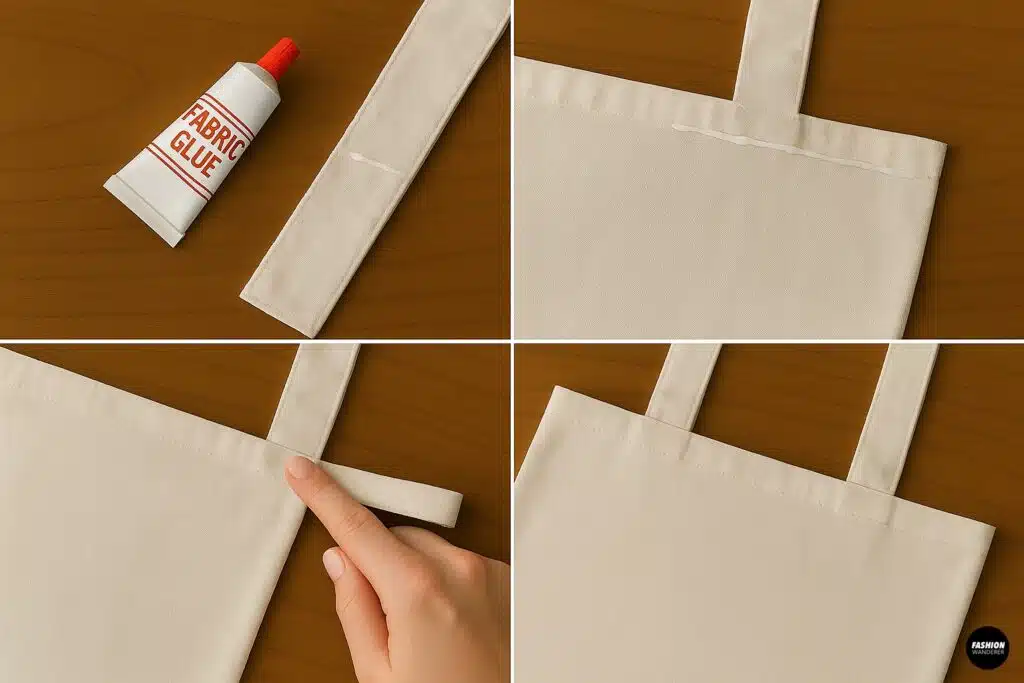
Step 5: Attach the Handles

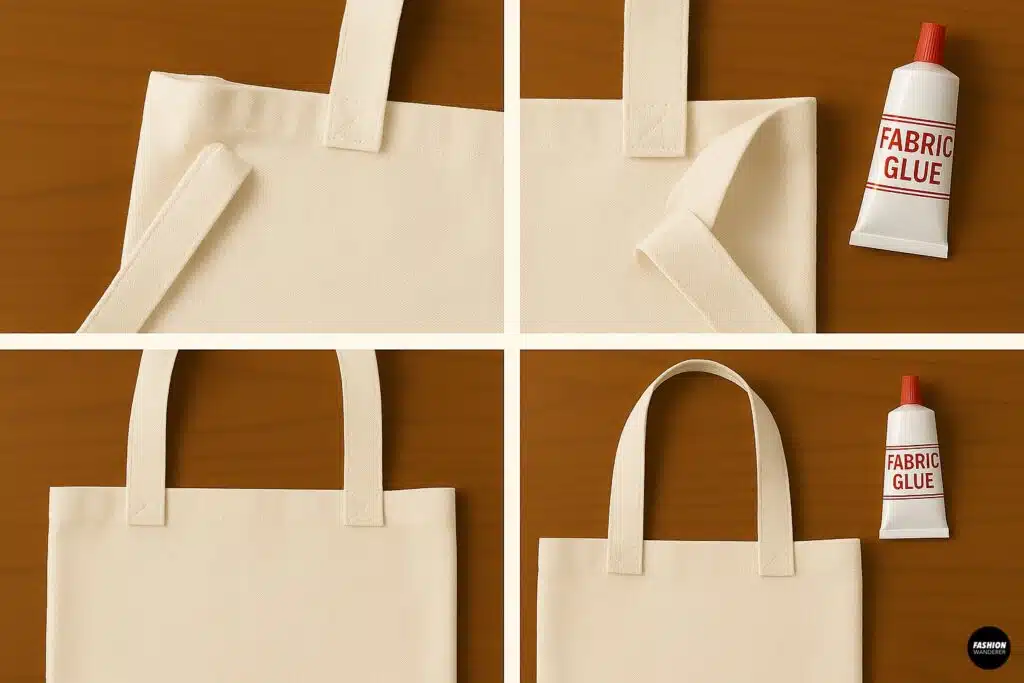
Position the handles evenly on the inside of the pillowcase opening. Use fabric glue or hot glue to attach each end of the strap to the pillowcase. Press firmly and allow it to set.
Tip: For extra strength, fold the end of each strap into a square “tab” and glue it down. This helps the handle hold more weight.
Step 6: Add Your Personal Touch

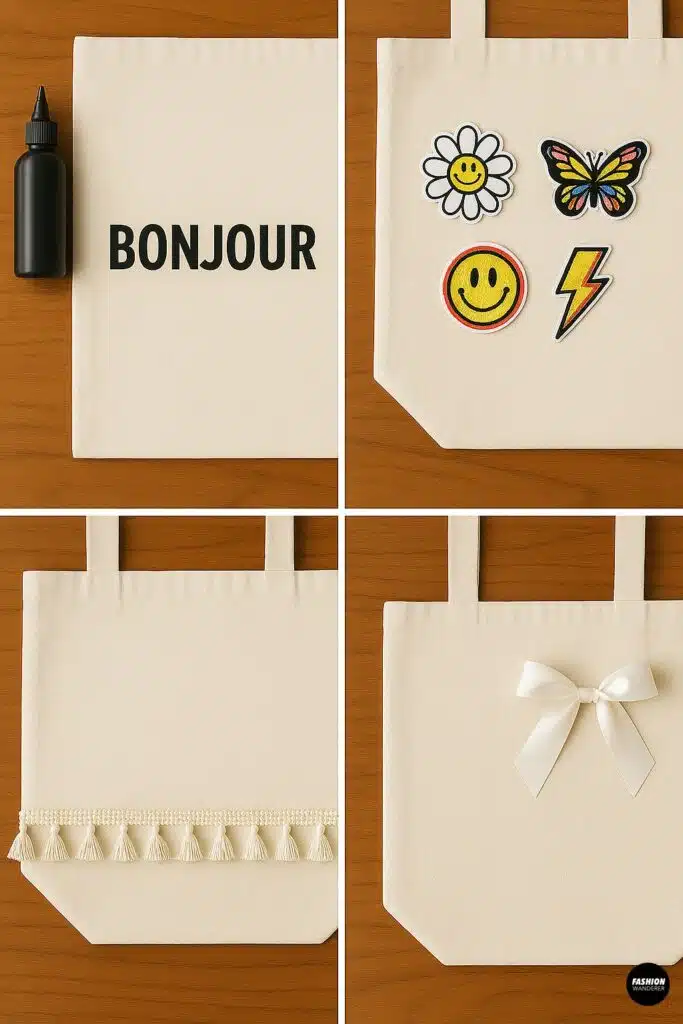
This is the fun part—customizing your tote! I kept mine chic and minimal, but here are some ideas:
- Fabric paint or stencils: Add a slogan, design, or graphic.
- Iron-on patches: Personalize with fun motifs.
- Fringe or tassels: Glue along the bottom hem for a boho style.
- Ribbons or bows: Add a feminine, coquette detail to the straps.
I chose a simple black stencil print for a modern look.
Step 7: Let It Dry and Style It!

Once everything is glued, let your bag dry completely. Fabric glue usually sets within 10–15 minutes, but waiting longer ensures durability.
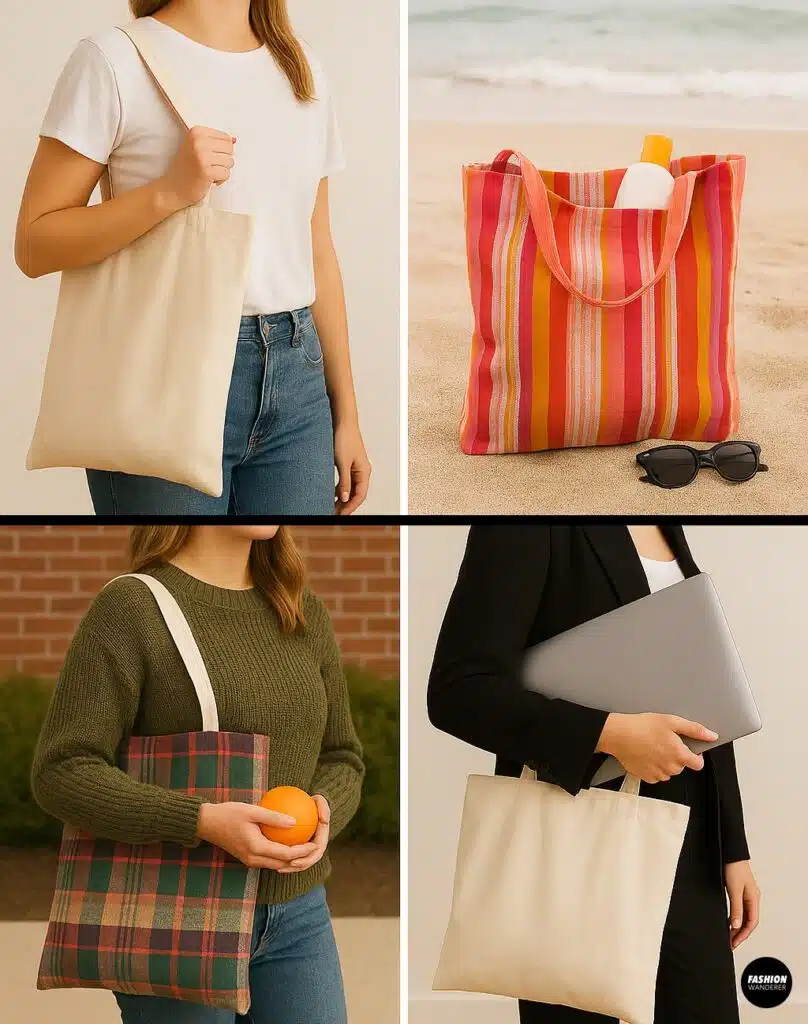
Your chic tote bag is now ready to use! I styled mine with jeans and a white tee for a casual day out, but you could easily pair it with a sundress or use it as a reusable shopping tote.
Styling Ideas for Your Pillowcase Tote

This tote is versatile and works with different outfits and occasions. Here are a few ideas:
- Casual Errands: Pair it with jeans, sneakers, and a tee.
- Beach Day: Use a brightly colored pillowcase and carry sunscreen, towels, and snacks.
- Farmers Market: Go for a rustic plaid or floral pillowcase for a country-chic look.
- Work Bag: Choose a sleek neutral pillowcase and carry notebooks or your laptop.
- Eco Shopping Tote: Keep it in your car as a reusable bag for groceries.
Final Thoughts

Making a chic tote bag from a pillowcase was easier (and faster) than I imagined. The best part? It didn’t cost me a thing since I used an old pillowcase from my linen closet. In just 15 minutes, I had a functional, fashionable tote that looks like something you’d buy at a boutique.
So next time you’re decluttering or want a quick craft project, grab a pillowcase and try this tutorial. You’ll save money, recycle fabric, and end up with a chic new accessory you can proudly say you made yourself—without even touching a sewing machine.
Trendy, Affordable Sewing Patterns for All Sizes


Tie Shoulder Jumpsuit Pattern


Palazzo Pants Sewing Pattern


Pocket Overall Romper Pattern


Wrap Maxi Skirt Sewing Pattern


Tie Back Top Sewing Pattern