
If your closet is filled with old button-downs or tees that no longer spark joy, don’t toss them—transform them into something functional and fabulous!
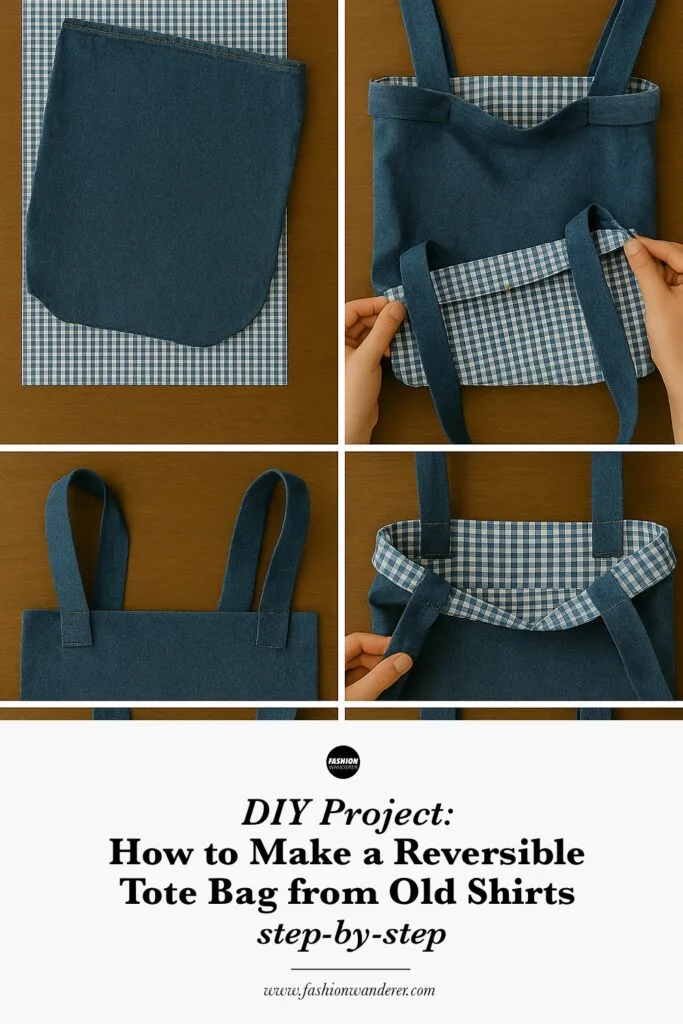
This beginner-friendly tutorial shows you how to make a fully reversible tote bag using just two old shirts. It’s a zero-waste, budget-friendly sewing project that’s equal parts practical and stylish.
Whether you’re going to the farmer’s market, the beach, or the library, this upcycled tote is the ultimate carryall—and since it’s reversible, it’s basically two bags in one.
♻️ Why You’ll Love This Reversible Tote Bag DIY
- Eco-Friendly: Diverts textile waste from landfills.
- Two-in-One Design: Reversible for mood-based styling.
- Customizable: Add pockets, buttons, or contrast stitching.
- Beginner-Friendly: Straight seams only—no fancy techniques required.
- Budget Project: No need to buy new fabric or a pattern.
🧶 Step-by-Step: DIY Reversible Tote Bag from Old Shirts

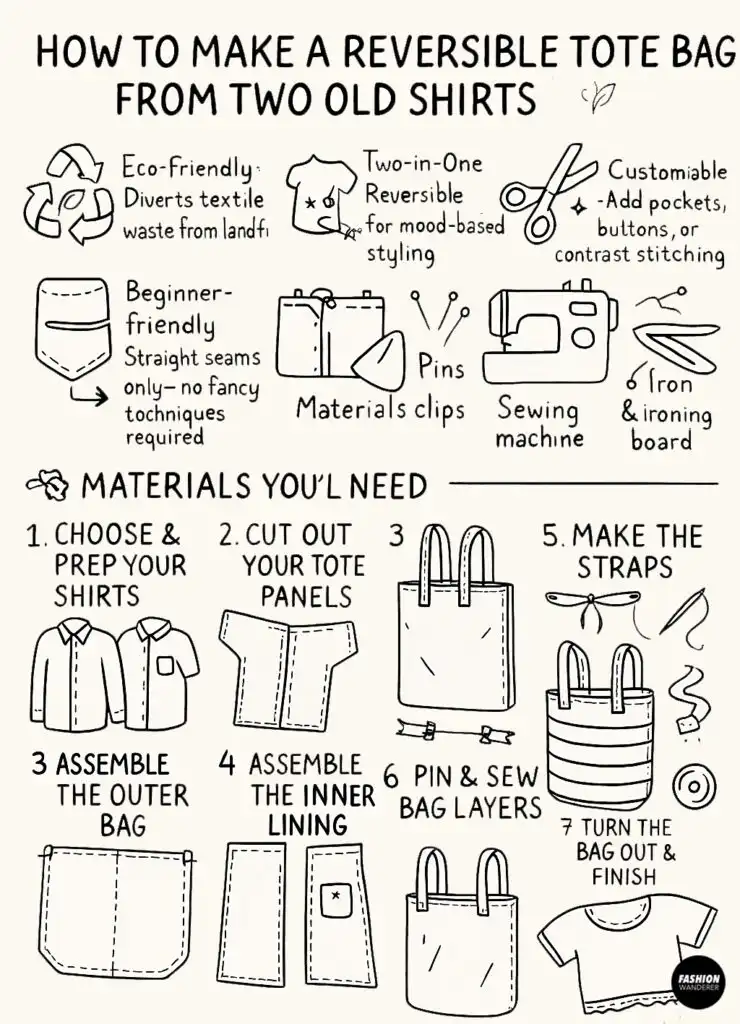
🧵 Materials You’ll Need

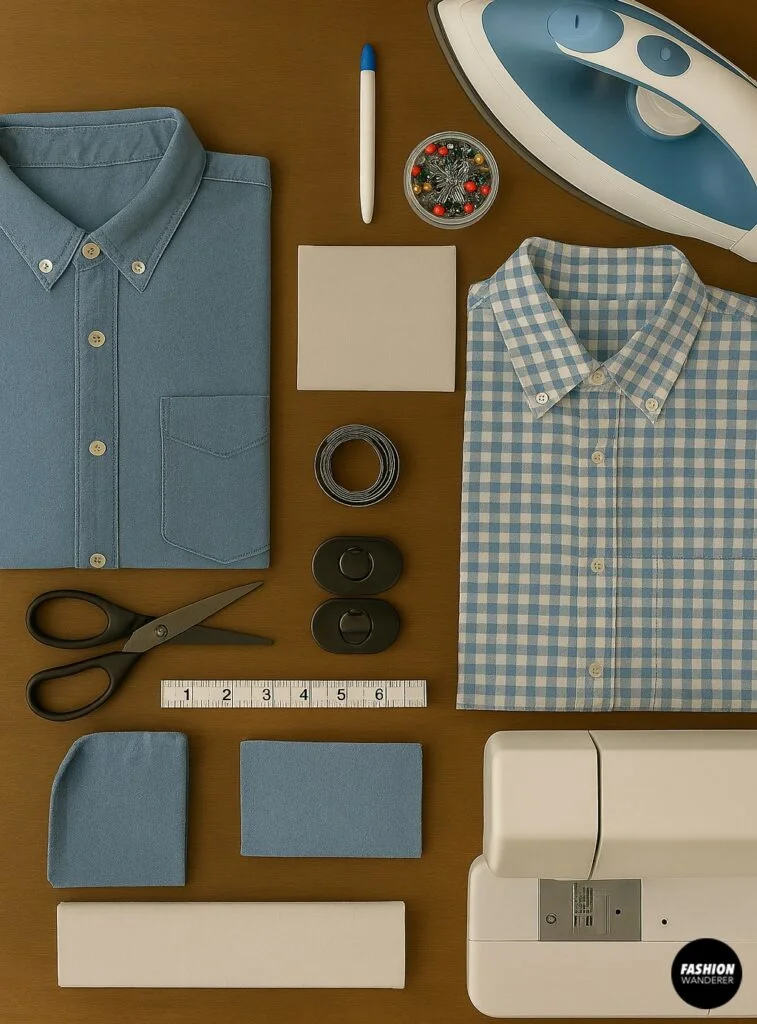
- 2 button-down shirts or T-shirts (cotton or light denim works best)
- Fabric scissors or rotary cutter
- Pins or fabric clips
- Tailor’s chalk or washable marker
- Ruler or measuring tape
- Sewing machine or hand-sewing tools
- Iron & ironing board
Optional Add-ons:
- Fusible interfacing for structure
- Magnetic snap or button for closure
- Extra shirt fabric for inside pockets
Step 1: Choose & Prep Your Shirts

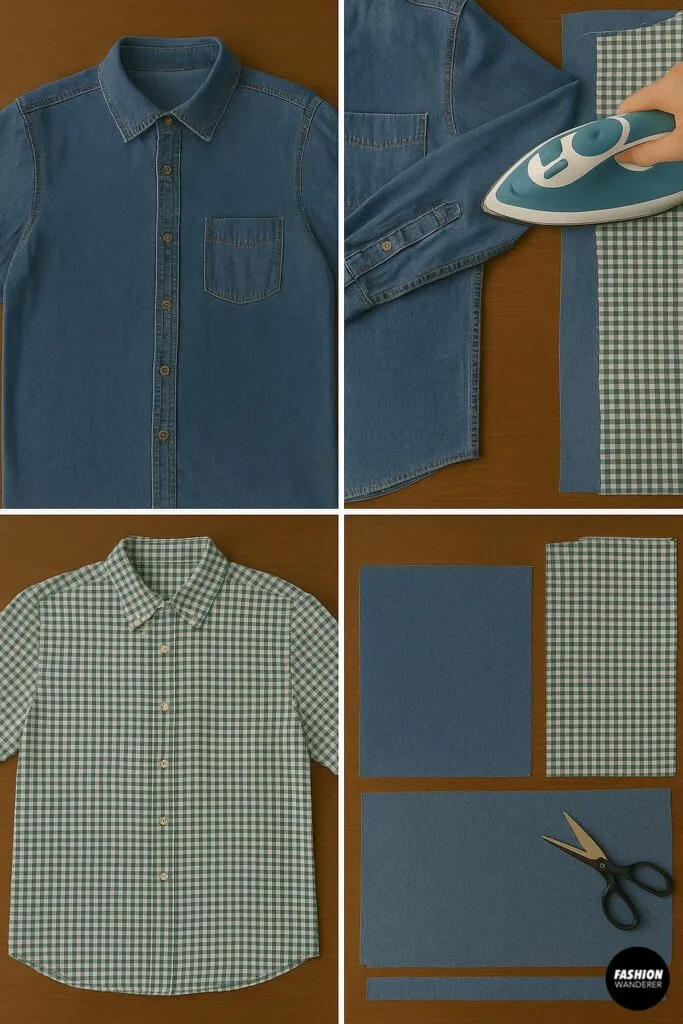
Pick two shirts that complement each other in color or pattern. Button-down shirts with collars or chest pockets add character, while plain tees offer clean simplicity.
Prep Tip:
- Wash and press both shirts first.
- Remove pockets, buttons, or tags you don’t want to include.
- Cut along the seams to flatten the shirts into large fabric pieces.
Step 2: Cut Out Your Tote Panels

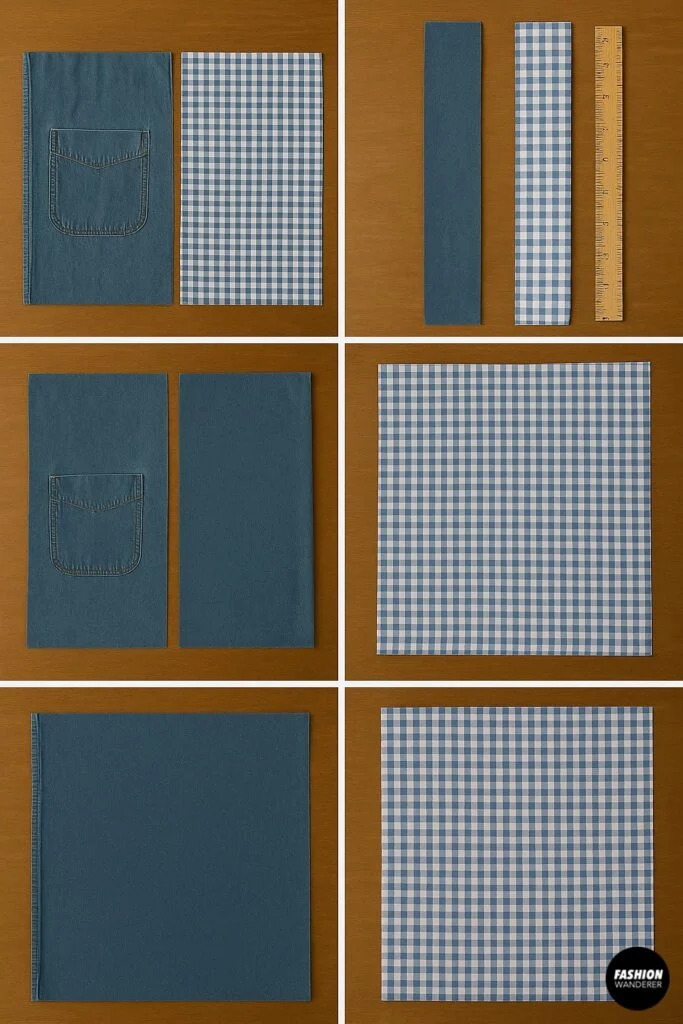
You’ll need:
- 2 outer panels (front/back of one shirt)
- 2 lining panels (from the second shirt)
- 2 straps (each about 22″ long and 2.5″ wide)
Use a ruler to cut two rectangles approx. 15″ wide × 17″ tall from each shirt. Adjust size based on how much fabric you have.
Strap Tip: If your shirts are short on fabric, you can piece straps together or use contrasting bias tape, webbing, or denim.
Step 3: Assemble the Outer Bag

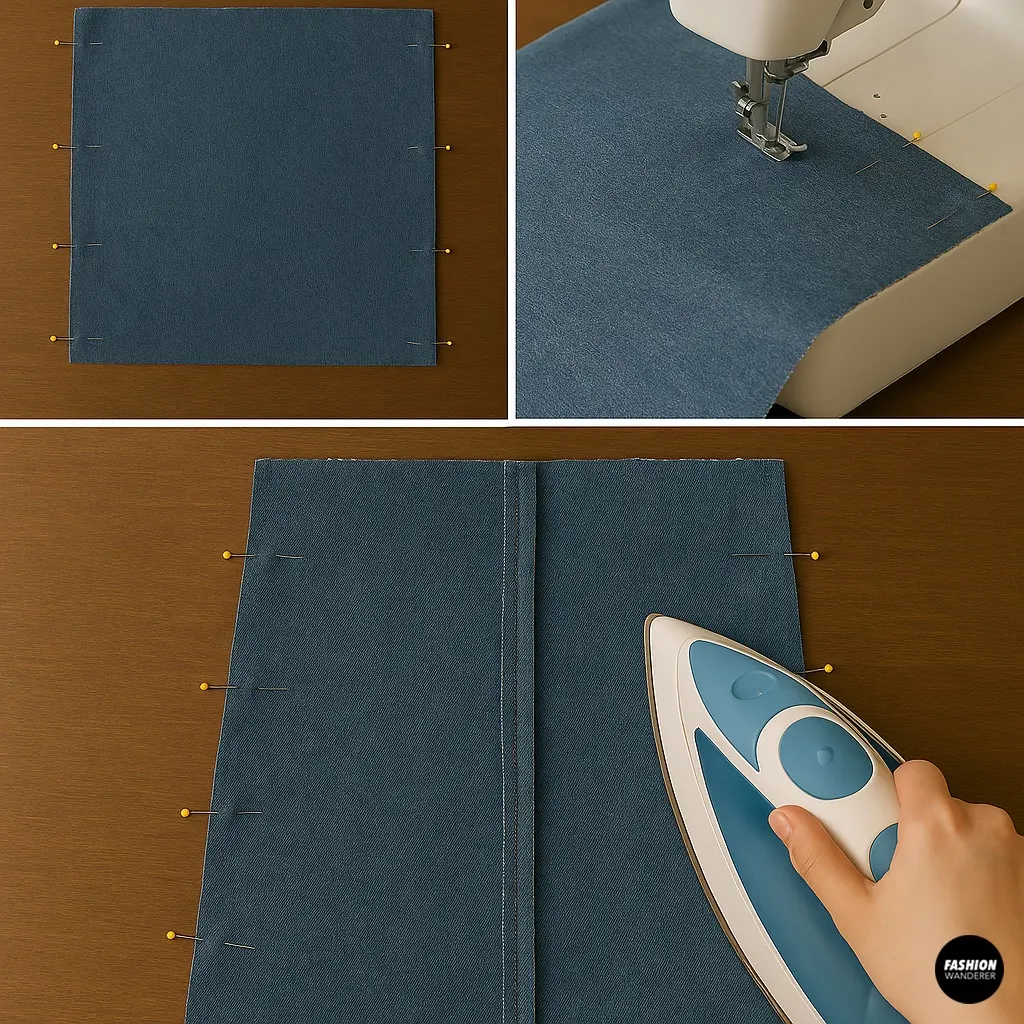
Lay the two outer panels right sides together. Pin along the sides and bottom only (leave the top open).
- Sew with a ½” seam allowance.
- Press the seams open with an iron.
Optional: Create boxed corners for a flat bottom by folding the bottom corners into triangles and sewing across 2” from the tip. Trim off excess.
Step 4: Repeat for the Lining

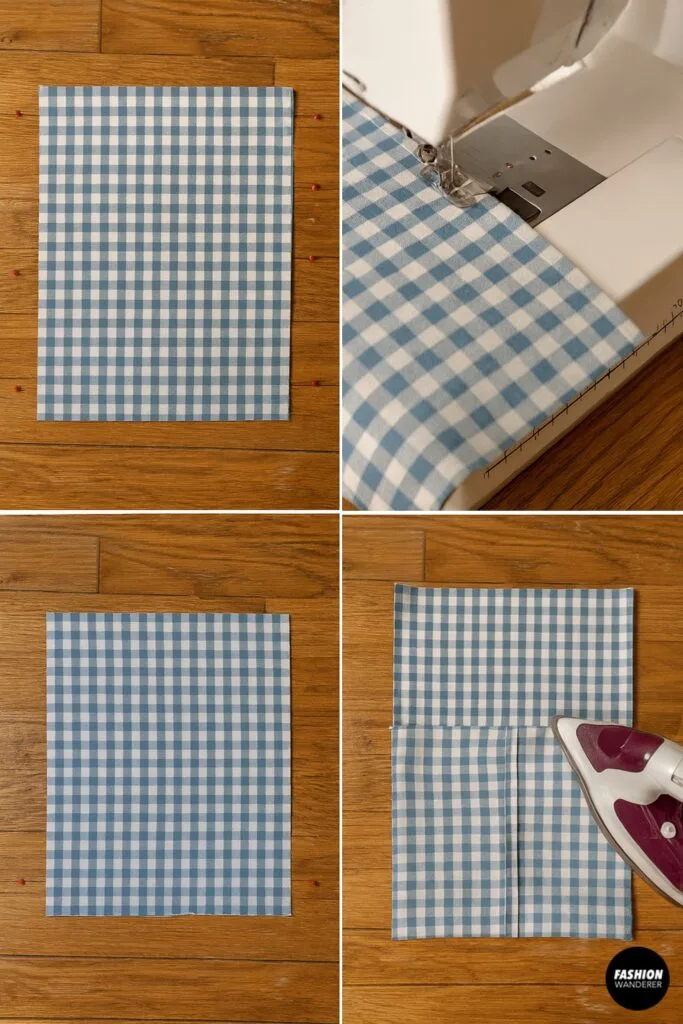
Repeat the same process with the lining fabric from the second shirt.
Pro Tip: Want inner pockets? Use leftover pieces to sew a square or rectangular pocket onto one of the lining pieces before stitching the sides.
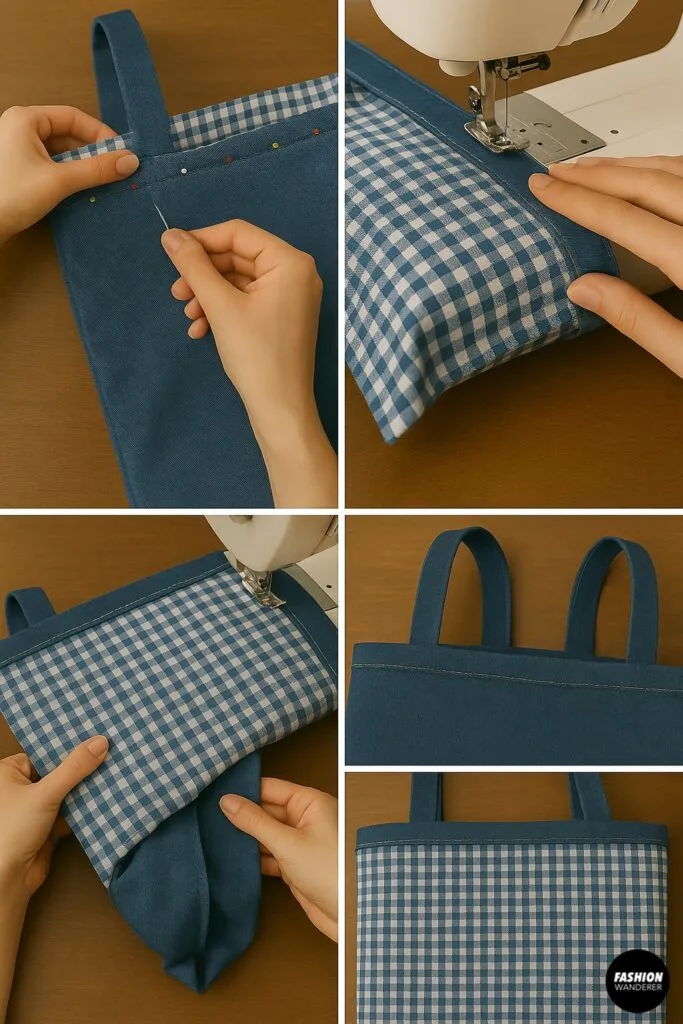
Step 5: Make the Straps

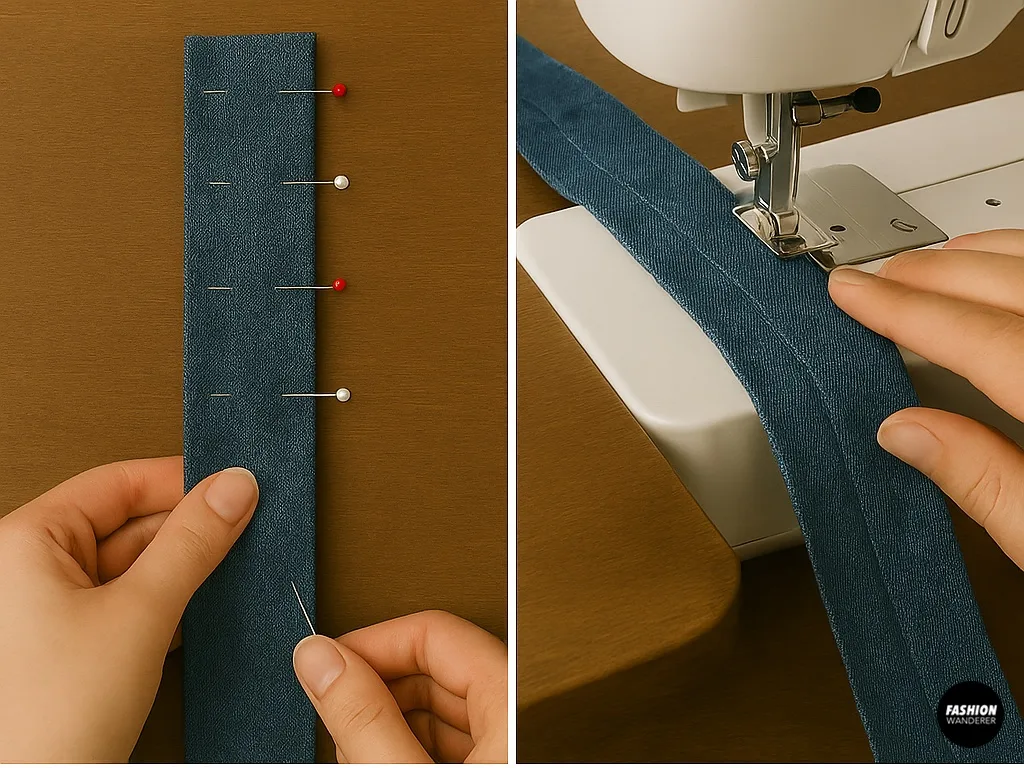
Take your two 22” × 2.5” rectangles and fold each strap in half lengthwise (right sides together). Stitch along the long edge.
- Turn the strap right side out using a safety pin or loop turner.
- Press flat.
- Topstitch along both long edges for a polished finish.
Step 6: Pin & Sew Bag Layers

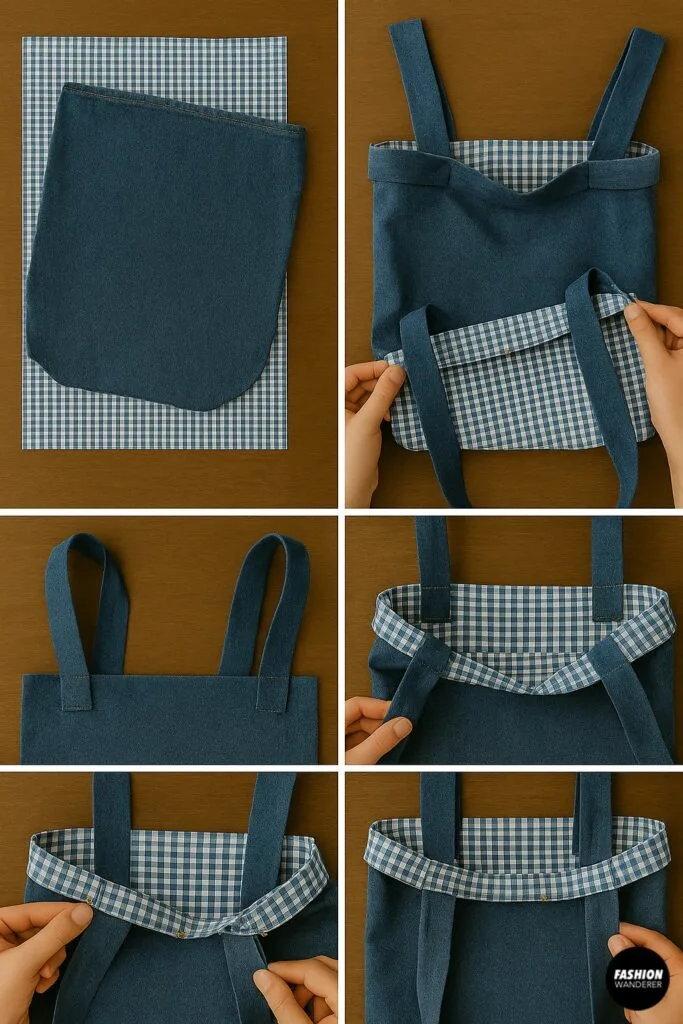
Turn the outer tote right side out. Keep the lining wrong side out.
- Tuck the outer bag inside the lining so right sides are facing each other.
- Align side seams and pin all around the top edge.
Insert straps: Slide the raw ends of the straps between the outer and lining layers, 3″ from each side seam. Pin in place, making sure they’re not twisted.
Step 7: Sew the Top Seam

- Sew around the entire top edge with a ½” seam allowance.
- Leave a 3″ opening between pins (at the back or side) for turning the bag right side out.
Step 8: Turn Right Side Out & Finish

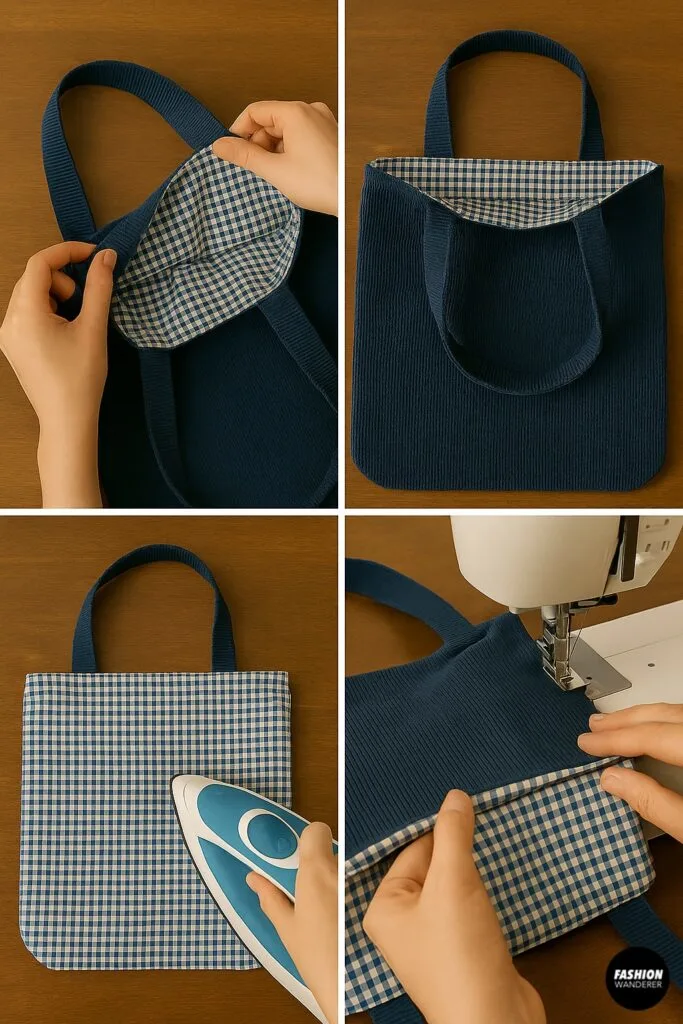
Gently pull the entire bag through the 3” opening.
- Push the lining inside the outer shell.
- Press the top edge flat, making sure the opening seam is aligned.
Topstitch around the entire top edge (about ⅛” from the edge) to close the turning hole and add structure.
🎒 Optional Enhancements

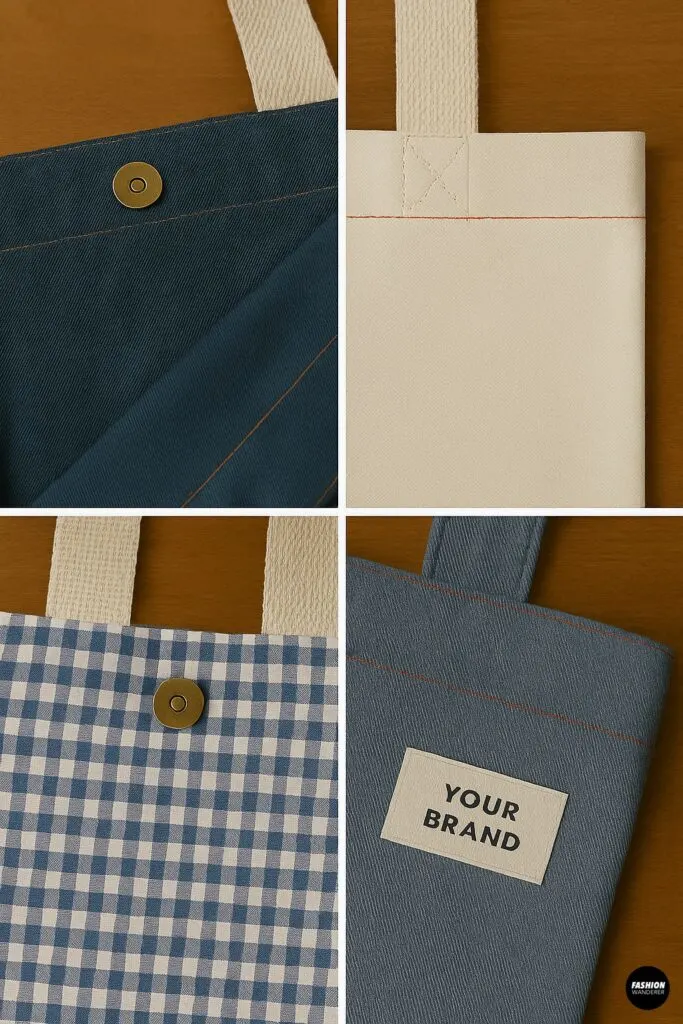
- Add a snap: Insert a magnetic closure between layers before topstitching.
- Contrast stitching: Use a bold thread color for decorative seams.
- Label it: Sew in a branded tag if you’re selling or gifting.
💡 Styling Ideas for Your Reversible Tote

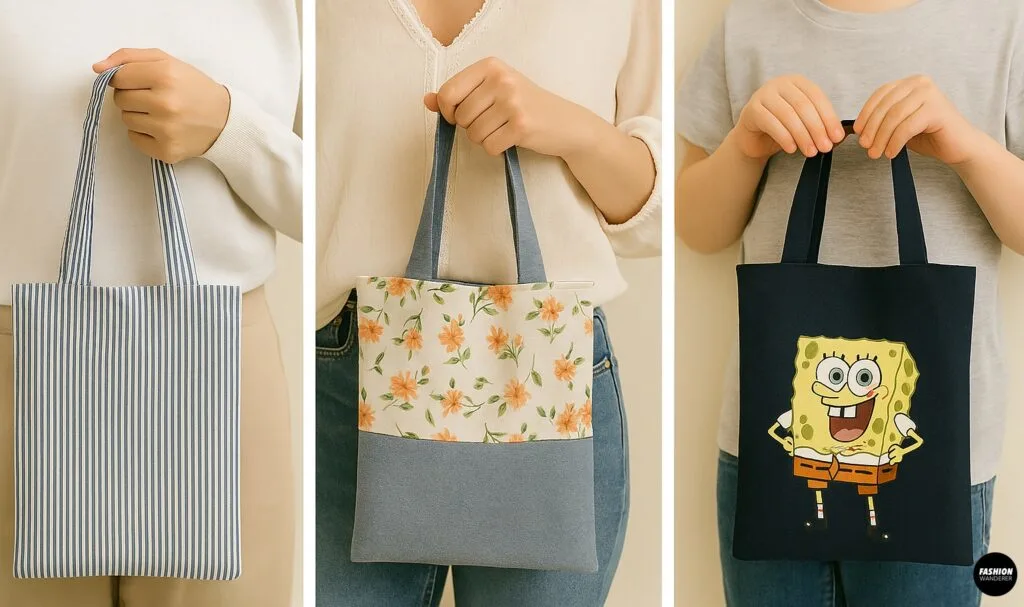
- Use a striped men’s shirt for a nautical vibe.
- Pair a floral fabric with a neutral chambray for seasonal flair.
- Make a mini tote for kids using old graphic tees.
🔁 Reversible Function = Built-in Mood Shift
The best part? You can switch your look instantly. Floral for brunch. Plaid for the market. Solid for office errands.
Want more contrast? Use color-blocking or patchwork from several shirts for a trendier look.
🧺 Washing & Care Tips
- Machine wash on gentle cycle, cold water.
- Air dry or tumble dry low.
- Press with an iron for a crisp, clean shape.
- Avoid bleach or heavy agitation if shirts are vintage.
🧵 Common Troubleshooting
Bag too floppy?
- Use interfacing on one or both shirt panels before sewing.
Straps pulling?
- Reinforce with an X-stitch box where they meet the top seam.
Uneven edges?
- Re-square your panels with a rotary cutter and clear ruler before assembling.
✅ Final Thoughts

A reversible tote made from old shirts is the perfect blend of sustainability and style. It’s a rewarding weekend project that helps you declutter while upgrading your wardrobe. Each bag is unique, personalized, and practical—whether you’re heading to the grocery store, packing your laptop, or gifting a handmade surprise.
Don’t stop at just one—create a whole series from vintage tees, flannels, or even old dresses. The more unexpected the fabric, the cooler the bag!
Trendy, Affordable Sewing Patterns for All Sizes


Tie Shoulder Jumpsuit Pattern


Palazzo Pants Sewing Pattern


Pocket Overall Romper Pattern


Wrap Maxi Skirt Sewing Pattern


Tie Back Top Sewing Pattern