
Transforming an old T-shirt into a trendy tube top is a fantastic way to breathe new life into your wardrobe—without breaking the bank. Whether you’re prepping for a beach day, festival season, or just craving a fresh summer look, this DIY tube top tutorial from a T-shirt is the perfect project.
In this post, you’ll learn how to upcycle any crewneck tee into a snug, stylish tube top in just a few easy steps. With minimal tools and beginner-friendly techniques, you’ll be rocking your custom-made tube top in under an hour!
Why Make a DIY Tube Top from a T-Shirt?
- Eco-friendly fashion: Upcycling reduces waste and gives old garments a second life.
- Custom fit: You control the sizing, length, and style—no more one-size-fits-all frustrations.
- Cost-effective: Skip expensive boutique purchases and create something unique for a fraction of the price.
- Quick project: From cutting to finishing, you can complete this DIY in under an hour.
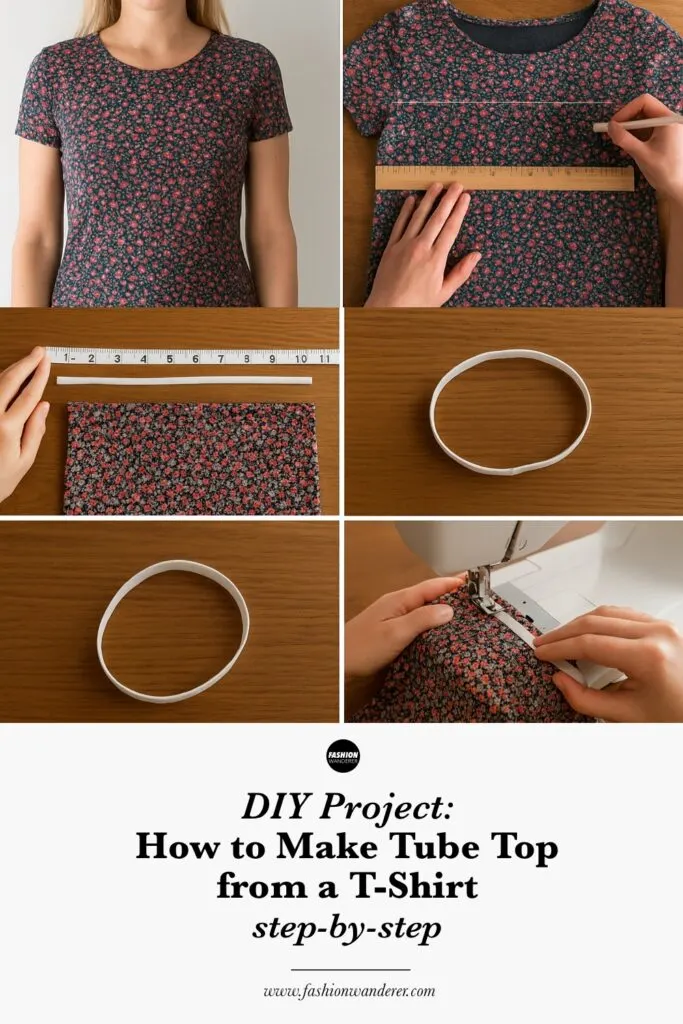
How to Make a Tube Top from a Tee
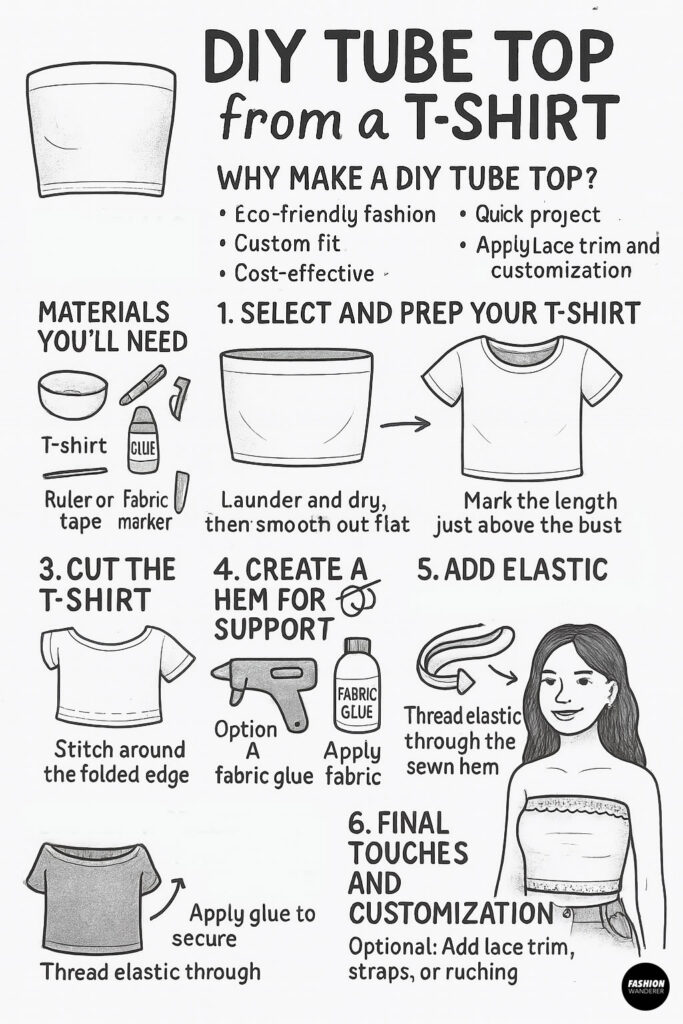
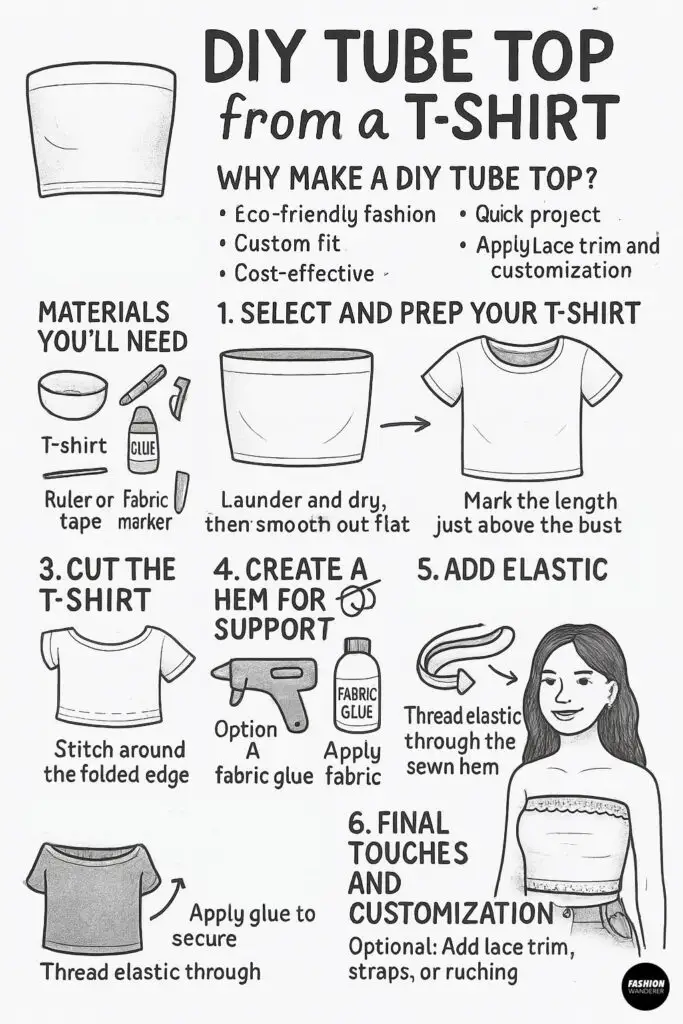
Materials You’ll Need

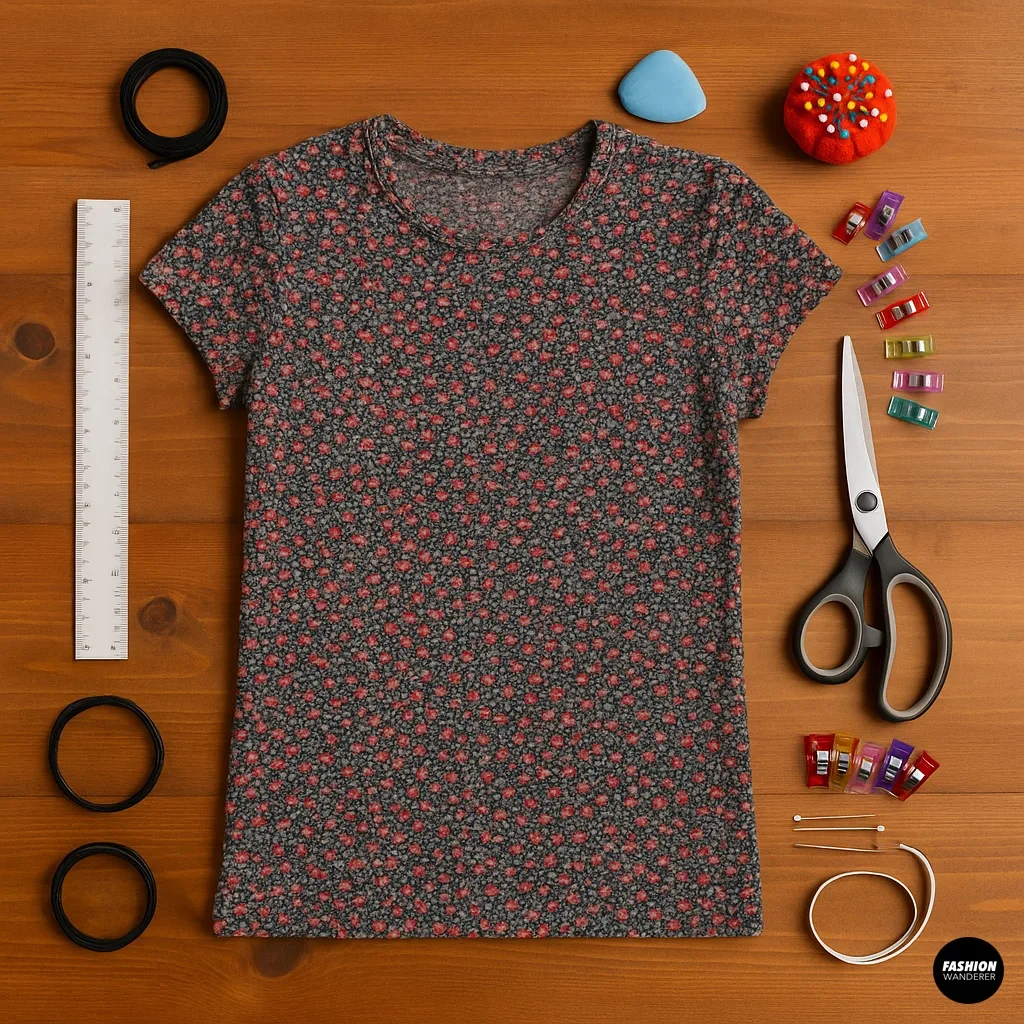
- One clean, stretchable cotton T-shirt (any color or print)
- Ruler or measuring tape
- Fabric chalk or washable marker
- Sharp fabric scissors
- Elastic band (optional, for extra support)
- Sewing machine or needle and thread (or fabric glue for a no-sew version)
- Pins or clips
Step 1: Select and Prep Your T-Shirt
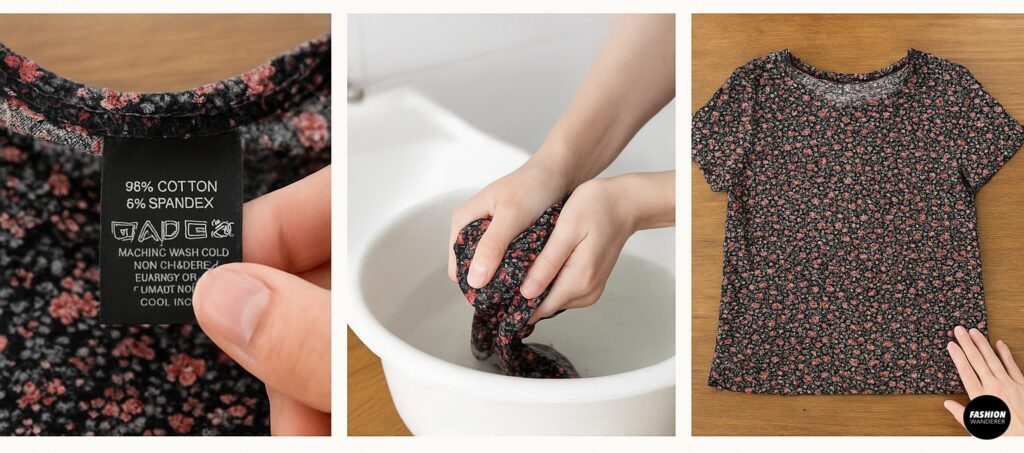

- Choose the right fabric: A T-shirt with at least 5% spandex or elastane holds shape better as a tube top.
- Wash and dry: Make sure your shirt is clean to avoid shrinkage after the project.
- Lay it flat: Smooth out wrinkles on a flat surface—this ensures your cutting lines stay straight.
Step 2: Measure and Mark Your Tube Top

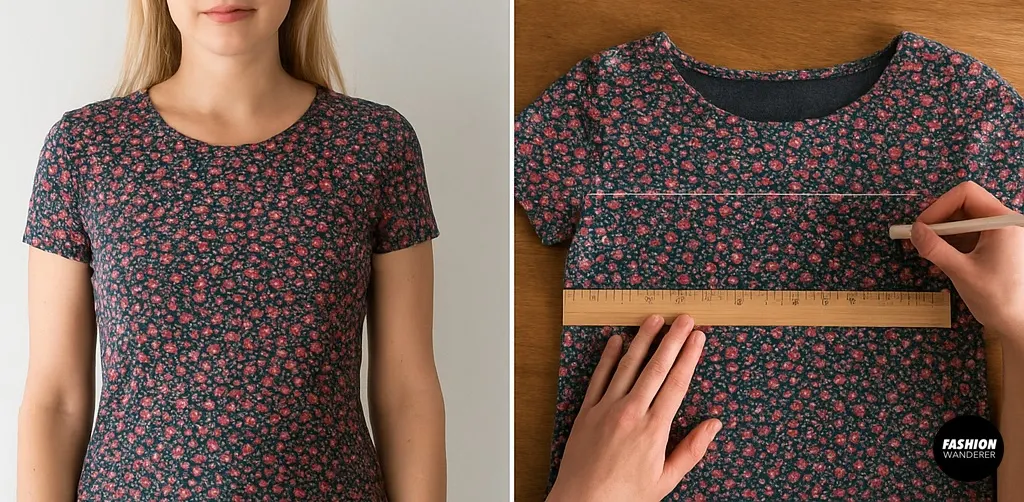
- Determine the desired length: Try on the shirt and use chalk to mark where you want the top edge of the tube top to sit (just above the bust line).
- Add seam allowance: From that mark, measure an additional 1–1.5 inches downward to create a seam allowance or hem fold.
- Draw a straight line: Use a ruler and fabric marker to connect your marks all the way around each side of the shirt.
Step 3: Cut the T-Shirt

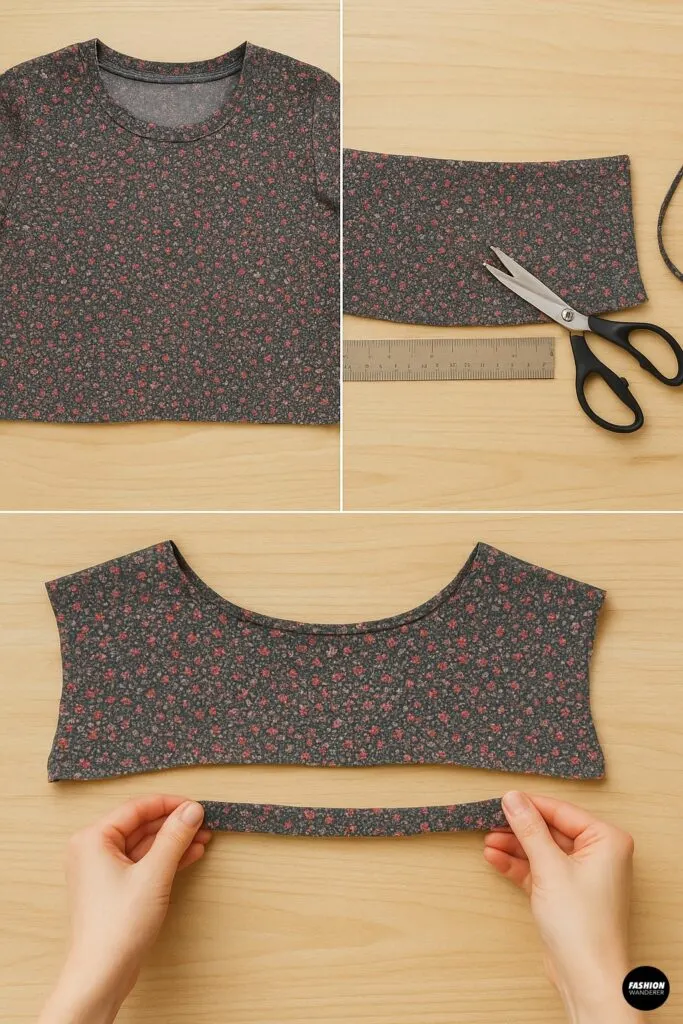
- Cut off the top: Carefully cut along the marked line to remove the upper portion of the shirt. You can keep the remaining fabric for other DIY projects!
- Trim excess: If the hem allowance is larger than 1.5 inches, trim it down for a neater finish.
- Smooth the edge: Lightly stretch the cut edge to help prevent fraying—this technique encourages the fabric to curl slightly for a polished look.
Step 4: Create a Hem for Support
Option A: Sewing Machine or Hand-Stitching
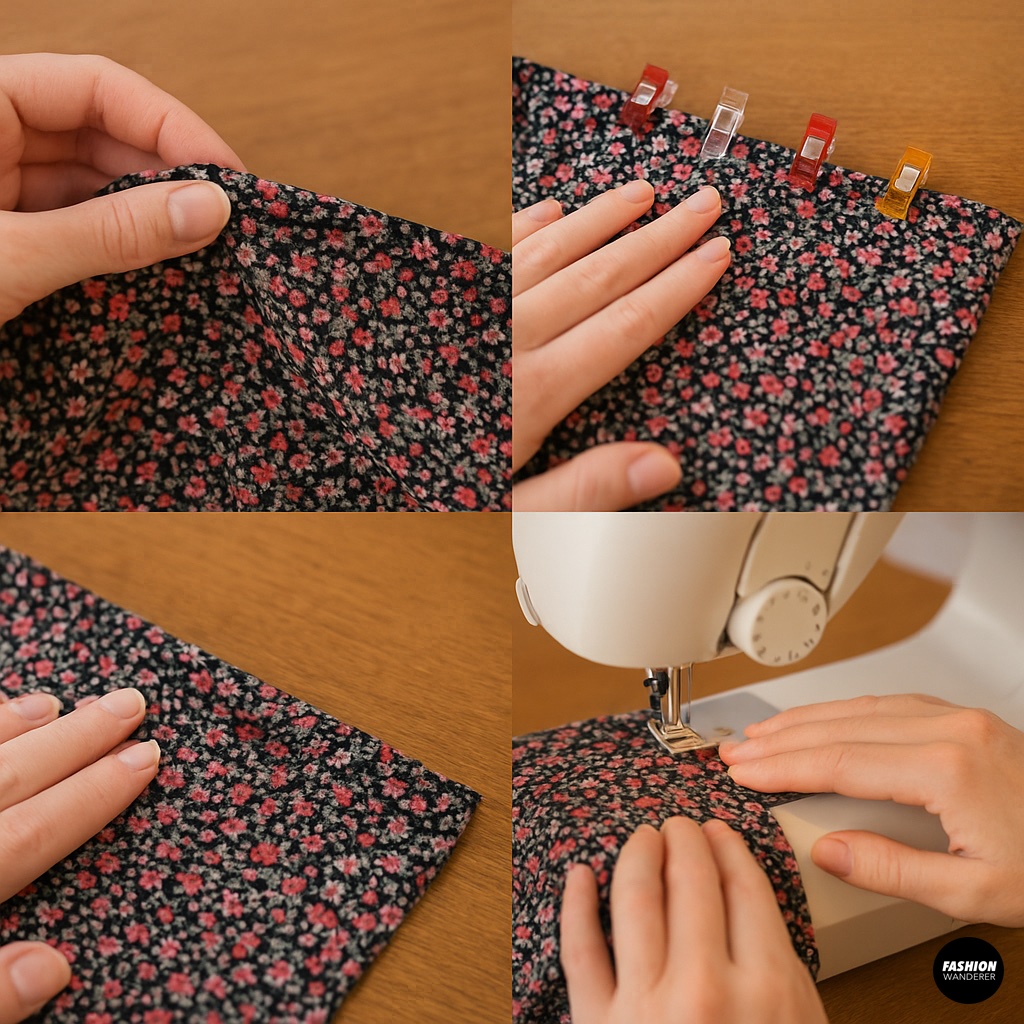

- Fold the edge: Fold the top raw edge inward along your seam-allowance line.
- Pin or clip: Secure the fold evenly around the entire top.
- Stitch: Sew a straight stitch around the tube’s circumference, catching both layers. Backstitch at the start and end to secure.
Option B: No-Sew Method
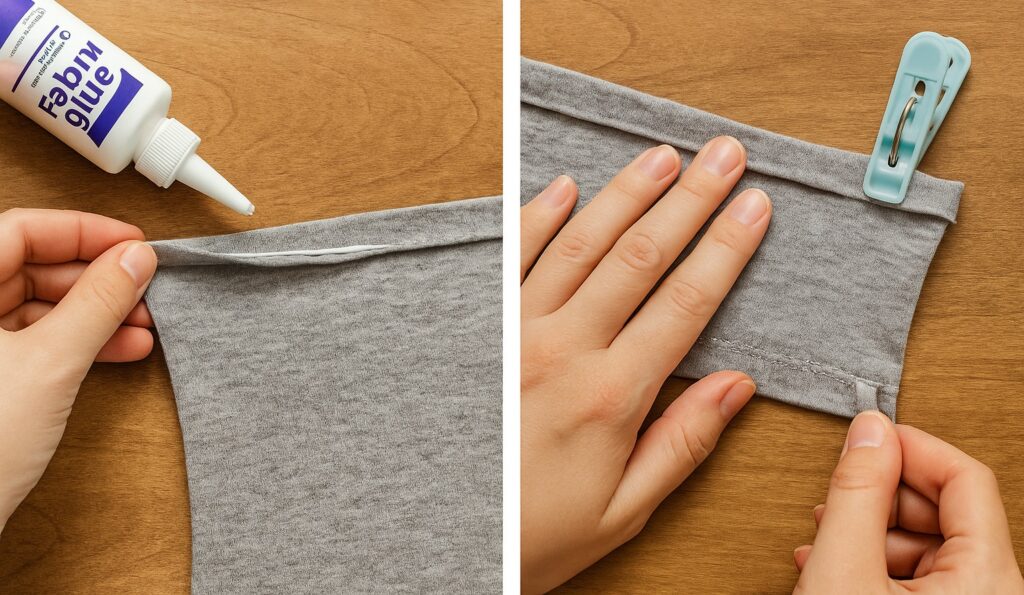

- Fabric glue: Apply a thin bead of fabric glue along the inside fold.
- Press and hold: Fold the hem inward and hold or clip for the glue’s recommended drying time.
Step 5: Add Elastic (Optional but Recommended)
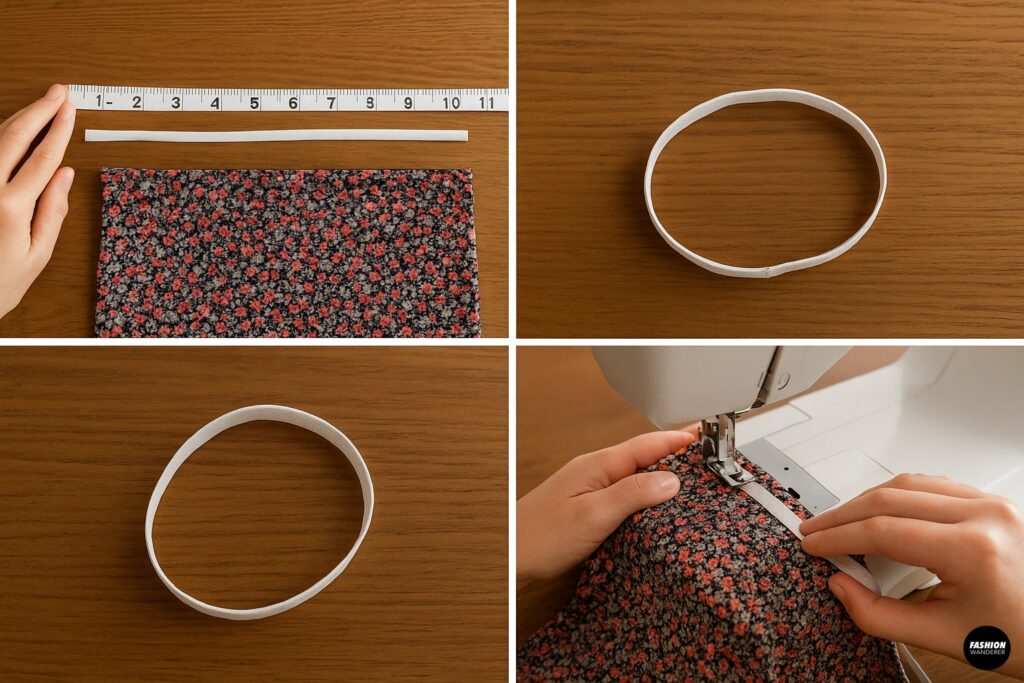

For extra grip—especially useful if your shirt has less stretch—incorporate a length of narrow elastic.
- Measure elastic: Wrap the elastic around your bust where the top will sit, subtracting about 1 inch for a snug fit.
- Form a loop: Sew the elastic ends together to create a loop.
- Attach inside hem: As you sew or glue the top hem, sandwich the elastic between the layers; stretch it slightly as you go so it gathers evenly.
Step 6: Final Touches and Customization

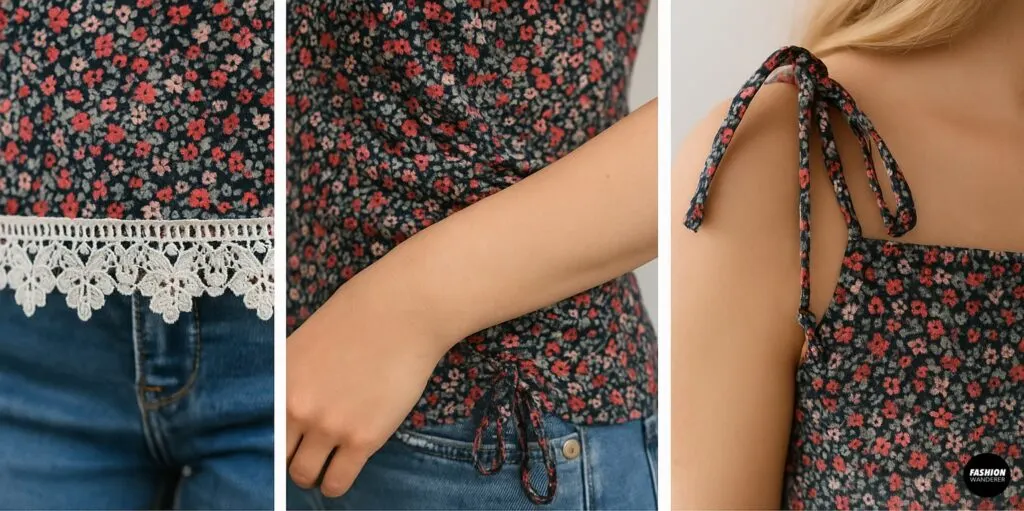
- Edge embellishment: Add lace trim or ribbon along the bottom hem for a feminine flair.
- Gathered style: Sew vertical lines of elastic thread on the sides to create gentle ruching.
- Strap hack: Use scrap fabric or leftover T-shirt strips to fashion removable straps—loop them through the hem and knot.
Styling Your DIY Tube Top
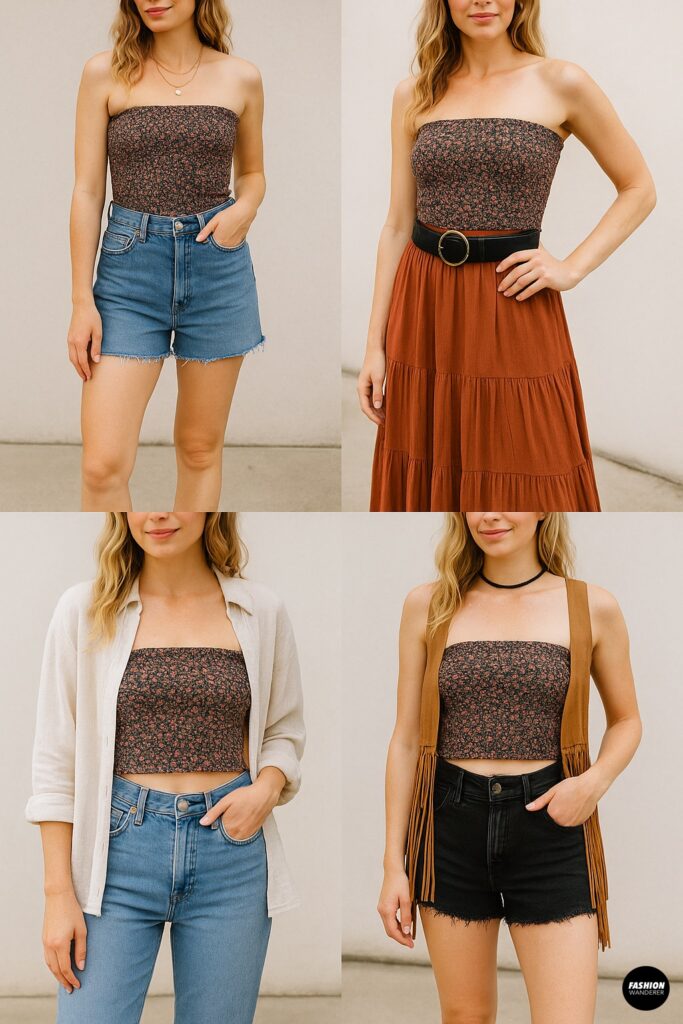

- Casual summer vibe: Pair with high-waisted denim shorts, chunky sandals, and layered necklaces.
- Evening glow: Tuck into a flowy maxi skirt, add strappy heels, and a bold statement belt.
- Layered look: Wear under an open linen button-down or oversized denim jacket for transitional weather.
- Festival ready: Add body glitter, fringe vest, and ankle boots for an eclectic, boho ensemble.
Troubleshooting Common Issues
- Tube top slipping down: Ensure your elastic measurement is snug and that it’s properly sandwiched in the hem.
- Uneven hem: Press and pin carefully, and use a walking foot on your sewing machine to feed layers evenly.
- Fabric fraying: Opt for a no-fray knit T-shirt or use a zigzag stitch along the raw edge before folding.
Conclusion

Creating your own DIY tube top from a T-shirt is a quick, eco-friendly project that rewards you with a one-of-a-kind summer staple. Armed with just a few tools and a willingness to experiment, you can customize length, fit, and embellishments to match your personal style.
Ready to revamp that old tee? Gather your materials, follow these steps, and let your creativity shine—your wardrobe (and the planet) will thank you!
Trendy, Affordable Sewing Patterns for All Sizes


Tie Shoulder Jumpsuit Pattern


Palazzo Pants Sewing Pattern


Pocket Overall Romper Pattern


Wrap Maxi Skirt Sewing Pattern


Tie Back Top Sewing Pattern