
Distressed jeans are a timeless fashion staple that adds a cool, edgy vibe to any outfit. Whether you love subtle worn-in details or bold, ripped designs, learning how to distress jeans like a pro at home can save you money and let you customize your look exactly how you want it.
With a few simple tools and techniques, you can upcycle denim into a trendy statement piece. In this guide, we’ll walk you through easy-to-follow, step-by-step tutorials for distressing jeans perfectly—no sewing skills required!
Why Distress Your Jeans?
Distressing your jeans gives them a unique character and vintage appeal that store-bought ripped denim often lacks. Plus, DIY distressing allows you to:
- Customize the placement and intensity of rips and frays
- Extend the life of older jeans by creatively repurposing worn areas
- Save money by avoiding expensive designer ripped jeans
- Express your personal style with truly one-of-a-kind denim
Whether you prefer subtle whiskering or bold shredded knees, mastering distressing techniques will elevate your fashion game and turn your denim into your new favorite wardrobe staple.
What You’ll Need to Distress Jeans at Home

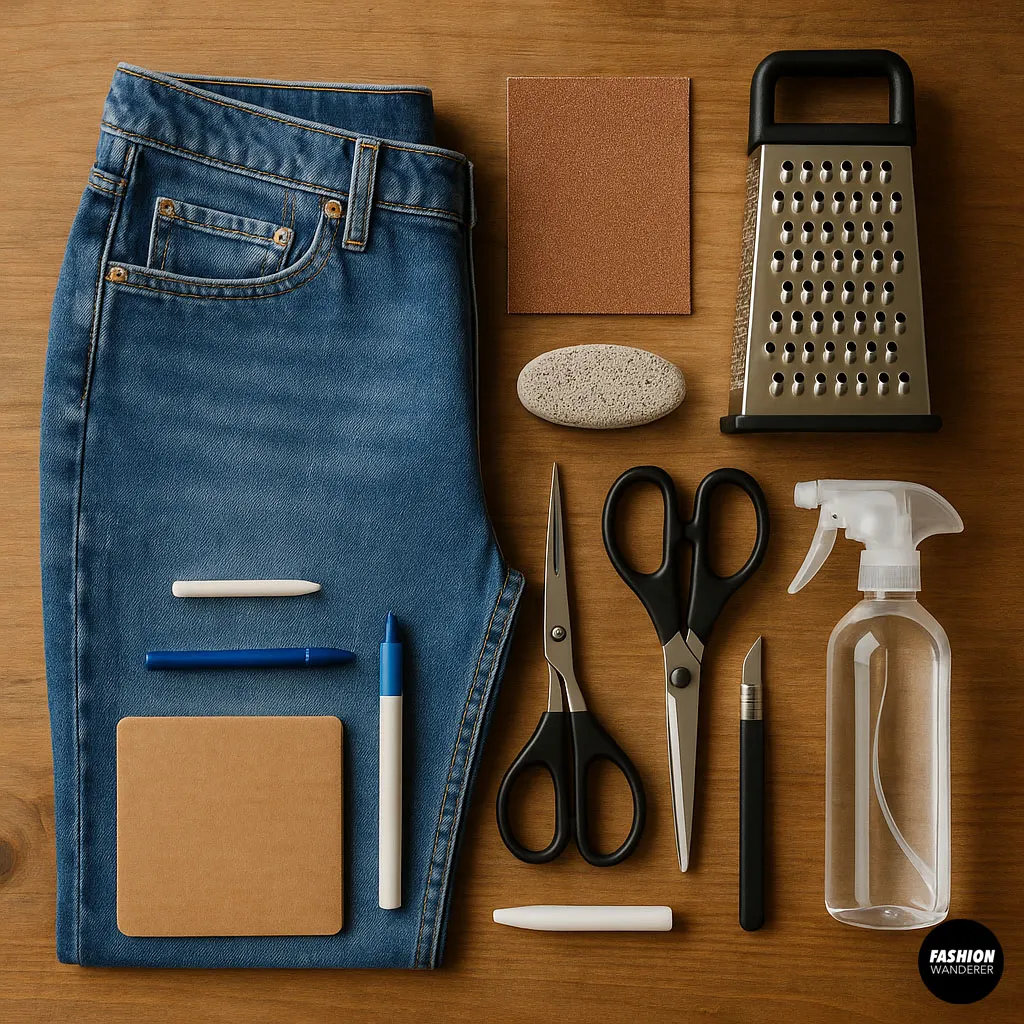
Before you start, gather the following supplies:
- A pair of jeans (preferably 100% cotton denim for best results)
- Sandpaper or a pumice stone
- Tweezers
- Scissors or a razor blade (sharp craft knife or box cutter works too)
- Chalk or fabric marker (for marking distress spots)
- A cutting board or thick piece of cardboard (to protect surfaces)
- Optional: cheese grater (for subtle texture), spray bottle with water (to soften fabric)
With these simple tools, you’re ready to distress your jeans like a pro!
Step-by-Step Tutorial: How to Distress Jeans
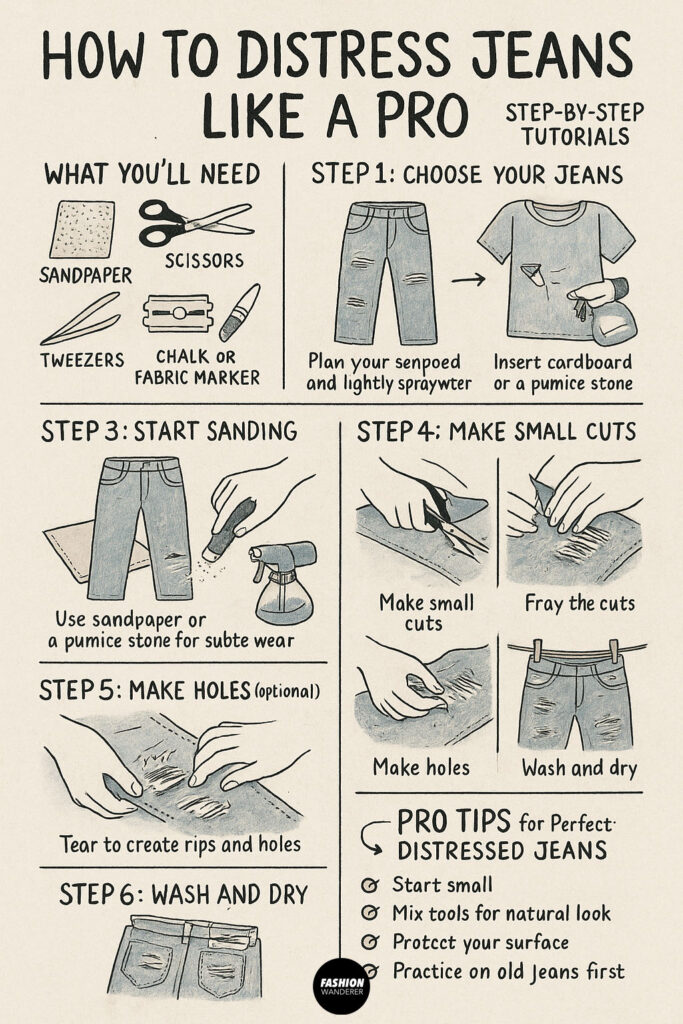
Step 1: Choose Your Jeans and Plan Your Design
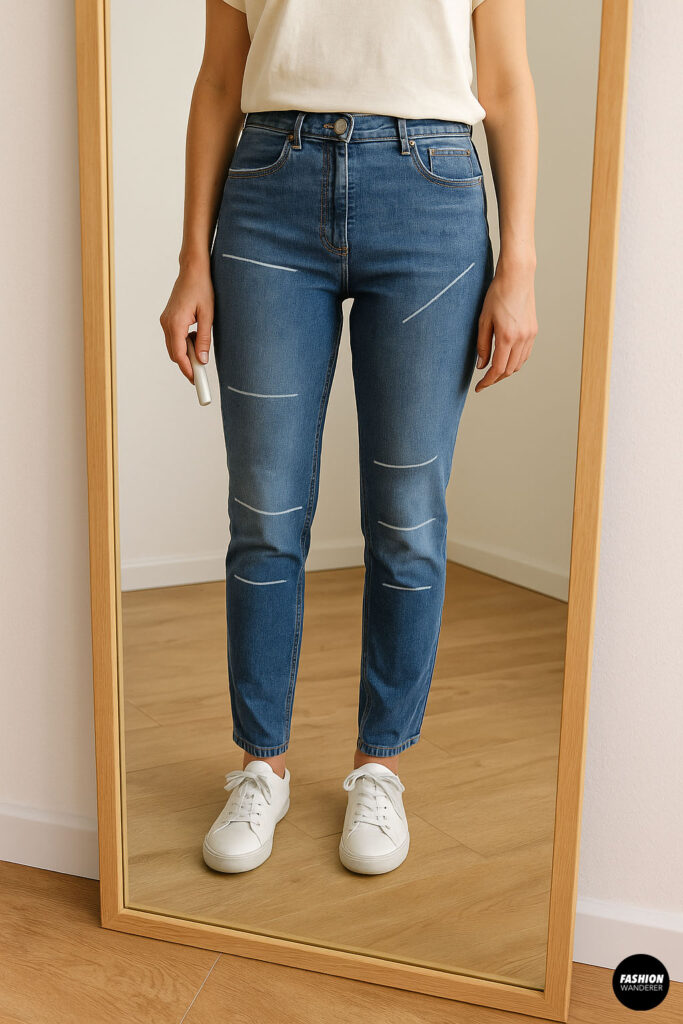

Start by selecting a pair of jeans you want to distress. Light to medium wash denim typically shows distressing more prominently, but dark denim can work beautifully for subtle worn effects.
Wear your jeans and look in the mirror to decide where you want to create distressing. Popular spots include:
- Knees
- Thighs
- Back pockets
- Hems
- Along seams and pockets
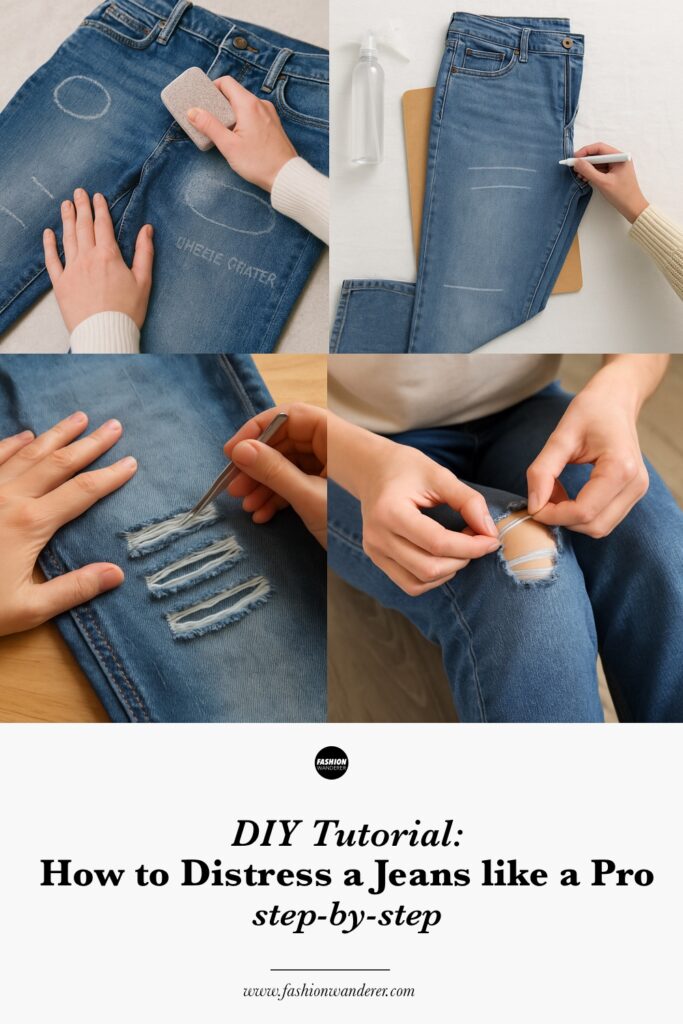
Use chalk or a fabric marker to lightly outline these areas. Planning your design first ensures your distressing looks natural and intentional.
Step 2: Prep Your Work Area and Jeans
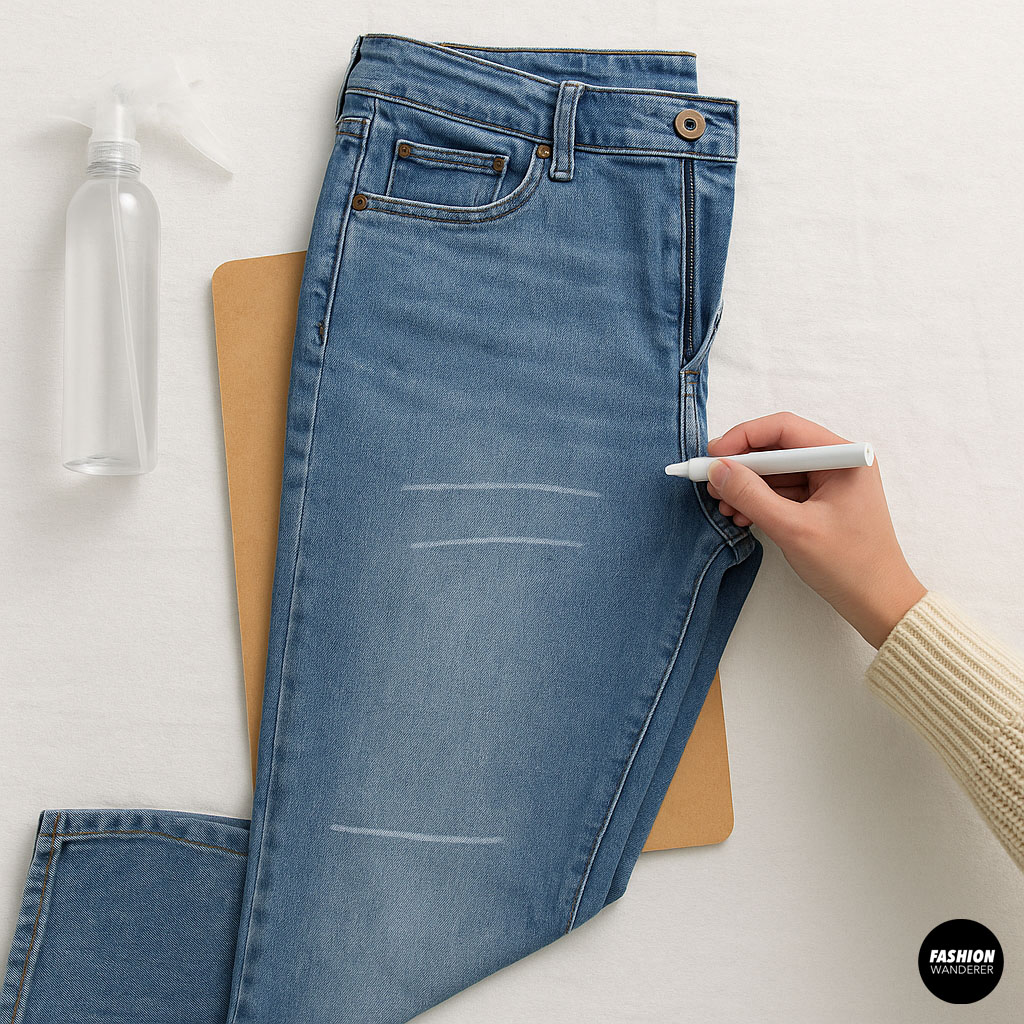

Lay your jeans flat on a clean surface with the inside facing up. Insert a cutting board or piece of cardboard inside the leg you’ll work on to protect the back layer of fabric and your work surface from accidental cuts.
If your denim feels stiff, lightly spray the distress areas with water to soften the fabric—this will make cutting and fraying easier.
Step 3: Start Sanding or Using a Cheese Grater for Subtle Distressing

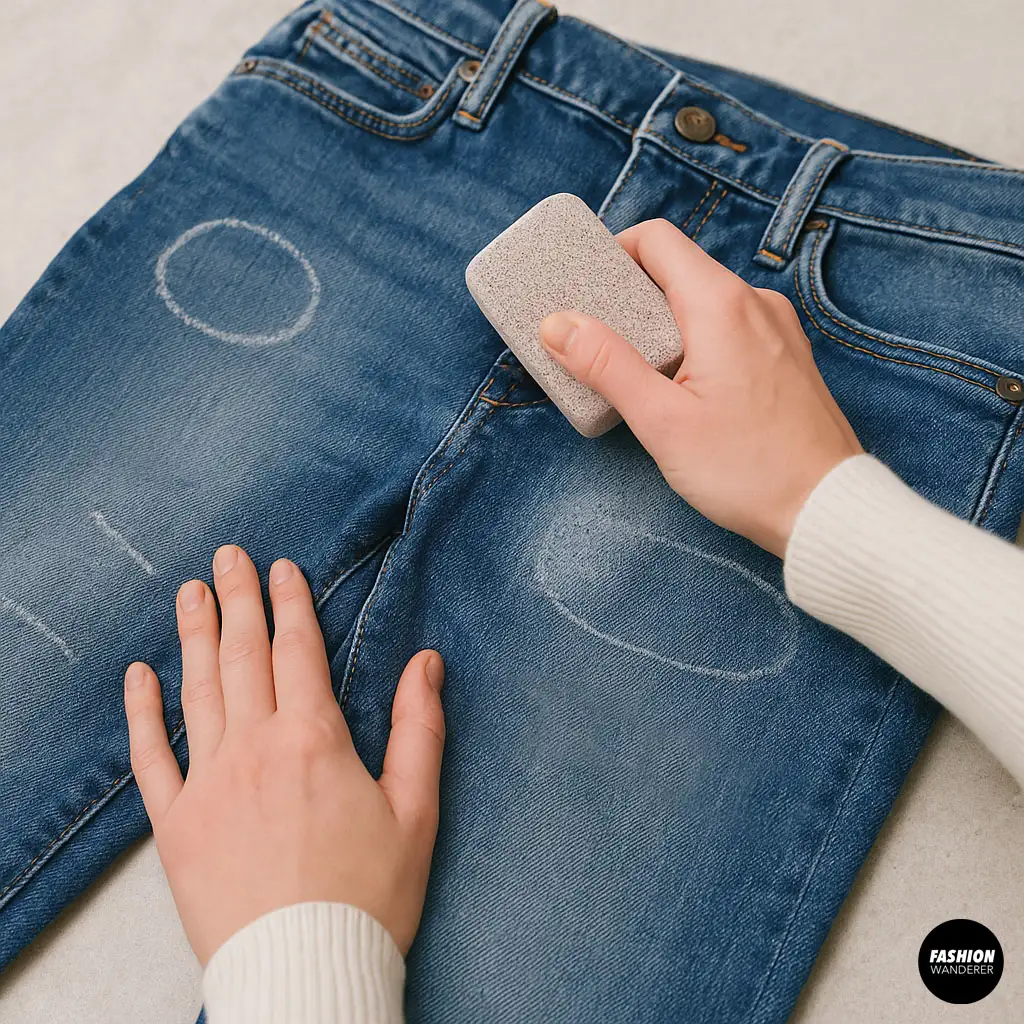
For a naturally worn look without large holes, gently rub sandpaper or a pumice stone over your marked areas. Focus on edges like pocket corners, thighs, and hems.
Alternatively, use a cheese grater to scrape the fabric in the distress zones. This roughens the surface and creates small frays and faded patches for a lived-in vibe.
Step 4: Create Small Cuts with Scissors or Razor Blade
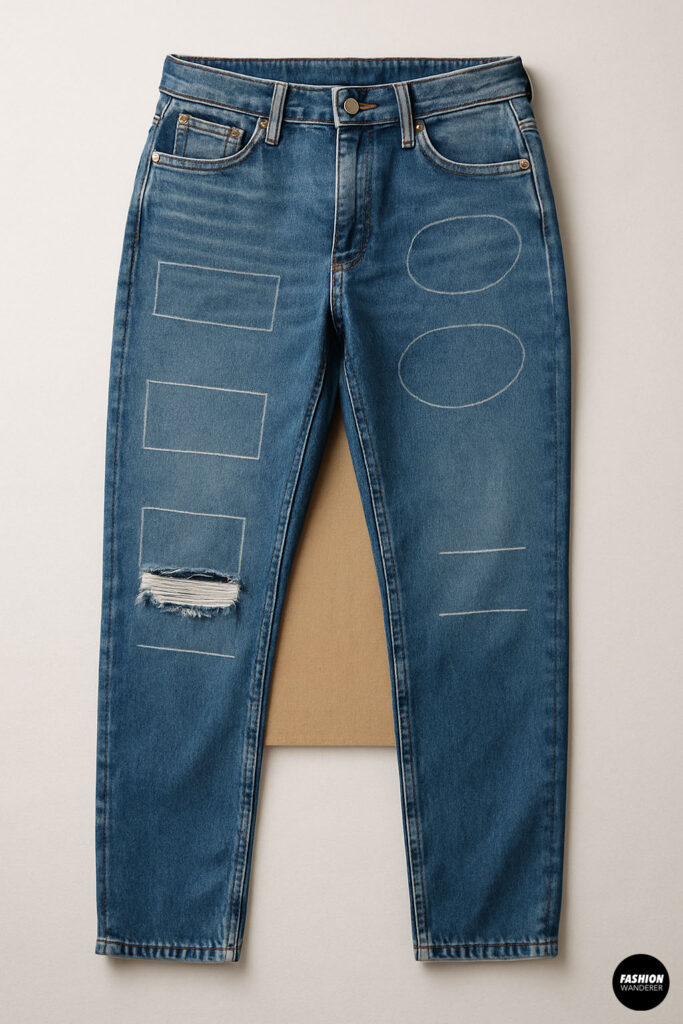
Using your scissors or razor blade, carefully make horizontal cuts about 1-2 inches long on the marked spots. Don’t cut all the way through both layers—aim to cut only the top layer or the outer surface of the denim.
For ripped knees, make several parallel cuts spaced about ½ inch apart. The closer the cuts, the more shredded your jeans will look.
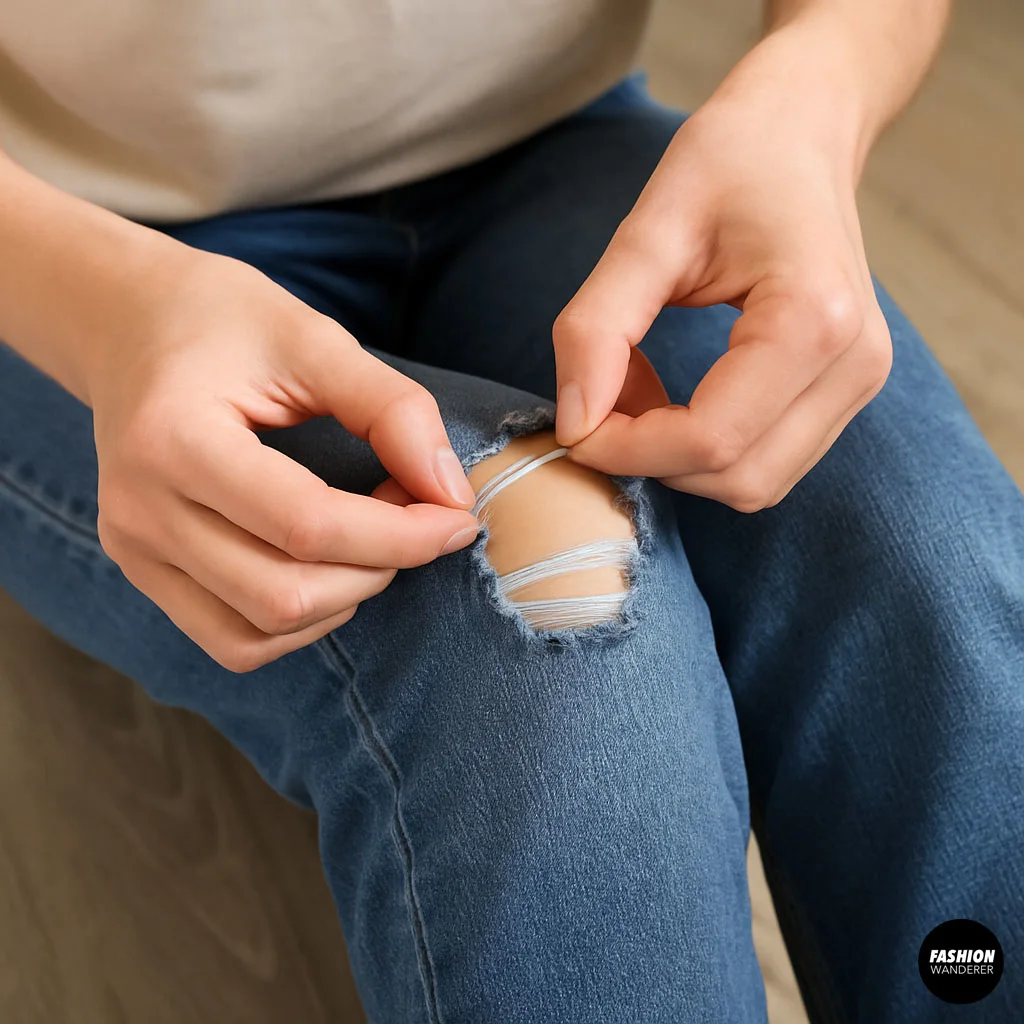
Step 5: Fray the Cuts with Tweezers


After cutting, use tweezers to pull out some of the white horizontal threads inside the cuts. This frays the edges and creates the classic distressed texture.
For a more natural look, vary the amount of fraying on each cut. Tug gently so you don’t accidentally enlarge the holes too quickly.
Step 6: Optional – Make Holes and Rips

If you want bolder holes, carefully widen some of the cuts by cutting vertically or ripping along the frayed edges with your fingers. Go slowly and check the size frequently.
For extra flair, you can create holes on the pockets or near seams. Remember: you can always make holes bigger, but you can’t undo them—so start small!
Step 7: Finish by Washing and Drying Your Jeans

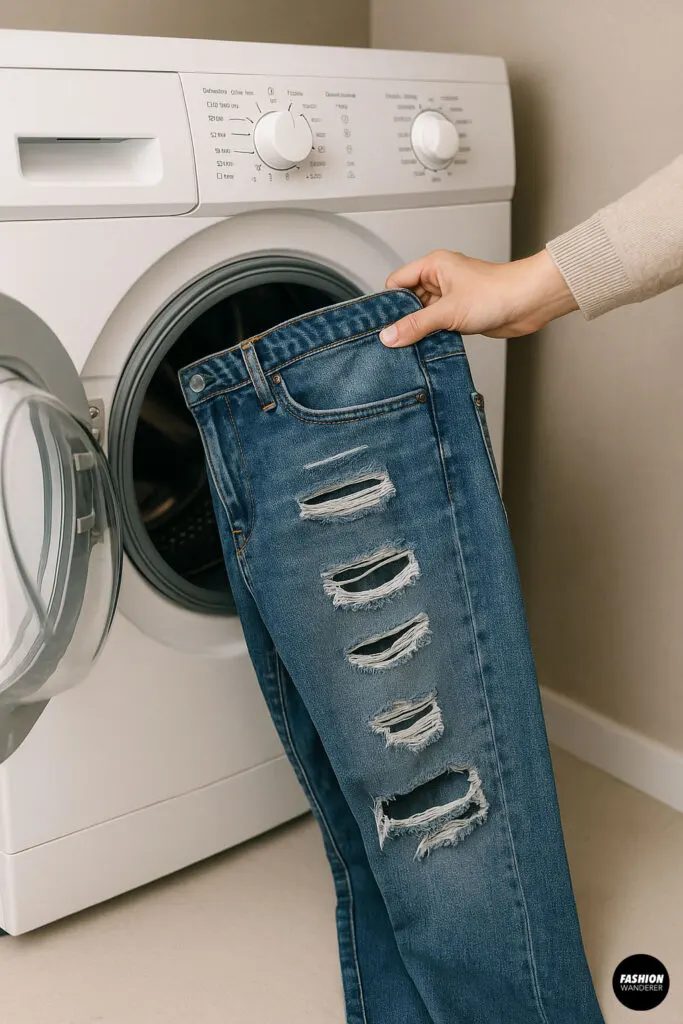
Once you’ve finished distressing, wash your jeans on a gentle cycle to soften the frayed edges and remove loose threads. Air dry or tumble dry on low heat.
Washing also helps set the distressed look and prevents the holes from closing up again.
Pro Tips for Perfect Distressed Jeans
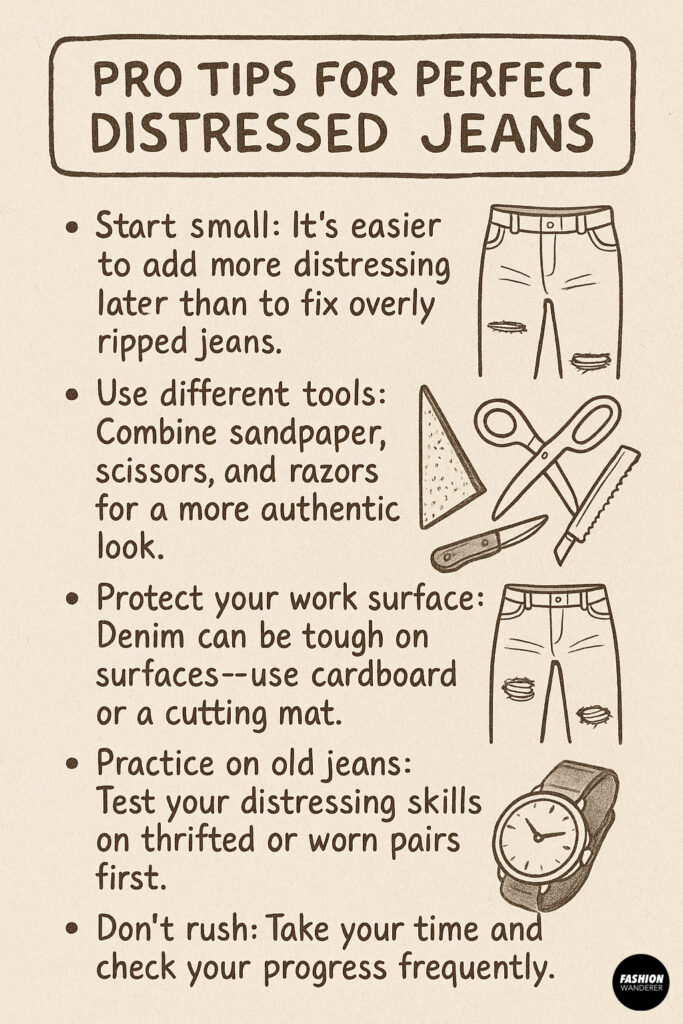
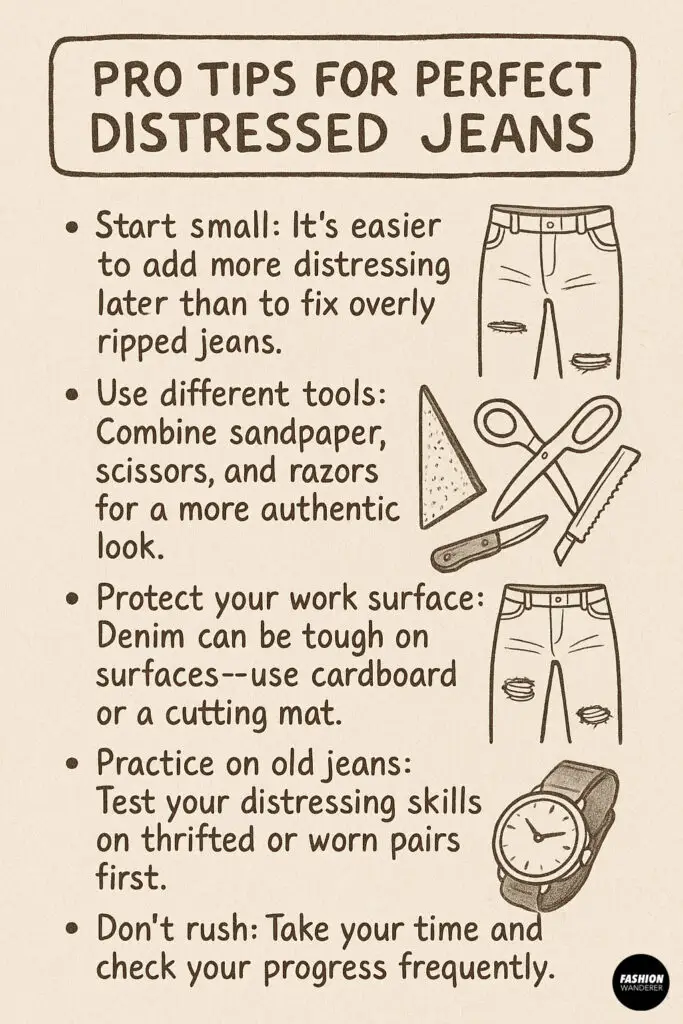
- Start small: It’s easier to add more distressing later than to fix overly ripped jeans.
- Use different tools: Combine sandpaper, scissors, and razors for a more authentic look.
- Protect your work surface: Denim can be tough on surfaces—use cardboard or a cutting mat.
- Practice on old jeans: Test your distressing skills on thrifted or worn pairs first.
- Don’t rush: Take your time and check your progress frequently.
Creative Distressing Ideas to Try

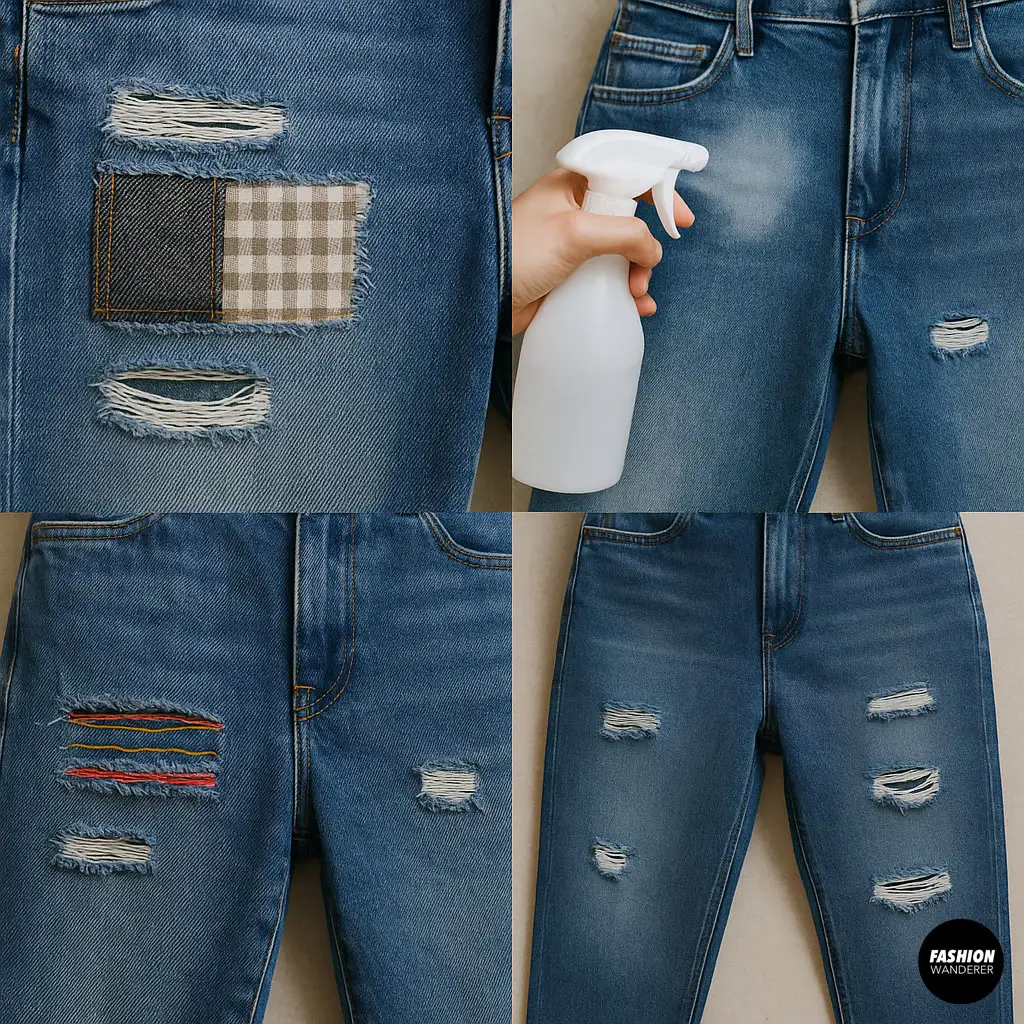
- Patchwork distress: Add fabric patches under ripped areas for a trendy layered look.
- Bleached distress: Use bleach spray to fade specific areas before distressing.
- Colored threads: Replace some pulled threads with embroidery for a pop of color.
- Asymmetrical distressing: Distress only one leg or a specific side for a modern twist.
Conclusion: Distress Your Jeans Like a Pro
Now that you know how to distress jeans at home, you can transform your old denim into fashion-forward favorites. With a few simple tools, a bit of patience, and these expert techniques, you’ll master the art of perfectly worn-in, stylishly ripped jeans that turn heads.
Try these step-by-step tutorials today and enjoy a personalized look that’s truly your own!

Trendy, Affordable Sewing Patterns for All Sizes


Tie Shoulder Jumpsuit Pattern


Palazzo Pants Sewing Pattern


Pocket Overall Romper Pattern


Wrap Maxi Skirt Sewing Pattern


Tie Back Top Sewing Pattern