
If you love the soft, feminine “coquette” aesthetic—think bows, lace, and balletcore vibes—this easy thrift flip is for you. In about an hour, you can turn a secondhand cardigan into a cropped shrug that layers perfectly over camis, dresses, and slip skirts.
Below is an upcycle clothing idea, detailed beginner‑friendly tutorial with sewing and no‑sew finishing options, plus styling ideas to make it unmistakably coquette.
How to Upcycle a Cardigan into Coquette Shrug

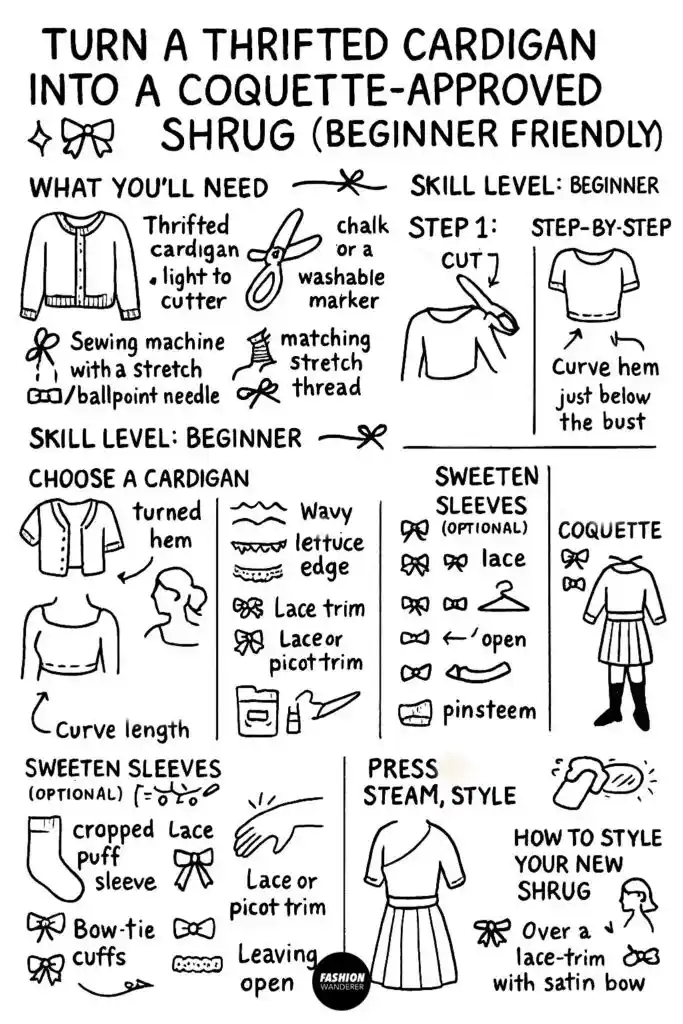
What You’ll Need


- Thrifted cardigan (light to medium‑weight knits are easiest)
- Fabric scissors or rotary cutter + mat
- Measuring tape or ruler
- Tailor’s chalk or washable marker
- Sewing machine with a stretch/ballpoint needle or hand needle
- Matching stretch thread (poly/serger cone works great)
- Pins or clips
- Iron + pressing cloth
- Optional coquette details: ½–1″ ribbons, lace trim, picot elastic, pearl buttons, tiny bows, ruffle trim, fabric glue (stretch‑safe), Fray Check
Skill level: Beginner. Basic straight/zigzag stitches only.
Step 1: Choose the Right Cardigan


For the coquette look, pick something delicate:
- Fabric: Cotton jersey, rayon/spandex, fine rib or lightweight sweater knit. Avoid heavy chunky knits on your first try.
- Fit: A size that fits your shoulders well—shrugs sit at the shoulder and upper back, so shoulder width matters more than body size.
- Front: Button‑front or open‑front both work. If it has a long placket, we’ll shorten it.
Pro tip: Check fiber content on the tag. A little spandex (3–8%) helps recovery and keeps your shrug from stretching out.
Step 2: Mark Your Crop (Bolero Length)


A shrug is essentially a cropped, curved “bolero” that frames the upper body.
- Put the cardigan on and close it as you’d wear it.
- Decide the finished hem length: just under the bust is classic for coquette styling. Mark this point at center front.
- Use a ruler to continue that line around the entire cardigan, from center front → side seams → across the back.
- Add ¾” hem allowance to your chalk line if you plan to sew a turned hem. If using lace trim or elastic finish, add ¼–⅜“.
Shape option (more flattering): Curve the hem slightly upward at center front (½–1″) and keep the back almost straight. This creates a soft, ballet‑style line.
Step 3: Cut the Cardigan


Lay the cardigan flat, smoothing out ripples. Pin through both layers to keep it from shifting. Cut along the marked line with sharp scissors for a clean edge.
If your cardigan has a long button placket: After cutting, trim the placket so its bottom edge aligns with your new hem. We’ll secure it in finishing.
Step 4: Finish the Hem (Pick One)
A) Turned & Stitched Hem (neat + beginner friendly)


- Press up the hem by your allowance. Use a pressing cloth.
- Stitch with a narrow zigzag (2.0–2.5 mm width, 2.5–3.0 mm length) or a twin needle for a professional look.
- Steam press to relax the stitches.
B) Lettuce‑Edge Hem (flirty + coquette)


- Set zigzag to wide (4–5 mm width) and short (1.5–2.0 mm length).
- As you stitch along the raw edge, gently stretch the fabric behind the presser foot. The edge will ripple.
- Go slowly at corners; the curve enhances the lettuce effect.
C) Lace‑Trim Finish (ultra‑coquette)


- Place lace with right sides up so the scallop peeks below the hem.
- Stitch with a narrow zigzag catching both lace and knit edge.
- Press lightly. Add tiny bows at the front corners if you like.
D) No‑Sew Finish (fast)

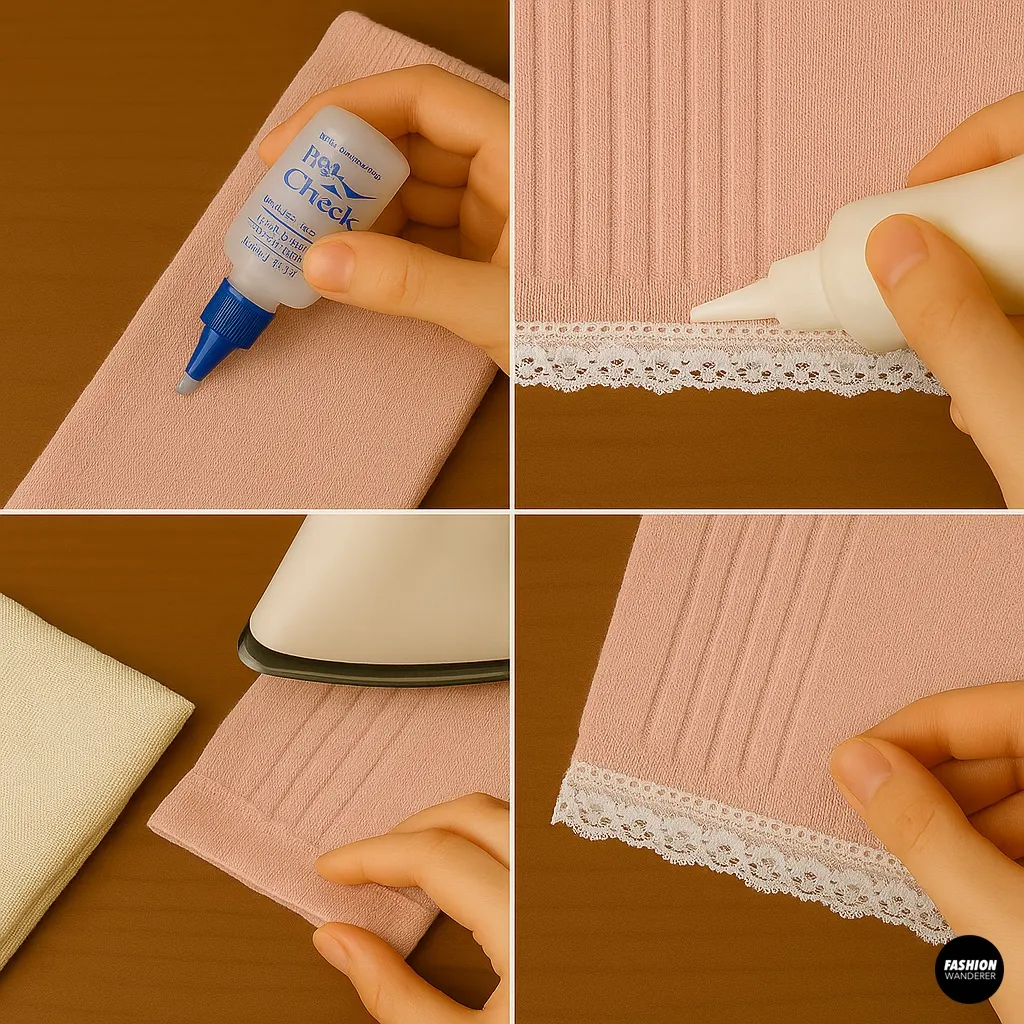
- Seal the raw edge with Fray Check, then apply stretch‑safe fabric glue to secure lace or picot elastic. Press under a cloth until set.
Step 5: Sleeve Sweeteners (Optional but So Cute)

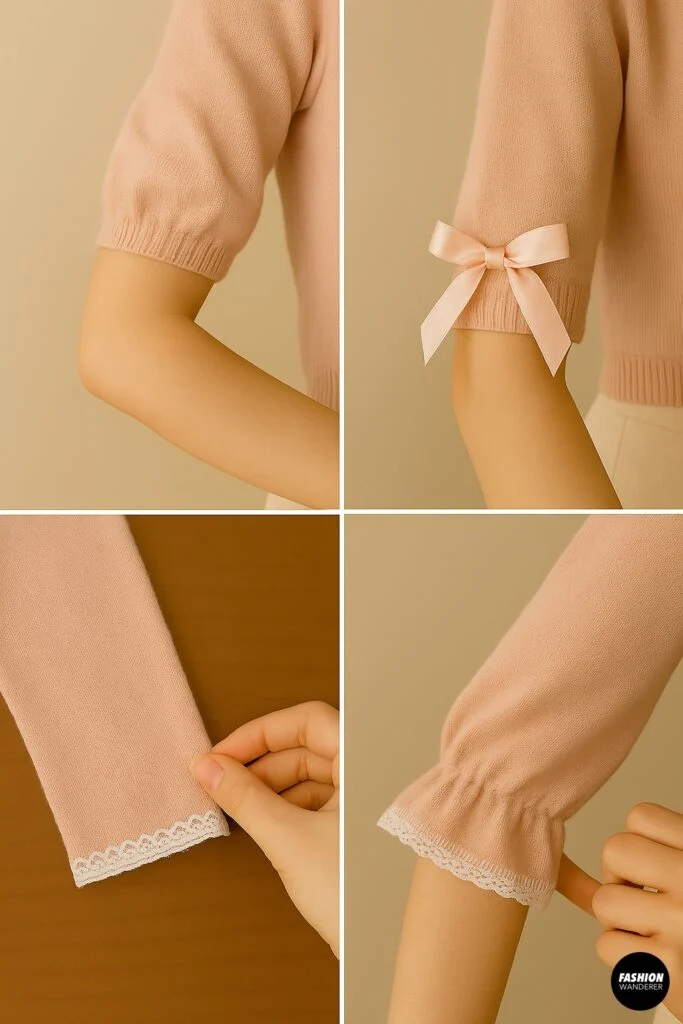
- Cropped puff sleeve: Remove cuffs, crop sleeves to just above elbow, then add a 1″ elastic casing to create a gentle puff.
- Bow‑tie cuffs: Keep full sleeve length. Stitch ¼” ribbon ties at seam underside; tie into bows.
- Lace or picot trim: Mirror the hem finish on sleeve edges for cohesion.
Step 6: Front Closure Options


- Minimal ribbon ties: Sew two 10–12″ ribbons at the neckline edge or just above bust. Tie a small bow to close.
- Single pearl button + loop: Hand‑sew a pearl button on the right side; create a thin thread loop or use baby elastic on the left.
- No closure: Leave open for a ballet wrap vibe.
If shortening a button placket, stitch across the placket bottom to secure the last button, or swap the lowest button for a bow detail.
Step 7: Shape the Shoulder (If Needed)


If the shrug feels droopy:
- Turn inside out.
- Pinch ¼–⅜” from the shoulder seam and sew a shallow dart or topstitch along the existing seam with a narrow zigzag.
- Press. This tiny tweak keeps the shrug perched at the shoulder line.
Step 8: Press, Steam, Style


Give everything a final steam with a pressing cloth to relax stitches and remove puckers. Tie your bows, trim any thread tails, and you’re done!
Make It Extra Coquette

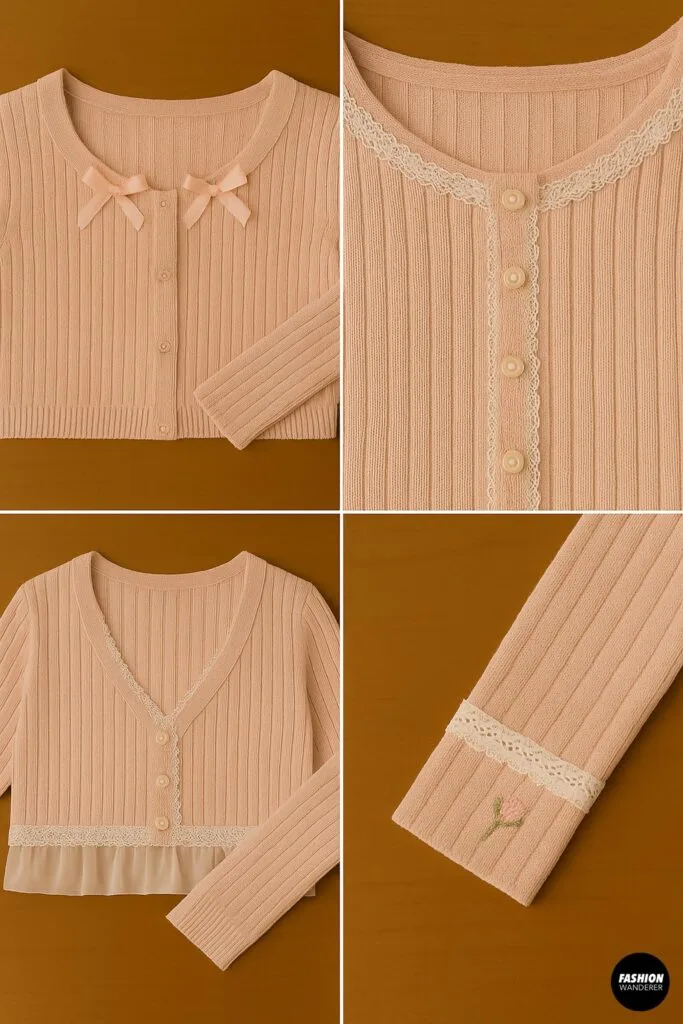
- Bows everywhere: Tiny satin bows at neckline, cuff, or center back.
- Lace layering: Narrow lace along the placket and hem.
- Ruffle trim: Gather a 1.5–2x strip of matching knit or chiffon and attach along the hem.
- Pastel palette: Blush, ivory, baby blue, lavender, or soft neutrals read instantly coquette.
- Embellishments: Pearl buttons, rosebud appliqués, picot elastic, or eyelet lace.
How to Style Your New Shrug


- Over a lace‑trim cami with a satin bow and pleated mini.
- Layered on a slip dress with ballet flats and sheer socks.
- With high‑waisted jeans, a ribbon‑tie tank, and a satin headband.
- For fall, toss it over a turtleneck and add Mary Janes.
Fit & Care Tips
- Stretch stitches only: Use zigzag or twin needle so seams don’t pop.
- Test first: Try your chosen finish on a scrap from the cutoff hem.
- Washing: Cold water, gentle cycle, lay flat to dry to preserve shape and trims.
- Adjustability: If in doubt, crop slightly longer; you can always shorten more after a try‑on.
Quick Troubleshooting
- Wavy hem (unwanted): Lower presser foot pressure and lengthen stitch. Steam press flat.
- Tunneling with twin needle: Reduce bobbin tension slightly; use woolly nylon in the bobbin if available.
- Lace flipping up: Understitch (zigzag the seam allowance to the cardigan just inside the lace line) or topstitch ⅛” from edge.
FAQ


Can I do this with a thick wool cardigan?
You can, but finishing is trickier and bulkier. Lightweight knits yield the best coquette drape.
Will fabric glue hold on knits?
Yes—choose a stretch‑safe formula and let it cure fully. Avoid high‑stress points if you’re skipping stitches.
What if my cardigan is too wide?
Take in side seams ¼–½” with a zigzag from hem to underarm, blending back into the original seam.
Trendy, Affordable Sewing Patterns for All Sizes


Tie Shoulder Jumpsuit Pattern


Palazzo Pants Sewing Pattern


Pocket Overall Romper Pattern


Wrap Maxi Skirt Sewing Pattern


Tie Back Top Sewing Pattern