
Fashion is all about versatility. One of the simplest DIY fashion hacks that instantly transforms your look is the detachable collar. Whether you’re going for a preppy, vintage, coquette, or office-ready vibe, adding a removable collar to your favorite tops gives you multiple outfit options without cluttering your closet.
In this tutorial, you’ll learn step by step how to make a detachable collar from scratch—or upcycle one from an old shirt—so you can switch up your look in seconds.
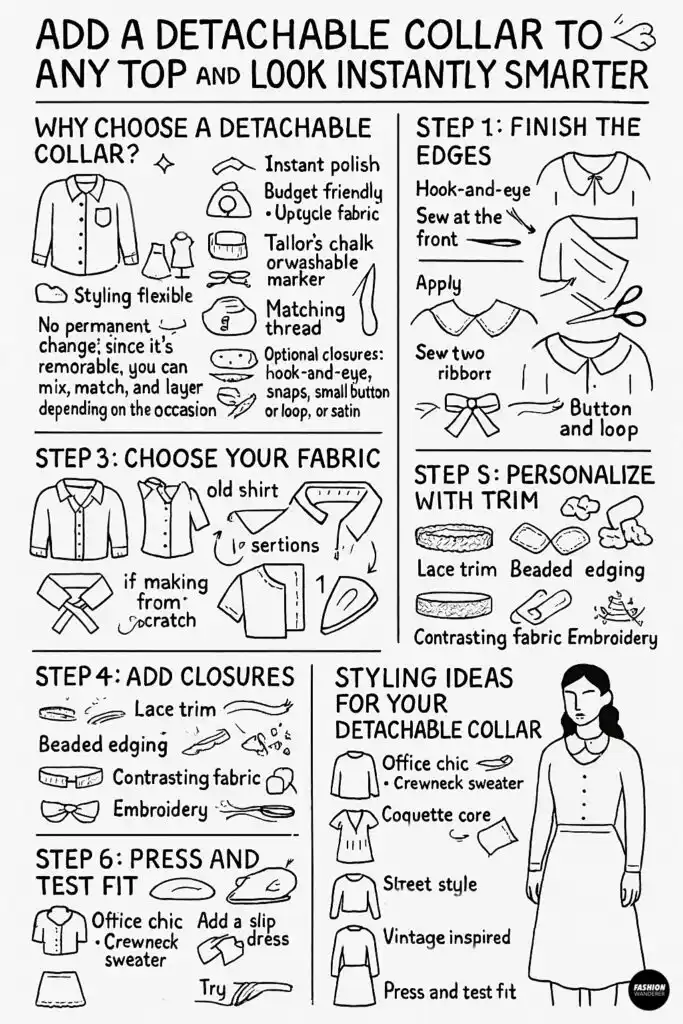
Why Choose a Detachable Collar?
- Instant polish: A collar adds structure and refinement, making even a plain T-shirt or sweater look smart.
- Budget-friendly: Upcycle fabric from thrifted shirts instead of buying new accessories.
- Styling flexibility: Wear it with dresses, sweaters, cardigans, or even basic tanks.
- No permanent change: Since it’s removable, you can mix, match, and layer depending on the occasion.
This is the perfect beginner-friendly sewing project, requiring minimal fabric and sewing tools.
Why This DIY Wins
Adding a detachable collar is not just about fashion—it’s about sustainability. Instead of buying new tops, you’re upgrading your wardrobe with versatile accessories. This project is beginner-friendly, requires minimal fabric, and offers endless design possibilities.
Plus, collars are trending in 2025 fashion, from TikTok coquette styling to Parisian streetwear looks. By making your own, you’ll stay ahead of the curve while showcasing your creativity.
DIY Add Detachable Collar to Any Top

Materials You’ll Need

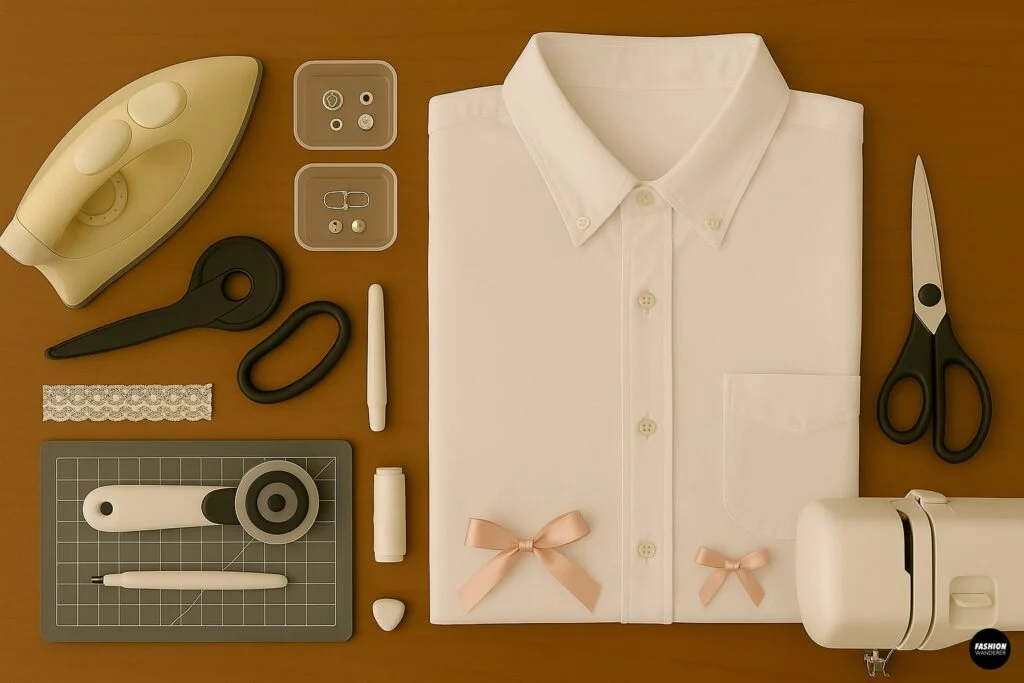
- Old button-down shirt (cotton, poplin, or linen work best) or ½ yard of fabric
- Fabric scissors or rotary cutter
- Tailor’s chalk or washable marker
- Sewing machine (or hand needle if you prefer slow sewing)
- Matching thread
- Iron and ironing board
- Optional closures: hook-and-eye, snaps, small button with loop, or satin ribbons
- Optional trim: lace, ruffles, beads, or embroidered edging
Step 1: Choose Your Fabric or Base Collar


The easiest way to make a detachable collar is to start with a thrifted button-down shirt. Look for one with a crisp collar that still holds its shape.
If you’re making one from scratch, opt for medium-weight woven fabric that won’t collapse.
For a playful or coquette look, pastel colors, lace, or printed cottons are excellent choices.
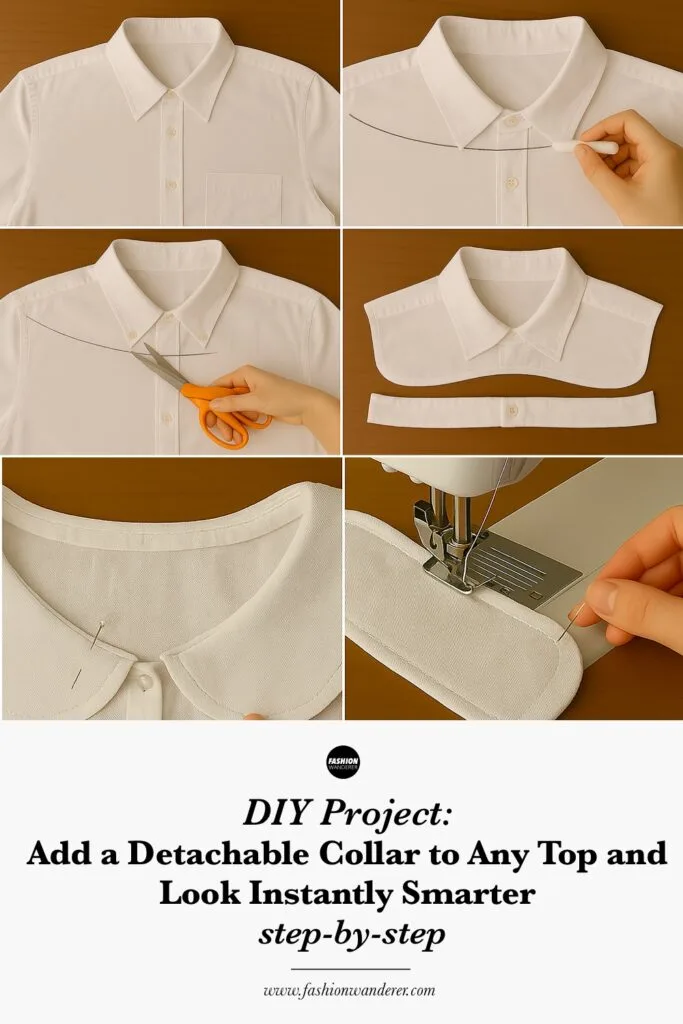
Step 2: Mark and Cut the Collar
If using an old shirt:
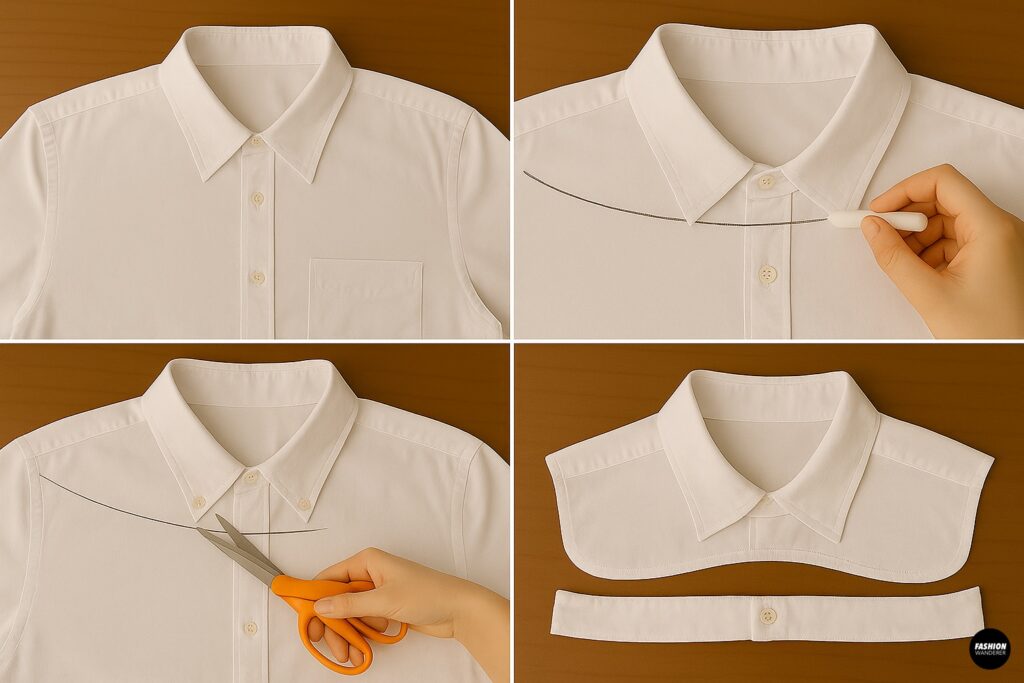

- Lay the shirt flat and button it all the way up.
- Using tailor’s chalk, mark a cutting line around the neckline, about 1–1.5 inches below the collar seam.
- Cut carefully along the line so you have the collar with a small strip of the yoke or neckline still attached. This will serve as your collar base.
If making from scratch:

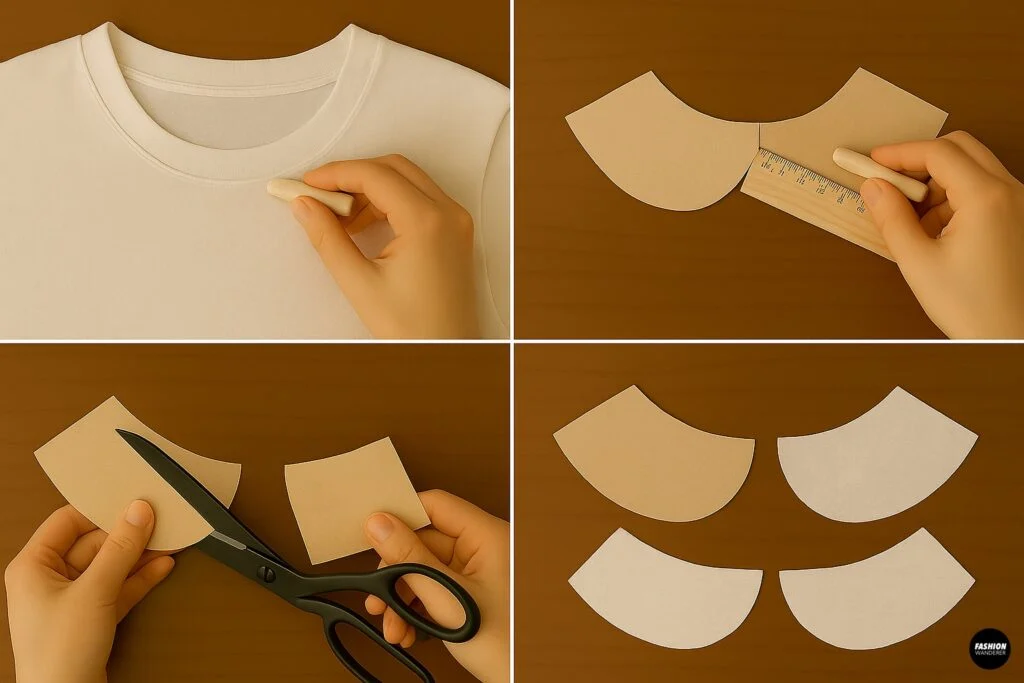
- Draft a basic collar pattern by tracing the neckline of a top you own.
- Add seam allowance (½ inch) all around.
- Cut two collar pieces (top and underside) and one interfacing piece if you want extra structure.
Step 3: Finish the Edges
For upcycled collars:

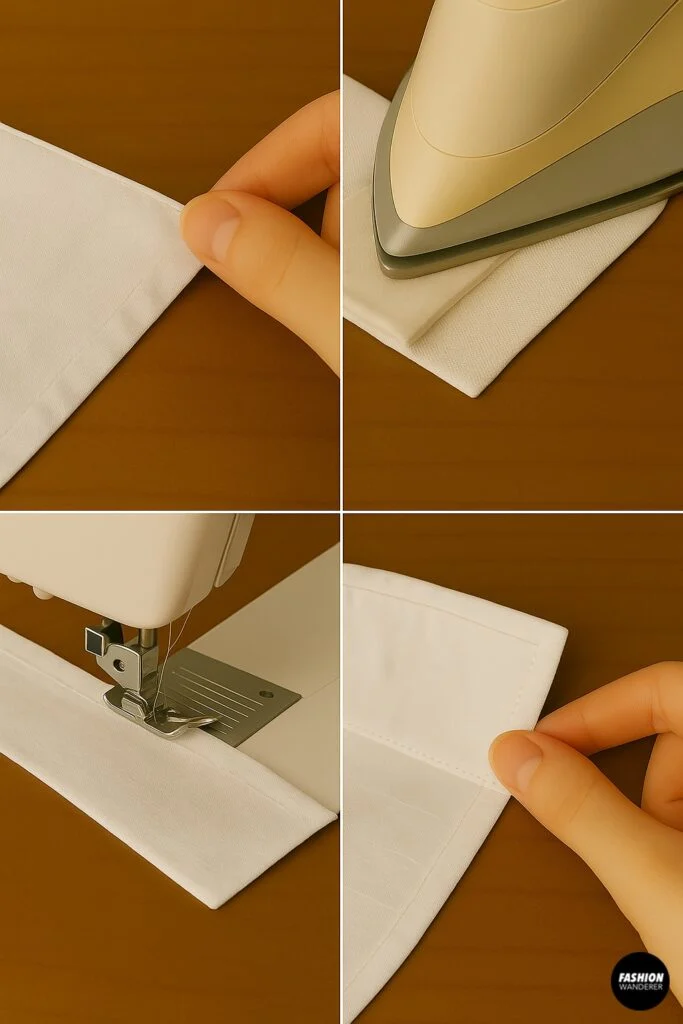
- Fold under the raw edge and press with an iron.
- Sew a straight stitch or zigzag close to the edge to secure.
For sewn-from-scratch collars:

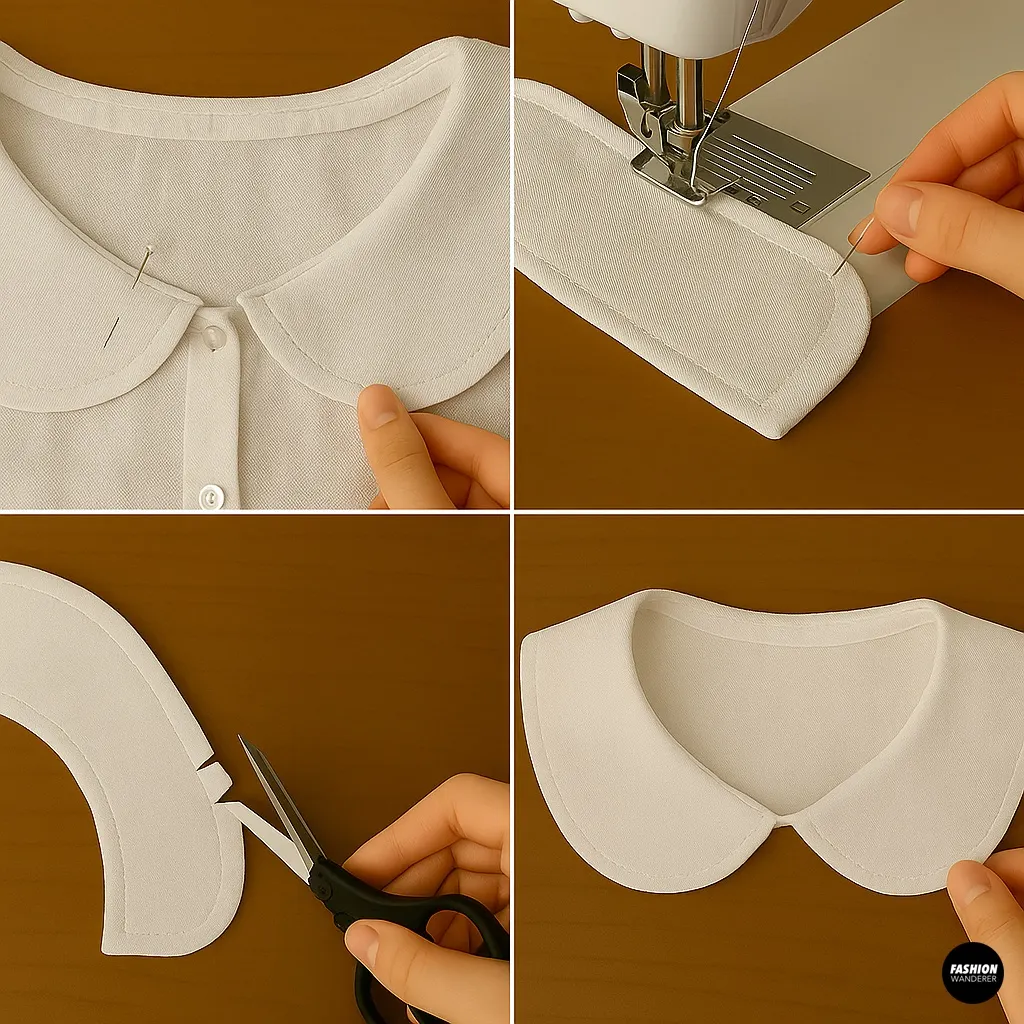
- Place right sides together and sew along the outer curved edge.
- Clip curves, turn right side out, and press.
- Topstitch around the edge for a professional finish.
Step 4: Add Closures

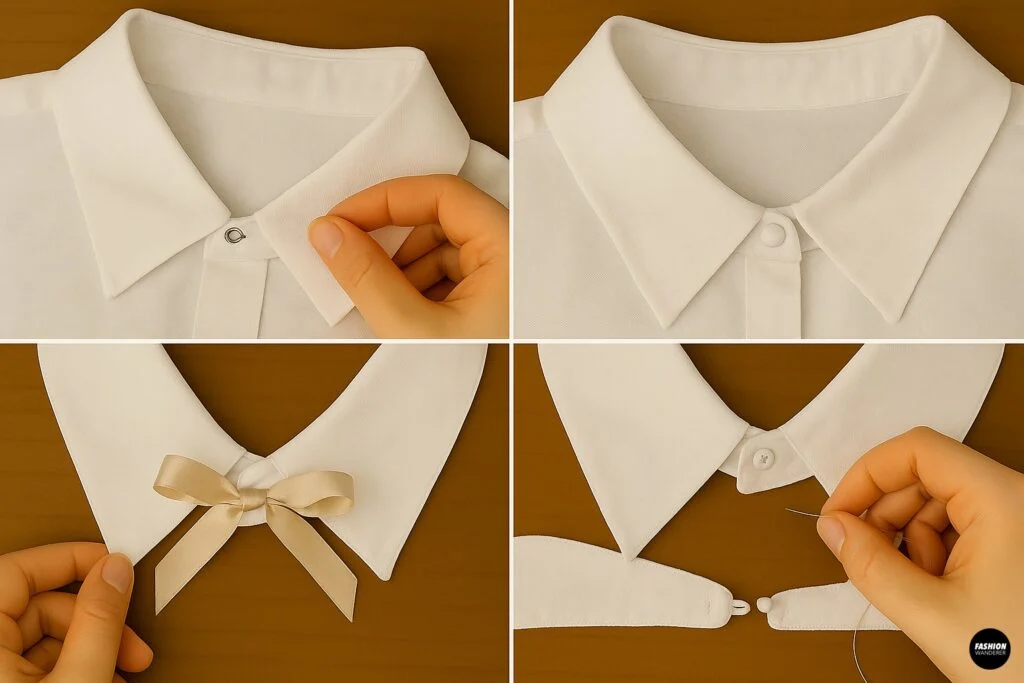
Since your collar is detachable, you’ll need a way to fasten it. Choose one of these methods:
- Hook-and-eye: Sew at the front for a discreet closure.
- Snap buttons: Easy and flat, perfect for layering.
- Ribbon ties: Sew two pieces of ribbon to the collar ends for a sweet, bow-tied effect.
- Button and loop: Add a small button on one side and a fabric loop on the other for a polished detail.
Pro tip: If you’re making multiple collars, vary the closures for different styles. Satin ribbons feel romantic, while snaps look minimal and modern.
Step 5: Personalize with Trim

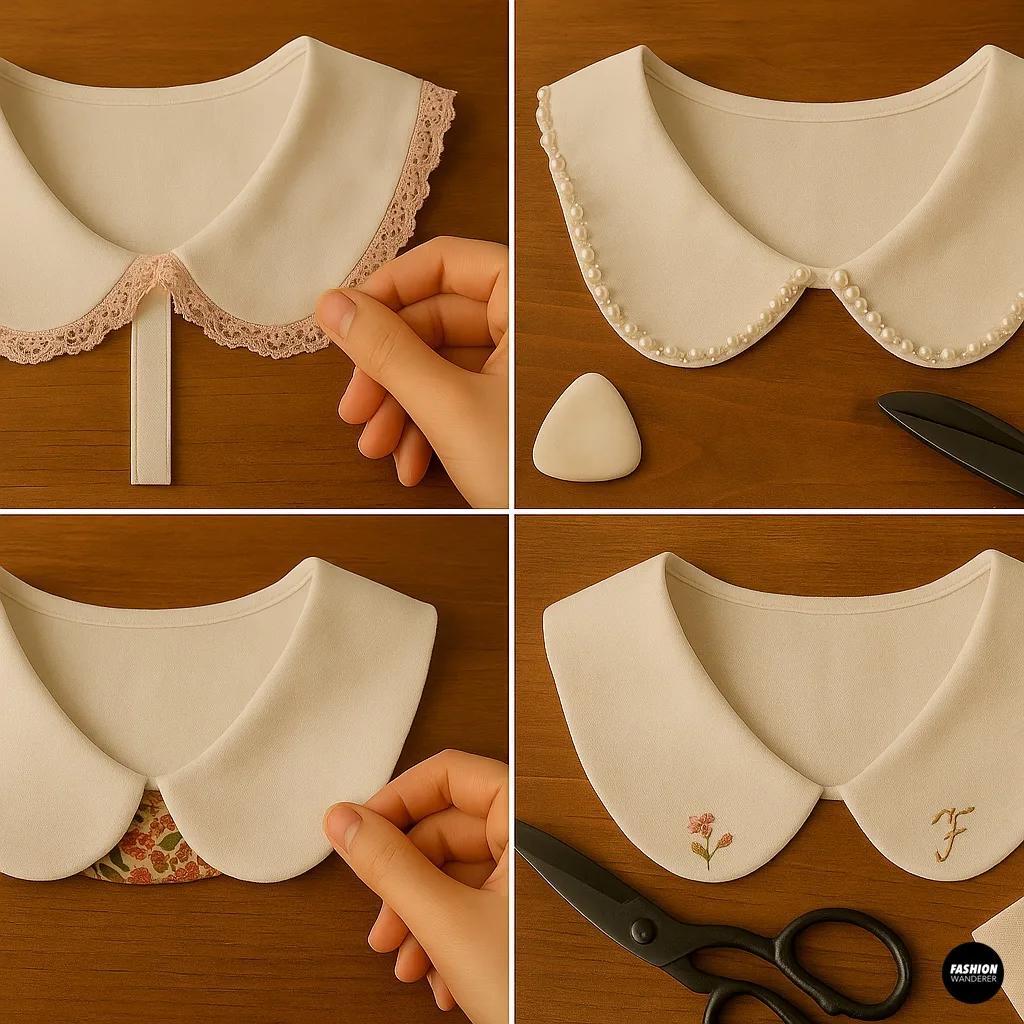
Here’s where you can really express your style:
- Lace trim: Sew lace along the collar edge for a feminine look.
- Beaded edging: Hand-stitch pearls or seed beads for subtle sparkle.
- Contrasting fabric: Line the underside of the collar with a different print for a peekaboo effect.
- Embroidery: Add tiny florals, initials, or motifs to the corners for a cottagecore vibe.
Even simple stitches in a contrasting thread can make your collar pop.
Step 6: Press and Test Fit

Press your finished collar flat with a steam iron, shaping the neckline to curve naturally. Try it on over different tops—sweaters, camis, T-shirts, and dresses—to see how it transforms each piece. Adjust the closure if necessary for a comfortable fit.
Styling Ideas for Your Detachable Collar

Now that you’ve made your collar, here’s how to style it for maximum impact:
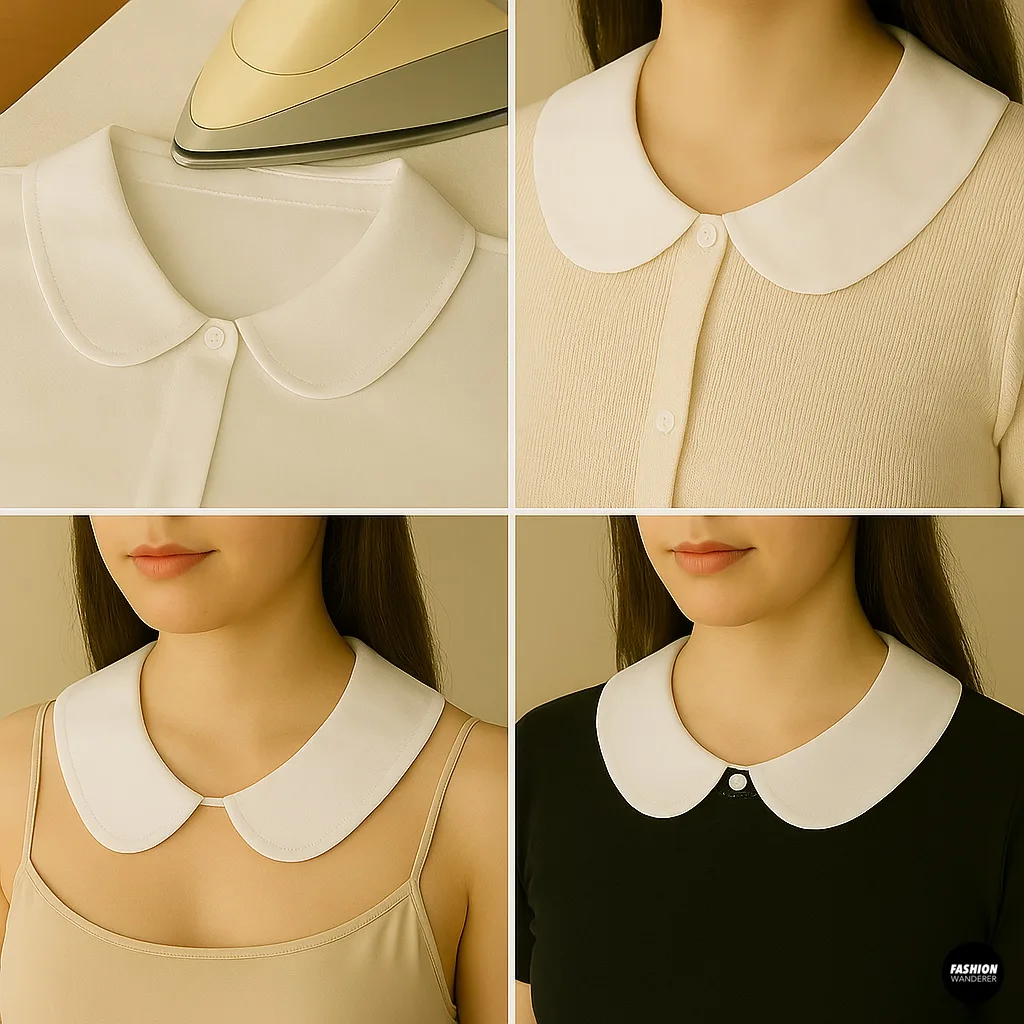
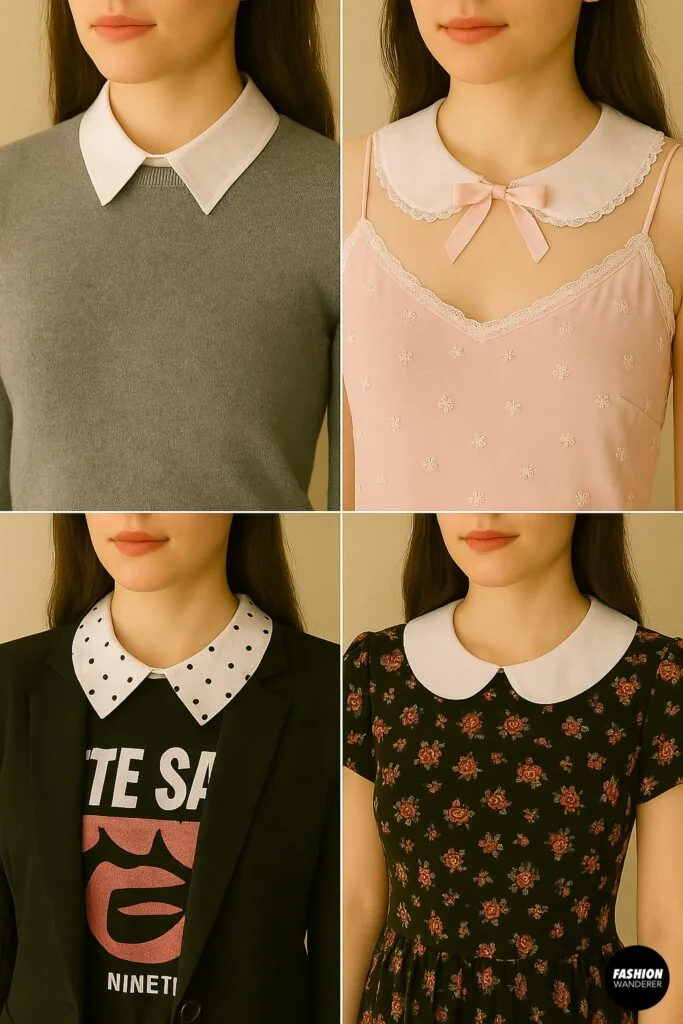
- Office Chic: Add a crisp white collar to a crewneck sweater for a polished work look.
- Coquette Core: Pair a pastel collar trimmed with ribbons or lace over a slip dress.
- Street Style: Layer a bold printed collar over a graphic tee and blazer.
- Minimalist: Wear a sleek black collar with a monochrome outfit for subtle sophistication.
- Vintage Inspired: Match a rounded Peter Pan collar with a floral dress for retro charm.
Because it’s detachable, one collar can serve multiple outfits, making it one of the most cost-effective accessories you’ll ever create.
Care and Maintenance
To keep your collar looking sharp:
- Hand wash or use a delicate cycle if you’ve added trims like lace or beads.
- Press lightly after washing to maintain shape.
- Store flat or hang on a small hanger to avoid creases.
Final Thoughts

With just a little fabric and creativity, you can add a detachable collar to any top and look instantly smarter.
This small but impactful accessory upgrades everything from casual tees to formal blouses. It’s quick to make, endlessly customizable, and the perfect DIY for fashion lovers who want to refresh their wardrobe without spending much.
Try one today—whether you upcycle a thrifted shirt collar or sew your own from scratch—and enjoy how easily this chic detail transforms your everyday outfits.
Trendy, Affordable Sewing Patterns for All Sizes


Tie Shoulder Jumpsuit Pattern


Palazzo Pants Sewing Pattern


Pocket Overall Romper Pattern


Wrap Maxi Skirt Sewing Pattern


Tie Back Top Sewing Pattern