
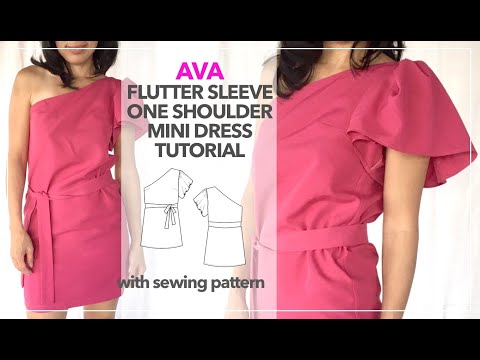
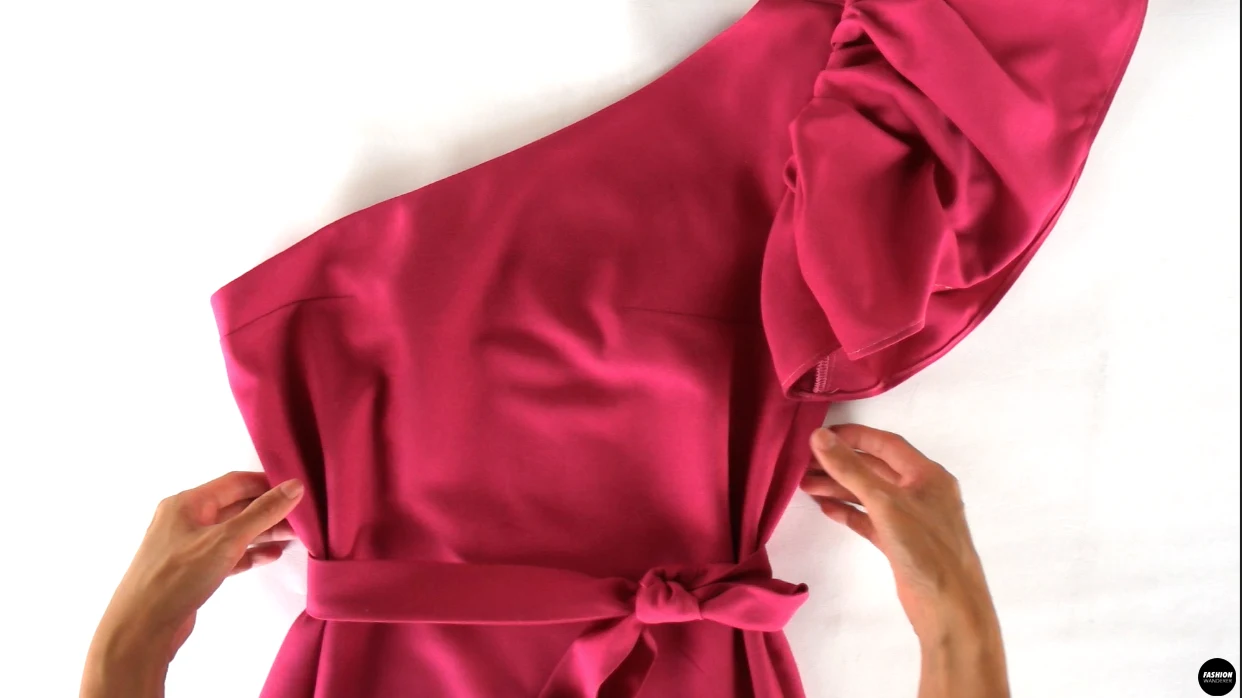
Have you tried to make one shoulder dress that fits you like a glove? The Ava dress features waist accentuating tie, shift dress silhouette, and fun one shoulder flutter sleeve that gives unique and stylish outfit.
This shift dress has a loose silhouette that can be worn with or without the waist tie that looks good on many body silhouettes. This garment is made with a poly twill to give volume and keep the sleeve shape, but you can alternatively use chambray, linen, or poplin to achieve the same look.
How to make flutter sleeve one shoulder mini dress? Prepare the poly twill by washing and drying to pretreat the fabric before cutting. Use fabric softener to reduce any static, but do not wring or rub the fabric due to its tendency of fraying the edges.
Study the instruction booklet and measure your body to select the size Ava dress sewing pattern. Each sewing pattern from Fashion Wanderer includes ⅜” or 0.95 cm width of seam allowance, therefore it is ready to sew once the fabric is cut.
Ava dress consists of various sewing techniques that include overlock and straight stitches, applying fusible interfacing, facing for neckline, and properly hemming.
Follow the step by step instructions and video tutorial that comes with Ava sewing pattern to help you achieve this sewing project easily, smoothly, and without mistakes. Dress up with your favorite heels or sneakers of your choice to enjoy anytime and anywhere.


DIY Flutter Sleeve One Shoulder Mini Dress


You will love this DIY flutter sleeve one shoulder mini dress because…
- Cove blouse sewing pattern include US size from 0 to 18 for wide range of fit.
- Manually hand gather along sleeve to create flutter sleeve look.
- Learn how to properly apply fusible interfacing with iron.
- Sew facing along the neckline for clean finishing edges.
- Master invisible zipper on the side seam of a dress.
This elegant and modern flutter sleeve one shoulder mini dress includes hand gathering, side invisible zipper, and self facing along the neckline. These design elements are all pretty straightforward sewing techniques.
If you are pursuing an easy yet quality dress, this is the perfect design for you to learn to enhance your sewing skills.
Have your bust and hip measurements ready to choose the size from our size guide and pick the right size for best fit. However, the waist measurement is not needed due to its shift silhouette.


How to make flutter sleeve one shoulder mini dress
Ava dress sewing pattern from Fashion Wanderer includes a detailed instruction booklet, video tutorial, and demonstrates how to assemble the pdf sewing patterns to guide you in the right direction when preparing the sewing project.
This garment is made with bold statement fuchsia color that is season-less and can be worn for special occasion. However, it will look good in prints or embellished fabric such as sequins, embroidered, or beaded fabric as well.
Consider purchasing an extra ½ to ¾ yardage depending on the width of the fabric to test stitch length, tension, and type of stitches.
Start by threading the machine properly and replace sewing needle if needed. As a result, you can easily stop thread from breaking while sewing which is extremely frustrating.
For any questions, refer to the instruction booklet for sewing tips and answers to your questions.
DIY Flutter Sleeve One Shoulder Mini Dress Tutorial Material:
- Ava Dress Sewing Pattern
- Poly Twill Fabric 2 yards for 60” width or 2½ yards for 45” width
- 14” Long Invisible Zipper
- Fusible Interfacing
- Sewing machine
- Serger
- Pins
- Thread
- Water erasable pen
- Iron
Start transferring the bust dart onto the fabric.
Fold the dart, straight stitch along the dart leg and double hand tie the ends.
Prepare fusible interfacing on both Front and Back Dress Facing.
Overlock the bottom of these pieces. Place on top of neckline right side down and stitch along the neck opening.
Open the seam and edge topstitch, then bring the facing inside and press.


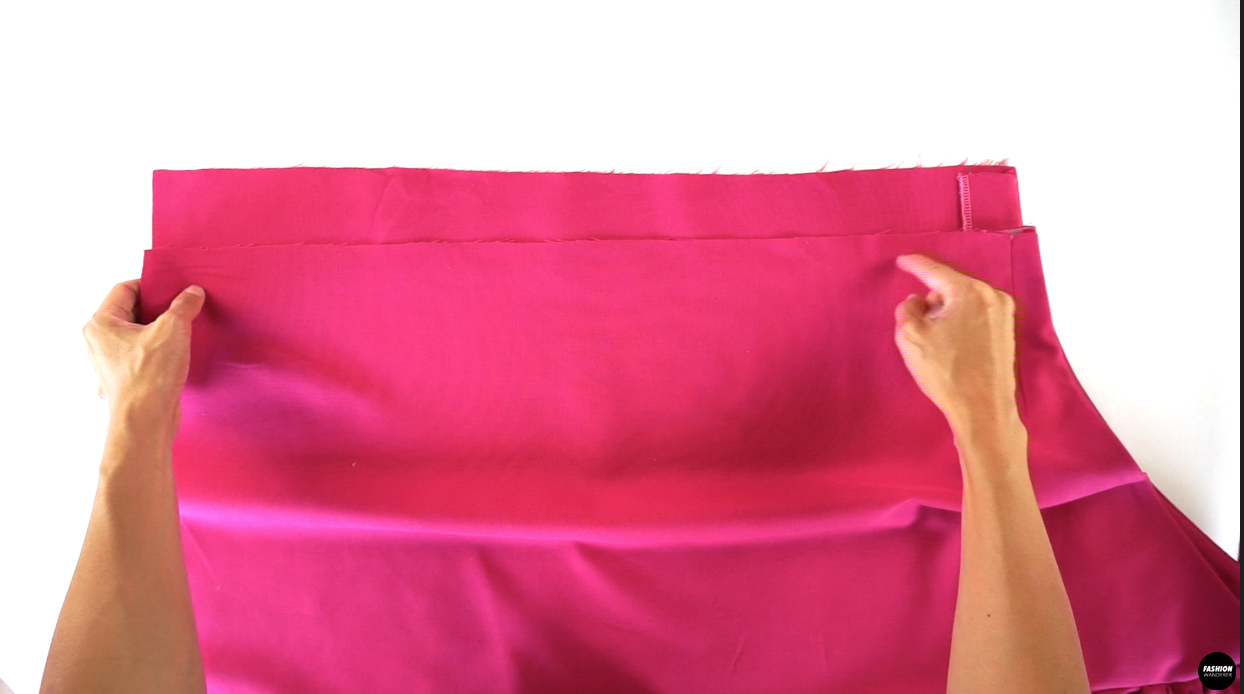
Join the Front Dress and Back Dress along the shoulder and right side seam.
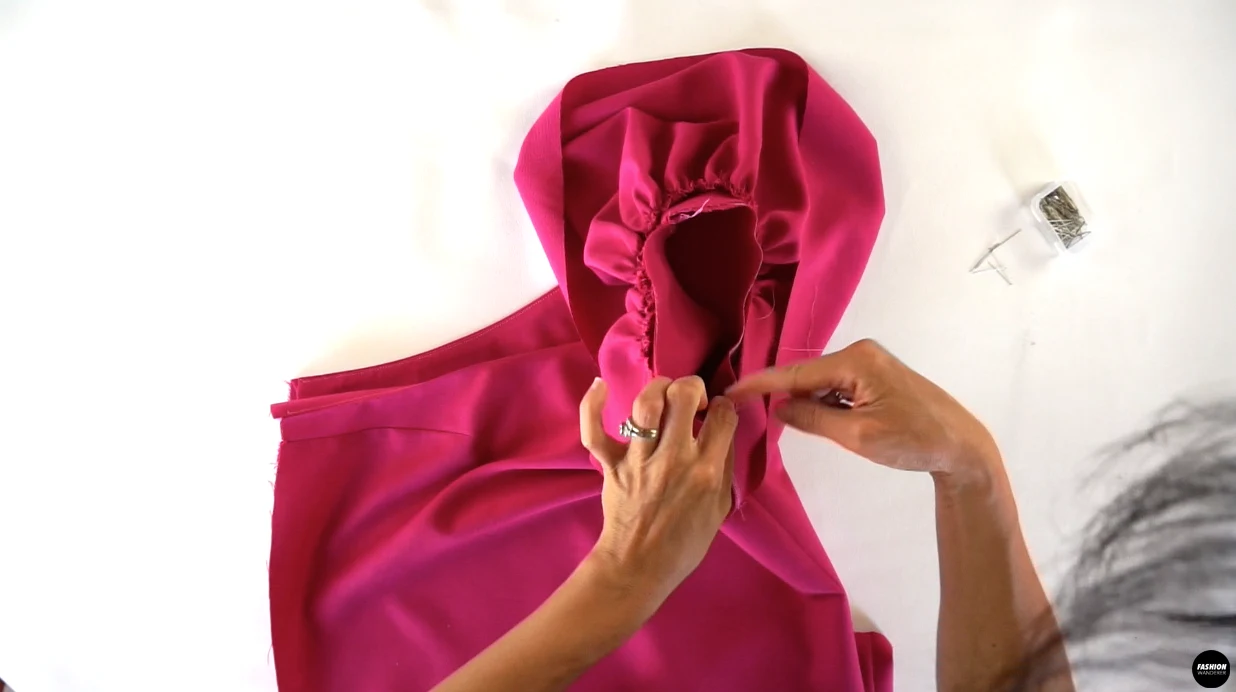
Sew wide stitch length along the sleeve.
Close the seam on the sleeve and press toward the back.
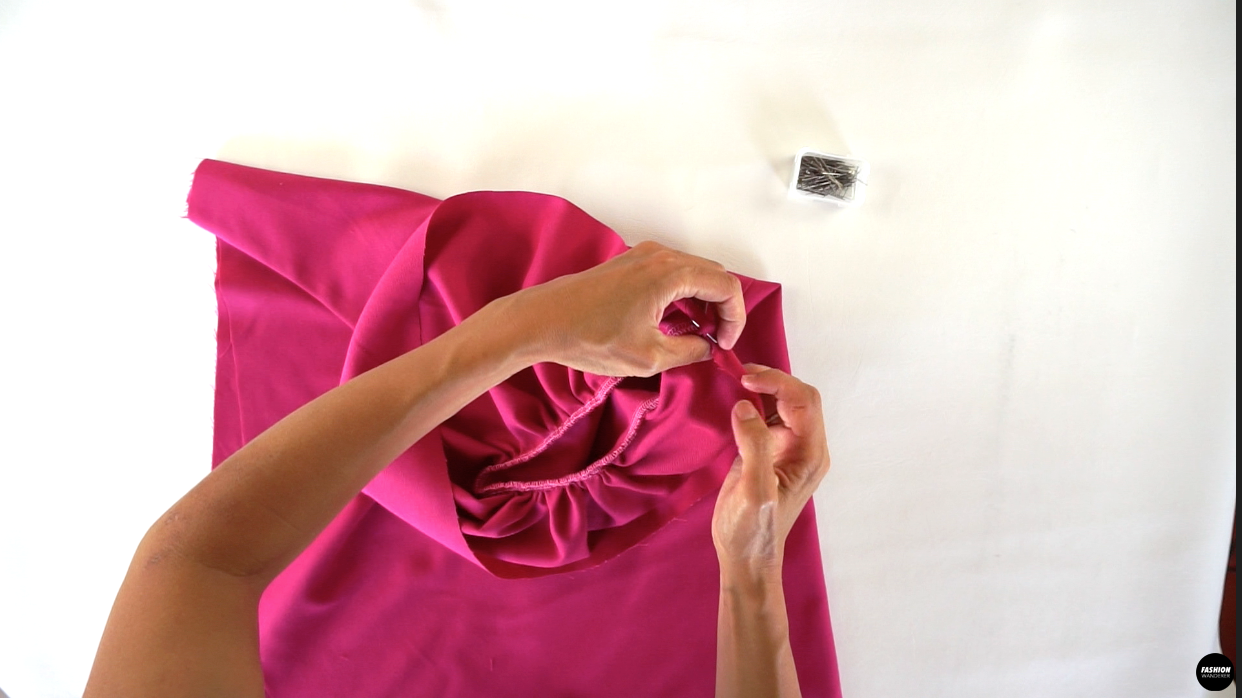
Pull the thread to create hand gathering.
Slide the sleeve through the dress armhole right side facing each other and sew around.
Overlock the edges and double fold the sleeve opening.
Finish the left side of the side seam with overlock stitch.
Close the left side seam by leaving the length of zipper.
Insert invisible zipper and sew closely around the tape.
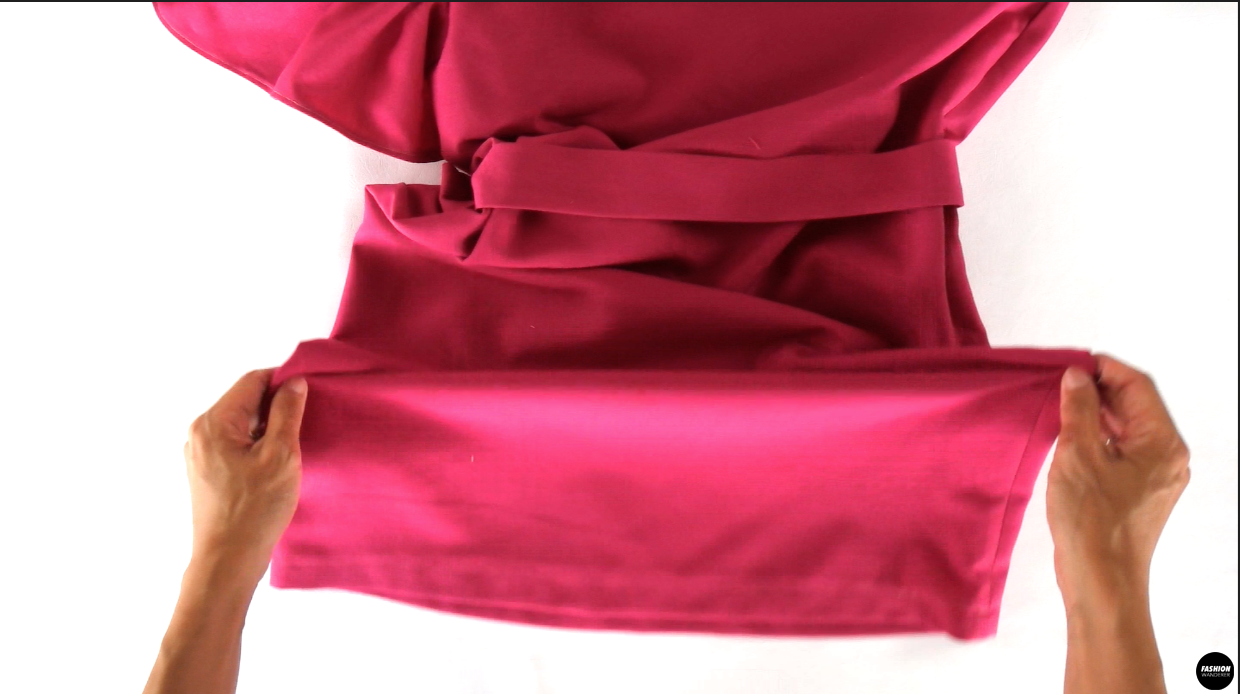
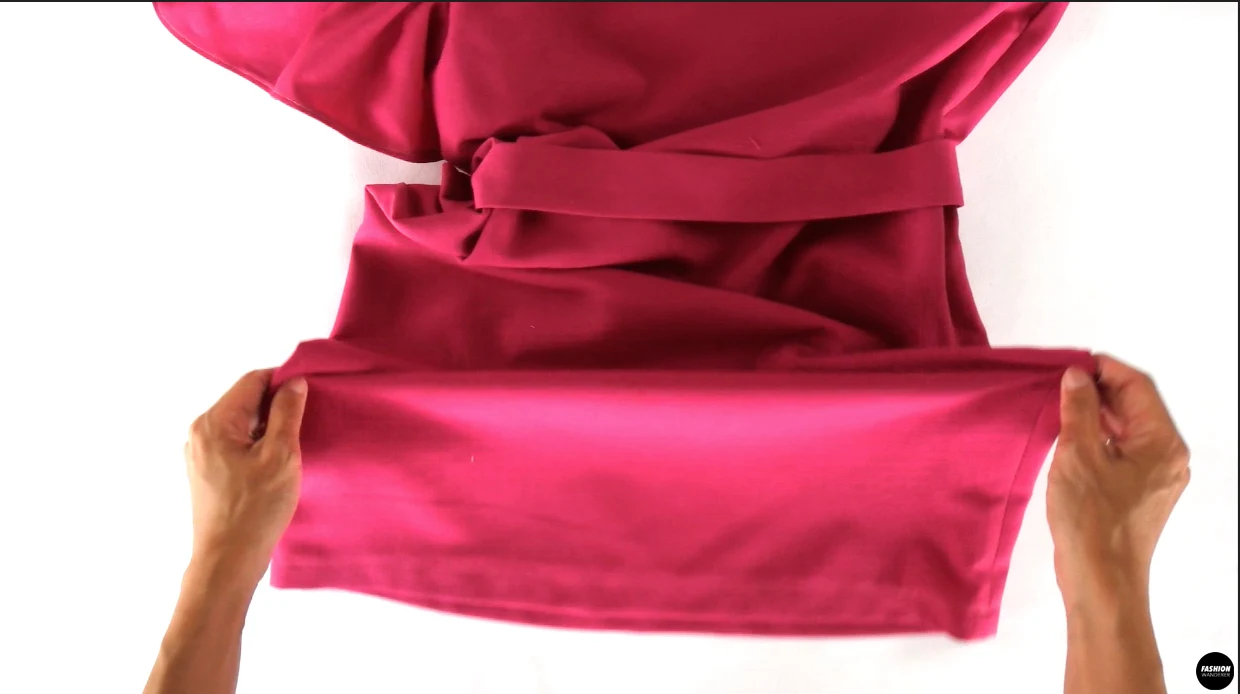
Hem the dress by overlocking the edges, and then fold 1” width and straight stitch around.
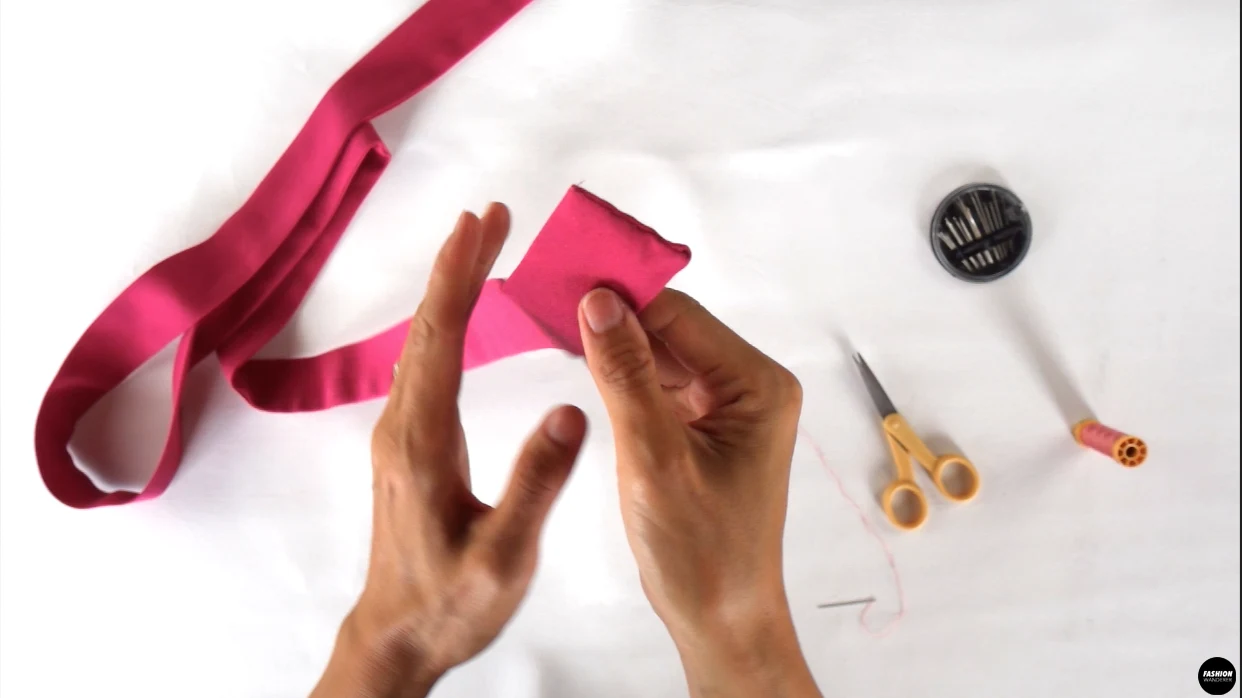
Make waist tie and flip inside out. Hand baste the ends to close the tie opening.


DIY Flutter Sleeve One Shoulder Mini Dress Sewing Tips


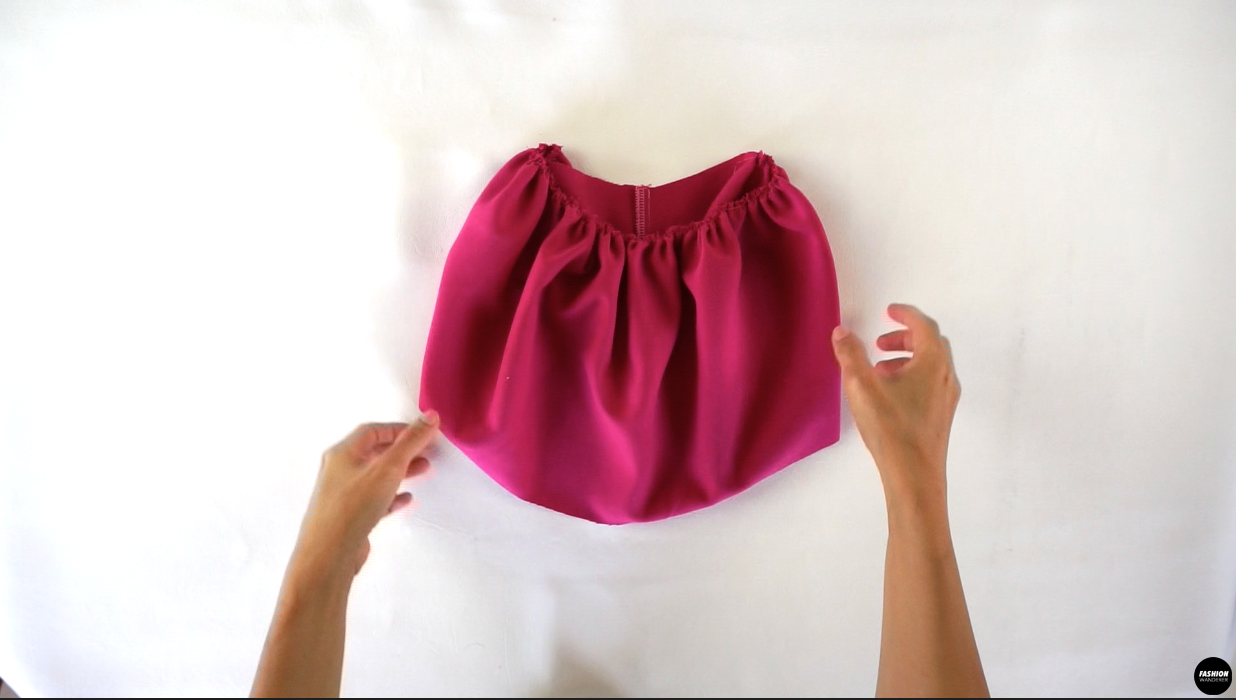
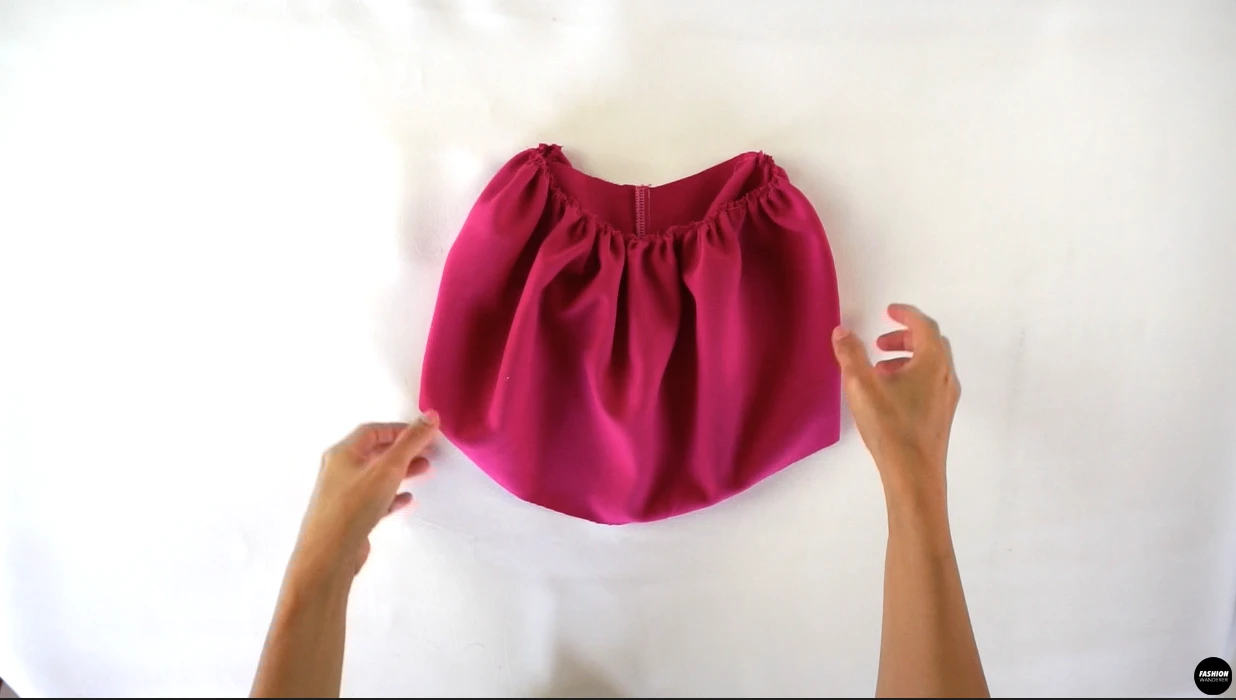
Unique one shoulder silhouette shift mini dress with flattering sleeve detail, this dress is modern and feminine style that can be worn as wedding guest or special occasion.
Review the sewing tips listed below to minimize mistakes and accomplish the Ava dress without mistake. Since the project is made out of poly twill, these tips apply to chambray, poplin, and any other medium weight non-stretchy fabrics.
- Sewing Needle: Depending on the weight of the poly twill, for lightweight twill go with 70/9 or medium weight use 90/14 needle size is ideal.
- Thread: Multi-purpose thread is suitable for all types of non-stretchy fabric, especially with poly twill. When choosing different types of thread, polyester and cotton blend thread as the best.
- Tension: For smooth sewing and clean stitches, adjust the tension to the middle by using 3 or 4 tension. For the best results, ensure the upper and lower threads are balanced to achieve clean stitches.
- Stitches: Finishing poly twill edges is quite important to prevent the edges from fraying. In this tutorial, I use a tight zigzag stitch or overlock stitch on all cut edges. Also, I use this type of stitch to single or double fold the hem along the sleeve and dress hemline.
- Fusible Interfacing: Ensure the glue sides are facing the wrong side of the fabric. Start slow with the hottest and steamiest setting that your fabric and interfacing can handle. Double check that the glue dots disappear and let it sit for couple of minutes to stiffen before sewing to the garment.
Practice straight and overlock stitches to compete Ava dress through the tutorial. From one shoulder and clean neckline to flutter sleeve, there are lots of steps to achieve the results of a professional look.
No matter what type of fabric you choose, go with non-stretchy woven fabric including chambray, linen, or poplin to sew Ava dress. Prepare your fabric, download the sewing pattern, and select your size. Follow the instructions in the video and booklet to make this unique and stylish dress to add to your DIY collection.


DIY Flutter Sleeve One Shoulder Mini Dress
Are there ways to make a shift dress more fun and avoid looking outdated? If you are looking for an easy shift dress to add to your DIY wardrobe, sew this modern and feminine Ava dress.
From flutter sleeves to one shoulder design, this mini dress offers a slim and elongated look. Adding an adjustable waist tie helps to accentuate the waistline without looking out of style.
In this tutorial, the sewing detail and finishing method are perfect for those with a beginner to intermediate experience level. You will learn to add invisible zipper on the side seam, manual hand gathering the sleeve, and clean finish the neckline with facing and fusible interfacing.
Follow the video tutorial and step by step instructions to make an Ava dress with the sewing pattern. This design is perfect to wear for a special occasion and date night.
Materials
- Ava Dress Sewing Pattern
- Poly Twill Fabric 2 yards for 60” width or 2½ yards for 45” width
- 14” Long Invisible Zipper
- Fusible Interfacing
Tools
- Sewing Machine
- Serger
- Thread
- Fabric Scissors
- Water Erasable Pen
- Measuring Tape
- Pins
- Zipper Foot
Instructions
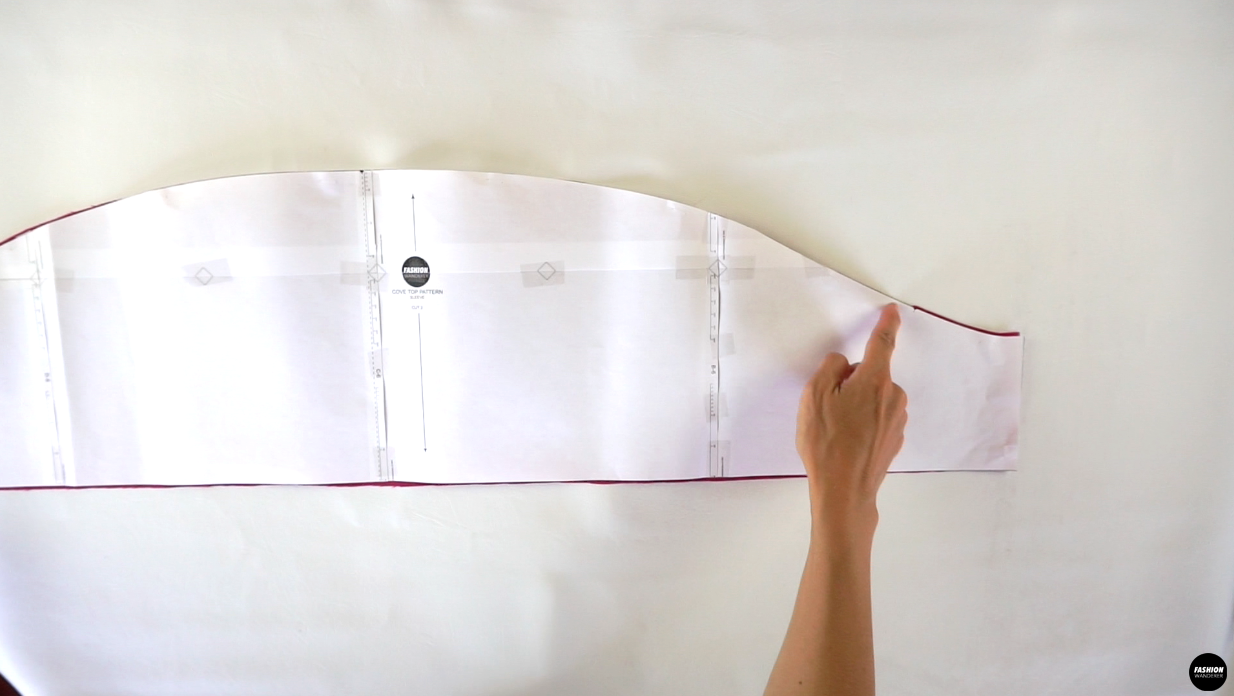
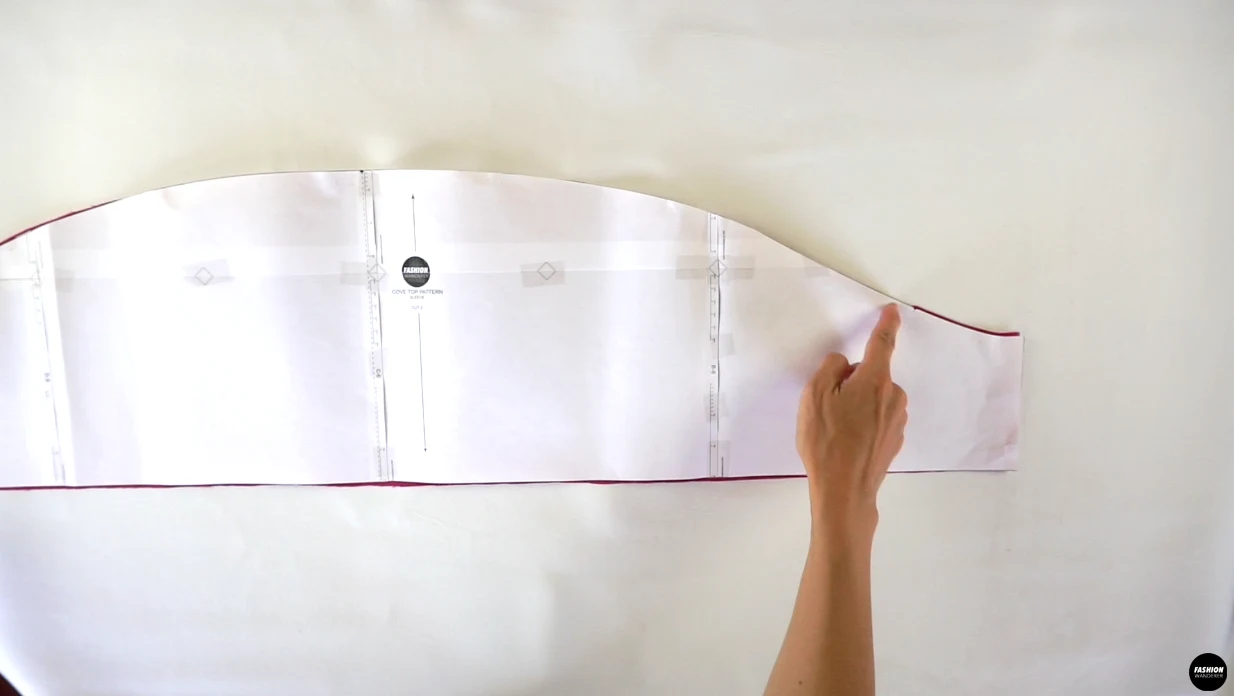
For this Ava flutter sleeve one shoulder mini dress tutorial, start by assembling the pattern pieces:
- 1 Piece of Front Dress
- 1 Piece of Back Dress
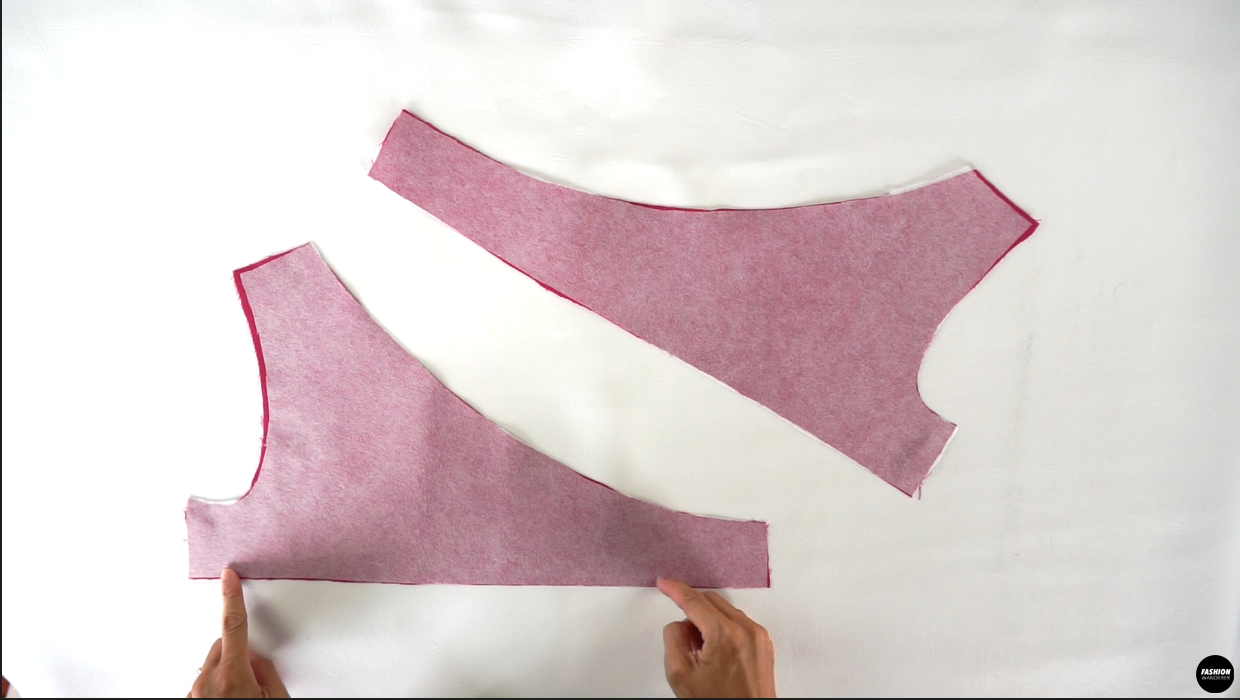
- 1 Piece Front Dress Facing
- 1 Piece Front Dress Facing Interfacing
- 1 Piece Back Dress Facing
- 1 Piece Back Dress Facing Interfacing
- 2 Pieces of Sleeve
- 1 Piece of Waist Tie
How To Sew Bust Dart On Mini Dress
- Transfer the bust dart by poking a hole on the dart point with a pin.
- Flip the pattern wrong side up, pin through the dart point and mark with water erasable pen.
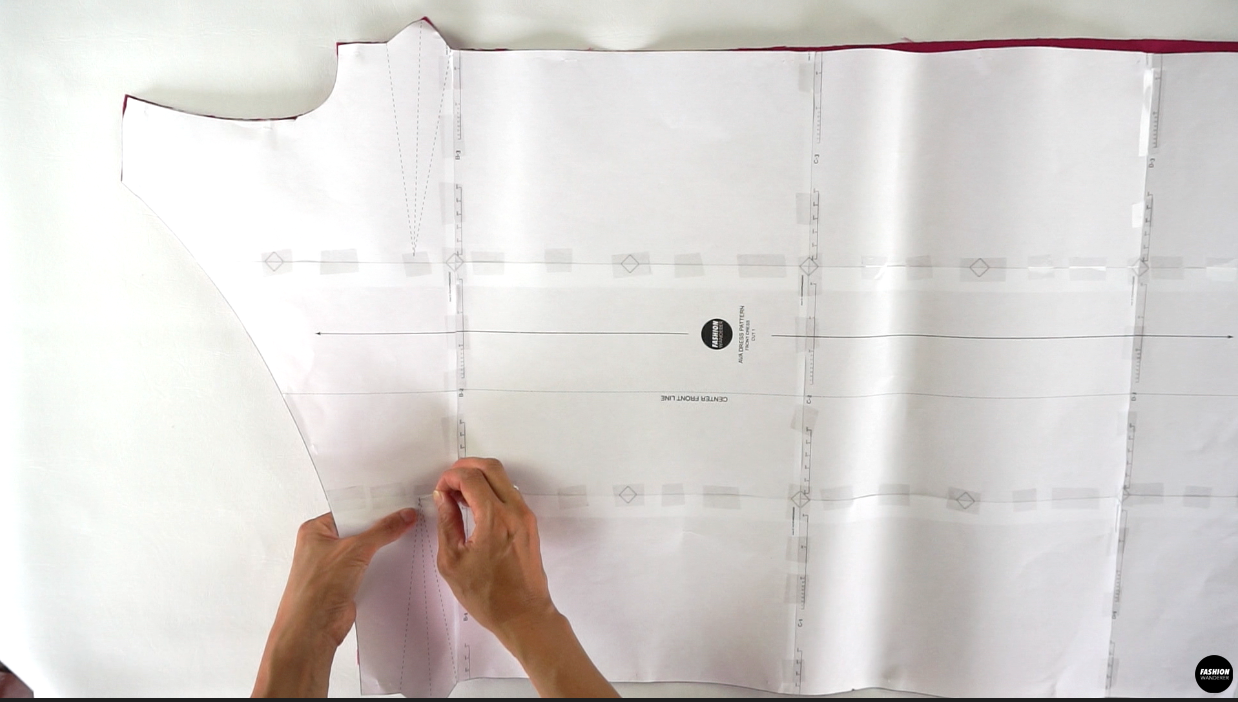

- Use ruler to draw dart leg and connect to dart point.
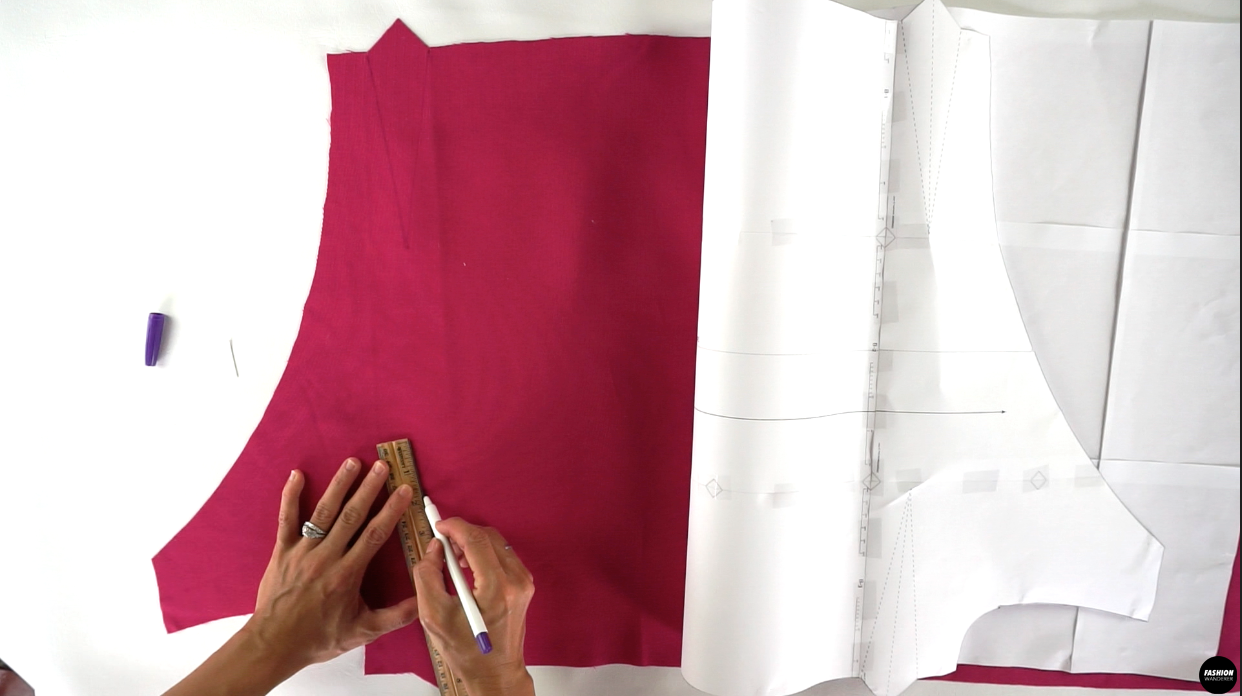
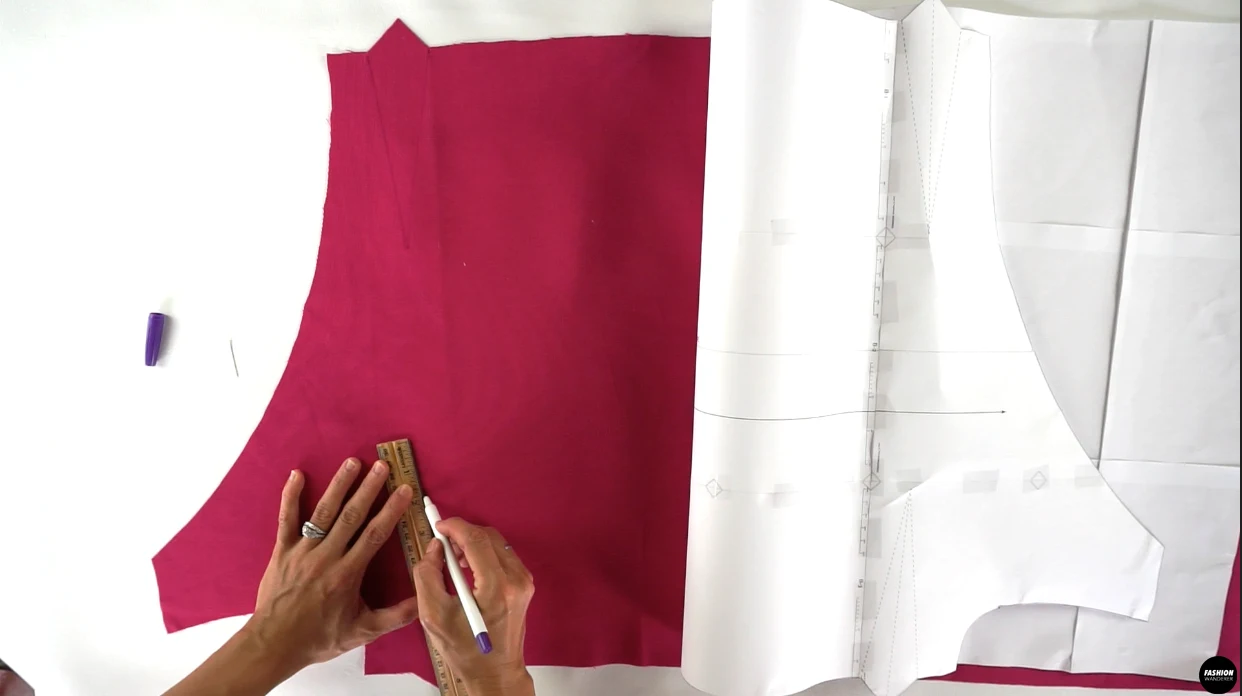
- Fold the dart horizontally and match the dart leg and pin.

- Start straight stitching from the dart notch and end at the point without stitching back and forth. Instead double tie the end and press the bust dart facing toward the bottom.
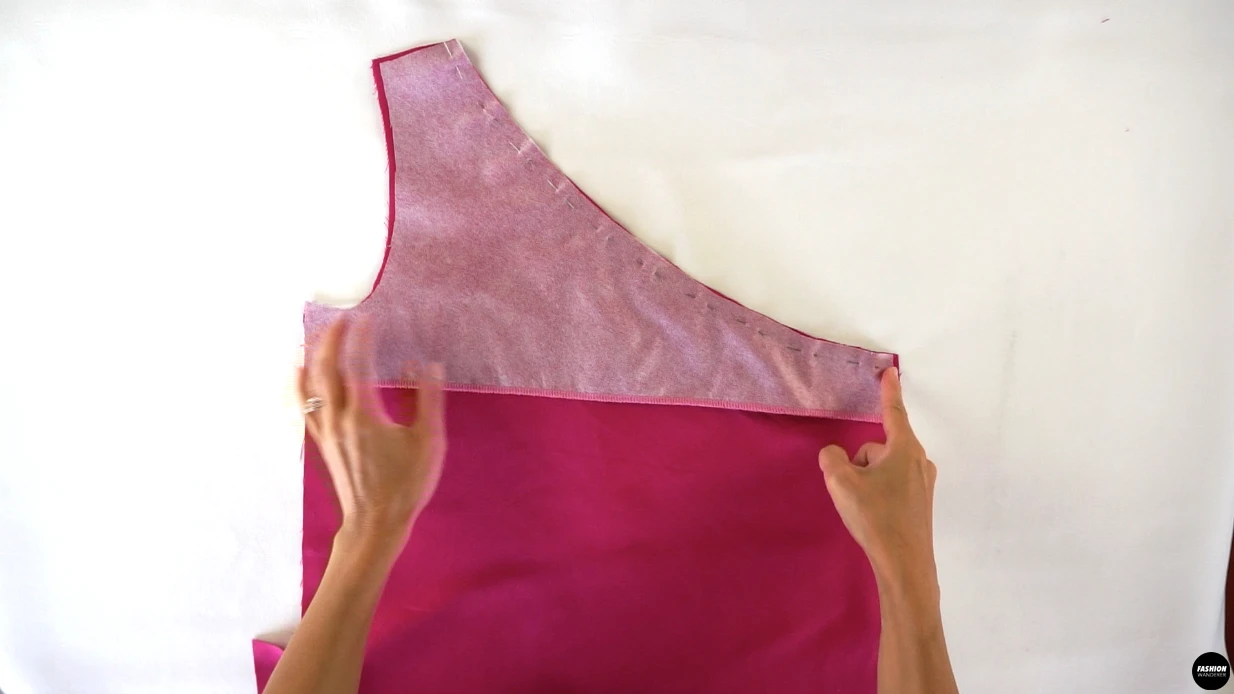
How To Make Neck Facing On A Dress
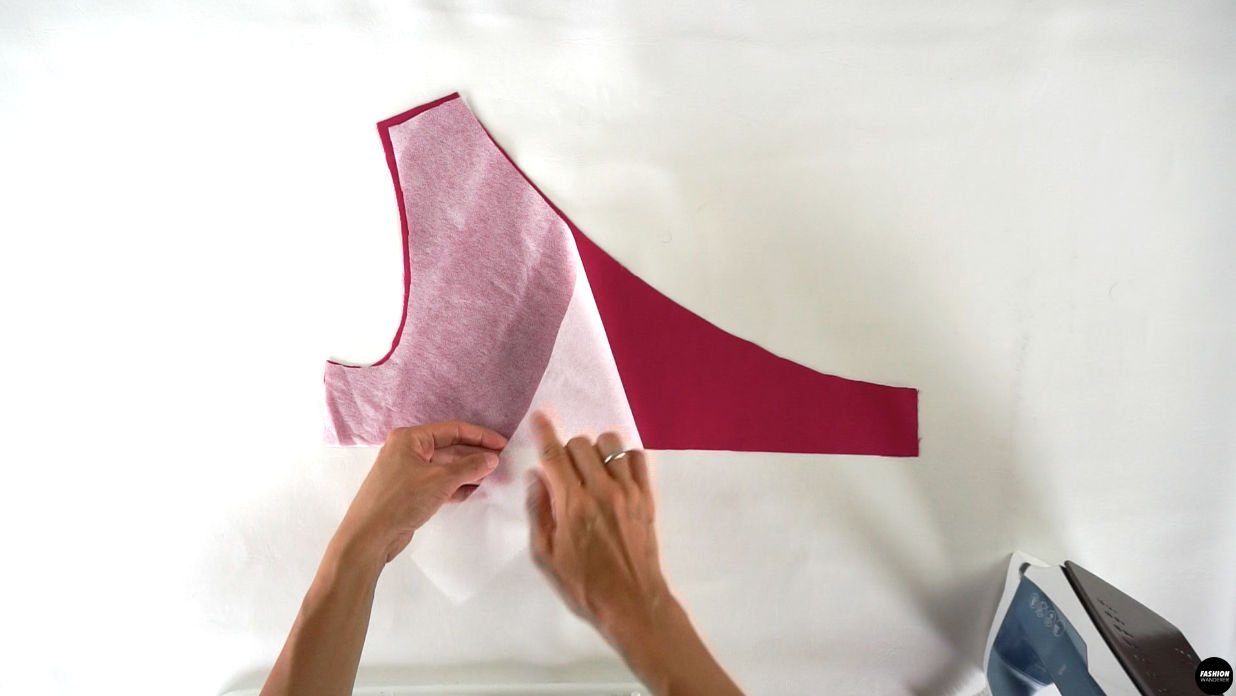
- Cut out the lightweight fusible interfacing and iron on the wrong side of the Front Dress Facing.

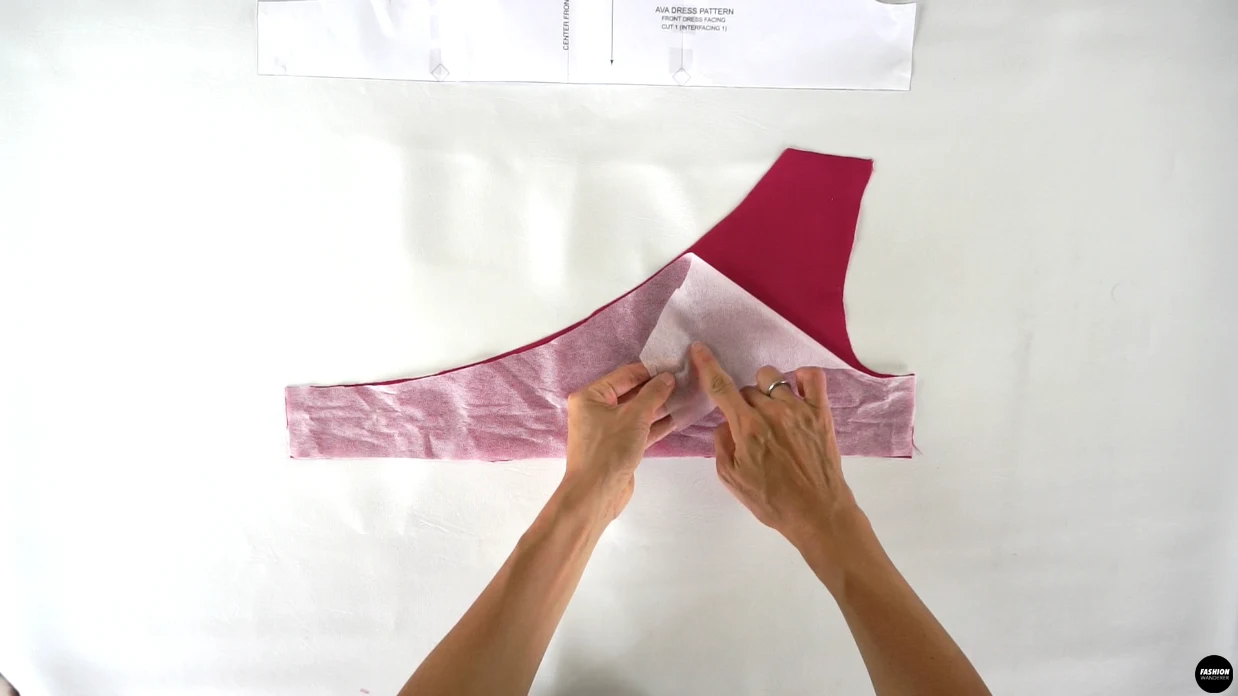
- Do the same on the wrong side of the Back Dress Facing with dry iron a because no steam is necessary.

- Overlock stitch the bottom edge of the Front and Back Dress Facing. This will prevent fraying and reduce bulkiness when attached to the garment.

- Place right sides of the Front Dress Facing and Front Dress against each other and sew ⅜” width seam allowance along the neckline.
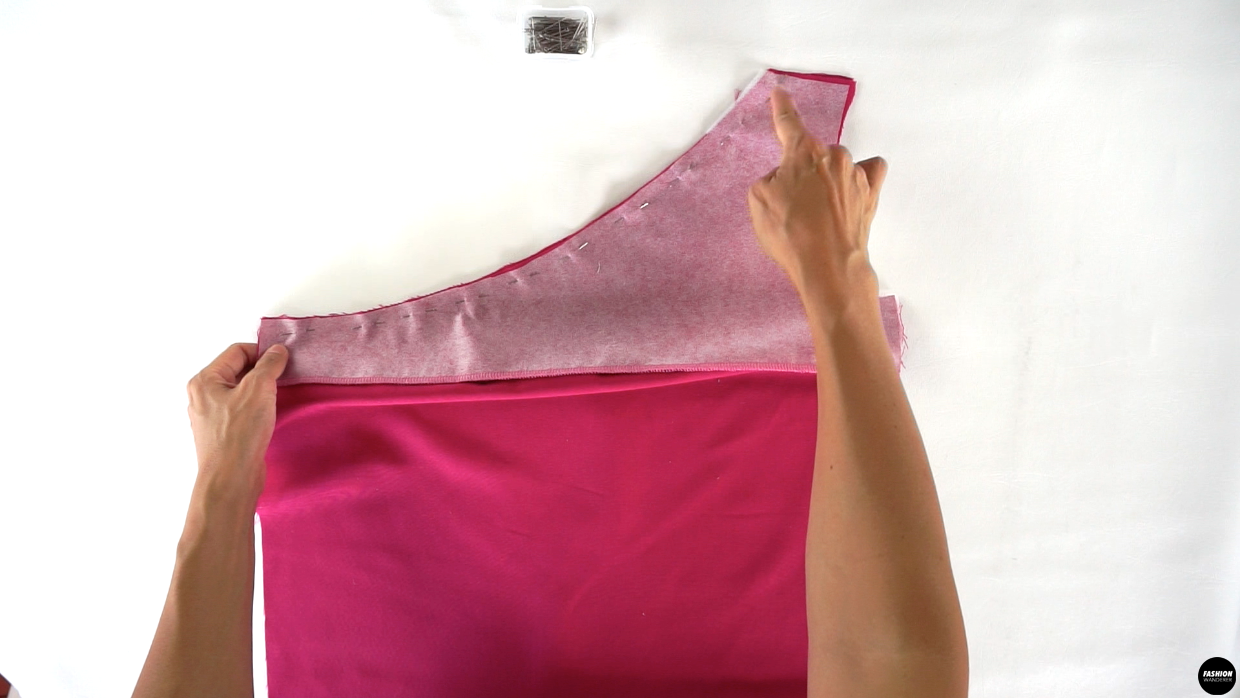

- Open the Front Dress Facing and edge topstitch to create a smooth neckline. If needed, press with iron to shape the clean and smooth seam line.

- Do the same on the Back Dress neckline to attach Back Dress Facing.

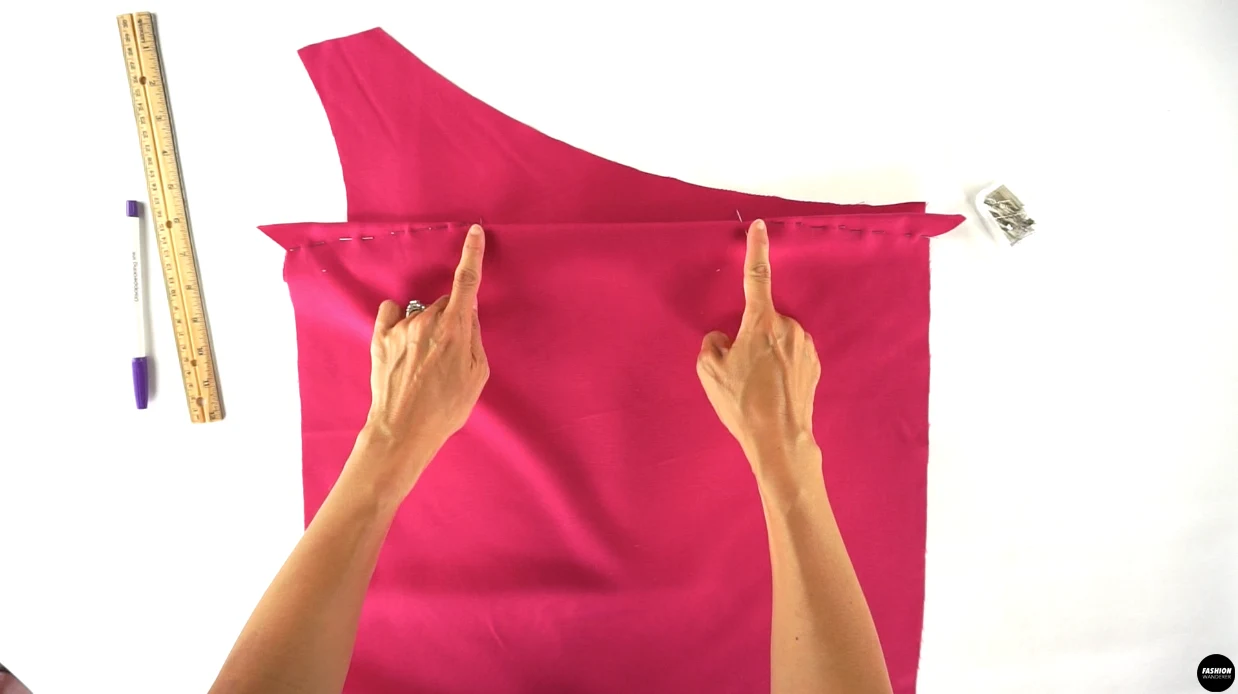
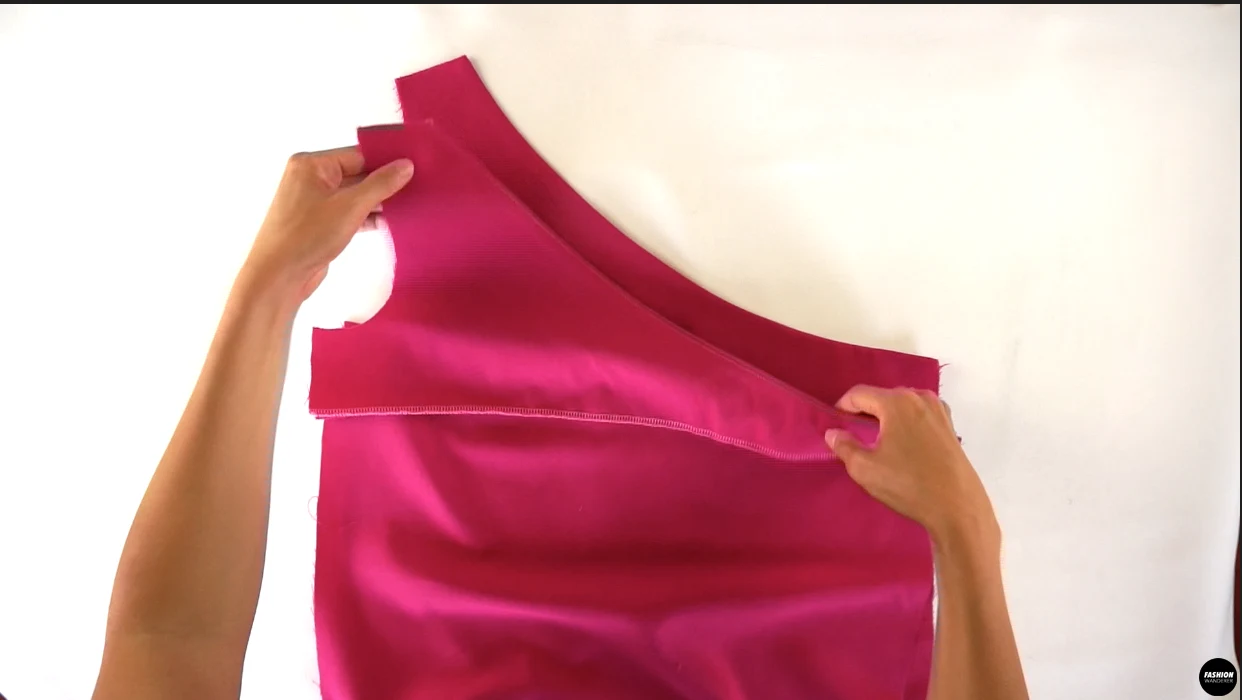
How To Sew One Shoulder Mini Dress
- Position right side of the Front Dress and Back Dress facing each other, then sew ⅜” width seam allowance and overlock stitch to join the shoulder.

- Press the shoulder seam toward the Back Dress with gentle light steam.
- Close the right side seam with ⅜” width seam allowance and overlock stitch to finish. Press the side seam toward the back.
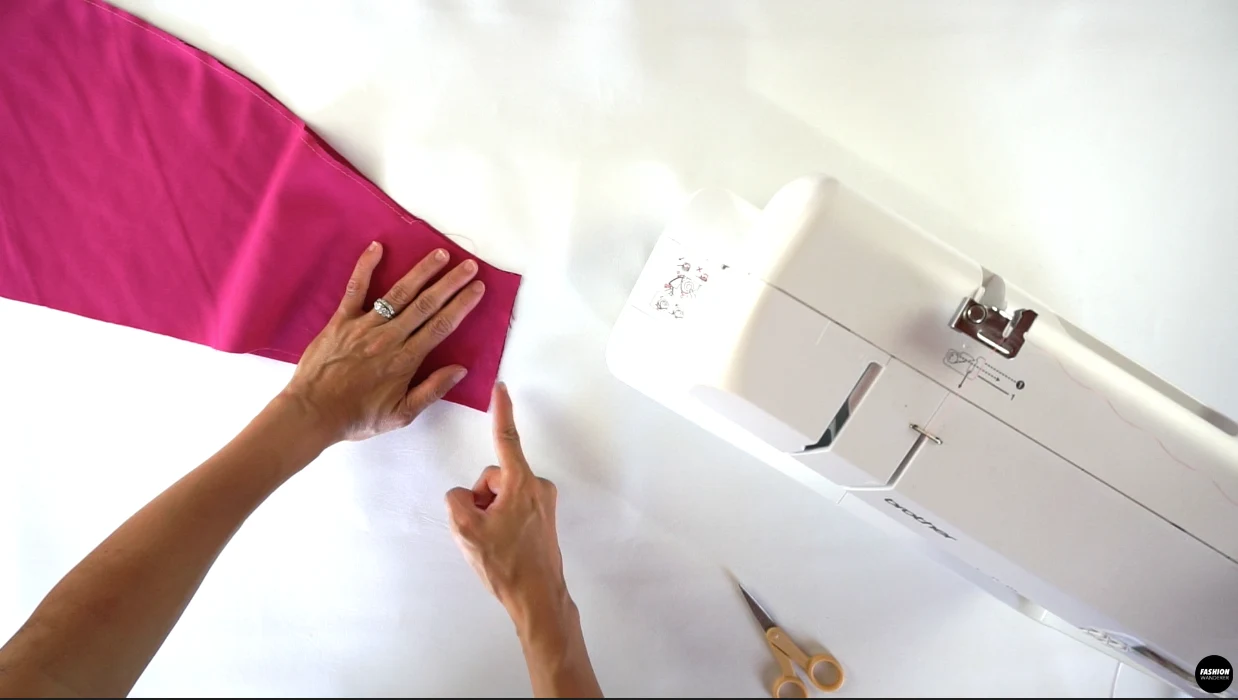
How To Make Flutter Sleeve
- Adjust the stitch length to 5.0 and ¼” straight stitch from Front to Back sleeve notches. Leave the thread about 3-4” long and do not back and forth stitch the ends.
- Fold the Sleeve on the center right sides facing each other, then close the underarm seam with ⅜” width straight stitch and overlock to finish. Press the seam toward the back side of the sleeve.

- Gently, pull one of the threads to evenly distribute the shirring along the sleeve.
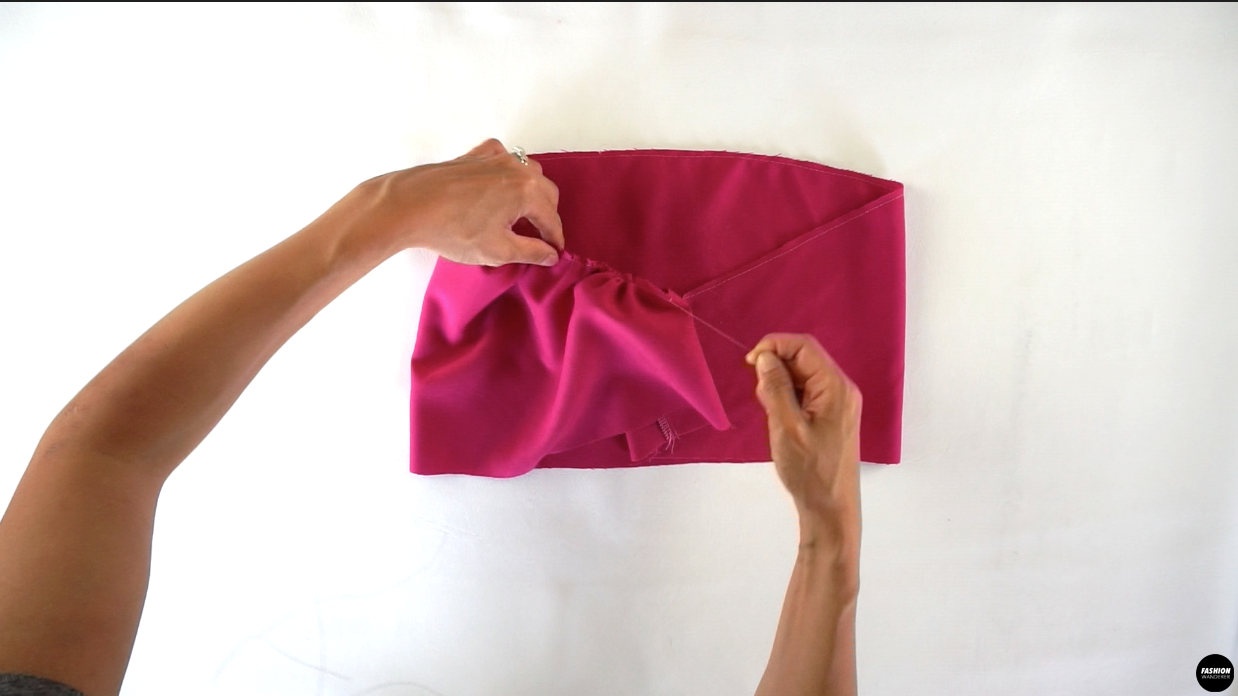

- Double check that shirring is equally distributed around the sleeve.
- Slide the sleeve through the bodice right side facing each other and pin along the armhole opening.

- Sew straight stitch ⅜” width seam allowance around the armhole and overlock the raw edges.

- ¼” width double fold the hem of the sleeve and edge topstitch for hemming. Press the hem all around the sleeve opening.
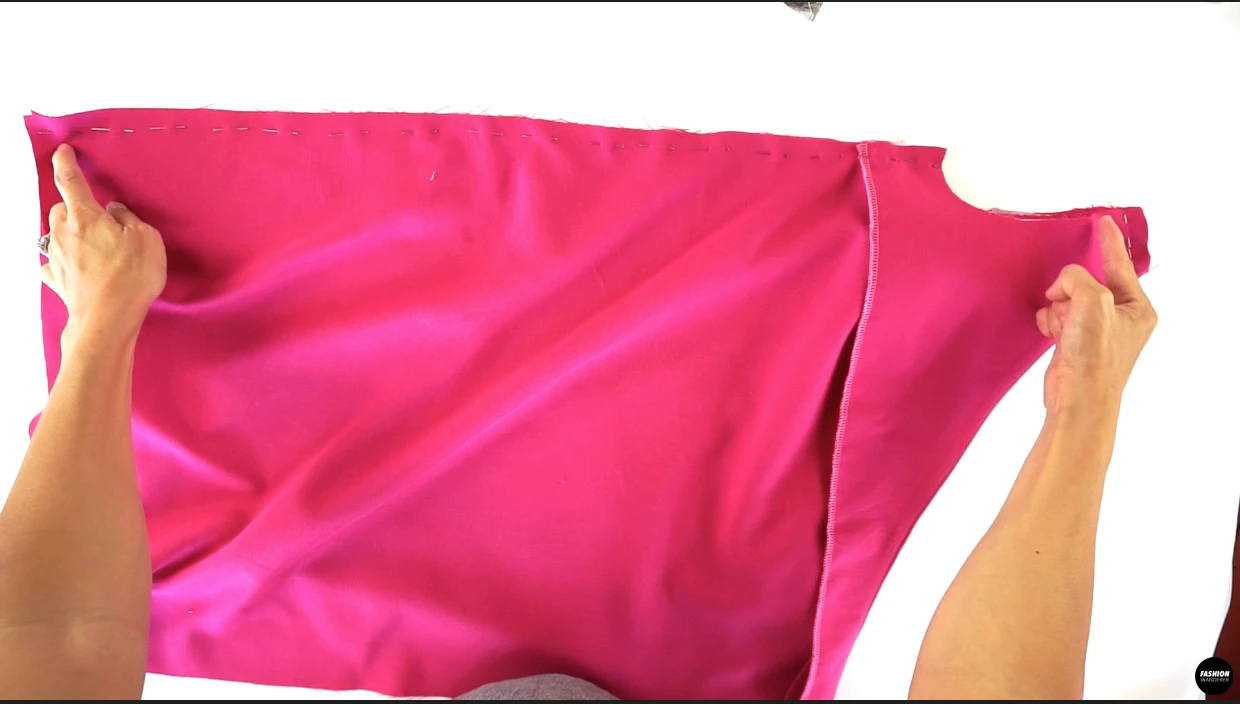
How To Sew Side Seam Invisible Zipper On A Mini Dress
- Place right sides of the Front Dress and Back Dress facing each other along the left side seams, then overlock stitch the side seams separately.

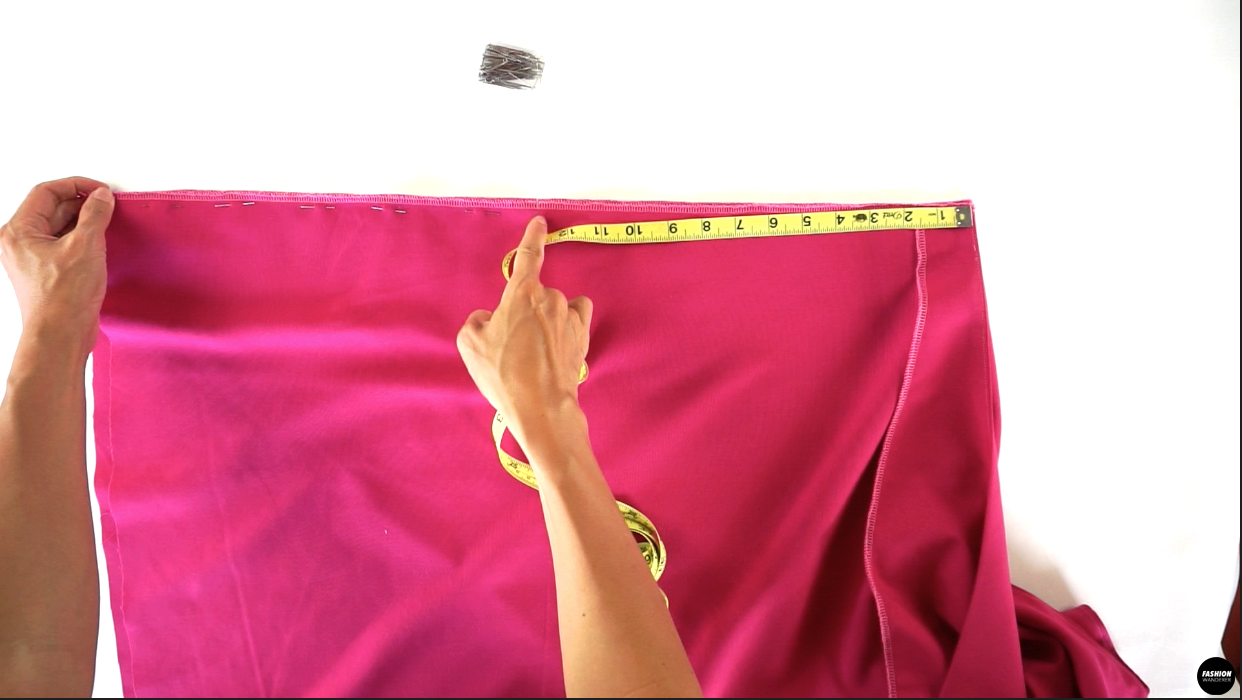
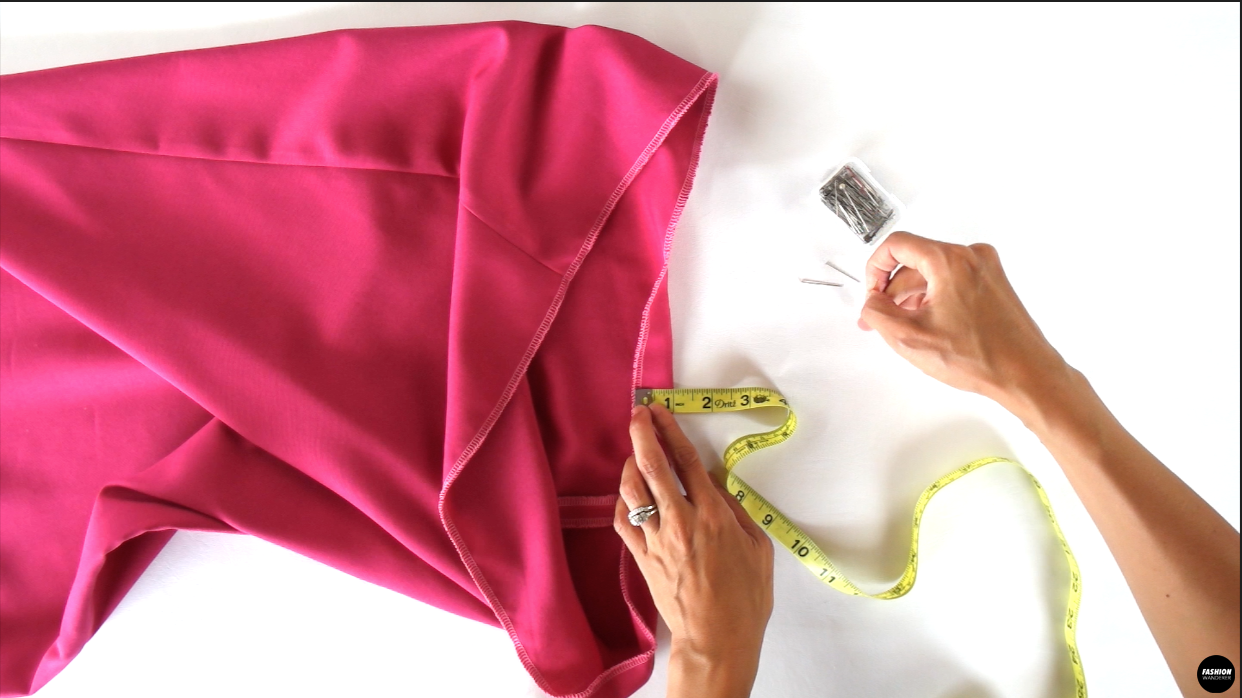
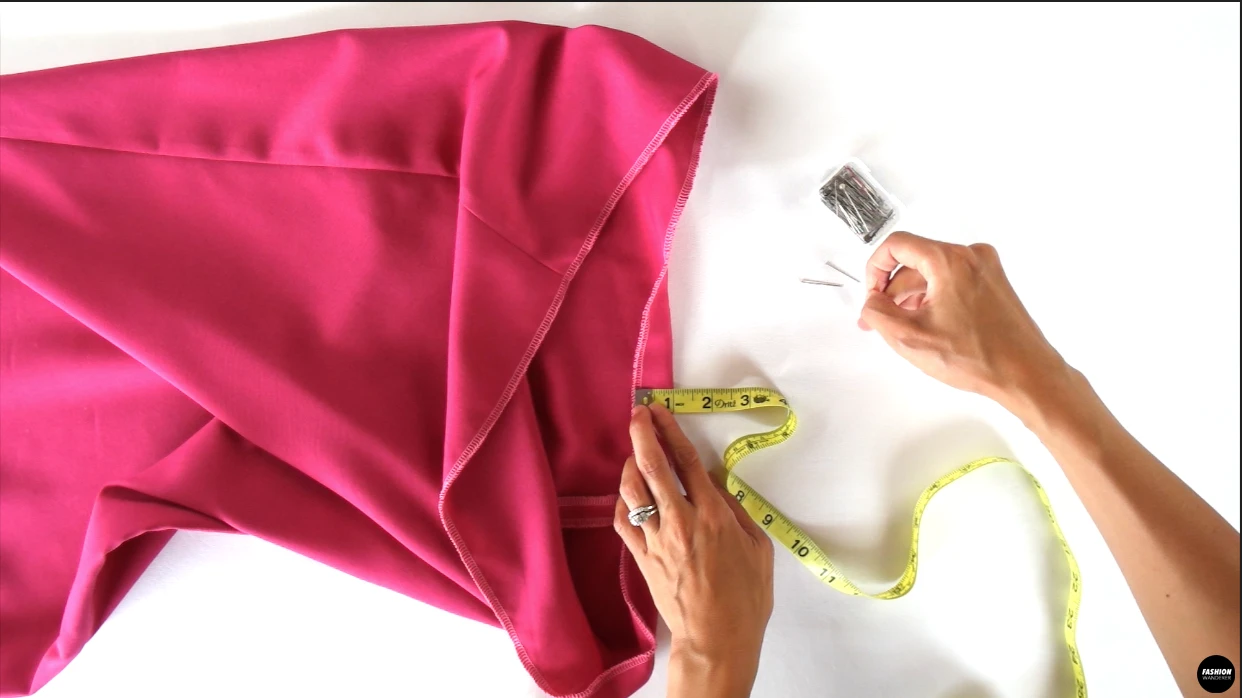
- Measure from neckline 13” down and pin to mark. Sew ⅜” width straight stitch all the way to hemline and press seam open.

- Open the invisible zipper tape and pin the tape on the right side of the dress.

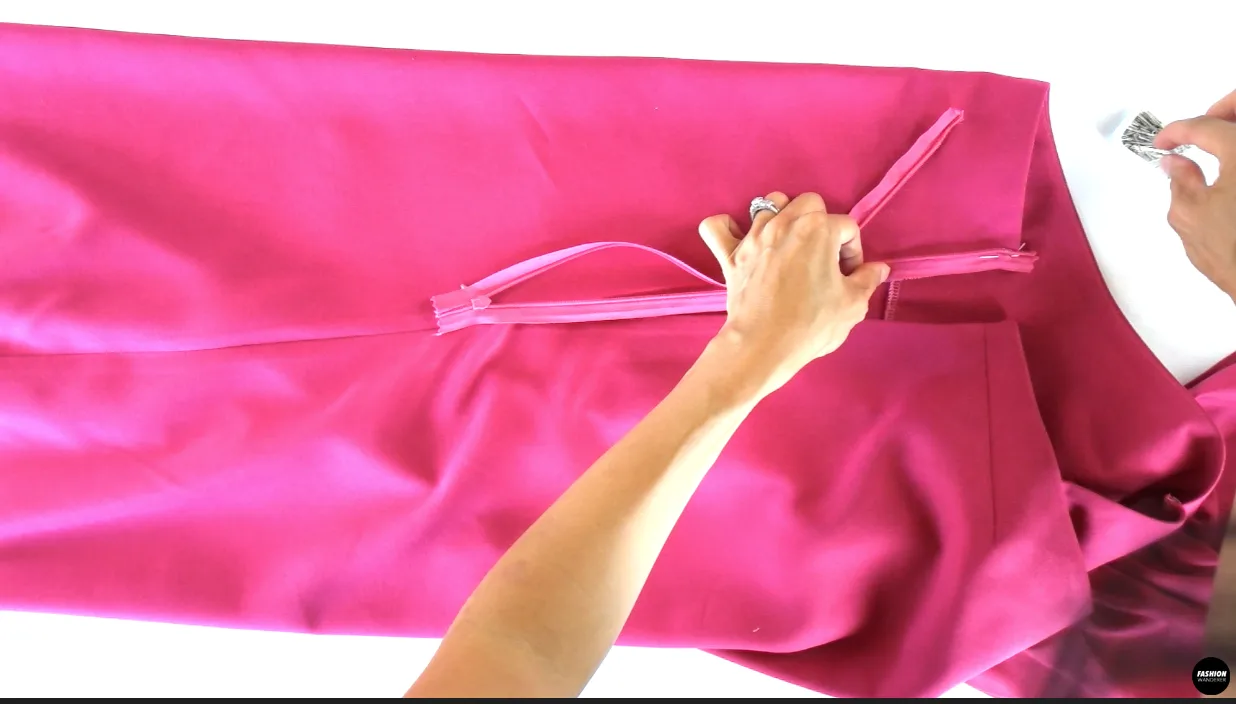
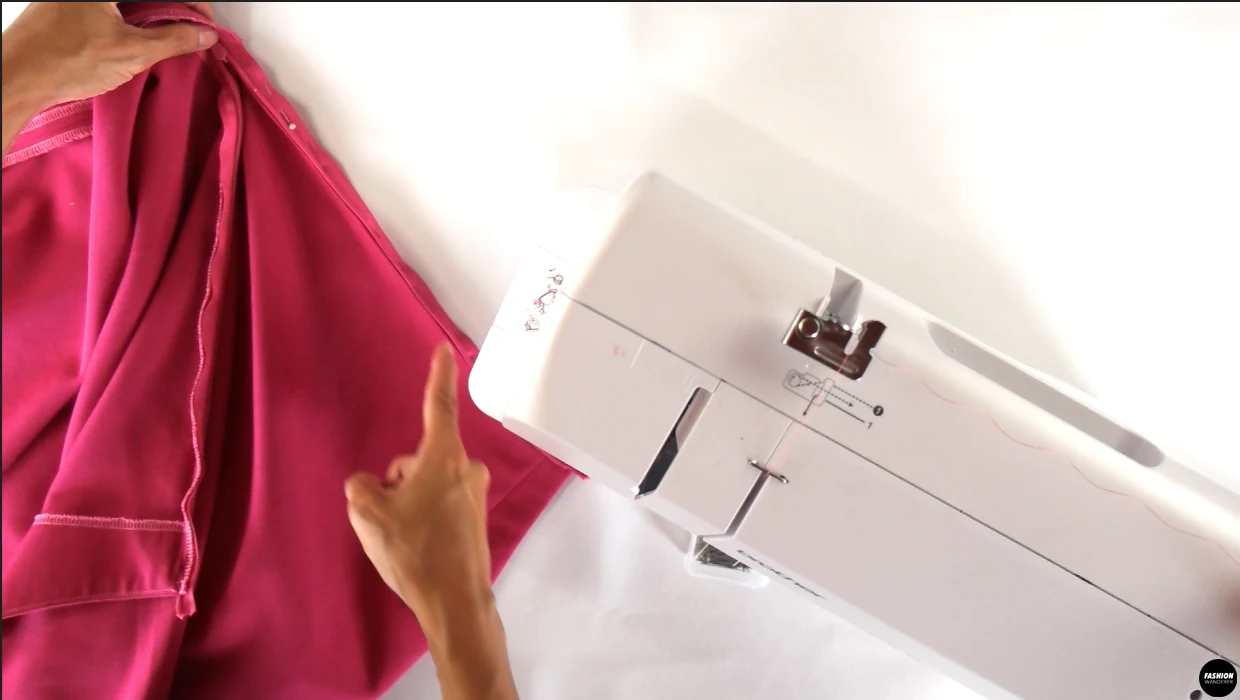
- Replace the regular sewing foot with a zipper foot and closely stitch along the zipper tape. Close the zipper tape and sew close to the zipper teeth of the other side.

How To Hem A Mini Dress
- Overlock stitch around the hem of the dress.
- Fold the hemline a width of 1” and topstitch around the hemline. Press the hem with gentle steam.
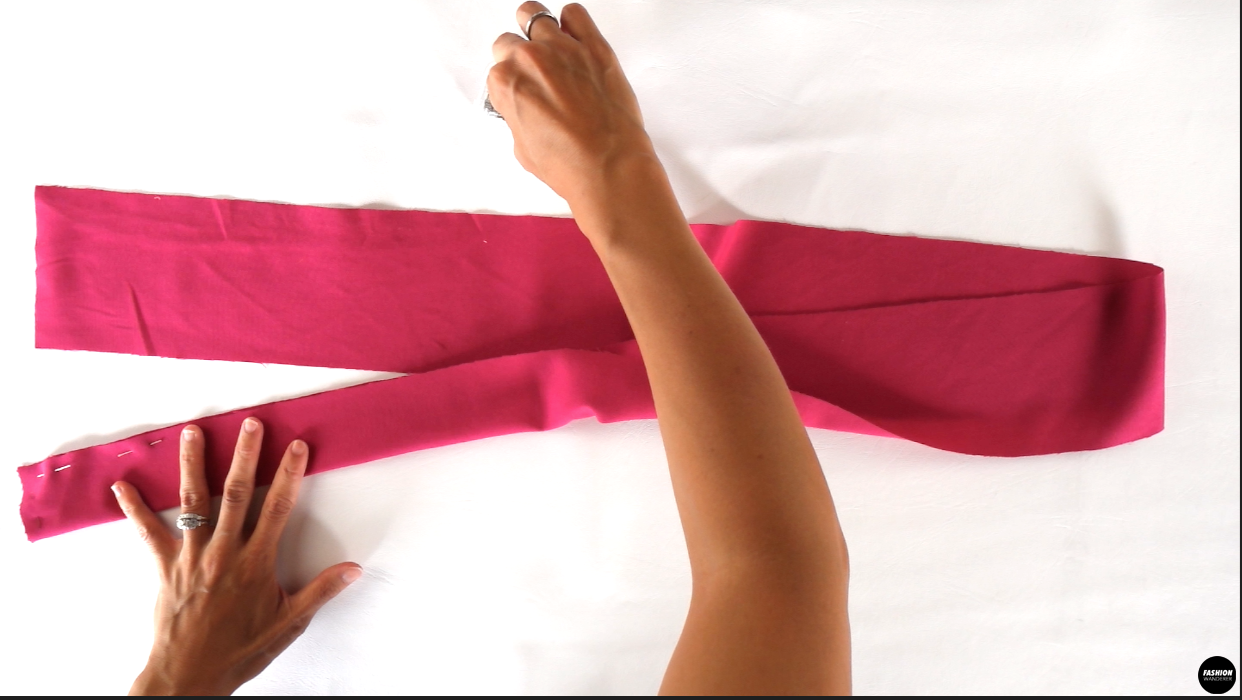
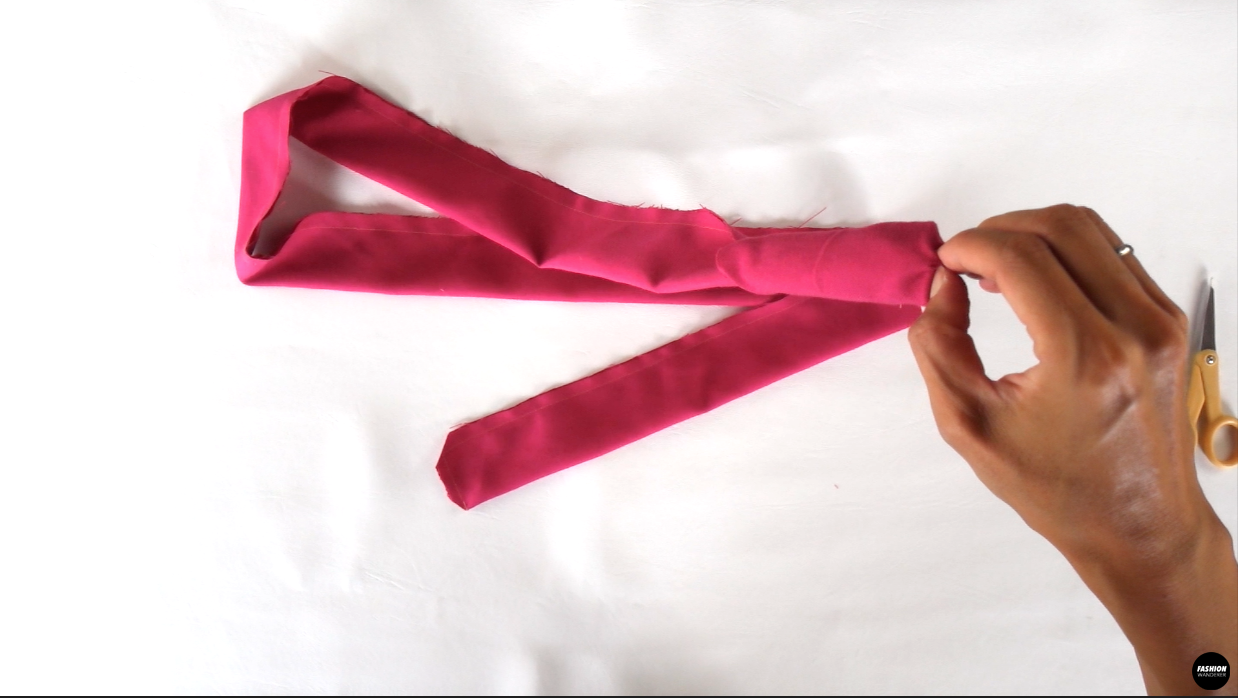
How To Sew Waist Tie
- Fold the waist tie piece lengthwise right side facing each other and sew ¼” width straight stitch.

- Use a loop turner or manually flip the tie inside out.

- ¼” width slide both ends of the opening and pin to secure.

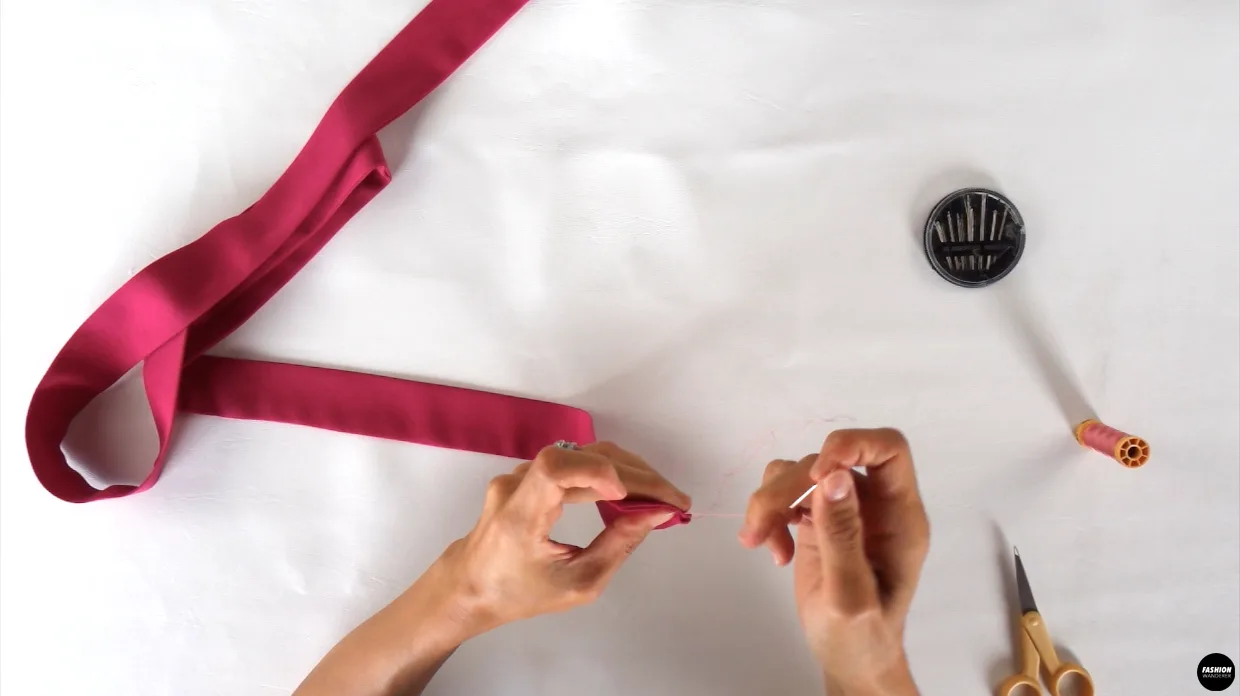
- Hand baste for a clean finish and iron press.

- Gently press all around the flutter sleeve one shoulder mini dress and add a waist tie to cinch the curve!

Recommended Products
As an Amazon Associate and member of other affiliate programs, I earn from qualifying purchases.


Trendy, Affordable Sewing Patterns for All Sizes


Tie Shoulder Jumpsuit Pattern


Palazzo Pants Sewing Pattern


Pocket Overall Romper Pattern


Wrap Maxi Skirt Sewing Pattern


Tie Back Top Sewing Pattern