
I transformed an oversized tee into a DIY racerback t-shirt dress. Follow along for a complete tutorial to make a dress without a pattern that features a sleek racerback cutout.
Experience the proud moment when you share your reconstruction design with others. Give it a try, and explore these t-shirt to dress tutorials today!


There are so many t-shirt upcycle ideas for you to attempt. Start with this DIY racerback t-shirt dress and test your refashion skills.
Take on a new challenge and learn how to do easy DIY fashion projects with me. Understand the fundamentals of a useful skills when you pursue upcycled clothing as a hobby.
In the before and after pic, you can see how the oversized tee really helped to contribute to the A-line dress shape. Tighten up the top bodice, but take advantage of that extra material when shaping the dress.
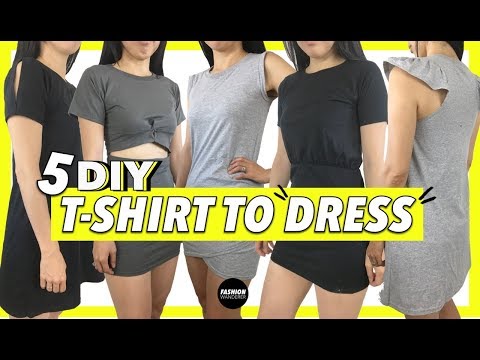
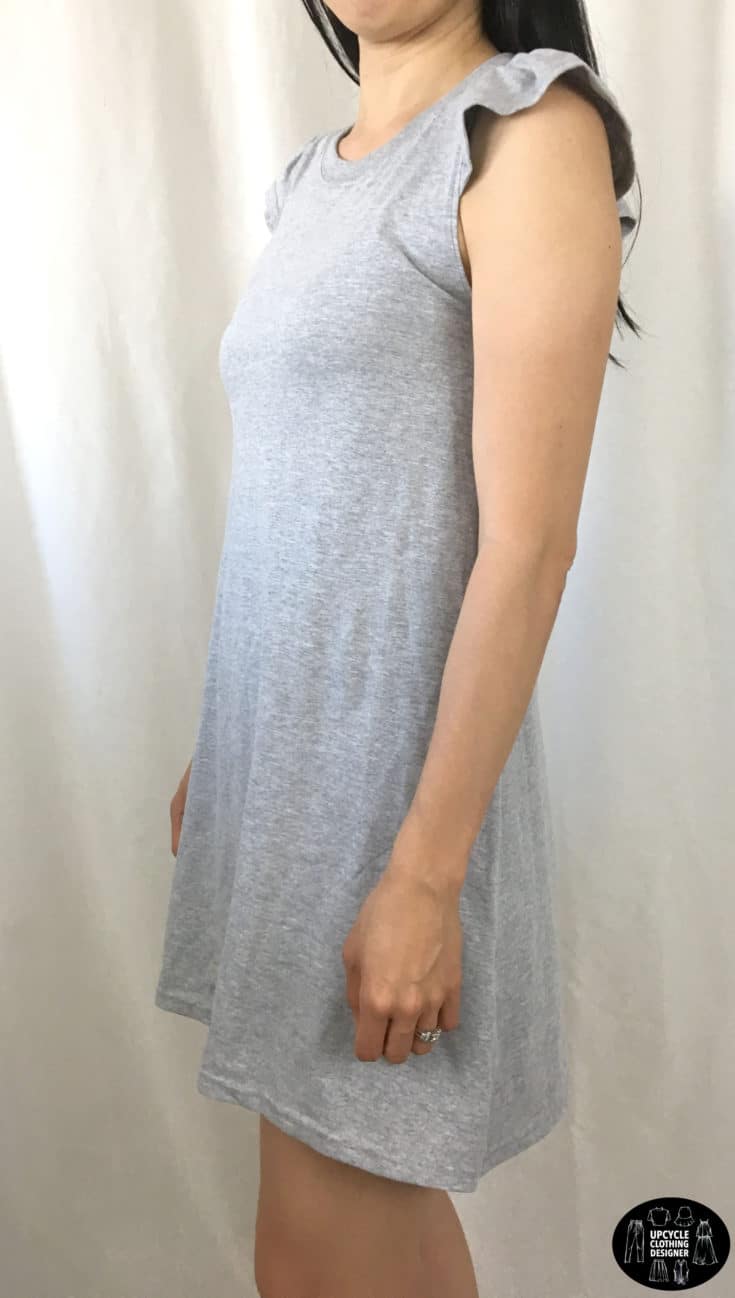
The main focus for this dress is the sleeveless top bodice. I took the opportunity to spice it up the style a little bit by adding ruffles along the racerback and armholes. The ruffles add a really cute touch to the racerback look.


The A-line dress silhouette adds flow to the dress bottom and also showcases a tasteful style that really balances out the overall look.
I’m super excited with how this DIY racerback t-shirt dress and how it turned out. The ruffles help to cover the tops of the shoulders a little bit, but also allows the dress to maintain a sleeveless silhouette over the arms.
Wear this dress as is, or even throw a denim jacket over your shoulders for a more casual look. As a result, this style is really fun to wear for a variety of occasions.
More T-Shirt Dress Upcycle Designs:
DIY Racerback T-shirt Dress
I’m super excited how this ruffled racerback t-shirt dress turned out. The dress covers the tops of the shoulders a little bit, but maintains a sleeveless silhouette over the arms.
The ruffles add a cute detail to the racerback. Wear this dress as it is, or even throw a denim jacket over for a more casual look.
Materials
- Oversized T-shirt
Tools
- Sewing Machine
- Fabric Chalk
- Measuring Tape
- Ruler
- Scissors
- Straight Pins
Instructions
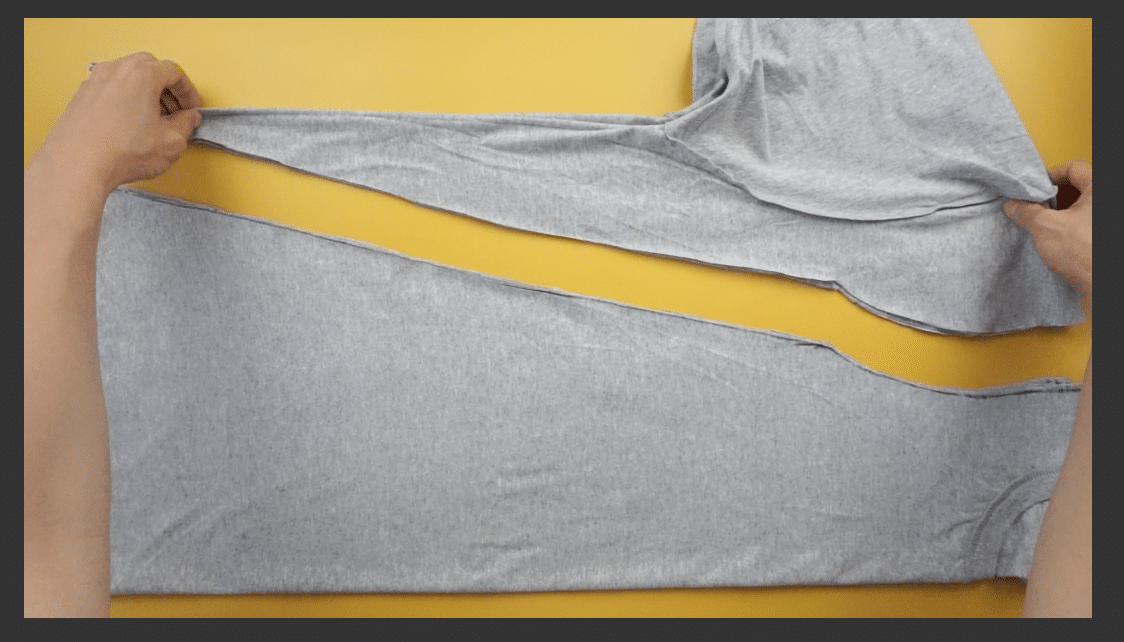
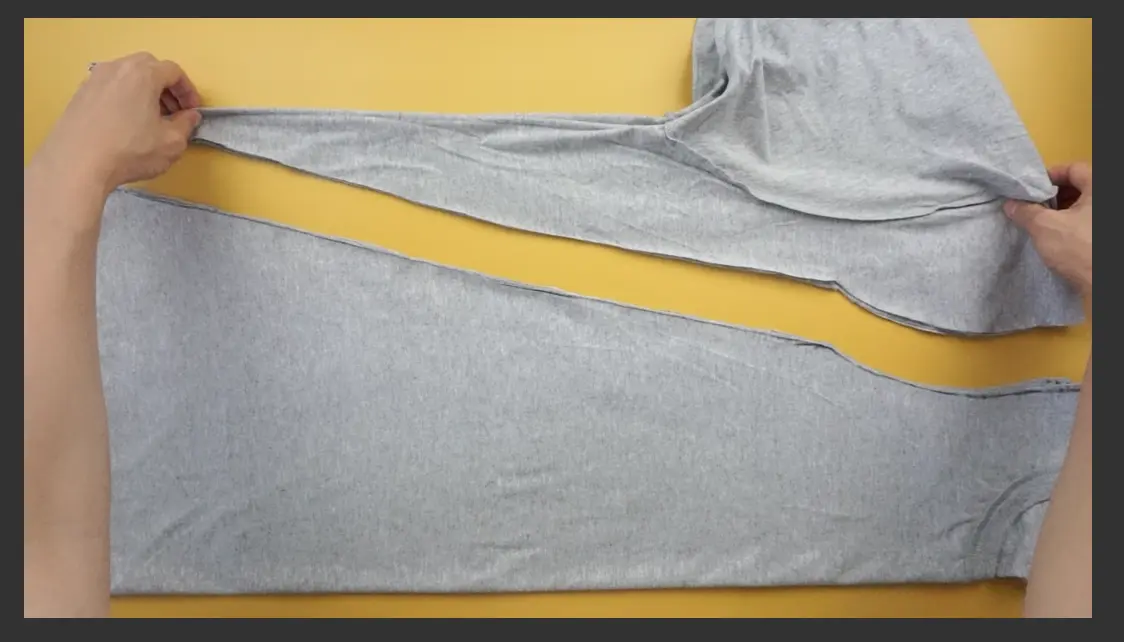
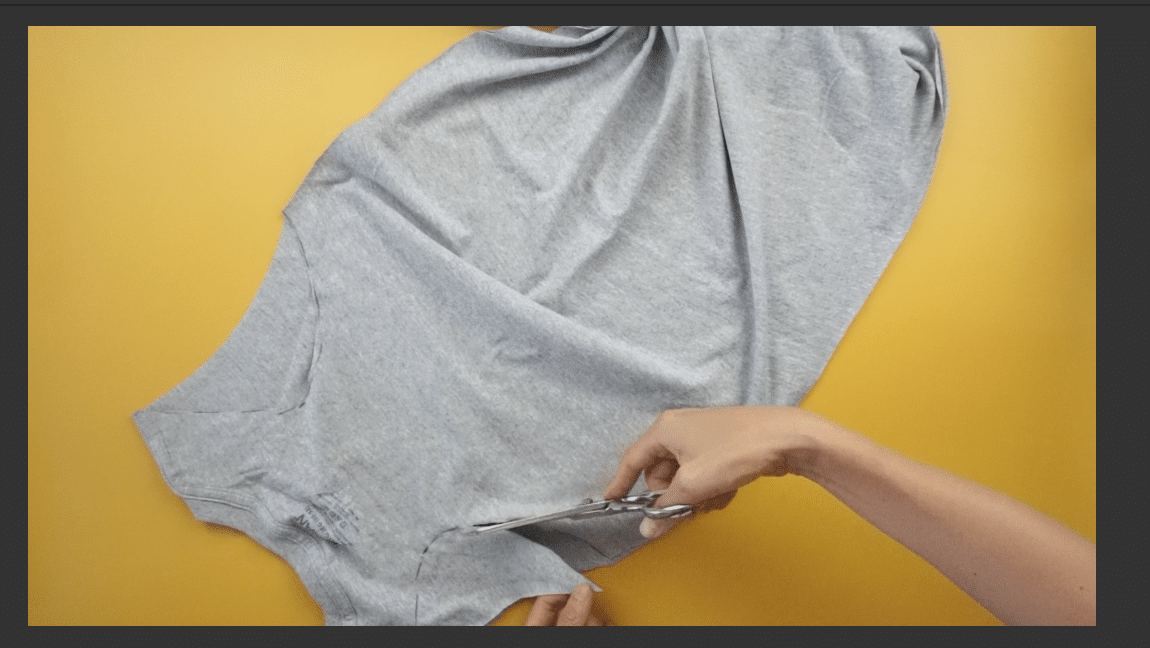
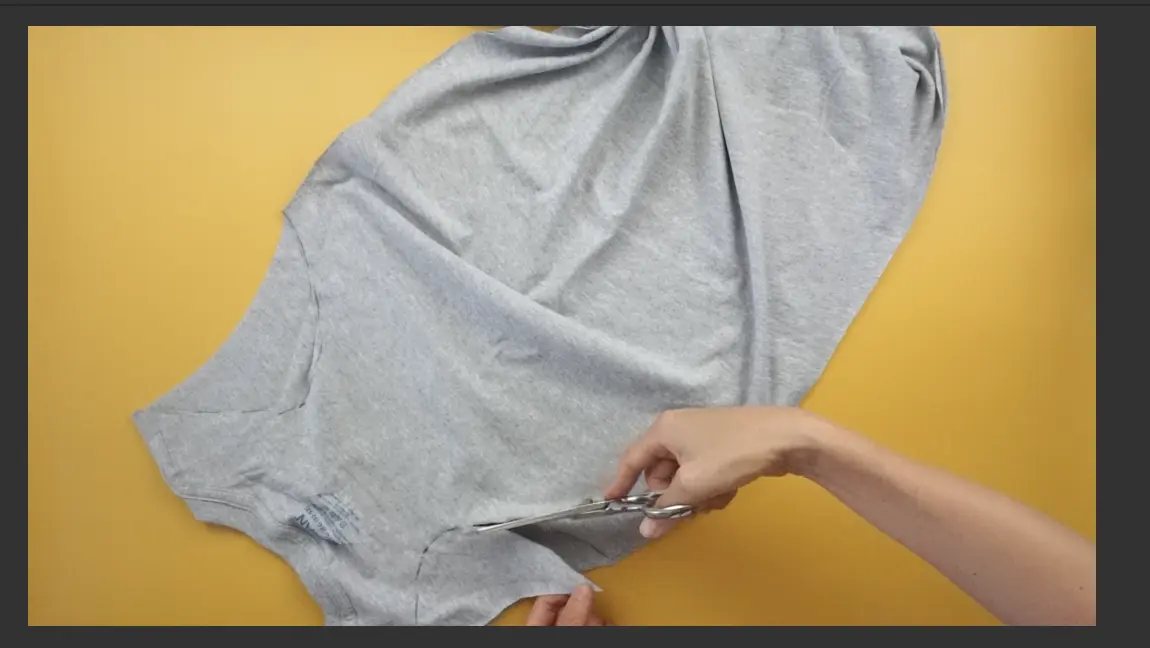
- For the top bodice, flip the t-shirt inside out and fold in half. Use your favorite crewneck shirt to trace the measurement for the top bodice of the dress. Copy the armhole and shoulder seam. Add ¼” seam allowance, and then cut.
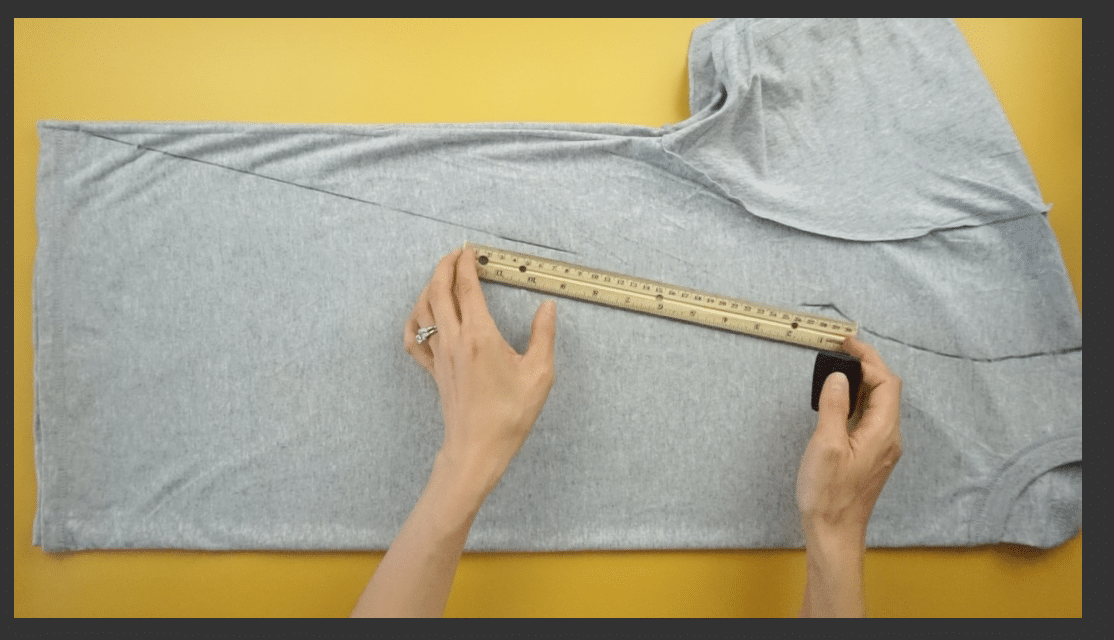
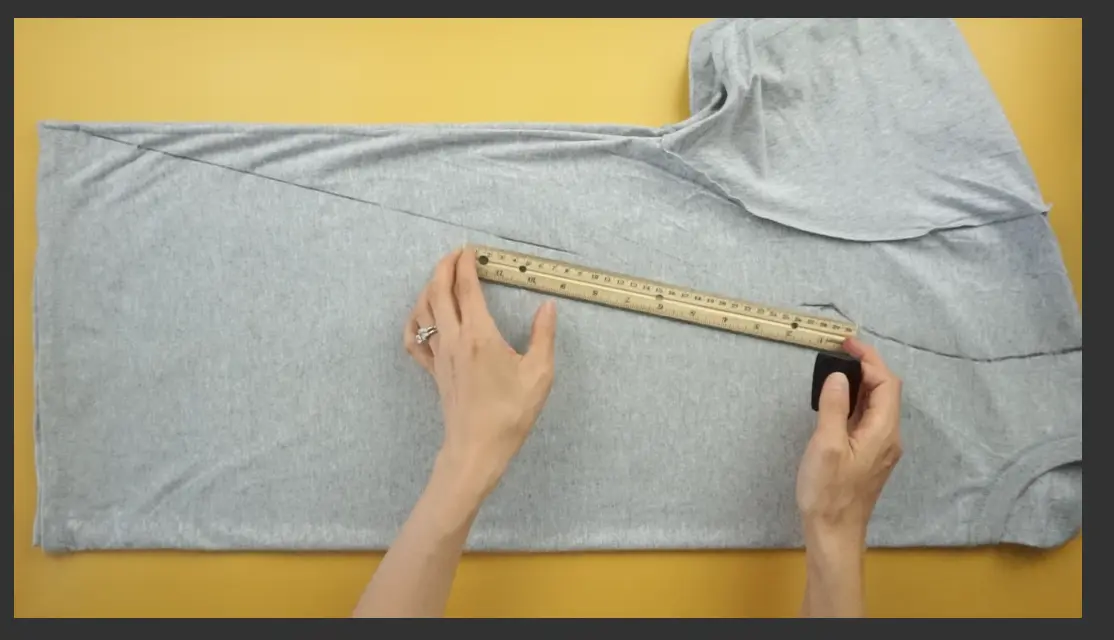
- Use a ruler to draw a straight line from the under armhole to the hemline. Add ¼” seam allowance and cut.
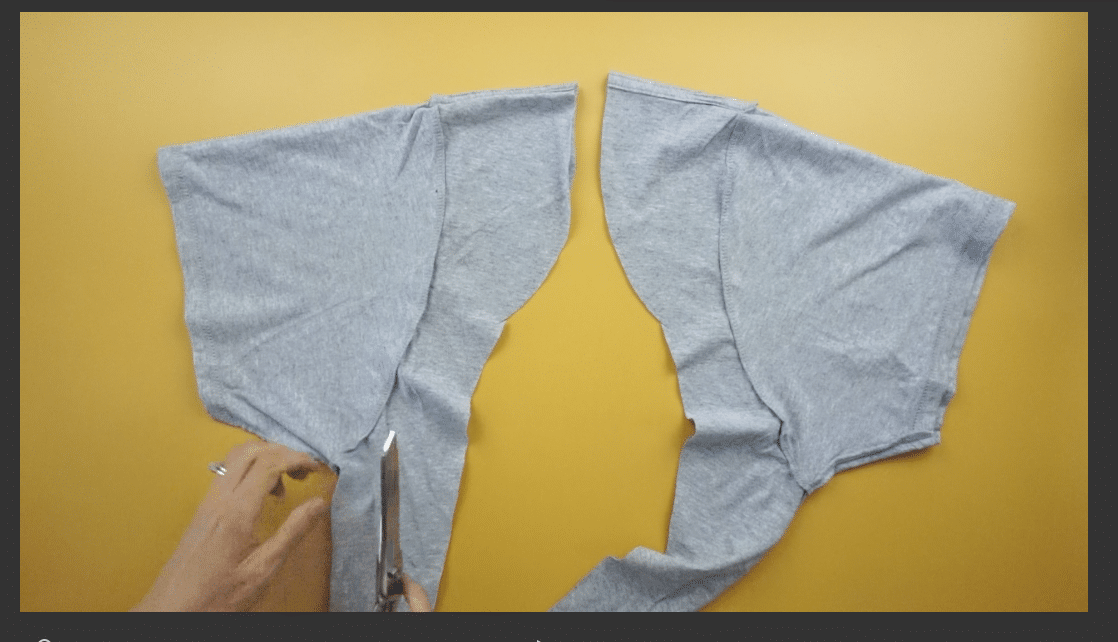
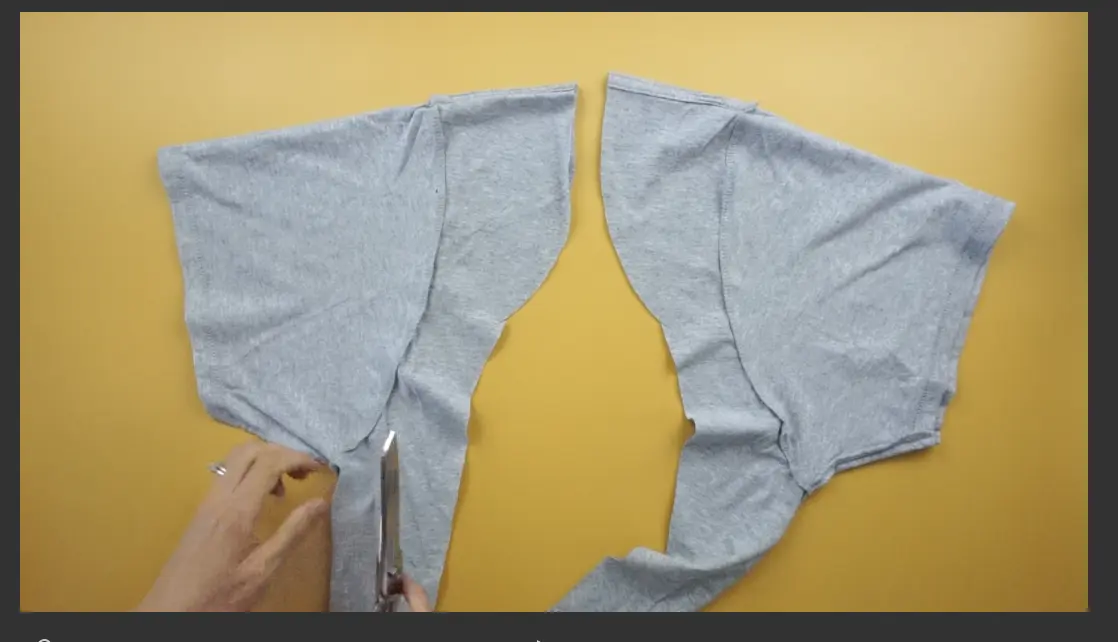
- For the racerback, measure across from the middle of the armhole. Mark 3” away from both sides.
Helpful hint: My width was originally 12”. Therefore, the racerback measurement ended up being 6” wide.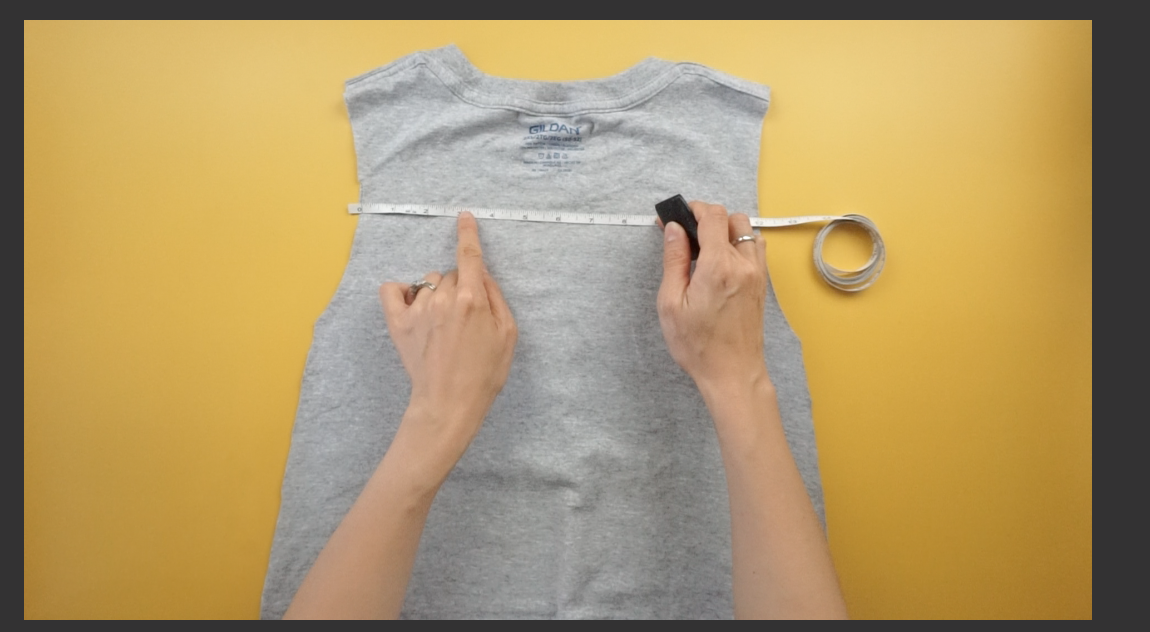

- Draw a smooth curve from the shoulder to the 3” mark and then back to the under the armhole. Cut along the chalk mark for the back piece only.
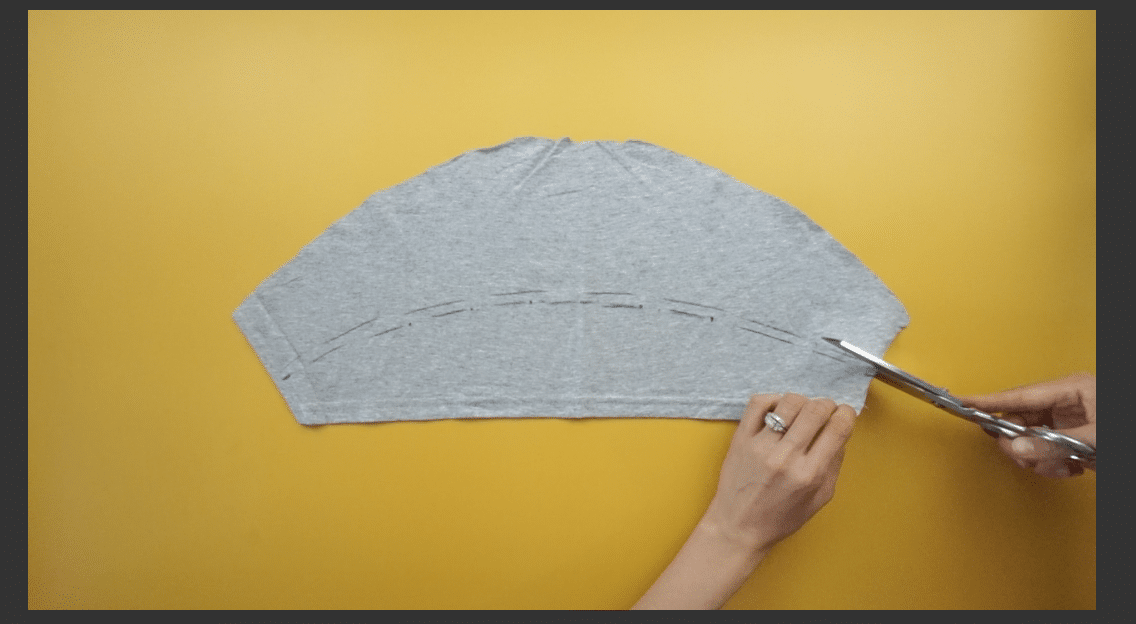
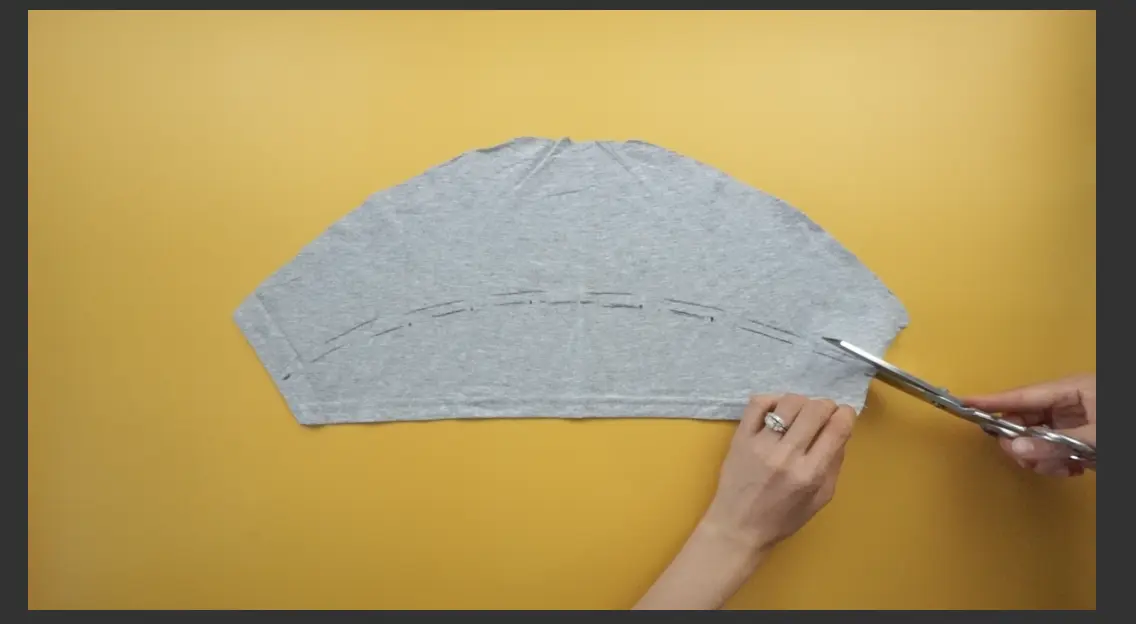
- To make the ruffles, use the discarded sleeves. Cut open the side seams, then measure 1” from the hemline on both sides and chalk mark. Measure 3 ½” from the center of the sleeve and chalk mark again.
- Draw a smooth curved line to connect the marks. Add ¼” seam allowance and cut. Then, copy the ruffle piece for the sleeve pattern on the other side.
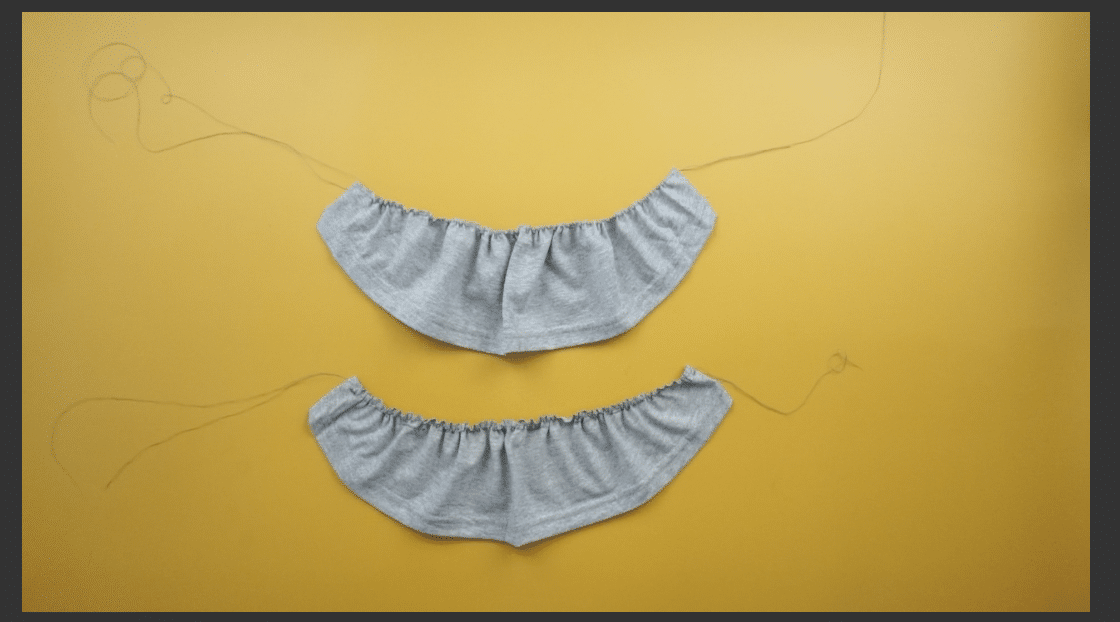
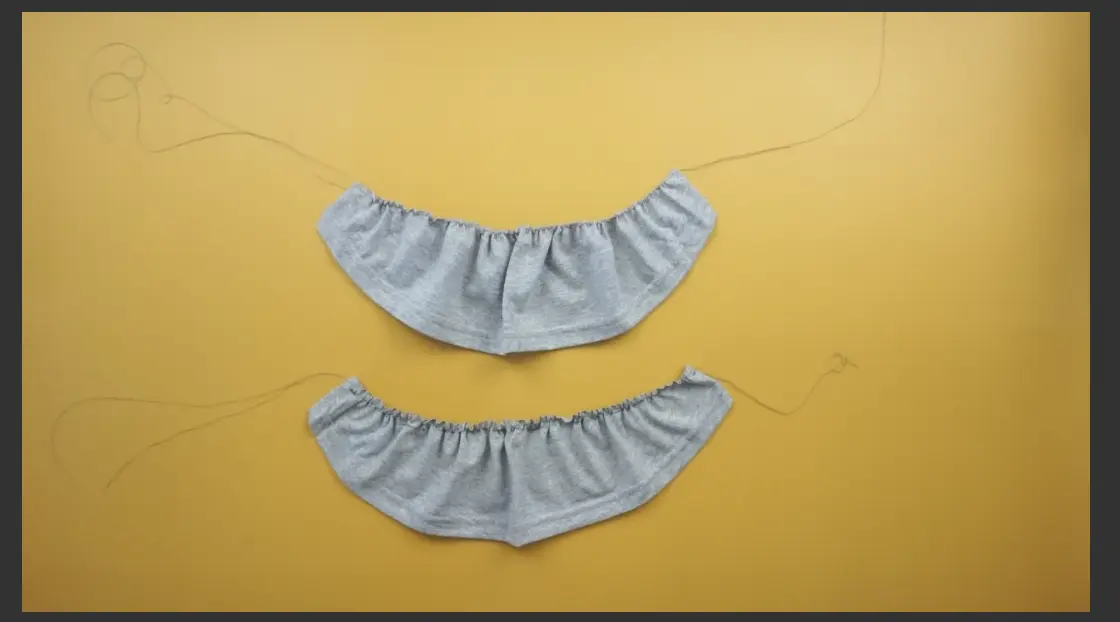
- For shirring the ruffles, use loose tension and wide stitch width to ⅛” topstitch. Evenly distribute the hand shirring to finish the 12” long ruffles.
- To finish both side seams, close with ¼” topstitch.
- To attach the ruffles, measure 3 ½” down from the front neckband and mark. Match the end of the ruffle piece to the chalk mark and sew ¼” topstitch along the armhole.
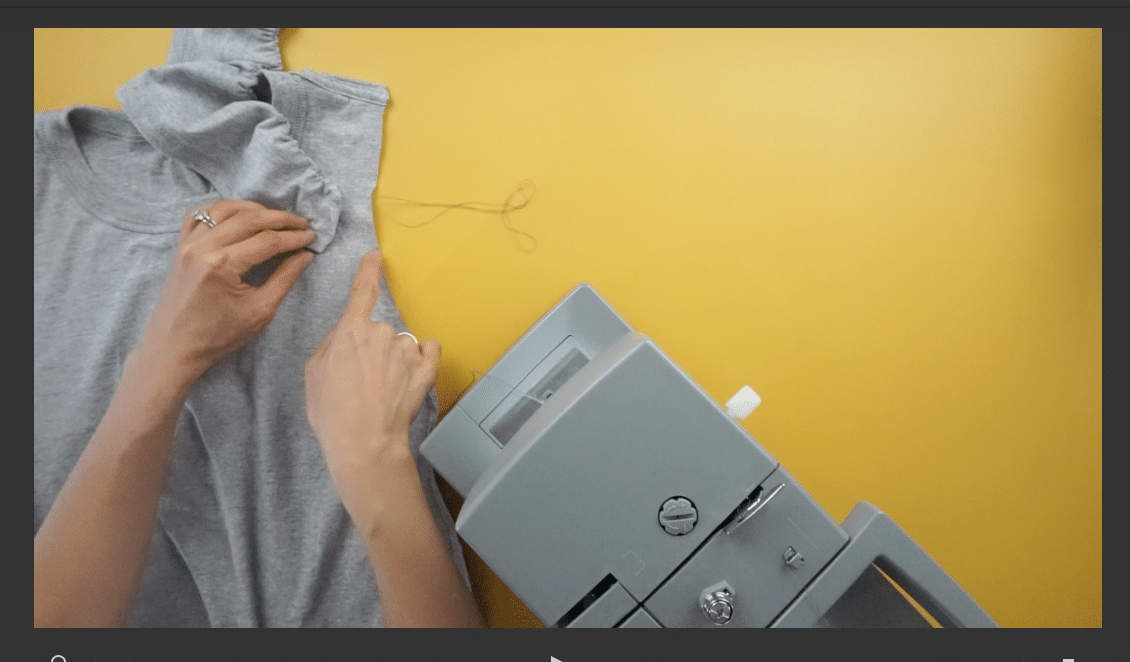
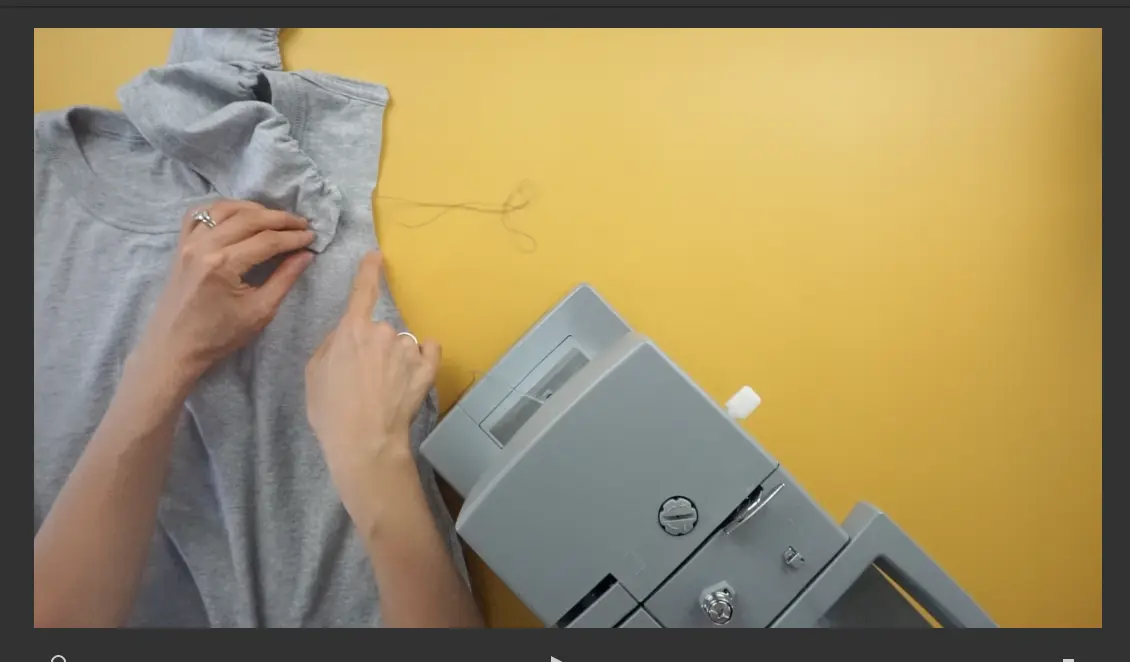
- To finish the under armhole of the dress, simply fold one time and edge topstitch completely around the armhole and also over the ruffles.
Sewing tip: This will help the ruffles to stay positioned and also prevent flipping while wearing.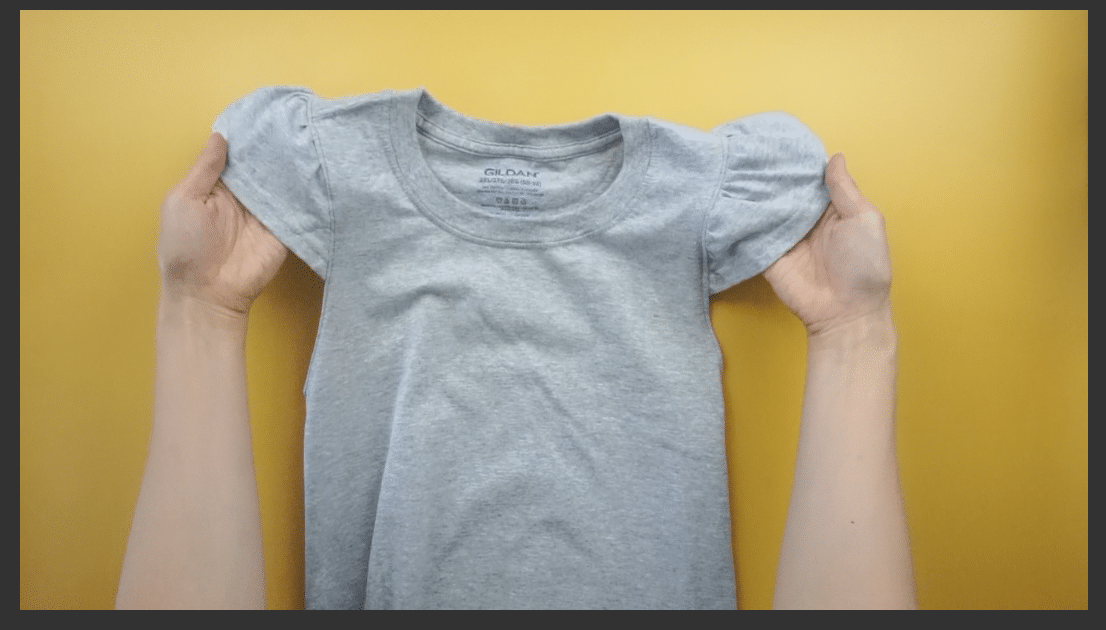

Notes
An oversized tee works best for this design in order to maintain the A-line silhouette.
Recommended Products
As an Amazon Associate and member of other affiliate programs, I earn from qualifying purchases.


Trendy, Affordable Sewing Patterns for All Sizes


Tie Shoulder Jumpsuit Pattern


Palazzo Pants Sewing Pattern


Pocket Overall Romper Pattern


Wrap Maxi Skirt Sewing Pattern


Tie Back Top Sewing Pattern