
Start out with this DIY side shirring dress from t-shirt. However, there are more t-shirt to dress projects to explore. In the end, it’s just a tee shirt that you’re practicing with.
In this refashion tutorial, learn how to reconstruct a DIY side shirring dress from a t-shirt. Follow the best t-shirt upcycle idea so that you can also learn exciting ways to recycle old clothes into new clothes.


The skintight dress silhouette helps to accentuate the natural curved lines on your body. Furthermore, the side shirring incorporates texture into the dress that lends to the gorgeous look.
In addition, the asymmetrical tulip skirt bottom displays a slimming effect that really showcases your sexy legs with a flawless look. As a result, I was truly impressed by this DIY side shirring dress from t-shirt design.
The t-shirt into dress appears to be an advanced project; however, this DIY tutorial truly showcases how to make a dress without a pattern. The upcycle transformation teaches how to make a DIY side shirring dress with step-by-step instructions for you to follow along.

Is this your first attempt a refashioning old clothes into something new? If so, then this beginners sewing project is perfect for you.
Explore the many ways to recycle old t-shirts into new clothes that are available. Using a cheap tee, we will cover step-by-step instructions for you to follow in each lesson.
Of course you must practice new skills and improve your abilities, but DIY fashion is a fun hobby to consistently pursue. It is quite satisfying to wear your own upcycled clothing. The end result is that you get to say, “Yes, I made that!”
More T-Shirt Dress Upcycle Designs:


What is a shirred dress?
This dress features shirring along the side of the skirt bottom. Shirring is to create textured appearance only, and requires a specific technique to accomplish.
When sewing, shirring means to gather two or more rows of material. The desired outcome is to decorate parts of a garment, like the sleeves, bodice or yoke, with the gathering.
Although the outward appearance is similar to pleating and smocking, the approach and technique are much different.
What is the difference between smocking and shirring?
The fabric gathering may appear to look similar, however shirring and smocking require completely different sewing techniques.
Smocking uses embroidery stitches and elastic thread to naturally gather fabric. In this smocking dress from men’s dress shirt, you can see how the fabric bunches tightly using elasticity and a varied stitching technique.
Shirring adds decorative patterns and texture to the fabric without the use of elastic thread. This tutorial demonstrates how to hand shirr a dress by pulling the back thread to evenly disperse to gathered material.
How do you know how much fabric you need when shirring?
As you may have well guessed, shirring consumes fabric width. For exact measurements, you will need to consider a few factors like the type of fabric and how many gathers you will complete.
For best results, its recommended to test the shirring on scraps of the actual material you are using. This will help you determine how much extra fabric you will need to finish the project.


DIY Side Shirring Dress From T-shirt
This sleeveless side shirring dress turned out super gorgeous. The asymmetrical tulip silhouette skirt detail really flatters the legs and gives a flawless look. Follow along with this upcycle project and learn how to make this side shirring dress from an big t-shirt.
Materials
- Big T-shirt
Tools
- Sewing Machine
- Fabric Chalk
- Measuring Tape
- Ruler
- Straight Pins
- Scissors
Instructions
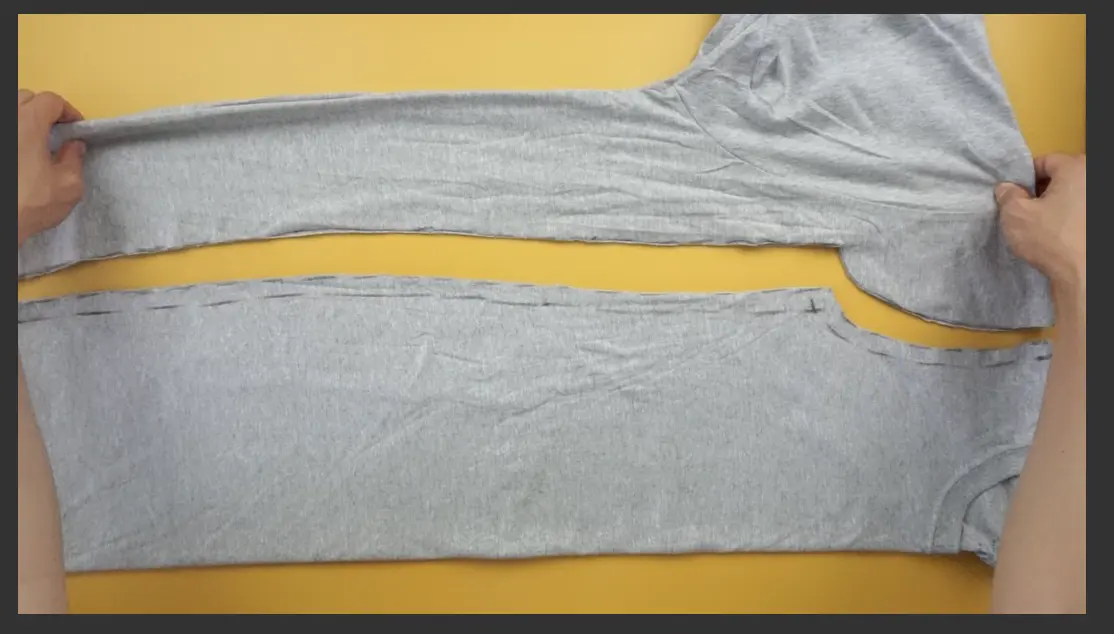
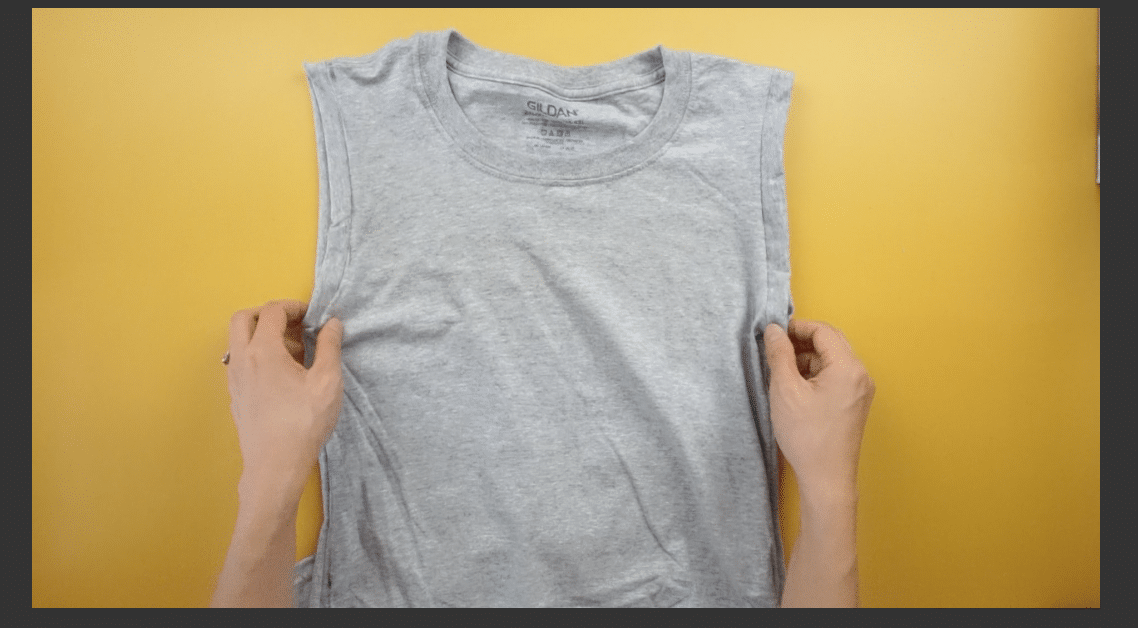
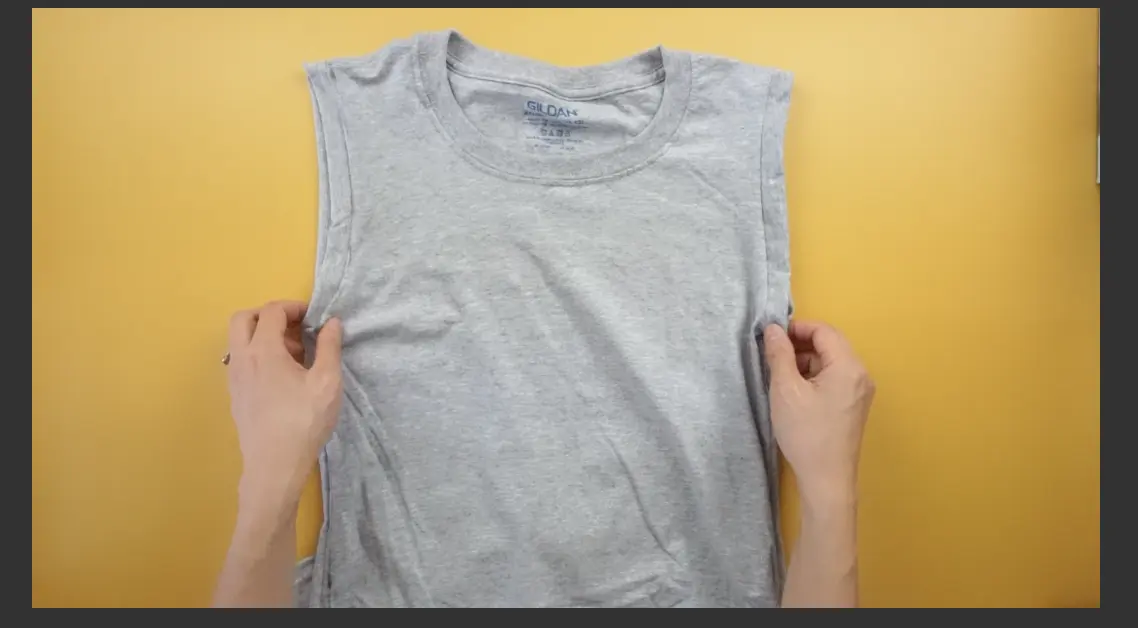
- For the top bodice, fold the oversized t-shirt in half. Use a crew neck and skirt to copy. Lay the two pieces on top of the shirt in order to copy the shoulder seam, armhole, and side seam all the way down to the skirt hemline.

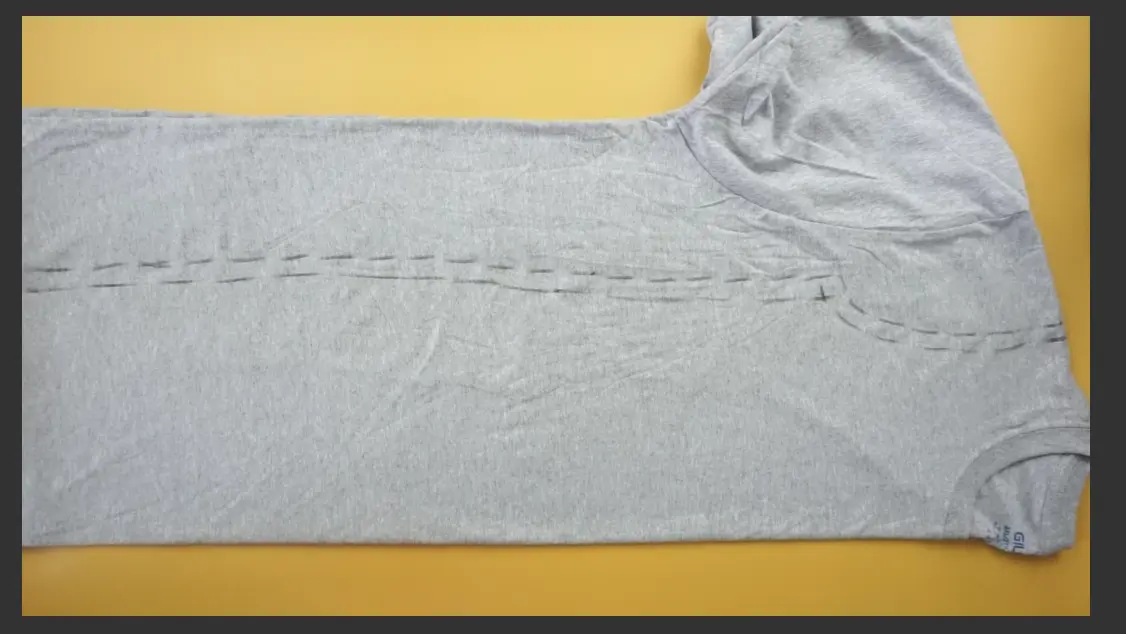
Add ¼” seam allowance around the armhole and side seam; then cut.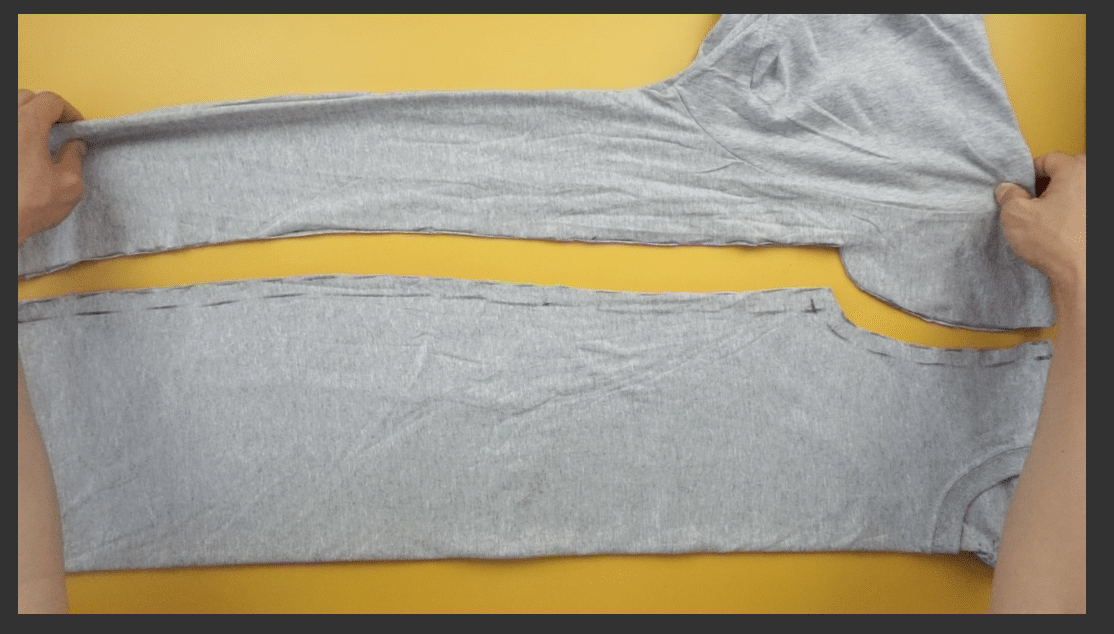
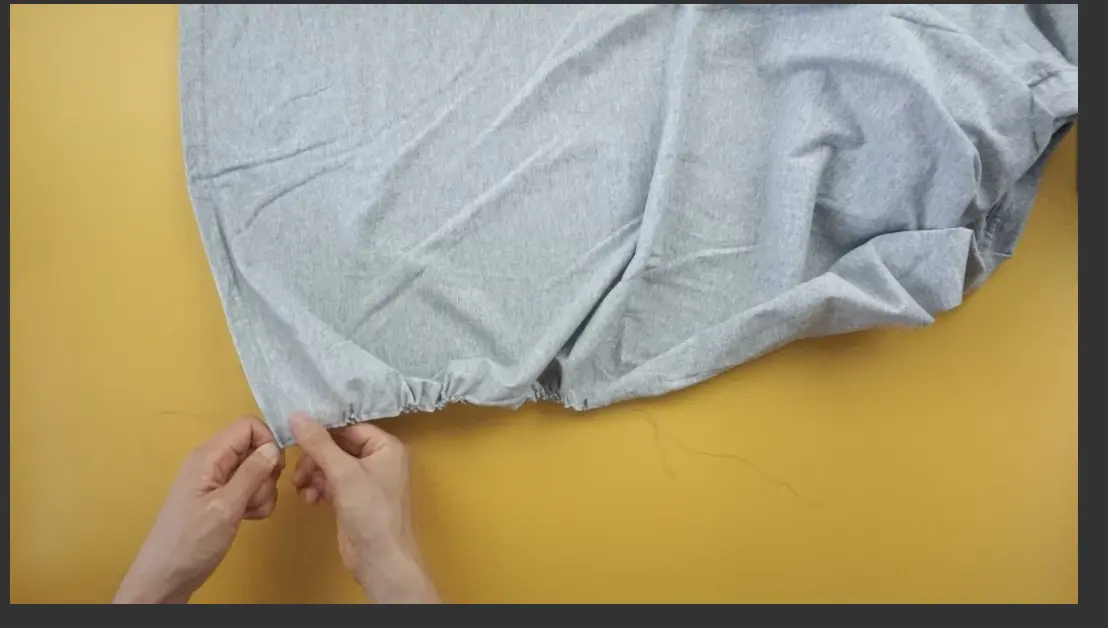
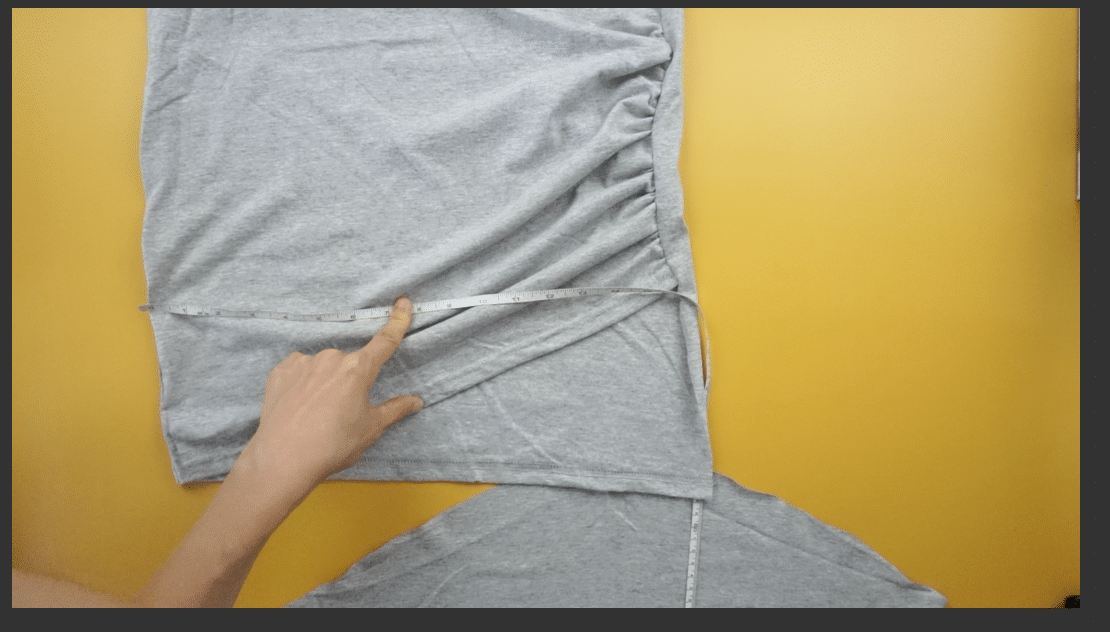
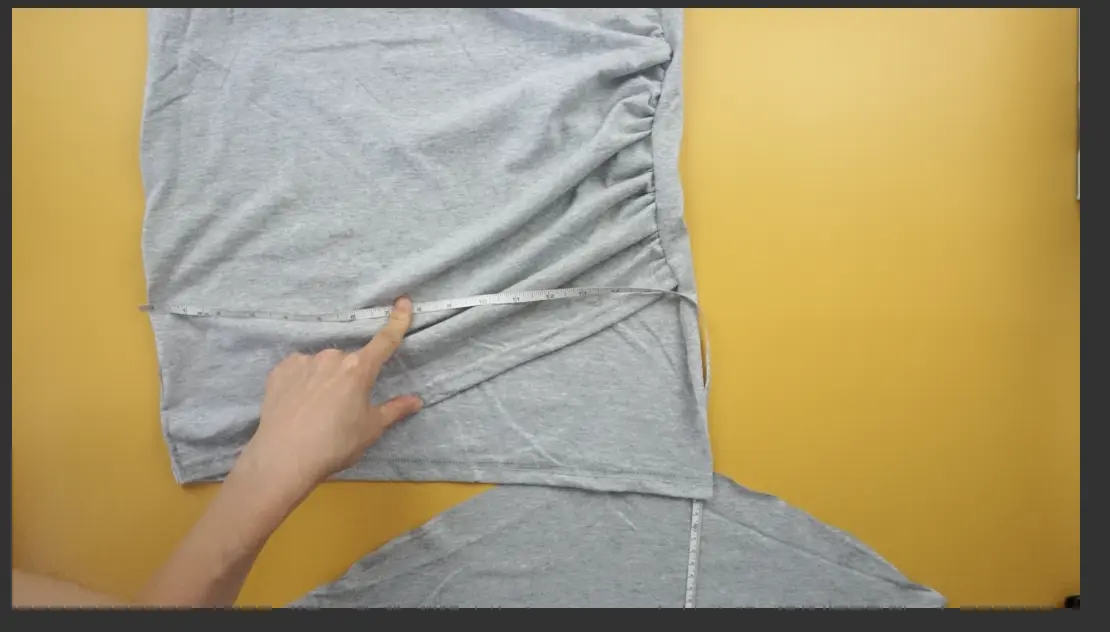
- For the side shirring, measure 17 ½” down from the neckband on the left side of the t-shirt, then mark with chalk. With loose tension and wide stitch length, topstitch from the hemline to the 17 ½” mark. Pull the back thread gently, and evenly distribute the shirring along the side seam.

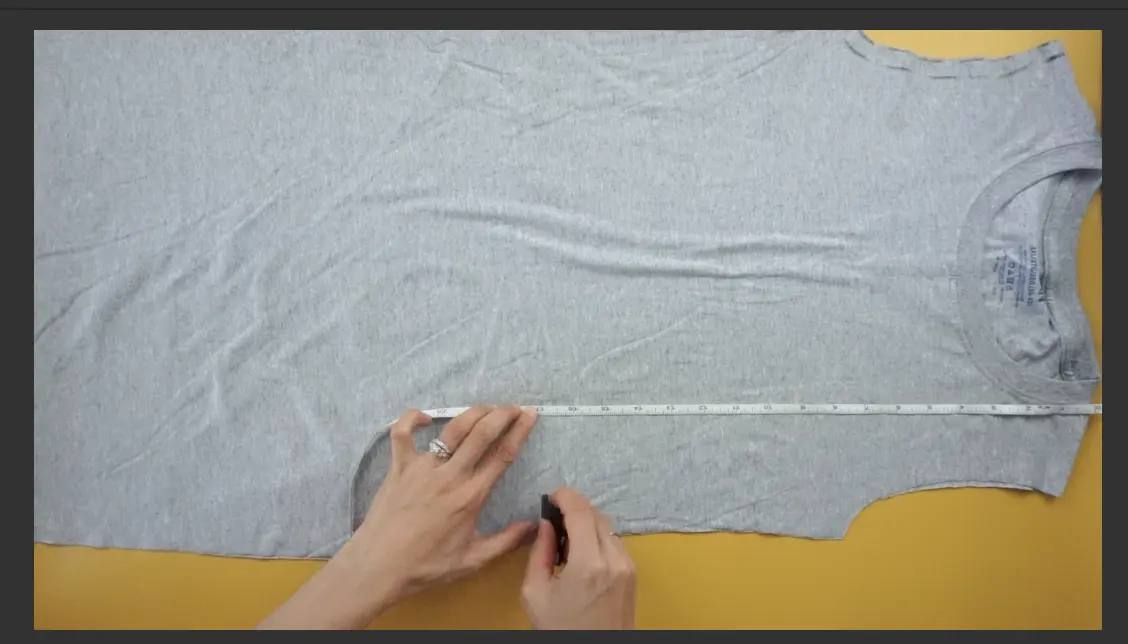
Helpful hint: The shirring length for my dress is about 7 ½” long. It’s a perfect length to give an asymmetric look.
- To close the side seam, face the wrong side of the front and the wrong side of the back together, then sew with ¼” topstitch.
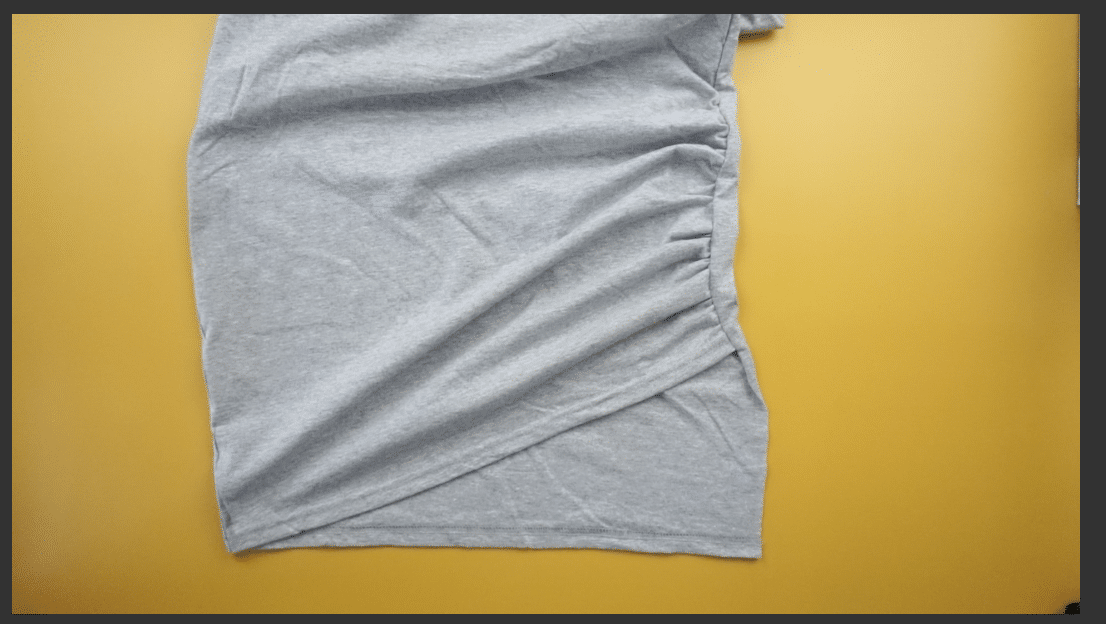
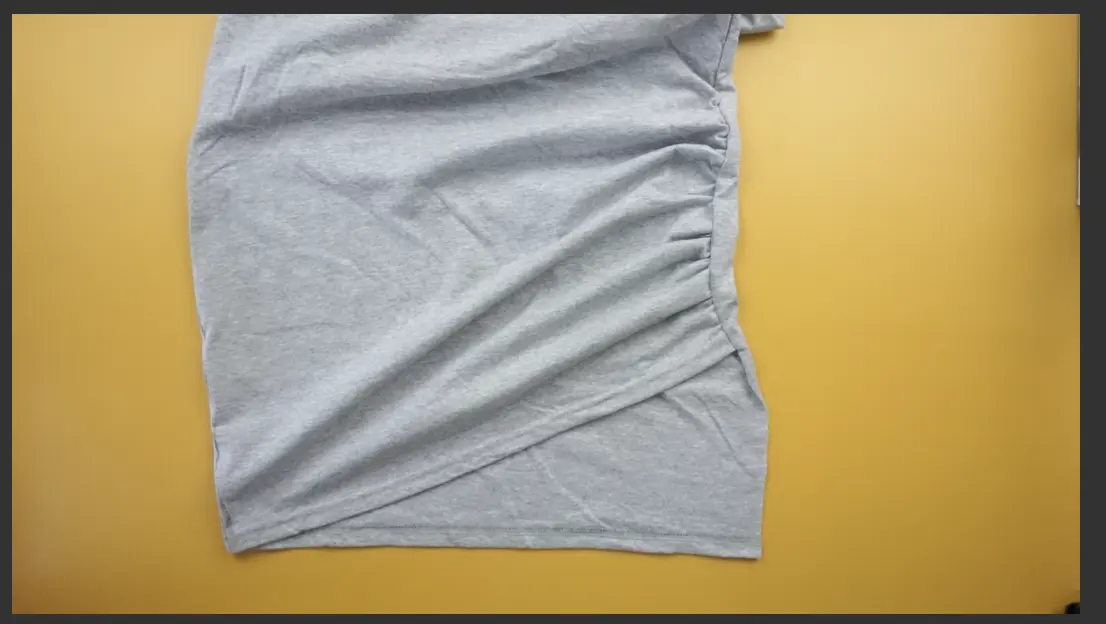
- To finish the skirt overlap, use a remaining scrap piece from the sleeve. Cut along the armhole to open the seam. Lay the dress flat and measure the opening and find the center.

- Then, lay one sleeve piece on top and utilize the hemline to create an overlay look. Chalk mark along the diagonal skirt line and side seam; then cut.
- Sew ¼” topstitch on the side, and then insert the piece underneath the diagonal skirt line.
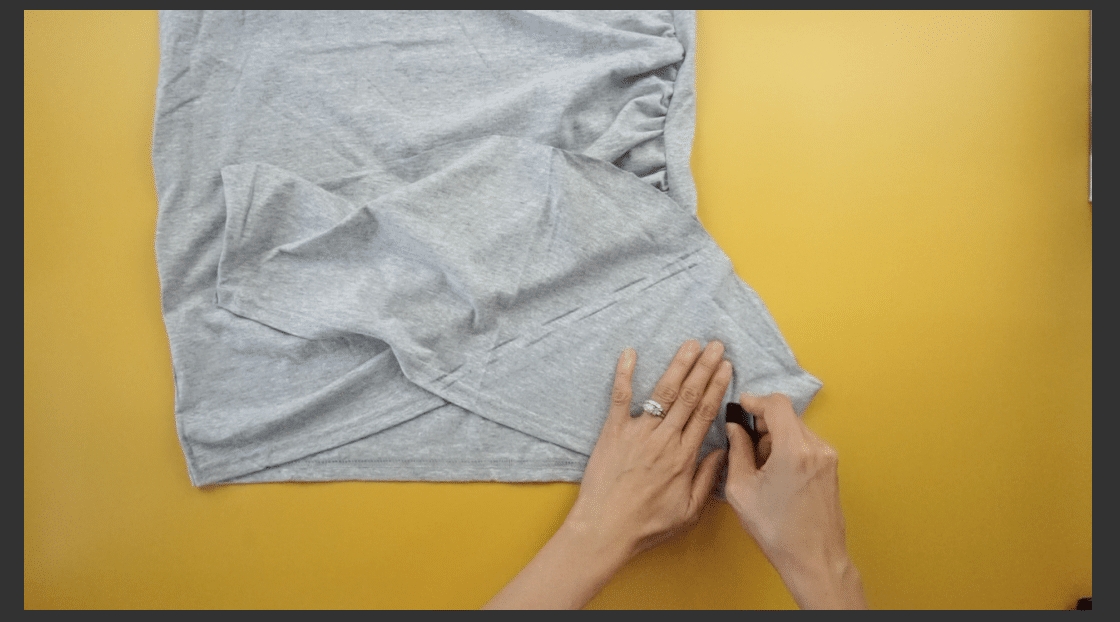
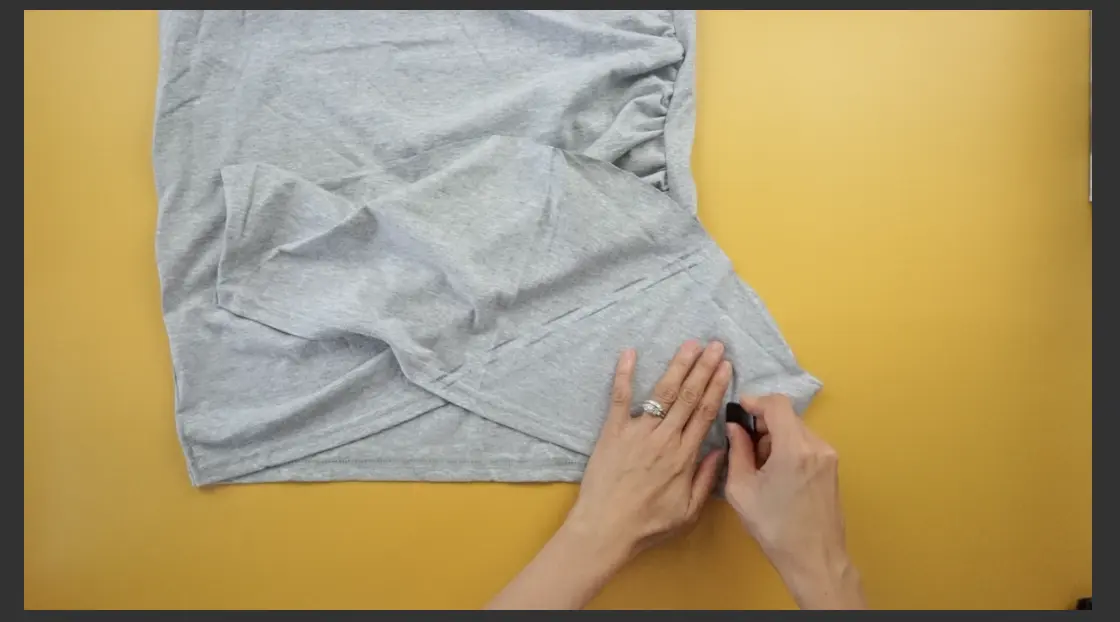
Edge topstitch to secure the layered skirt piece.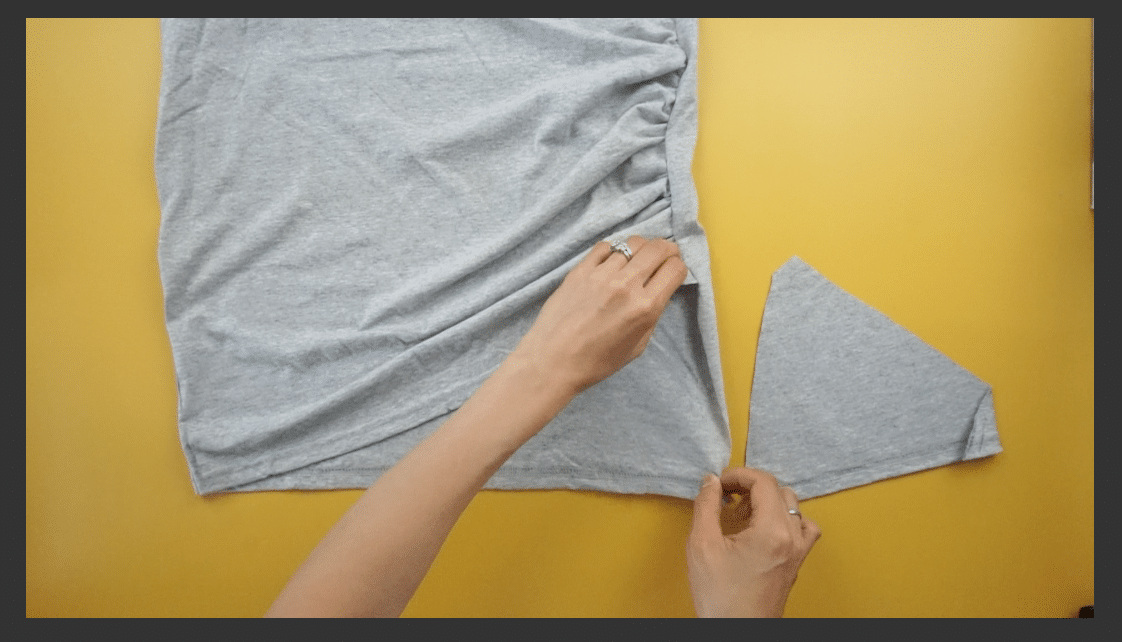

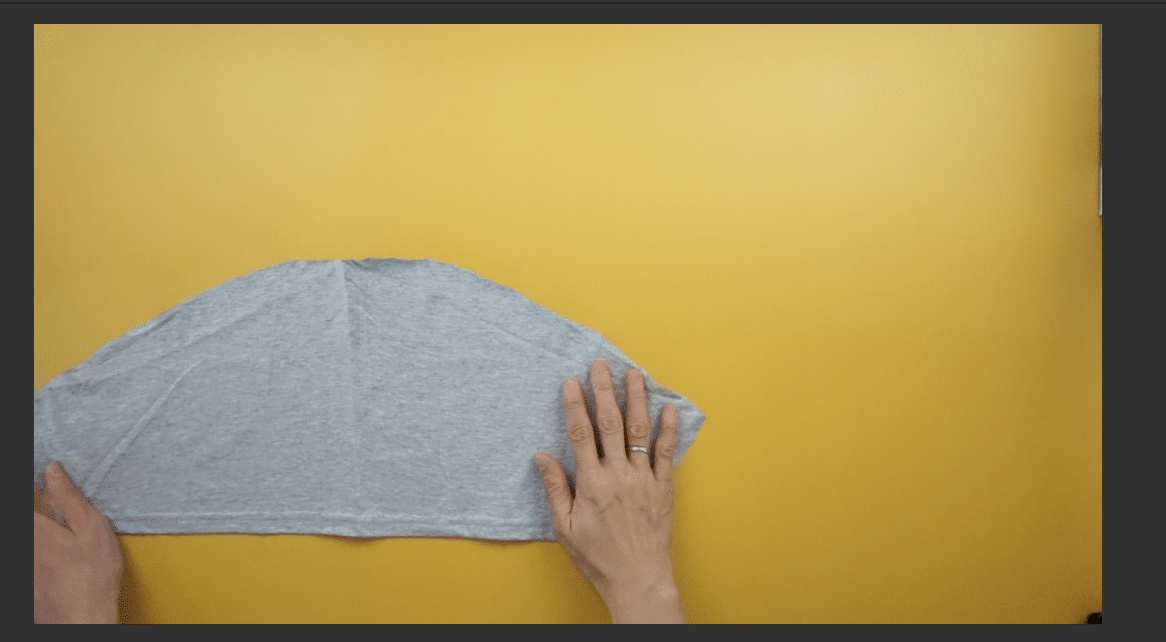
- To finish the armhole, use the other sleeve piece. Cut along the armhole to open the seam. Then, remove the hemline of the sleeve.
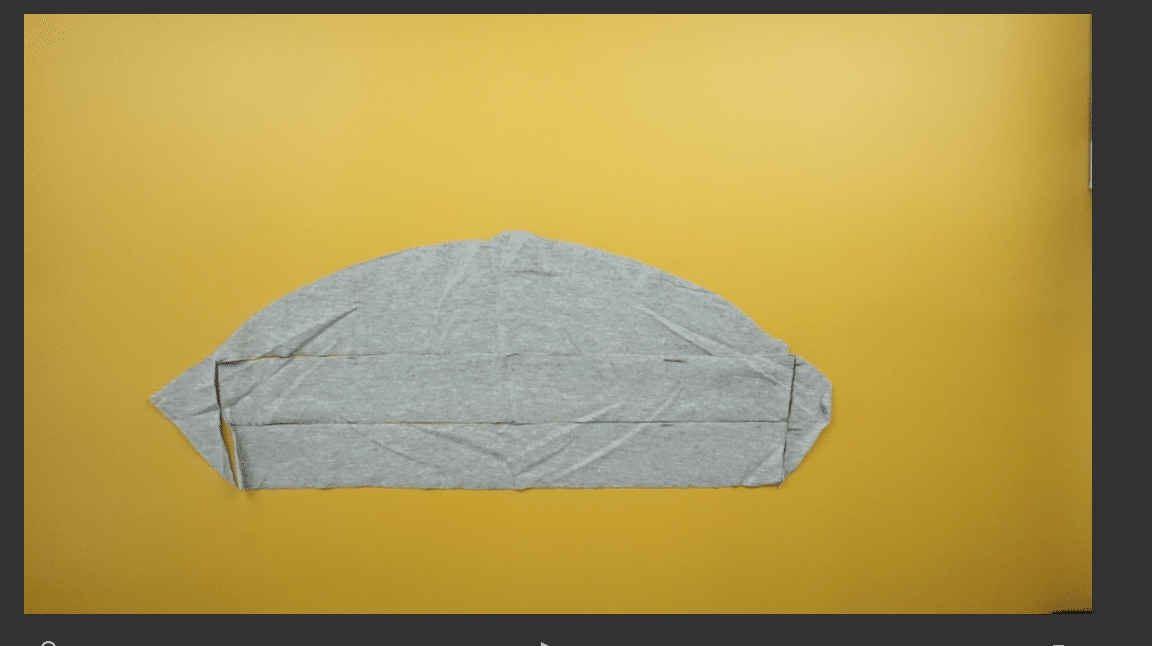
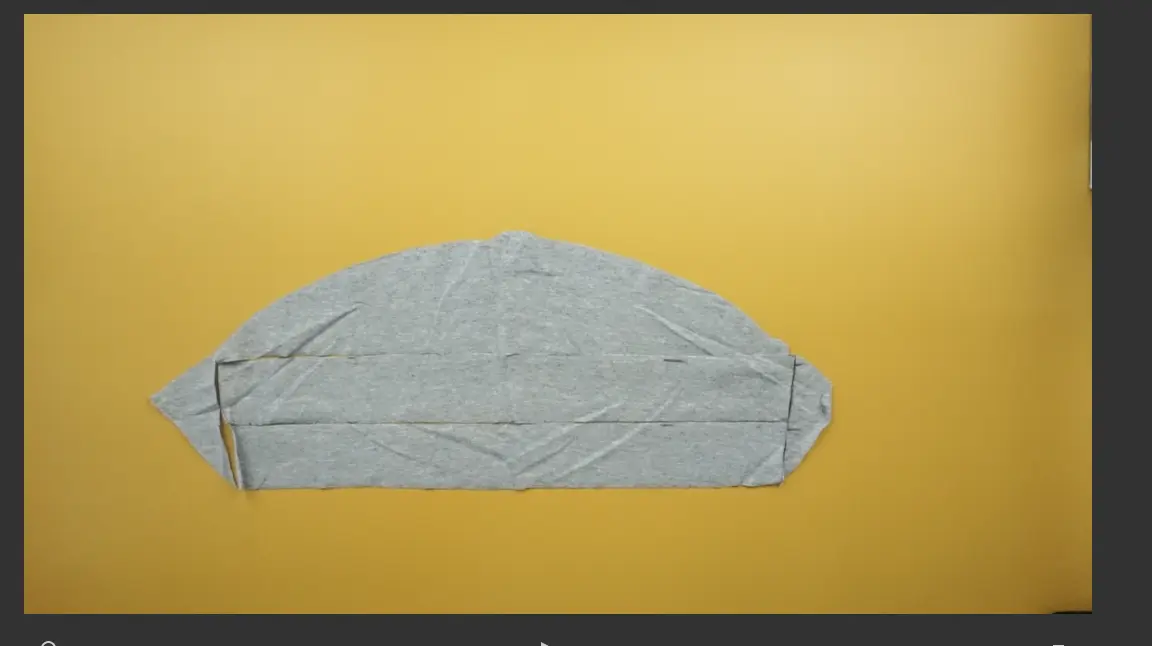
- Draw a vertical line on both sides and horizontal line to create a rectangle. Split the rectangle in half with a horizontal line, then cut to make two long straps.

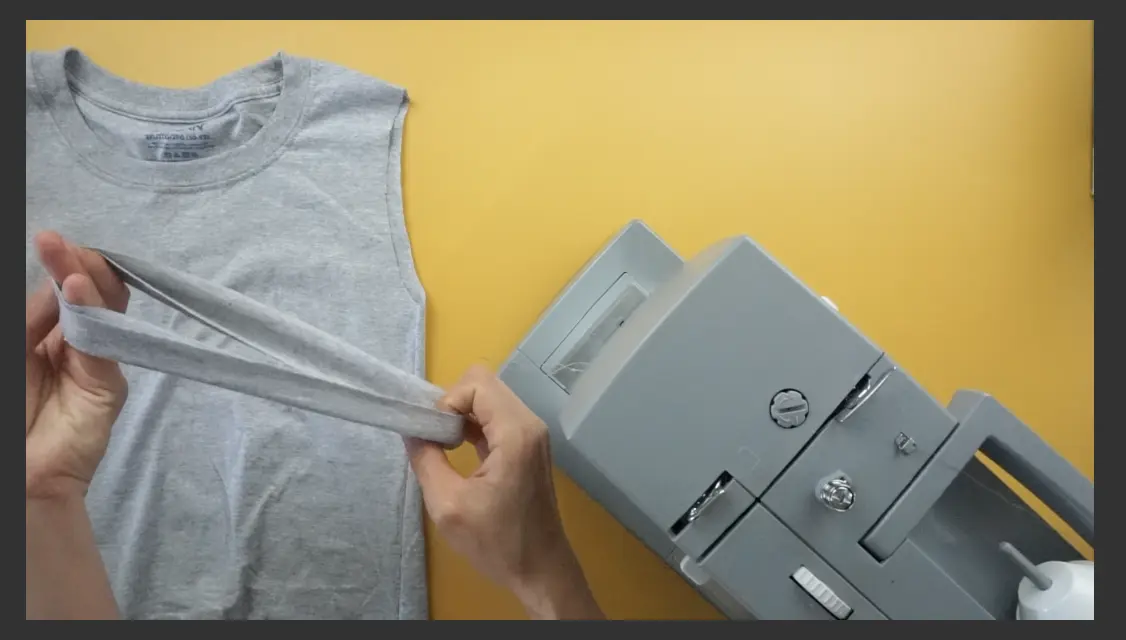
- Overlap the ends of the strap and topstitch to make a circle.
Then, match the seam with the side seam of the dress, pin to secure and sew ¼” topstitch to join the band to the armhole. Fold the strap over the seam, and topstitch the other side to finish.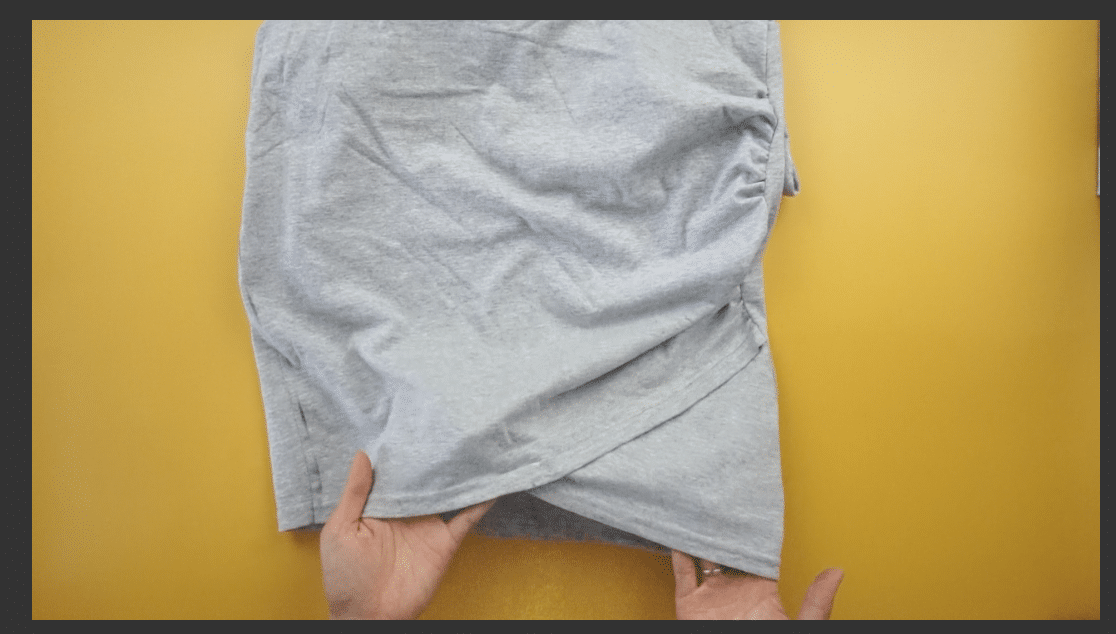

Notes
Any size plain tee that is big on you will work great for the project.
Recommended Products
As an Amazon Associate and member of other affiliate programs, I earn from qualifying purchases.


Trendy, Affordable Sewing Patterns for All Sizes


Tie Shoulder Jumpsuit Pattern


Palazzo Pants Sewing Pattern


Pocket Overall Romper Pattern


Wrap Maxi Skirt Sewing Pattern


Tie Back Top Sewing Pattern