
Are you looking for a stylish, versatile layering piece that you can make yourself without buying a new pattern? Transform your favorite basic tee into a trendy tie-front cardigan with this easy DIY tutorial!
Whether you want to upcycle an old t-shirt or add a custom piece to your wardrobe, this no-fuss project is perfect for beginner and intermediate sewists alike.
This step-by-step guide will walk you through the process of creating a lightweight, flattering cardigan that’s perfect for layering over dresses, tanks, or your everyday outfits. Plus, it’s customizable in length, sleeve style, and tie placement to suit your style.
Let’s dive into how you can create your own stylish tie-front cardigan from a simple tee!
Why Make a Tie-Front Cardigan from a Tee?
- Budget-Friendly: Upcycle an old or basic tee and save money on buying a new cardigan.
- Custom Fit: Tailor the cardigan’s length, sleeve style, and ties exactly how you want.
- Easy and Fast: No pattern needed! Just some simple cutting and sewing.
- Stylish & Versatile: Tie-front cardigans are trendy and can be worn with casual or dressy looks.
- Sustainable: Reduce textile waste by repurposing what you already have.
DIY Tie-Front Cardigan from a T-Shirt
What You’ll Need
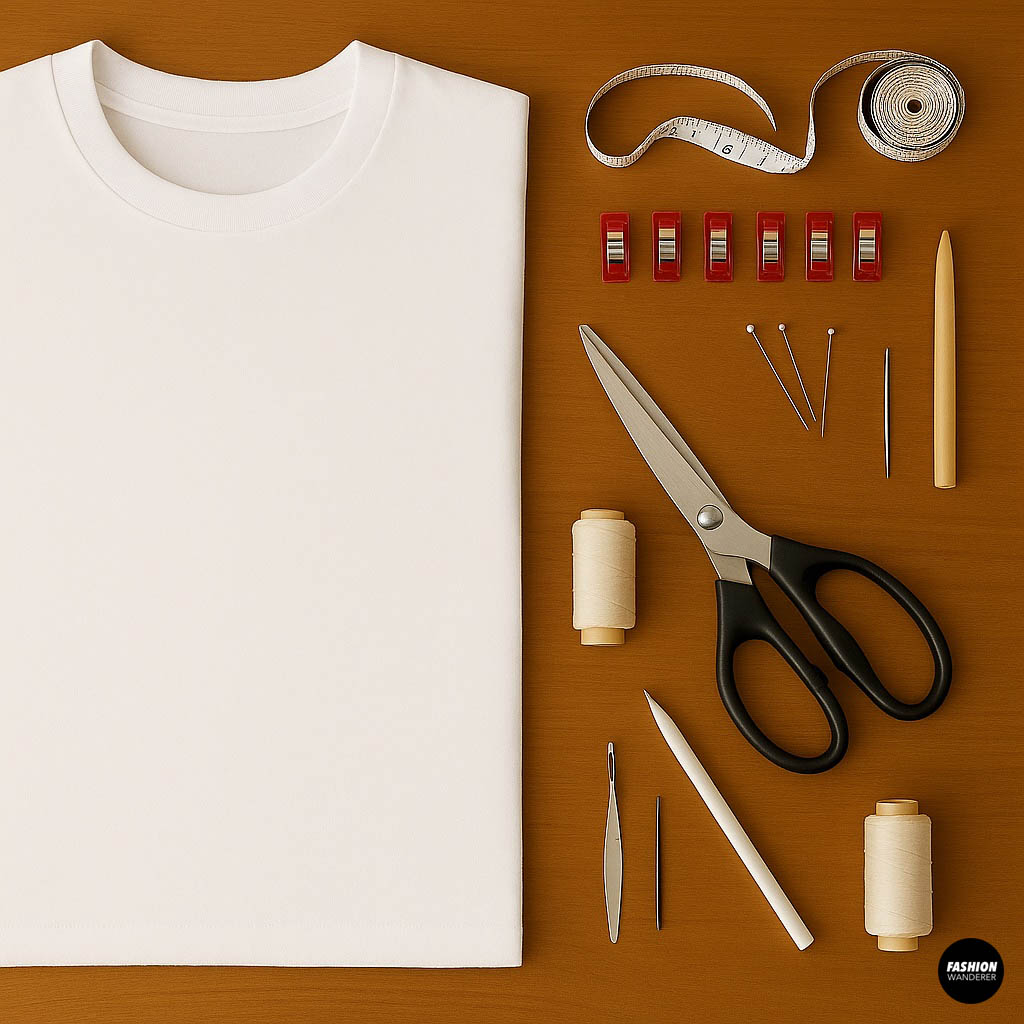
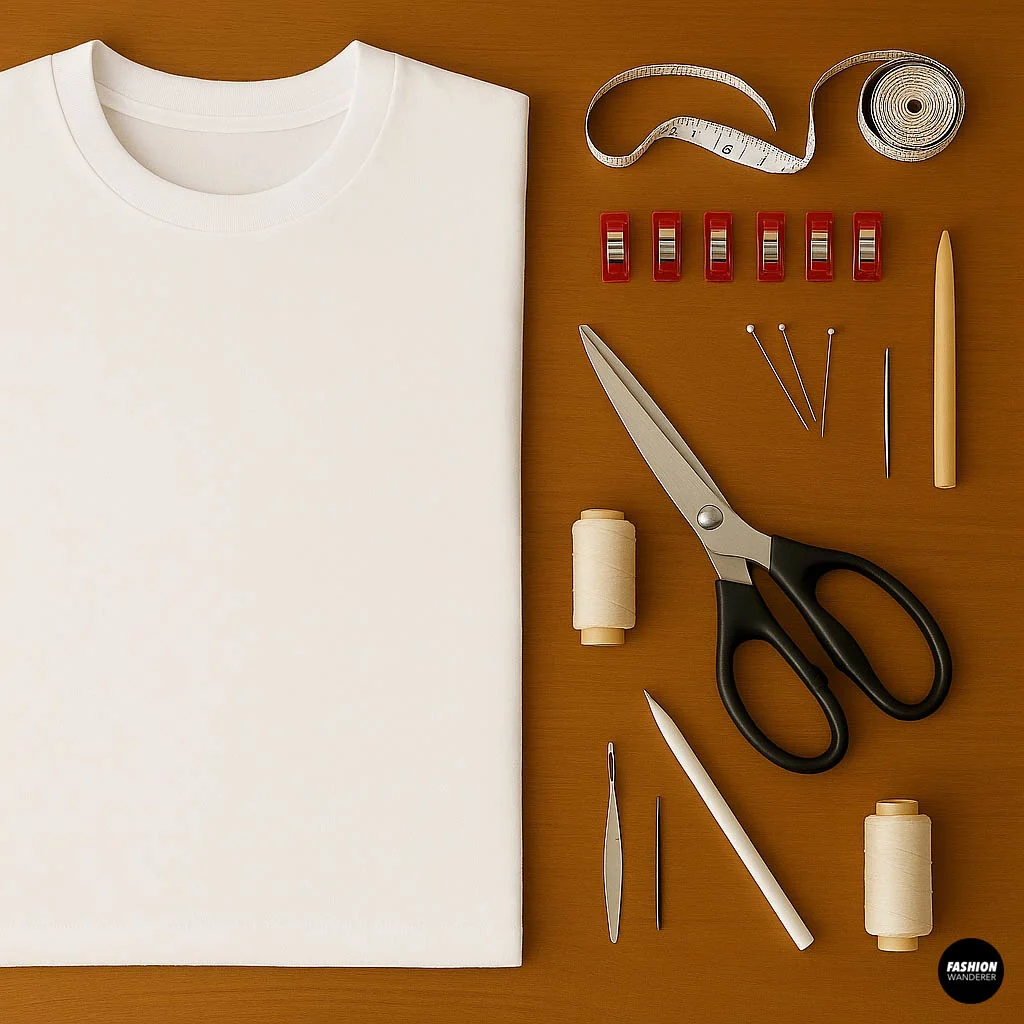
- Basic cotton or knit t-shirt (preferably a size bigger than your usual fit for drape)
- Fabric scissors
- Measuring tape or ruler
- Fabric chalk or washable fabric marker
- Pins or sewing clips
- Sewing machine or hand needle and thread
- Matching thread
- Optional: serger or zigzag stitch for finishing edges
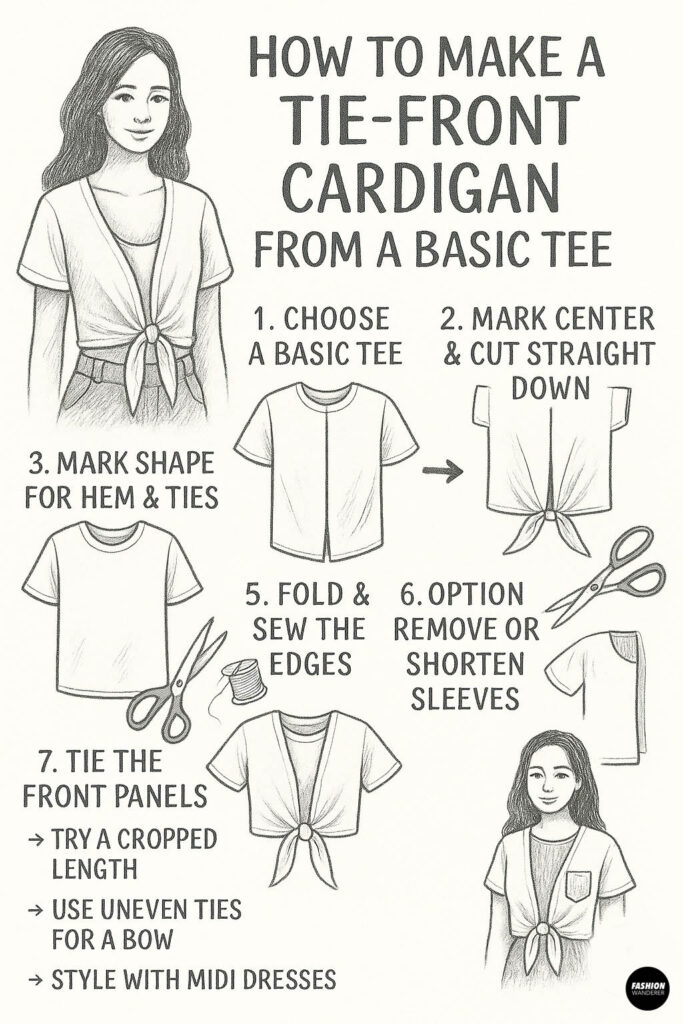
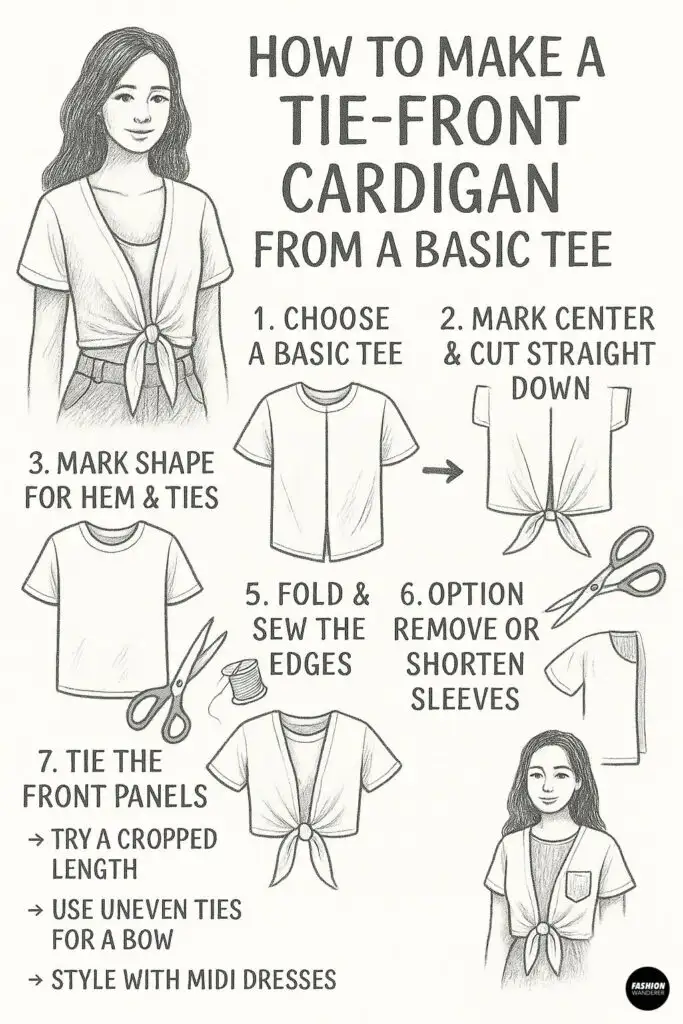
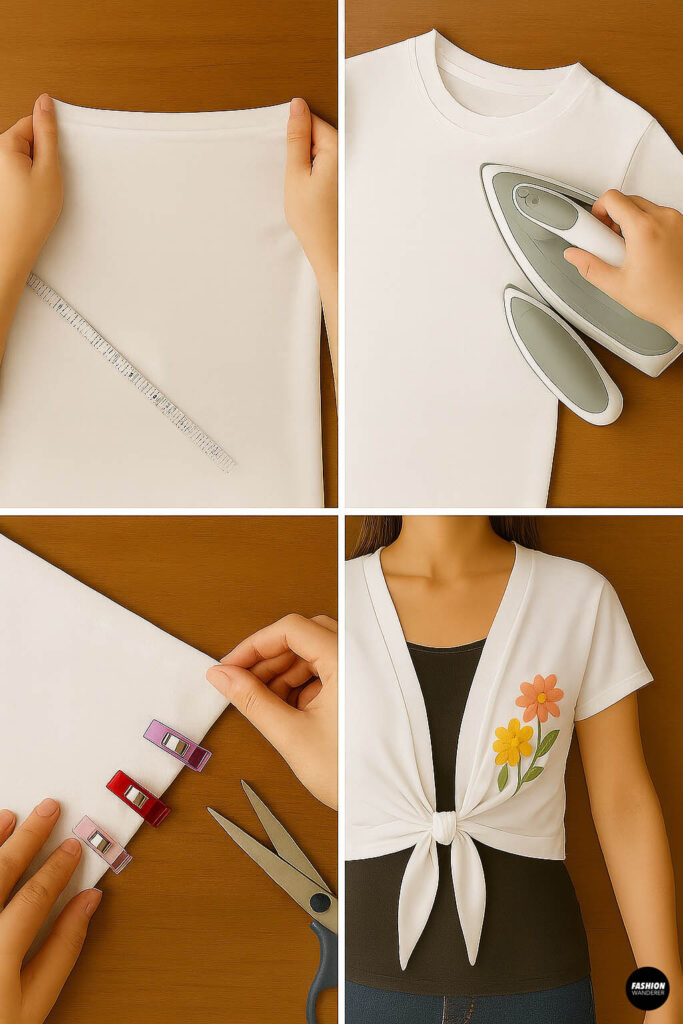
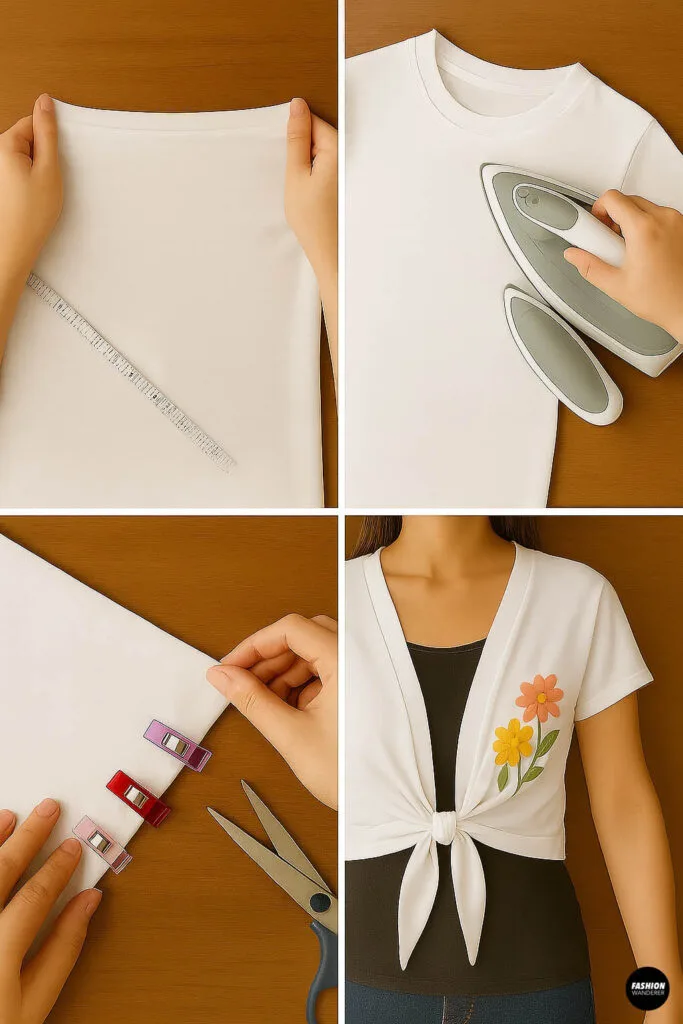
Step 1: Choose Your Tee and Prep

Start by selecting a basic tee that you love or want to repurpose. A lightweight cotton or knit tee works best for this project to ensure the cardigan drapes beautifully.
Tip: If your tee is tight-fitting, consider using one size larger to allow for comfortable layering and tie adjustments.
Lay your tee flat on a clean surface and smooth out wrinkles. This will make your measurements and cuts more precise.
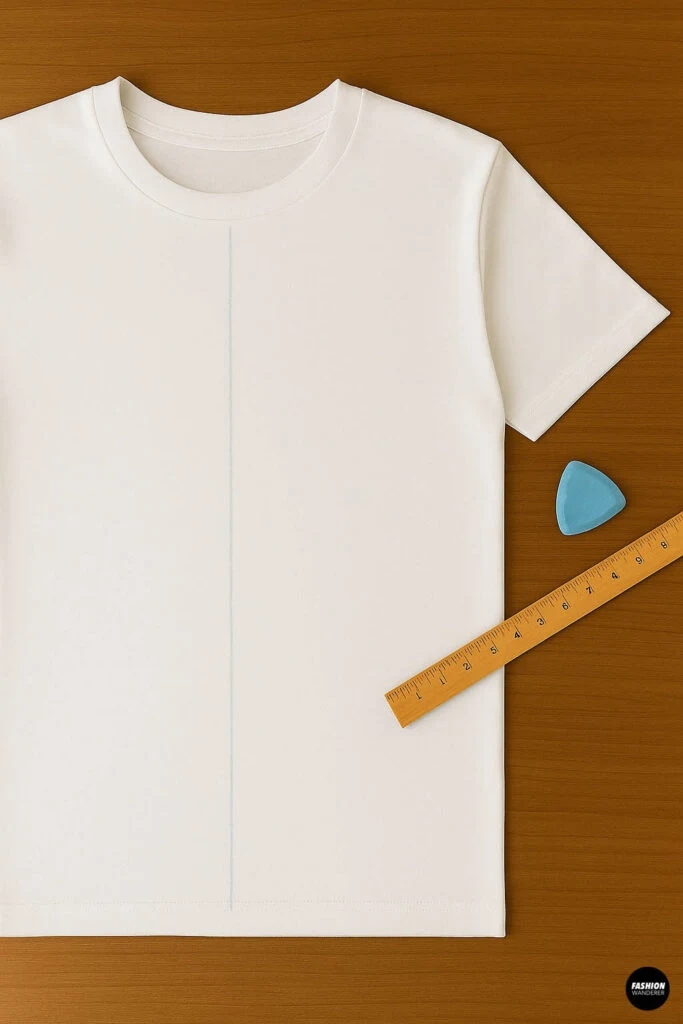
Step 2: Mark the Front Opening
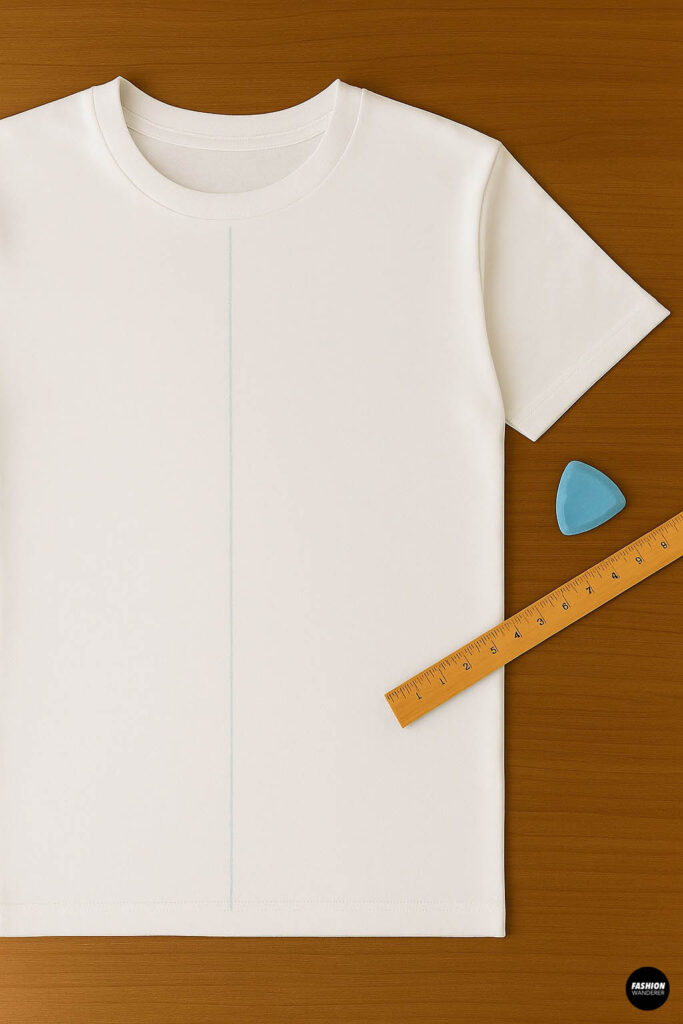
Unlike a regular tee, your tie-front cardigan needs a front opening.
- Using fabric chalk, mark a straight vertical line from the center front neckline down to the bottom hem.
- The width of the opening depends on your preference, but generally, a 2 to 3-inch opening works well to create the tie effect.
You’ll be cutting along this line in the next step, so ensure your marks are clear and straight.
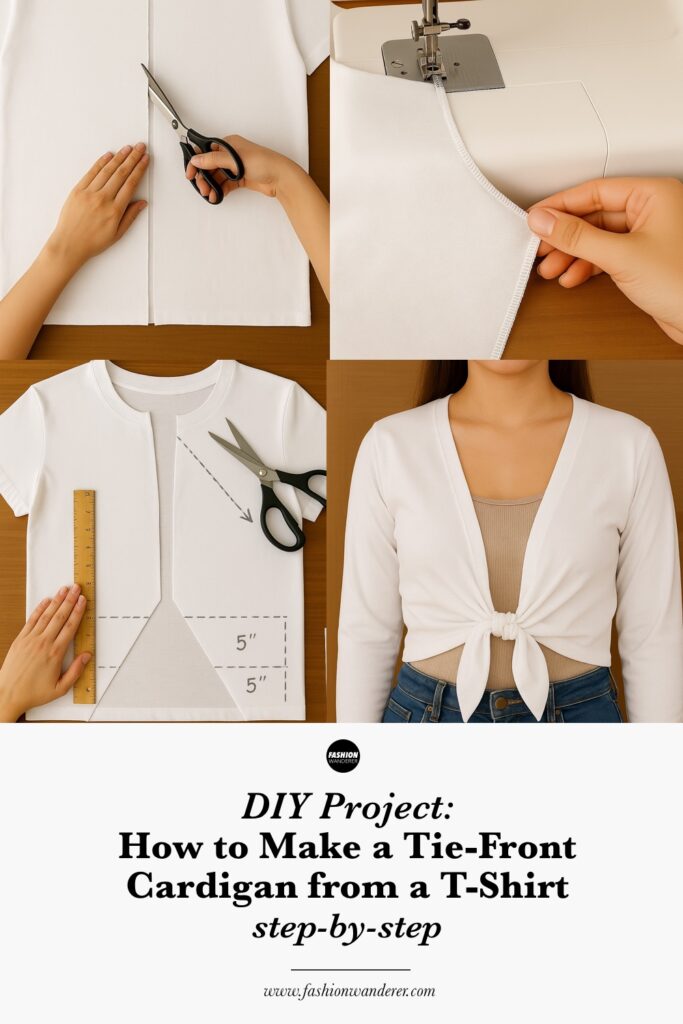
Step 3: Cut the Front Opening
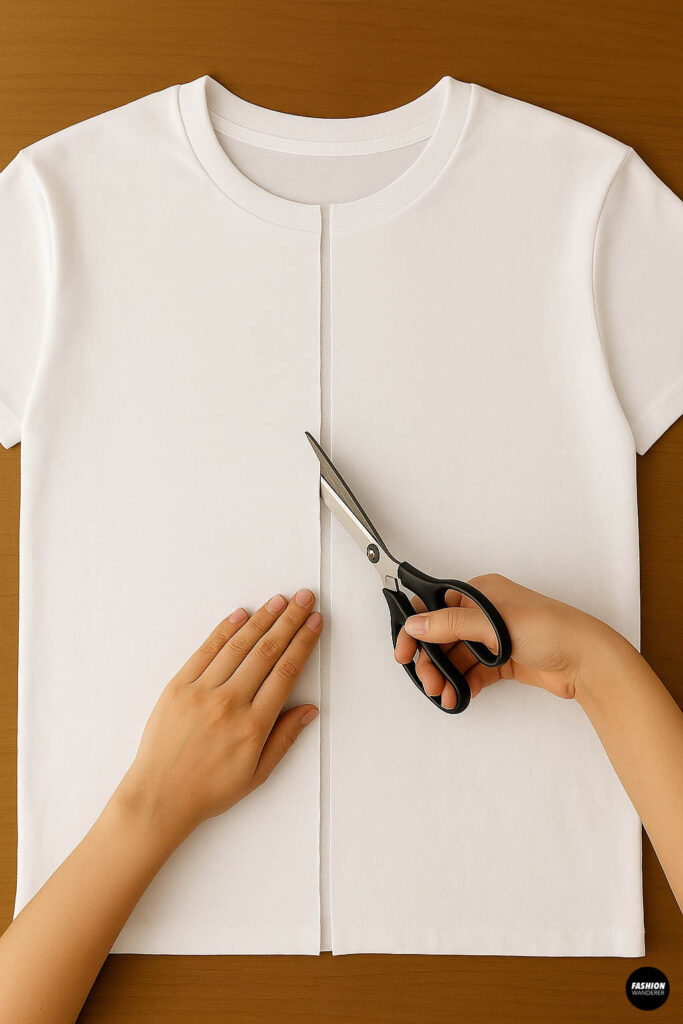

Carefully cut along the vertical line you marked to create the front opening of your cardigan.
Tip: If you want to keep your tee’s original hem intact, cut just inside the seam allowance and plan to finish the raw edges with a stitch or binding.
Step 4: Shape the Hem and Tie Ends

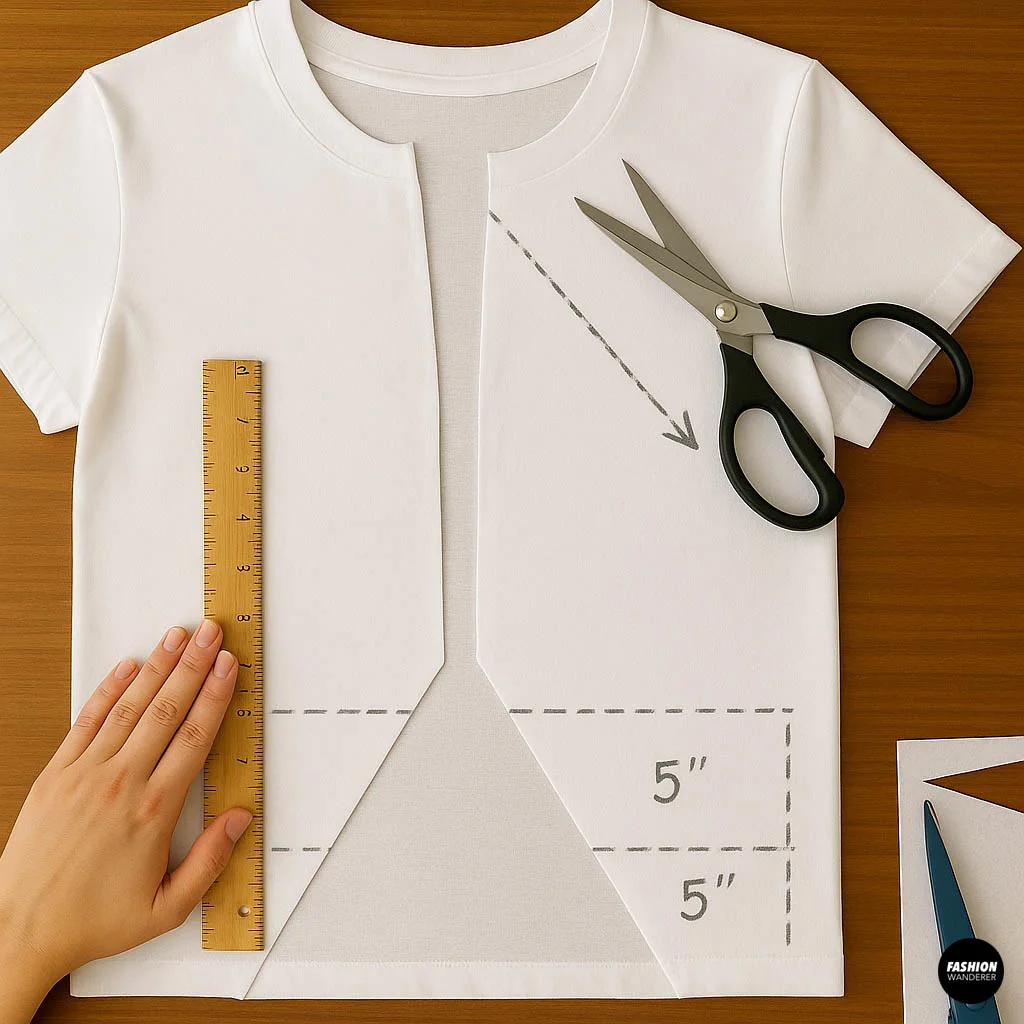
To give your cardigan a stylish finish:
- From the bottom of the front opening, measure and mark a diagonal line about 4-6 inches long going towards the center front (this will create the angled ends where you’ll make the ties).
- Cut along this diagonal line on both sides.
- Then, measure and cut tie strips about 4-5 inches wide and 12-15 inches long from the bottom of each front panel. These will be the ties to knot or bow at the waist.
Step 5: Finish Raw Edges (Optional but Recommended)
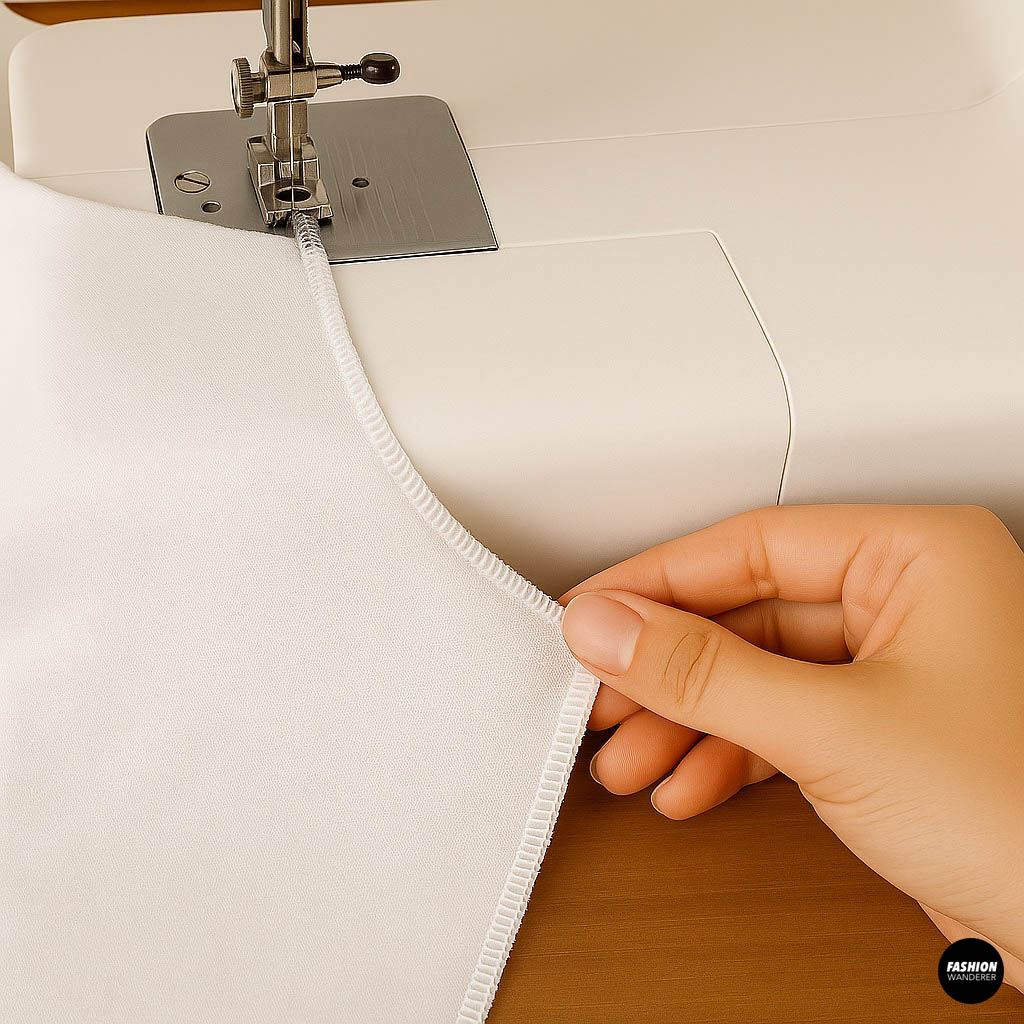
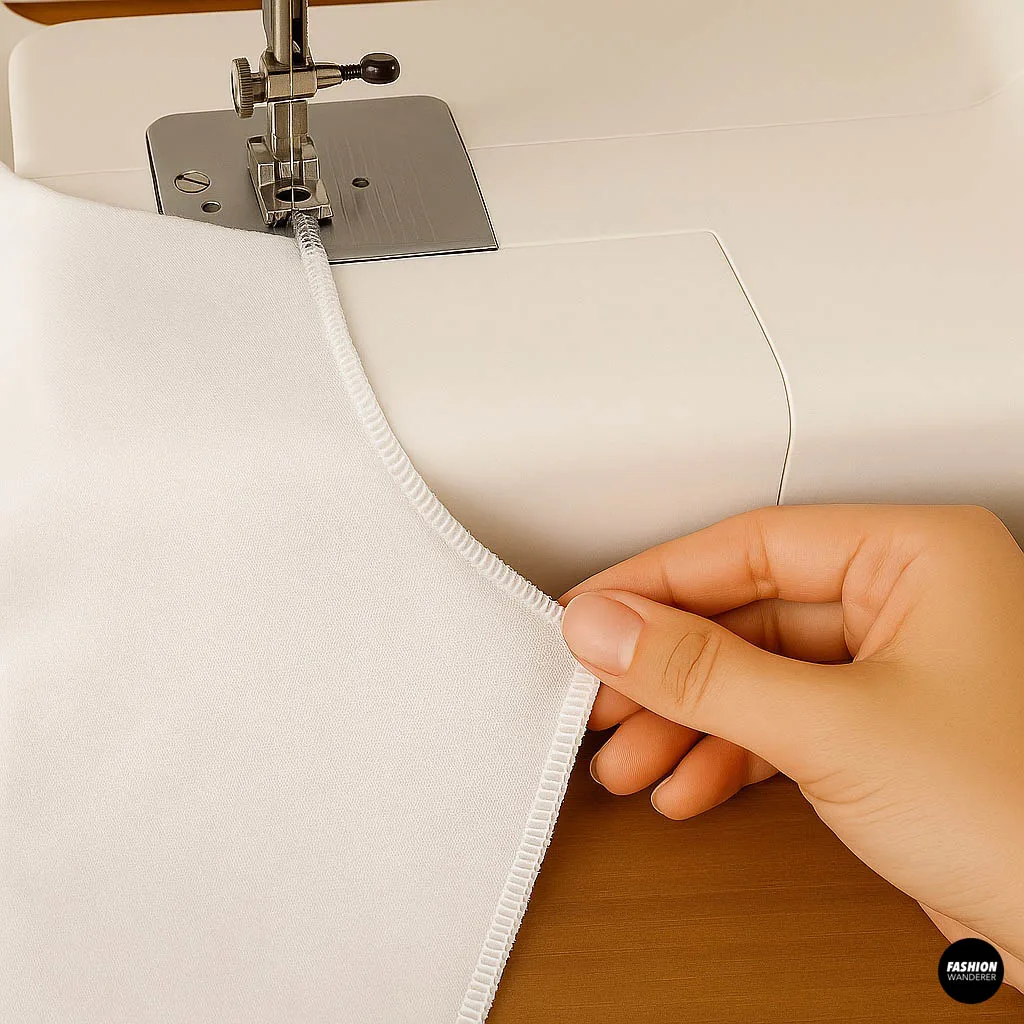
Since you just cut new edges, it’s a good idea to finish the raw edges to prevent fraying.
- Use a sewing machine with a narrow zigzag stitch or a serger to sew along all the cut edges.
- Alternatively, fold the edges about ¼ inch and press with an iron, then topstitch to secure a clean finish.
Step 6: Create the Sleeves (Optional Variation)
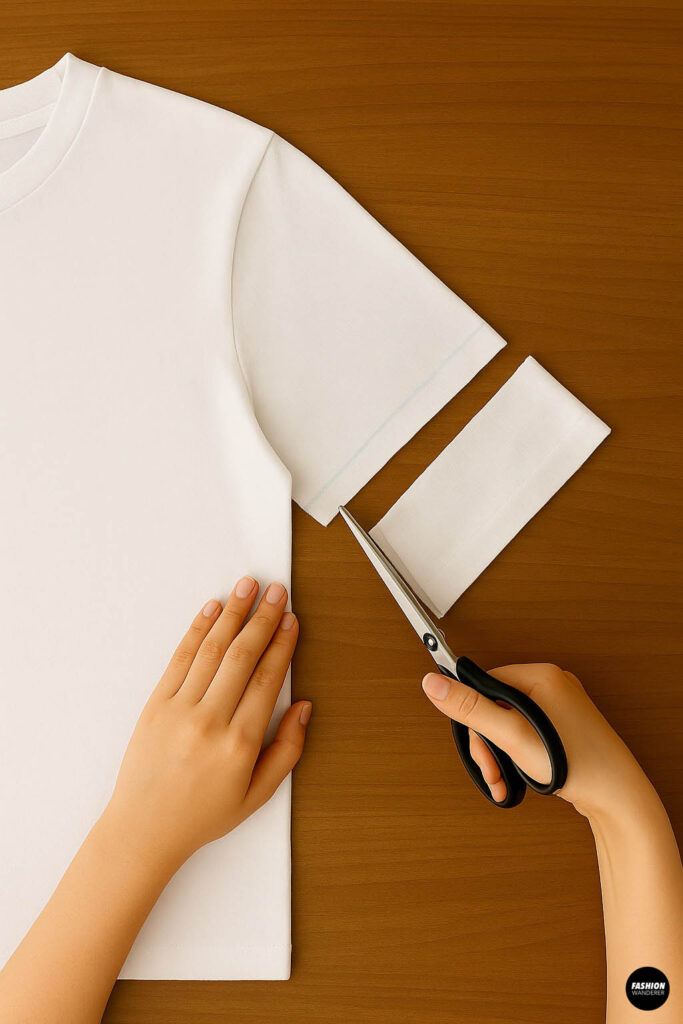

If you want a sleeveless or cropped sleeve look:
- Mark your desired sleeve length with fabric chalk.
- Cut off excess fabric around the sleeves.
- Finish raw edges as described above.
Step 7: Add Your Tie-Front Cardigan Style Details

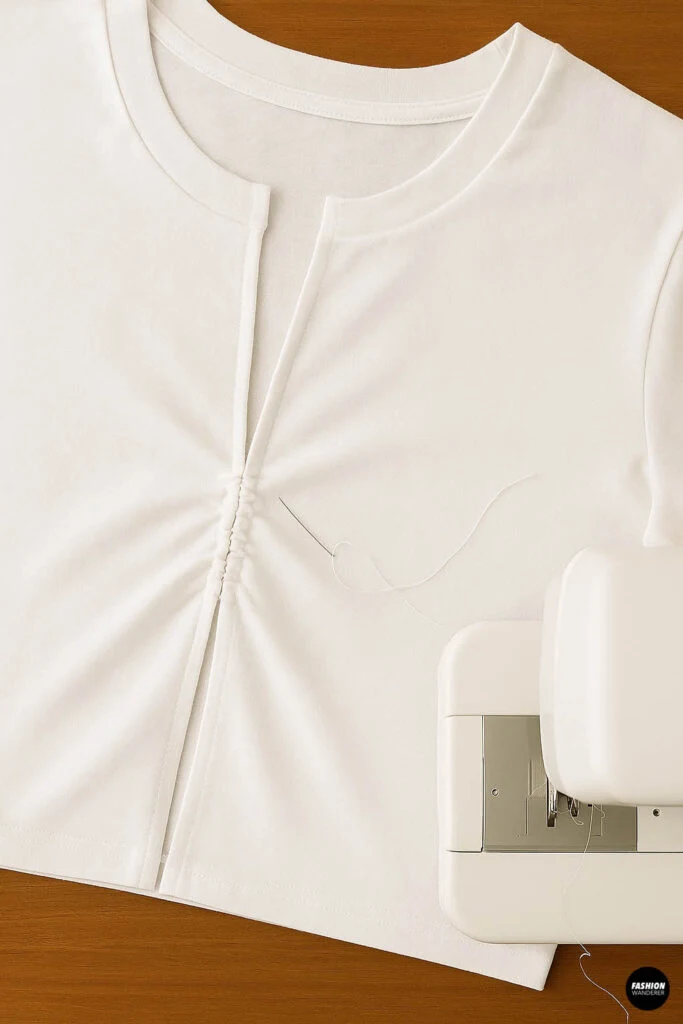
Now is the time to customize your cardigan:
- For a gathered or ruched tie, sew a loose gathering stitch along the inside edge of the front opening before finishing the ties.
- You can also add decorative topstitching along the front edges for a polished look.
- Experiment with knot styles — classic bow, side knot, or wrap tie — to change the vibe.
Step 8: Try It On and Style!


Your tie-front cardigan is now ready to wear! Try it on with your favorite tank top, dress, or jeans for a versatile and flattering layered look.
Bonus Tips for Success
- Use lightweight, stretch fabrics for comfortable draping.
- Prewash your tee to avoid shrinkage after sewing.
- For a professional look, press seams and hems with an iron as you sew.
- If you’re new to sewing, use pins or clips to hold fabric edges in place while stitching.
- Experiment with fabric paints or patches to personalize your cardigan.
FAQs About Making a Tie-Front Cardigan from a Tee
Q: Can I use any t-shirt for this project?
A: Ideally, choose a lightweight cotton or knit tee with some stretch for the best fit and drape.
Q: Do I need a sewing machine?
A: While a sewing machine makes finishing edges faster, you can hand-sew with small stitches for the same effect.
Q: How do I care for my DIY cardigan?
A: Wash gently on cold cycle and air dry or tumble dry low to maintain shape and fabric quality.
Conclusion

Making a tie-front cardigan from a basic tee is an easy, budget-friendly way to add a custom, trendy piece to your wardrobe. With simple cutting and sewing, you’ll turn an ordinary t-shirt into a versatile layering staple that’s perfect for any season.
Get creative with your fabric choices, lengths, and tie styles — the possibilities are endless! So grab your favorite tee, some sewing tools, and start stitching your way to stylish comfort.
Love this tutorial? Share your creations on social media and tag us for a chance to be featured! For more DIY fashion projects and sewing tips, subscribe to our blog and follow us on Instagram.
Trendy, Affordable Sewing Patterns for All Sizes


Tie Shoulder Jumpsuit Pattern


Palazzo Pants Sewing Pattern


Pocket Overall Romper Pattern


Wrap Maxi Skirt Sewing Pattern


Tie Back Top Sewing Pattern
Mary
Wednesday 15th of October 2025
The DIY tie front cardigan looks cute and simple! I am going to give it a try this weekend.