
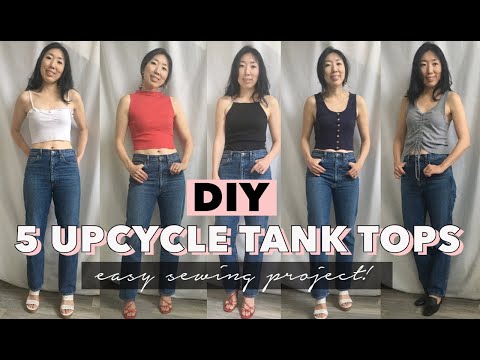
This DIY ruched drawstring tank top is easy to make and fun to wear! Adjust the ruching to make your new tank top shorter or longer depending on the look you are going for.
Master this project and then move on to accomplishing these easy ways to transform a tank top. It’s easy and fun to make your wardrobe dreams come true with your own personal touch.
In fact, making your own upcycled clothing is a perfect way to stay on trend without spending too much. I have provided unique inspirations and fashion forward designs for you to search through.
If you’re looking for a good place to start, these t-shirt upcycle ideas are easy transformations that don’t require much effort. From no sew to beginners’ refashion projects, we have you covered with detailed tutorials!


You will love this ruched drawstring tank top because…
- Learn how to make tunnels with knit fabric.
- Understand how to use a loop turner to make the drawstrings.
- Versatile piece to easily adjust the length you desire.
- Perfect beginner level project to learn how to sew knits.
- Make this magic happen with a sewing machine and loop turner!
Medium weight knit material is a great fabrication to work with when making this DIY ruched drawstring tank top. When creating the drawstring, choose the right thread and stitching length so the thread won’t break when you use the loop turner.
There is something in particular that makes the ruching and drawstring outfit look casual and fun to wear. This little sewing trick transforms your old tank top into a brand new wearable style.
The hidden tunnel is a smart element to make your tank top silhouette look different based on what bottoms you decide to wear. Let’s dive into the ruched tank top transformation!
How to make DIY Ruched Drawstring Tank Top?
In order to make this DIY ruched drawstring tank top, you need basic sewing skills and few quick tricks so the drawstring operates smoothly. For more details, follow the sewing tips included down below.
DIY clothing begins with accurate measurements. Learn how to take body measurements for clothes so that you brand new clothing fits you perfectly.
Grab your basic sewing kit and master the simple sewing tips to upgrade your tank top into a brand new style.
DIY Ruched Drawstring Tank Top Materials:


- Tank Top
- Thread
- Fabric Chalk
- Scissor
- Loop Turner
- Pins
- Ruler
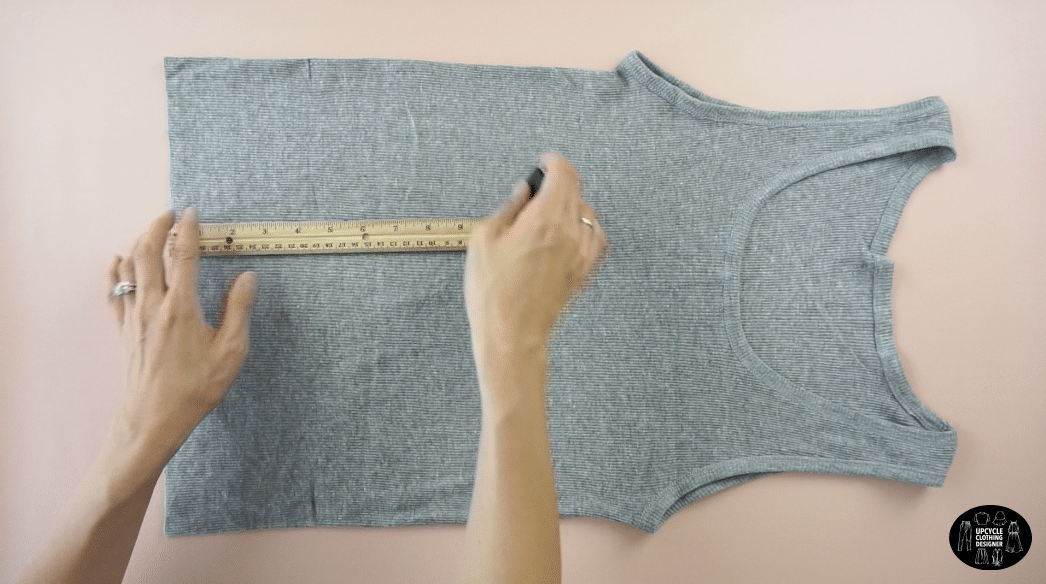
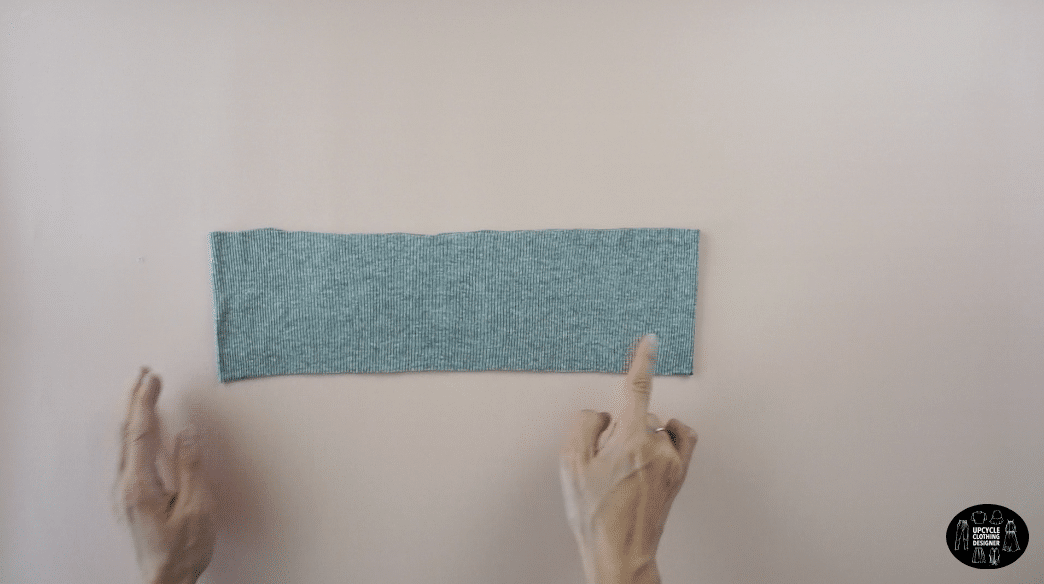
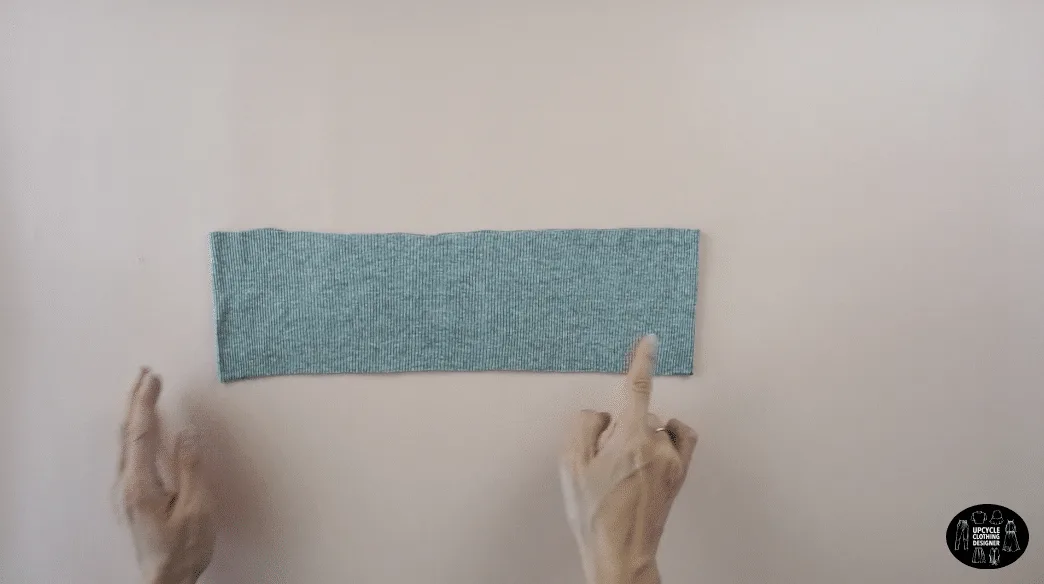
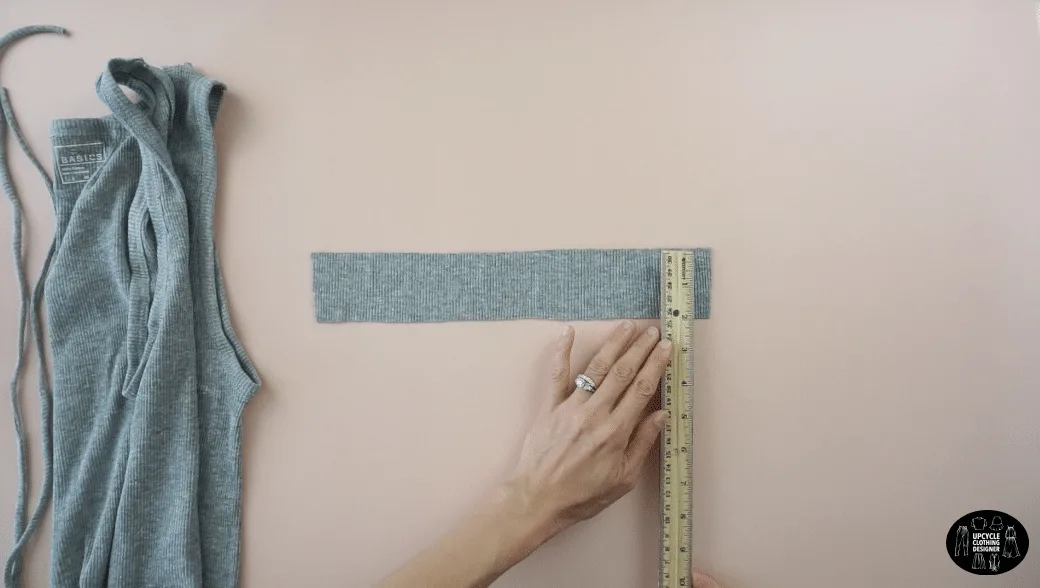
Mark 5” from the hemline and cut a line across.
Use the excess fabric to cut two separate 1” wide straps to make the drawstrings. Cut one end of each strap to double the length. fold each strap in half lengthwise, and 1/4” topstitch to close the edge.
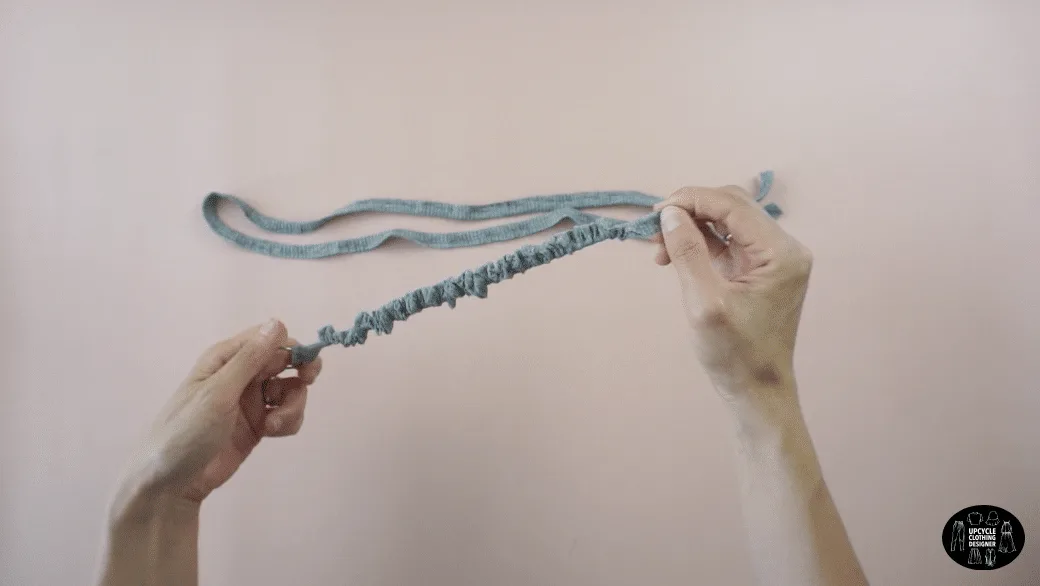
Complete both drawstrings by using a loop turner to flip the strap inside out.
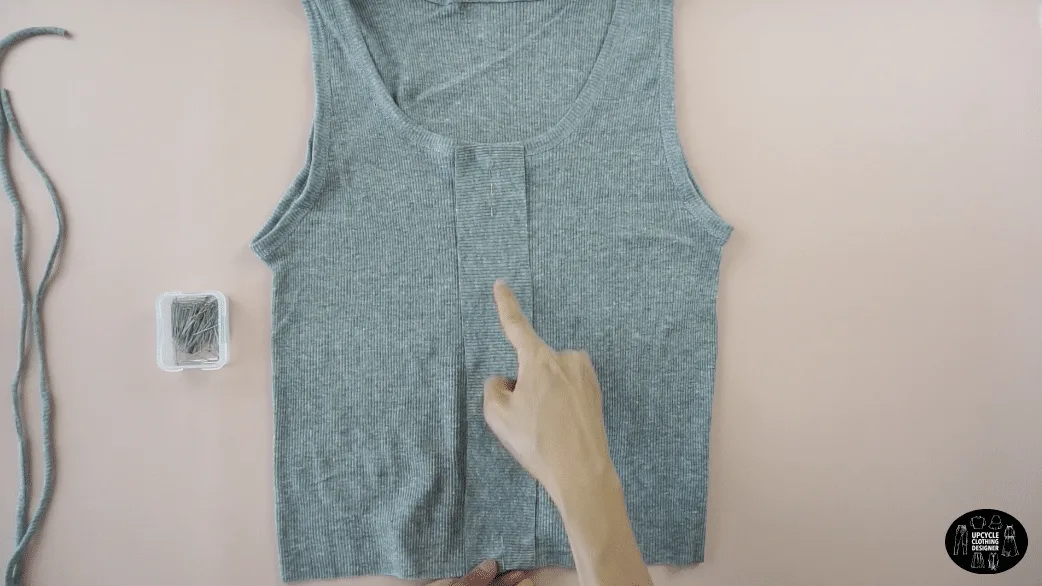
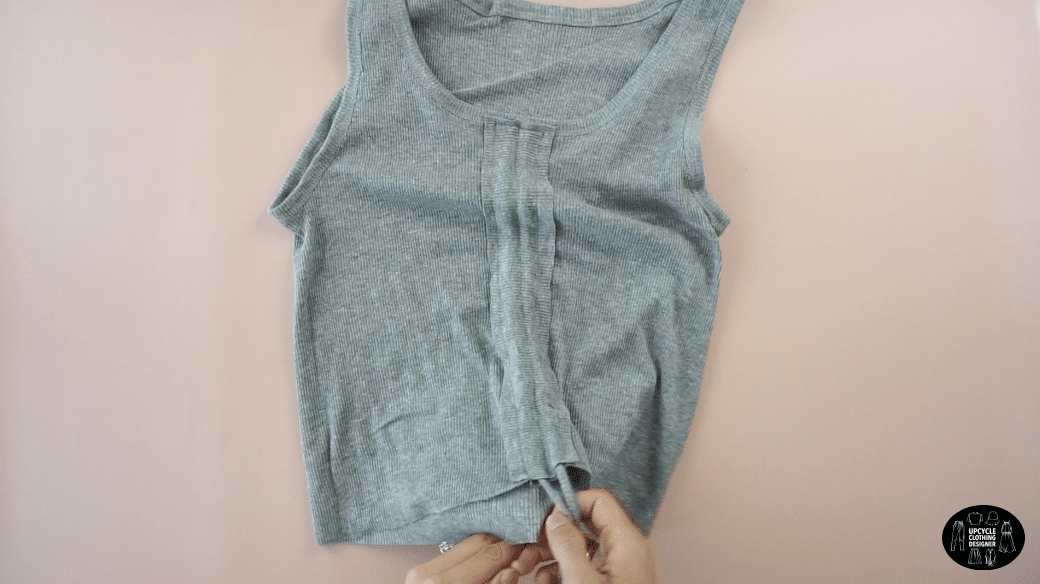
Cut a 2” by 12” piece from the excess fabric. Pin vertically on the wrong side of the center chest. Sew topstitch along the center line to secure the panel to the front of the top.
Lay one drawstring on the side of the center line and overlap with the panel. Topstitch the top of the drawstring , and also lock the drawstring in a tunnel with a topstitch along the side of the panel.
Same goes for the other side.
The drawings are used to ruche the fabric over the tunnel. Make a cute bowtie with the ends of the strings to complete this DIY ruched drawstring tank top.
Below are detailed instructions along with step-by-step photos for you to easily follow along!


DIY Ruched Drawstring Tank Top Sewing Tips
The hidden tunnel underneath the tank top creates natural ruching and the drawstrings help to make an adjustable length. Here are sewing tips to get you prepared before you start refashioning your old tank top.
- Type of Stitch: A zigzag stitch is used to finish the ends of the tunnel to prevent the seam from unraveling. Resembles the look and function of an overlock stitch.
- Walking Foot: The walking foot will help you sew straight drawstrings and tunnel lines. Using this tool will help prevent puckering.
- Needle: Use a ballpoint needle to help avoid damaging the knit fabric when sewing.
- Thread: Use regular polyester thread because it has a slight amount of stretch. Stay away from cotton thread because it can break when pulled too tightly.
More tank top upcycle projects for your next DIY fashion:
DIY Ruched Drawstring Tank Top
Learn how to make tunnels and drawstrings from knit fabrics to create this DIY ruched drawstring tank top.
The sewing tips will help you create pucker-free sewing lines that look great and last long. With these easy tips, your old tank top will transform into a brand new style!
Materials
- Tank Top
- Thread
Tools
- Sewing Machine
- Fabric Chalk
- Loop Turner
- Ruler
- Scissors
- Straight Pins
Instructions
- For this DIY ruched drawstring tank top tutorial, start by marking 5” from the hemline with fabric chalk and then cut along the line.

- To make the drawstrings, use the excess fabric to cut two separate 1” wide straps.
Cut one end of each strap to double the length.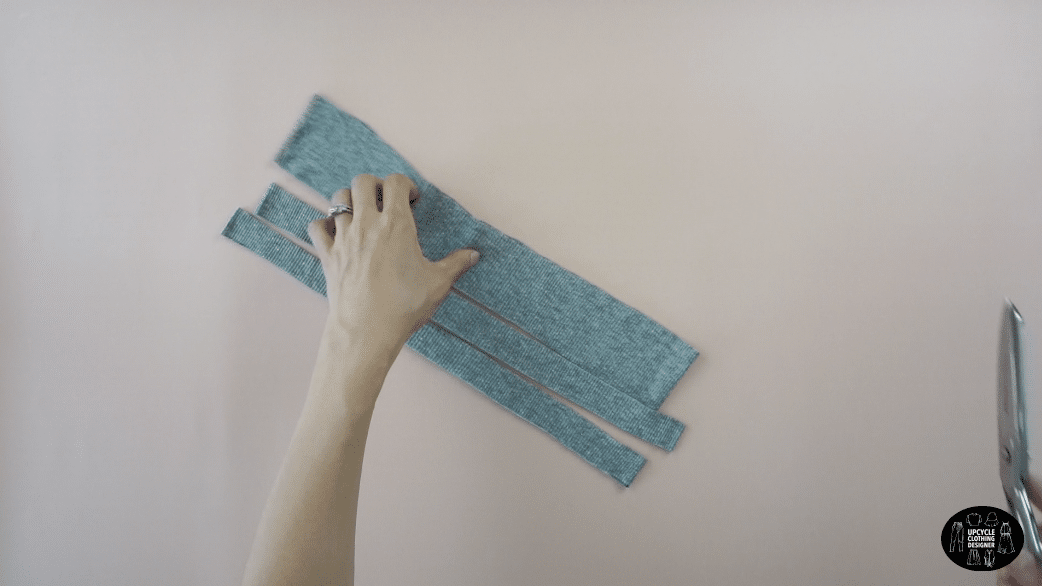

Fold both long straps in half lengthwise, and 1/4” topstitch along the edge.
Use a loop turner to flip the strap inside out to complete both drawstrings.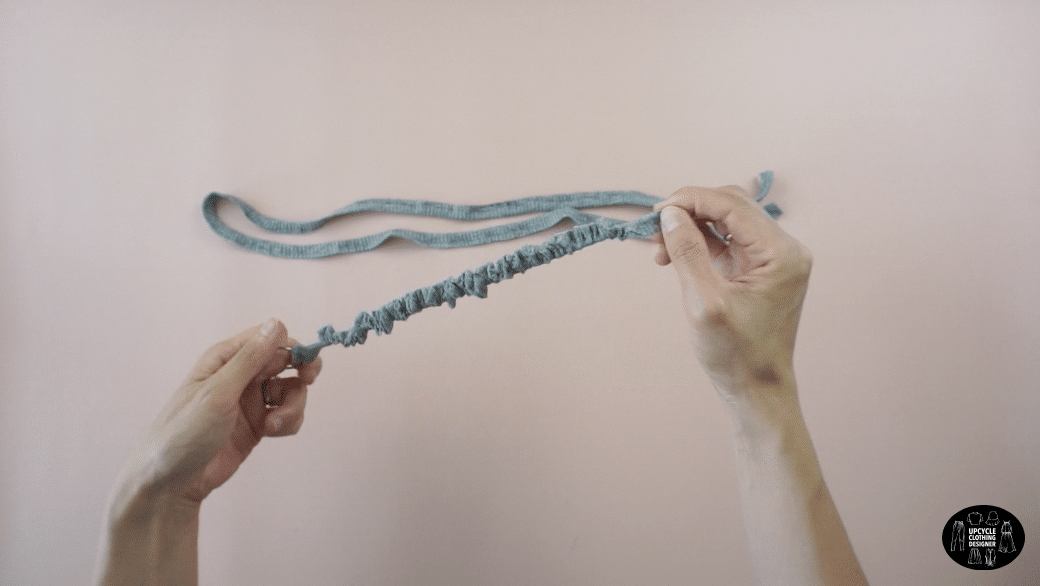
- To make the ruched center piece, use the remaining 2” by 12” piece of fabric.

Pin to secure on the wrong side of the center chest.
Sew topstitch along the center line of the panel.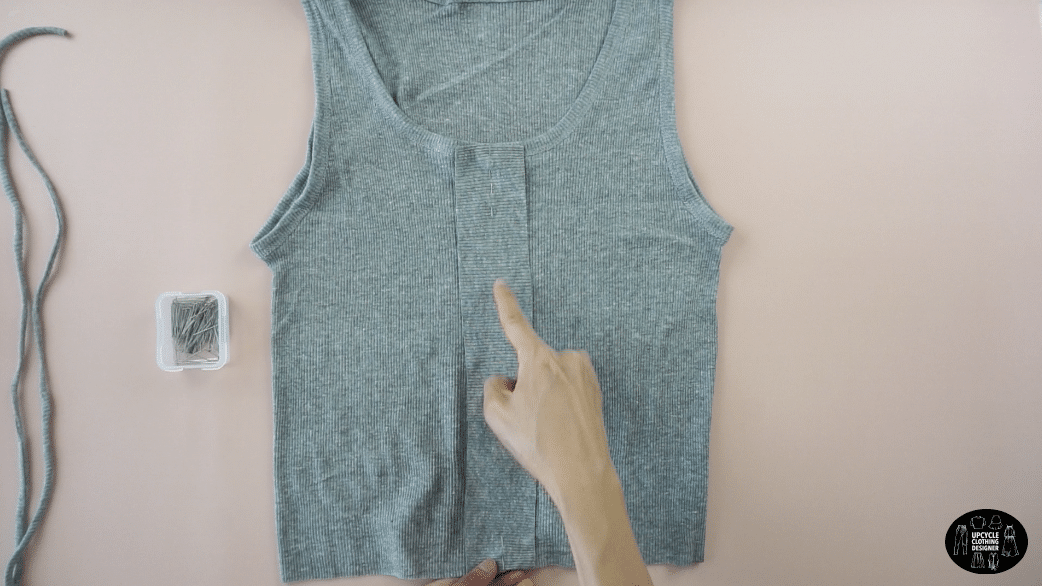
- To finish the ruched center piece, lay one drawstring on the side of the center line and use the panel to overlap.
Pin to secure the panel in place to hold the string in place.
Topstitch the top of the drawstring to fasten, and then along the side of the panel to lock the drawstring in a tunnel.

- Do the same for the opposite side. Lay the drawstring against the center line, fasten the top edge and then topstitch along the side of the panel to make a tunnel for the drawstring.

- Ruche the fabric using the drawstrings and then tie a cute bowtie with the ends to complete this diy ruched drawstring tank top.
Recommended Products
As an Amazon Associate and member of other affiliate programs, I earn from qualifying purchases.


Trendy, Affordable Sewing Patterns for All Sizes


Tie Shoulder Jumpsuit Pattern


Palazzo Pants Sewing Pattern


Pocket Overall Romper Pattern


Wrap Maxi Skirt Sewing Pattern


Tie Back Top Sewing Pattern