
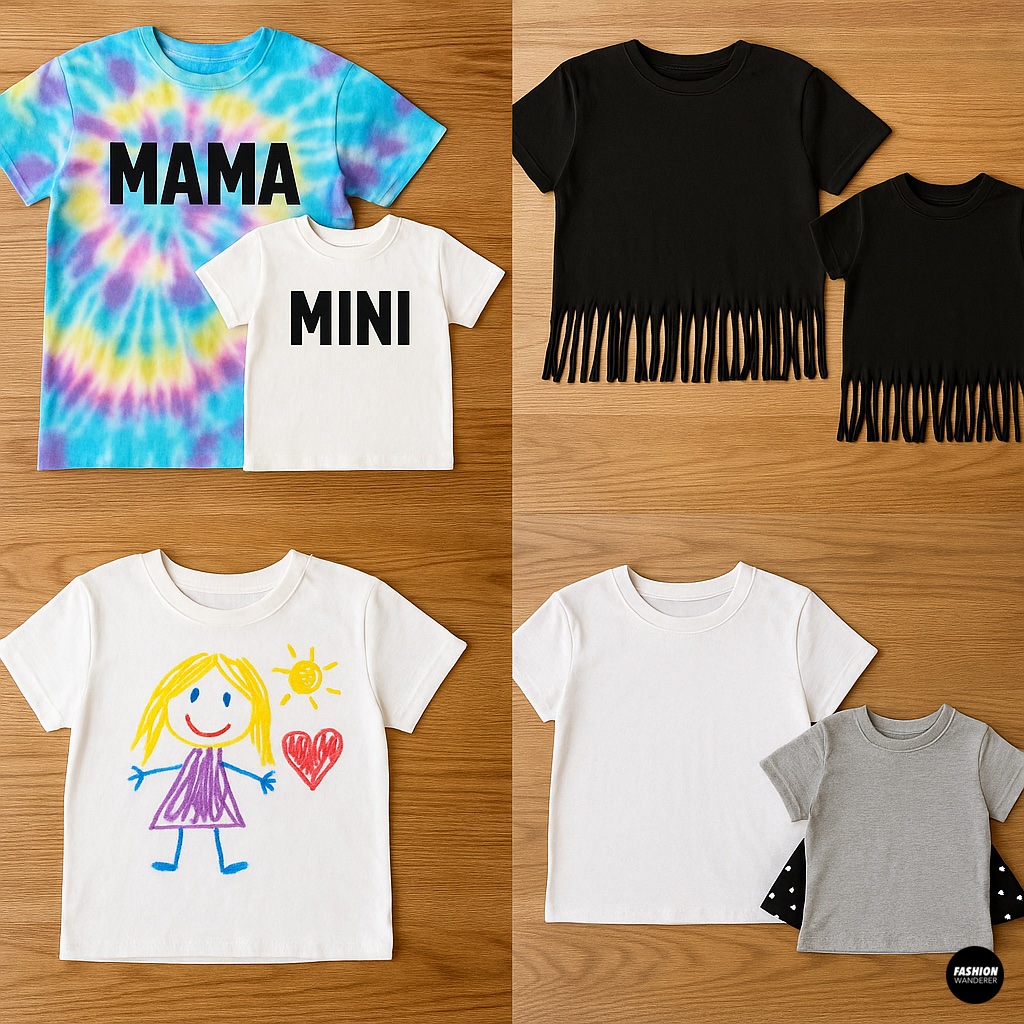
Looking for a fun, budget-friendly way to celebrate the special bond between you and your little one? A Mommy & Me DIY T-Shirt Set is the perfect craft project—adorable, affordable, and infinitely customizable.
In this step-by-step tutorial, you’ll learn how to turn basic tees into coordinated outfits that showcase your creativity and style. Ready to get crafting? Let’s dive in!
Why You’ll Love This Mommy & Me DIY T-Shirt Set

- Adorable & On-Trend: Matching sets are huge on social media and at family gatherings.
- Affordable: Upcycle plain tees or shop budget-friendly basics—each set costs under $10!
- Customizable: Choose colors, graphics, and embellishments to suit your style.
- Memory-Making: Create keepsakes and photo ops you’ll treasure forever.
Supplies You’ll Need

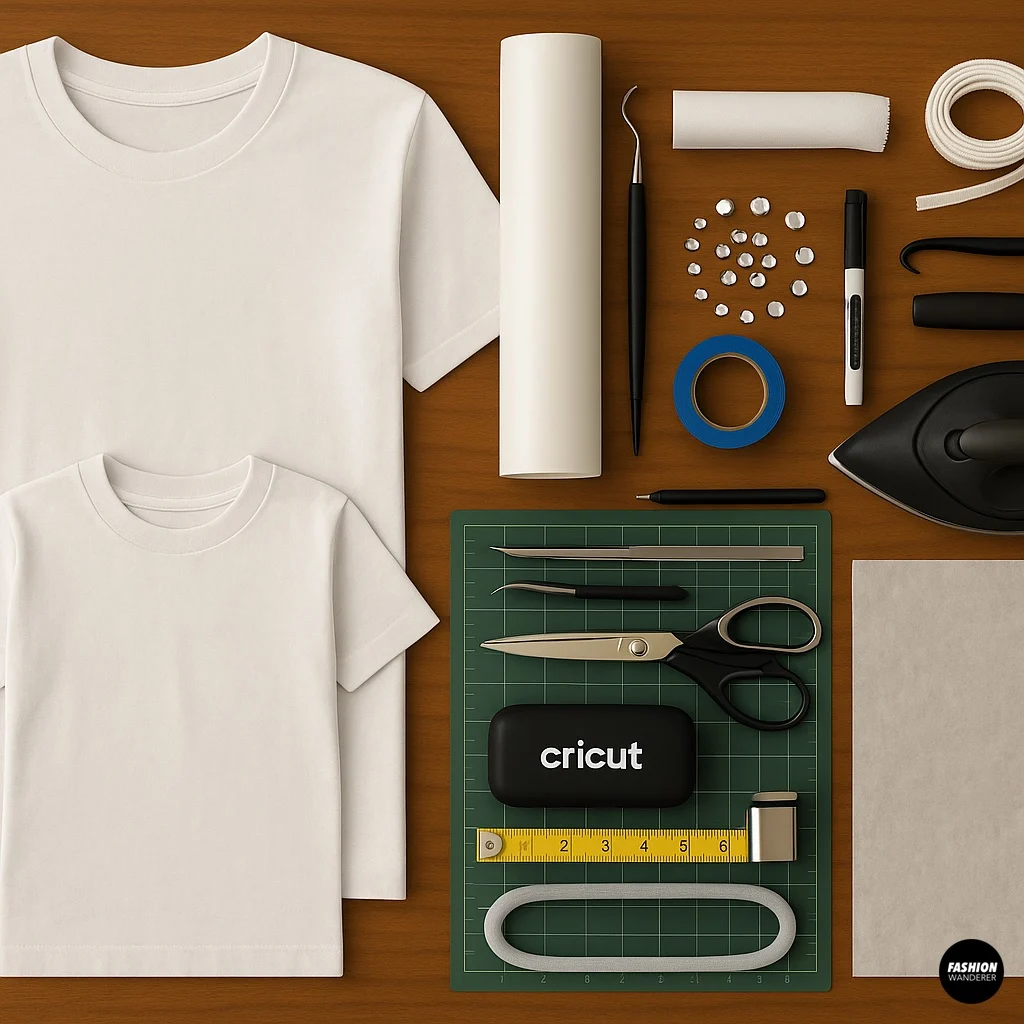
Gather everything before you begin:
- Plain cotton T-shirts (one adult size, one child size)
- Heat-transfer vinyl (HTV) or fabric paint
- Cutting machine (e.g., Cricut) or stencils
- Weeding tools (for vinyl)
- Heat press or iron
- Painter’s tape (if using paint)
- Printable transfer paper (optional)
- Measuring tape
- Parchment paper (for HTV)
- Embellishments: rhinestones, fabric markers, fringe, ribbon
Tip: Shop basics at discount retailers or thrift stores to keep it truly affordable.
DIY Mommy & Me Tee Shirt Set

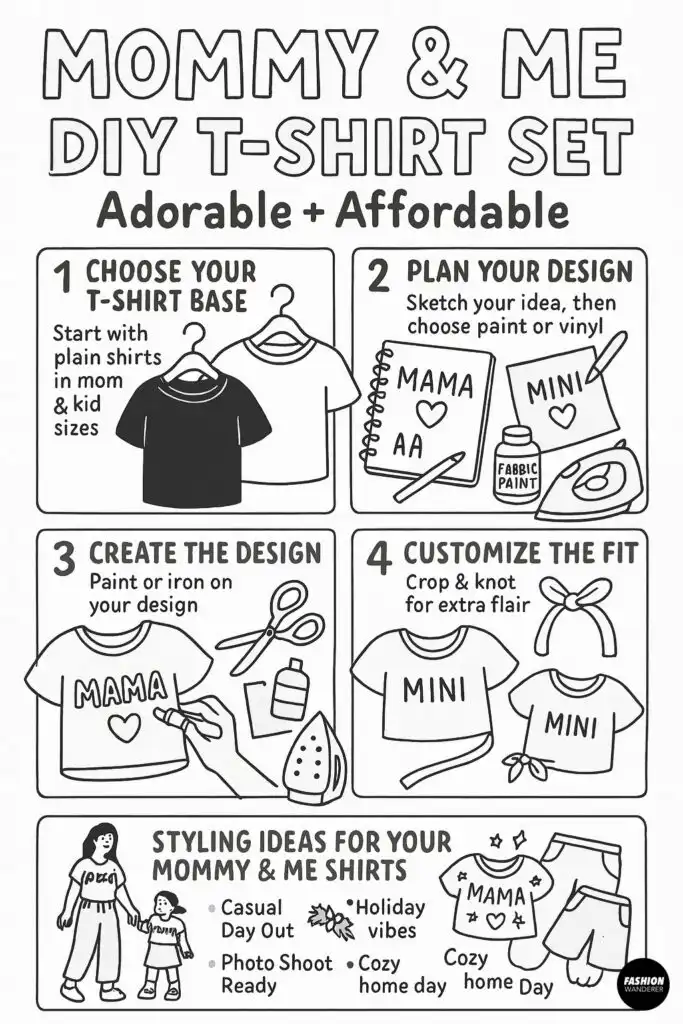
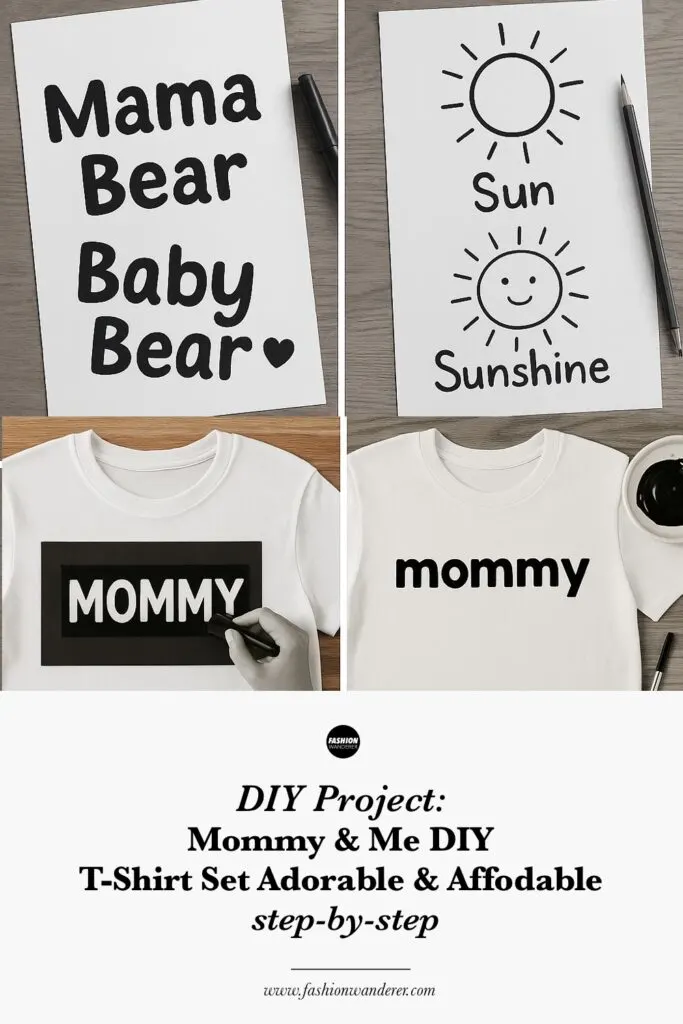
Step 1: Choose Your Design


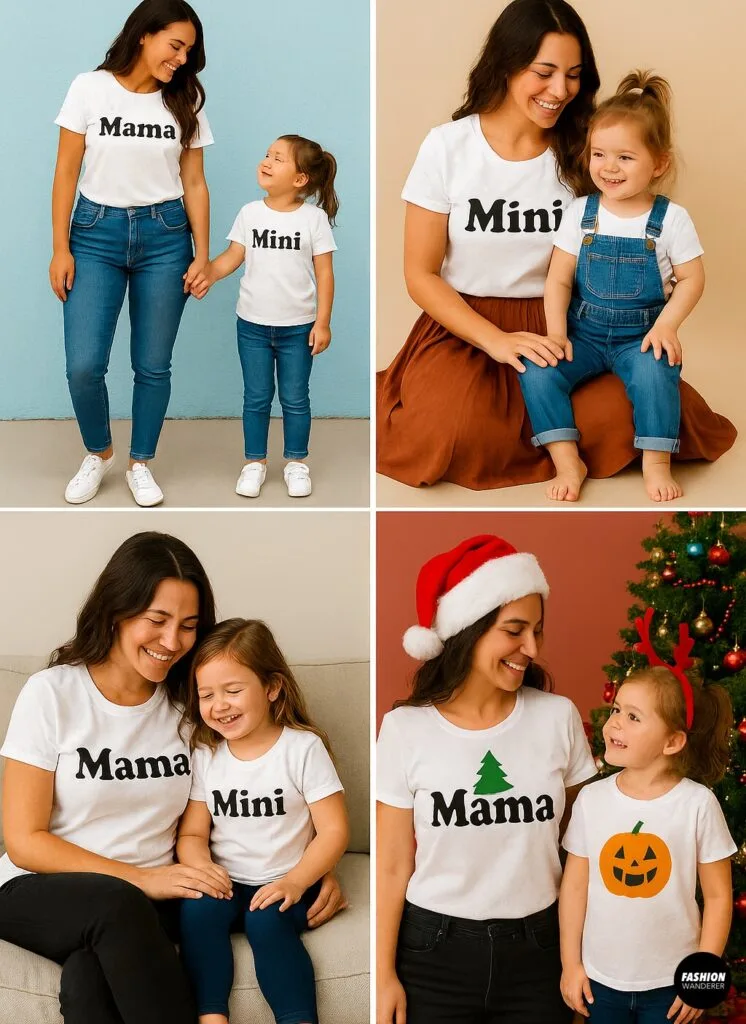
- Brainstorm a theme: hearts and arrows, floral silhouettes, cute slogans (e.g., “Mommy & Mini” or “Partner in Crime”).
- Select colors: coordinate adult and child shades (e.g., blush pink & lavender, navy & mint).
- Decide on technique:
- HTV for crisp, professional vinyl graphics.
- Fabric paint for a hand-painted look.
- Printable transfers for full-color photos or intricate artwork.
Step 2: Prepare Your T-Shirts

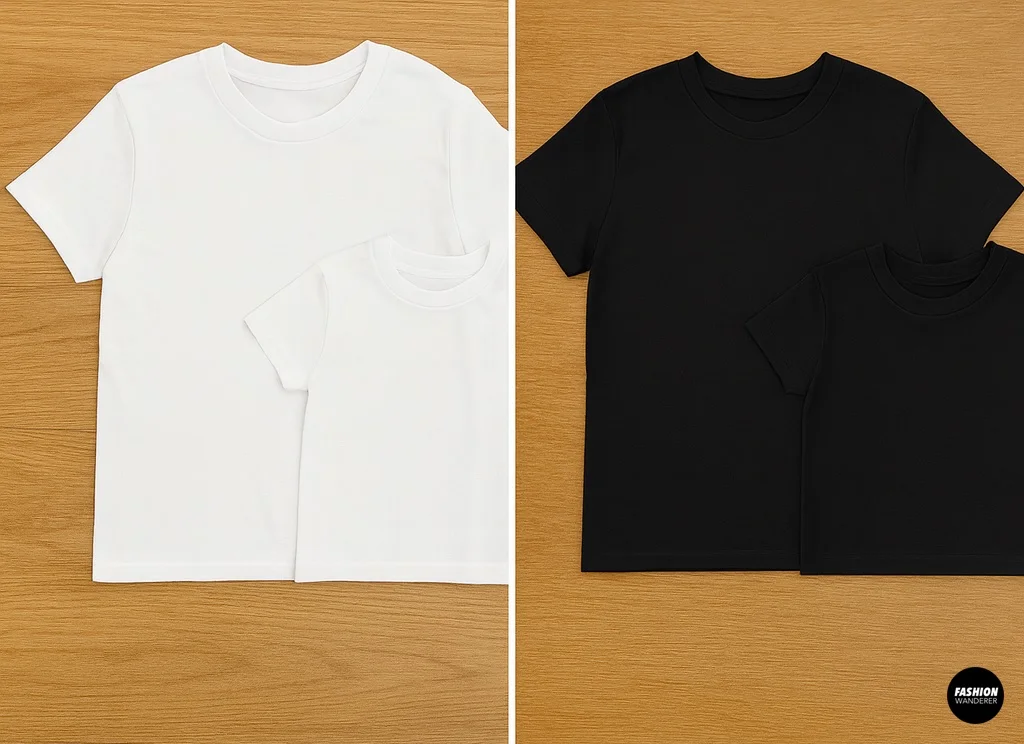
- Pre-wash and dry all shirts without fabric softener (helps paint and vinyl adhere).
- Iron each shirt flat, removing wrinkles so your design lays smoothly.
- Stretch the fabric taut across an ironing board or heat press surface.
Step 3: Create & Cut Your Design

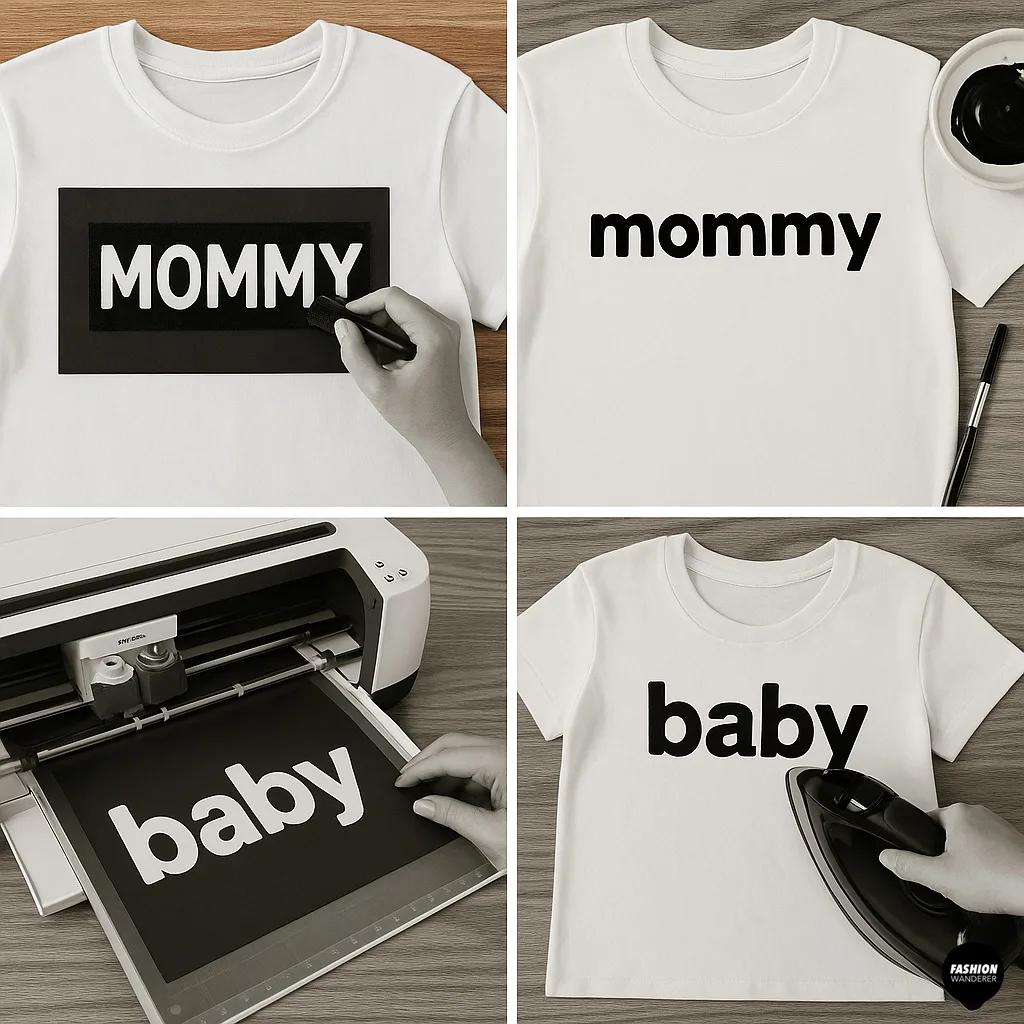
For Heat-Transfer Vinyl
- Open your cutting software and set canvas size to your shirt’s printable area (approx. 8″×10″ for adults, 6″×8″ for kids).
- Import or draw your motif.
- Mirror image the design before cutting (essential for HTV).
- Load vinyl into the machine, shiny side down.
- Cut on the recommended setting for cotton.
- Weed away excess vinyl, leaving only your design.
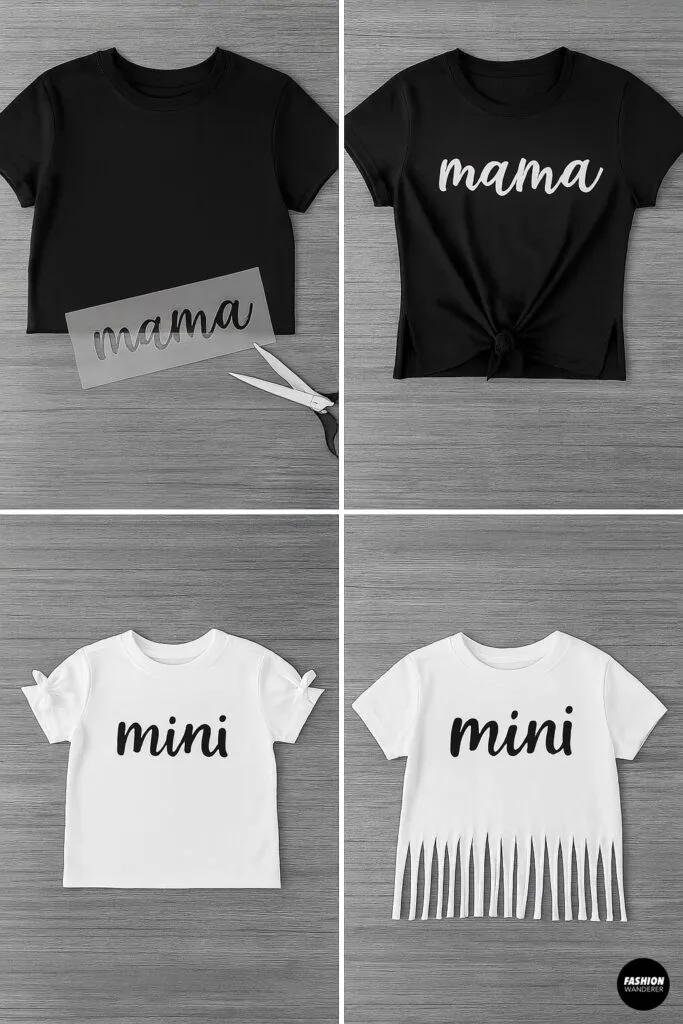
For Fabric Paint
- Position a piece of cardboard inside each shirt to prevent bleed-through.
- Tape stencil or transfer paper in place with painter’s tape.
- Apply paint using a sponge or brush—use light, even coats.
- Remove stencil carefully once paint is tacky.
Here is a detailed post with more information about DIY t-shirt painting.
Step 4: Apply Your Design

Using a Heat Press or Iron (HTV)
- Pre-press: Heat the shirt for 2–3 seconds to remove moisture.
- Position the vinyl design, liner side up.
- Cover with parchment paper.
- Press at 305°F (150°C) for 10–15 seconds with medium pressure.
- Peel liner when cool or warm, per manufacturer’s instructions.
Using Fabric Paint
- Let paint dry completely (4–6 hours).
- Heat-set by ironing on the reverse side for 2 minutes (no steam).
- Wash & wear: Wait 24 hours before first wash; turn inside out and machine-wash cold.
Step 5: Add Embellishments (Optional)

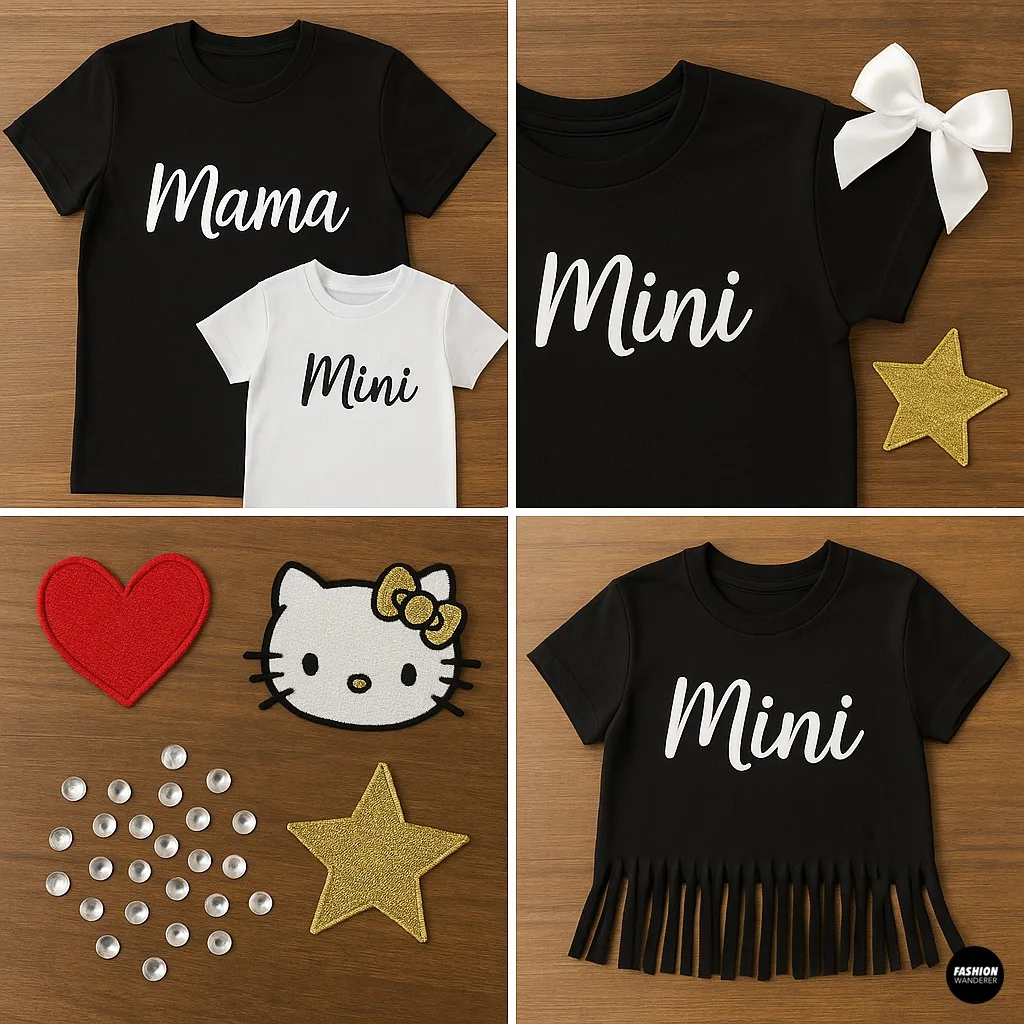
Take your Mommy & Me set to the next level:
- Rhinestones: Attach with fabric glue or hot-fix tool in clusters around the design.
- Fringe or Tassels: Sew or hot-glue along the hem or sleeves for boho flair.
- Ribbon Bows: Tie small bows at the shoulder seams for a sweet touch.
- Fabric Markers: Hand-draw doodles, names, or dates along the hem.
- Vibrant colors: Acid wash or tie-dye add flare to the design.
Tip: Keep all embellishments light and machine-washable to avoid damage.
Step 6: Final Fit & Styling Tips

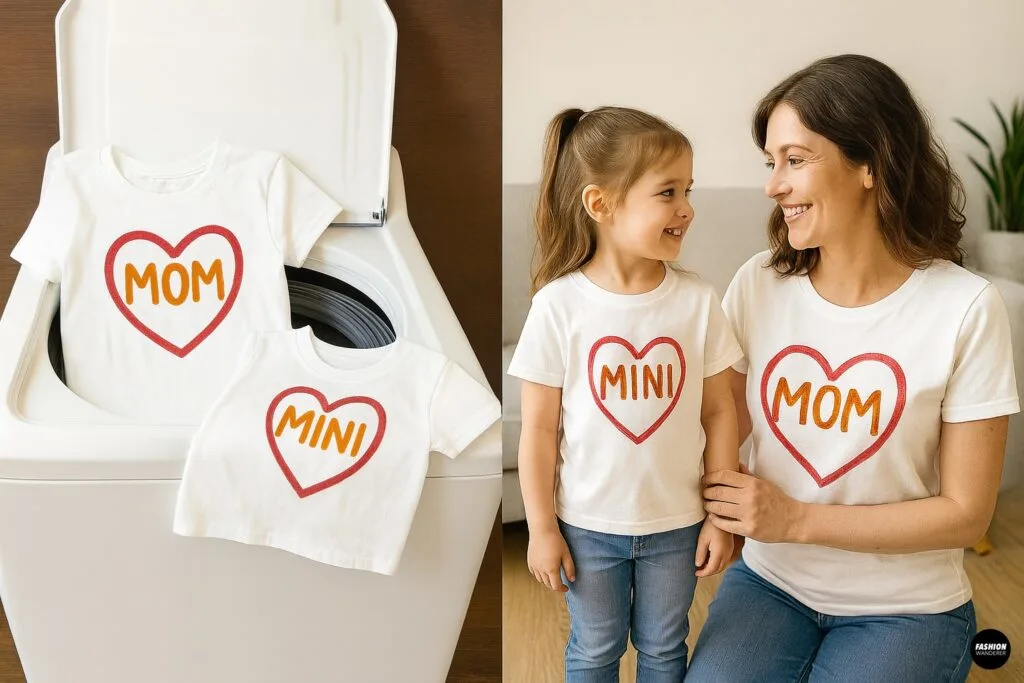
- Try on both shirts together to ensure designs line up and shirts lay flat.
- Adjust by trimming or re-pressing any vinyl that shifted.
- Style: Pair with jeans, leggings, or skirts. Add matching sneakers or headbands for photo-ready looks.
Variations & Creative Ideas

- Ombre Dye + Vinyl: Dip-dye the bottom half of both shirts before adding vinyl for a trendy gradient effect.
- Pocket Makeover: Cut a pocket from the adult shirt’s sleeve or hem and attach to the child’s shirt—personalize with contrast stitching.
- Photo Transfer Tees: Print a family photo on transfer paper and press onto both shirts for sentimental value.
- Seasonal Themes: Christmas matching sets (“Santa & Elf”), Halloween (“Witch & Tiny Witch”), Valentine’s Day (“Be Mine”).
Care & Maintenance
- Wash inside out on a gentle cycle, cold water.
- Air-dry or tumble-dry low.
- Avoid bleach or harsh detergents.
- Hand-wash any rhinestone or fringe accents to extend lifespan.
Conclusion

A Mommy & Me DIY T-Shirt Set is more than just coordinated clothing—it’s a creative experience that builds memories, showcases your DIY spirit, and makes a bold style statement.
Best of all, you can create these adorable, affordable matching tees in under an hour with supplies you probably already have. Gather your plain shirts, pick your favorite design, and get crafting today!
Trendy, Affordable Sewing Patterns for All Sizes


Tie Shoulder Jumpsuit Pattern


Palazzo Pants Sewing Pattern


Pocket Overall Romper Pattern


Wrap Maxi Skirt Sewing Pattern


Tie Back Top Sewing Pattern