
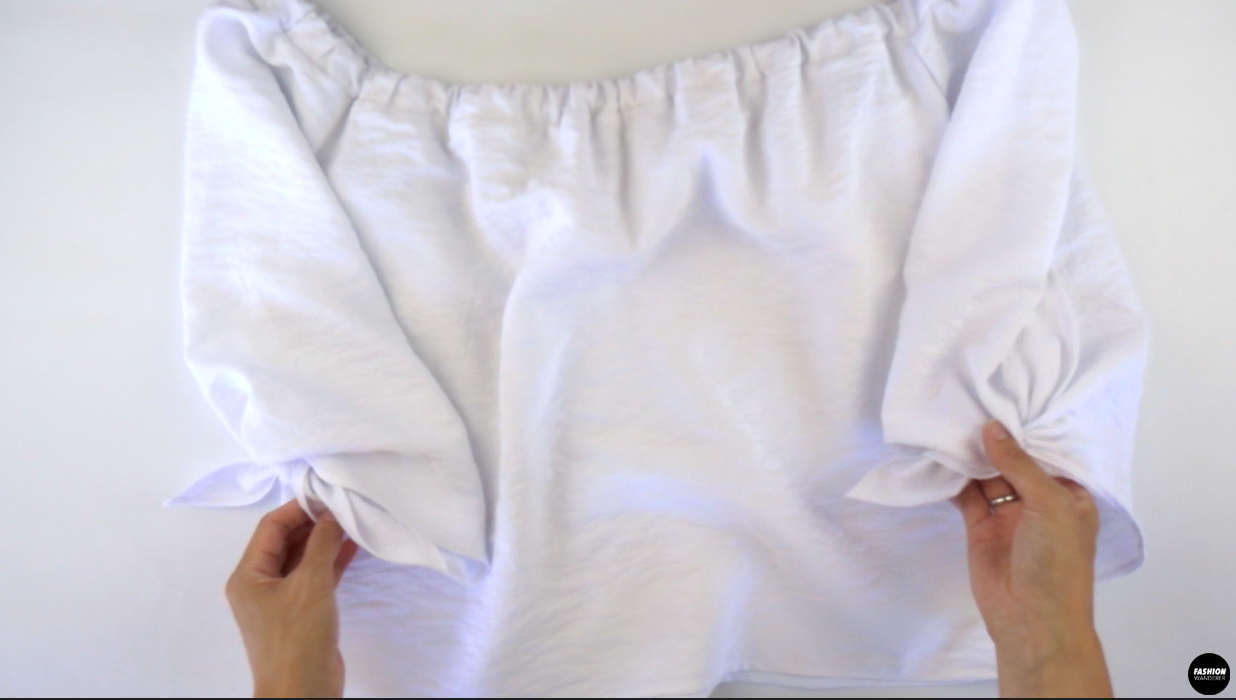
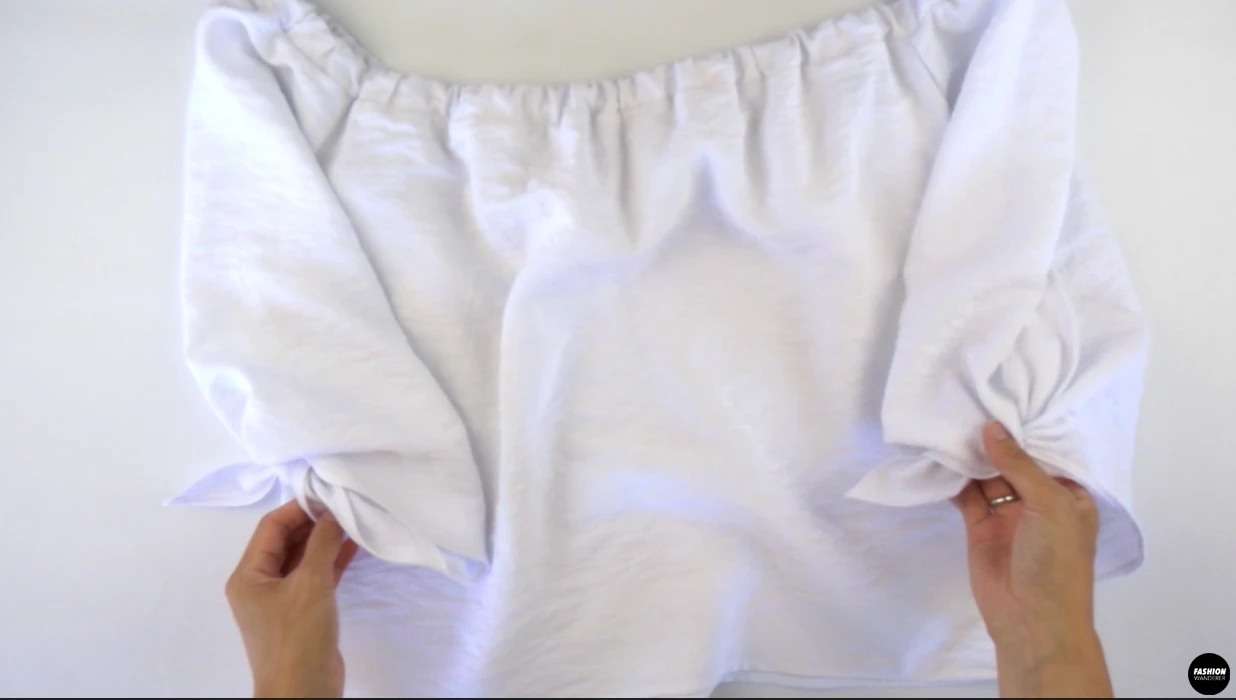
Looking for a different top style to wear through out the four seasons? Parker top features elegant off the shoulder neckline, elastic band sits around the standard neckline, and cute tie sleeve that is adjustable and adds that special touch.
This top has a modern yet feminine design that works best with rigid cotton, linen, or poplin. This will naturally create volume around the elastic that holds the shape exquisitely.
How to make tie sleeve off the shoulder top? Use cotton blend or poplin fabric for best results, read through the pretreatment of the care label to prepare the material before cutting and sewing. It is recommended to wash, dry, and press the fabric before starting.
Fashion Wanderer sewing patterns include ⅜” width or 0.95 cm seam allowance that is ready to cut and sew. Download the Parker top, choose your size and start the project by following the video tutorial and picture instructions.
From off the shoulder neckline to tie sleeve detail, there are multiple design elements featured in the Parker top.
Sew a stylish and feminine top by using this blueprint to execute a store-bought quality and professional looking garment. Wear with casual jeans or fun mini skirt of your choice to complete the outfit.


DIY Tie Off The Shoulder Top


You will love this DIY tie sleeve off the shoulder top because…
- Parker top sewing pattern includes US size from 0 to 18 for wide range of fit.
- Easy ways to add elastic band through self tunnel method.
- Correct way to join elastic to prevent popping.
- Learn to finish slit opening.
- Practice and master straight and overlock stitches.
This stylish and easy to wear tie sleeve off the shoulder top includes elasticized neckline that hugs comfortably. The adjustable tie sleeve is functional and also adds design element to the garment.
If you are looking for a beginner friendly sewing project that only takes one hour of making, this Parker top is perfect to try.
Select your favorite fabric and find the size from the chart according to the bust and waist measurements.


How to make tie sleeve off the shoulder top

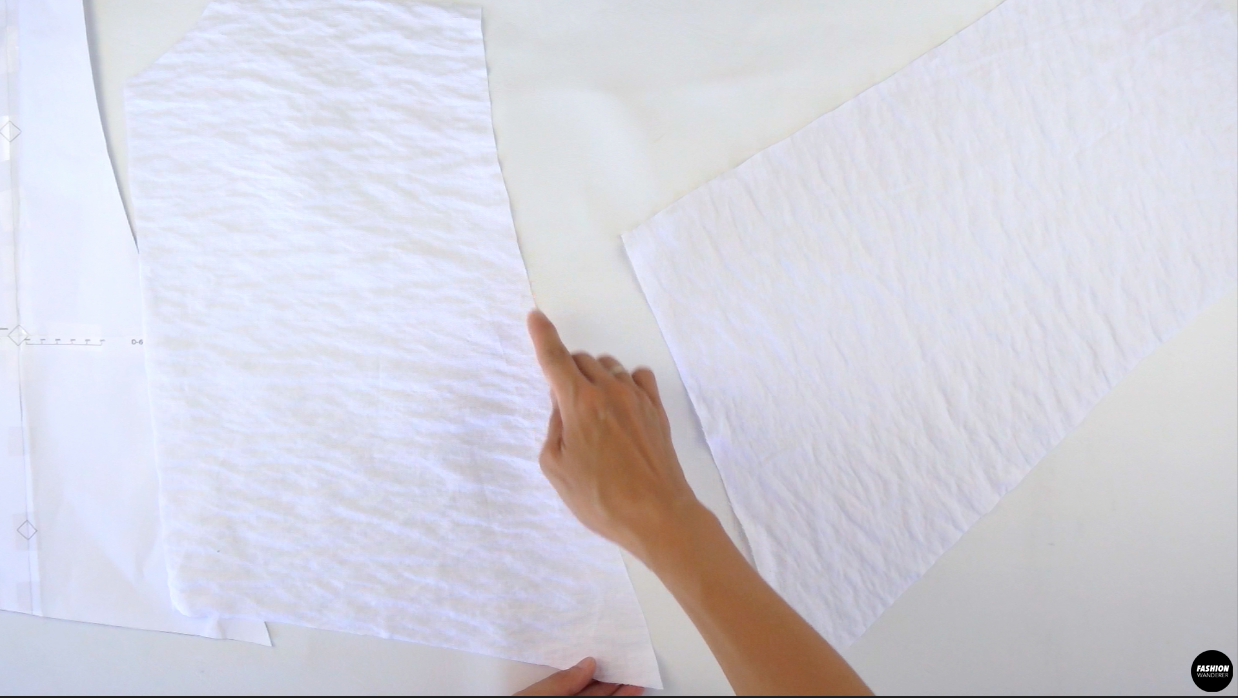
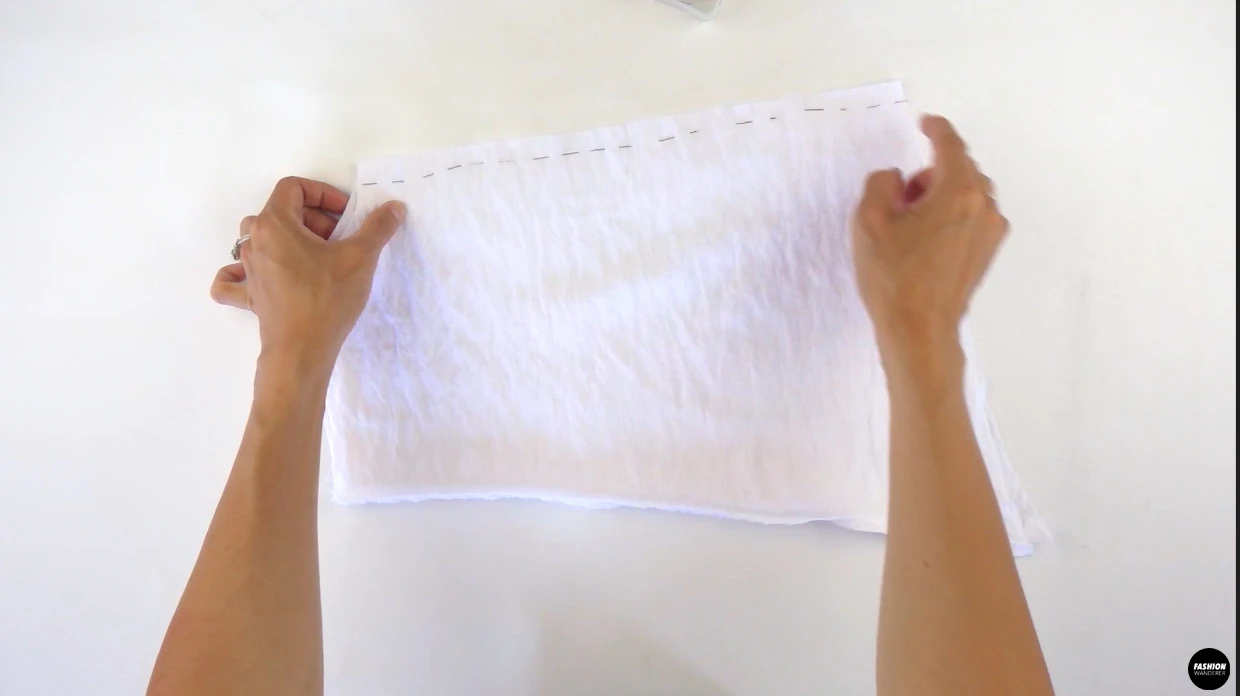
Start by downloading Parker top sewing pattern and choose the paper size to assemble the pdf sewing patterns properly. Fashion Wanderer sewing patterns are easy to put together and read, making them perfect for beginners.
Parker top is also great piece that does not require more than 1 yard to accomplish, regardless of the fabric width. But if you need specific measurement for how much fabric you need, refer to the instruction booklet for more information.
It is great practice to include ½ yard extra to practice some of the stitches, stitch length, and tension. This will help prevent thread breaking and allow you to thread the machine properly for best results.
DIY Tie Sleeve Off the Shoulder Top Material:
- Parker Top Sewing Pattern
- Poly cotton Fabric ½ yards for 60” width or ¾ yards for 45” width
- 1” width elastic
- Sewing machine
- Serger
- Pins
- Safety Pin
To sew off the shoulder top, lay right side of the Front Top and Back Top facing each other and match to pin along the side seam.
Sew ⅜” width straight stitch on both side seams and overlock to finish. Press the side seams facing towards the Back Top.


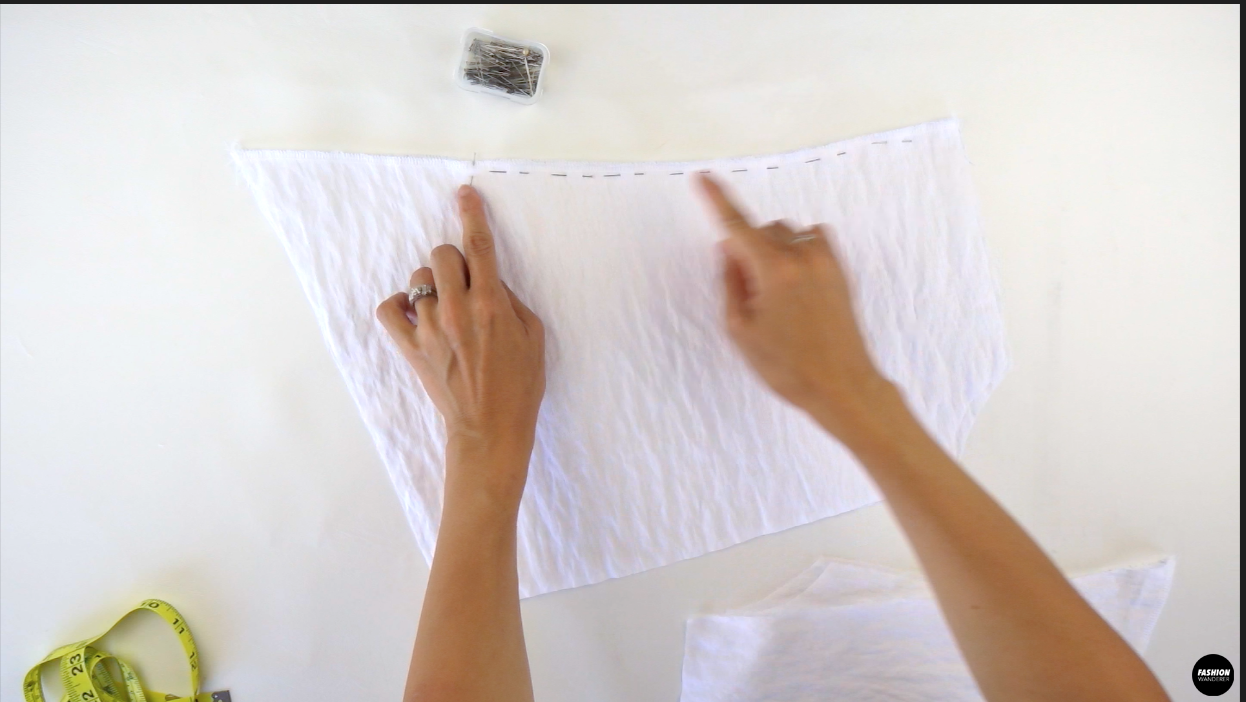
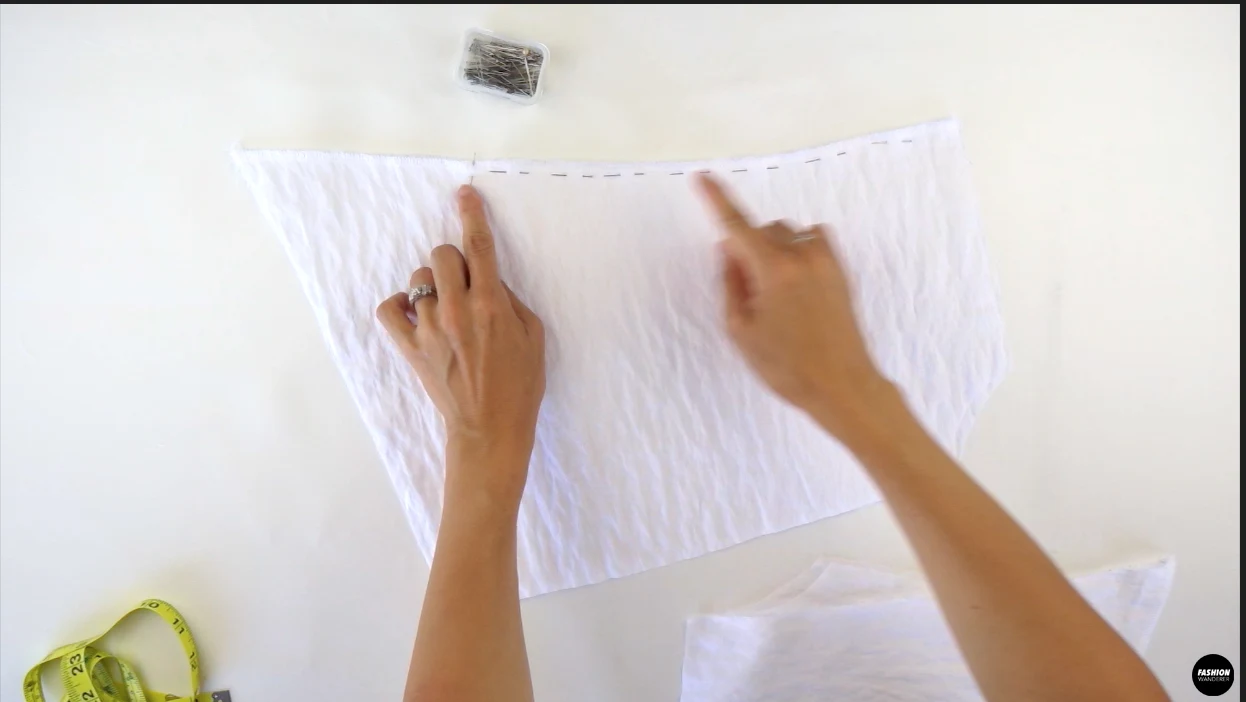
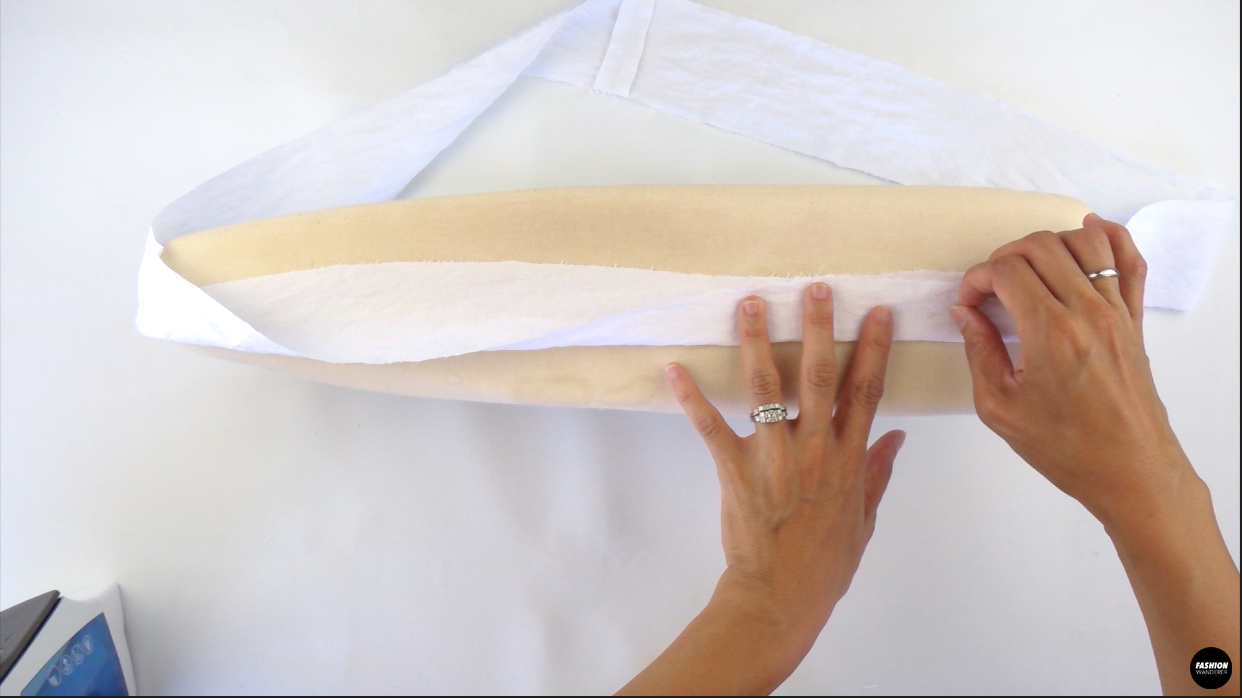
To sew slit tie detail on the sleeves, overlock stitch along the long cut edges of the sleeve on Front and Back Sleeve separately.
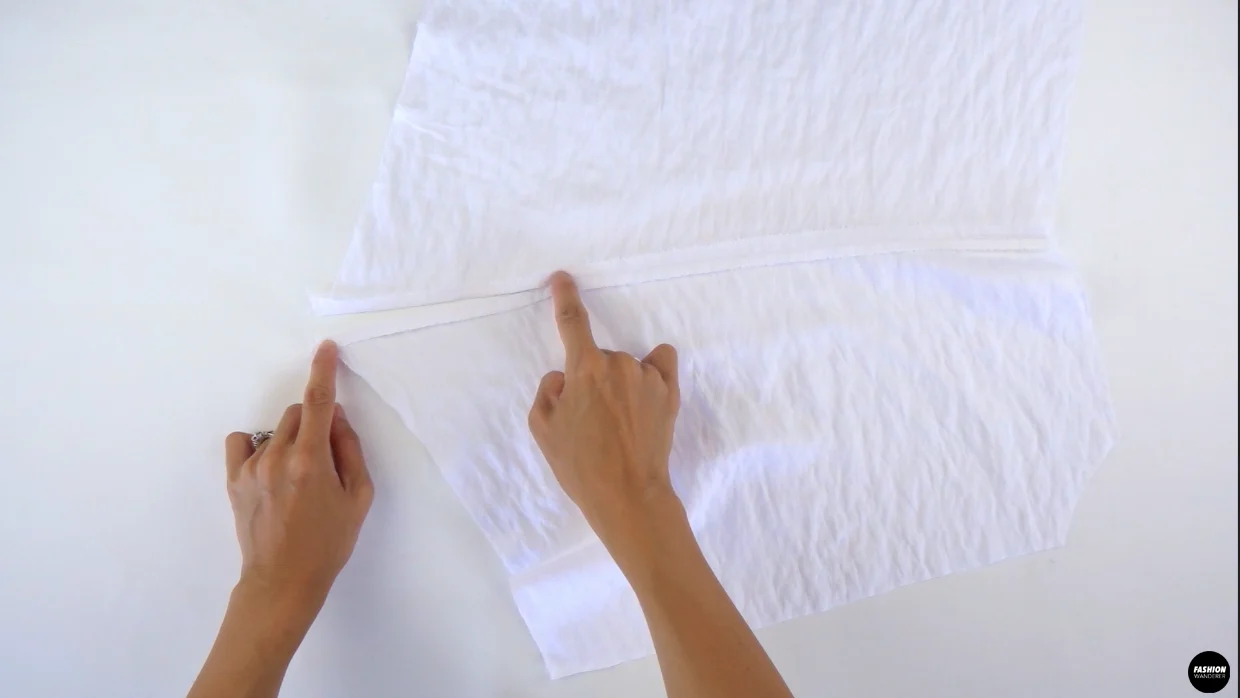
Place the right sides of front and Back Sleeve facing each other and line up the overlock stitches together.
Measure 6” up from the sleeve hem and pin along the cut edge till the neck opening.
Straight stitch along the pin line with ⅜” width seam allowance. Press seam open. Edge topstitch around the slit opening.
Place right side of the Front Sleeve and Back Sleeve facing each other and pin.
Sew underarm sleeve ⅜” width straight stitch and overlock to finish. Press seam towards the Back Sleeve.
Next, assemble off the shoulder sleeve to the bodice by matching side seams of the bodice and sleeve, then pin around the underarm.
Straight stitch ⅜” width seam allowance and overlock to finish.


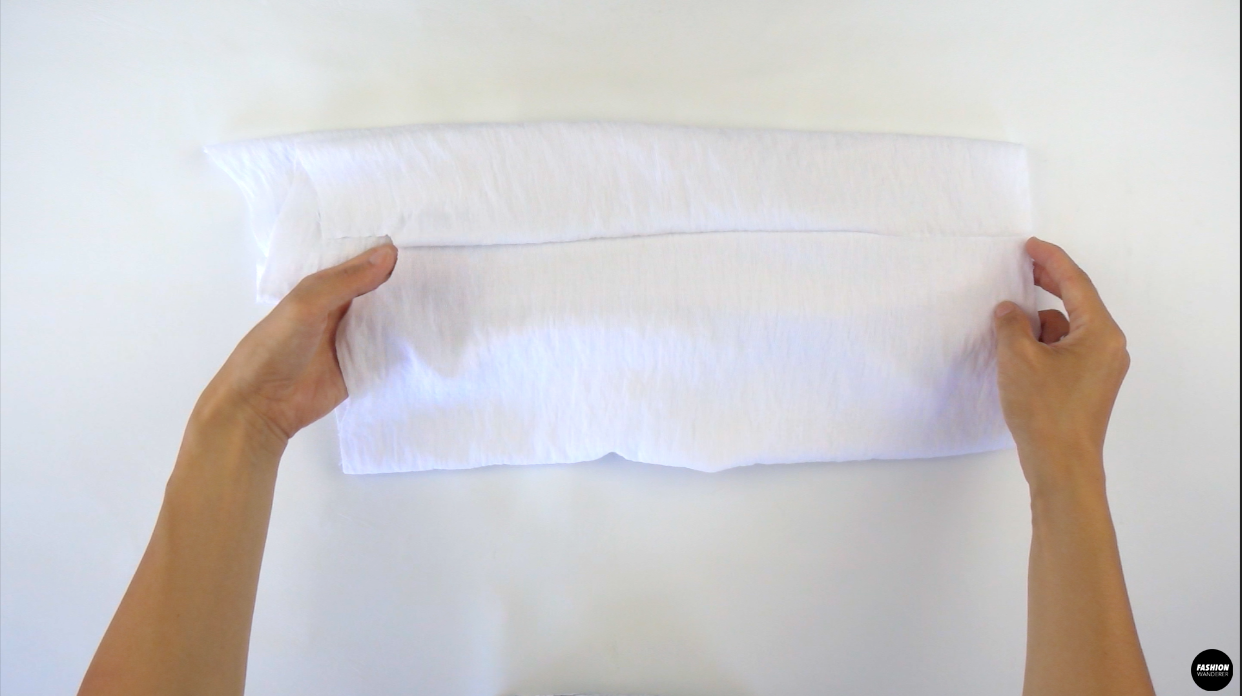
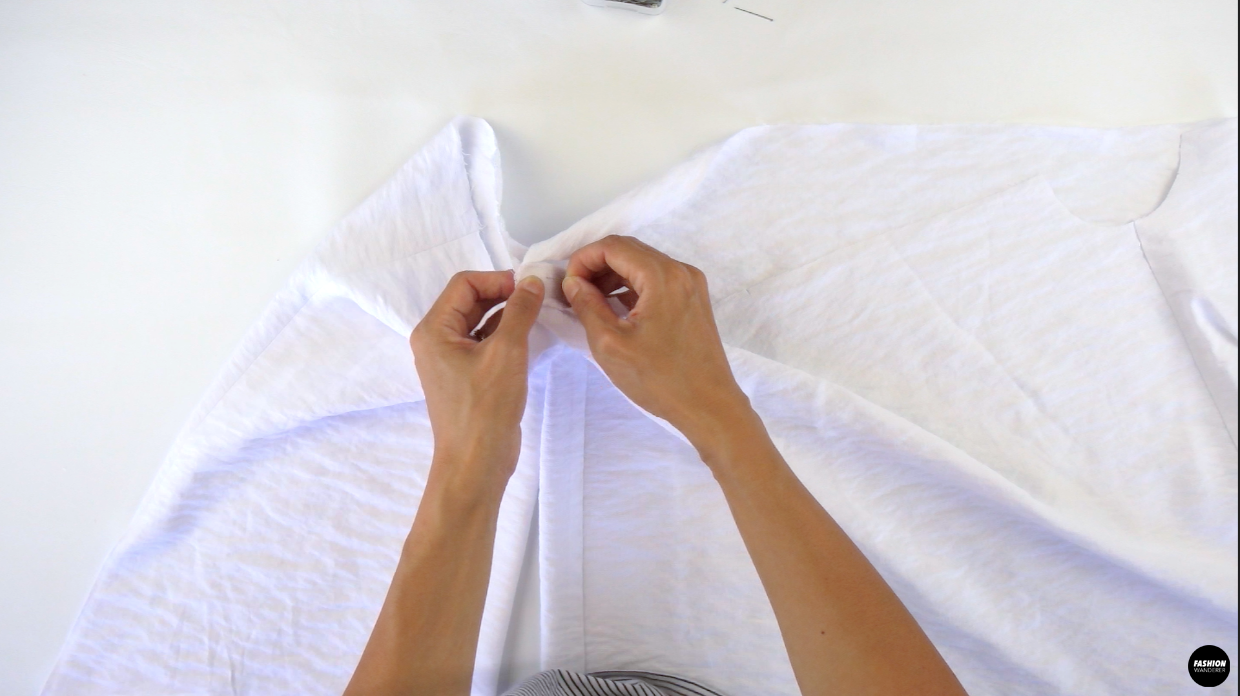
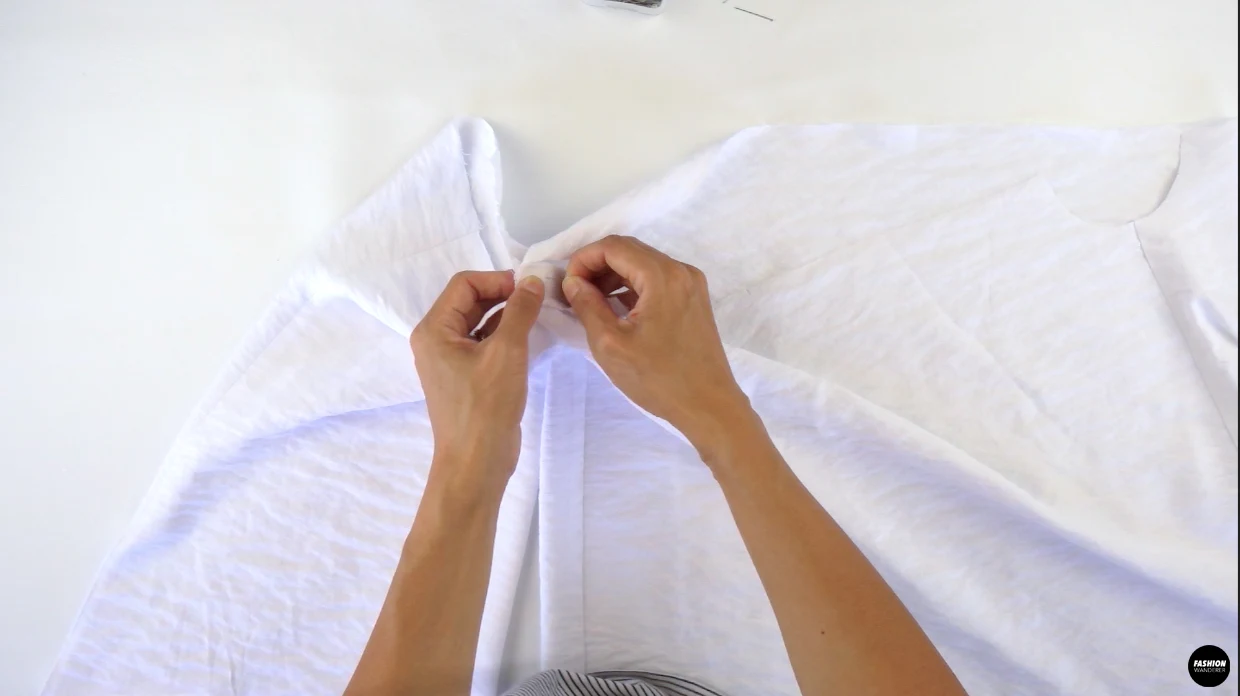
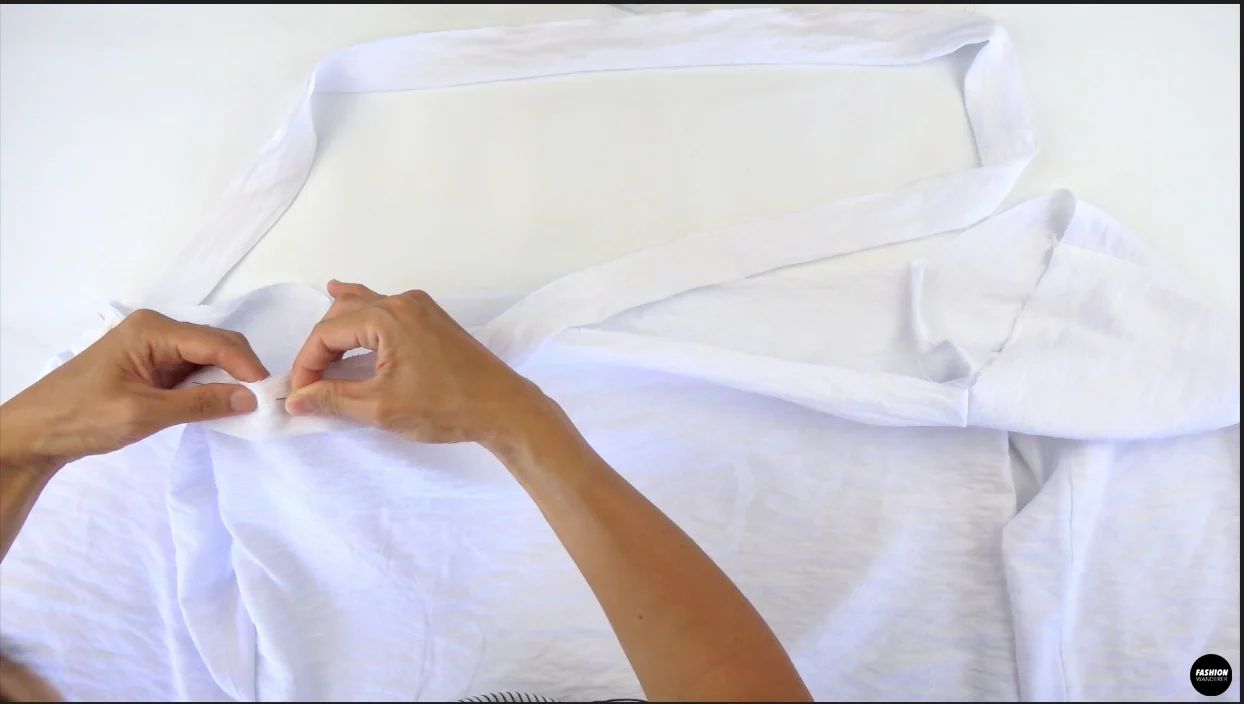
To make tunnel for elastic neck opening, place right side of the Neckline Opening pieces facing each other. Join to make one piece with ⅜” width straight stitch and overlock stitch to create a giant loop.
Fold the Neckline Opening piece right side facing each other lengthwise and give a gentle press to indicate the total width.
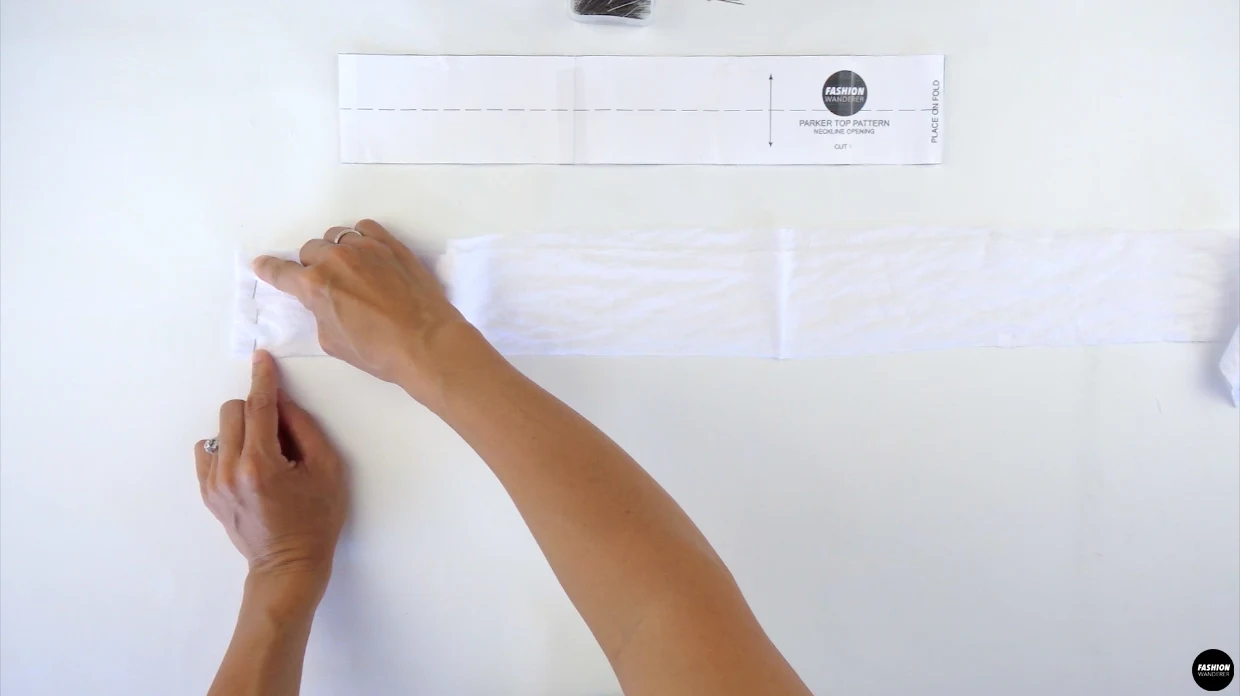
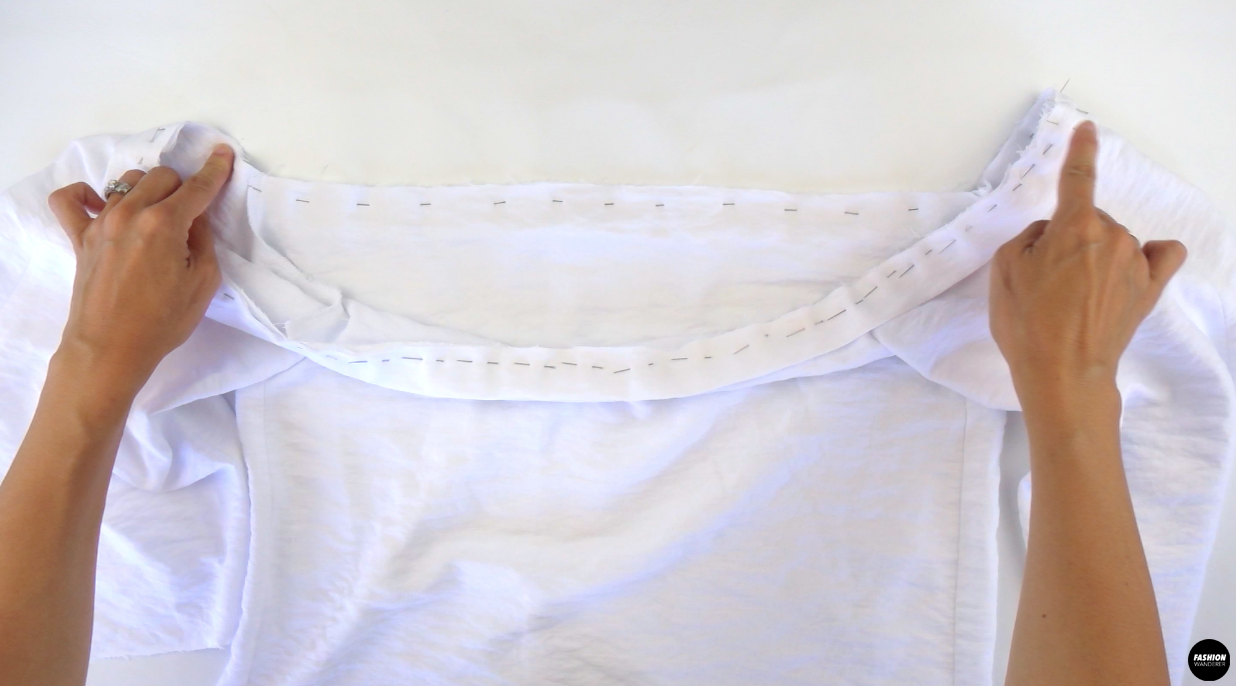
Slide right side of the strap and right side of the bodice to pin around.
Leave 2” opening and sew ⅜” width straight stitch, then overlock the edges.
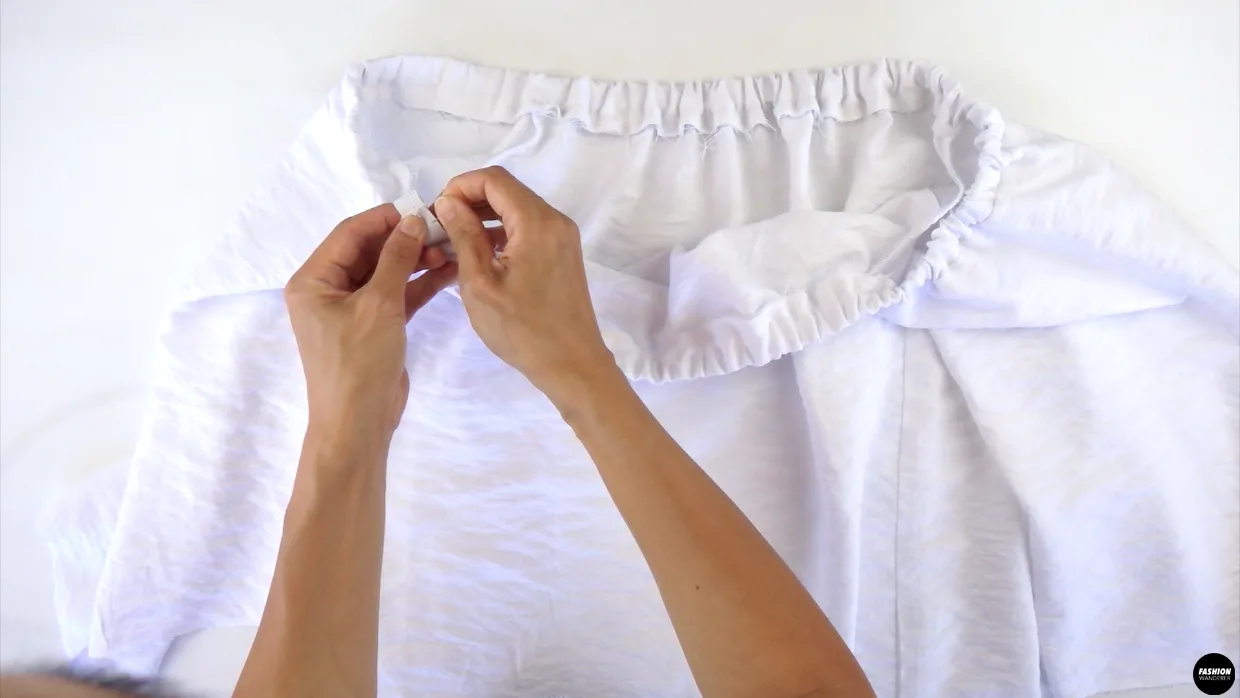
Prepare 1” width elastic that is 42” long. Use safety pin to slide the elastic through the one end of the tunnel to exit out the other end.
Overlap the ends to join the elastic about ½” and zigzag stitch or create rectangular box to join.
Close the 2” opening gap and overlock the ends. Press the overlock seams facing towards the hemline.
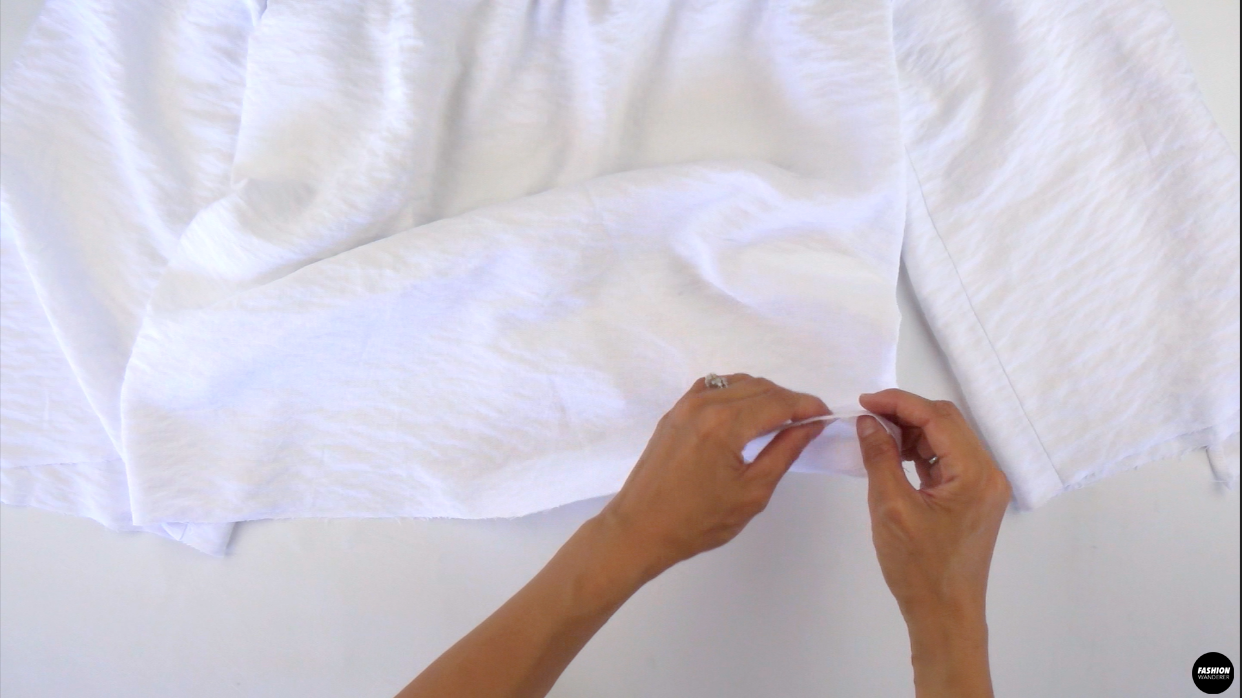
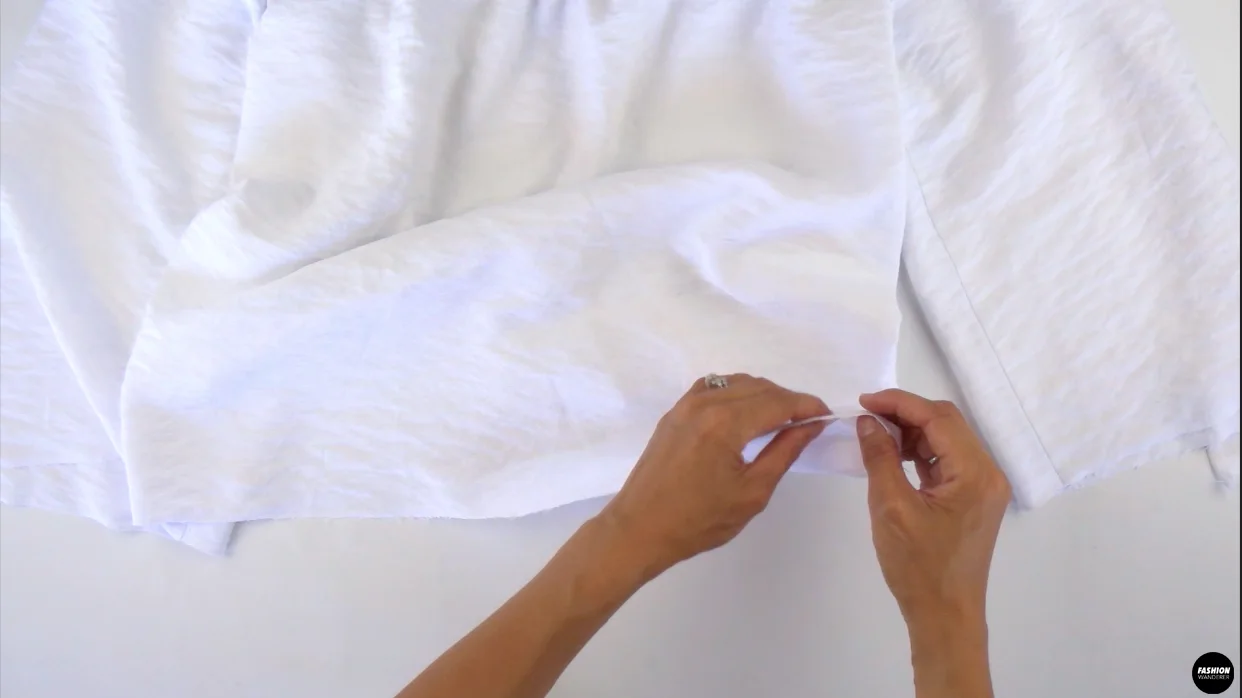
Lastly, double fold the hem of the bodice with ¼” width and straight stitch all around to finish.
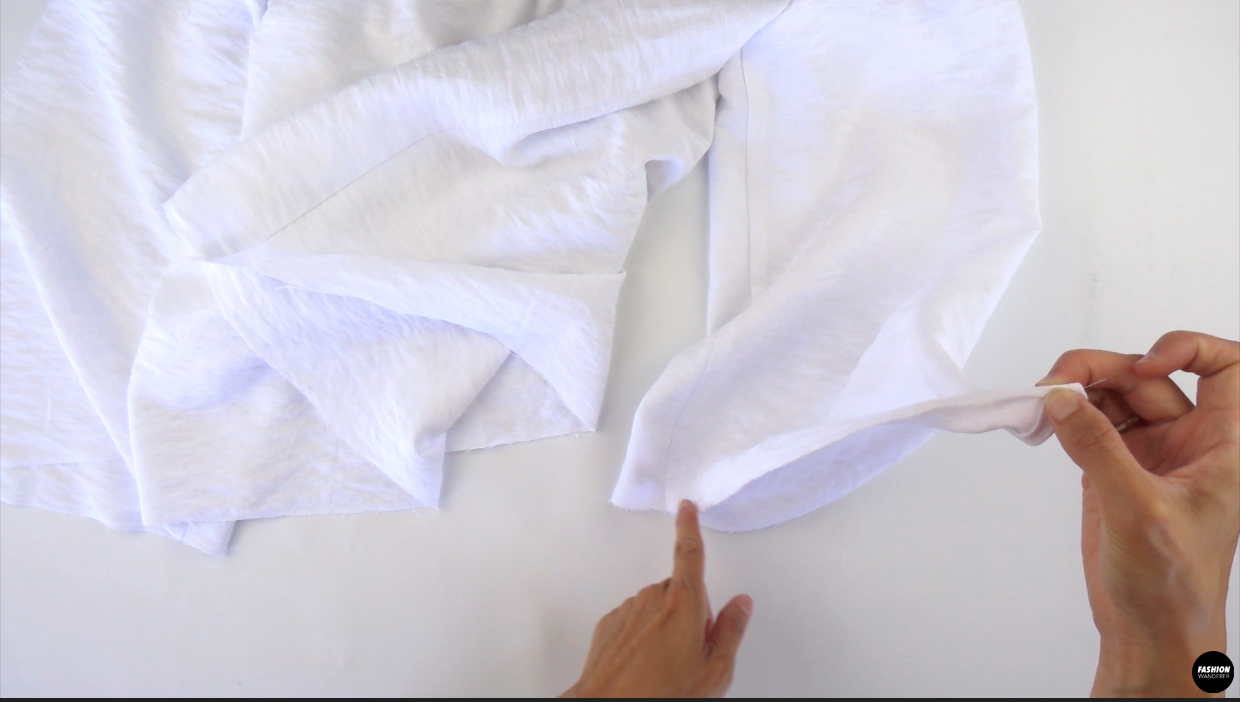
Double fold ¼” width along the sleeve opening and edge topstitch.
DIY Tie Sleeve Off The Shoulder Top Sewing Tips


Beautiful and clean off the shoulder neckline using elastic band and tie sleeve detail makes this top very fun to wear and easy to make. The sewing pattern and step by step instructions are all you need to accomplish this Parker top with success.
For beginners, read through the instruction booklet and sewing tips below to understand the garment structure and design elements prior to start sewing.
- Sewing Needle: For any lighter and medium cotton, sharp needle 90/14 size is preferred. Ensure the needle point is sharp and not outdated to make crisp holes, even length and prevent skipping stitches.
- Thread: It is best to use cotton thread for cotton or poplin fabric. However, universal polyester thread also works well for poly blend cotton fabric. But if possible, don’t sew 100% natural fibers with polyester thread.
- Stitches: Start the stitch length at 2.5mm for medium cotton or poplin fabric, but if the fabric is lightweight then adjust the stitch length between 1.5 to 2.5mm. It is great practice to straight stitch on separate fabric to test the stitches and evaluate any problems before starting on the actual garment.
- Elastic: The clean and easy way to attach elastic to the garment is by making casing or tunnel to insert the elastic band. Furthermore, it helps to evenly distribute the shirring naturally. Use a safety pin to slide the elastic through without twisting.
- Tension: The great starting point of medium weight cotton, poplin, or shirting fabric is a standard tension of 4. Depending on the weight, you may try between 3 and 4 tension to find the optimal setting for your machine.
In this tutorial, you will learn easy and quick ways to sew the Parker top using beginner-friendly sewing tips and methods. From elastic to overlock stitches, these techniques will help you to accomplish a professional looking top. Overall, you will improve your sewing skills to the next level with these basic stitches.
Choose either cotton or poplin to make this stunning and elegant Parker top to add to your DIY wardrobe. Start by downloading the sewing pattern, and review the instruction booklet and video to guide you in the right direction.


DIY Tie Sleeve Off The Shoulder Top
Looking for quick and easy sewing project to accomplish in an hour, but is also stylish enough to add to your DIY wardrobe? If you have less than a yard of remnant fabric, this Parker off the shoulder tie sleeve top is a stylish and modern top to add to your DIY collection.
The instruction and video tutorial offers in-depth steps to achieve a tunnel for elastic band to hug comfortably around the shoulder, slit open for adjustable tie sleeve to style however you want.
The Parker top sewing pattern is super beginner friendly, making it easily achievable within an hour. Furthermore, it offers practice to master straight stitch, overlock stitch, and confidence to join and use elastic band.
Follow the blueprint sewing pattern of this fun top to wear with jeans or skirt for both casual and date night looks.
Materials
- Parker Top Sewing Pattern
- Poly cotton Fabric ½ yards for 60” width or ¾ yards for 45” width
- 1” width elastic
Tools
- Sewing Machine
- Serger
- Thread
- Fabric Scissors
- Water Erasable Pen
- Measuring Tape
- Pins
- Iron
Instructions
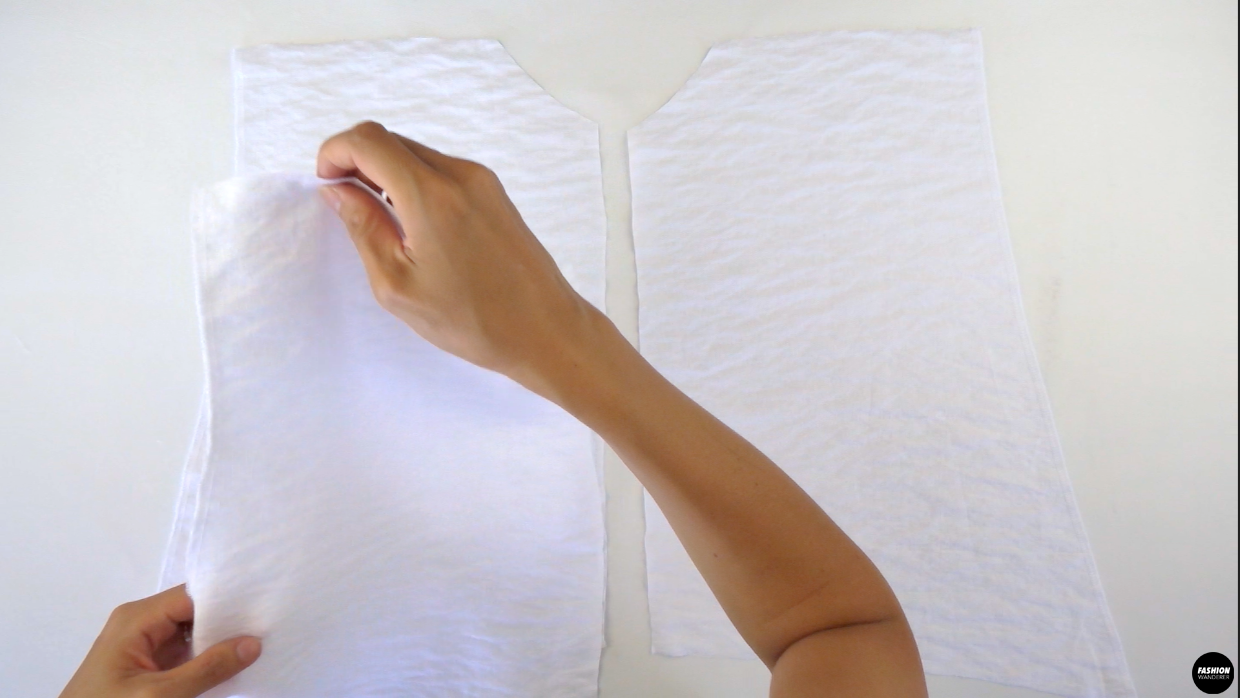
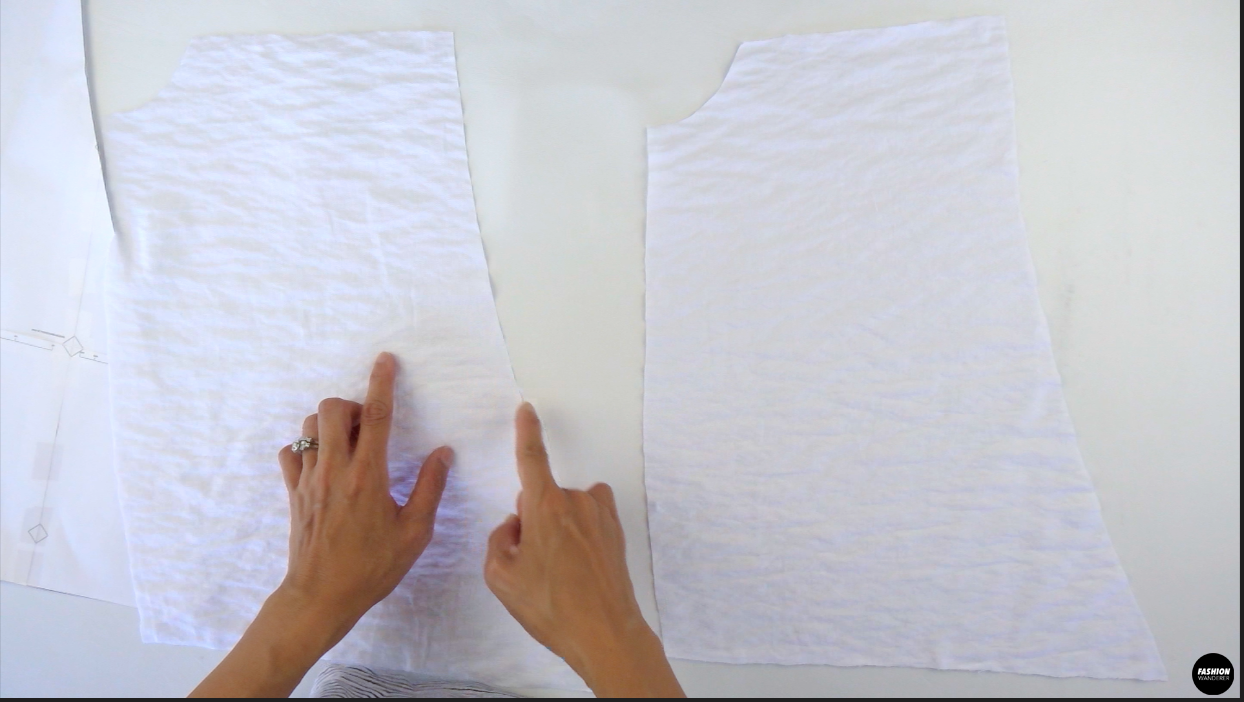
For this Parker tie sleeve off the shoulder top tutorial, start by assembling the pattern pieces:
- 1 Piece of Front Top
- 1 Piece of Back Top
- 2 Pieces of Front Sleeve
- 2 Pieces of Back Sleeve
- 2 Pieces of Neckline Opening
How To Sew Off The Shoulder Top
- Lay right side of the Front Top and Back Top facing each other, then match to pin along the side seam.

- Sew ⅜” width straight stitch on both side seams and overlock to finish.

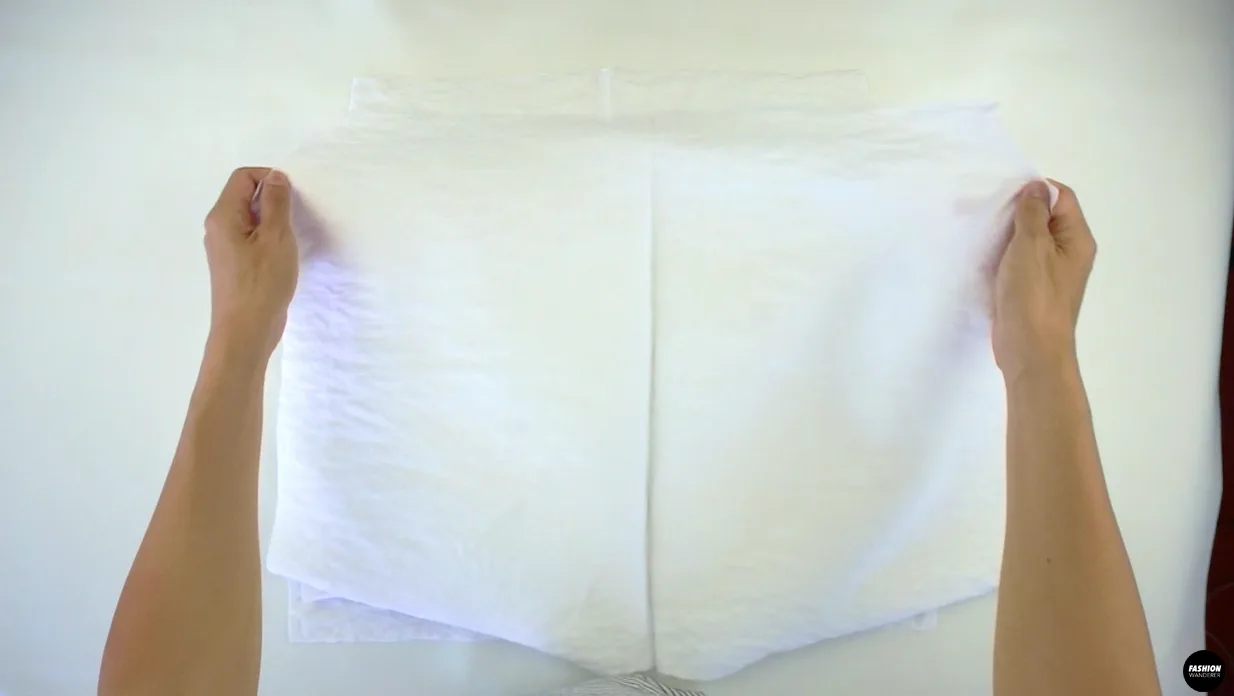
- Press the side seams facing toward the Back Top.

How To Sew Slit Tie Sleeve
- Overlock stitch along the long cut edges of the sleeve on the Front and Back Sleeve separately.

- Place the right sides of Front and Back Sleeve facing each other, then line up the overlock stitches together.

- Measure 6” up from the sleeve hem and pin along the cut edge till the neck opening.


- Straight stitch along the pin line with ⅜” width seam allowance. Press the seam open.
- Edge topstitch around the slit opening.


- Place right side of the Front Sleeve and Back Sleeve facing each other and pin.

- Sew underarm sleeve ⅜” width straight stitch and overlock to finish. Press seam toward the Back Sleeve.

How To Assemble Off The Shoulder Sleeve To Bodice
- Match side seams of the bodice and sleeve, then pin around the underarm.
- Straight stitch ⅜” width seam allowance and overlock to finish.
How To Make Tunnel For Elastic Neck Opening
- Place right side of the Neckline Opening pieces facing each other, then join to make one piece with ⅜” width straight stitch and overlock stitch to create a giant loop.

- Fold the Neckline Opening piece right side facing each other lengthwise and give a gentle press to indicate the total width.

- Slide right side of the strap and right side of the bodice to pin around it.

- Leave 2” opening, then sew ⅜” width straight stitch and overlock the edges.

- Prepare 1” width elastic that is 42” long.
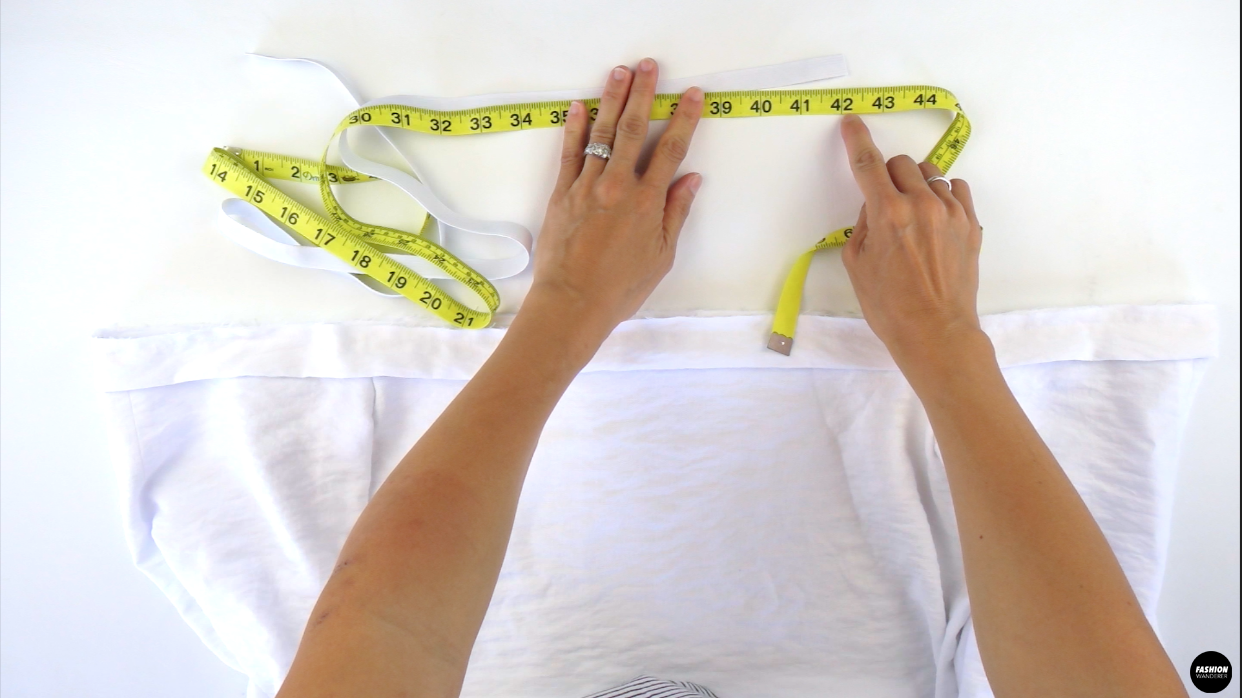

- Use safety pin to slide elastic through the one end of the tunnel to pop out the other side. Overlap the ends of elastic about ½” and zigzag stitch or create rectangular box to join.

- Close the 2” opening gap and overlock the ends. Press the overlock seams facing toward the hemline.
How To Complete The Tie Sleeve Off The Shoulder Top
- Double fold the hem of the bodice with ¼” width and straight stitch all around to finish.
- Double fold ¼” width along the sleeve opening and edge topstitch.
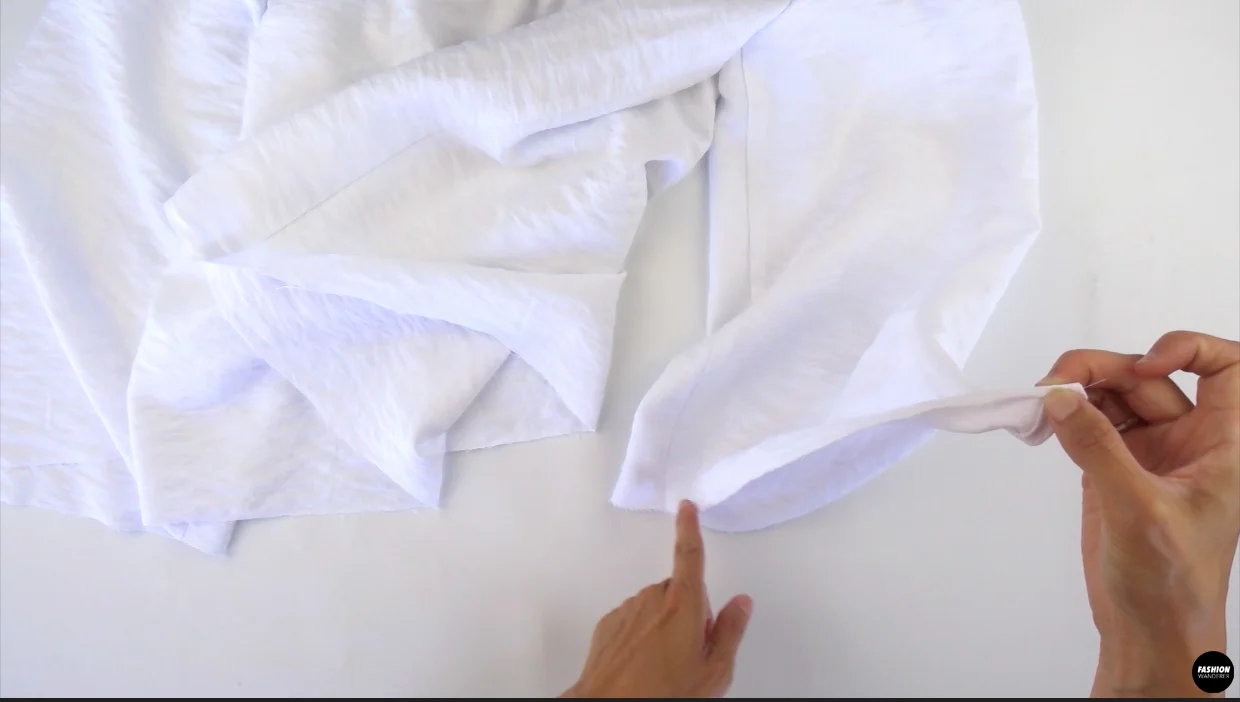
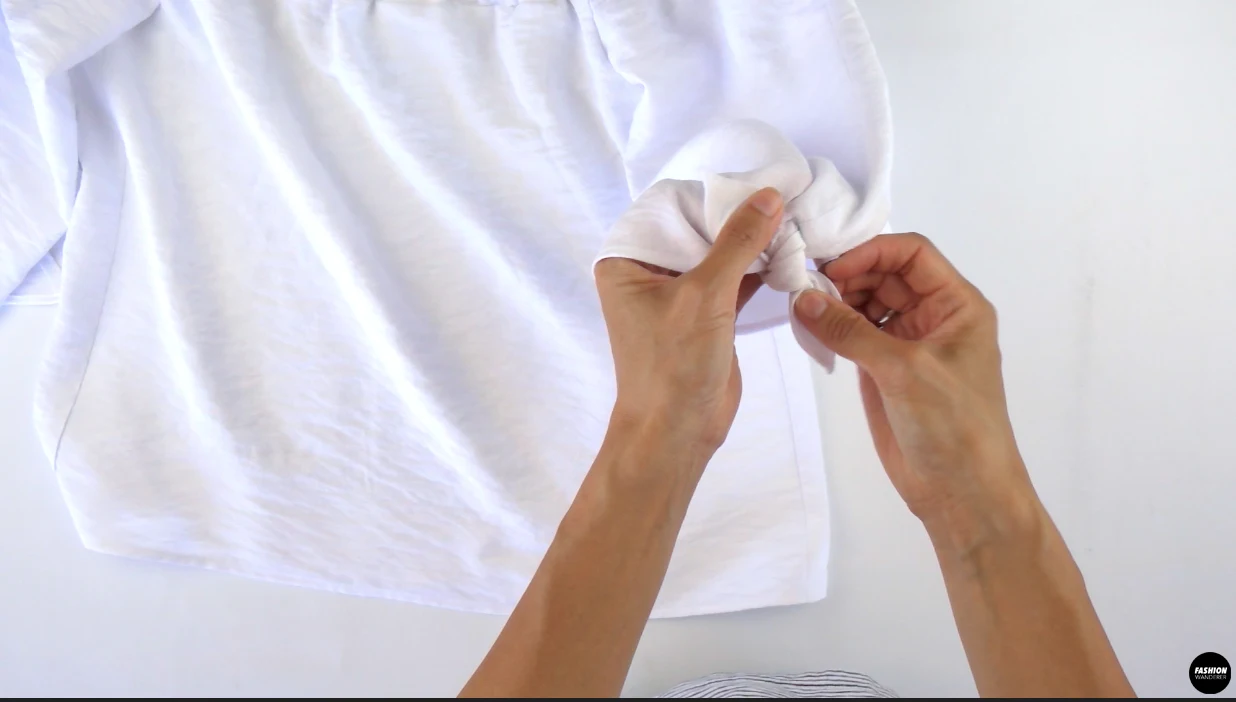
- Tie the sleeve ends and give a nice steam press to enjoy the Parker top!

Recommended Products
As an Amazon Associate and member of other affiliate programs, I earn from qualifying purchases.


Trendy, Affordable Sewing Patterns for All Sizes


Tie Shoulder Jumpsuit Pattern


Palazzo Pants Sewing Pattern


Pocket Overall Romper Pattern


Wrap Maxi Skirt Sewing Pattern


Tie Back Top Sewing Pattern
Cristofer Mcconnell
Saturday 20th of May 2023
I just like the helpful information you provide in your articles