
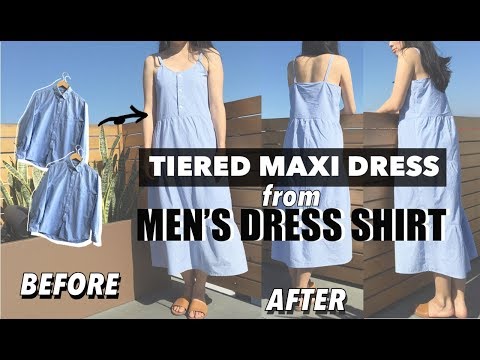
Do you have a statement dress in your wardrobe this summer? For this tutorial, we are going to learn how to refashion DIY tiered maxi dress from a men’s dress shirt.
Two- or three-tiered style dresses are wearable year round. The great news is that this tiered dress is easily made using men’s dress shirt upcycle ideas.


Select a cotton poplin material that also has a button-down placket. The step-by-step sewing instructions provide the basics for beginner and intermediate level skills to understand.
In fact, I often make a dress without a pattern. Follow along with these upcycle tutorials and you can also learn how to make a dress from men’s dress shirt.
Gather a couple pinstriped men’s dress shirts to start this refashion dress project today! Enjoy your tiered maxi dress from a men’s dress shirt because it’s easy to complete a stylish outfit to wear.
The subtle striped print pattern is easy to sew and also, fun to play horizontally or vertically of your choice. I’ve also seen mix and match red and white stripes with blue and white stripes on these dresses.


Whether you are thrift shopping or trying to downsize your wardrobe, there are so many fun ways to refashion a men’s dress shirt instead of donating or throwing them away. To be stylish and fashionable, you don’t need to break the bank.
The step-by-step sewing instructions provide the basics for beginner and intermediate level skills to understand. Use this upcycled clothing tutorial as a base and just have fun with it to create your own personalized tiered maxi dress to wear any occasion.
The elegant and breezy tiered maxi dress is perfect length and silhouette that you can pair with a wide-brimmed straw hat for a weekend getaway to your favorite beach or a raffia crochet belt bag for a casual brunch date.
Grab your men’s button down shirt and let’s get started!
More men’s shirt into dress upcycle designs:

Tiered Maxi Dress From Men's Dress Shirt
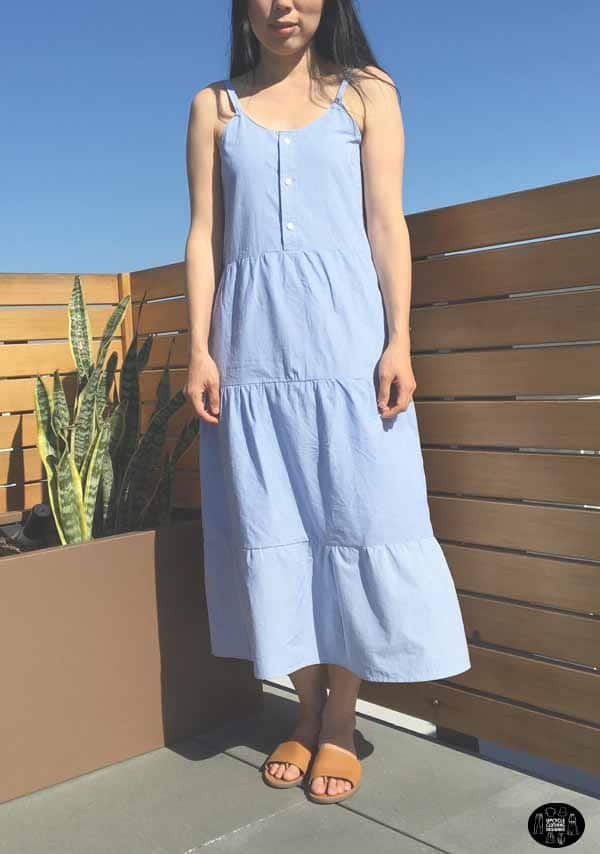
This maxi dress has a modern and feminine style that you can wear with flip flops or espadrille wedges and a great alternate piece for swimsuit cover-ups.
I personally picked the light blue and white pinstripe shirt that I got from a local thrift store. You can simply use a solid colored shirt or other multi pinstripe print pattern.
The subtle striped print pattern is easy to sew and also, fun to play horizontally or vertically of your choice. I’ve also seen mix and match red and white stripes with blue and white stripes on these dresses.
Materials
- 2 Each Men's Button Down Shirts
Tools
- Sewing Machine
- Fabric Chalk
- Measuring Tape
- Ruler
- Scissors
- Seam Ripper
- Straight Pins
Instructions
- First, lay the shirt flat and remove the pocket. Start from one corner and work around to detach the pocket carefully.
- Then, cut off the sleeve, and the neck collar. Follow along the seam and don’t worry about the bulky French seams because they will also be removed.
- Open the shoulder seam, and then the side seam.
Cut along the back yoke.
How To Make Top Bodice Of Maxi Dress From Men’s Dress Shirt Without Pattern
- For the front piece of the top bodice, grab your favorite camisole top to use as a sizing reference. Fold it in half and pin the side seams together to secure. Measure 8” down from the side seam and mark with a pin.
- Place the camisole along the center front of the button placket and trace with a chalk mark.
Sewing tip: Since the camisole that I’m using is a stretchy knit fabric, you want to adjust slightly for the ridged woven fabric. As a result, I added ½” side seam allowance and traced a straight line towards the waistline. - Add ¼” seam allowance and connect the dotted line along the neckline and armhole. Cut along the line.
Next, turn the front piece and match the center front to copy the other half. - Now, you have completed the front piece of the top bodice! Button to secure.
Sewing tip: Pin it first, and then just cut instead of tracing again. - For the back piece of the top bodice, use the back piece of the men’s dress shirt. Place the front piece on top and match the side seams together. Then, cut along the waistline and also both side seams.
How To Make Tiered Skirt Of The Maxi Dress From Men’s Dress Shirt
- To make the tiered skirt of the maxi dress, use a seam ripper to remove the buttons from the men’s dress shirt.
Helpful hint: You will need the button placket on one side, so make sure you don’t damage the fabric. Use a seam ripper to open up the right side of the button placket. - All hemlines on men’s dress shirt have a slightly curved line that we don’t need for this tutorial. Draw a straight line and cut it off.
- Do the same on the other side. Open the placket and cut the hemline along a straight line. Because the other side has a buttonhole, we are going to cut close to the hole and remove the rest of the placket.
- Next, grab the back piece of the dress shirt. Remove the shirttail hem by drawing a straight line and cutting across.
- The first tier of the skirt is 44” long by 13 ½” tall.
Next, remove the buttons from the other shirt. Draw a straight line on both sides and cut. Measure 12 ½” from the cut line and mark with chalk. Draw a straight line and cut along the dotted line. - Flip the piece and place it on the other side of the shirt to trace and cut.
- Use a seam ripper and open up the button placket on both sides. Do the same as before and remove the buttonhole placket. With the remaining back piece, draw a straight line along the hem and cut.
- Measure 26”, mark with chalk, and then 12 ½” up and mark again. Connect the dots and draw a 26” by 12 ½” rectangle for the second tier skirt piece.
- The second tier of the skirt is 52” long and 12 ½” tall.
Next, measure 10” and mark with chalk. Connect the dots with a straight line and cut. This is your third tier piece for the skirt that is 20” by 10”. - For the remaining third tier pieces, I used the 4 sleeves. Cut out the cuff and open the underarm seams.
- Draw a straight line on both sides to create a 10” by 14” rectangle. You will end up with 4 pieces that are 10” by 14”, plus one piece that is 10” by 20”. This completes the circumference of the third tier skirt.
- The third tier of the skirt is 76” long and 10” tall.
How To Sew Tiered Maxi Dress From Men’s Dress Shirt
- To sew the top bodice, lay the right side of the front piece and the wrong side of the back piece together. Sew ¼” side seam, and close with an overlock stitch. Then, flip the top inside out.
- To sew them together with the tiered skirt of the dress, join all sides of the first tier with ¼” seam allowance.
- To make shirring for each tier, adjust the tension and stitch width on the sewing machine. Then, topstitch ¼” along the top of the tier.
Sewing tip: I changed my tension to 6, and stitch width to 4 or 5 to make the hand shirring process easier. Pull the back thread to evenly distribute the shirring along the skirt portion. Pull gently so you don’t snag the thread by accident. I hold the thread with my fingertips to have more control. - After completing the shirring around the first tier, fold the layer in half with the right sides touching, and sew ¼” seam allowance.
- Next, slip the skirt piece through the top bodice with the right sides facing each other. Match both side seams and pin to secure.
Sewing tip: Double check the width of the top piece and adjust to increase or decrease the amount of shirring.
Helpful hint: Always point the seam backward. Pin around the opening so it’s easier for you to join the seams. - For the second tier, follow the same steps. Attach the three panels with a ¼” side seam. Adjust the tension and stitch width to make hand shirring. Then, topstitch ¼” along the top of the tier.
- After hand shirring the second tier, close the skirt by sewing ¼” seam allowance. Double-check the width of the opening of the first skirt tier.
- Slip the second tier over the first tier with the right sides facing each other. Match the side seams and pin to secure and sew ¼” to attach the first and second together.
- For the third tier, follow the instructions for the previous tiers. Join the side seams together to make a long panel, and then sew ¼” topstitch to make hand shirring. Because the last tier was so long, I divided the pieces in half to make the hand shirring easier.
- Place the right sides of the third tier together, then sew ¼” topstitch to secure.
- Slip the third tier over the second tier with the right sides facing each other. Match the side seams, pin to secure and sew ¼” to attach the layers together.
- To finish the hemline, twice fold a ¼” width and edge topstitch.
How To Make A Lining For A Dress
- Because the material of the men’s dress shirt was so sheer, I decided to add a cotton linen lining.
- Flip the dress inside out and lay flat on the fabric lining. Copy the front and back from the top bodice down to the bottom of the second tier.
- Sew ¼” width side seams to attach the front and back lining together.
- Fold ¼” width two times, and then edge topstitch to cleanly finish the hemline of the dress lining.
How To Finish The Tiered Maxi Dress From Men’s Dress Shirt
- To make the shoulder straps, cut 2 pieces of ¾” by 13” straps using leftover scraps.
Fold the straps in half and topstitch ¼”. Use a loop turner to flip the straps inside out, then iron flat. - Slip the dress lining over the outer garment with the right sides facing each other. Place the shoulder straps in between the inner and outer layers, then pin to secure.
- Pin along the neckline, armholes, and back, then sew ¼” width topstitch.
- Flip the dress inside out and sew ⅛” edge topstitch along the top of the dress.
- Lastly, attach the back straps and make sure they are about 6"-7” apart from each other.
Helpful hint: Double-check by using your camisole to verify the right placement of the back shoulder straps.
Notes
I found 2 identical blue and white pinstriped men’s dress shirts at a local thrift store. I thought they would look adorable for this tutorial.
You can be creative and go with multicolor mixed patterns, or even a red and white pinstriped shirt of your choice.
Most importantly, select a cotton poplin material that doesn’t stretch at all.
Recommended Products
As an Amazon Associate and member of other affiliate programs, I earn from qualifying purchases.


Would you make this tiered maxi dress from a men’s dress shirt?
Share your favorite refashion dress inspirations with me!
#FashionWanderer
Trendy, Affordable Sewing Patterns for All Sizes


Tie Shoulder Jumpsuit Pattern


Palazzo Pants Sewing Pattern


Pocket Overall Romper Pattern


Wrap Maxi Skirt Sewing Pattern


Tie Back Top Sewing Pattern