
This silk skirt had a beautiful burnout pattern that I thought would look super sexy as a top. I searched around for some inspiration, and decided on making an upcycled skirt to halter neck top.
Originally, I fell in love with the lace pattern, but after wearing the skirt a few times it was time for a change. I landed on this design for the transformation, however there are refashion skirt into top projects that are worth checking out.


By transitioning the skirt into a halter neck top, I felt like there were more outfit opportunities. From work to date night, this refashioned top is great for many occasions.
In fact, I loved the neckline finish so much that I took the inspiration a notch further. Check out how to cut a t-shirt into halter top!


The sheer chiffon lace included a black lining, so therefore I didn’t need to worry about adding one fore this project. The halter neckline was a bit more challenging to execute, however the steps in this tutorial make it easy to turn a skirt into a halter neck top.
Continue reading for the detailed steps and also an instructional video for this refashion project.

I have executed countless upcycled clothing tutorials to breath new life into old clothes. Recycle your old clothes into up-to-date styles.
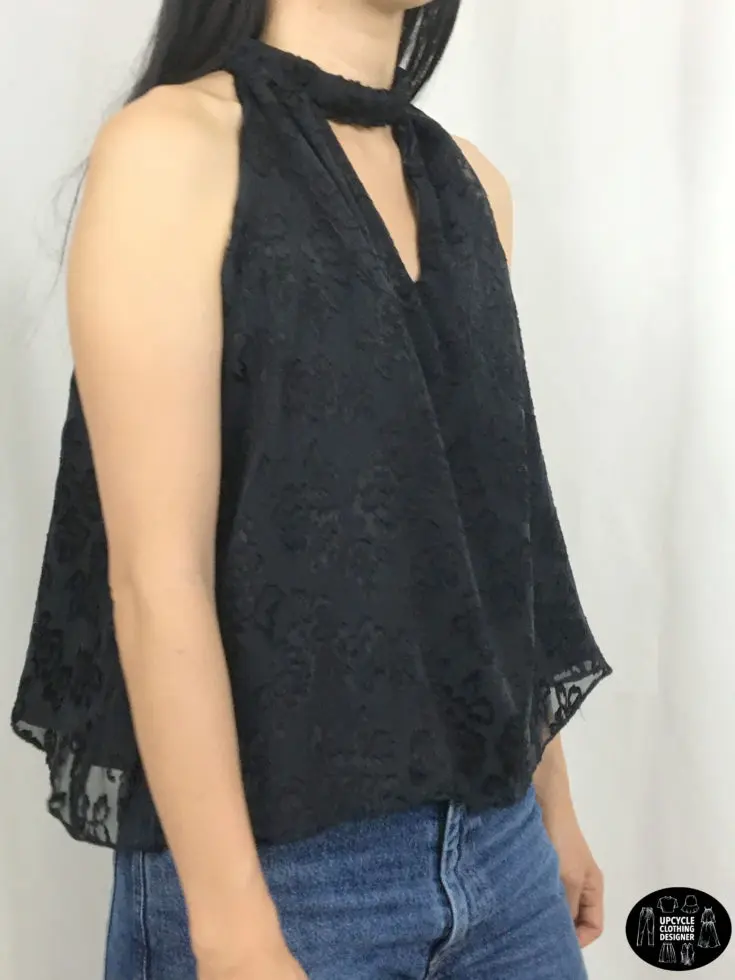
I love the floral pattern because it gives a sexy and flattering look to the high neckline and deep slit. Follow along and make your own upcycled skirt into a halter neck top by following the simple instructions.
More skirt into top upcycle designs:

Upcycled Skirt To Halter Neck Top
I had this old silk skirt with pretty floral burnout pattern that I don’t wear anymore. Lighten up the skirt by transforming it into a halter date night top that can be worn to work and also for going out.
I fell in love with the lace pattern, and felt like it would be a perfect upcycle skirt project for a sexy halter neck top. The sheer chiffon lace included a black lining so I don’t need to worry about what to wear underneath.
The neckline was challenging to execute, however the steps in this tutorial clearly demonstrate how to turn a skirt into a halter neck top. Follow along and upcycle your skirt into a top with these simple instructions.
Materials
- Old Skirt
Tools
- Sewing Machine
- Fabric Chalk
- Measuring Tape
- Ruler
- Scissors
- Straight Pins
Instructions
- Fold the skirt in half and measure 21” up from the hemline; mark with chalk. Use the ruler to draw a straight line across to the side seams.
- To make the keyhole neckline, measure 1” away from the folded seam and mark with chalk. Then, measure 5” down from the chalk line and mark. Draw a straight line to create a triangle shape, and cut to make the keyhole.
Helpful hint: Feel free to adjust the length and width of the keyhole neckline as you wish. - To make the armhole, measure 7” away from the folded seam and mark with chalk. Measure 8 ½” along the side seam and mark. Use the ruler to draw a straight-line. Then, pin along the chalk mark to secure the inner lining and cut the folded triangle shape.
- To make the halter neckband, use the discarded waistband piece.
Measure 3 ¼”, mark with chalk and cut along the chalk mark. - To sew the halter neck top, flip the front layer and back layer inside out. Match the right sides facing each other. Pin to secure the lining, and then sew ¼” topstitch along the neckline and armhole.
- To make pleated shoulder straps, fold inwards about ½” towards the center front and pin. Do the same on the other side, and then sew to secure the first pleat. Next, add a second pleat by folding ¼” towards the center front and pin. Do the same on the other side. Verify that both sides are the same width, and then adjust if necessary. Sew both sides to secure the second set of pleats.
- To attach the halter neckband, mark the center of neckband and lay it flat around the neckline. Pin to secure both pieces together and topstitch.
- Next, wrap the neckband around, pin to the back piece, and then sew to secure. Fold ¼” and than fold in half again to meet the neckline. Topstitch to close all the way around the neckband.
Sewing tip: Make sure to insert the seam allowance inside the neckband. Simply pin along or use an iron press to help sew easily. - To make a closure for the halter neck, locate the center back placement. Leave about ½” overlap, and then cut off any extra fabric.
- Use the original button from the skirt as the new halter top closure. Because the material is silk chiffon, I didn’t cut a buttonhole for this top. Instead, I added a piece of black elastic to make a small loop for the button closure.
- Fold the elastic in half, insert the loop in-between the neckband, and then ¼ topstitch to secure. Finally, hand sew the button on the other side and you are set to go!
Notes
I love the floral pattern because it gives a flattering look to the high neckline and deep slit. You can pair this halter top with dark washed skinny jeans for casual date night or match with a pencil skirt for a fancy dinner date.
Recommended Products
As an Amazon Associate and member of other affiliate programs, I earn from qualifying purchases.


Trendy, Affordable Sewing Patterns for All Sizes


Tie Shoulder Jumpsuit Pattern


Palazzo Pants Sewing Pattern


Pocket Overall Romper Pattern


Wrap Maxi Skirt Sewing Pattern


Tie Back Top Sewing Pattern