
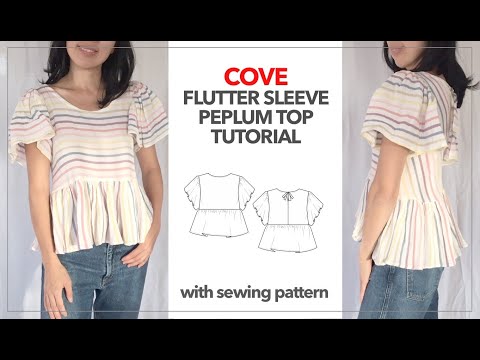
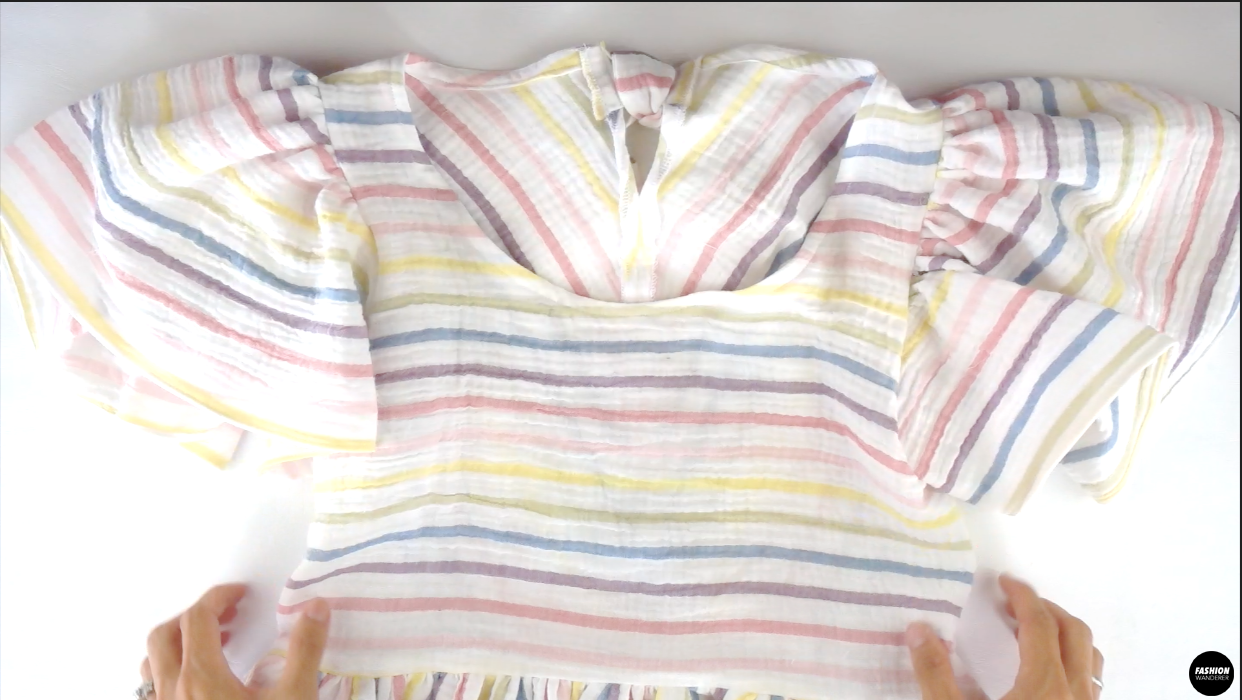
Looking for new sleeve ideas to sew other than regular short sleeves? The Cove top features flowy flutter sleeves with peplum hemline to make a super adorable top that is easy to pair with various outfits.
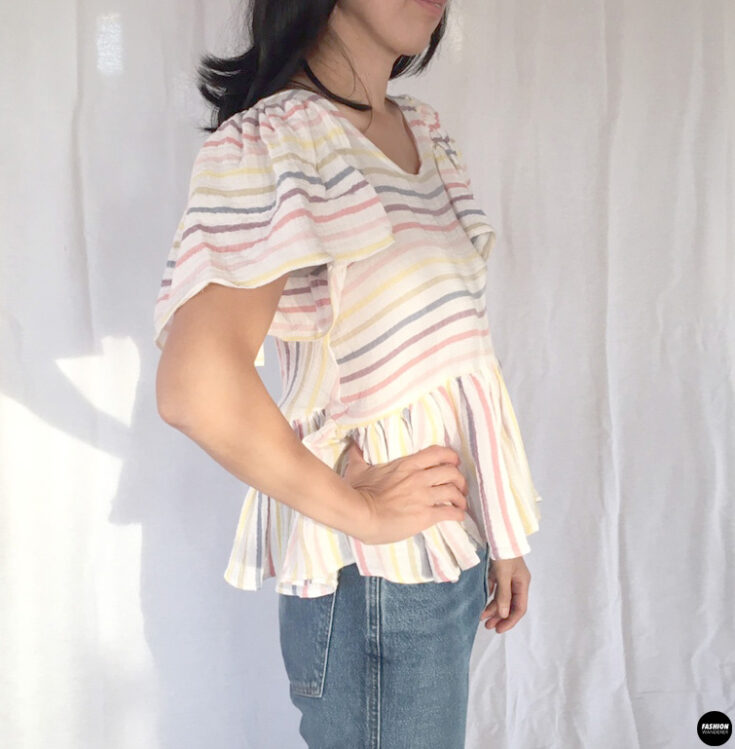
This top has a loose and boxy silhouette that looks good in a wide range of body types. Made with crinkled gauze fabric, however it can alternatively be made in rayon, cotton, or linen, and is the perfect garment to make if you only have 1 yard of fabric leftover.
How to make flutter sleeve peplum top? Hand wash and tumble dry on low heat, lay flat to dry on a towel or simply hang to dry crinkled gauze fabric prior to cutting and sewing. This step is necessary because gauze or double layered gauze tends to shrivel and shrink on the first wash.
Once the fabric is ready to cut, download the Cove top sewing pattern. Every Fashion Wanderer pattern already includes ⅜” or 0.95 cm width seam allowance. Review the pattern and instruction to start the sewing project.
From hand gathering around the wide sleeve to peplum hemline, this cute boxy top is super easy to sew and beginner-friendly. To complete the design elements, follow the Cove blueprint to make a perfecting fit garment.
Create adorable and easy to wear flutter sleeve peplum top using the step by step instructions and video tutorial. It will brighten your DIY wardrobe and be able to dress up with skinny jeans and sandals for both spring and summer.


DIY Flutter Sleeve Peplum Top


You will love this DIY flutter sleeve peplum top because…
- Cove blouse sewing pattern includes US size from 0 to 18 for wide range of fit.
- Manual hand gathering along the sleeve and peplum hem.
- Clean finish neckline by attaching self inbinding.
- Easy way to use double fold hemline for high quality finishing.
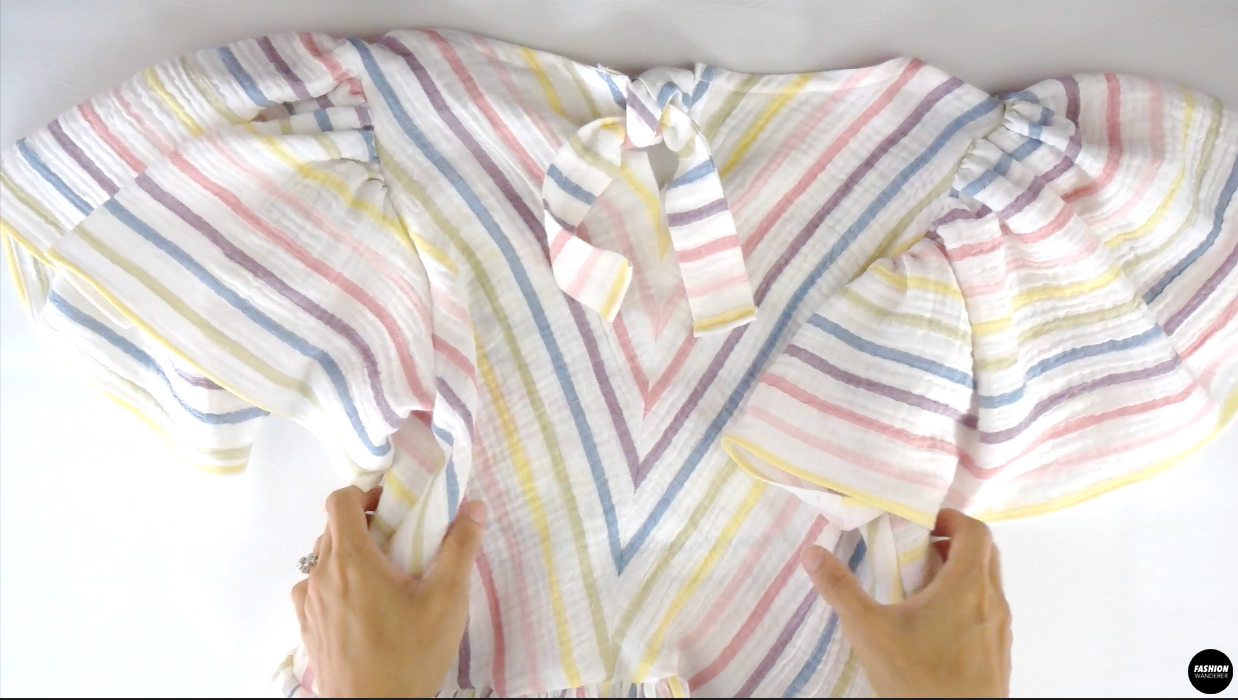
- Sew keyhole at center back for closure.
- Master straight and overlock stitch on crinkled gauze fabric.
This cute and casual flutter sleeve peplum top includes manual gathering, neck inbinding, tie strap closure at back, and standard hemming method.
If you are looking for a beginner-friendly sewing project, this is the right pattern for you to learn tips and tricks to accomplish a high-quality garment.
Use your bust and chest measurement to find the right size using our size guide. Be aware that this top is loose fitting, therefore give a nice wiggle room for best outcome.


How to make flutter sleeve peplum top
Every Fashion Wanderer sewing patterns includes detailed instructions to assemble pdf sewing patterns, pictured steps, and video tutorial.
The garment is made with fun colorful pastel stripes which consciously match the stripes on the back piece. However, if using solid or other print such as dot or floral, matching the print is not necessary.
Always prepare ½ to ¾ extra yardage to practice stitches, stitch length, and tension. Especially when using crinkled gauze, test the prewash method to prevent shrinkage.
Prepare the sewing machine by threading properly and use the correct sewing needle to avoid any issues like breaking thread and tangled bobbins.
Refer to the instruction booklet for more sewing tips to product the best results.
DIY Flutter Sleeve Peplum Tutorial Materials:
- Cove Top Sewing Pattern
- Crinkled Gauze Fabric ¾ yard for 60” width or 1 yards for 45” width
- Sewing machine
- Serger
- Pins
- Thread
- Pins
- Loop Turner
- Iron
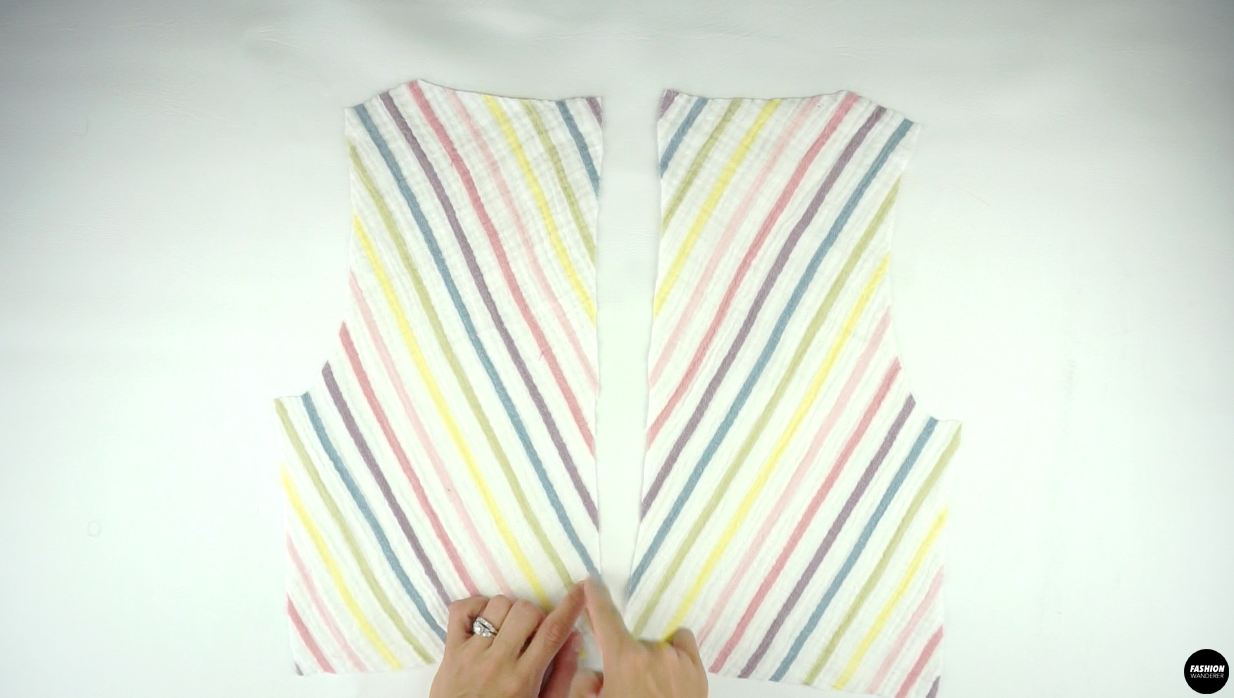
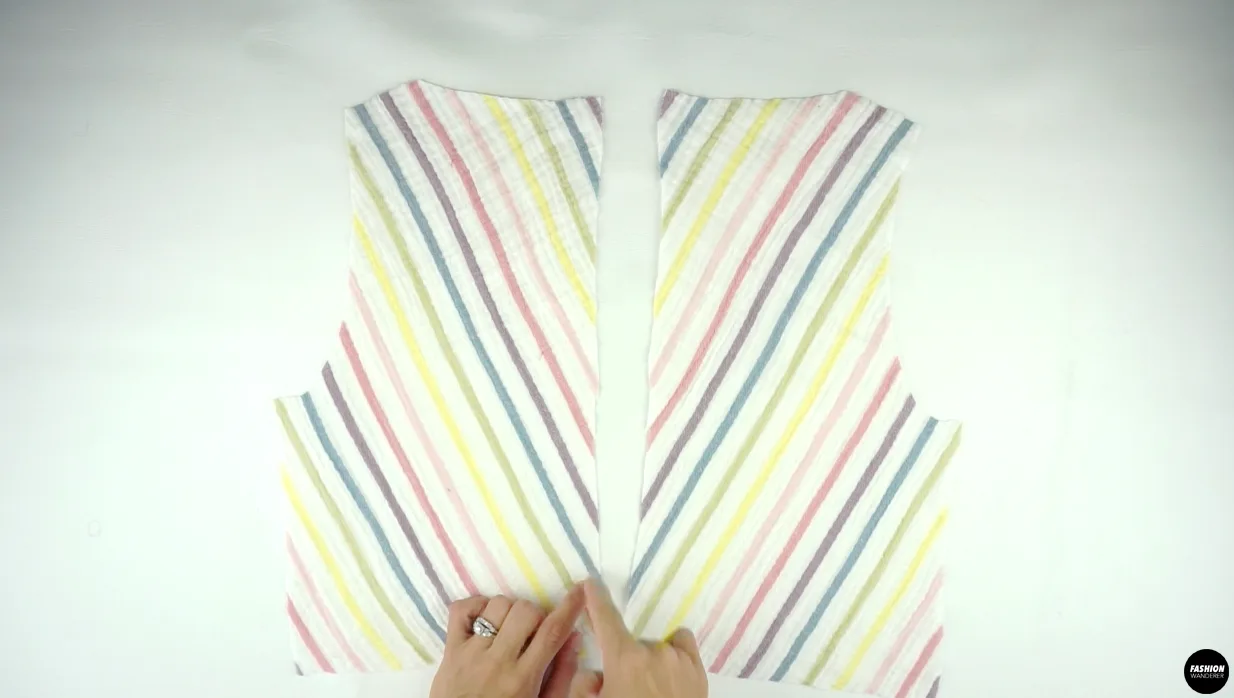
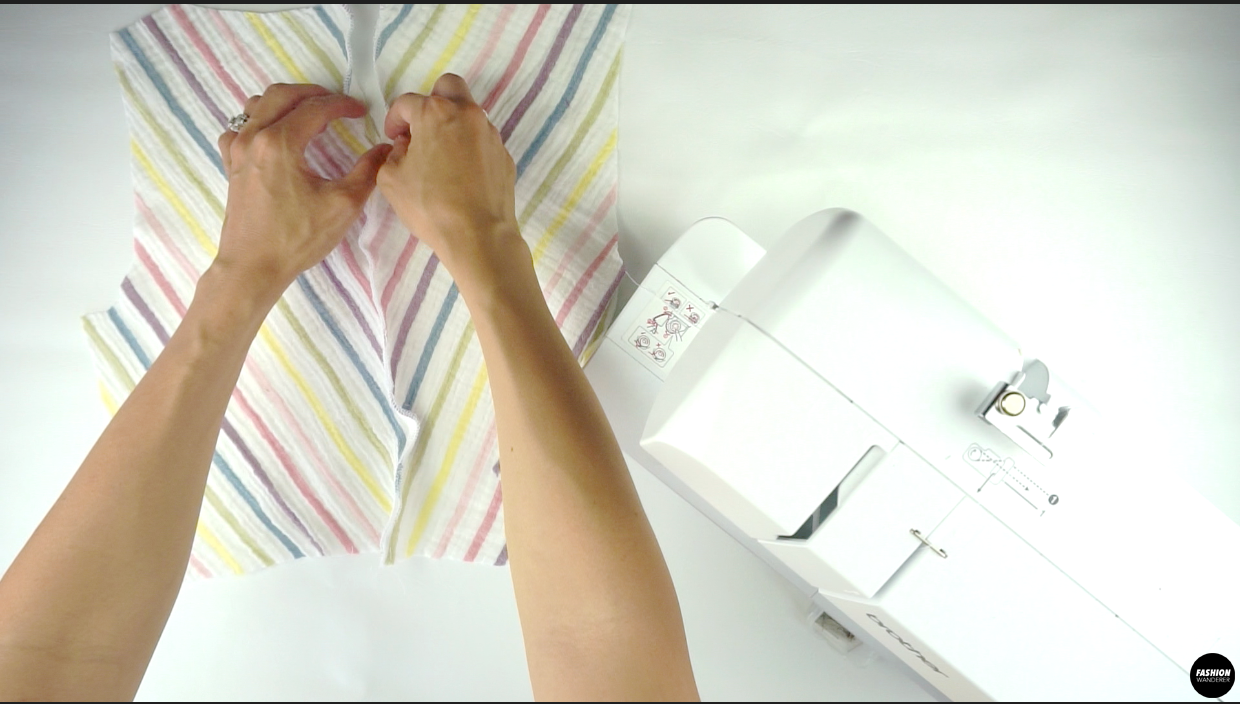
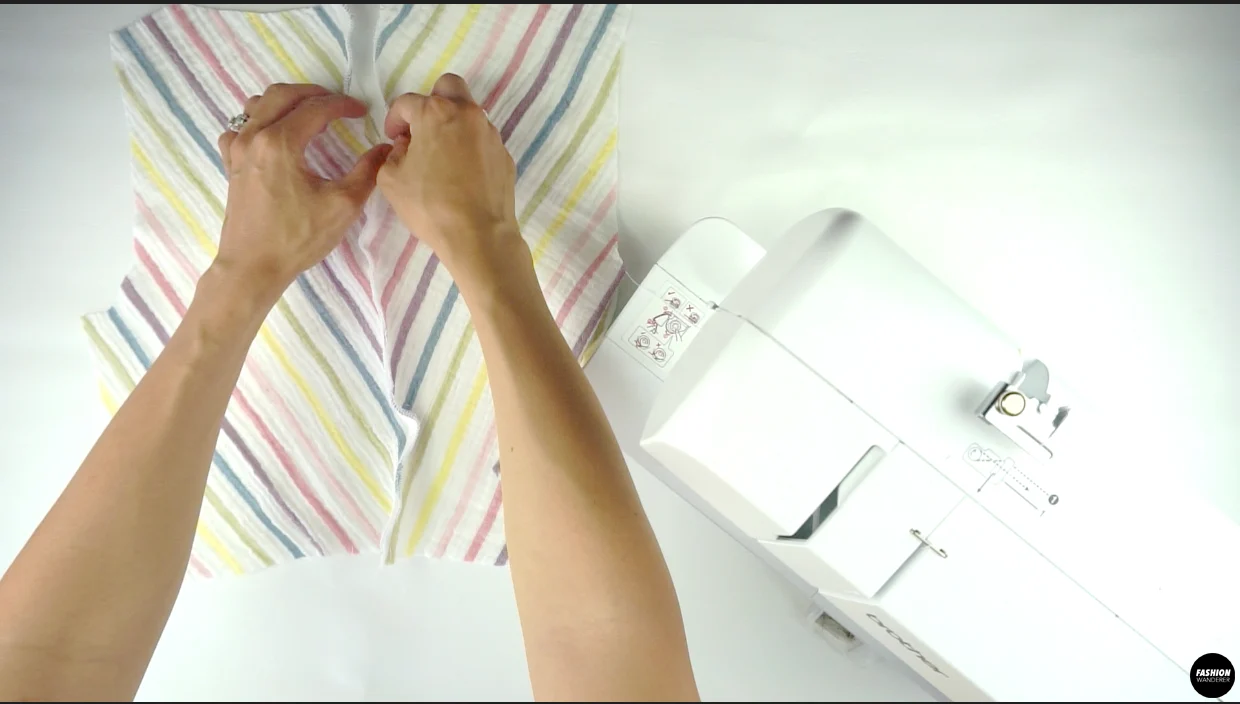
Start by overlock stitching the center on both sides of the Back Top pieces.
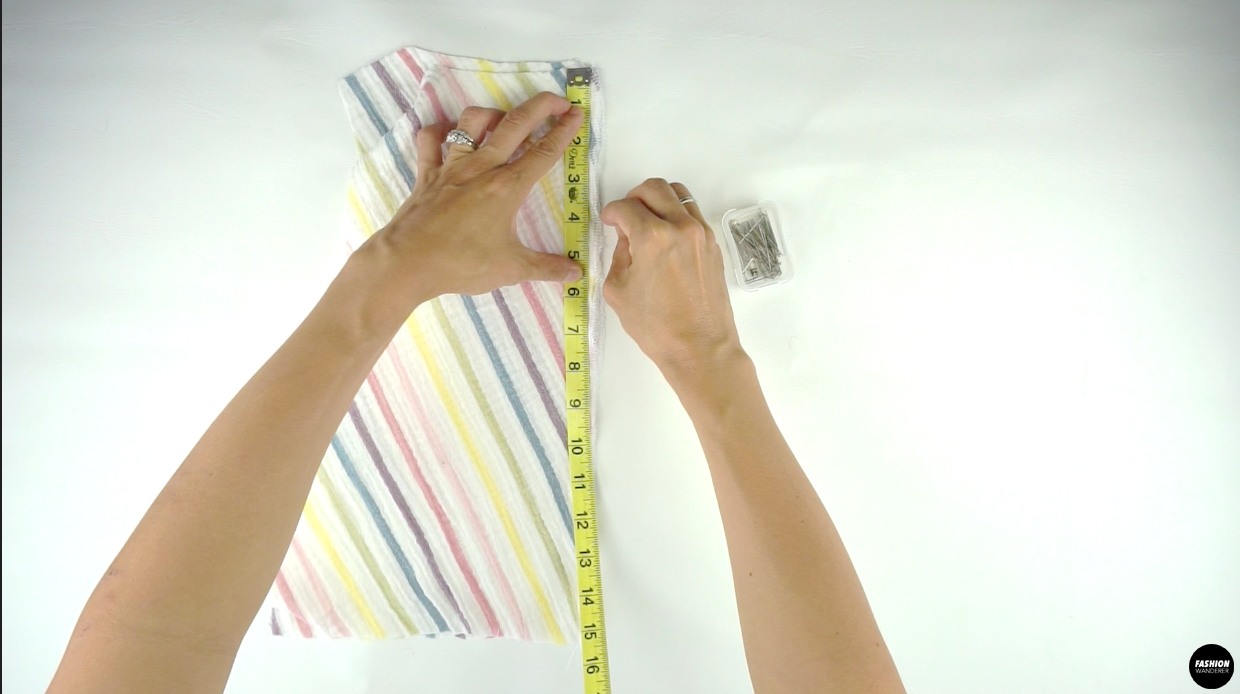
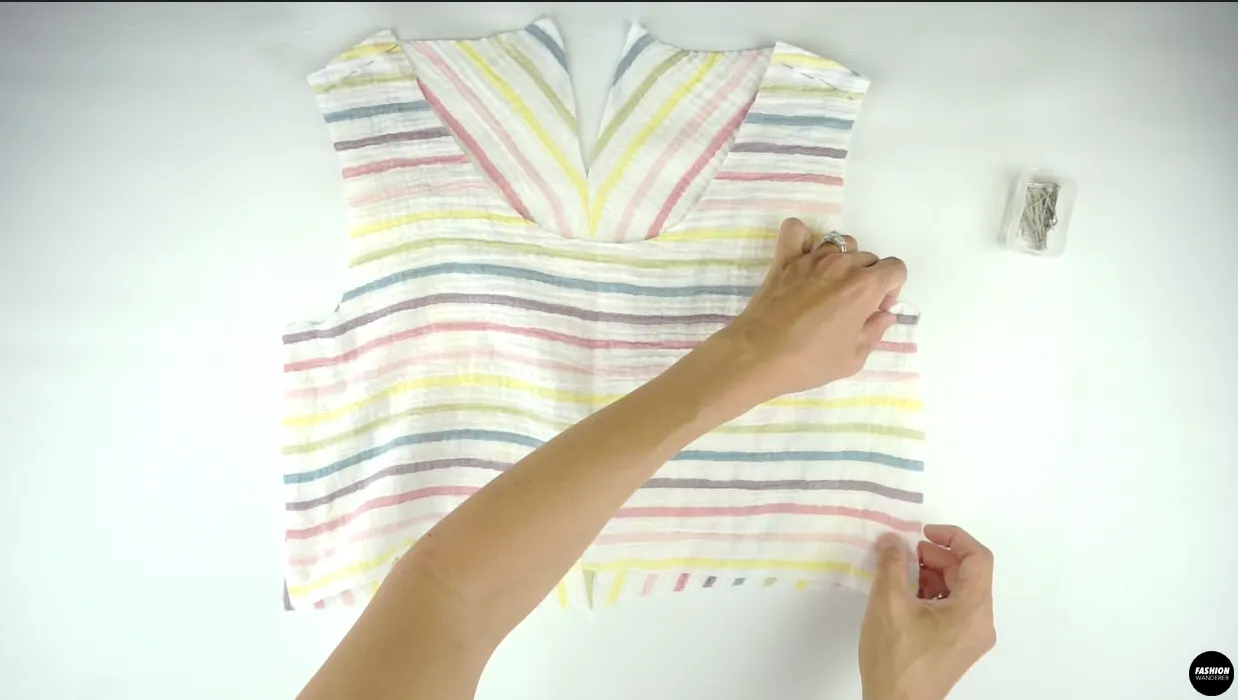
Face both Back Top pieces right side together and measure the keyhole length to pin.
Close the center back and leave the keyhole position. Press the seam open from neckline to waist.
Place Front Top and Back Top facing right sides together. Close the shoulder and side seam with straight stitch and overlock stitch.
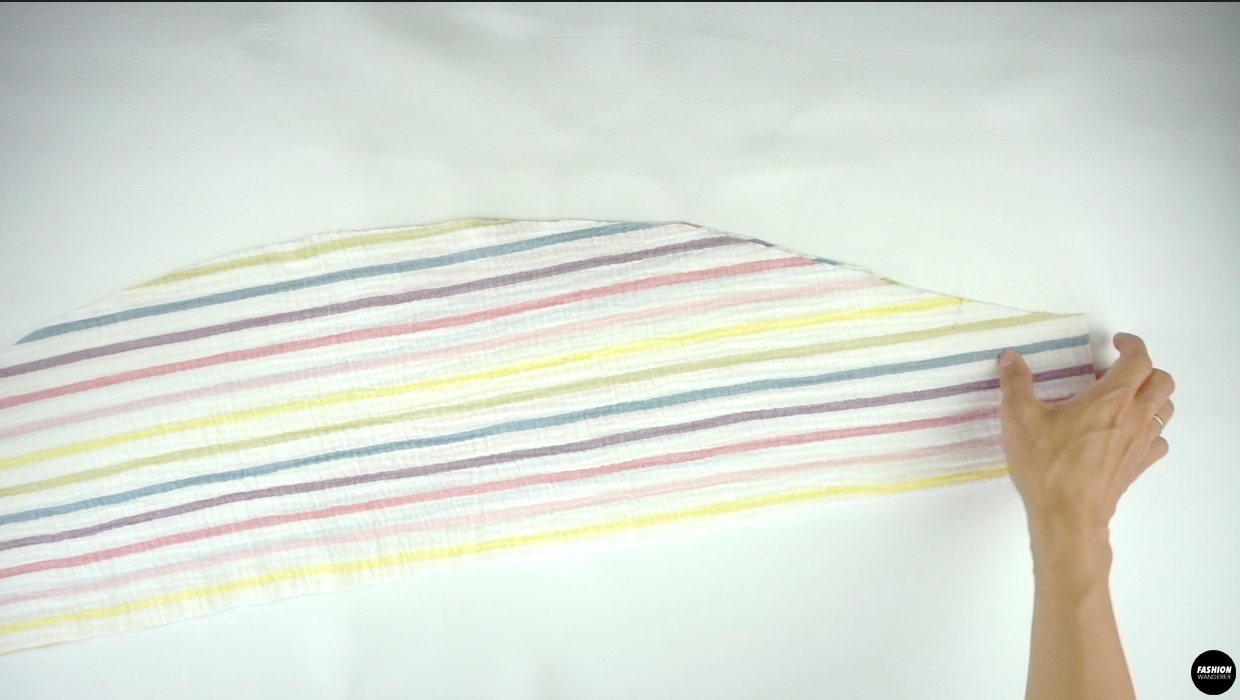
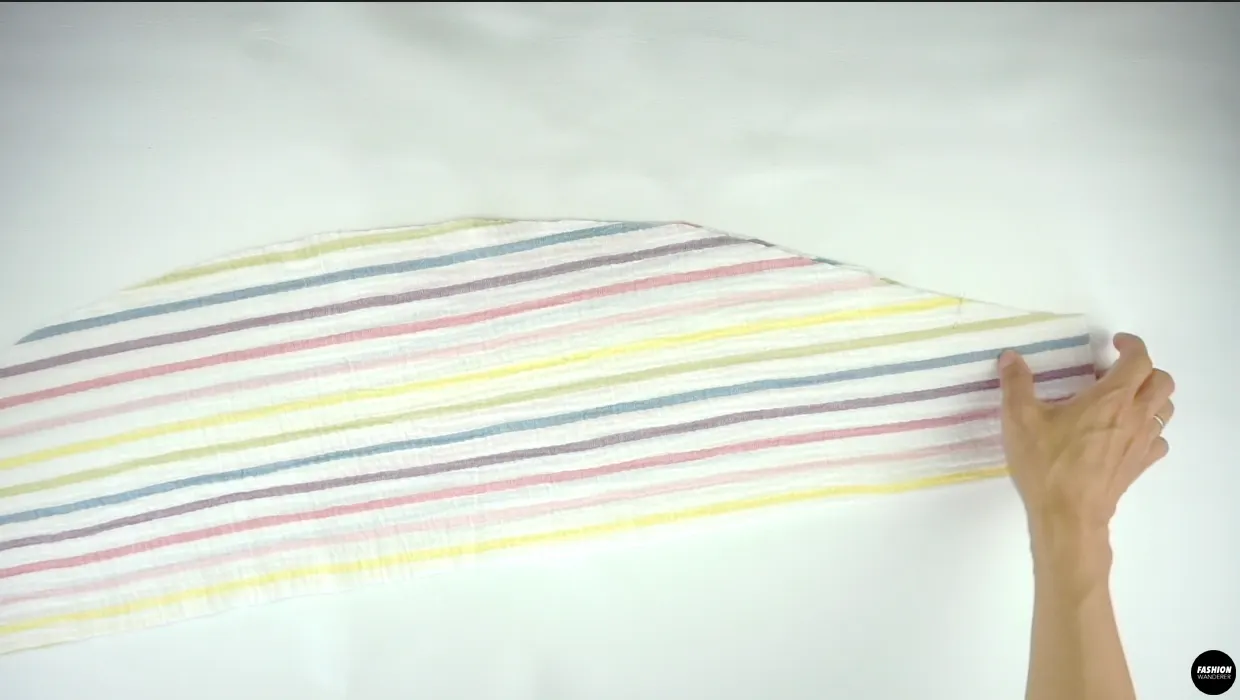
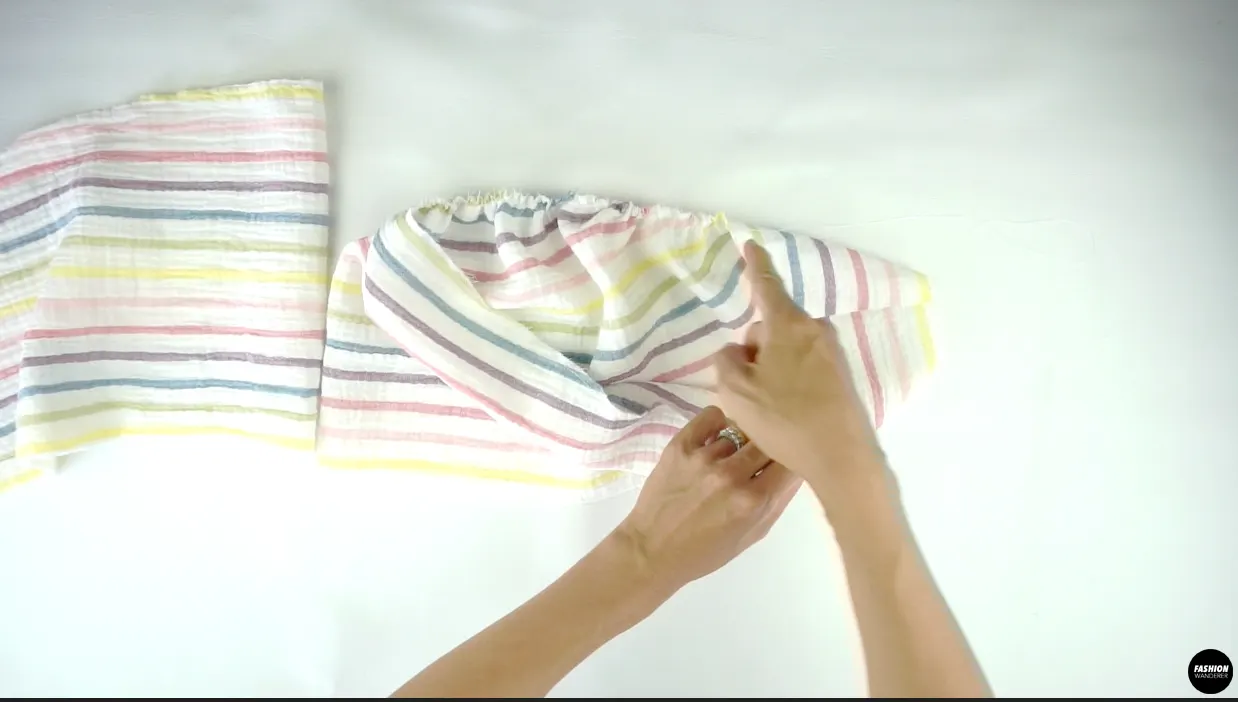
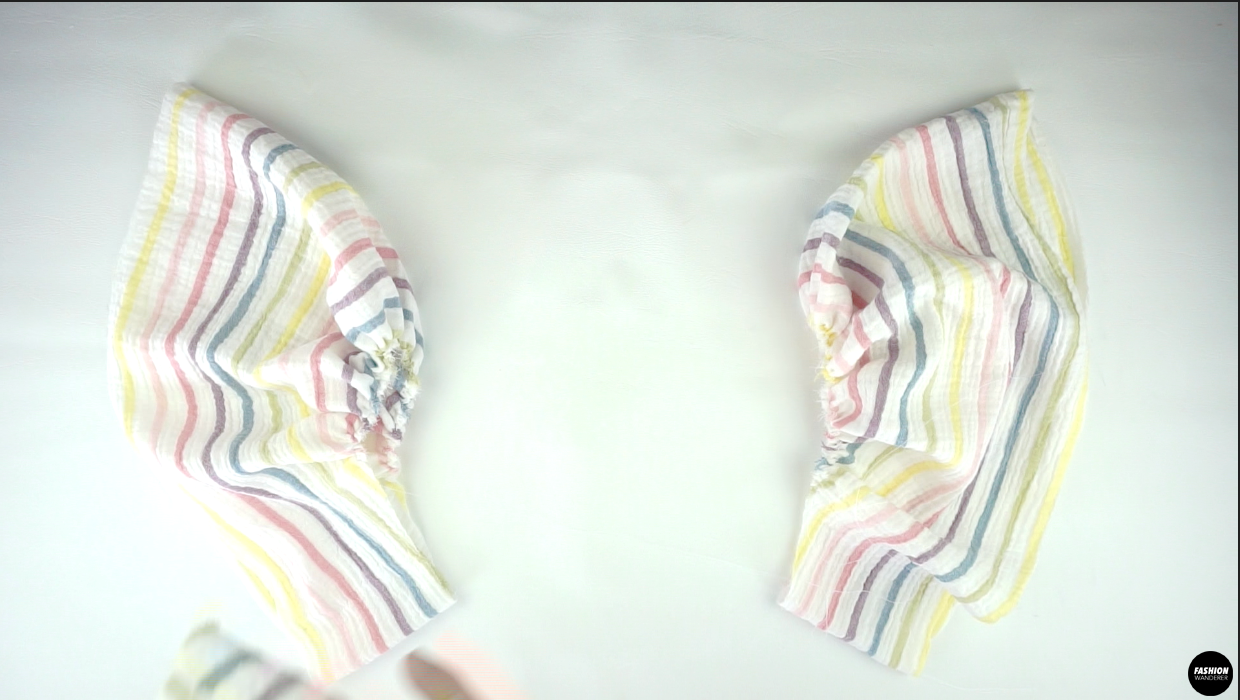
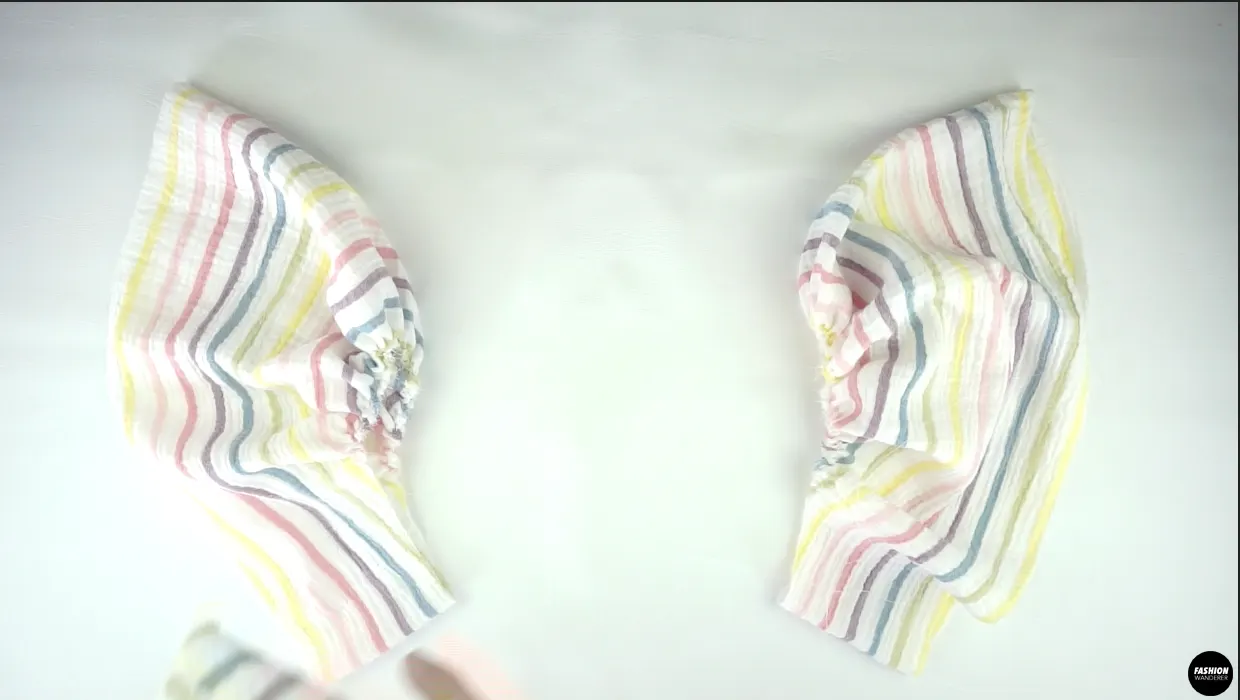
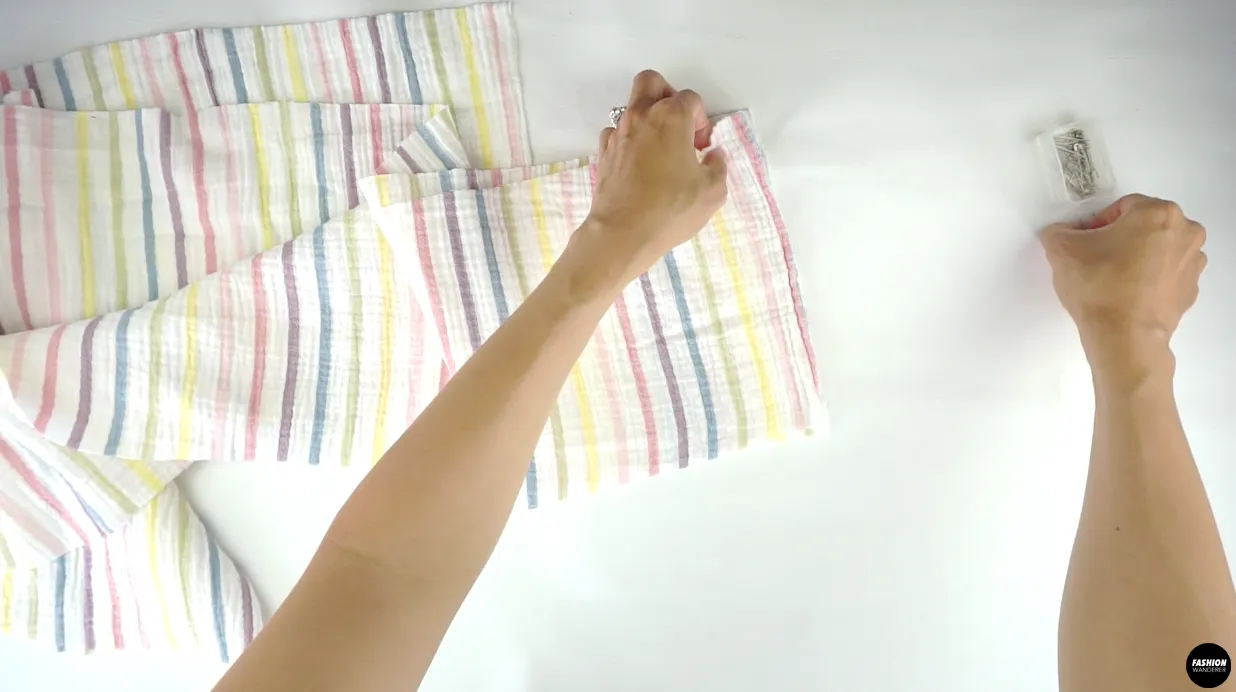
Use hand gathering method to stitch along the top of the sleeve. Close the underarm seam on the sleeve.
Pull the back thread to create gathering on the sleeve.
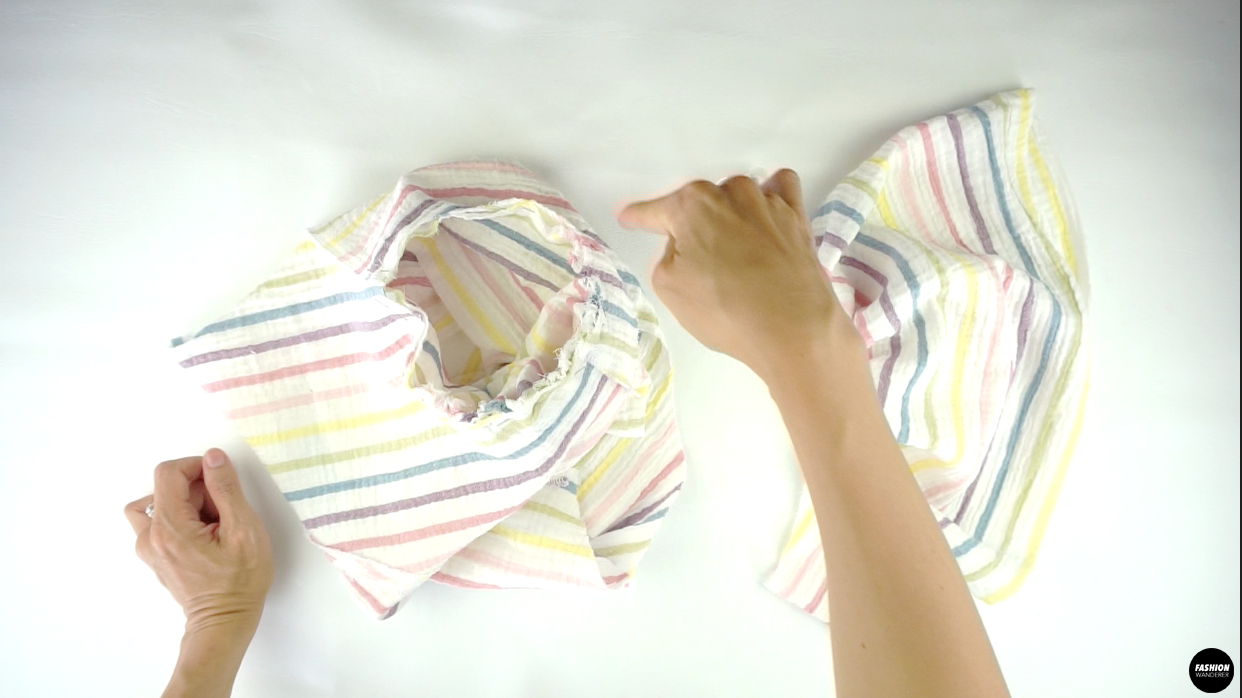
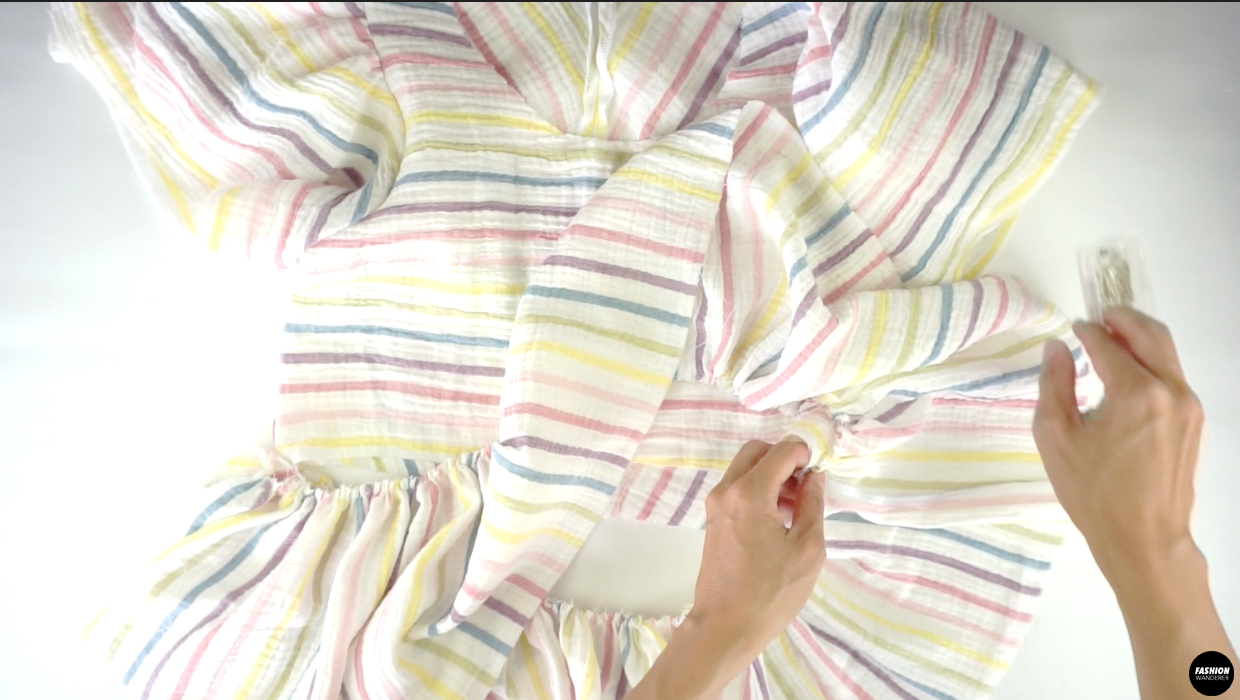
Insert the sleeve to the bodice and adjust the gathering to equally distribute along the armhole. Sew around the armhole to attach securely.


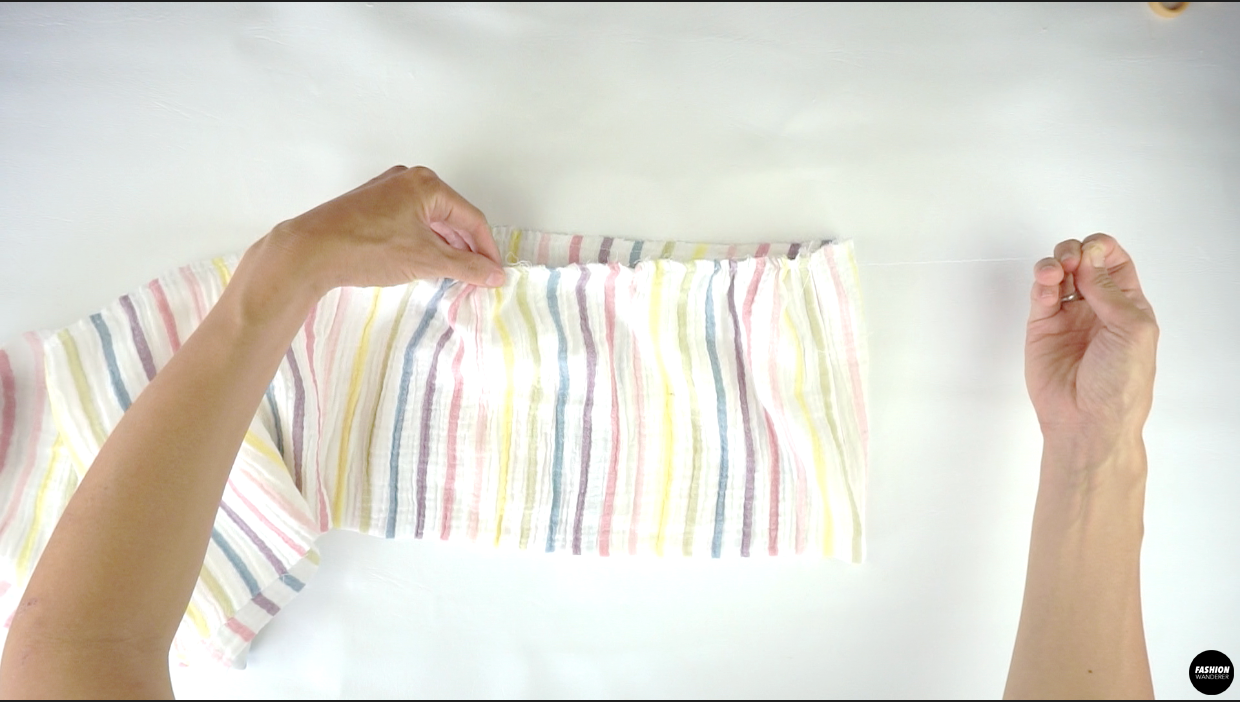
Join the Peplum Hem pieces together to create a loop.
Use wide stitch length to sew top of the Peplum Hem and hand gather around it.
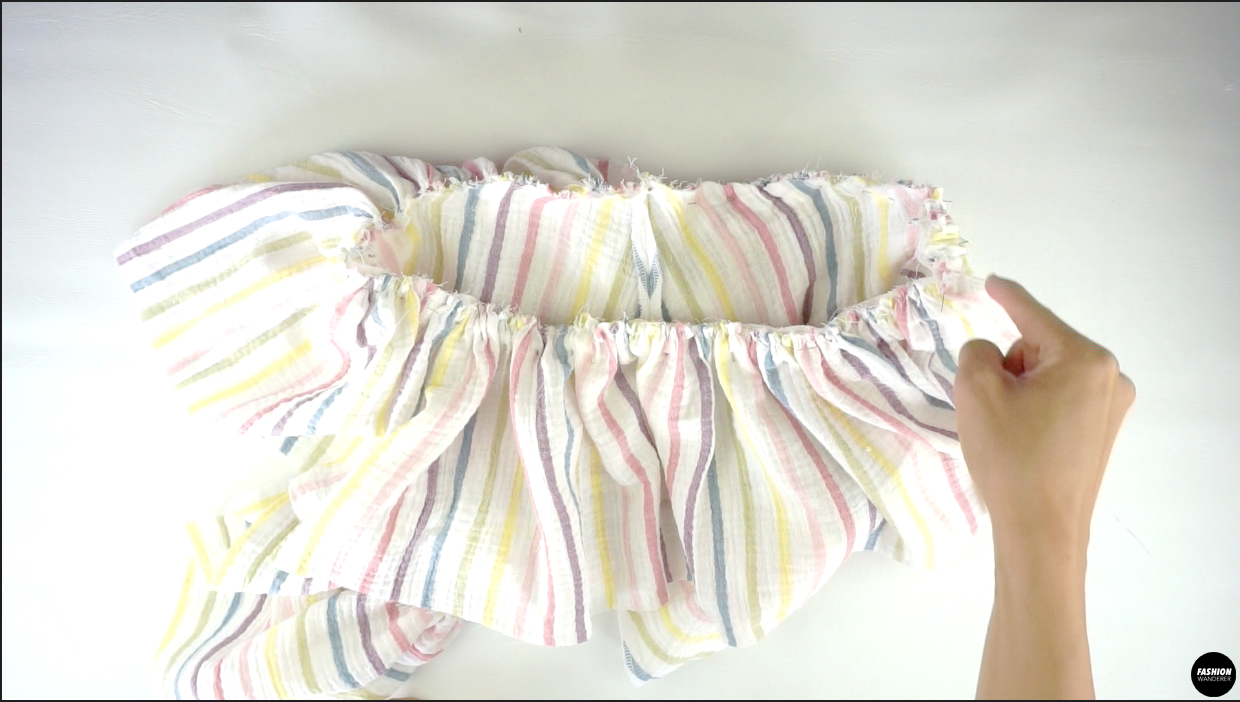
Slide the Peplum Hem to the bodice and join with straight and overlock stitch.
Apply bias cut strap around the neckline and double fold inward to clean finish. Press the neckline to remove any bulky or crinkled seam lines.
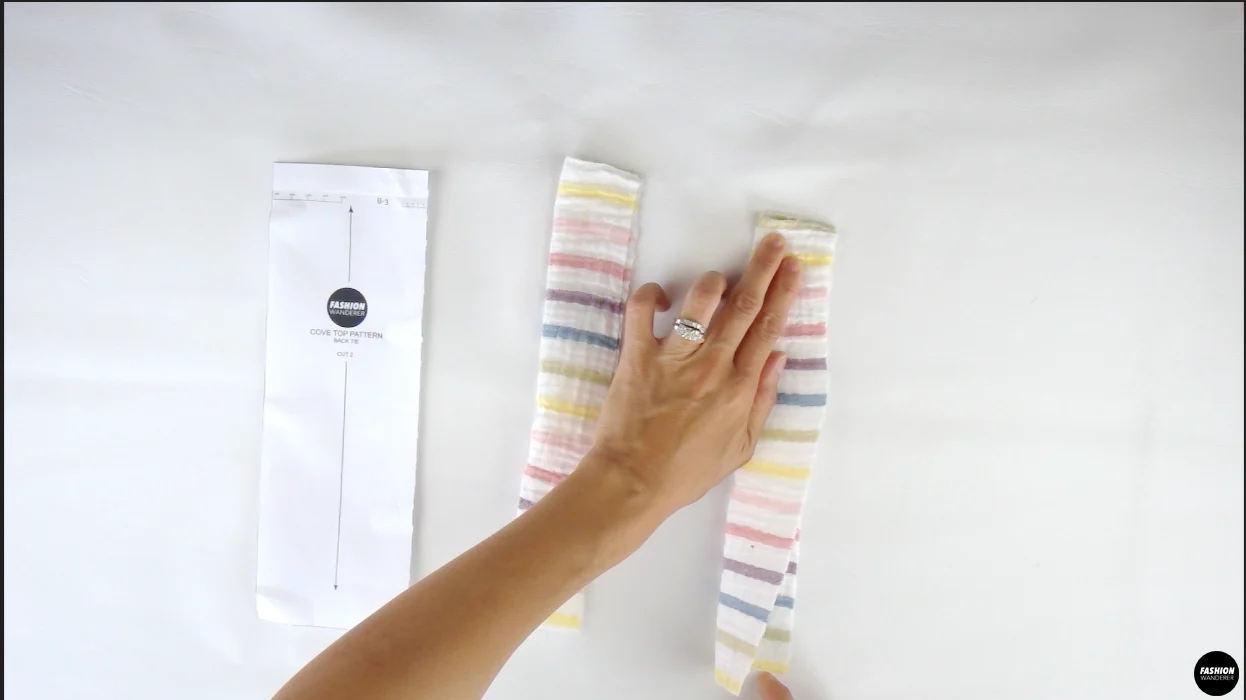
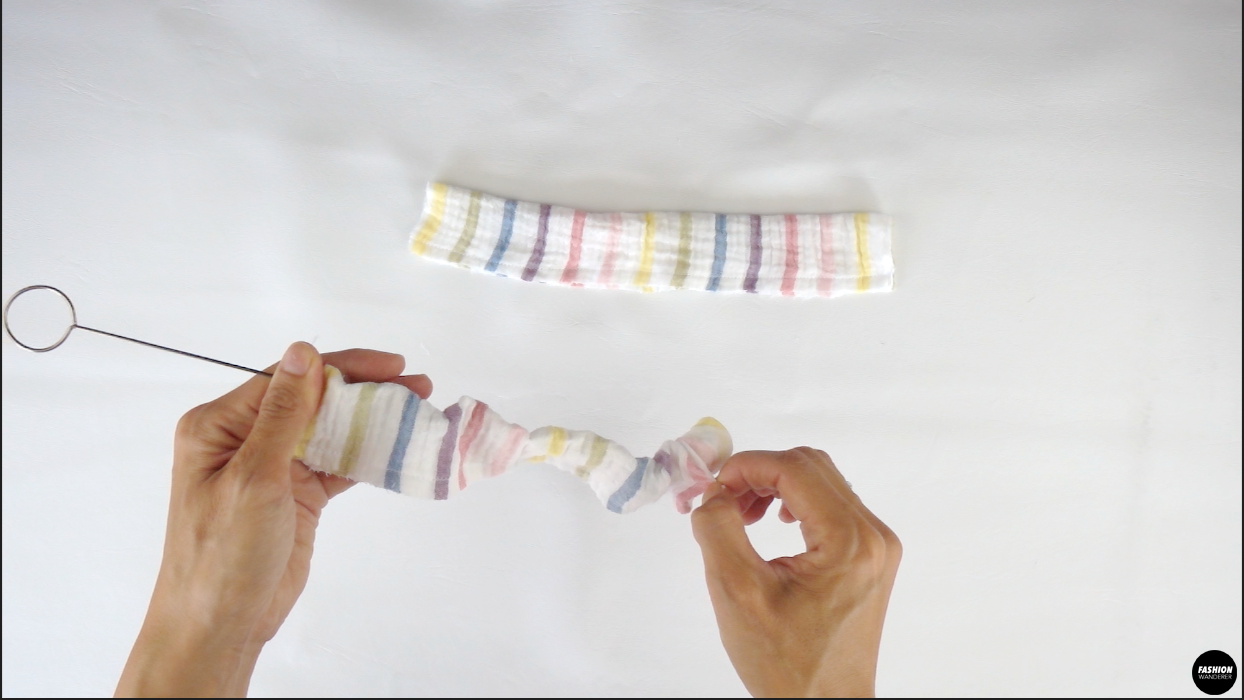
Fold the Back Tie piece and stitch wrong side up. Use a loop turner to flip inside out and press.
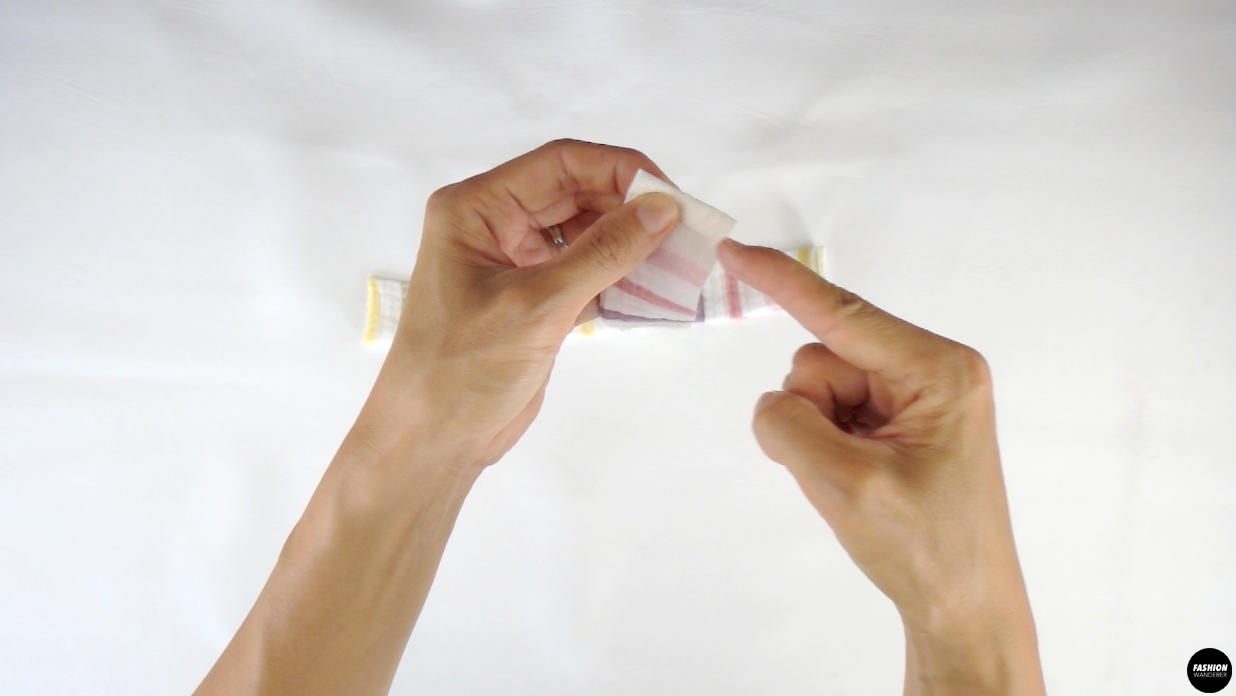
Finish the ends of the Back Tie pieces and sew onto the back keyhole.
Double fold the hem of the bodice and sleeve to finish hemming. Press all around before trying on the DIY blouse!


DIY Flutter Sleeve Peplum Top Sewing Tips


From flutter sleeve to peplum hemming, this top is adorable and casual enough to be worn any season and anytime of the day. Simply follow the sewing pattern and instruction to avoid any mistakes in this beginners sewing project.
Below are listed tips and tricks to accomplish the Cove top. It is specifically designed with crinkled gauze, so if you are using this type of fabric then review these tips before sewing.
- Sewing Needle: Needle size when sewing gauze is critical, and go with new sharp needles for best results. A good standard sewing needle size for gauze is 70 or 80. And for any slippery and lightweight gauze, consider using a walking foot for better grip.
- Thread: I recommend a polyester or 50 weight cotton thread to sew garments with single or double gauze.
- Stitches: No other special stitches are used in crinkled gauze. Follow the instructions for straight and overlock stitches to finish seams with accuracy. It is very delicate fabric, so take time, sew slowly and avoid speed stitching as it may result in puckered seams.
- Tension: Go with slightly longer stitches such as 2.8mm to 3mm for gauze fabric. A light tension on your presser foot will keep the fabric from stretching out as you sew.
- Inbinding: Always use bias cut strap when creating inbinding for neckline. It helps to curve smoothly and sit nicely around the neck.
In this tutorial, implement basic stitches and sewing methods to accomplish the Cove top. Flutter sleeves, tie closure at back, and peplum hem, this blouse is a great way to master sewing basics to create store-bought quality garment.
Whether crinkled gauze or linen, choose solid or fun prints to work to sew a Cove top with. Let’s download the sewing pattern, pretreat the fabric, cut out the pattern pieces, study the instructions and make this adorable top to add to your DIY collection.

DIY Flutter Sleeve Peplum Top
Do you have flutter sleeve garment in your DIY wardrobe? If you are tired of having too many puff sleeve top, the Cove flutter sleeve peplum top is a great addition to your sewing collection.
In this tutorial, you will learn how to make airy flutter sleeves and pretty peplum hemming using a hand gathering method. Included are tips to sew inbinding for a clean finish neckline and back keyhole for adjustable tie.
The detail video and step by step instructions offer are easy to understand and follow, and the finishing methods create a high quality garment. The Cove top sewing pattern will guide you to make an adorable top to include to your DIY wardrobe.
Materials
- Cove Top Sewing Pattern
- Crinkled Gauze Fabric ¾ yards for 60” width or 1 yards for 45” width
Tools
- Sewing Machine
- Serger
- Thread
- Fabric Scissors
- Measuring Tape
- Pins
- Loop Turner
- Iron
Instructions
For this Cove flutter sleeve peplum top tutorial, start by assembling the pattern pieces:
- 1 Piece of Front Top
- 2 Pieces of Back Top
- 2 Pieces of Bottom Top Peplum
- 2 Pieces of Sleeve
- 2 Pieces of Back Tie
How To Sew Top Bodice
- Overlock stitch the Center Back on both sides of the Back Top pieces.
- Place right side of Back Top pieces facing each other and measure 4” down from the neckline to pin.

- Sew ⅜” width straight stitch from pin to waistline. Press the seam open with an iron.
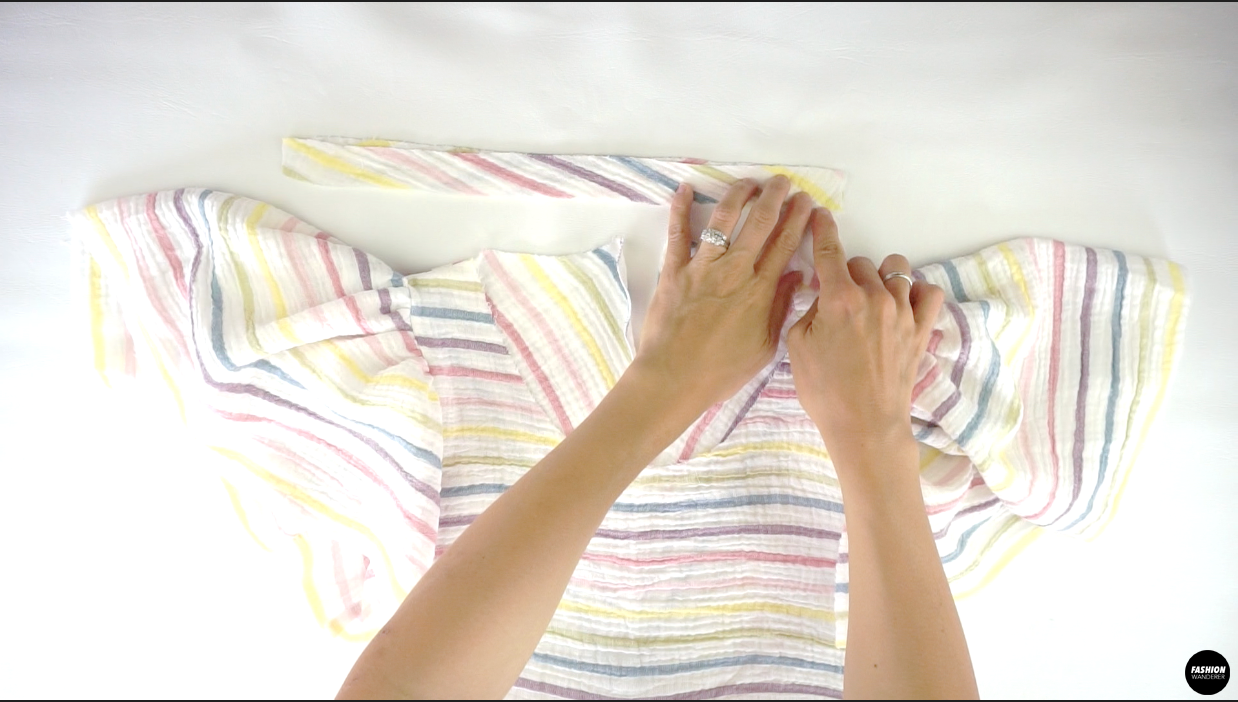
- Lay right side of Back Top pieces and right side of Front Top piece facing each other, and line up the side and shoulder seams to pin.
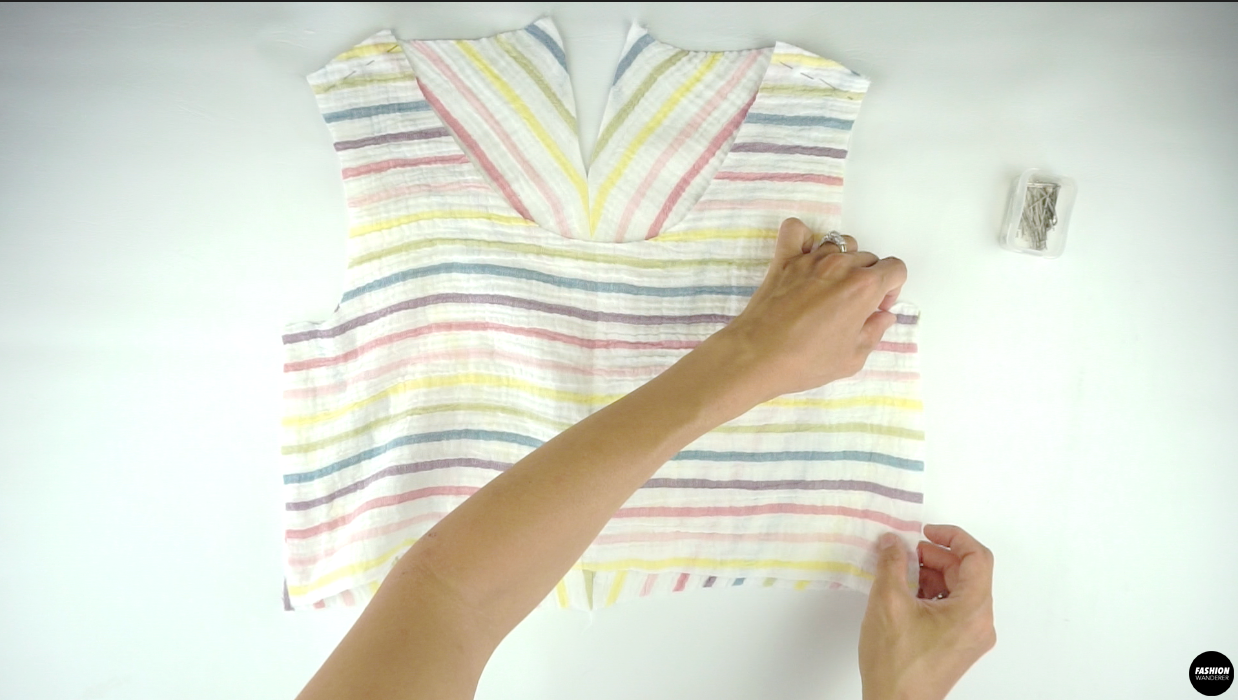
- Join the bodice with ⅜” width seam allowance straight stitch and overlock the edges to finish. Press the seams toward the Back Top.
How To Make Flutter Sleeve
- Adjust the stitch length to 5.0 and ¼” straight stitch from Front to Back notches along the sleeve. Leave the thread about 3-4” long and do not back and forth stitch the ends.
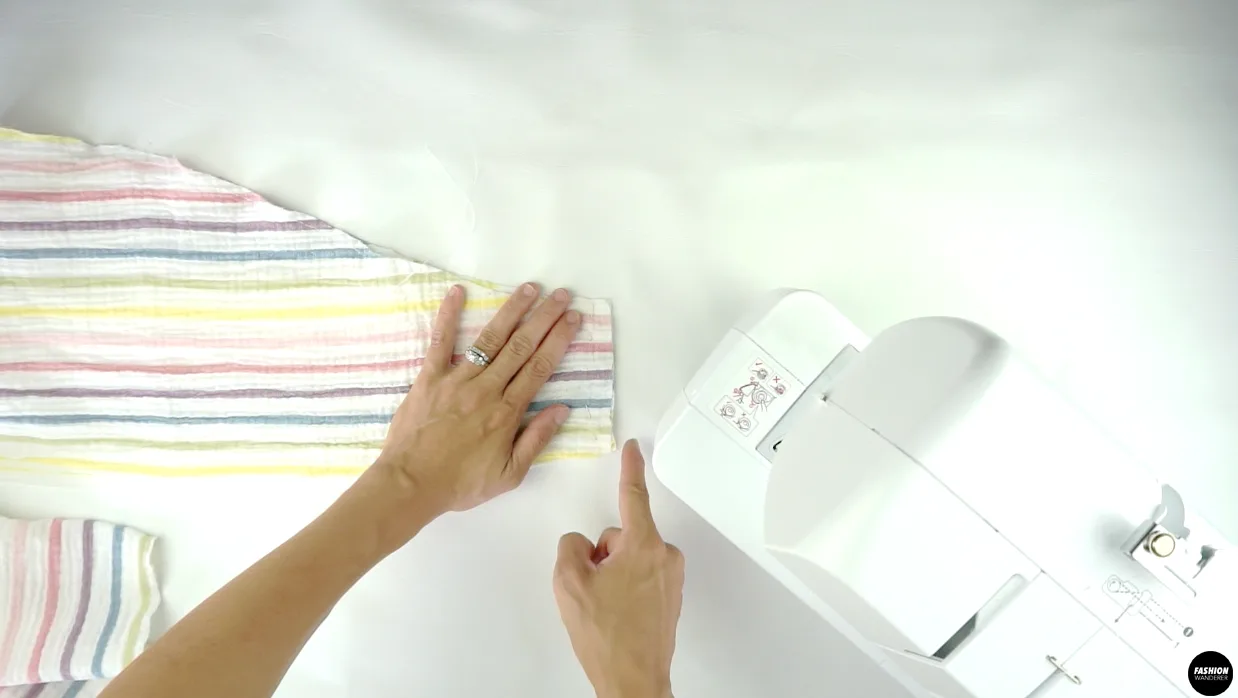
- Fold the Sleeve on the center right side facing each other, and close the underarm seam with ⅜” width straight stitch and overlock to finish. Press the seam toward the back side of the sleeve.

- Gently, pull one of the threads and evenly distribute the shirring along the sleeve.

- Do the same on the other sleeve with an equal amount of shirring on both sides.
- Slide the sleeve through the bodice right side facing each other and pin along the armhole opening. If needed, adjust the shirring amount of the sleeve.

- Sew straight stitch ⅜” width seam allowance around the armhole and overlock the raw edges.
How To Make Peplum Hem
- Join the ends of the Bottom Top Peplum pieces by straight stitching ⅜” width and overlock to finish. Press the seams towards the back Bottom Top Peplum piece.

- Adjust the stitch length to 5.0 and ¼” width straight stitch around the top of the Peplum pieces.

- Gently, pull the back thread and evenly distribute the shirring.
- Place the right side of the bodice and Bottom Top Peplum facing each other and pin around the waist. If needed, adjust the gathering to evenly distribute.

- Sew ⅜” width straight stitch and overlock to finish the raw edges.

How To Sew Neckline Inbinding
- Join the bias cut strap or use one long piece that is equal distance to the neckline.

- Place right side of the bias cut strap and right side of the bodice facing each other, then pin around the neckline.
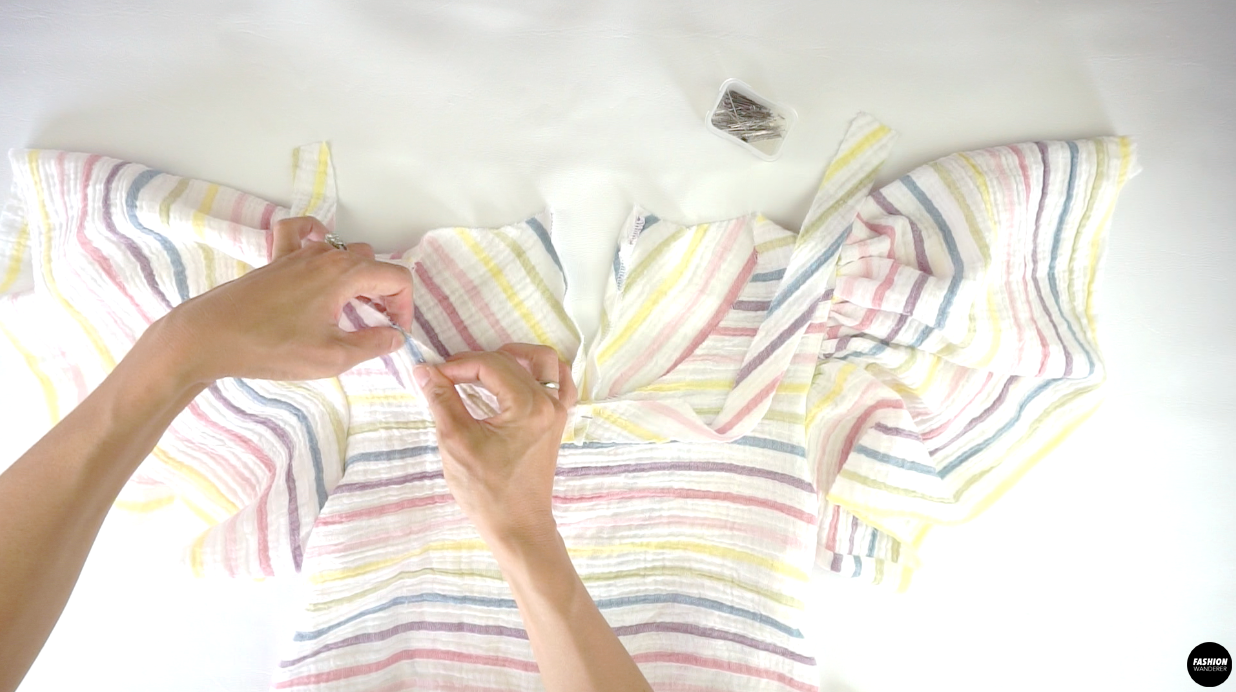

- Sew ¼” width straight stitch around the neckline and trim the ends at center back keyhole. Open up the strap and closely edge topstitch around.

- Double fold the strap towards the inside and pin around the neckline. Edge topstitch at the bias strap to secure the position.

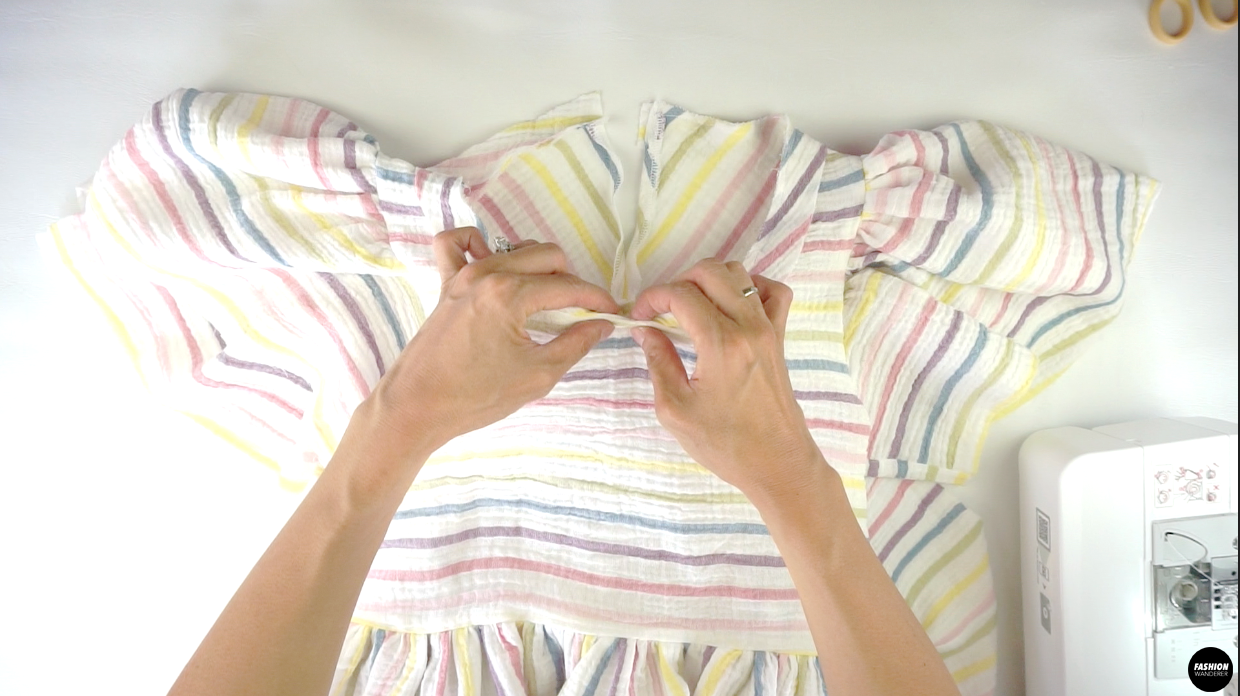
How To Make Back Tie
- Fold the Back Tie pieces in half lengthwise with the right sides facing each other and sew ¼” width seam allowance.

- Use a loop turner to flip inside out and give a nice press.

- Overlock stitch one end. Double fold the other end and ¼” topstitch.

- Place the Back Tie inside the keyhole and pin. Double edge topstitch to secure the tie on both sides.
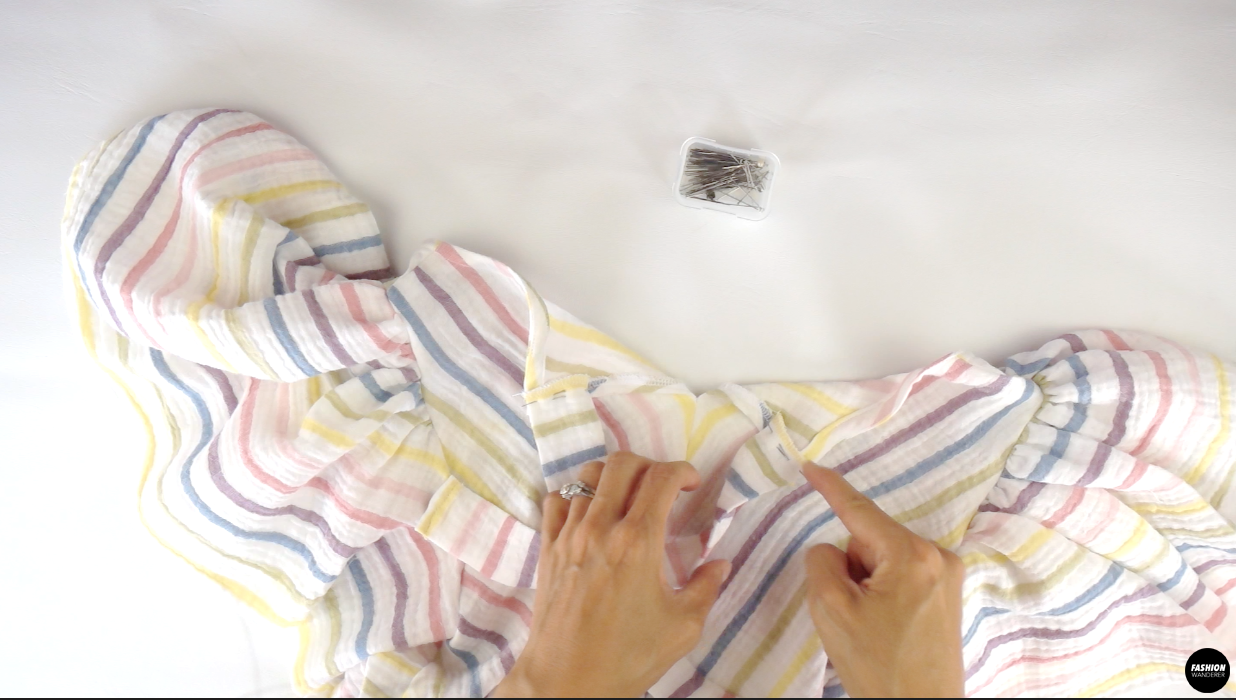

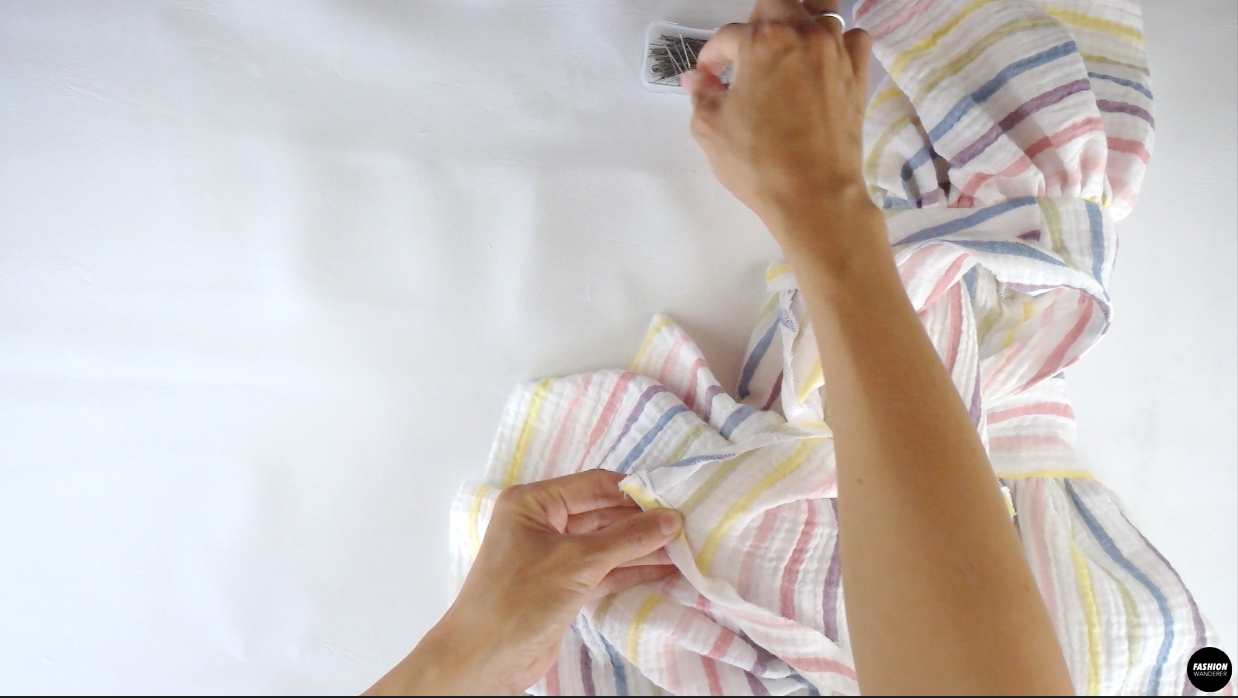
How To Finish Flutter Sleeve Peplum Top
- Double fold ¼” width and pin around the peplum hemline and flutter sleeves. Straight stitch slightly shy of ¼” width and press.


- Give a gentle press all around the flutter sleeve peplum top and wear with jeans for a casual look.


Recommended Products
As an Amazon Associate and member of other affiliate programs, I earn from qualifying purchases.


Trendy, Affordable Sewing Patterns for All Sizes


Tie Shoulder Jumpsuit Pattern


Palazzo Pants Sewing Pattern


Pocket Overall Romper Pattern


Wrap Maxi Skirt Sewing Pattern


Tie Back Top Sewing Pattern